-
Contents
-
Table of Contents
-
Troubleshooting
-
Bookmarks
Quick Links
PMS 419
RZR® 800
RZR® S 800
RZR® 4 800
Owner’s Manual
for Maintenance and Safety
Related Manuals for Polaris RZR 800
Summary of Contents for Polaris RZR 800
-
Page 1
PMS 419 RZR® 800 RZR® S 800 RZR® 4 800 Owner’s Manual for Maintenance and Safety… -
Page 2
WARNING Read, understand, and follow all of the instructions and safety precautions in this manual and on all product labels. Failure to follow the safety precautions could result in serious injury or death. WARNING The engine exhaust from this product contains chemicals known to the State of California to cause cancer, birth defects or other reproductive harm. -
Page 3
WELCOME Thank you for purchasing a POLARIS vehicle, and welcome to our world-wide family of POLARIS enthusiasts. Be sure to visit us online at www.polaris.com for the latest news, new product introductions, upcoming events, career opportunities and more. Here at POLARIS we proudly produce an exciting line of utility and recreational products. -
Page 4
The original instructions for this vehicle are in English. Other languages are provided as translations of the original instructions. Printed in U.S.A. 2014 RZR 800 / RZR S 800 / RZR 4 800 Owner’s Manual P/N 9924707… -
Page 5: Table Of Contents
Specifications ……132 POLARIS Products….. 136 Troubleshooting .
-
Page 6: Introduction
INTRODUCTION The RZR is an off-road vehicle. Familiarize yourself with all laws and regulations concerning the operation of this vehicle in your area. The following signal words and symbols appear throughout this manual and on your vehicle. Your safety is involved when these words and sym- bols are used.
-
Page 7
Failure to heed the warnings and safety precautions contained in this manual can result in severe injury or death. Your POLARIS vehicle is not a toy and can be hazardous to operate. This vehicle handles differently than cars, trucks or other off-road vehicles. -
Page 8: Vehicle Identification Numbers
Record your vehicle’s identification numbers and key number in the spaces provided. Remove the spare key and store it in a safe place. An ignition key can be duplicated only by ordering a POLARIS key blank (using your key number) and mating it with one of your existing keys.
-
Page 9: Safety
SAFETY Safety Training Safety training is a top priority for POLARIS. POLARIS strongly encourages you and any family members who will be riding this vehicle to take a training course. ROHVA (Recreational Off-Highway Vehicle Association) provides both an online safety e-course and a hands-on safety course. To access this valuable training, visit www.rohva.org.
-
Page 10: Safe Riding Gear
Helmet Helmet Wearing a helmet can prevent a severe head injury. Whenever riding this POLARIS vehicle, always wear a helmet that meets or exceeds estab- lished safety standards. Approved helmets in the USA and Canada bear a U.S. Department of Transportation (DOT) label.
-
Page 11
Eye Protection Do not depend on eyeglasses or sunglasses for eye protection. When- ever riding this POLARIS vehicle, always wear shatterproof goggles or use a shatterproof helmet face shield. POLARIS recommends wearing approved Personal Protective Equipment (PPE) bearing markings such as VESC 8, V-8, Z87.1, or CE. -
Page 12
If an informational or graphic label becomes illegible or comes off, con- tact your POLARIS dealer to purchase a replacement. Replacement safety labels are provided by POLARIS at no charge. The part number is printed on the label. Load/Passenger/Tire Pressure Warning… -
Page 13
SAFETY Safety Labels and Locations Seat Belt/Drive Responsibly Warning WARNING Improper vehicle use can result in SEVERE INJURY or DEATH Be Prepared • Fasten seat belts. • Wear an approved helmet and protective gear. • ALWAYS use cab nets and/or doors. Seat Belt/Drive •… -
Page 14
SAFETY Safety Labels and Locations Proper Use Shift Caution Warning Proper Use Warning (RZR) WARNING Require Proper Use of Your Vehicle Do your part to prevent injuries: • Do not allow careless or reckless driving. • Make sure operators are 16 or older with a valid driver’s license. -
Page 15
SAFETY Safety Labels and Locations Rear Passenger Cab Frame Passenger Cab Frame Warning (RZR 4) Warning (both sides) WARNING Do NOT hold onto this bar. Hands and arms could be crushed or seriously injured in event of rollover. ALWAYS keep hands on passenger hand hold. -
Page 16: Safety Warnings
SAFETY Safety Warnings WARNING Failure to operate this vehicle properly can result in a collision, loss of control, accident or rollover, which may result in serious injury or death. Heed all safety warnings outlined in this section of the owner’s manual and in the safety DVD provided with your vehicle.
-
Page 17: Protective Apparel
SAFETY Safety Warnings Failure to Inspect Before Operating Failure to inspect and verify that the vehicle is in safe operating condition before operating increases the risk of an accident. Always perform the pre-ride inspection before each use of your vehicle to make sure it’s in safe operating condition.
-
Page 18
SAFETY Safety Warnings Carrying Multiple Passengers (RZR 4) Never carry a passenger until you have operated this vehicle for at least two hours and have completed the New Operator Driving Procedures outlined on pages 52-53. A passenger must always be seated in a passenger seat with seat belt secured. -
Page 19: Operating On Pavement
SAFETY Safety Warnings Passengers in the Cargo Box Carrying a passenger in the cargo box could result in a fall from the vehicle or contact with moving components. Never allow a passenger to ride in the cargo box. A passenger must always be seated in the passenger seat with seat belt secured.
-
Page 20: Turning Improperly
SAFETY Safety Warnings Turning Improperly Turning improperly could cause loss of traction, loss of control, accident or rollover. Always follow proper procedures for turning as described in this owner’s manual. Avoid sharp turns. Never turn while applying heavy throttle. Never make abrupt steering maneuvers.
-
Page 21: Crossing Hillsides
SAFETY Safety Warnings Crossing Hillsides Driving on a sidehill is not recommended. Improper procedure could cause loss of control or rollover. Avoid crossing the side of any hill unless absolutely necessary. If crossing a hillside is unavoidable, always follow proper procedures as described in this owner’s manual.
-
Page 22: Skidding Or Sliding
SAFETY Safety Warnings Operating Improperly in Reverse Improperly operating in reverse could result in a collision with an obstacle or person. Always follow proper operating procedures as outlined in this manual. See page 60. Before shifting into reverse gear, always check for obstacles or people behind the vehicle.
-
Page 23: Operating A Damaged Vehicle
SAFETY Safety Warnings Operating Through Water Operating through deep or fast-flowing water can cause loss of traction, loss of control, rollover or accident. Never operate in fast-flowing water or in water that exceeds the floor level of the vehicle. Always follow proper procedures for operating in water as described in this owner’s manual.
-
Page 24: Improper Cargo Loading
SAFETY Safety Warnings Improper Cargo Loading Overloading the vehicle or carrying/towing cargo improperly may cause changes in stability and handling, which could cause loss of control or an accident. • Always follow the instructions in this owner’s manual for carrying cargo. See page 62.
-
Page 25: Exposure To Exhaust
SAFETY Safety Warnings Exposure to Exhaust Engine exhaust fumes are poisonous and can cause loss of consciousness or death in a short time. Never start the engine or let it run in an enclosed area. Operate this vehicle only outdoors or in well-ventilated areas. Hot Exhaust Systems Exhaust system components are very hot during and after use of the vehicle.
-
Page 26: Equipment Modifications
SAFETY Safety Warnings Equipment Modifications Your POLARIS vehicle is designed to provide safe operation when used as directed. Modifications to your vehicle may negatively impact vehicle stability. Failure of critical machine components may result from operation with any modifications, especially those that increase speed or power. This vehicle may become less stable at speeds higher than those for which it is designed.
-
Page 27: Features And Controls
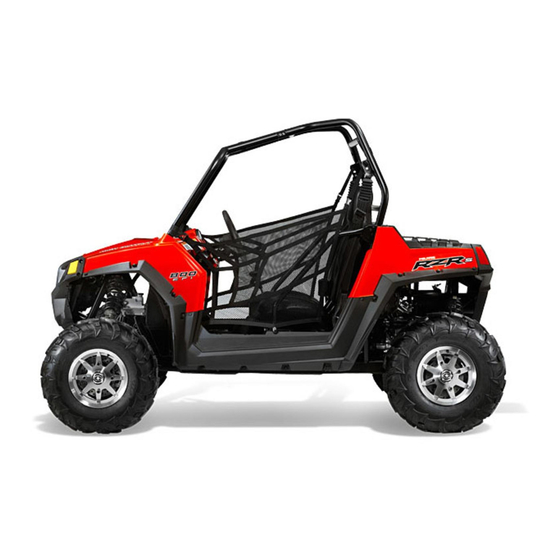
FEATURES AND CONTROLS Component Locations Rear Passenger Hand Hold Cab Nets Front Passenger Cargo Hand Hold Shifter Fuel Tank Hip Bars Tie-Down Points Rack Extenders (RZR/RZR EPS only)
-
Page 28: Component Locations
FEATURES AND CONTROLS Component Locations Cab Frame Under Hood Steering Storage Wheel Compartment (LE models) Headlights Radiator Taillights Brush Guard Receiver Hitch Trailer Receiver Hitch Bracket This vehicle is equipped with a receiver hitch bracket for a trailer hitch. Trailer towing equipment is not supplied with this vehicle. To avoid injury and property damage, always heed the warnings and towing capacities outlined on pages 62-64.
-
Page 29: Seat Removal
FEATURES AND CONTROLS Rear Service Panel The rear service panel is located behind the seats on the frame of the vehicle. Remove the seats to access the service panel. Remove the ser- vice panel to access serviceable engine components and clutches. Radiator Access/Grill Removal The front grill can be removed to clean debris from the radiator.
-
Page 30: Steering Wheel
FEATURES AND CONTROLS Steering Wheel The steering wheel can be tilted upward or downward for rider preference. Lift and hold the steering wheel adjustment lever while moving the steering wheel upward or down- ward. Release the lever when the steering wheel is Adjustment Lever at the desired position.
-
Page 31
FEATURES AND CONTROLS Hood Remove the hood to access the front storage compartment (if equipped), the radiator cap and the coolant overflow bottle. 1. Turn the hood fasteners Storage Compartment 1/4 turn. (LE models) 2. Grasp the upper hood edge and pull upward to disengage the hood from the vehicle. -
Page 32: Fuel Cap
Use the strap adjusters to tighten any loose straps. Promptly replace worn or damaged cab nets and latches with new cab nets and latches. Please see your authorized POLARIS dealer.
-
Page 33: Seat Belts
FEATURES AND CONTROLS Seat Belts This POLARIS vehicle is equipped with three-point lap and diagonal seat belts for all riders. Always make sure the seat belts are secured for the operator and all passengers before riding. To wear the seat belt properly, follow this procedure: 1.
-
Page 34: Auxiliary Outlet
(under cover) in the ON position. The EPS warning indicator will illuminate to indicate the EPS has shut down. If the light remains on after starting the engine, the EPS system is inoperative. See your authorized POLARIS dealer for service.
-
Page 35: Ignition Switch
FEATURES AND CONTROLS Switches Ignition Switch The ignition switch is a three-position, key-operated switch. Use the ignition switch to start the engine. See page 50 for starting procedures. The key can be removed from the switch when it is in the OFF position. The engine is off.
-
Page 36: Gear Selector
FEATURES AND CONTROLS Gear Selector P: Park R: Reverse N: Neutral L: Low Gear H: High Gear To change gears, stop the vehicle, and with the engine idling, move the lever to the desired gear. Do not attempt to shift gears with engine speed above idle or while the vehicle Gear Selector is moving.
-
Page 37: Brake Pedal
ROPS Label Structure (ROPS) on this vehicle meets OSHA 1928.53 rollover performance requirements. Always have your authorized POLARIS dealer thoroughly inspect the ROPS if it ever becomes damaged in any way. No device can assure occupant protection in the event of a rollover.
-
Page 38: Engaging Awd
FEATURES AND CONTROLS All Wheel Drive (AWD) System The All Wheel Drive system is controlled by the AWD switch. When the switch is on 2X4, the vehi- cle is in two-wheel drive at all times. When the switch is on AWD, the vehicle is in all wheel drive and the 4X4 indicator in the instrument cluster will be on.
-
Page 39: Instrument Cluster
FEATURES AND CONTROLS Instrument Cluster NOTICE: High water pressure may damage components. Wash the vehicle by hand or with a garden hose using mild soap. Certain products, including insect repellents and chemicals, will damage the speedometer lens and other plastic surfaces. Do not use alcohol to clean the instrument cluster.
-
Page 40: Indicator Lamps
EPS Warning This indicator illuminates briefly when the key is turned to the ON position. If the light remains on, the EPS system is inoperative. See your authorized POLARIS dealer for service. Neutral This lamp illuminates when the transmission is in neutral and the ignition key is in the ON position.
-
Page 41: Rider Information Center
If this occurs, take the vehicle to your POLARIS dealer for proper diagnosis. The information center is set to display standard units of measurement and a 12-hour clock at the factory.
-
Page 42
FEATURES AND CONTROLS Instrument Cluster Rider Information Center 2. Fuel Gauge — The segments of the fuel gauge show the level of fuel in the fuel tank. When the last segment clears, a low fuel warning is activated. All segments including the fuel icon will flash. Refuel immediately. -
Page 43
FEATURES AND CONTROLS Instrument Cluster Rider Information Center Use the MODE button to toggle through the information area options. Display Units (Standard/Metric) MODE Button The display can be changed to show either standard or metric units of measurement for each of the following settings. Tip: To exit the set-up mode, turn the key off. -
Page 44: Clock Mode
FEATURES AND CONTROLS Instrument Cluster Rider Information Center Clock Mode Tip: The clock must be reset any time the battery has been disconnected or dis- charged. 1. Turn the key to the ON position. Use the MODE button to toggle to the odometer display.
-
Page 45
FEATURES AND CONTROLS Instrument Cluster Rider Information Center Odometer Mode The odometer records and displays the distance traveled by the vehicle. Trip Meter Mode The trip meter records the distance traveled by the vehicle if reset before each trip. To reset, select the trip meter mode. Press and hold the MODE button until the meter resets to zero. -
Page 46
Diagnostic Display Mode The EFI diagnostic display mode is for informational purposes only. Please see your POLARIS dealer for all major repairs. The diagnostic mode is accessible only when the check engine warning indicator activates after the key has been turned on. Leave the key on if you want to view the active code (failure code). -
Page 47: Engine Error Codes
3. Record the three numbers displayed in the gear position, clock and odometer displays. 4. Press the MODE button to advance to the next error code. 5. Press and hold the MODE button to exit the diagnostics code menu. 6. See an authorized POLARIS dealer for code details and diagnosis.
-
Page 48: Operation
Vehicle Break-in Period The break-in period for your new POLARIS vehicle is the first 25 hours of operation, or the time it takes to use the first two tanks full of gaso- line. No single action on your part is as important as a proper break-in period.
-
Page 49: Brake System Break-In
OPERATION Vehicle Break-in Period Engine and Drivetrain Break-in 1. Fill the fuel tank with gasoline. See page 30. Always exercise extreme caution whenever handling gasoline. 2. Check the oil level. See page 85. Add the recommended oil as needed to maintain the oil level in the safe operating range. 3.
-
Page 50
Throttle Ensure proper operation Indicator lights/switches Ensure proper operation Air filter, pre-filter Inspect, clean Headlamp Check operation, apply POLARIS dielectric grease when lamp is replaced Brake light/tail lamp Check operation, apply POLARIS dielectric grease when lamp is replaced Seat Latches… -
Page 51: Safe Operation Practices
4. Engine exhaust fumes are poisonous. Never start the engine or let it run in an enclosed area. 5. Never operate with accessories not approved by POLARIS for use on this vehicle. 6. Operate this vehicle off-road only. Never operate the vehicle on pavement or on any public street, road or highway, including dirt and gravel roads.
-
Page 52: Starting The Engine
OPERATION Starting the Engine 1. Position the vehicle on a level surface outdoors or in a well-venti- lated area. 2. Sit in the driver’s seat and fasten the seat belt. Secure the cab nets. 3. Place the transmission in PARK. 4.
-
Page 53: Parking The Vehicle
Respect the environment in which you ride your vehicle. Find out where the designated riding areas are by con- tacting your POLARIS dealer, a local riding club, or local officials. Help keep our trails open for recreational vehicle use. As an off-road enthusiast, you represent the sport and can set a good example (or a poor example) for others to follow.
-
Page 54
OPERATION New Operator Driving Procedures 1. Read and understand the owner’s manual and all warning and instruction labels before operating this vehicle. 2. Visit the Recreational Off-Highway Vehicle Association web site (rohva.org) and take the free on-line training course. Hands-on training is also available through ROHVA. -
Page 55
OPERATION New Operator Driving Procedures 13. Apply the brakes and shift into low gear. 14. Check your surroundings and determine your path of travel. 15. Keeping both hands on the steering wheel, slowly release the brakes and depress the throttle with your right foot to begin driving. 16. -
Page 56: Driving With Passengers
OPERATION Driving with Passengers 1. Complete the New Operator Driving Procedures outlined on pages 52-53. 2. Perform the pre-ride inspection. See page 48. 3. Do not carry more than one passenger in a 2-seat vehicle. Do not carry more than three passengers in a 4-seat vehicle.
-
Page 57: Driving On Slippery Surfaces
OPERATION Driving on Slippery Surfaces When driving on slippery surfaces such as wet trails, loose gravel, or ice, be alert for the possibility of skidding and sliding. Follow these precautions when encountering slippery conditions: 1. Slow down before entering slippery areas. 2.
-
Page 58: Driving Uphill
OPERATION Driving Uphill Whenever traveling uphill, follow these precautions: 1. Always check the terrain carefully before ascending any hill. Never drive on hills with excessively slippery or loose surfaces. 2. Avoid excessively steep hills. If ascending a steeper grade is unavoidable, engage all-wheel drive before ascending.
-
Page 59: Driving Downhill
OPERATION Driving on a Sidehill (Sidehilling) Driving on a sidehill is not recommended. Improper procedure could cause loss of control or rollover. Avoid crossing the side of any hill unless absolutely necessary. If crossing a hill is unavoidable, follow these precautions: 1.
-
Page 60: Driving Through Water
OPERATION Driving Through Water Your vehicle can operate through water with a maximum recommended depth equal to floor level. Follow these precautions when operating through water: 1. Determine water depth and current before entering water. 2. Choose a crossing where the Floor Level water level is lowest and where both banks have grad-…
-
Page 61: Driving Over Obstacles
OPERATION Driving Over Obstacles Follow these precautions when operating over obstacles: 1. Always check for obstacles before operating in a new area. 2. Look ahead and learn to read the terrain. Be constantly alert for hazards such as logs, rocks and low hanging branches. 3.
-
Page 62: Driving In Reverse
OPERATION Driving in Reverse Follow these precautions when operating in reverse: 1. Always check for obstacles or people behind the vehicle. 2. Apply the throttle lightly. Never open the throttle suddenly. 3. Back slowly. 4. Apply the brakes lightly for stopping. 5.
-
Page 63: Parking On An Incline
OPERATION Parking on an Incline A rolling vehicle can result in serious injury. Avoid parking on an incline. If parking on an incline is unavoidable, follow these precau- tions: 1. Place the transmission in PARK. 2. Turn the engine off. 3.
-
Page 64: Hauling Cargo
OPERATION Hauling Cargo WARNING Overloading the vehicle or carrying or towing cargo improperly can alter vehicle handling and may cause loss of control or brake instability. Always follow these precautions when hauling cargo: Never exceed the stated load capacity for this vehicle. REDUCE SPEED AND ALLOW GREATER DISTANCES FOR BRAKING WHEN HAULING CARGO.
-
Page 65: Belt Life
OPERATION Hauling Cargo Your POLARIS vehicle has been designed to carry or tow specific capacities. Reduce speed and allow a greater distance for braking when carrying cargo. Loads should be centered and carried as low as possible in the box. For stability on rough or hilly terrain, reduce both speed and cargo.
-
Page 66: Towing Loads
OPERATION Hauling Cargo Towing Loads WARNING Towing improperly can alter vehicle handling and may cause loss of control or brake instability. Always follow these precautions when towing: 1. Never load more than 150 lbs. (68.1 kg) tongue weight on the tow- ing bracket.
-
Page 67: Winch Guide
WINCH GUIDE These safety warnings and instructions apply if your vehicle came equipped with a winch or if you choose to add an accessory winch to your vehicle. WARNING Improper winch use can result in SEVERE INJURY or DEATH. Always follow all winch instructions and warnings in this manual.
-
Page 68: Winch Safety Precautions
WINCH GUIDE Winch Safety Precautions 10. Always apply your vehicle’s park brake and/or park mechanism to hold the vehicle in place during winching. Use wheel chocks if needed. 11. Always align the vehicle and winch with the load directly in front of the vehicle as much as possible.
-
Page 69
WINCH GUIDE Winch Safety Precautions 18. Never release the clutch on the winch when the winch cable is under load. 19. Never use the winch for lifting or transporting people. 20. Never use the winch to hoist or suspend a vertical load. 21. -
Page 70: Winch Operation
WINCH GUIDE Winch Operation Read the Winch Safety Precautions in the preceding pages before using your winch. Tip: Consider practicing the operation and use of your winch before you actually need to use it in the field. WARNING Improper winch use can result in SEVERE INJURY or DEATH. Always follow all winch instructions and warnings in this manual.
-
Page 71
WARNING! Replace the winch cable at the first sign of damage to prevent SEVERE INJURY or DEATH in the event of failure. For your safety, always replace POLARIS winch parts (including the cable) with genuine POLARIS replacement parts available at your authorized POLARIS dealer. -
Page 72
WINCH GUIDE Winch Operation 5. Never remove the hook strap from the hook. 6. Release the winch clutch and pull out the winch cable. 7. Pulling out as much cable as possible maximizes the winch’s pulling capacity. Always be sure that at least five (5) full turns of winch cable are wrapped around the winch drum at all times. -
Page 73
WINCH GUIDE Winch Operation 11. The ONLY time a winch-equipped vehicle should be moving when using the winch is when that vehicle itself is stuck. The winch- equipped vehicle should NEVER be in motion to “shock” load the winch cable in an attempt to move a second stuck vehicle. See the Shock Loading section on page 74. -
Page 74
WINCH GUIDE Winch Operation 14. The winch motor may become hot during winch use. If you winch for more than 45 seconds, or if the winch stalls during operation, stop winching and permit the winch to cool down for 10 minutes before using it again. -
Page 75: Winch Cable Care
WINCH GUIDE Winch Cable Care For your safety, always replace POLARIS winch parts (including the cable) with genuine POLARIS replacement parts available at your authorized POLARIS dealer. WARNING! Use of worn or damaged cable could lead to sudden failure and SEVERE INJURY.
-
Page 76
WINCH GUIDE Shock Loading WARNING! Your winch cable is very strong but it is NOT designed for dynamic, or “shock” loading. Shock loading may tension a winch cable beyond its strength and cause the cable to break. The end of a broken winch cable under such high loading can cause SEVERE INJURY or DEATH to you and other bystanders. -
Page 77: Winch Maintenance And Service Safety
3. Never work on your winch without first disconnecting the battery connections to prevent accidental activation of the winch 4. For your safety, always replace POLARIS winch parts (including the cable) with genuine POLARIS replacement parts available at your authorized POLARIS dealer.
-
Page 78: Emission Control Systems
Operation on Public Lands in the U.S.A. Your POLARIS vehicle has a spark arrester that was tested and qualified to be in accor- dance with the USFS standard 5100-1C. Federal law requires that this spark arrester be installed and functional when the vehicle is operated on public lands.
-
Page 79: Maintenance
Inspect, clean, lubricate, adjust and replace parts as necessary. When inspection reveals the need for replacement parts, use genuine POLARIS parts available from your POLARIS dealer. Record maintenance and service in the Maintenance Log beginning on page 148.
-
Page 80: Periodic Maintenance Chart
Emission-related service (failure to conduct this maintenance will not void the emissions warranty but may affect emissions) Have an authorized POLARIS dealer perform these services. WARNING! Improperly performing the procedures marked with a “D” could result in component failure and lead to serious injury or death. Have an…
-
Page 81
Main gearcase oil 25 H Break-in oil level check Transfer case oil 25 H Break-in oil level check Perform these procedures more often for vehicles subjected to severe use. E Emission-Related Service D Have an authorized POLARIS dealer perform these services. -
Page 82
Spark plug 100 H 600 (1000) Inspect; replace as needed Perform these procedures more often for vehicles subjected to severe use. E Emission-Related Service D Have an authorized POLARIS dealer perform these services. -
Page 83
Adjust as needed D Toe adjustment Inspect periodically; adjust when parts are replaced Headlight aim Adjust as needed Perform these procedures more often for vehicles subjected to severe use. E Emission-Related Service D Have an authorized POLARIS dealer perform these services. -
Page 84: Lubrication Recommendations
MAINTENANCE Lubrication Recommendations Check and lubricate all components at the intervals outlined in the Peri- odic Maintenance Chart beginning on page 77, or more often under severe use, such as wet or dusty conditions. Items not listed in the chart should be lubricated at the general lubrication interval.
-
Page 85
MAINTENANCE Lubrication Recommendations RZR S/RZR 4 Control Arm Stabilizer Bar Pivot Bushings Bushings RZR 4 Stabilizer Bar Bushings Control Arm Pivot Bushings RZR S/RZR 4 Control Arm Pivot Bushings… -
Page 86: Engine Oil
Always perform the maintenance procedures as outlined in the Periodic Maintenance Chart. Oil may need to be changed more frequently if POLARIS PS-4 oil is not used. Follow the manufacturer’s recommendations for ambient tempera- ture operation. See page 136 for the part numbers of POLARIS prod- ucts.
-
Page 87: Oil Check
MAINTENANCE Engine Oil Always check and change the oil at the intervals outlined in the Periodic Maintenance Chart beginning on page 77. Always use the recommended engine oil. Oil Check The oil dipstick and fill tube is located on the engine, behind the passenger seat (behind the right rear passenger seat on RZR 4 models).
-
Page 88: Oil And Filter Change
MAINTENANCE Engine Oil Oil and Filter Change Always change the oil and filter at the intervals outlined in the Periodic Maintenance Chart beginning on page 77. Always change the oil filter whenever changing oil. The engine drain plug is located on the bottom of the crankcase.
-
Page 89
MAINTENANCE Engine Oil Oil and Filter Change 8. Using a cap-style oil filter wrench, turn the filter counter-clockwise to remove it. 9. Using a clean dry cloth, clean the filter sealing surface on the crank- case. 10. Lubricate the o-ring on the new filter with a film of fresh engine oil. Check to make sure the o-ring is in good condition. -
Page 90
MAINTENANCE Gearcases Transfer Case Always check and change the fluid at the intervals outlined in the Peri- odic Maintenance Chart beginning on page 77. Refer to the Gearcase Specifications Chart on page 94 for recommended lubricants, capacities and torque specifications. Fill Plug Level Check… -
Page 91
MAINTENANCE Gearcases Transfer Case Fluid Change The drain plug is located on the bottom of the transfer case. Access the drain plug through the drain hole in the skid plate. 1. Remove the fill plug. 2. Place a drain pan under the drain plug. 3. -
Page 92
MAINTENANCE Gearcases Transmission (Main Gearcase) Always check and change the fluid at the intervals outlined in the Peri- odic Maintenance Chart beginning on page 77. Refer to the Gearcase Specifications Chart on page 94 for recommended lubricants, capacities and torque specifications. Fluid Check The fill plug is located on the left side of the gearcase. -
Page 93
MAINTENANCE Gearcases Transmission (Main Gearcase) Fluid Change The drain plug is located on the bottom of the gearcase. Access the drain plug through the drain hole in the skid plate. 1. Remove the fill plug. 2. Place a drain pan under the drain plug. 3. -
Page 94
MAINTENANCE Gearcases Demand Drive Unit (Front Gearcase) Always check and change the fluid at the intervals outlined in the Peri- odic Maintenance Chart beginning on page 77. Refer to the Gearcase Specifications Chart on page 94 for recommended lubricants, capacities and torque specifications. -
Page 95: Rear Gearcase
MAINTENANCE Gearcases Rear Gearcase Always check and change the fluid at the intervals outlined in the Peri- odic Maintenance Chart beginning on page 77. Refer to the Gearcase Specifications Chart on page 94 for recommended lubricants, capacities and torque specifications. Fluid Check The fill plug is located on the right side of the rear gearcase.
-
Page 96: Gearcase Specification Chart
MAINTENANCE Gearcases Gearcase Specification Chart Use of other fluids may result in improper operation of components. See page 136 for the part numbers of POLARIS products. Gearcase Lubricant Capacity Fill Plug Drain Plug/ Torque Level Check Plug Torque Transmission AGL Gearcase 24 oz.
-
Page 97: Spark Plug Condition
MAINTENANCE Spark Plugs Spark Plug Removal and Replacement 1. Remove both seats. 2. Remove the rear service Spark Plugs panel. See page 27. 3. Remove the spark plug cap. 4. Using the spark plug wrench provided in the tool kit, remove the plug by rotating it counter-clockwise.
-
Page 98
MAINTENANCE Fuses If the engine stops or will not start, if the power steering stops working (if equipped), or if you experience other electrical failures, a fuse may need replacement. Locate and correct any short circuits that may have caused the blown fuse, then replace the fuse. Fuse Feature Supported Lights: Headlights, Taillights… -
Page 99: Fuses
MAINTENANCE Fuses The fuse box is located above the power Fuse Label steering unit. Spare fuses are provided in the fuse box. 1. From the left side of the vehicle, reach in and lift up on the two fuse box tabs. 2.
-
Page 100: Cooling System
POLARIS recommends the use of POLARIS Antifreeze 60/40 premix or a 50/50 mixture of high quality aluminum compatible anti-freeze/ coolant and distilled water. POLARIS Antifreeze is already premixed and ready to use.
-
Page 101: Radiator And Cooling Fan
MAINTENANCE Cooling System Radiator and Cooling Fan Always check and clean the screen and radiator fins at the intervals out- lined in the Periodic Maintenance Chart beginning on page 77. Do not obstruct or deflect air flow through the radiator by installing unauthor- ized accessories in front of the radiator or behind the cooling fan.
-
Page 102: Coolant Level
Reinstall the cap. Tip: If coolant must be added often, or if the overflow bottle runs completely dry, there may be a leak in the system. Have the cooling system inspected by your POLARIS dealer.
-
Page 103
• See your dealer as recommended in the owner’s manual and on safety labels. • This PVT system is intended for use on POLARIS products only. Do not install it in any other product. • Always make sure the PVT housing is securely in place during operation. -
Page 104: Pvt Drying
MAINTENANCE POLARIS Variable Transmission (PVT) System Belt Replacement/Debris Removal If a belt fails, always clean any debris from the duct and from the clutch and engine compartments when replacing the belt. WARNING! Failure to remove ALL debris when replacing the belt could result in vehicle damage, loss of control and severe injury or death.
-
Page 105: Air Filter
MAINTENANCE Air Filter Always change the air filter at the intervals outlined in the Periodic Maintenance Chart beginning on page 77. 1. Access the air box from Air Box Cover behind the left rear wheel. 2. Remove the air box cover Gasket and inspect the gasket.
-
Page 106: Spark Arrester
MAINTENANCE Spark Arrester WARNING • Failure to heed the following warnings while servicing the spark arrester could result in serious injury or death. • Do not perform clean-out immediately after the engine has been run, as the exhaust system becomes very hot. Serious burns could result from contact with the exhaust components.
-
Page 107: Throttle System
MAINTENANCE Throttle System WARNING Failure to check or maintain proper operation of the throttle system can result in an accident and lead to serious injury or death if the throttle pedal sticks during operation. Never start or operate this vehicle if it has a sticking or improperly operating throttle pedal.
-
Page 108: Throttle Freeplay Adjustment
Throttle System Throttle Body/Idle RPM Idle RPM is preset by the manufacturer. If the engine idle speed is not satisfactory, please see your POLARIS dealer for adjustment. Throttle Freeplay Adjustment 1. Remove both seats. Remove the rear service panel. See page 27.
-
Page 109
MAINTENANCE Brakes The front and rear brakes are hydraulic disc type brakes activated by the brake pedal. See page 35. Always check brake pedal travel and the brake fluid reservoir level before each use of the vehicle. When applied, the brake pedal should feel firm. -
Page 110: Brake Fluid
Inspect the level of the brake fluid before each operation. If the fluid level is low add DOT 4 brake fluid only. See page 136 for the part num- bers of POLARIS products. WARNING! After opening a bottle of brake fluid, always discard any unused portion.
-
Page 111: Brake Inspection
MAINTENANCE Brakes Brake Inspection 1. Check the brake system for fluid leaks. 2. Check the brake pedal for excessive travel or a spongy feel. 3. Check the friction pads for wear, damage and looseness. 4. Check brake discs for signs of cracks, excessive corrosion, warping or other 3/64″…
-
Page 112: Steering Wheel Inspection
2. Lightly turn the steering wheel left and right. 3. There should be 0.8″-1.0″ (20-25 mm) of freeplay. 4. If there is excessive freeplay or strange noises, or the steering feels rough or “catchy,” have the steering system inspected by an autho- rized POLARIS dealer.
-
Page 113: Suspension Settings
If desired, the suspension may be adjusted to maintain vehicle clearance height when carrying loads. Please see your POLARIS dealer for the tool required to make suspension adjustments. Elevate the vehicle slightly for easier adjustment.
-
Page 114
If desired, the suspension may be adjusted to maintain vehicle clearance height when carrying loads. Please see your POLARIS dealer for the tool required to make suspension adjustments. Elevate the Preload Setting vehicle slightly for easier Measurement adjustment. -
Page 115
WARNING! Uneven adjustment may cause poor handling of the vehicle, which could result in an accident. Always adjust both the left and right spring preloads equally or have your POLARIS dealer perform the adjustments. 4. Tighten the jam nut firmly against the adjuster ring. -
Page 116
MAINTENANCE Suspension Settings (RZR S Premium and RZR 4 Premium Models) Front/Rear Shock Compression Increase Decrease The compression damping clicker knob is located on top of the shock reservoir. When the knob is turned clockwise until it stops, the damping is in the fully closed position. 1. -
Page 117: Tire Tread Depth
Improper tire inflation or the use of non-standard size or type of tires may adversely affect vehicle handling, which could result in vehicle damage or personal injury. Always maintain proper tire pressure. Always use POLARIS- approved size and type of tires for this vehicle when replacing tires.
-
Page 118: Wheel Removal
Always ensure that all nuts are torqued to specification. Do not service axle nuts that have a cotter pin installed. See your POLARIS dealer. 3. Attach the wheel nuts and washers and finger tighten.
-
Page 119
MAINTENANCE Lights Do not operate the vehicle at night or in low light conditions without properly working headlights. Always make sure lights are adjusted properly for best visibility. Tip: If an LED headlamp has moisture or fogging inside, disconnect the wiring harness from the headlamp(s) for a few days to allow the moisture to clear out. -
Page 120
MAINTENANCE Lights Headlight High Beam Adjustment 25 ft. (7.6 m) 8″ (20 cm) 1. Place the vehicle on a level surface with the headlight approxi- mately 25 ft. (7.6 m) from a wall. Place the transmission in PARK. 2. Measure the distance from the floor to the center of the headlight and make a mark on the wall at the same height. -
Page 121: Vehicle Immersion
MAINTENANCE Lights Brake Lights When the brake pedal is depressed, the brake light comes on. Check the brake light before each ride. 1. Turn the ignition switch to the ON position. 2. Apply the brakes. The brake light should come on after about 10 mm (0.4 in.) of pedal travel.
-
Page 122
MAINTENANCE Battery WARNING Battery electrolyte is poisonous. It contains sulfuric acid. Serious burns can result from contact with skin, eyes or clothing. Antidote: External: Flush with water. Internal: Drink large quantities of water or milk. Follow with milk of magnesia, beaten egg, or vegetable oil. -
Page 123: Battery Removal
MAINTENANCE Battery WARNING Improperly connecting or disconnecting battery cables can result in an explosion and cause serious injury or death. When removing the battery, always disconnect the negative (black) cable first. When reinstalling the battery, always connect the negative (black) cable last. Battery Removal 1.
-
Page 124: Battery Installation
MAINTENANCE Battery Battery Installation Using a new battery that has not been fully charged can damage the bat- tery and result in a shorter life. It can also hinder vehicle performance. Follow the battery charging instructions on page 124 before installing the battery.
-
Page 125: Battery Storage
See page 124. Tip: Battery charge can be maintained by using a POLARIS Battery Tender charger or by charging about once a month to make up for normal self-dis- charge.
-
Page 126
MAINTENANCE Battery Battery Charging (Conventional Battery) 1. Remove the battery from the vehicle to prevent damage from leak- ing or spilled electrolyte during charging. See page 121. 2. Charge the battery with a charging output no larger than 1/10 of the battery’s amp/hr rating. -
Page 127
MAINTENANCE Battery Battery Charging (Sealed Battery) Always verify battery condition before and 1-2 hours after the end of charging. Charge Time State of Voltage Action (Using constant current Charge charger @ standard amps specified on top of battery) 100% 12.8-13.0 volts None, check at 3 None required mos. -
Page 128: Cleaning And Storage
Do not allow these types of products to contact the vehicle. The best and safest way to clean your POLARIS vehicle is with a gar- den hose and a pail of mild soap and water. 1. Use a professional-type washing cloth, cleaning the upper body first and the lower parts last.
-
Page 129: Washing The Vehicle
• Cab and body panels • Labels and decals • Electrical components and wiring If warning and safety labels are damaged, contact your POLARIS dealer for free replacement. Grease all zerk fittings immediately after washing. Allow the engine to run for a while to evaporate any water that may have entered the engine or exhaust system.
-
Page 130
MAINTENANCE Cleaning and Storage Chrome Wheel Care (if equipped) Proper maintenance will protect chrome wheels from corrosion, pre- serve wheel life and ensure a “like new” appearance for many years. Tip: Chrome wheels exposed to road salt (or salt in the air in coastal areas) are more susceptible to corrosion if not properly cleaned. -
Page 131: Storage Tips
126. Stabilize the Fuel 1. Fill the fuel tank. 2. Add POLARIS Carbon Clean Fuel Treatment or POLARIS Fuel Stabilizer. Follow the instructions on the container for the recom- mended amount. Carbon Clean removes water from fuel systems, stabilizes fuel and removes carbon deposits from pistons, rings, valves and exhaust systems.
-
Page 132
6. If POLARIS fuel system additive is not used, fuel tank, fuel lines, and injectors should be completely drained of gasoline. 7. Reinstall the spark plug caps to the spark plugs. -
Page 133: Removal From Storage
Secure or remove all cargo, and inspect the unit for loose parts prior to transport. 4. Always tie the frame of the POLARIS vehicle to the transporting unit securely with suitable straps or rope. Do not attach tie straps to…
-
Page 134: Specifications
SPECIFICATIONS RZR / RZR S Gross Vehicle Weight Rating RZR: 1727 lbs. (783 kg) RZR S: 1782 lbs. (808 kg) Dry Weight RZR: 993 lbs. (450 kg) RZR EPS: 1041 lbs. (472 kg) RZR S: 1029 lbs. (467 kg) RZR S EPS: 1055 lbs. (479 kg) Test GVW — Rollover Protection RZR: 1745 lbs.
-
Page 135
SPECIFICATIONS RZR / RZR S Lubrication System Wet Sump Driving System Type Automatic POLARIS Variable Transmission Shift Type Dual Range P/R/N/L/H Gear Reduction — Low 8.71:1 Gear Reduction — Reverse 5.94:1 Gear Reduction — High 3.14:1 Drive Ratio — Front 3.82:1… -
Page 136
SPECIFICATIONS RZR 4 Gross Vehicle Weight Rating 2206 lbs. (1000 kg) Dry Weight 1255 lbs. (569 kg) (RZR 4) 1271 lbs. (576.5 kg) (RZR 4 EPS) Test GVW — Rollover Protection 2250 lbs. (1021 kg) per OSHA 29 CFR 1928.53 System (ROPS) Rear Cargo Box Capacity 300 lbs. -
Page 137
SPECIFICATIONS RZR 4 Lubrication System Wet Sump Driving System Type Automatic POLARIS Variable Transmission Shift Type Dual Range P/R/N/L/H Gear Reduction — Low 8.71:1 Gear Reduction — Reverse 5.94:1 Gear Reduction — High 3.14:1 Drive Ratio — Front 3.82:1 Drive Ratio — Final 3.70:1… -
Page 138: Polaris Products
2877923 Demand Drive Fluid (gal./3.8 l) 2870465 Pump for Gallon (3.8 l) Jug Coolant 2871534 Polaris Antifreeze 60/40 Premix (qt./.95 l) 2871323 Polaris Antifreeze 60/40 Premix (gal./3.8 l) Grease / Specialized Lubricants 2871312 Grease Gun Kit, All Season Grease 2871322 All Season Grease (3 oz./89 ml cartridge)
-
Page 139: Troubleshooting
PVT outlet duct (see page 126). Inspect PVT system clutch seals for damage if repeated leaking occurs. Clutch malfunction See your POLARIS dealer. Poor engine performance Check for fouled plugs or foreign material in gas tank or fuel lines. See your dealer.
-
Page 140
Inspect plugs and replace if necessary No spark to spark plug Inspect plugs and replace if necessary Water or fuel in crankcase Immediately see your POLARIS dealer Low battery voltage Recharge the battery to 12.8 VDC Mechanical failure See your dealer… -
Page 141
Low or contaminated fuel Add or change fuel, clean the fuel system Low octane fuel Replace with recommended fuel Clogged fuel filter See your POLARIS dealer Possible Rich Fuel Cause Solution Fuel is very high octane Replace with lower octane fuel… -
Page 142
TROUBLESHOOTING Engine Stops or Loses Power Possible Cause Solution Out of fuel Refuel Kinked or plugged fuel vent line Inspect and replace Water is present in fuel Replace with new fuel Fouled or defective spark plugs Inspect, clean and/or replace spark plug Worn or defective spark plug wires See your dealer Incorrect spark plug gap or heat range… -
Page 143: Warranty
WARRANTY COVERAGE AND EXCLUSIONS: LIMITATIONS OF WARRANTIES AND REMEDIES This POLARIS limited warranty excludes any failures that are not caused by a defect in material or workmanship. THIS WARRANTY DOES NOT COVER CLAIMS OF DEFECTIVE DESIGN. This warranty also does not cover acts of God, accidental damage, normal wear and tear, abuse or improper handling.
-
Page 144
MATERIALS, COMPONENTS, OR PRODUCTS. THE REMEDIES SET FORTH IN THIS WARRANTY ARE THE ONLY REMEDIES AVAILABLE TO ANY PERSON FOR BREACH OF THIS WARRANTY. POLARIS SHALL HAVE NO LIABILITY TO ANY PERSON FOR INCIDENTAL, CONSEQUENTIAL OR SPECIAL DAMAGES OF ANY DESCRIPTION, WHETHER ARISING OUT OF EXPRESS OR IMPLIED WARRANTY OR ANY OTHER CONTRACT, NEGLIGENCE, OR OTHER TORT OR OTHERWISE. -
Page 145
If you purchase from a private party: If you purchase a POLARIS product from a private party, to be kept and used outside of the country in which the product was originally purchased, all warranty coverage will be denied. -
Page 146
SOLD OUTSIDE THE COUNTRY OF THE SELLING DEALER’S AUTHORIZED LOCATION. This policy does not apply to products that have received authorization for export from POLARIS. Dealers may not give authorization for export. You should consult an authorized dealer to determine this product’s warranty or service coverage if you have any questions. -
Page 147
This EPA emissions warranty period is extended for at least as long as the standard factory warranty that Polaris provides on the vehicle as a whole. The EPA emissions warranty period does not further extend if you purchase… -
Page 148
*As related to the evaporative emission control system. The exclusive remedy for breach of this limited warranty shall be, at the exclusive option of POLARIS, repair or replacement of any defective materials, components or products. THE REMEDIES SET FORTH IN THIS LIMITED WARRANTY ARE THE ONLY REMEDIES AVAILABLE TO ANY PERSON FOR BREACH OF THIS WARRANTY. -
Page 149
POLARIS dealer to perform any service that may be necessary for your vehicle. POLARIS also recommends that you use only Pure POLARIS parts. It is a potential violation of the Clean Air Act if a part supplied by an aftermarket parts manufacturer reduces the effectiveness of the vehicle’s emission controls. -
Page 150: Maintenance Log
MAINTENANCE LOG Use the following chart to record periodic maintenance. DATE MILES (KM) TECHNICIAN SERVICE PERFORMED / COMMENTS OR HOURS…
-
Page 151
MAINTENANCE LOG DATE MILES (KM) TECHNICIAN SERVICE PERFORMED / COMMENTS OR HOURS… -
Page 152: Index
INDEX Accessory Outlet ….32 Cab Frame, ROPS ….35 Adding Coolant ….98 Cab Nets .
-
Page 153: Gearcase Oil
INDEX Electromagnetic Interference ..76 Fluid Check Electronic Power Steering ..32 Demand Drive ….92 Front Gearcase .
-
Page 154
INDEX Hand Hold, Passenger … 28 Maintenance Log … 148-149 Hauling a Load ….62-64 Maintenance, Periodic . -
Page 155
Seat Removal ….27 Polaris Products ….136 Selector, Gear ….34 Polishing the Vehicle . -
Page 156
INDEX Storage Area ….130 Vehicle Identification Numbers..6 Storage, Battery ….123 Vehicle Immersion . -
Page 157
12 or who cannot comfortably reach the floor and hand holds. • On paved surfaces — pavement may seriously affect handling and control. • With non-Polaris approved accessories — they may seriously affect stability. ALWAYS: • Wear your seat belt. Vehicle rollover can cause severe injury or death.
-
Page 1
Publication Printed August 2014 (PN 9925724 R01) © Copyright 2014 Polaris Industries Inc. All information contained within this publication is based on the latest product information at the time of publication. Due to constant improvements in the design and quality of production components, some minor discrepancies may result between the actual vehicle and the information presented in this publication. -
Page 2
UNDERSTANDING SAFETY LABELS AND DIRECTIONS Throughout this manual, important information is brought to your attention by the following symbols: WARNING SAFETY ALERT WARNING indicates a potential hazard that may result in severe injury or death to the operator, bystander or person(s) inspecting or servicing the vehicle. CAUTION SAFETY ALERT CAUTION indicates a potential hazard that may result in minor personal injury or damage to the vehicle. -
Page 3
Hilliard, Trademark of the Hilliard Corporation Warn, Trademark of Warn Industries FOX, Registered Trademark of FOX RACING SHOX RydeFX, Registered Trademark of ArvinMeritor Some Polaris factory publications can be downloaded from www.polarisindustries.com, purchased from www.purepolaris.com or by contacting the nearest Polaris dealer. -
Page 5: Table Of Contents
GENERAL INFORMATION MAINTENANCE ENGINE / COOLING SYSTEM FUEL SYSTEM PVT SYSTEM TRANSMISSION FINAL DRIVE STEERING / SUSPENSION BRAKE SYSTEM BODY / FRAME ELECTRICAL…
-
Page 7
…………… . .1.26 DECIMAL EQUIVALENTS 9925724 R01 — 2014-2015 RZR XP 1000 / RZR XP4 1000 Service Manual © Copyright 2014 Polaris Industries Inc. -
Page 8: Vehicle Identification
First 3 digits and 10th digit are used in model number only. They are not used with the 17 digit VIN. Digits 1 through 8 determine Digital Wrench calibration. 9925724 R01 — 2014-2015 RZR XP 1000 / RZR XP4 1000 Service Manual © Copyright 2014 Polaris Industries Inc.
-
Page 9: Vehicle Identification Number
* Model Year: A = 2010; B = 2011; C = 2012; D = 2013; E = 2014; F = 2015 9925724 R01 — 2014-2015 RZR XP 1000 / RZR XP4 1000 Service Manual © Copyright 2014 Polaris Industries Inc.
-
Page 10: Vehicle And Engine Serial Number Location
GENERAL INFORMATION Vehicle and Engine Serial Number Location Whenever corresponding about a Polaris ORV, refer to the vehicle identification number (VIN) and the engine serial number. The VIN can be found stamped on a portion of the left rear frame, behind the lower shock mounting location. Refer to Figure 1-1.
-
Page 11: Vehicle Information
NOTE: When ordering service parts be sure to use the correct parts manual. Polaris factory publications can be found at www.polaris.com or purchased from www.purepolaris.com. 9925724 R01 — 2014-2015 RZR XP 1000 / RZR XP4 1000 Service Manual © Copyright 2014 Polaris Industries Inc.
-
Page 12: Special Tools
Special tools may be required while servicing this vehicle. Some of the tools listed or depicted are mandatory, while other tools may be substituted with a similar tool, if available. Polaris recommends the use of Polaris Special Tools when servicing any Polaris product. Dealers may order special tools through Polaris’ official tool supplier.
-
Page 13
Roll Pin Removal Tool Combination Pliers Spanner Wrench / CV Boot Clamp Pliers Drive Clutch Holding (27″) Clutch Spreader (ear) Tool 9925724 R01 — 2014-2015 RZR XP 1000 / RZR XP4 1000 Service Manual © Copyright 2014 Polaris Industries Inc. -
Page 14
Oil Pressure Gauge Transmission Nut Clutch Spider Nut Rolling Engine Stand Engine Stand Adapter Adapter (1/2 NPT) Socket Socket Sleeve (2″) 9925724 R01 — 2014-2015 RZR XP 1000 / RZR XP4 1000 Service Manual © Copyright 2014 Polaris Industries Inc. -
Page 15
PV-48656 PW-47053 PW-47054 Piston Ring Fuel Pressure Gauge Bench Mount Engine Engine Stand Adapter Compressor Pliers Adapter Stand Sleeve (2 3/8″) 9925724 R01 — 2014-2015 RZR XP 1000 / RZR XP4 1000 Service Manual © Copyright 2014 Polaris Industries Inc. -
Page 16: General Specifications
Do not use this vehicle for towing. Do not Hitch Tongue Capacity modify the vehicle by adding a hitch. 1.10 9925724 R01 — 2014-2015 RZR XP 1000 / RZR XP4 1000 Service Manual © Copyright 2014 Polaris Industries Inc.
-
Page 17: Rzr Xp 1000 Clutch Chart
SHIFT WEIGHT DRIVE SPRING DRIVEN SPRING Meters 0-1800 26-61 White / Orange 2014 XP 1000 (Feet) (0-6000) (1323098) (7043924) (3234452) 1.11 9925724 R01 — 2014-2015 RZR XP 1000 / RZR XP4 1000 Service Manual © Copyright 2014 Polaris Industries Inc.
-
Page 18
Orange / Black (0-6000) (1323176) (1323176) (3234452) Meters 2015 XP 1000 (Feet) 1800-3700 26-59 Orange / Black (6000-12000) (1322981) (7044338) (3234452) 1.12 9925724 R01 — 2014-2015 RZR XP 1000 / RZR XP4 1000 Service Manual © Copyright 2014 Polaris Industries Inc. -
Page 19: Rzr Xp 4 1000
Do not use this vehicle for towing. Do not Hitch Tongue Capacity modify the vehicle by adding a hitch. 1.13 9925724 R01 — 2014-2015 RZR XP 1000 / RZR XP4 1000 Service Manual © Copyright 2014 Polaris Industries Inc.
-
Page 20: Rzr 1000 Xp4
SHIFT WEIGHT DRIVE SPRING DRIVEN SPRING Meters 0-1800 26-67 White / Orange 2014 XP4 1000 (Feet) (0-6000) (1323177) (7043924) (3234452) 1.14 9925724 R01 — 2014-2015 RZR XP 1000 / RZR XP4 1000 Service Manual © Copyright 2014 Polaris Industries Inc.
-
Page 21
(0-6000) (1323260 (7043924) (3234452) Meters 2015 XP4 1000 (Feet) 1800-3700 26-59 White / Orange (6000 — 12000) (1322981) (7043924) (3234452) 1.15 9925724 R01 — 2014-2015 RZR XP 1000 / RZR XP4 1000 Service Manual © Copyright 2014 Polaris Industries Inc. -
Page 22: Rzr Xp 1000 Eps High Lifter
Hitch Tongue Capacity vehicle’s transmission in neutral. Do not operate the vehicle faster than 10 MPH (16 km/h) when towing. 1.16 9925724 R01 — 2014-2015 RZR XP 1000 / RZR XP4 1000 Service Manual © Copyright 2014 Polaris Industries Inc.
-
Page 23
20A Cooling Fan Fuses 10A EFI 10A Fuel Pump 5A Brake Light 10A Accessory 10A Drive 10A Lights 20A EPS (if appl.) 1.17 9925724 R01 — 2014-2015 RZR XP 1000 / RZR XP4 1000 Service Manual © Copyright 2014 Polaris Industries Inc. -
Page 24: 2015 Rzr Xp 1000 High Lifter
Meters 0-1800 26-61 White / Orange High Lifter (Feet) (0-6000) (1323260) (7043924) (3234452) Edition 2015 RZR XP 1000 Desert Edition 1.18 9925724 R01 — 2014-2015 RZR XP 1000 / RZR XP4 1000 Service Manual © Copyright 2014 Polaris Industries Inc.
-
Page 25
Do not use this vehicle for towing. Do not Hitch Tongue Capacity modify the vehicle by adding a hitch. 1.19 9925724 R01 — 2014-2015 RZR XP 1000 / RZR XP4 1000 Service Manual © Copyright 2014 Polaris Industries Inc. -
Page 26: 2015 Rzr Xp 1000 Desert Edition Clutch Chart
10A Drive 10A Lights White / 26-61 20A EPS (if appl.) Meters 0-1800 Orange Desert (13231- (323445- (Feet) (0-6000) (70439- Edition 1.20 9925724 R01 — 2014-2015 RZR XP 1000 / RZR XP4 1000 Service Manual © Copyright 2014 Polaris Industries Inc.
-
Page 27: Misc. Specifications And Charts
7 ft-lb (10 Nm) Drive Clutch Cover Plate 9 ft-lb (12 Nm) Oil Sump Cover M8 Bolts 26 ft-lb (35 Nm) Screw 1.21 9925724 R01 — 2014-2015 RZR XP 1000 / RZR XP4 1000 Service Manual © Copyright 2014 Polaris Industries Inc.
-
Page 28
7 ft-lb (10 Nm) Fastener Steering Pivot Tube 8 ft-lb (11 Nm) Fasteners Steering Rack Mounting 16 ft-lbs (22 Nm) Bolts 1.22 9925724 R01 — 2014-2015 RZR XP 1000 / RZR XP4 1000 Service Manual © Copyright 2014 Polaris Industries Inc. -
Page 29: Conversion Table
= cylinder volume °C to °F: 9/5 (°C + 32) = °F °F to °C: 5/9 (°F − 32) = °C 1.23 9925724 R01 — 2014-2015 RZR XP 1000 / RZR XP4 1000 Service Manual © Copyright 2014 Polaris Industries Inc.
-
Page 30: Standard Bolt Torque Specification
59 (80) 85 (115) 159 (215) 232 (315) 273 (370) 81 (110) 118 (160) 225 (305) 321 (435) 376 (510) 1.24 9925724 R01 — 2014-2015 RZR XP 1000 / RZR XP4 1000 Service Manual © Copyright 2014 Polaris Industries Inc.
-
Page 31: Sae Tap / Drill Sizes
2 1/4–4 1/2 2 1/32 3/8–16 2 1/2–4 2 1/4 3/8–24 2 3/4–4 2 1/2 7/16–14 3–4 2 3/4 7/16–20 25/64 1.25 9925724 R01 — 2014-2015 RZR XP 1000 / RZR XP4 1000 Service Manual © Copyright 2014 Polaris Industries Inc.
-
Page 32: Decimal Equivalents
14 mm = 0.5512″ 9/16 0.5625″ 37/64 0.5781″ 15 mm = 0.5906″ 19/32 0.5938″ 39/64 0.6094″ 0.625″ 16 mm = 0.6299″ 1.26 9925724 R01 — 2014-2015 RZR XP 1000 / RZR XP4 1000 Service Manual © Copyright 2014 Polaris Industries Inc.
-
Page 33
…………….2.29 COOLANT DRAIN / FILL 9925724 R01 — 2014-2015 RZR XP 1000 / RZR XP4 1000 Service Manual © Copyright 2014 Polaris Industries Inc. -
Page 34
…………2.43 BRAKE HOSE AND FITTING INSPECTION 9925724 R01 — 2014-2015 RZR XP 1000 / RZR XP4 1000 Service Manual © Copyright 2014 Polaris Industries Inc. -
Page 35: Periodic Maintenance Chart
▶ = SEVERE USE ITEM: See information provided above. E = Emission Control System Service (California). NOTE: Inspection may reveal the need for replacement parts. Always use genuine Polaris parts. WARNING Improperly performing the procedures marked ■ could result in component failure and lead to serious injury or death.
-
Page 36: Pre-Ride — 50 Hour Maintenance Interval
▶ Perform these procedures more often for vehicles subjected to severe use. E Emission Control System Service (California) ■ Have an authorized Polaris dealer perform these services. 9925724 R01 — 2014-2015 RZR XP 1000 / RZR XP4 1000 Service Manual © Copyright 2014 Polaris Industries Inc.
-
Page 37: 50 — 500 Hour Maintenance Interval
▶ Perform these procedures more often for vehicles subjected to severe use. E Emission Control System Service (California) ■ Have an authorized Polaris dealer perform these services. 9925724 R01 — 2014-2015 RZR XP 1000 / RZR XP4 1000 Service Manual © Copyright 2014 Polaris Industries Inc.
-
Page 38: Maintenance Quick Reference
— Under Front Hood / Access Panel Coolant bottle * More often under severe use, such as operation in water or under severe loads. 9925724 R01 — 2014-2015 RZR XP 1000 / RZR XP4 1000 Service Manual © Copyright 2014 Polaris Industries Inc.
-
Page 39: Maintenance Quick Reference, Continued
Polaris AGL the fill hole threads * More often under severe use, such as operation in water or under severe loads. 9925724 R01 — 2014-2015 RZR XP 1000 / RZR XP4 1000 Service Manual © Copyright 2014 Polaris Industries Inc.
-
Page 40: Grease Lubrication Points
Polaris All Season Grease Bushings each side of the vehicle *There is no grease point on the upper control arm rear mount. 9925724 R01 — 2014-2015 RZR XP 1000 / RZR XP4 1000 Service Manual © Copyright 2014 Polaris Industries Inc.
-
Page 41: Lubricants / Service Products
2871323 60/40 Coolant (Gallon) (6 Count) 2871534 60/40 Coolant (Quart) (12 Count) NOTE: Each item can be purchased separately at your local Polaris dealer. 9925724 R01 — 2014-2015 RZR XP 1000 / RZR XP4 1000 Service Manual © Copyright 2014 Polaris Industries Inc.
-
Page 42: General Vehicle Inspection And Maintenance
4. Adjust the shift cable so there is the same amount of cable travel when shifting slightly past HIGH gear and PARK. 2.10 9925724 R01 — 2014-2015 RZR XP 1000 / RZR XP4 1000 Service Manual © Copyright 2014 Polaris Industries Inc.
-
Page 43
7. Start engine and shift through all gears to ensure the shift cable is properly adjusted. If transmission still ratchets after cable adjustment, the transmission will require service. 2.11 9925724 R01 — 2014-2015 RZR XP 1000 / RZR XP4 1000 Service Manual © Copyright 2014 Polaris Industries Inc. -
Page 44: Fuel System And Air Intake
Never drain the fuel when the engine is hot. Severe burns may result. 2.12 9925724 R01 — 2014-2015 RZR XP 1000 / RZR XP4 1000 Service Manual © Copyright 2014 Polaris Industries Inc.
-
Page 45: Fuel Pump / Fuel Filters
Make sure lines are not kinked or Refer to Chapter 4 for fuel pump replacement and all pinched. other information related to the EFI System. 2.13 9925724 R01 — 2014-2015 RZR XP 1000 / RZR XP4 1000 Service Manual © Copyright 2014 Polaris Industries Inc.
-
Page 46: Throttle Pedal Inspection
Check throttle pedal periodically. 3. Inspect the pre-filter. If necessary, clean with soapy water and dry with low pressure compressed air. 2.14 9925724 R01 — 2014-2015 RZR XP 1000 / RZR XP4 1000 Service Manual © Copyright 2014 Polaris Industries Inc.
-
Page 47: Air Filter Service
3. Pull cover rearward far enough to remove air filter . debris so it can drain properly. If needed, remove the drain from the baffle box during inspection. 2.15 9925724 R01 — 2014-2015 RZR XP 1000 / RZR XP4 1000 Service Manual © Copyright 2014 Polaris Industries Inc.
-
Page 48: Air Box / Air Filter Assembly View
Intake Airbox Hose Airbox Clip (4) Drain Cap Vent Hose Airbox Intake Tubes Air Filter Engine Intake Housing Airbox Cover 2.16 9925724 R01 — 2014-2015 RZR XP 1000 / RZR XP4 1000 Service Manual © Copyright 2014 Polaris Industries Inc.
-
Page 49: Engine
. Remove the dipstick and wipe it dry with a clean cloth. 8. When finished, reinstall dipstick and lock the lever. 2.17 9925724 R01 — 2014-2015 RZR XP 1000 / RZR XP4 1000 Service Manual © Copyright 2014 Polaris Industries Inc.
-
Page 50: Engine Oil And Filter Change
5. Remove the seats and engine service panel to access the oil filter. Engine Oil Drain Plug: 12 ft-lbs (16 Nm) 2.18 9925724 R01 — 2014-2015 RZR XP 1000 / RZR XP4 1000 Service Manual © Copyright 2014 Polaris Industries Inc.
-
Page 51: Engine Crankcase Breather Hose Inspection
20. Reinstall the cargo box access panel, engine service panel and seats. 21. Dispose of used oil and filter properly. 2.19 9925724 R01 — 2014-2015 RZR XP 1000 / RZR XP4 1000 Service Manual © Copyright 2014 Polaris Industries Inc.
-
Page 52: Engine Cylinder Leakdown Test
NOT necessary to perform this procedure. 5. Remove the spark plug wires to gain access to valve cover as shown below. 2.20 9925724 R01 — 2014-2015 RZR XP 1000 / RZR XP4 1000 Service Manual © Copyright 2014 Polaris Industries Inc.
-
Page 53
14. Install NEW isolators on the valve cover bolts. Install the valve cover and the four T40 bolts. Torque bolts to specification. Valve Cover Bolts: 7 ft-lbs (10 Nm) 2.21 9925724 R01 — 2014-2015 RZR XP 1000 / RZR XP4 1000 Service Manual © Copyright 2014 Polaris Industries Inc. -
Page 54
19. Connect the negative (-) battery cable to the battery and install the seat. 20. Start the engine to ensure proper operation. 21. Install the engine access panel. 2.22 9925724 R01 — 2014-2015 RZR XP 1000 / RZR XP4 1000 Service Manual © Copyright 2014 Polaris Industries Inc. -
Page 55: Transmission And Front Gearcase
9. Reinstall the drain plug and torque to specification. 3. If lubricant level is not even with bottom threads, add recommended lubricant as needed. Do not overfill. 2.23 9925724 R01 — 2014-2015 RZR XP 1000 / RZR XP4 1000 Service Manual © Copyright 2014 Polaris Industries Inc.
-
Page 56: Front Gearcase Lubrication
5. Remove the fill plug (see Chapter 2 – Front Gearcase Lubrication, page 2.24). 2.24 9925724 R01 — 2014-2015 RZR XP 1000 / RZR XP4 1000 Service Manual © Copyright 2014 Polaris Industries Inc.
-
Page 57
Front Gearcase Fill / Drain Plug Torque: 10 ft-lbs (14 Nm) 12. Check for leaks. Dispose of used fluid properly. 2.25 9925724 R01 — 2014-2015 RZR XP 1000 / RZR XP4 1000 Service Manual © Copyright 2014 Polaris Industries Inc. -
Page 58: Cooling System
NOTE: Use of a non-standard pressure cap will not allow the recovery system to function properly. 7. Remove recovery bottle cap and add coolant using a funnel. 2.26 9925724 R01 — 2014-2015 RZR XP 1000 / RZR XP4 1000 Service Manual © Copyright 2014 Polaris Industries Inc.
-
Page 59: Cooling System Pressure Test
Make sure radiator fins are clean to prevent overheating. ITEM DESCRIPTION Recovery Bottle Engine Hoses Radiator Hoses To Thermostat Housing To Waterpump To Radiator 2.27 9925724 R01 — 2014-2015 RZR XP 1000 / RZR XP4 1000 Service Manual © Copyright 2014 Polaris Industries Inc.
-
Page 60: Radiator Inspection / Cleaning
Washing the vehicle with a high-pressure washer could damage the radiator fins and impair the radiators effectiveness. Use of a high-pressure washer is not recommended. 2.28 9925724 R01 — 2014-2015 RZR XP 1000 / RZR XP4 1000 Service Manual © Copyright 2014 Polaris Industries Inc.
-
Page 61: Coolant Drain / Fill
8. Refer to Cooling System Bleeding Procedure, page 3.18. Recommended Coolant: Polaris Premium Pre-Mixed Antifreeze (PN 2871534) (Quart) (PN 2871323) (Gallon) 2.29 9925724 R01 — 2014-2015 RZR XP 1000 / RZR XP4 1000 Service Manual © Copyright 2014 Polaris Industries Inc.
-
Page 62: Pvt / Final Drive / Wheel And Tire
PVT system and has not been operated for a period of time, be sure to check the PVT system components for water damage. 2.30 9925724 R01 — 2014-2015 RZR XP 1000 / RZR XP4 1000 Service Manual © Copyright 2014 Polaris Industries Inc.
-
Page 63: Drive Shaft Boot Inspection
4. Elevate the appropriate side of the vehicle by placing a suitable stand under the frame. 5. Remove the wheel nuts and remove the wheel. 2.31 9925724 R01 — 2014-2015 RZR XP 1000 / RZR XP4 1000 Service Manual © Copyright 2014 Polaris Industries Inc.
-
Page 64: Wheel Installation
19 psi (131 kPa) 21 psi (145 kPa) wheel. High Lifter 18 psi (124 kPa) 18 psi (124 kPa) 2.32 9925724 R01 — 2014-2015 RZR XP 1000 / RZR XP4 1000 Service Manual © Copyright 2014 Polaris Industries Inc.
-
Page 65: Beadlock Rims (Desert Edition)
NOTE: Beadlock bolts should be checked and retorqued every 300 miles (450 km). 7. Seat bead and inflate to 16 psi. 2.33 9925724 R01 — 2014-2015 RZR XP 1000 / RZR XP4 1000 Service Manual © Copyright 2014 Polaris Industries Inc.
-
Page 66: Electrical And Ignition System
Procedure”, page 11.37. Do not use the vehicle’s stator/alternator to charge a new battery. 5. Lift the battery out of the vehicle. 2.34 9925724 R01 — 2014-2015 RZR XP 1000 / RZR XP4 1000 Service Manual © Copyright 2014 Polaris Industries Inc.
-
Page 67: Battery Installation
2. Inspect the chassis ground terminals. Be sure the grounds are clean and tight. 6. Verify that cables are properly routed and reinstall the driver’s seat. 2.35 9925724 R01 — 2014-2015 RZR XP 1000 / RZR XP4 1000 Service Manual © Copyright 2014 Polaris Industries Inc.
-
Page 68: Spark Plug Service
4. Rinse plug wells with water and dry with compressed air. NOTE: Spark plug wells have drain holes built into the cylinder head to allow water to drain out. 2.36 9925724 R01 — 2014-2015 RZR XP 1000 / RZR XP4 1000 Service Manual © Copyright 2014 Polaris Industries Inc.
-
Page 69: Steering
Due to the critical nature of the procedures outlined in this chapter, Polaris recommends steering component repair and adjustment be performed by an authorized Polaris MSD certified technician. 2.37 9925724 R01 — 2014-2015 RZR XP 1000 / RZR XP4 1000 Service Manual © Copyright 2014 Polaris Industries Inc.
-
Page 70: Tie Rod End / Wheel Hub Inspection
(loose wheel nuts or loose front hub nut). hub/axle center line. • Refer to Chapter 7 “Final Drive” for front hub service procedures. 2.38 9925724 R01 — 2014-2015 RZR XP 1000 / RZR XP4 1000 Service Manual © Copyright 2014 Polaris Industries Inc.
-
Page 71: Wheel Toe Adjustment
• After alignment is complete, torque jam nuts to specification. Tie Rod Jamb Nut: 14 ft-lbs (19 Nm) 2.39 9925724 R01 — 2014-2015 RZR XP 1000 / RZR XP4 1000 Service Manual © Copyright 2014 Polaris Industries Inc.
-
Page 72: Suspension (Walker Evans™)
The increased suspension height will negatively impact vehicle stability when operating without a load. 2.40 9925724 R01 — 2014-2015 RZR XP 1000 / RZR XP4 1000 Service Manual © Copyright 2014 Polaris Industries Inc.
-
Page 73: Shock Compression Adjustment
The rear shock adjuster can be found on the remote reservoir. Clockwise will increase damping and counter- clockwise will decrease damping. 2.41 9925724 R01 — 2014-2015 RZR XP 1000 / RZR XP4 1000 Service Manual © Copyright 2014 Polaris Industries Inc.
-
Page 74: Brake System
2.42 9925724 R01 — 2014-2015 RZR XP 1000 / RZR XP4 1000 Service Manual © Copyright 2014 Polaris Industries Inc.
-
Page 75: Brake Hose And Fitting Inspection
Tighten any loose fittings and replace any worn or damaged parts. Brake Disc Thickness Service Limit: 0.170” (4.32 mm) 2.43 9925724 R01 — 2014-2015 RZR XP 1000 / RZR XP4 1000 Service Manual © Copyright 2014 Polaris Industries Inc.
-
Page 76
MAINTENANCE NOTES 2.44 9925724 R01 — 2014-2015 RZR XP 1000 / RZR XP4 1000 Service Manual © Copyright 2014 Polaris Industries Inc. -
Page 77
…………….3.40 VALVE SEALING TEST 9925724 R01 — 2014-2015 RZR XP 1000 / RZR XP4 1000 Service Manual © Copyright 2014 Polaris Industries Inc. -
Page 78
………………3.90 COOLING SYSTEM 9925724 R01 — 2014-2015 RZR XP 1000 / RZR XP4 1000 Service Manual © Copyright 2014 Polaris Industries Inc. -
Page 79: General Information
(Quick Release) Valve Spring Compressor PV-43513-A Adapter Water Pump Mechanical Seal PU-50564 Installer Bosch Automotive Service Solutions: 1-800-345- 2233 or http://polaris.service-solutions.com/ 9925724 R01 — 2014-2015 RZR XP 1000 / RZR XP4 1000 Service Manual © Copyright 2014 Polaris Industries Inc.
-
Page 80: Oil Pressure Test
MAG side of the engine. 4. Remove the crankcase gallery plug and insert the oil pressure adapter. 9925724 R01 — 2014-2015 RZR XP 1000 / RZR XP4 1000 Service Manual © Copyright 2014 Polaris Industries Inc.
-
Page 81: Engine Oil Flow Chart
ENGINE / COOLING SYSTEM Engine Oil Flow Chart 9925724 R01 — 2014-2015 RZR XP 1000 / RZR XP4 1000 Service Manual © Copyright 2014 Polaris Industries Inc.
-
Page 82: Engine Service Specifications
0.0590 ± 0.0039″ (1.5 ± 0.10 mm) 0.0748″ (1.9 mm) Valve Seat 30.0° ± 1.5° Valve Seat Angles 45.0° ± 0.5° 60.0° ± 1.5° 9925724 R01 — 2014-2015 RZR XP 1000 / RZR XP4 1000 Service Manual © Copyright 2014 Polaris Industries Inc.
-
Page 83
Crankshaft Runout Limit (PTO and MAG) (0.025 mm) Balance Bearing Journal O.D. (Standard) 1.4939 — 1.4946″ (37.946 — 37.962 mm) 1.4921″ (37.900 mm) Shaft 9925724 R01 — 2014-2015 RZR XP 1000 / RZR XP4 1000 Service Manual © Copyright 2014 Polaris Industries Inc. -
Page 84: Engine Detail — Torque Values / Sequences / Assembly Notes
ENGINE / COOLING SYSTEM ENGINE DETAIL — TORQUE VALUES / SEQUENCES / ASSEMBLY NOTES Main Engine Components — Torque Specification and Sequence 9925724 R01 — 2014-2015 RZR XP 1000 / RZR XP4 1000 Service Manual © Copyright 2014 Polaris Industries Inc.
-
Page 85: Balance Shaft / Connecting Rods / Crankcase / Crankshaft / Pistons
ENGINE / COOLING SYSTEM Balance Shaft / Connecting Rods / Crankcase / Crankshaft / Pistons 9925724 R01 — 2014-2015 RZR XP 1000 / RZR XP4 1000 Service Manual © Copyright 2014 Polaris Industries Inc.
-
Page 86: Cylinder / Oil Cooler / Oil Filter / Oil Pump / Oil Sump / Water Pump
ENGINE / COOLING SYSTEM Cylinder / Oil Cooler / Oil Filter / Oil Pump / Oil Sump / Water Pump 3.10 9925724 R01 — 2014-2015 RZR XP 1000 / RZR XP4 1000 Service Manual © Copyright 2014 Polaris Industries Inc.
-
Page 87: Camshafts / Cylinder Head / Flywheel / Idler Gears / Stator Cover
ENGINE / COOLING SYSTEM Camshafts / Cylinder Head / Flywheel / Idler Gears / Stator Cover 3.11 9925724 R01 — 2014-2015 RZR XP 1000 / RZR XP4 1000 Service Manual © Copyright 2014 Polaris Industries Inc.
-
Page 88: Spark Plugs / Starter / Thermostat Housing / Throttle Body / Valve Cover
ENGINE / COOLING SYSTEM Spark Plugs / Starter / Thermostat Housing / Throttle Body / Valve Cover 3.12 9925724 R01 — 2014-2015 RZR XP 1000 / RZR XP4 1000 Service Manual © Copyright 2014 Polaris Industries Inc.
-
Page 89: Cooling System Pressure Test
3.13 9925724 R01 — 2014-2015 RZR XP 1000 / RZR XP4 1000 Service Manual © Copyright 2014 Polaris Industries Inc.
-
Page 90: Cooling System Pressure Cap Test
Allow the engine to cool before servicing. 4. Disconnect cooling fan electrical connector. 5. Remove the upper radiator hose from the radiator. 3.14 9925724 R01 — 2014-2015 RZR XP 1000 / RZR XP4 1000 Service Manual © Copyright 2014 Polaris Industries Inc.
-
Page 91: Thermostat Replacement
Upper Radiator Hose To Radiator Fitting Lower Radiator Hose Fan Motor Assembly Recovery Bottle Radiator 3.15 9925724 R01 — 2014-2015 RZR XP 1000 / RZR XP4 1000 Service Manual © Copyright 2014 Polaris Industries Inc.
-
Page 92
Thermostat Cover Bolts: 7 ft-lb (10 Nm) 11. Be sure to properly fill and bleed cooling system as outlined in this chapter. 3.16 9925724 R01 — 2014-2015 RZR XP 1000 / RZR XP4 1000 Service Manual © Copyright 2014 Polaris Industries Inc. -
Page 93: Cooling System Assembly View
Engine Hoses Pressure Cap Bypass Hose Lower Radiator Hose Upper Radiator Hose Water Pump Outlet Hose Fan Assembly Recovery Bottle 3.17 9925724 R01 — 2014-2015 RZR XP 1000 / RZR XP4 1000 Service Manual © Copyright 2014 Polaris Industries Inc.
-
Page 94: Cooling System Bleeding Procedure
5. Remove the seats, engine service panel and divider panel heat shield to access the coolant bleed screw. 3.18 9925724 R01 — 2014-2015 RZR XP 1000 / RZR XP4 1000 Service Manual © Copyright 2014 Polaris Industries Inc.
-
Page 95: Water Pump Removal
14. Plug the water pump drive access hole in the engine block with a clean shop towel. 3.19 9925724 R01 — 2014-2015 RZR XP 1000 / RZR XP4 1000 Service Manual © Copyright 2014 Polaris Industries Inc.
-
Page 96
12. Install the right rear lower shock bolt and new nut. Torque mounting bolt to specification. Rear Shock Mounting Bolt: 70 ft-lbs (95 Nm) 3.20 9925724 R01 — 2014-2015 RZR XP 1000 / RZR XP4 1000 Service Manual © Copyright 2014 Polaris Industries Inc. -
Page 97: Water Pump Service
6. Using an appropriate arbor press, properly support the water pump housing and press out the water pump shaft from the impeller side. 3.21 9925724 R01 — 2014-2015 RZR XP 1000 / RZR XP4 1000 Service Manual © Copyright 2014 Polaris Industries Inc.
-
Page 98
19. Install a new water pump cover gasket 13. Place water pump drive tab vertically into soft jaw vice as previously shown in this procedure. 3.22 9925724 R01 — 2014-2015 RZR XP 1000 / RZR XP4 1000 Service Manual © Copyright 2014 Polaris Industries Inc. -
Page 99
“Water Pump Installation” procedure. Bolt Washers Oil Seal Loctite 204 Drive Tab Impeller Mechanical Seal Water Pump Shaft Washer O-Rings Water Pump Housing 3.23 9925724 R01 — 2014-2015 RZR XP 1000 / RZR XP4 1000 Service Manual © Copyright 2014 Polaris Industries Inc. -
Page 100: Engine Service
Use care when supporting vehicle so that it does not tip or fall. Serious injury may occur if vehicle tips or falls. 3.24 9925724 R01 — 2014-2015 RZR XP 1000 / RZR XP4 1000 Service Manual © Copyright 2014 Polaris Industries Inc.
-
Page 101
NOTE: Be sure to use the correct Drive Clutch Puller (PN 2872085) to prevent damage to crankshaft. 3.25 9925724 R01 — 2014-2015 RZR XP 1000 / RZR XP4 1000 Service Manual © Copyright 2014 Polaris Industries Inc. -
Page 102
NOTE: It is not necessary to remove the bolts that retain the bracket to the transmission. 3.26 9925724 R01 — 2014-2015 RZR XP 1000 / RZR XP4 1000 Service Manual © Copyright 2014 Polaris Industries Inc. -
Page 103
• Sleeve adapter for a 2″ bore engine stand: • (PU-50625) • Sleeve adapter for a 2.375″ bore engine stand: • (PW-47054) 3.27 9925724 R01 — 2014-2015 RZR XP 1000 / RZR XP4 1000 Service Manual © Copyright 2014 Polaris Industries Inc. -
Page 104: Engine Installation
6. Align transmission joint mounting holes with the transmission front mounting holes. Starter Motor Bolts: 7 ft-lb (10 Nm) Trans Joint Bracket Bolts: 44 ft-lb (60 Nm) 3.28 9925724 R01 — 2014-2015 RZR XP 1000 / RZR XP4 1000 Service Manual © Copyright 2014 Polaris Industries Inc.
-
Page 105
13. Remove the clutch center distance tool. 9. Align the front transmission mounting holes with transmission joint bracket mounting holes on engine. 3.29 9925724 R01 — 2014-2015 RZR XP 1000 / RZR XP4 1000 Service Manual © Copyright 2014 Polaris Industries Inc. -
Page 106
Check level after filling and add all the way so they engage onto the spark plugs. oil as needed. 3.30 9925724 R01 — 2014-2015 RZR XP 1000 / RZR XP4 1000 Service Manual © Copyright 2014 Polaris Industries Inc. -
Page 107: Engine Mounting And Torque Values
40. Start engine and check for any oil or coolant leaks. Engine Mounting and Torque Values 3.31 9925724 R01 — 2014-2015 RZR XP 1000 / RZR XP4 1000 Service Manual © Copyright 2014 Polaris Industries Inc.
-
Page 108: Engine Break-In Period
6. Change oil and oil filter after 25 hour break-in period. * Additional oil may be required after complete engine disassembly. Check level after filling and add oil as needed. 3.32 9925724 R01 — 2014-2015 RZR XP 1000 / RZR XP4 1000 Service Manual © Copyright 2014 Polaris Industries Inc.
-
Page 109: Engine Disassembly / Inspection — Top End
Replace the sealing washer upon the combustion chamber. reassembly. 3.33 9925724 R01 — 2014-2015 RZR XP 1000 / RZR XP4 1000 Service Manual © Copyright 2014 Polaris Industries Inc.
-
Page 110
6. Rotate the engine using the flywheel and remove the remaining bolt from each camshaft sprocket. 3.34 9925724 R01 — 2014-2015 RZR XP 1000 / RZR XP4 1000 Service Manual © Copyright 2014 Polaris Industries Inc. -
Page 111: Camshaft Sprocket Inspection
Exhaust: 1.5142 — 1.5181″ (38.46 — 38.56 mm) Service Limit: 1.5122″ (38.41 mm) 3. Visually inspect each camshaft journal for scoring, wear or damage. 3.35 9925724 R01 — 2014-2015 RZR XP 1000 / RZR XP4 1000 Service Manual © Copyright 2014 Polaris Industries Inc.
-
Page 112
Calculated Camshaft Oil Clearance: 0.0000 — 0.0026″ (0.001 — 0.067 mm) 0.0039″ (0.1 mm) Camshaft Carrier Bolts: 89 in-lbs (10 Nm) 3.36 9925724 R01 — 2014-2015 RZR XP 1000 / RZR XP4 1000 Service Manual © Copyright 2014 Polaris Industries Inc. -
Page 113: Cylinder Head Removal
Holding & Camshaft Timing Plate (PU-50563). Refer to Cylinder / Piston Removal, page 3.56. Cylinder Head Warp Limit: 0.0039″ (0.1 mm) 3.37 9925724 R01 — 2014-2015 RZR XP 1000 / RZR XP4 1000 Service Manual © Copyright 2014 Polaris Industries Inc.
-
Page 114: Cylinder Head Disassembly
8. Clean the combustion chamber and head gasket surface. 9. Check the condition of each valve spring. Replace if wear or cracking is present on the spring. 3.38 9925724 R01 — 2014-2015 RZR XP 1000 / RZR XP4 1000 Service Manual © Copyright 2014 Polaris Industries Inc.
-
Page 115: Valve Inspection
They must be replaced if extensively worn, burnt, bent or damaged. Valve Guide I.D.: 0.2165 — 0.2171″ (5.500 — 5.515 mm) 3.39 9925724 R01 — 2014-2015 RZR XP 1000 / RZR XP4 1000 Service Manual © Copyright 2014 Polaris Industries Inc.
-
Page 116: Combustion Chamber Cleaning
2. Visually inspect cylinder head gasket surface and combustion chamber for cracks or damage. Pay close attention to areas around spark plug and valve seats. 3.40 9925724 R01 — 2014-2015 RZR XP 1000 / RZR XP4 1000 Service Manual © Copyright 2014 Polaris Industries Inc.
-
Page 117: Valve Seat Reconditioning
2. Apply cutting oil to valve seat and cutter. 3. Place 46° cutter on the pilot and make a light cut. 3.41 9925724 R01 — 2014-2015 RZR XP 1000 / RZR XP4 1000 Service Manual © Copyright 2014 Polaris Industries Inc.
-
Page 118
Intake: 0.0393 ± 0.0039″ (1.0 ± 0.10 mm) Service Limit: 0.0551″ (1.4 mm) Exhaust: 0.0590 ± 0.0039″ (1.5 ± 0.10 mm) Service Limit: 0.0748″ (1.9 mm) 3.42 9925724 R01 — 2014-2015 RZR XP 1000 / RZR XP4 1000 Service Manual © Copyright 2014 Polaris Industries Inc. -
Page 119
12. Thoroughly clean cylinder head and valves. 3.43 9925724 R01 — 2014-2015 RZR XP 1000 / RZR XP4 1000 Service Manual © Copyright 2014 Polaris Industries Inc. -
Page 120: Engine Disassembly / Inspection — Lower End
3. Inspect the condition of the stator windings output wires . If replacement is required, refer to Chapter 10. 3.44 9925724 R01 — 2014-2015 RZR XP 1000 / RZR XP4 1000 Service Manual © Copyright 2014 Polaris Industries Inc.
-
Page 121: Water Pump Housing Removal
Water Pump Service, page 3.21. 2. Remove the three long gold colored bolts retaining the water pump housing to the engine 3.45 9925724 R01 — 2014-2015 RZR XP 1000 / RZR XP4 1000 Service Manual © Copyright 2014 Polaris Industries Inc.
-
Page 122: Flywheel Removal
5. Fully install Flywheel Puller (PA-49316) on the threads of the flywheel (left hand thread — turn flywheel puller counterclockwise to install). 3.46 9925724 R01 — 2014-2015 RZR XP 1000 / RZR XP4 1000 Service Manual © Copyright 2014 Polaris Industries Inc.
-
Page 123: Starter One-Way Clutch Disassembly
3. Remove the one-way clutch and inspect both sides of drive rollers . Inspect the roller contact surface inside the hub for wear, damage or uneven surface. 3.47 9925724 R01 — 2014-2015 RZR XP 1000 / RZR XP4 1000 Service Manual © Copyright 2014 Polaris Industries Inc.
-
Page 124: Crankcase Disassembly / Inspection
The cylinder holding to the crankcase. tool retains the cylinder and pistons when the engine is rotated. 3.48 9925724 R01 — 2014-2015 RZR XP 1000 / RZR XP4 1000 Service Manual © Copyright 2014 Polaris Industries Inc.
-
Page 125
14. Remove the eleven M6 and two M8 upper pump. crankcase bolts. 15. Rotate the engine so the cylinder is facing down. 3.49 9925724 R01 — 2014-2015 RZR XP 1000 / RZR XP4 1000 Service Manual © Copyright 2014 Polaris Industries Inc. -
Page 126: Balance Shaft Removal / Inspection
3. Carefully rotate the balance shaft and remove it from the crankcase. 4. Inspect the balance shaft gear teeth for damage. 3.50 9925724 R01 — 2014-2015 RZR XP 1000 / RZR XP4 1000 Service Manual © Copyright 2014 Polaris Industries Inc.
-
Page 127: Crankshaft Removal / Inspection
1.4939 — 1.4946″ (37.946 — 37.962 mm) 5. Carefully lift the crankshaft out of the crankcase. Service Limit: 1.4921″ (37.900 mm) 3.51 9925724 R01 — 2014-2015 RZR XP 1000 / RZR XP4 1000 Service Manual © Copyright 2014 Polaris Industries Inc.
-
Page 128
8. If the crankshaft gear or sprocket is damaged, the crankshaft assembly must be replaced. 3.52 9925724 R01 — 2014-2015 RZR XP 1000 / RZR XP4 1000 Service Manual © Copyright 2014 Polaris Industries Inc. -
Page 129
Crankshaft Main Bearing Selection, page 3.63 and Connecting Rod Bearing Selection, page 3.63 procedures. 3.53 9925724 R01 — 2014-2015 RZR XP 1000 / RZR XP4 1000 Service Manual © Copyright 2014 Polaris Industries Inc. -
Page 130: Crankcase Inspection
NOTE: Always replace plain bearings when the crankcase connecting rods have been disassembled. Refer to Bearing Selection Identification Letters and Numbers, page 3.62. 3.54 9925724 R01 — 2014-2015 RZR XP 1000 / RZR XP4 1000 Service Manual © Copyright 2014 Polaris Industries Inc.
-
Page 131: Cylinder Inspection
0.001″ (0.025 mm) Cylinder Out of Round: 0.001″ (0.025 mm) Standard Bore Size: 3.6614 ± 0.0003″ (93 mm ± 0.008 mm) 3.55 9925724 R01 — 2014-2015 RZR XP 1000 / RZR XP4 1000 Service Manual © Copyright 2014 Polaris Industries Inc.
-
Page 132: Cylinder / Piston Removal
(MAG / PTO). 4. Carefully lift the cylinder and pistons from the upper crankcase. 3.56 9925724 R01 — 2014-2015 RZR XP 1000 / RZR XP4 1000 Service Manual © Copyright 2014 Polaris Industries Inc.
-
Page 133: Piston Disassembly / Inspection
DO NOT apply heat to piston rings or a loss of radial tension could result. Piston Pin O.D.: 0.7873 — 0.7875″ (20.000 — 20.005 mm) Service Limit: 0.7866″ (19.98 mm) 3.57 9925724 R01 — 2014-2015 RZR XP 1000 / RZR XP4 1000 Service Manual © Copyright 2014 Polaris Industries Inc.
-
Page 134: Piston Ring Removal
Remove top rail first, then bottom rail, then the expander. 3.58 9925724 R01 — 2014-2015 RZR XP 1000 / RZR XP4 1000 Service Manual © Copyright 2014 Polaris Industries Inc.
-
Page 135: Piston Ring Installed Gap
Service Limit: 0.0354″ (0.9 mm) NOTE: Always check piston ring installed gap when installing new rings and/or a new cylinder. 3.59 9925724 R01 — 2014-2015 RZR XP 1000 / RZR XP4 1000 Service Manual © Copyright 2014 Polaris Industries Inc.
-
Page 136: Connecting Rod Inspection
3. Inspect the small end and big end of connecting rod (and matching rod cap) for damage, galling of surface or pitting. 3.60 9925724 R01 — 2014-2015 RZR XP 1000 / RZR XP4 1000 Service Manual © Copyright 2014 Polaris Industries Inc.
-
Page 137
10. Whether using new connecting rods or re-installing the original ones, refer to the bearing selection chart provided in the Connecting Rod Bearing Selection, page 3.63 procedure. 3.61 9925724 R01 — 2014-2015 RZR XP 1000 / RZR XP4 1000 Service Manual © Copyright 2014 Polaris Industries Inc. -
Page 138: Engine Assembly — Lower End
Connecting Rod Bearing Crankcase Bearing Identification Crankshaft Bearing Identification Identification Number ( one number) Number (six numbers) Letters (six letters) 3.62 9925724 R01 — 2014-2015 RZR XP 1000 / RZR XP4 1000 Service Manual © Copyright 2014 Polaris Industries Inc.
-
Page 139: Connecting Rod Bearing Selection
Bearing Selection Chart — Main Bearings Blue Green Yellow Crankshaft Green Yellow Yellow Code Blue Blue Green Case Blue Green Yellow Green Yellow Yellow 3.63 9925724 R01 — 2014-2015 RZR XP 1000 / RZR XP4 1000 Service Manual © Copyright 2014 Polaris Industries Inc.
-
Page 140: Upper Crankcase Preparation
NOTE: Ends must butt squarely together and must not overlap. 2. Install lower rail with end gap positioned on the intake side of piston. 3.64 9925724 R01 — 2014-2015 RZR XP 1000 / RZR XP4 1000 Service Manual © Copyright 2014 Polaris Industries Inc.
-
Page 141
4. Install second ring with marking facing top of piston. Rotate ring to position the end gap toward intake side of piston as shown below. 3.65 9925724 R01 — 2014-2015 RZR XP 1000 / RZR XP4 1000 Service Manual © Copyright 2014 Polaris Industries Inc. -
Page 142: Piston / Connecting Rod Assembly
(there is no piston pin offset in the rod), however it is recommended they be installed with rods facing the same direction. 3.66 9925724 R01 — 2014-2015 RZR XP 1000 / RZR XP4 1000 Service Manual © Copyright 2014 Polaris Industries Inc.
-
Page 143: Cylinder / Piston Installation
NOTE: Orientation arrow is also located on the bottom side of piston as an additional reference. 3.67 9925724 R01 — 2014-2015 RZR XP 1000 / RZR XP4 1000 Service Manual © Copyright 2014 Polaris Industries Inc.
-
Page 144: Crankshaft Installation
5. Install oil drain diverter into the upper crankcase. 3.68 9925724 R01 — 2014-2015 RZR XP 1000 / RZR XP4 1000 Service Manual © Copyright 2014 Polaris Industries Inc.
-
Page 145
Connecting Rod Bolts: Step 1: 9 ft-lbs (12 Nm) Step 2: 13 ft-lb (18 Nm) Step 3: Tighten add’n 105° 3.69 9925724 R01 — 2014-2015 RZR XP 1000 / RZR XP4 1000 Service Manual © Copyright 2014 Polaris Industries Inc. -
Page 146: Balance Shaft Installation
Rinse with clear, warm water and dry with compressed air. 7. Be sure passages are clean and dry before assembling the crankcase. 3.70 9925724 R01 — 2014-2015 RZR XP 1000 / RZR XP4 1000 Service Manual © Copyright 2014 Polaris Industries Inc.
-
Page 147: Crankcase Assembly
Do not allow sealant to dry before assembly. NOTE: Install new M10 lower crankcase bolts. NOTE: DO NOT block oil passages with crankcase sealant. 3.71 9925724 R01 — 2014-2015 RZR XP 1000 / RZR XP4 1000 Service Manual © Copyright 2014 Polaris Industries Inc.
-
Page 148
11. Rotate the engine so the cylinder is facing up. 12. Install the eleven M6 and two M8 upper crankcase bolts. Tighten all bolts lightly by hand. 3.72 9925724 R01 — 2014-2015 RZR XP 1000 / RZR XP4 1000 Service Manual © Copyright 2014 Polaris Industries Inc. -
Page 149
NOTE: Gasket surfaces must be DRY and oil free. Use care upon assembly to keep oil away. 3.73 9925724 R01 — 2014-2015 RZR XP 1000 / RZR XP4 1000 Service Manual © Copyright 2014 Polaris Industries Inc. -
Page 150
25. Reinstall the crankcase drain plug if previously removed. Torque drain plug to specification. Crankcase Drain Plug: 12 ft-lbs (16 Nm) 3.74 9925724 R01 — 2014-2015 RZR XP 1000 / RZR XP4 1000 Service Manual © Copyright 2014 Polaris Industries Inc. -
Page 151: Starter One-Way Clutch Assembly
5. If starter gear was replaced, inspect the torque limit gear. 6. After assembly, be sure the starter gear rotates in the clockwise direction only. 3.75 9925724 R01 — 2014-2015 RZR XP 1000 / RZR XP4 1000 Service Manual © Copyright 2014 Polaris Industries Inc.
-
Page 152: Flywheel Installation
3. Install stator cover and thirteenscrews. Torque screws in sequence to specification. Flywheel Retaining Bolt: 133 ft-lbs (180 Nm) Stator Cover Screws: 9 ft-lb (12 Nm) 3.76 9925724 R01 — 2014-2015 RZR XP 1000 / RZR XP4 1000 Service Manual © Copyright 2014 Polaris Industries Inc.
-
Page 153: Engine Assembly — Top End
9. Install split keepers with gap even on both sides. 10. Repeat this procedure for remaining valves. 3.77 9925724 R01 — 2014-2015 RZR XP 1000 / RZR XP4 1000 Service Manual © Copyright 2014 Polaris Industries Inc.
-
Page 154: Cylinder Head Installation
5. Carefully set the cylinder head in place on alignment pins. 6. Install new bolts and finger tighten the six cylinder head bolts evenly. 3.78 9925724 R01 — 2014-2015 RZR XP 1000 / RZR XP4 1000 Service Manual © Copyright 2014 Polaris Industries Inc.
-
Page 155: Camshaft Installation / Timing
Exhaust Camshaft — PN 1204786 3. Lubricate all camshaft lobes and bearing journal surfaces with Polaris PS-4 engine oil prior to installation. 3.79 9925724 R01 — 2014-2015 RZR XP 1000 / RZR XP4 1000 Service Manual © Copyright 2014 Polaris Industries Inc.
-
Page 156
Install the exhaust cam sprocket first (opposite the cam chain tensioner) to ensure proper cam timing. 3.80 9925724 R01 — 2014-2015 RZR XP 1000 / RZR XP4 1000 Service Manual © Copyright 2014 Polaris Industries Inc. -
Page 157
. Do not torque the bolts at this time. markings should line up as shown. NOTE: Use new sprocket retaining bolts upon assembly. 3.81 9925724 R01 — 2014-2015 RZR XP 1000 / RZR XP4 1000 Service Manual © Copyright 2014 Polaris Industries Inc. -
Page 158
Cam Chain Tensioner: 29 ft-lb (40 Nm) 23. Rotate crankshaft through two revolutions and verify camshaft timing is correct. 3.82 9925724 R01 — 2014-2015 RZR XP 1000 / RZR XP4 1000 Service Manual © Copyright 2014 Polaris Industries Inc. -
Page 159: Camshaft Timing — Quick Reference
DO NOT use the “V” mark located on the flywheel opposite of the “I” mark. Only the “I” mark should be used as a TDC reference 3.83 9925724 R01 — 2014-2015 RZR XP 1000 / RZR XP4 1000 Service Manual © Copyright 2014 Polaris Industries Inc.
-
Page 160: Valve Clearance Adjustment
7. Measure the valve clearance using a thickness (feeler) gauge. Record the measurement if clearance is out of specification. 3.84 9925724 R01 — 2014-2015 RZR XP 1000 / RZR XP4 1000 Service Manual © Copyright 2014 Polaris Industries Inc.
-
Page 161
Camshaft Installation / Timing, page 3.79. 3.85 9925724 R01 — 2014-2015 RZR XP 1000 / RZR XP4 1000 Service Manual © Copyright 2014 Polaris Industries Inc. -
Page 162: Intake Valve Lash — Tappet Selection Matrix
0.951-0.975 522 525 528 530 532 535 538 540 542 545 0.976-1.000 525 528 530 532 535 538 540 542 545 3.86 9925724 R01 — 2014-2015 RZR XP 1000 / RZR XP4 1000 Service Manual © Copyright 2014 Polaris Industries Inc.
-
Page 163: Exhaust Valve Lash — Tappet Selection Matrix
0.951-0.975 510 512 515 518 520 522 525 528 530 532 535 538 540 542 545 0.976-1.000 512 515 518 520 522 525 528 530 532 535 538 540 542 545 3.87 9925724 R01 — 2014-2015 RZR XP 1000 / RZR XP4 1000 Service Manual © Copyright 2014 Polaris Industries Inc.
-
Page 164: Valve Cover Installation
6. Torque valve cover bolts to specification. Spark Plugs: 7 ft-lbs (10 Nm) Valve Cover Bolts: 7 ft-lbs (10 Nm) 3.88 9925724 R01 — 2014-2015 RZR XP 1000 / RZR XP4 1000 Service Manual © Copyright 2014 Polaris Industries Inc.
-
Page 165: Troubleshooting
Engine Idles But Will Not Accelerate • Air filter dirty or contaminated • Spark plug fouled/weak spark Low Compression • Broken throttle cable 3.89 9925724 R01 — 2014-2015 RZR XP 1000 / RZR XP4 1000 Service Manual © Copyright 2014 Polaris Industries Inc.
-
Page 166
Leak at Water Pump Weep Hole • Faulty water pump mechanical seal (coolant leak) • Faulty pump shaft oil seal (oil leak) 3.90 9925724 R01 — 2014-2015 RZR XP 1000 / RZR XP4 1000 Service Manual © Copyright 2014 Polaris Industries Inc. -
Page 167
ELECTRONIC THROTTLE CONTROL (ETC) …………4.36 9925724 R01 — 2014-2015 RZR XP 1000 / RZR XP4 1000 Service Manual… -
Page 168
…………..4.51 ECU REPROGRAMMING (REFLASH) 9925724 R01 — 2014-2015 RZR XP 1000 / RZR XP4 1000 Service Manual © Copyright 2014 Polaris Industries Inc. -
Page 169: General Information
Fuel Pressure Gauge Adapter — PV-48656 9925724 R01 — 2014-2015 RZR XP 1000 / RZR XP4 1000 Service Manual © Copyright 2014 Polaris Industries Inc.
-
Page 170
(1-800-345-2233). NOTE: For the most recent information on Digital Wrench® software and update downloads please visit the website: www.polaris.diagsys.com 9925724 R01 — 2014-2015 RZR XP 1000 / RZR XP4 1000 Service Manual © Copyright 2014 Polaris Industries Inc. -
Page 171: Efi Service Notes
• Always disconnect negative (-) battery cable lead before charging battery. • Always unplug ECU from the wire harness before performing any welding on the unit. 9925724 R01 — 2014-2015 RZR XP 1000 / RZR XP4 1000 Service Manual © Copyright 2014 Polaris Industries Inc.
-
Page 172: Efi System Assembly View
Engine Coolant Temperature Sensor (ECT) Fuel Filter Dual Throttle Body Assembly Fuel Supply Line Fuel Injectors T-MAP Sensor Fuel Rail / Regulator Electronic Throttle Control 9925724 R01 — 2014-2015 RZR XP 1000 / RZR XP4 1000 Service Manual © Copyright 2014 Polaris Industries Inc.
-
Page 173: Efi System Component Locations
Located on the left side of the thermostat housing. assembly. The sensor can be accessed with the air box assembly removed. 9925724 R01 — 2014-2015 RZR XP 1000 / RZR XP4 1000 Service Manual © Copyright 2014 Polaris Industries Inc.
-
Page 174
• Fuel Rail / Regulator Located on the throttle body, on top of the fuel injectors. 9925724 R01 — 2014-2015 RZR XP 1000 / RZR XP4 1000 Service Manual © Copyright 2014 Polaris Industries Inc. -
Page 175: Fuel Tank
PFA Nut Fuel Sender Float Arm Fuel Tank Vent PFA Gasket (replace if removed) Fuel Tank Assembly Fuel Pump / Regulator 9925724 R01 — 2014-2015 RZR XP 1000 / RZR XP4 1000 Service Manual © Copyright 2014 Polaris Industries Inc.
-
Page 176: Fuel Line Removal / Installation
3. Pull on the fuel line for removal. 4. To install the line, verify the connections are clean and free of debris. 4.10 9925724 R01 — 2014-2015 RZR XP 1000 / RZR XP4 1000 Service Manual © Copyright 2014 Polaris Industries Inc.
-
Page 177
. Remove the rear seat base assembly from the vehicle. 4.11 9925724 R01 — 2014-2015 RZR XP 1000 / RZR XP4 1000 Service Manual © Copyright 2014 Polaris Industries Inc. -
Page 178
Remove the panel from the vehicle. 12. Remove the nuts retaining the regulator and Torx screws retaining the fuse box. 4.12 9925724 R01 — 2014-2015 RZR XP 1000 / RZR XP4 1000 Service Manual © Copyright 2014 Polaris Industries Inc. -
Page 179: Fuel Tank Installation
8. Reinstall center console, shift knob and screws. 9. Reinstall seat belt mechanism. Torque bolt to specification. Seat Belt Mechanism Bolt: 40 ft-lbs (54 Nm) 4.13 9925724 R01 — 2014-2015 RZR XP 1000 / RZR XP4 1000 Service Manual © Copyright 2014 Polaris Industries Inc.
-
Page 180: Fuel Tank Removal Rzr Xp 4 1000
Once removed, place the mechanism in the rear cargo box to keep it out of the way. 4.14 9925724 R01 — 2014-2015 RZR XP 1000 / RZR XP4 1000 Service Manual © Copyright 2014 Polaris Industries Inc.
-
Page 181
12. Remove the fuel tank vent line from the tank fitting. 4.15 9925724 R01 — 2014-2015 RZR XP 1000 / RZR XP4 1000 Service Manual © Copyright 2014 Polaris Industries Inc. -
Page 182: Fuel Tank Installation Rzr Xp 4 1000
8. Reinstall rear and front center console, shift knob and screws. 9. Reinstall seat belt mechanism. Torque bolt to specification. 4.16 9925724 R01 — 2014-2015 RZR XP 1000 / RZR XP4 1000 Service Manual © Copyright 2014 Polaris Industries Inc.
-
Page 183: Electronic Fuel Injection
4- stroke cycle. When the intake valve opens, the fuel/air mixture is drawn into the combustion chamber, ignited and burned. 4.17 9925724 R01 — 2014-2015 RZR XP 1000 / RZR XP4 1000 Service Manual © Copyright 2014 Polaris Industries Inc.
-
Page 184: Electronic Control Unit (Ecu)
This process repeats it self in rapid succession, limiting operation to the preset maximum. RPM Limit: 8300 4.18 9925724 R01 — 2014-2015 RZR XP 1000 / RZR XP4 1000 Service Manual © Copyright 2014 Polaris Industries Inc.
-
Page 185
NOTE: Upon installing the ECU connector, you should hear a “click” when the connector is fully closed. ECU Retaining Screws: 24 in-lb (3 Nm) 4.19 9925724 R01 — 2014-2015 RZR XP 1000 / RZR XP4 1000 Service Manual © Copyright 2014 Polaris Industries Inc. -
Page 186: Fuel Injectors
Additives and higher grades of fuel can be used as a preventative measure if clogging has been a problem. 4.20 9925724 R01 — 2014-2015 RZR XP 1000 / RZR XP4 1000 Service Manual © Copyright 2014 Polaris Industries Inc.
-
Page 187: Fuel Injector Test
NOTE: Be sure to connect the PTO harness lead to the PTO injector and the MAG harness lead to the MAG injector to ensure proper engine operation. 4.21 9925724 R01 — 2014-2015 RZR XP 1000 / RZR XP4 1000 Service Manual © Copyright 2014 Polaris Industries Inc.
-
Page 188
5 mm Allen wrench. 11. Upon installation of the new fuel injectors, lightly lubricate the injector O-rings to aid installation. 4.22 9925724 R01 — 2014-2015 RZR XP 1000 / RZR XP4 1000 Service Manual © Copyright 2014 Polaris Industries Inc. -
Page 189
23. Reinstall the two screws retaining the air box assembly. 24. Position the intake hose onto the air box and tighten the hose clamp. 4.23 9925724 R01 — 2014-2015 RZR XP 1000 / RZR XP4 1000 Service Manual © Copyright 2014 Polaris Industries Inc. -
Page 190
FUEL SYSTEM 25. Reinstall the cargo box access panel. 4.24 9925724 R01 — 2014-2015 RZR XP 1000 / RZR XP4 1000 Service Manual © Copyright 2014 Polaris Industries Inc. -
Page 191: Fuel Pump
• If the key switch is not promptly turned to the «start» position. • If the engine fails to start. 4.25 9925724 R01 — 2014-2015 RZR XP 1000 / RZR XP4 1000 Service Manual © Copyright 2014 Polaris Industries Inc.
-
Page 192: Fuel Pump Test
ECU operation by plugging in a known-good ECU of the same model. NOTE: If the pump still does not operate, replace the fuel pump assembly. 4.26 9925724 R01 — 2014-2015 RZR XP 1000 / RZR XP4 1000 Service Manual © Copyright 2014 Polaris Industries Inc.
-
Page 193: Fuel Pump Replacement
4. Ensure that static has been discharged by touching a ground source such as the engine or frame. 4.27 9925724 R01 — 2014-2015 RZR XP 1000 / RZR XP4 1000 Service Manual © Copyright 2014 Polaris Industries Inc.
-
Page 194
Do not use water or any other chemicals to remove debris. 4.28 9925724 R01 — 2014-2015 RZR XP 1000 / RZR XP4 1000 Service Manual © Copyright 2014 Polaris Industries Inc. -
Page 195
21. Install the fuel tank vent line onto the tank fitting. flange is centered. 22. Connect the fuel pump electrical harness. 4.29 9925724 R01 — 2014-2015 RZR XP 1000 / RZR XP4 1000 Service Manual © Copyright 2014 Polaris Industries Inc. -
Page 196
Cycle the key several times to prime the system. 24. Install the passenger seat / storage box. 4.30 9925724 R01 — 2014-2015 RZR XP 1000 / RZR XP4 1000 Service Manual © Copyright 2014 Polaris Industries Inc. -
Page 197: Temperature / Manifold Absolute Pressure (T-Map) Sensor
The T-MAP provides the ECU with engine load data. 4.31 9925724 R01 — 2014-2015 RZR XP 1000 / RZR XP4 1000 Service Manual © Copyright 2014 Polaris Industries Inc.
-
Page 198: Crankshaft Position Sensor (Cps)
CPS and flywheel encoder ring for damage. 4. If the resistance is incorrect, follow the Replacement, page 4.33 procedure. 4.32 9925724 R01 — 2014-2015 RZR XP 1000 / RZR XP4 1000 Service Manual © Copyright 2014 Polaris Industries Inc.
-
Page 199: Cps Replacement
4. Install new sensor using a light coating of oil on the O-ring to aid installation. 5. Torque the CPS retaining bolt to specification. CPS Retaining Bolt: 9 ft-lb (12 Nm) 4.33 9925724 R01 — 2014-2015 RZR XP 1000 / RZR XP4 1000 Service Manual © Copyright 2014 Polaris Industries Inc.
-
Page 200: Throttle Body Assembly
INJECTORS, page 4.20 and Temperature / Manifold Absolute Pressure (T-MAP) Sensor, page 4.31). 5. Remove the driver’s seat and disconnect the negative battery cable. 4.34 9925724 R01 — 2014-2015 RZR XP 1000 / RZR XP4 1000 Service Manual © Copyright 2014 Polaris Industries Inc.
-
Page 201
NOTE: It is not necessary to disconnect fuel lines or the injector harnesses to perform this procedure. 9. Reverse the previous steps to reinstall the throttle body. 4.35 9925724 R01 — 2014-2015 RZR XP 1000 / RZR XP4 1000 Service Manual © Copyright 2014 Polaris Industries Inc. -
Page 202: Electronic Throttle Control (Etc)
ETC Housing Retaining Bolts: 7 ft-lb (10 Nm) Intake Boot Clamp: 35 in-lb (4 Nm) 4.36 9925724 R01 — 2014-2015 RZR XP 1000 / RZR XP4 1000 Service Manual © Copyright 2014 Polaris Industries Inc.
-
Page 203: Pedal Position Sensor (Pps)
1. Disconnect the PPS harness connection located on the throttle pedal. 2. Remove the drivers seat and disconnect the negative (-) battery cable. 4.37 9925724 R01 — 2014-2015 RZR XP 1000 / RZR XP4 1000 Service Manual © Copyright 2014 Polaris Industries Inc.
-
Page 204
7. Manually cycle the throttle pedal to verify the throttle pedal moves freely. 8. Connect the negative (-) battery cable and install the drivers seat. 4.38 9925724 R01 — 2014-2015 RZR XP 1000 / RZR XP4 1000 Service Manual © Copyright 2014 Polaris Industries Inc. -
Page 205: Oxygen Sensor (My15 Only)
O2 sensor (increases the delay). The delay time ensures the oxygen sensor heater has run long enough to provide accurate data. 4.39 9925724 R01 — 2014-2015 RZR XP 1000 / RZR XP4 1000 Service Manual © Copyright 2014 Polaris Industries Inc.
-
Page 206: Efi Diagnostics
5. To exit the diagnostic mode, press and hold the diagnostics code menu. MODE button or turn the ignition key OFF once the codes are recorded. 4.40 9925724 R01 — 2014-2015 RZR XP 1000 / RZR XP4 1000 Service Manual © Copyright 2014 Polaris Industries Inc.
-
Page 207
P0265 Driver Circuit Grounded P1265 Driver Circuit Open / Grounded P1691 Rear Differential Output Driver Circuit Short to B+ P1692 4.41 9925724 R01 — 2014-2015 RZR XP 1000 / RZR XP4 1000 Service Manual © Copyright 2014 Polaris Industries Inc. -
Page 208
Idle Air Control Valve (IAC) 520268 Driver Circuit Short to B+ P1519 M17; IAC Stepper Pin 3 Driver Circuit Grounded P1518 4.42 9925724 R01 — 2014-2015 RZR XP 1000 / RZR XP4 1000 Service Manual © Copyright 2014 Polaris Industries Inc. -
Page 209
ECU Monitoring of Injection Condition Exists 520289 P1543 Cut Off (Level 2) Controller Option Setting Not Out of Calibration 520290 P1544 Programmed 4.43 9925724 R01 — 2014-2015 RZR XP 1000 / RZR XP4 1000 Service Manual © Copyright 2014 Polaris Industries Inc. -
Page 210
Voltage Below Normal or Shorted Oxygen Sensor Heater 1 520209 P0031 to Low Source Current below Normal or Open P0030 Circuit 4.44 9925724 R01 — 2014-2015 RZR XP 1000 / RZR XP4 1000 Service Manual © Copyright 2014 Polaris Industries Inc. -
Page 211: Efi Troubleshooting
• Air Leaks, dirty injector • TMAP damaged (check with Digital Wrench®) • Tight valves (low compression or high leakdown) 4.45 9925724 R01 — 2014-2015 RZR XP 1000 / RZR XP4 1000 Service Manual © Copyright 2014 Polaris Industries Inc.
-
Page 212: Digital Wrench® Operation
PV-43546 (Fluke 77: PV-43568) Commercially Available (refer to diagnostic software Laptop or Desktop Computer user manual or HELP section for minimum requirements) 4.46 9925724 R01 — 2014-2015 RZR XP 1000 / RZR XP4 1000 Service Manual © Copyright 2014 Polaris Industries Inc.
-
Page 213: Digital Wrench Software Version And Update
NOTE: Do not «run» or «open» the file from where they are. Select «save» and download them to your PC before running the install. 4.47 9925724 R01 — 2014-2015 RZR XP 1000 / RZR XP4 1000 Service Manual © Copyright 2014 Polaris Industries Inc.
-
Page 214: Digital Wrench® Communication Errors
‘Connected’ in the lower left corner of the screen. 5. Once connected, proceed with using Digital Wrench®. 4.48 9925724 R01 — 2014-2015 RZR XP 1000 / RZR XP4 1000 Service Manual © Copyright 2014 Polaris Industries Inc.
-
Page 215: Guided Diagnostics
Check your release version often and upgrade when available to be sure you are using the most current software available. 4.49 9925724 R01 — 2014-2015 RZR XP 1000 / RZR XP4 1000 Service Manual © Copyright 2014 Polaris Industries Inc.
-
Page 216: Digital Wrench® Feature Map
Run the Help System. adjustment functions service reports. Prints the current screen as a Open the ASSERT ASK form. formatted printout. 4.50 9925724 R01 — 2014-2015 RZR XP 1000 / RZR XP4 1000 Service Manual © Copyright 2014 Polaris Industries Inc.
-
Page 217: Ecu Replacement
2. Connect SmartLink Module cables to PC and Chapter 4 – Digital Wrench® Updates, page 4.47. vehicle. See, page 4.48 3. Open the Digital Wrench® program. 4.51 9925724 R01 — 2014-2015 RZR XP 1000 / RZR XP4 1000 Service Manual © Copyright 2014 Polaris Industries Inc.
-
Page 218
7. Select the file you want to load into the ECU then click the “Continue” icon to proceed to the Integrity Check and obtain a Request Code. 4.52 9925724 R01 — 2014-2015 RZR XP 1000 / RZR XP4 1000 Service Manual © Copyright 2014 Polaris Industries Inc. -
Page 219
Digital Wrench® screen. Click the ‘Continue’ button and follow instructions provided on the screen to complete reprogramming procedure. 4.53 9925724 R01 — 2014-2015 RZR XP 1000 / RZR XP4 1000 Service Manual © Copyright 2014 Polaris Industries Inc. -
Page 220
FUEL SYSTEM NOTES 4.54 9925724 R01 — 2014-2015 RZR XP 1000 / RZR XP4 1000 Service Manual © Copyright 2014 Polaris Industries Inc. -
Page 221
TROUBLESHOOTING…………….. . .5.37 9925724 R01 — 2014-2015 RZR XP 1000 / RZR XP4 1000 Service Manual… -
Page 222: General Information
Driven Clutch Helix 48 in-lb (5 Nm) Retaining Screws SPECIAL SUPPLIES PART NUMBER Loctite® 620™ 648™ and 7088™ Primer RTV Silicone Sealer 8560054 9925724 R01 — 2014-2015 RZR XP 1000 / RZR XP4 1000 Service Manual © Copyright 2014 Polaris Industries Inc.
-
Page 223: Rzr Xp 1000 Clutch Chart
ALTITUDE SHIFT WEIGHT DRIVE SPRING DRIVEN SPRING Meters 0-1800 26-61 White / Orange High Lifter (Feet) (0-6000) (1323260) (7043924) (3234452) Edition 9925724 R01 — 2014-2015 RZR XP 1000 / RZR XP4 1000 Service Manual © Copyright 2014 Polaris Industries Inc.
-
Page 224: Pvt System Overview
Proper clutch setup and careful inspection of existing components must be the primary objective when troubleshooting and tuning. 9925724 R01 — 2014-2015 RZR XP 1000 / RZR XP4 1000 Service Manual © Copyright 2014 Polaris Industries Inc.
-
Page 225: Driven Clutch Operation
Rather than vary throttle position, as a conventional governor does, the PVT system changes engine load requirements by either upshifting or backshifting. 9925724 R01 — 2014-2015 RZR XP 1000 / RZR XP4 1000 Service Manual © Copyright 2014 Polaris Industries Inc.
-
Page 226: Maintenance / Inspection
PVT area. This is especially critical on units subjected to frequent water forging. 9925724 R01 — 2014-2015 RZR XP 1000 / RZR XP4 1000 Service Manual © Copyright 2014 Polaris Industries Inc.
-
Page 227: Overheating / Diagnosis
NOTE: Using High gear for heavy loads, hilly terrain, sand/dune environments, or in wet, muddy conditions will increase the chance of drive belt burning. 9925724 R01 — 2014-2015 RZR XP 1000 / RZR XP4 1000 Service Manual © Copyright 2014 Polaris Industries Inc.
-
Page 228: Pvt System Service
NUT, NYLOK O-RING BRACKET, BELT SCREEN DRAIN PLUG, COVER HOSE, AIR OUTLET SEAL, COVER INTAKE BOOT SCREW SEAL, COVER COVER ASSEMBLY 9925724 R01 — 2014-2015 RZR XP 1000 / RZR XP4 1000 Service Manual © Copyright 2014 Polaris Industries Inc.
-
Page 229
Outer Cover Screws (8 ft-lbs, 11 Nm) Outlet Duct Clutch Cover Drain Screw Outer Clutch Cover Inner Cover Screws (8 ft-lbs, 11 Nm) Inner Clutch Cover 9925724 R01 — 2014-2015 RZR XP 1000 / RZR XP4 1000 Service Manual © Copyright 2014 Polaris Industries Inc. -
Page 230: Pvt Covers And Ducting Components (High Lifter)
Lower Exhaust Hose Outer Cover Seal Outlet Duct Outer Clutch Cover Inlet Duct Outer Clutch Cover Screw (8) Boot PVT Drain Screw 5.10 9925724 R01 — 2014-2015 RZR XP 1000 / RZR XP4 1000 Service Manual © Copyright 2014 Polaris Industries Inc.
-
Page 231: Pvt Disassembly
PVT intake hose to the outer clutch cover and disengage the hose from the outer clutch cover. Drive Clutch Holding Tool 9314177-A 5.11 9925724 R01 — 2014-2015 RZR XP 1000 / RZR XP4 1000 Service Manual © Copyright 2014 Polaris Industries Inc.
-
Page 232
15. Remove the seven bolts that retain inner clutch cover to engine and transmission. Remove inner clutch cover. 5.12 9925724 R01 — 2014-2015 RZR XP 1000 / RZR XP4 1000 Service Manual © Copyright 2014 Polaris Industries Inc. -
Page 233: Pvt Assembly
12. Clean the end of the taper on the crankshaft and the tapered bore inside the drive clutch. 13. Install the drive clutch onto the engine. 5.13 9925724 R01 — 2014-2015 RZR XP 1000 / RZR XP4 1000 Service Manual © Copyright 2014 Polaris Industries Inc.
-
Page 234
Torque screws to specification. Outer Clutch Cover Retaining Screws: 48 in-lb (5 Nm) 18. Install inlet and outlet ducts and tighten hose clamps. 5.14 9925724 R01 — 2014-2015 RZR XP 1000 / RZR XP4 1000 Service Manual © Copyright 2014 Polaris Industries Inc. -
Page 235: Drive Belt
NOT necessary for belt replacement. 3. Mark the drive belt direction of rotation so that it can be installed in the same direction. 5.15 9925724 R01 — 2014-2015 RZR XP 1000 / RZR XP4 1000 Service Manual © Copyright 2014 Polaris Industries Inc.
-
Page 236: Belt Inspection
5. Install the outer clutch cover and eight screws. Torque screws to specification. Outer Clutch Cover Retaining Screws: 48 in-lb (5 Nm) 5.16 9925724 R01 — 2014-2015 RZR XP 1000 / RZR XP4 1000 Service Manual © Copyright 2014 Polaris Industries Inc.
-
Page 237: Drive Clutch Service
PVT SYSTEM DRIVE CLUTCH SERVICE Drive Clutch Assembly View 5.17 9925724 R01 — 2014-2015 RZR XP 1000 / RZR XP4 1000 Service Manual © Copyright 2014 Polaris Industries Inc.
-
Page 238: Drive Clutch Disassembly / Inspection
Belt life will be greatly reduced. 3. Remove cover bolts evenly in a cross pattern and remove cover plate. Drive Clutch Spring Inspection 5.18 9925724 R01 — 2014-2015 RZR XP 1000 / RZR XP4 1000 Service Manual © Copyright 2014 Polaris Industries Inc.
-
Page 239: Needle Bearing Inspection
Drive Clutch Spring Specifications Part Number 7043924 White / Orange Color Free Length 3.563″ (90.50 mm) Spring Wire Diameter 0.177″ (4.50 mm) 5.19 9925724 R01 — 2014-2015 RZR XP 1000 / RZR XP4 1000 Service Manual © Copyright 2014 Polaris Industries Inc.
-
Page 240: Shift Weight Inspection
Button to Tower Clearance: 0.000-.012″ (.000-.304 mm) 2. Inspect the tower sheave surfaces. Replace the drive clutch if worn, damaged or cracked. 5.20 9925724 R01 — 2014-2015 RZR XP 1000 / RZR XP4 1000 Service Manual © Copyright 2014 Polaris Industries Inc.
-
Page 241: Spider Removal
2. Loosen and remove the spider (counterclockwise) using Clutch Spider Removal / Installation Tool (PN 2870341). Spider Removal / Installation Tool: 2870341 Clutch Holding Fixture: 2871358-A 5.21 9925724 R01 — 2014-2015 RZR XP 1000 / RZR XP4 1000 Service Manual © Copyright 2014 Polaris Industries Inc.
-
Page 242: Clutch Inspection
Replace as an assembly if worn, damaged, or if operational problems were noted prior disassembly. 5.22 9925724 R01 — 2014-2015 RZR XP 1000 / RZR XP4 1000 Service Manual © Copyright 2014 Polaris Industries Inc.
-
Page 243: Moveable Sheave Bushing Inspection
P-90 Driven Clutch 5020631 Cover Bushing Removal Tool Main Puller Adapter 5020632 Adapter Reducer 5010279 Number Two Puller 5020633 Adapter 5.23 9925724 R01 — 2014-2015 RZR XP 1000 / RZR XP4 1000 Service Manual © Copyright 2014 Polaris Industries Inc.
-
Page 244
Piston Pin Puller: PN 2870386 3. Remove nut from puller rod and set aside. 4. Install puller adapter from kit PN 2871226. 5.24 9925724 R01 — 2014-2015 RZR XP 1000 / RZR XP4 1000 Service Manual © Copyright 2014 Polaris Industries Inc. -
Page 245: Drive Clutch Assembly
29. Remove bushing and bushing removal tool from puller. Discard bushing. Cover Bushing Installation 30. Apply Loctite® 648 evenly to bushing bore in the cover. 5.25 9925724 R01 — 2014-2015 RZR XP 1000 / RZR XP4 1000 Service Manual © Copyright 2014 Polaris Industries Inc.
-
Page 246
Loctite® 7088™ Primer in 90° apart to the threads of the spider jamb nut. Install spider jamb nut onto stationary shaft threads. Moveable Sheave Spider 5.26 9925724 R01 — 2014-2015 RZR XP 1000 / RZR XP4 1000 Service Manual © Copyright 2014 Polaris Industries Inc. -
Page 247
12. Install cover bolts and torque in a cross pattern evenly to specification. Drive Clutch Cover Bolts: 9 ft-lb (12 Nm) 5.27 9925724 R01 — 2014-2015 RZR XP 1000 / RZR XP4 1000 Service Manual © Copyright 2014 Polaris Industries Inc. -
Page 248: Driven Clutch Service
X’s on the components for reference. This will aid in assembly and maintains clutch balance. 5.28 9925724 R01 — 2014-2015 RZR XP 1000 / RZR XP4 1000 Service Manual © Copyright 2014 Polaris Industries Inc.
-
Page 249
9. Remove the clutch assembly from the holding tool. 10. Press out the spring pins in the inner sheave. 5.29 9925724 R01 — 2014-2015 RZR XP 1000 / RZR XP4 1000 Service Manual © Copyright 2014 Polaris Industries Inc. -
Page 250
5.30 9925724 R01 — 2014-2015 RZR XP 1000 / RZR XP4 1000 Service Manual © Copyright 2014 Polaris Industries Inc. -
Page 251: Bushing Service
Turn puller barrel for further tension if needed. 7. Turn clutch sheave counterclockwise until bushing is removed and sheave comes free. 5.31 9925724 R01 — 2014-2015 RZR XP 1000 / RZR XP4 1000 Service Manual © Copyright 2014 Polaris Industries Inc.
-
Page 252: Clutch Assembly
18. Remove nut (C) from puller rod and set aside. 19. Remove installation tool and clutch sheave from puller. 5.32 9925724 R01 — 2014-2015 RZR XP 1000 / RZR XP4 1000 Service Manual © Copyright 2014 Polaris Industries Inc.
-
Page 253
8. Install the clutch rollers (D) onto each side of the outside spider. Install the washers (E) and E-clips (F) to secure the rollers. The rollers should spin freely. 5.33 9925724 R01 — 2014-2015 RZR XP 1000 / RZR XP4 1000 Service Manual © Copyright 2014 Polaris Industries Inc. -
Page 254
(helix) side down. Press down on the moveable sheave belt face with both hands and the helix will release. 5.34 9925724 R01 — 2014-2015 RZR XP 1000 / RZR XP4 1000 Service Manual © Copyright 2014 Polaris Industries Inc. -
Page 255
15. Use a T25 Torx driver to install the four helix retaining screws and torque to specification. Helix Retaining Screws: 48 in-lb (5 Nm) 5.35 9925724 R01 — 2014-2015 RZR XP 1000 / RZR XP4 1000 Service Manual © Copyright 2014 Polaris Industries Inc. -
Page 256: Assembly View
Spider Insert Stationary Sheave Spider Dampener E-Clip Roller Washer Helix (Cam) Moveable Sheave Helix Screws Clutch Shaft 48 in-lb (5 Nm) 5.36 9925724 R01 — 2014-2015 RZR XP 1000 / RZR XP4 1000 Service Manual © Copyright 2014 Polaris Industries Inc.
-
Page 257: Troubleshooting
Belt burnt, thin Dragging brake Inspect brake system. spots Slow, easy clutch engagement Fast, effective use of throttle for efficient engagement. 5.37 9925724 R01 — 2014-2015 RZR XP 1000 / RZR XP4 1000 Service Manual © Copyright 2014 Polaris Industries Inc.
-
Page 258
Thin spots on belt, worn belt Engagement and instruct operator. erratic or stabby Drive clutch bushings stick Inspect and repair clutches. 5.38 9925724 R01 — 2014-2015 RZR XP 1000 / RZR XP4 1000 Service Manual © Copyright 2014 Polaris Industries Inc. -
Page 259
…………….6.53 SHIFTING DIFFICULTY 9925724 R01 — 2014-2015 RZR XP 1000 / RZR XP4 1000 Service Manual © Copyright 2014 Polaris Industries Inc. -
Page 260: Specifications
Capacity (INT’L): 41 oz. (1200 ml) Mounting Bolt (INT’L) Park Flange Screws 10 ft-lb (14 Nm) Rear Transmission 40 ft-lb (54 Nm) Isolator Bolt 9925724 R01 — 2014-2015 RZR XP 1000 / RZR XP4 1000 Service Manual © Copyright 2014 Polaris Industries Inc.
-
Page 261: Transmission Mounting And Torque Values
TRANSMISSION Transmission Mounting and Torque Values 9925724 R01 — 2014-2015 RZR XP 1000 / RZR XP4 1000 Service Manual © Copyright 2014 Polaris Industries Inc.
-
Page 262: Shift Lever
5. Remove both bushings from the shift lever and service as needed. 9925724 R01 — 2014-2015 RZR XP 1000 / RZR XP4 1000 Service Manual © Copyright 2014 Polaris Industries Inc.
-
Page 263: Shift Cable
7. Start engine and shift through all gears to ensure the shift cable is properly adjusted. If transmission still ratchets after cable adjustment, the transmission will require service. 9925724 R01 — 2014-2015 RZR XP 1000 / RZR XP4 1000 Service Manual © Copyright 2014 Polaris Industries Inc.
-
Page 264: Transmission Service
(see Chapter 5 – PVT Disassembly, page 5.11). NOTE: Be sure to use the correct Drive Clutch Puller (PN 2872085) to prevent damage to crankshaft. 9925724 R01 — 2014-2015 RZR XP 1000 / RZR XP4 1000 Service Manual © Copyright 2014 Polaris Industries Inc.
-
Page 265
15. Maneuver the drive shafts out of the vehicle frame. Reinstall the lower shock bolts to hold the trailing arms up during the rest of the removal procedure. 9925724 R01 — 2014-2015 RZR XP 1000 / RZR XP4 1000 Service Manual © Copyright 2014 Polaris Industries Inc. -
Page 266
21. Remove the two rear exhaust springs securing the muffler to the rear transmission mounting bracket. 9925724 R01 — 2014-2015 RZR XP 1000 / RZR XP4 1000 Service Manual © Copyright 2014 Polaris Industries Inc. -
Page 267: Transmission Installation
NOTE: DO NOT torque fasteners at this time. Rear Transmission Mount Bracket Fasteners 17 ft-lb (23 Nm) 9925724 R01 — 2014-2015 RZR XP 1000 / RZR XP4 1000 Service Manual © Copyright 2014 Polaris Industries Inc.
-
Page 268
Step 4-7: 44 ft-lb (60 Nm) Shift Cable Bracket Bolts: 17 ft-lb (23 Nm) 12. Remove the clutch center distance tool. 6.10 9925724 R01 — 2014-2015 RZR XP 1000 / RZR XP4 1000 Service Manual © Copyright 2014 Polaris Industries Inc. -
Page 269
Wheel Nuts: nuts. Torque to specification. 120 ft-lbs (163 Nm) 26. Properly lower the vehicle. 6.11 9925724 R01 — 2014-2015 RZR XP 1000 / RZR XP4 1000 Service Manual © Copyright 2014 Polaris Industries Inc. -
Page 270: Transmission Disassembly
. Note how the detent star fits onto the splined shaft with the raised edge facing outward for reassembly. 8. Remove the spacer 6.12 9925724 R01 — 2014-2015 RZR XP 1000 / RZR XP4 1000 Service Manual © Copyright 2014 Polaris Industries Inc.
-
Page 271
Do not pry on case sealing surfaces. opposite side. Use only the designated pry points on the transmission. 6.13 9925724 R01 — 2014-2015 RZR XP 1000 / RZR XP4 1000 Service Manual © Copyright 2014 Polaris Industries Inc. -
Page 272
Gear Cluster Disassembly 22. Tilt the two shafts towards each other and remove the silent chain from the two shafts. 6.14 9925724 R01 — 2014-2015 RZR XP 1000 / RZR XP4 1000 Service Manual © Copyright 2014 Polaris Industries Inc. -
Page 273
Use caution when disassembling the shift rail. The compressed springs on the shift rail may pop off causing eye or face injury. 6.15 9925724 R01 — 2014-2015 RZR XP 1000 / RZR XP4 1000 Service Manual © Copyright 2014 Polaris Industries Inc. -
Page 274: Differential Operation (Turf Mode Models Only)
This unlocks the rear differential. 6.16 9925724 R01 — 2014-2015 RZR XP 1000 / RZR XP4 1000 Service Manual © Copyright 2014 Polaris Industries Inc.
-
Page 275
When “Differential-Lock” is selected, power is removed from the electrical solenoid allowing the solenoid plunger 6.17 9925724 R01 — 2014-2015 RZR XP 1000 / RZR XP4 1000 Service Manual © Copyright 2014 Polaris Industries Inc. -
Page 276: Planetary Differential Disassembly (Turf Mode Models Only)
Replacement (Turf Mode Models Only), page 6.19. 2. Remove the six screws retaining the differential cover and remove the cover. 6.18 9925724 R01 — 2014-2015 RZR XP 1000 / RZR XP4 1000 Service Manual © Copyright 2014 Polaris Industries Inc.
-
Page 277: Planetary Differential Bushing Replacement (Turf Mode Models Only)
5. Press the old bushing out of the planet gear. 6. Thoroughly clean the bore of the planet gear and check for any unwanted burs. 6.19 9925724 R01 — 2014-2015 RZR XP 1000 / RZR XP4 1000 Service Manual © Copyright 2014 Polaris Industries Inc.
-
Page 278
13. Thoroughly clean the bore of the side gear and check for any unwanted burs. 6.20 9925724 R01 — 2014-2015 RZR XP 1000 / RZR XP4 1000 Service Manual © Copyright 2014 Polaris Industries Inc. -
Page 279: Planetary Differential Assembly (Turf Mode Models Only)
5. Install screws hand tight. Place assembly in soft jaw vise and torque to specification. Differential Cover Screws: 22 ft-lb (30 Nm) 6.21 9925724 R01 — 2014-2015 RZR XP 1000 / RZR XP4 1000 Service Manual © Copyright 2014 Polaris Industries Inc.
-
Page 280: Gear / Shaft / Bearing Inspection
TRANSMISSION Gear / Shaft / Bearing Inspection 6.22 9925724 R01 — 2014-2015 RZR XP 1000 / RZR XP4 1000 Service Manual © Copyright 2014 Polaris Industries Inc.
-
Page 281: Transmission Assembly / Snorkel Gear Backlash Procedure
NOTE: Failure to press the gear back against the washer and retaining ring will lead to a gear backlash change after vehicle is placed into service. 6.23 9925724 R01 — 2014-2015 RZR XP 1000 / RZR XP4 1000 Service Manual © Copyright 2014 Polaris Industries Inc.
-
Page 282
6.24 9925724 R01 — 2014-2015 RZR XP 1000 / RZR XP4 1000 Service Manual © Copyright 2014 Polaris Industries Inc. -
Page 283
15. Clean both transmission case halves thoroughly. Inspect case half mating surfaces for damage. 6.25 9925724 R01 — 2014-2015 RZR XP 1000 / RZR XP4 1000 Service Manual © Copyright 2014 Polaris Industries Inc. -
Page 284
Lift up on the shift shaft rail and move the rail assembly towards the shift drum to allow the shift fork ends to be installed into the shift drum. 6.26 9925724 R01 — 2014-2015 RZR XP 1000 / RZR XP4 1000 Service Manual © Copyright 2014 Polaris Industries Inc. -
Page 285
28. Install the spacer and then the detent star onto the shift drum shaft. Be sure to install the detent star with the raised edge facing outward and skip-tooth aligned. 6.27 9925724 R01 — 2014-2015 RZR XP 1000 / RZR XP4 1000 Service Manual © Copyright 2014 Polaris Industries Inc. -
Page 286
36. Refer to Transmission Installation, page complete the repair. 31. Clean the transmission and gear sector cover mating surfaces thoroughly. 6.28 9925724 R01 — 2014-2015 RZR XP 1000 / RZR XP4 1000 Service Manual © Copyright 2014 Polaris Industries Inc. -
Page 287: Transmission Assembly View
TRANSMISSION TRANSMISSION ASSEMBLY VIEW 6.29 9925724 R01 — 2014-2015 RZR XP 1000 / RZR XP4 1000 Service Manual © Copyright 2014 Polaris Industries Inc.
-
Page 288
Bearing, Ball Cover, Sector Gears Spring, Wave Case, RH Case, LH Bracket, Wire Harness Drum, Shift Collar Sleeve, Input Shaft 6.30 9925724 R01 — 2014-2015 RZR XP 1000 / RZR XP4 1000 Service Manual © Copyright 2014 Polaris Industries Inc. -
Page 289: Transmission Service (Int
This unlocks the rear differential. The rear drive shafts are now dependent on the differential allowing for tighter turns. 6.31 9925724 R01 — 2014-2015 RZR XP 1000 / RZR XP4 1000 Service Manual © Copyright 2014 Polaris Industries Inc.
-
Page 290: Transmission Disassembly
. Remove the switch. outward for reassembly. 8. Remove the spacer (J). 6.32 9925724 R01 — 2014-2015 RZR XP 1000 / RZR XP4 1000 Service Manual © Copyright 2014 Polaris Industries Inc.
-
Page 291
CAUTION Do not pry on case sealing surfaces. Use only the designated pry points on the transmission. 6.33 9925724 R01 — 2014-2015 RZR XP 1000 / RZR XP4 1000 Service Manual © Copyright 2014 Polaris Industries Inc. -
Page 292
If disassembly is required, refer to “Gear Cluster Disassembly”. Gear Cluster Disassembly 18. Slide engagement dog (X) off of shift fork guides. 6.34 9925724 R01 — 2014-2015 RZR XP 1000 / RZR XP4 1000 Service Manual © Copyright 2014 Polaris Industries Inc. -
Page 293
Use caution when disassembling the shift rail. The compressed springs on the shift rail may pop off causing eye or face injury. Snorkel Shaft Removal / Disassembly 6.35 9925724 R01 — 2014-2015 RZR XP 1000 / RZR XP4 1000 Service Manual © Copyright 2014 Polaris Industries Inc. -
Page 294
29. Using the Snorkel Tool (PA-50231), fully loosen the snorkel tube. 32. Use an arbor press to remove the snorkel tube from the snorkel shaft. 6.36 9925724 R01 — 2014-2015 RZR XP 1000 / RZR XP4 1000 Service Manual © Copyright 2014 Polaris Industries Inc. -
Page 295
34. Lightly tap on the bearing from the opposite side to remove it from the snorkel tube. 6.37 9925724 R01 — 2014-2015 RZR XP 1000 / RZR XP4 1000 Service Manual © Copyright 2014 Polaris Industries Inc. -
Page 296: Planetary Differential Disassembly (Turf Mode Models Only)
Replacement (Turf Mode Models Only), page 6.19. 2. Remove the six screws retaining the differential cover and remove the cover. 6.38 9925724 R01 — 2014-2015 RZR XP 1000 / RZR XP4 1000 Service Manual © Copyright 2014 Polaris Industries Inc.
-
Page 297: Planetary Differential Bushing Replacement (Turf Mode Models Only)
5. Press the old bushing out of the planet gear. 6. Thoroughly clean the bore of the planet gear and check for any unwanted burs. 6.39 9925724 R01 — 2014-2015 RZR XP 1000 / RZR XP4 1000 Service Manual © Copyright 2014 Polaris Industries Inc.
-
Page 298
13. Thoroughly clean the bore of the side gear and check for any unwanted burs. 6.40 9925724 R01 — 2014-2015 RZR XP 1000 / RZR XP4 1000 Service Manual © Copyright 2014 Polaris Industries Inc. -
Page 299: Planetary Differential Assembly (Turf Mode Models Only)
5. Install screws hand tight. Place assembly in soft jaw vise and torque to specification. Differential Cover Screws: 22 ft-lb (30 Nm) 6.41 9925724 R01 — 2014-2015 RZR XP 1000 / RZR XP4 1000 Service Manual © Copyright 2014 Polaris Industries Inc.
-
Page 300: Gear / Shaft / Bearing Inspection
TRANSMISSION Gear / Shaft / Bearing Inspection 6.42 9925724 R01 — 2014-2015 RZR XP 1000 / RZR XP4 1000 Service Manual © Copyright 2014 Polaris Industries Inc.
-
Page 301: Snorkel Gear Backlash Procedure
8. Apply Loctite® 242™ to the threads of the bearing cover retaining screws. 6.43 9925724 R01 — 2014-2015 RZR XP 1000 / RZR XP4 1000 Service Manual © Copyright 2014 Polaris Industries Inc.
-
Page 302
Allen wrench, punch or screwdriver into the hole to feel when the notch is aligned with the hole. 6.44 9925724 R01 — 2014-2015 RZR XP 1000 / RZR XP4 1000 Service Manual © Copyright 2014 Polaris Industries Inc. -
Page 303
18. Install shift fork (S) and torsion spring into transmission housing as an assembly. Load spring as shown in image below 6.45 9925724 R01 — 2014-2015 RZR XP 1000 / RZR XP4 1000 Service Manual © Copyright 2014 Polaris Industries Inc. -
Page 304
23. Install the rear output shaft assembly (C). Rotate output shaft assembly to align slots with engagement dog. Ensure bearing is fully seated upon assembly. 6.46 9925724 R01 — 2014-2015 RZR XP 1000 / RZR XP4 1000 Service Manual © Copyright 2014 Polaris Industries Inc. -
Page 305
Sealant (PN 2871557) to the left hand transmission mating surface. NOTE: Shift fork pins should be offset towards the input shaft as shown above. 6.47 9925724 R01 — 2014-2015 RZR XP 1000 / RZR XP4 1000 Service Manual © Copyright 2014 Polaris Industries Inc. -
Page 306
(.070″ or 1.8 mm from outer face of bore). Transmission Case Screws: 20 ft-lbs (27 Nm) 6.48 9925724 R01 — 2014-2015 RZR XP 1000 / RZR XP4 1000 Service Manual © Copyright 2014 Polaris Industries Inc. -
Page 307
35. Install the detent star onto the shift drum shaft. Be sure to install the detent star with the raised edge facing outward and skip-tooth aligned. 6.49 9925724 R01 — 2014-2015 RZR XP 1000 / RZR XP4 1000 Service Manual © Copyright 2014 Polaris Industries Inc. -
Page 308
Bell Crank Nut: 18 ft-lb (24 Nm) 43. Refer to TRANSMISSION INSTALLATION, page 6.9 to complete the repair. 6.50 9925724 R01 — 2014-2015 RZR XP 1000 / RZR XP4 1000 Service Manual © Copyright 2014 Polaris Industries Inc. -
Page 309: Transmission Assembly View (Turf Mode Models)
TRANSMISSION TRANSMISSION ASSEMBLY VIEW (Turf Mode Models) 6.51 9925724 R01 — 2014-2015 RZR XP 1000 / RZR XP4 1000 Service Manual © Copyright 2014 Polaris Industries Inc.
-
Page 310
108. Bearing, Ball Gear, 44T Collar Sleeve, Input Shaft 109. Bearing, Ball Fork, Shift Bearing, Needle Cage Sprocket, 48T, 6-Face 6.52 9925724 R01 — 2014-2015 RZR XP 1000 / RZR XP4 1000 Service Manual © Copyright 2014 Polaris Industries Inc. -
Page 311: Troubleshooting
(rounding) or damage. Inspect all bearings, circlips, thrust washers and shafts for wear. 6.53 9925724 R01 — 2014-2015 RZR XP 1000 / RZR XP4 1000 Service Manual © Copyright 2014 Polaris Industries Inc.
-
Page 312
TRANSMISSION NOTES 6.54 9925724 R01 — 2014-2015 RZR XP 1000 / RZR XP4 1000 Service Manual © Copyright 2014 Polaris Industries Inc. -
Page 313
…………7.42 BEADLOCK RIMS (DESERT EDITION) 9925724 R01 — 2014-2015 RZR XP 1000 / RZR XP4 1000 Service Manual © Copyright 2014 Polaris Industries Inc. -
Page 314: General Information
30 ft-lbs (41 Nm) Mounting Bolts Bearing Carrier to 42 ft-lb (54 Nm) Trailing Arm Bolts Radius Rod 40 ft-lb (54 Nm) Fasteners 9925724 R01 — 2014-2015 RZR XP 1000 / RZR XP4 1000 Service Manual © Copyright 2014 Polaris Industries Inc.
-
Page 315: Bearing Carrier
13. Replace bearing if moisture, dirt, corrosion, or roughness is evident. 5. Remove the fastener retaining the steering tie rod end to the front bearing carrier. 9925724 R01 — 2014-2015 RZR XP 1000 / RZR XP4 1000 Service Manual © Copyright 2014 Polaris Industries Inc.
-
Page 316: Front Bearing Replacement
6. Support the bottom of the bearing carrier housing. CAUTION Use an arbor and press only on the outer race, otherwise bearing damage may occur. 9925724 R01 — 2014-2015 RZR XP 1000 / RZR XP4 1000 Service Manual © Copyright 2014 Polaris Industries Inc.
-
Page 317: Front Bearing Carrier Installation
8. Torque the tie rod end fastener to specification and install a new cotter pin Tie Rod End Fastener: 15 ft-lbs (20 Nm) + 90° 9925724 R01 — 2014-2015 RZR XP 1000 / RZR XP4 1000 Service Manual © Copyright 2014 Polaris Industries Inc.
-
Page 318: Rear Bearing Carrier Inspection / Removal
Swing radius rod down. Discard the nut. 6. Remove the two brake caliper mounting bolts Remove the rear brake caliper assembly. 9925724 R01 — 2014-2015 RZR XP 1000 / RZR XP4 1000 Service Manual © Copyright 2014 Polaris Industries Inc.
-
Page 319
Discard the nuts. 10. Remove the bearing carrier from the rear drive shaft and trailing arm. 9925724 R01 — 2014-2015 RZR XP 1000 / RZR XP4 1000 Service Manual © Copyright 2014 Polaris Industries Inc. -
Page 320: Rear Bearing Replacement
6. Support the bottom of the bearing carrier housing. CAUTION Use an arbor and press only on the outer race, otherwise bearing damage may occur. 9925724 R01 — 2014-2015 RZR XP 1000 / RZR XP4 1000 Service Manual © Copyright 2014 Polaris Industries Inc.
-
Page 321: Rear Bearing Carrier Installation
42 ft-lb (54 Nm) Radius Rod to Bearing Carrier Fasteners: 40 ft-lb (54 Nm) 3. Apply anti-seize to drive shaft splines. 9925724 R01 — 2014-2015 RZR XP 1000 / RZR XP4 1000 Service Manual © Copyright 2014 Polaris Industries Inc.
-
Page 322
8. Rotate wheel and check for smooth operation. Bend both ends of cotter pin around end of spindle in different directions. 7.10 9925724 R01 — 2014-2015 RZR XP 1000 / RZR XP4 1000 Service Manual © Copyright 2014 Polaris Industries Inc. -
Page 323: Drive Shaft
5. CAUTION: Do not hang the caliper by the brake line. Use wire to hang caliper to prevent damage to the brake line. 6. Remove the front wheel hub assembly. 7.11 9925724 R01 — 2014-2015 RZR XP 1000 / RZR XP4 1000 Service Manual © Copyright 2014 Polaris Industries Inc.
-
Page 324: Front Drive Shaft Installation
3. Install drive shaft into the front bearing carrier. 4. Install the upper and lower ball joint ends into the front bearing carrier. 7.12 9925724 R01 — 2014-2015 RZR XP 1000 / RZR XP4 1000 Service Manual © Copyright 2014 Polaris Industries Inc.
-
Page 325: Rear Drive Shaft Removal
120 ft-lbs (163 Nm) 7. Remove the rear hub assembly from the bearing 11. Rotate wheel and check for smooth operation. carrier. 7.13 9925724 R01 — 2014-2015 RZR XP 1000 / RZR XP4 1000 Service Manual © Copyright 2014 Polaris Industries Inc.
-
Page 326: Rear Drive Shaft Installation
3. Swing the rear trailing arm assembly outward and upward until the rear axle can be inserted into the bearing carrier. Support the trailing arm from underneath. 7.14 9925724 R01 — 2014-2015 RZR XP 1000 / RZR XP4 1000 Service Manual © Copyright 2014 Polaris Industries Inc.
-
Page 327
8. Install the radius rod bolts, washers and new nuts. Torque fasteners to specification. Radius Rods to Bearing Carrier: 40 ft-lb (54 Nm) 7.15 9925724 R01 — 2014-2015 RZR XP 1000 / RZR XP4 1000 Service Manual © Copyright 2014 Polaris Industries Inc. -
Page 328: Drive Shaft / Cv Joint Handling Tips
Refer to text for grease capacity of CV joints and CV joint boots. Wheel Nuts: 120 ft-lbs (163 Nm) 7.16 9925724 R01 — 2014-2015 RZR XP 1000 / RZR XP4 1000 Service Manual © Copyright 2014 Polaris Industries Inc.
-
Page 329: Outer Cv Joint / Boot Replacement
3. Clean the grease from the face of the joint. 7.17 9925724 R01 — 2014-2015 RZR XP 1000 / RZR XP4 1000 Service Manual © Copyright 2014 Polaris Industries Inc.
-
Page 330
11. Install a new circlip on the end of the shaft. 7.18 9925724 R01 — 2014-2015 RZR XP 1000 / RZR XP4 1000 Service Manual © Copyright 2014 Polaris Industries Inc. -
Page 331: Inner Plunging Joint / Boot Replacement
3. Clean the grease from the face of the joint and place the drive shaft in a soft-jawed vise. Axle Boot Clamp Tool: PU-48951 CV Boot Clamp Pliers: 8700226 7.19 9925724 R01 — 2014-2015 RZR XP 1000 / RZR XP4 1000 Service Manual © Copyright 2014 Polaris Industries Inc.
-
Page 332
11. Install a new circlip on the end of the shaft. 7.20 9925724 R01 — 2014-2015 RZR XP 1000 / RZR XP4 1000 Service Manual © Copyright 2014 Polaris Industries Inc. -
Page 333
Make sure the boot is not dimpled or collapsed. CV Boot Clamp Pliers: 8700226 7.21 9925724 R01 — 2014-2015 RZR XP 1000 / RZR XP4 1000 Service Manual © Copyright 2014 Polaris Industries Inc. -
Page 334: Drive Shaft Assembly View
FINAL DRIVE Drive Shaft Assembly View 7.22 9925724 R01 — 2014-2015 RZR XP 1000 / RZR XP4 1000 Service Manual © Copyright 2014 Polaris Industries Inc.
-
Page 335: Front Propshaft Service
Roll Pin Removal Tool: PN 2872608 NOTE: Right front wheel can be removed to gain better access to the propshaft roll pin. 7.23 9925724 R01 — 2014-2015 RZR XP 1000 / RZR XP4 1000 Service Manual © Copyright 2014 Polaris Industries Inc.
-
Page 336: Front Prop Shaft Installation
3. While moving the prop shaft support bearing assembly, slide the front prop shaft off the rear prop shaft and remove it from the vehicle. 7.24 9925724 R01 — 2014-2015 RZR XP 1000 / RZR XP4 1000 Service Manual © Copyright 2014 Polaris Industries Inc.
-
Page 337: Rear Prop Shaft Installation
NOTE: Paint marks are applied to the front and rear prop shafts shaft alignment. Reference these marks during installation if still visible. 7.25 9925724 R01 — 2014-2015 RZR XP 1000 / RZR XP4 1000 Service Manual © Copyright 2014 Polaris Industries Inc.
-
Page 338: Rear Prop Shaft Removal Xp 4
6. Move the prop shaft support bearing assembly to the drivers side to slide the rear prop shaft yoke off the transmission output shaft. 7.26 9925724 R01 — 2014-2015 RZR XP 1000 / RZR XP4 1000 Service Manual © Copyright 2014 Polaris Industries Inc.
-
Page 339: Rear Prop Shaft Installation
5. Torque the support bearing fasteners to specification. Support Bearing Fasteners: 35 ft-lb (47 Nm) 7.27 9925724 R01 — 2014-2015 RZR XP 1000 / RZR XP4 1000 Service Manual © Copyright 2014 Polaris Industries Inc.
-
Page 340: Support Bearing Replacement
NOTE: Do not attempt to separate the bearing from the rubber isolated support assembly upon installation. 7.28 9925724 R01 — 2014-2015 RZR XP 1000 / RZR XP4 1000 Service Manual © Copyright 2014 Polaris Industries Inc.
-
Page 341: Prop Shaft U-Joint Service
The prop shafts on this unit are not serviceable. If a cross or yoke is worn, the prop shaft assembly needs to be replaced. 7.29 9925724 R01 — 2014-2015 RZR XP 1000 / RZR XP4 1000 Service Manual © Copyright 2014 Polaris Industries Inc.
-
Page 342
Cover Screws, M6 (T30 Torx) Armature Plate Cover Plate Assembly AWD Coil Gearcase Housing Fill Plug Clutch Housing (Ring Gear) Drain Plug, Magnetic 7.30 9925724 R01 — 2014-2015 RZR XP 1000 / RZR XP4 1000 Service Manual © Copyright 2014 Polaris Industries Inc. -
Page 343: All Wheel Drive Operation
Torsion Spring Operation: The torsion spring acts as a return mechanism to help disengage the coupling of 7.31 9925724 R01 — 2014-2015 RZR XP 1000 / RZR XP4 1000 Service Manual © Copyright 2014 Polaris Industries Inc.
-
Page 344: Awd Diagnosis
3. If electrical tests are within specification, remove gearcase (see Chapter 7 – Front Gearcase Removal, page 7.33) and inspect components. 7.32 9925724 R01 — 2014-2015 RZR XP 1000 / RZR XP4 1000 Service Manual © Copyright 2014 Polaris Industries Inc.
-
Page 345: Front Gearcase Removal
Lift and remove the gearcase from the front LH wheel well area and slide it out of the vehicle above the upper A-arm. 7.33 9925724 R01 — 2014-2015 RZR XP 1000 / RZR XP4 1000 Service Manual © Copyright 2014 Polaris Industries Inc.
-
Page 346: Front Gearcase Disassembly / Inspection
3. Remove the LH output hub assembly from the clutch housing or outer cover plate assembly. NOTE: Nylon spacer is non-serviceable and should not be removed. 7.34 9925724 R01 — 2014-2015 RZR XP 1000 / RZR XP4 1000 Service Manual © Copyright 2014 Polaris Industries Inc.
-
Page 347
9. Inspect the pinion gear for chipped, broken or missing teeth. Inspect the pinion bearing for signs of wear and the pinion shaft seal surface for pitting. 7.35 9925724 R01 — 2014-2015 RZR XP 1000 / RZR XP4 1000 Service Manual © Copyright 2014 Polaris Industries Inc. -
Page 348
13. Inspect clutch housing / ring gear (C) for a consistent wear pattern. Inspect the ring gear for chipped, broken, or missing teeth. 7.36 9925724 R01 — 2014-2015 RZR XP 1000 / RZR XP4 1000 Service Manual © Copyright 2014 Polaris Industries Inc. -
Page 349: Front Gearcase Assembly
6. Install the torsion spring by wrapping each leg of the spring around the dowel pin on the ring gear. 4. Install the RH output hub into the gearcase housing. 7.37 9925724 R01 — 2014-2015 RZR XP 1000 / RZR XP4 1000 Service Manual © Copyright 2014 Polaris Industries Inc.
-
Page 350
NOTE: Be sure the square O-ring is placed flat on the cover surface. If the O-ring is twisted fluid leakage may occur. 7.38 9925724 R01 — 2014-2015 RZR XP 1000 / RZR XP4 1000 Service Manual © Copyright 2014 Polaris Industries Inc. -
Page 351: Front Gearcase Installation
Front Gearcase Mounting Bolts: 30 ft-lbs (41 Nm) 5. Install the vent line Cover Plate Screws: 11 ft-lbs (15 Nm) 7.39 9925724 R01 — 2014-2015 RZR XP 1000 / RZR XP4 1000 Service Manual © Copyright 2014 Polaris Industries Inc.
-
Page 352
(PN 2877922) (Quart) Capacity: 8.5 oz. (250 ml) (fill on a level surface to bottom of threads on the fill hole) 7.40 9925724 R01 — 2014-2015 RZR XP 1000 / RZR XP4 1000 Service Manual © Copyright 2014 Polaris Industries Inc. -
Page 353: Wheel Hubs
FINAL DRIVE WHEEL HUBS Front Hub Assembly View Rear Hub Assembly View 7.41 9925724 R01 — 2014-2015 RZR XP 1000 / RZR XP4 1000 Service Manual © Copyright 2014 Polaris Industries Inc.
-
Page 354: Beadlock Rims (Desert Edition)
NOTE: Beadlock bolts should be checked and retorqued every 300 miles (450 km). 7. Seat bead and inflate to 16 psi. 7.42 9925724 R01 — 2014-2015 RZR XP 1000 / RZR XP4 1000 Service Manual © Copyright 2014 Polaris Industries Inc.
-
Page 355
WALKER EVANS™ SHOCK SERVICE …………..8.31 9925724 R01 — 2014-2015 RZR XP 1000 / RZR XP4 1000 Service Manual… -
Page 356
…………. . .8.39 WALKER EVANS™ SHOCK ASSEMBLY 9925724 R01 — 2014-2015 RZR XP 1000 / RZR XP4 1000 Service Manual © Copyright 2014 Polaris Industries Inc. -
Page 357: General Information
Walker Evans™: See Walker Evans™ Shock Service later in this chapter, page 8.36 Bosch Automotive Service Solutions: 1-800-345- 2233 or http://polaris.service-solutions.com 9925724 R01 — 2014-2015 RZR XP 1000 / RZR XP4 1000 Service Manual © Copyright 2014 Polaris Industries Inc.
-
Page 358
Mount Bracket Bolts Lower Steering Shaft to 42 ft-lb (57 Nm) Steering Rack Power Steering Bracket to 16 ft-lb (22 Nm) Frame Nuts 9925724 R01 — 2014-2015 RZR XP 1000 / RZR XP4 1000 Service Manual © Copyright 2014 Polaris Industries Inc. -
Page 359: Steering Assembly
STEERING / SUSPENSION STEERING ASSEMBLY Assembly View (Non-EPS Models) 9925724 R01 — 2014-2015 RZR XP 1000 / RZR XP4 1000 Service Manual © Copyright 2014 Polaris Industries Inc.
-
Page 360: Steering Wheel Removal (Non-Eps Models)
5. Refer to steps 11-13 of the Steering Shaft Bearing Replacement, page 8.7 procedure for installation. 9925724 R01 — 2014-2015 RZR XP 1000 / RZR XP4 1000 Service Manual © Copyright 2014 Polaris Industries Inc.
-
Page 361: Steering Shaft Bearing Replacement
Bushing 7 ft-lb (10 Nm) Bushing Bushing Bushing Be sure the lower washers and spacers are still on the steering shaft. 9925724 R01 — 2014-2015 RZR XP 1000 / RZR XP4 1000 Service Manual © Copyright 2014 Polaris Industries Inc.
-
Page 362
15. Wipe the pivot tube clean of any excess Loctite ® 16. Install steering wheel cap and field test steering operation. 9925724 R01 — 2014-2015 RZR XP 1000 / RZR XP4 1000 Service Manual © Copyright 2014 Polaris Industries Inc. -
Page 363: Electronic Power Steering Assembly
Tie Rod End Bolt (Do not reuse) EPS Module EPS Mount Bracket Nut, Nylok (Do not reuse) Lower Steering Shaft EPS Cover 9925724 R01 — 2014-2015 RZR XP 1000 / RZR XP4 1000 Service Manual © Copyright 2014 Polaris Industries Inc.
-
Page 364
3. Lift the steering wheel up and remove the four fasteners that retain the pivot tube. 8.10 9925724 R01 — 2014-2015 RZR XP 1000 / RZR XP4 1000 Service Manual © Copyright 2014 Polaris Industries Inc. -
Page 365: Steering Wheel Removal (Eps Models)
6. Once the steering wheel pops loose, completely remove the nut and lift the steering wheel off the shaft. 8.11 9925724 R01 — 2014-2015 RZR XP 1000 / RZR XP4 1000 Service Manual © Copyright 2014 Polaris Industries Inc.
-
Page 366
WARNING Electronic Power Steering (EPS) units are programmed to be vehicle specific and are not interchangeable between product lines. 8.12 9925724 R01 — 2014-2015 RZR XP 1000 / RZR XP4 1000 Service Manual © Copyright 2014 Polaris Industries Inc. -
Page 367: Lower Steering Shaft Removal (Eps Models)
. 5. Lift up on the shaft and remove it through the floor panel. 8.13 9925724 R01 — 2014-2015 RZR XP 1000 / RZR XP4 1000 Service Manual © Copyright 2014 Polaris Industries Inc.
-
Page 368: Power Steering Unit Installation
Torque to specification. Lower Steering Shaft to EPS Unit Pinch Bolt: 15 ft-lbs (20 Nm) 8.14 9925724 R01 — 2014-2015 RZR XP 1000 / RZR XP4 1000 Service Manual © Copyright 2014 Polaris Industries Inc.
-
Page 369: Upper Steering Shaft Installation (Eps Models)
8 ft-lb (11 Nm) 3. Install the tilt shock and torque fastener to specification. Tilt Shock Fastener: 7 ft-lb (10 Nm) 8.15 9925724 R01 — 2014-2015 RZR XP 1000 / RZR XP4 1000 Service Manual © Copyright 2014 Polaris Industries Inc.
-
Page 370: Front A-Arms
A-arm. Completely remove the ball joint end from the bearing carrier. 5. Remove the front bumper to allow A-arm bolt removal. 8.16 9925724 R01 — 2014-2015 RZR XP 1000 / RZR XP4 1000 Service Manual © Copyright 2014 Polaris Industries Inc.
-
Page 371
Lower A-arm Bolts: 44 ft-lb (60 Nm) Front Ball Joint Pinch Bolts: 42 ft-lbs (57 Nm) 8.17 9925724 R01 — 2014-2015 RZR XP 1000 / RZR XP4 1000 Service Manual © Copyright 2014 Polaris Industries Inc. -
Page 372
STEERING / SUSPENSION 8.18 9925724 R01 — 2014-2015 RZR XP 1000 / RZR XP4 1000 Service Manual © Copyright 2014 Polaris Industries Inc. -
Page 373: Ball Joint Service
9. Remove and discard the lower ball joint pinch bolt. 10. Remove both A-arm to frame mounting bolts and remove the A-arm from the chassis. 8.19 9925724 R01 — 2014-2015 RZR XP 1000 / RZR XP4 1000 Service Manual © Copyright 2014 Polaris Industries Inc.
-
Page 374: Ball Joint Installation
Front Shock Mounting Bolts: 44 ft-lb (60 Nm) Front Caliper Mounting Bolts: 40 ft-lbs (54 Nm) Wheel Nuts (Alum): 120 ft-lbs (163 Nm) 8.20 9925724 R01 — 2014-2015 RZR XP 1000 / RZR XP4 1000 Service Manual © Copyright 2014 Polaris Industries Inc.
-
Page 375: Rear Radius Rods
5. Remove bolts & attaching radius rods to the vehicle frame. Discard the nuts. 6. Remove radius rods from vehicle. 8.21 9925724 R01 — 2014-2015 RZR XP 1000 / RZR XP4 1000 Service Manual © Copyright 2014 Polaris Industries Inc.
-
Page 376: Rear Trailing Arm
Swing radius rod down. Discard the nut. 5. Remove the two brake caliper mounting bolts 8.22 9925724 R01 — 2014-2015 RZR XP 1000 / RZR XP4 1000 Service Manual © Copyright 2014 Polaris Industries Inc.
-
Page 377
Rear Brake Caliper Mounting Bolts: 40 ft-lbs (54 Nm) Rear Wheel Hub Castle Nut: 110 ft-lbs (149 Nm) Wheel Nuts: 120 ft-lbs (163 Nm) 8.23 9925724 R01 — 2014-2015 RZR XP 1000 / RZR XP4 1000 Service Manual © Copyright 2014 Polaris Industries Inc. -
Page 378: Trailing Arm Spherical Bearing Replacement
7. Press in new bearing until fully seated into trailing arm casting. 8. Install new snap ring, O-rings (not required) and bushings. 8.24 9925724 R01 — 2014-2015 RZR XP 1000 / RZR XP4 1000 Service Manual © Copyright 2014 Polaris Industries Inc.
-
Page 379: Rear Suspension Assembly View
Rear Suspension Assembly View Radius Rod Trailing Arm Spherical Bearing Bushing Shock Spring Bearing Carrier Stabilizer Bar Stabilizer Bar Link 8.25 9925724 R01 — 2014-2015 RZR XP 1000 / RZR XP4 1000 Service Manual © Copyright 2014 Polaris Industries Inc.
-
Page 380: Rear Stabilizer Bar
(if replacing stabilizer bar). 9. Inspect the stabilizer bar for straightness. Inspect the pivot bushings and replace if needed. 8.26 9925724 R01 — 2014-2015 RZR XP 1000 / RZR XP4 1000 Service Manual © Copyright 2014 Polaris Industries Inc.
-
Page 381: Shocks / Springs / Fasteners
STEERING / SUSPENSION SHOCKS / SPRINGS / FASTENERS Front Shock Assembly View Rear Shock Assembly View 8.27 9925724 R01 — 2014-2015 RZR XP 1000 / RZR XP4 1000 Service Manual © Copyright 2014 Polaris Industries Inc.
-
Page 382: Shock Removal / Installation
44 ft-lb (60 Nm) 6. Reinstall the shock onto the vehicle and torque new Rear: fasteners to specification. 70 ft-lbs (95 Nm) 8.28 9925724 R01 — 2014-2015 RZR XP 1000 / RZR XP4 1000 Service Manual © Copyright 2014 Polaris Industries Inc.
-
Page 383: Walker Evans™Shock Assembly Views
Piston Wear Band (1.750″ OD) 36. Clicker Bolt Shaft, Chrome Bump Stop Clicker Knob 2-Piece Piston Asm. Clicker Stud Screw (10/32″) Shaft Loop 8.29 9925724 R01 — 2014-2015 RZR XP 1000 / RZR XP4 1000 Service Manual © Copyright 2014 Polaris Industries Inc.
-
Page 384: Walker Evans™ 2.5″ Rear Shock
Wear Band Ball (.250″) O-Ring O-Ring Retention Nut Screw Screw 9/16 Heim Shaftloop O-Ring Snap Ring Shock Body Needle O-Ring Hose 8.30 9925724 R01 — 2014-2015 RZR XP 1000 / RZR XP4 1000 Service Manual © Copyright 2014 Polaris Industries Inc.
-
Page 385: Walker Evans™ Shock Service
IFP Location RZR XP 4 3.375″ (85.7 mm) 1000 / High Lifter IFP Location RZR XP 2.875” (73.02 mm) 1000 / Desert Edition 8.31 9925724 R01 — 2014-2015 RZR XP 1000 / RZR XP4 1000 Service Manual © Copyright 2014 Polaris Industries Inc.
-
Page 386
0.750 x 0.065 0.900 x 0.008 1.45 x 0.015 0.625 x 0.065 Piston Bleed Orifice: none 1.45 x 0.015 1.45 x 0.008 8.32 9925724 R01 — 2014-2015 RZR XP 1000 / RZR XP4 1000 Service Manual © Copyright 2014 Polaris Industries Inc. -
Page 387: Rear Shock Service Information
STEERING / SUSPENSION Rear Shock Service Information 8.33 9925724 R01 — 2014-2015 RZR XP 1000 / RZR XP4 1000 Service Manual © Copyright 2014 Polaris Industries Inc.
-
Page 388
0.75 x 0.065 1.10 x 0.012 (top-out) 0.900 x 0.012 0.800 x 0.012 1.50 x 0.125 (top-out) No Piston Bleed Orifice 8.34 9925724 R01 — 2014-2015 RZR XP 1000 / RZR XP4 1000 Service Manual © Copyright 2014 Polaris Industries Inc. -
Page 389
0.750 x 0.065 1.20 x 0.010 (top-out) 1.10 x 0.012 0.900 x 0.012 0.800 x 0.012 1.50 x 0.125 (top-out) 8.35 9925724 R01 — 2014-2015 RZR XP 1000 / RZR XP4 1000 Service Manual © Copyright 2014 Polaris Industries Inc. -
Page 390: Special Tools
Rear Shock Body Holding Tool: PU-50938 4. Remove the valve cap from the valve fitting on the top of the reservoir. 8.36 9925724 R01 — 2014-2015 RZR XP 1000 / RZR XP4 1000 Service Manual © Copyright 2014 Polaris Industries Inc.
-
Page 391
9. Slowly lift up and remove the shock rod assembly from the shock body. 7. Carefully remove the cap from the reservoir body. 8.37 9925724 R01 — 2014-2015 RZR XP 1000 / RZR XP4 1000 Service Manual © Copyright 2014 Polaris Industries Inc. -
Page 392
Front Shock Rod Holding Tool: 2872429 Rear Shock Rod Holding Tool: PU-50931 Front Shock Body Holding Tool: PU-50979 Rear Shock Body Holding Tool: PU-50938 8.38 9925724 R01 — 2014-2015 RZR XP 1000 / RZR XP4 1000 Service Manual © Copyright 2014 Polaris Industries Inc. -
Page 393: Walker Evans™ Shock Assembly
NOTE: If unsure of the valve stack order, refer to “Shock Valving” under the “Shock Service Information” provided earlier in this section. 8.39 9925724 R01 — 2014-2015 RZR XP 1000 / RZR XP4 1000 Service Manual © Copyright 2014 Polaris Industries Inc.
-
Page 394
Tighten the valve stack fastener securely. Recommended Shock Oil: Racing Gas Shock Oil (PN 2874124) (Quart) 10 Weight for Walker Evans Shocks 8.40 9925724 R01 — 2014-2015 RZR XP 1000 / RZR XP4 1000 Service Manual © Copyright 2014 Polaris Industries Inc. -
Page 395
You will see the released air bubbles come to the surface of the oil. 8.41 9925724 R01 — 2014-2015 RZR XP 1000 / RZR XP4 1000 Service Manual © Copyright 2014 Polaris Industries Inc. -
Page 396
If it does not, disassemble and reassemble per this procedure. 32. Secure the shock body in a vise by its lower mount. 8.42 9925724 R01 — 2014-2015 RZR XP 1000 / RZR XP4 1000 Service Manual © Copyright 2014 Polaris Industries Inc. -
Page 397
36. Clean all oil residue from the shock and reservoir with solvent, and dry with low pressure compressed air in a well ventilated area. 8.43 9925724 R01 — 2014-2015 RZR XP 1000 / RZR XP4 1000 Service Manual © Copyright 2014 Polaris Industries Inc. -
Page 398
STEERING / SUSPENSION NOTES 8.44 9925724 R01 — 2014-2015 RZR XP 1000 / RZR XP4 1000 Service Manual © Copyright 2014 Polaris Industries Inc. -
Page 399
…………..9.31 PAD ASSEMBLY / INSTALLATION 9925724 R01 — 2014-2015 RZR XP 1000 / RZR XP4 1000 Service Manual © Copyright 2014 Polaris Industries Inc. -
Page 400
………………9.40 BRAKES LOCK 9925724 R01 — 2014-2015 RZR XP 1000 / RZR XP4 1000 Service Manual © Copyright 2014 Polaris Industries Inc. -
Page 401: General Information
Outboard — 0.250” (6.35 mm) 0.190″ (4.83 mm) Park Brake Disc Thickness 0.175” — 0.185” (4.44 — 4.70 mm) 0.150″ (3.81 mm) 9925724 R01 — 2014-2015 RZR XP 1000 / RZR XP4 1000 Service Manual © Copyright 2014 Polaris Industries Inc.
-
Page 402: Torque Specifications
• Perform a brake burnishing procedure after installing new pads to maximize service life. • DO NOT lubricate or clean the brake components with aerosol or petroleum products. Use only approved brake cleaning products. 9925724 R01 — 2014-2015 RZR XP 1000 / RZR XP4 1000 Service Manual © Copyright 2014 Polaris Industries Inc.
-
Page 403: Brake Noise Troubleshooting
Inspect and repair as necessary HYDRAULIC BRAKE SYSTEM OPERATION The Polaris brake system consists of the following components or assemblies: brake pedal, master cylinder, hydraulic brake lines, brake calipers, brake pads, and brake discs, which are secured to the drive line.
-
Page 404: Brake System Assembly View
BRAKE SYSTEM BRAKE SYSTEM Brake System Assembly View 9925724 R01 — 2014-2015 RZR XP 1000 / RZR XP4 1000 Service Manual © Copyright 2014 Polaris Industries Inc.
-
Page 405: Master Cylinder
2. Remove the clip from the clevis pin that attaches the master cylinder to the brake pedal lever. 9925724 R01 — 2014-2015 RZR XP 1000 / RZR XP4 1000 Service Manual © Copyright 2014 Polaris Industries Inc.
-
Page 406: Master Cylinder Installation
Be sure the hose fits tightly on fitting. 9925724 R01 — 2014-2015 RZR XP 1000 / RZR XP4 1000 Service Manual © Copyright 2014 Polaris Industries Inc.
-
Page 407
10. Add brake fluid to MAX level inside reservoir. Master Cylinder Fluid Level Between MIN and MAX lines on reservoir. 11. Install master cylinder reservoir cover. 9925724 R01 — 2014-2015 RZR XP 1000 / RZR XP4 1000 Service Manual © Copyright 2014 Polaris Industries Inc. -
Page 408: Brake Pedal Lever
2. Remove the E-clip from the pedal mount and 0.090″ (2.28 mm) remove the brake pedal lever from the vehicle. 9.10 9925724 R01 — 2014-2015 RZR XP 1000 / RZR XP4 1000 Service Manual © Copyright 2014 Polaris Industries Inc.
-
Page 409: Parking Brake (Int’l Model)
BRAKE SYSTEM PARKING BRAKE (INT’L MODEL) Parking Brake Assembly View 9.11 9925724 R01 — 2014-2015 RZR XP 1000 / RZR XP4 1000 Service Manual © Copyright 2014 Polaris Industries Inc.
-
Page 410: Parking Brake Inspection
4. Adjust the parking brake cable where it attaches to the caliper mount / shift cable bracket. The mount bracket is located on the right-hand side of the transmission. 9.12 9925724 R01 — 2014-2015 RZR XP 1000 / RZR XP4 1000 Service Manual © Copyright 2014 Polaris Industries Inc.
-
Page 411: Parking Brake Caliper
BRAKE SYSTEM Parking Brake Caliper 9.13 9925724 R01 — 2014-2015 RZR XP 1000 / RZR XP4 1000 Service Manual © Copyright 2014 Polaris Industries Inc.
-
Page 412
Caliper Disassembly / Inspection NOTE: Refer to the “Electronic Parts Catalog” for parking brake caliper replacement parts information. 9.14 9925724 R01 — 2014-2015 RZR XP 1000 / RZR XP4 1000 Service Manual © Copyright 2014 Polaris Industries Inc. -
Page 413
37 ft-lb (50 Nm) 5. Ensure the parking brake assembly functions properly by actuating the lever. Install the mounting sleeves (D) before installation. 9.15 9925724 R01 — 2014-2015 RZR XP 1000 / RZR XP4 1000 Service Manual © Copyright 2014 Polaris Industries Inc. -
Page 414: Parking Brake Disc
4. Install the new brake disc. Install the mounting bolt and flat washer. Torque the mounting bolt to specification. Parking Brake Disc Mounting Bolt: 14 ft-lb (20 Nm) 9.16 9925724 R01 — 2014-2015 RZR XP 1000 / RZR XP4 1000 Service Manual © Copyright 2014 Polaris Industries Inc.
-
Page 415
BRAKE SYSTEM 9.17 9925724 R01 — 2014-2015 RZR XP 1000 / RZR XP4 1000 Service Manual © Copyright 2014 Polaris Industries Inc. -
Page 416
BRAKE SYSTEM 9.18 9925724 R01 — 2014-2015 RZR XP 1000 / RZR XP4 1000 Service Manual © Copyright 2014 Polaris Industries Inc. -
Page 417: Front Brake Pads
Support caliper to avoid kinking or bending brake line. 7. Remove the inner pad from the bracket and caliper. 9.19 9925724 R01 — 2014-2015 RZR XP 1000 / RZR XP4 1000 Service Manual © Copyright 2014 Polaris Industries Inc.
-
Page 418: Pad Inspection
0.297 ± 0.007″ (7.5 ± .178 mm) Service Limit: 0.180″ (4.6 mm) Front Caliper Mount Bolt: 40 ft-lbs (54 Nm) 9.20 9925724 R01 — 2014-2015 RZR XP 1000 / RZR XP4 1000 Service Manual © Copyright 2014 Polaris Industries Inc.
-
Page 419: Brake Burnishing Procedure
Up to MAX line inside reservoir 7. Install wheel and torque wheel nuts to specification. Wheel Nuts: 120 ft-lbs (163 Nm) 9.21 9925724 R01 — 2014-2015 RZR XP 1000 / RZR XP4 1000 Service Manual © Copyright 2014 Polaris Industries Inc.
-
Page 420: Front Caliper Service
BRAKE SYSTEM FRONT CALIPER SERVICE Caliper Assembly View 9.22 9925724 R01 — 2014-2015 RZR XP 1000 / RZR XP4 1000 Service Manual © Copyright 2014 Polaris Industries Inc.
-
Page 421: Caliper Removal
5. Loosen brake pad adjustment set screw 2-3 turns to allow brake pad removal after the caliper is removed. 9.23 9925724 R01 — 2014-2015 RZR XP 1000 / RZR XP4 1000 Service Manual © Copyright 2014 Polaris Industries Inc.
-
Page 422: Caliper Disassembly
NOTE: Do not remove the caliper pistons with a standard pliers. The piston sealing surfaces will become damaged if a standard pliers is used. 9.24 9925724 R01 — 2014-2015 RZR XP 1000 / RZR XP4 1000 Service Manual © Copyright 2014 Polaris Industries Inc.
-
Page 423: Caliper Inspection
Front Caliper Piston O.D.: Std: 1.370” (34.80 mm) Service Limit: 1.368” (34.75 mm) 9.25 9925724 R01 — 2014-2015 RZR XP 1000 / RZR XP4 1000 Service Manual © Copyright 2014 Polaris Industries Inc.
-
Page 424: Caliper Installation
NOTE: If new pads are installed, refer to Brake Burnishing Procedure, page 9.21. Banjo Bolt 15 ft-lbs (20 Nm) 9.26 9925724 R01 — 2014-2015 RZR XP 1000 / RZR XP4 1000 Service Manual © Copyright 2014 Polaris Industries Inc.
-
Page 425: Front Brake Disc
Brake Disc Thickness Variance Service Limit: 0.002″ (.051 mm) difference between measurements Brake Disc Runout: Service Limit: 0.010″ (0.254 mm) 9.27 9925724 R01 — 2014-2015 RZR XP 1000 / RZR XP4 1000 Service Manual © Copyright 2014 Polaris Industries Inc.
-
Page 426: Disc Replacement
5. Install new bolts and torque to specification. Brake Disc Mounting Bolts 30 ft-lb (41 Nm) 9.28 9925724 R01 — 2014-2015 RZR XP 1000 / RZR XP4 1000 Service Manual © Copyright 2014 Polaris Industries Inc.
-
Page 427: Rear Brake Pads
Remove excess fluid from reservoir as required. 9.29 9925724 R01 — 2014-2015 RZR XP 1000 / RZR XP4 1000 Service Manual © Copyright 2014 Polaris Industries Inc.
-
Page 428: Pad Inspection
8. Remove the inner brake pad. Rear Brake Pad Thickness: 0.298 ± 0.007″ (7.57 mm ± .178 mm) Service Limit: 0.180″ (4.6 mm) 9.30 9925724 R01 — 2014-2015 RZR XP 1000 / RZR XP4 1000 Service Manual © Copyright 2014 Polaris Industries Inc.
-
Page 429: Pad Assembly / Installation
8. Install wheel and torque wheel nuts to specification. Wheel Nuts: 120 ft-lbs (163 Nm) Rear Caliper Mount Bolt 40 ft-lbs (54 Nm) 9.31 9925724 R01 — 2014-2015 RZR XP 1000 / RZR XP4 1000 Service Manual © Copyright 2014 Polaris Industries Inc.
-
Page 430: Brake Burnishing Procedure
Repeat this procedure 10 times. Do not make more than 3 stops per 1 mile (1.6 km). 9.32 9925724 R01 — 2014-2015 RZR XP 1000 / RZR XP4 1000 Service Manual © Copyright 2014 Polaris Industries Inc.
-
Page 431: Rear Caliper Service
BRAKE SYSTEM REAR CALIPER SERVICE Caliper Assembly View 9.33 9925724 R01 — 2014-2015 RZR XP 1000 / RZR XP4 1000 Service Manual © Copyright 2014 Polaris Industries Inc.
-
Page 432: Caliper Removal
Discard nut. 5. Loosen the brake pad adjustment set screw to allow brake pad removal after the caliper is removed. 9.34 9925724 R01 — 2014-2015 RZR XP 1000 / RZR XP4 1000 Service Manual © Copyright 2014 Polaris Industries Inc.
-
Page 433: Caliper Disassembly
Measure diameter and replace if damaged or worn beyond service limit. Rear Caliper Piston O.D.: Standard: 1.500″ (38.10 mm) Service Limit: 1.498″ (38.05 mm) 9.35 9925724 R01 — 2014-2015 RZR XP 1000 / RZR XP4 1000 Service Manual © Copyright 2014 Polaris Industries Inc.
-
Page 434: Caliper Assembly
Install the brake pads. Clean the disc and pads with brake parts cleaner or denatured alcohol to remove any dirt, oil or grease. 9.36 9925724 R01 — 2014-2015 RZR XP 1000 / RZR XP4 1000 Service Manual © Copyright 2014 Polaris Industries Inc.
-
Page 435
6. Install wheel and torque wheel nuts to specification. Wheel Nuts: 120 ft-lbs (163 Nm) NOTE: If new pads are installed, refer to Brake Burnishing Procedure, page 9.32. 9.37 9925724 R01 — 2014-2015 RZR XP 1000 / RZR XP4 1000 Service Manual © Copyright 2014 Polaris Industries Inc. -
Page 436: Rear Brake Disc
Always use new brake disc mounting bolts. The bolts have a pre-applied locking agent which is destroyed upon removal. Brake Disc Mounting Bolts: 30 ft-lb (41 Nm) 9.38 9925724 R01 — 2014-2015 RZR XP 1000 / RZR XP4 1000 Service Manual © Copyright 2014 Polaris Industries Inc.
-
Page 437
Inspect for fluid leaks and firm brakes. Make sure brakes do not drag when pedal is released. If the brakes drag, re-check assembly and installation. 9.39 9925724 R01 — 2014-2015 RZR XP 1000 / RZR XP4 1000 Service Manual © Copyright 2014 Polaris Industries Inc. -
Page 438: Troubleshooting
• Operator riding brakes Brakes Lock • Alignment of caliper to disc • Caliper pistons sticking • Improper assembly of brake system components 9.40 9925724 R01 — 2014-2015 RZR XP 1000 / RZR XP4 1000 Service Manual © Copyright 2014 Polaris Industries Inc.
-
Page 439
…………… . 10.27 DECAL REPLACEMENT 10.1 9925724 R01 — 2014-2015 RZR XP 1000 / RZR XP4 1000 Service Manual © Copyright 2014 Polaris Industries Inc. -
Page 440: General Information
Seat Base to Frame (Front 14 ft-lb (19 Nm) Bolts) Seat Base to Frame (Rear 30 ft-lb (41 Nm) Bolts) 10.2 9925724 R01 — 2014-2015 RZR XP 1000 / RZR XP4 1000 Service Manual © Copyright 2014 Polaris Industries Inc.
-
Page 441: Body Assembly Views
5. Install deflector on front ROPS with M10 x 1.25 x 20 bolts. Torque bolts to 8 ft-lb (11 Nm) 10.3 9925724 R01 — 2014-2015 RZR XP 1000 / RZR XP4 1000 Service Manual © Copyright 2014 Polaris Industries Inc.
-
Page 442: Cab Frame Assembly Xp 4
8. Install visor panel on front ROPS with M10 x 1.25 x 20 bolts. Torque to 8 ft-lb (11 Nm) 10.4 9925724 R01 — 2014-2015 RZR XP 1000 / RZR XP4 1000 Service Manual © Copyright 2014 Polaris Industries Inc.
-
Page 443: Doors
BODY / FRAME Doors XP Hinge Pin Door Panel Door Frame Latch Release Latch Striker Latch 10.5 9925724 R01 — 2014-2015 RZR XP 1000 / RZR XP4 1000 Service Manual © Copyright 2014 Polaris Industries Inc.
-
Page 444: Doors
Doors XP 4 Door Panel Latch Release Door Frame Latch Door panel (Rear) Latch Striker Hinge Pin Door Frame (Rear) 10.6 9925724 R01 — 2014-2015 RZR XP 1000 / RZR XP4 1000 Service Manual © Copyright 2014 Polaris Industries Inc.
-
Page 445: Doors High Lifter
Upper Door Frame Latch Striker Screws (8 ft-lbs, 11 Nm) Lower Door Frame Hinge Screws (8 ft-lbs, 11 Nm) Hinge Pin 10.7 9925724 R01 — 2014-2015 RZR XP 1000 / RZR XP4 1000 Service Manual © Copyright 2014 Polaris Industries Inc.
-
Page 446: Dash Instruments / Controls
BODY / FRAME Dash Instruments / Controls Headlight Switch Instrument Cluster Key Switch AWD Switch 12V Accessory Port Bezel 10.8 9925724 R01 — 2014-2015 RZR XP 1000 / RZR XP4 1000 Service Manual © Copyright 2014 Polaris Industries Inc.
-
Page 447: Dash Instruments / Controls High Lifter
Dash Instruments / Controls High Lifter Instrument Cluster AWD Switch Key Switch Winch Switch 12V Accessory Port Bezel Headlight Switch 10.9 9925724 R01 — 2014-2015 RZR XP 1000 / RZR XP4 1000 Service Manual © Copyright 2014 Polaris Industries Inc.
-
Page 448: Hood / Front Body Work
Right Front Fender Grill Right Front Fender Flair Front Bumper Cover Left Front Fender Radiator Shroud Left Front Fender Flair 10.10 9925724 R01 — 2014-2015 RZR XP 1000 / RZR XP4 1000 Service Manual © Copyright 2014 Polaris Industries Inc.
-
Page 449: Chassis / Main Frame Xp / High Lifter
BODY / FRAME Chassis / Main Frame XP / High Lifter 10.11 9925724 R01 — 2014-2015 RZR XP 1000 / RZR XP4 1000 Service Manual © Copyright 2014 Polaris Industries Inc.
-
Page 450: Chassis / Main Frame Xp 4
BODY / FRAME Chassis / Main Frame XP 4 10.12 9925724 R01 — 2014-2015 RZR XP 1000 / RZR XP4 1000 Service Manual © Copyright 2014 Polaris Industries Inc.
-
Page 451: Seat Assembly Front
Spring Screw 4 ft-lb (5 Nm) Seat Slider Lever Shoulder Bolt Seat Bottom Spring Lock Washer Seat Back Flat Washer 10.13 9925724 R01 — 2014-2015 RZR XP 1000 / RZR XP4 1000 Service Manual © Copyright 2014 Polaris Industries Inc.
-
Page 452: Seat Assembly Rear
Screw 4 ft-lb (5 Nm) Seat Base Assembly Bolt Seat Latch Lever Seat Bottom Spring Seat Latch Seat Back Plate Seat Latch 10.14 9925724 R01 — 2014-2015 RZR XP 1000 / RZR XP4 1000 Service Manual © Copyright 2014 Polaris Industries Inc.
-
Page 453: Floor / Rocker Panels Xp / High Lifter
T27 Screws Push Rivots LH Rocker Console Cover U-Type Nuts Seat Belt Boot Block Off Flap Shifter Boot Lower Floor 10.15 9925724 R01 — 2014-2015 RZR XP 1000 / RZR XP4 1000 Service Manual © Copyright 2014 Polaris Industries Inc.
-
Page 454: Floor / Rocker Panels Xp 4
Console Rear Main Floor Lower Lower Rear Close-off Panel Upper Rear Close-off Panel Rocker RH B-Pillar Cover RH Floor Rear 10.16 9925724 R01 — 2014-2015 RZR XP 1000 / RZR XP4 1000 Service Manual © Copyright 2014 Polaris Industries Inc.
-
Page 455: Rear Cargo Box / Fenders
BODY / FRAME Rear Cargo Box / Fenders 10.17 9925724 R01 — 2014-2015 RZR XP 1000 / RZR XP4 1000 Service Manual © Copyright 2014 Polaris Industries Inc.
-
Page 456: Rear Bumper
BODY / FRAME Rear Bumper 10.18 9925724 R01 — 2014-2015 RZR XP 1000 / RZR XP4 1000 Service Manual © Copyright 2014 Polaris Industries Inc.
-
Page 457: Body Component Removal
• Remove the driver and passenger seats 2. Lift the panel upward and towards the front of the vehicle to remove the panel 10.19 9925724 R01 — 2014-2015 RZR XP 1000 / RZR XP4 1000 Service Manual © Copyright 2014 Polaris Industries Inc.
-
Page 458: Rear Bumper
7. Remove the two T-40 Torx screws retaining the dash and the one T-40 retaining the back of the dash to the bracket.. 10.20 9925724 R01 — 2014-2015 RZR XP 1000 / RZR XP4 1000 Service Manual © Copyright 2014 Polaris Industries Inc.
-
Page 459: Rear Fender / Fender Flare Removal Xp / High Lifter
Refer to appropriate Cab Frame Assembly XP / High Lifter, page 10.3 procedure for assembly torque specifications. 13. Remove the front fender. 10.21 9925724 R01 — 2014-2015 RZR XP 1000 / RZR XP4 1000 Service Manual © Copyright 2014 Polaris Industries Inc.
-
Page 460: Rear Fender Flare / Rear Fender Removal Xp
6. Remove the eight fasteners retaining the rear cab frame to the frame and to the front cab frame. Remove the rear cab frame from the vehicle. 10.22 9925724 R01 — 2014-2015 RZR XP 1000 / RZR XP4 1000 Service Manual © Copyright 2014 Polaris Industries Inc.
-
Page 461: Rocker Panels, Console And Floor Xp / High Lifter
10. Remove the cargo box half from the vehicle. 10.23 9925724 R01 — 2014-2015 RZR XP 1000 / RZR XP4 1000 Service Manual © Copyright 2014 Polaris Industries Inc.
-
Page 462: Rocker Panels, Rear Console And Floor Xp
Console and Lower Floor Removal 1. Remove seats and rocker panels (see Chapter 10 – Floor / Rocker Panels XP 4, page 10.16). 10.24 9925724 R01 — 2014-2015 RZR XP 1000 / RZR XP4 1000 Service Manual © Copyright 2014 Polaris Industries Inc.
-
Page 463
11. Remove two Torx T40 screws and four push rivets retaining the lower rear close off panel. 5. Remove the rear console. 10.25 9925724 R01 — 2014-2015 RZR XP 1000 / RZR XP4 1000 Service Manual © Copyright 2014 Polaris Industries Inc. -
Page 464
Remove front seat base assembly. 14. Remove four Torx T40 screws retaining the rear floor and remove the rear floor. 10.26 9925724 R01 — 2014-2015 RZR XP 1000 / RZR XP4 1000 Service Manual © Copyright 2014 Polaris Industries Inc. -
Page 465: Decal Replacement
2. Apply the decal on one edge first. Slowly lay down remainder of the decal while rubbing lightly over the decal surface to eliminate any air bubbles during the application. 10.27 9925724 R01 — 2014-2015 RZR XP 1000 / RZR XP4 1000 Service Manual © Copyright 2014 Polaris Industries Inc.
-
Page 466
BODY / FRAME NOTES 10.28 9925724 R01 — 2014-2015 RZR XP 1000 / RZR XP4 1000 Service Manual © Copyright 2014 Polaris Industries Inc. -
Page 467
…………..11.26 ECT SENSOR REPLACEMENT 11.1 9925724 R01 — 2014-2015 RZR XP 1000 / RZR XP4 1000 Service Manual © Copyright 2014 Polaris Industries Inc. -
Page 468
…………….11.52 CHARGING SYSTEM 11.2 9925724 R01 — 2014-2015 RZR XP 1000 / RZR XP4 1000 Service Manual © Copyright 2014 Polaris Industries Inc. -
Page 469: General Information
13 ft-lb (18 Nm) • Headlamp Switch • 12 Vdc Accessory Power Point • Ignition Switch • LED Ambiance Light 11.3 9925724 R01 — 2014-2015 RZR XP 1000 / RZR XP4 1000 Service Manual © Copyright 2014 Polaris Industries Inc.
-
Page 470: Instrument Cluster
NOTE: If the instrument cluster fails to illuminate, a battery over-voltage may have occurred and the instrument cluster may have shut off to protect the electronic speedometer. 11.4 9925724 R01 — 2014-2015 RZR XP 1000 / RZR XP4 1000 Service Manual © Copyright 2014 Polaris Industries Inc.
-
Page 471
Hours Indicator — Illuminates when Hours are being displayed on the Information Display Mode Button — Used to move through the menu features. 11.5 9925724 R01 — 2014-2015 RZR XP 1000 / RZR XP4 1000 Service Manual © Copyright 2014 Polaris Industries Inc. -
Page 472: Rider Information Display
TURF position (INT’L Model Only). 12. Neutral Gear Indicator — LED icon illuminates when gear selector is in the neutral (N) position. 11.6 9925724 R01 — 2014-2015 RZR XP 1000 / RZR XP4 1000 Service Manual © Copyright 2014 Polaris Industries Inc.
-
Page 473: Information Display Area
1. Toggle the MODE button to TRIP 1. Engine hours are logged anytime the engine is running. Total hours can not be reset. 11.7 9925724 R01 — 2014-2015 RZR XP 1000 / RZR XP4 1000 Service Manual © Copyright 2014 Polaris Industries Inc.
-
Page 474
(Standard 12-hour / Metric-24 hour). To set the clock, follow these steps: 7. Toggle the MODE button until the odometer is displayed. 11.8 9925724 R01 — 2014-2015 RZR XP 1000 / RZR XP4 1000 Service Manual © Copyright 2014 Polaris Industries Inc. -
Page 475
When the park brake is fully engaged, “BRAKE” appears in the rider information display. Engine speed is limited to 1500 RPM in all gears, except 11.9 9925724 R01 — 2014-2015 RZR XP 1000 / RZR XP4 1000 Service Manual © Copyright 2014 Polaris Industries Inc. -
Page 476: Diagnostic Mode
MODE button to toggle until “CK ENG” displays on the information display area. 2. Press and hold the MODE button to enter the diagnostics code menu. 11.10 9925724 R01 — 2014-2015 RZR XP 1000 / RZR XP4 1000 Service Manual © Copyright 2014 Polaris Industries Inc.
-
Page 477
NOTE: If there is a diagnostic problem with the power steering system, the power steering MIL will illuminate and blink in place of the check engine MIL. 11.11 9925724 R01 — 2014-2015 RZR XP 1000 / RZR XP4 1000 Service Manual © Copyright 2014 Polaris Industries Inc. -
Page 478: Instrument Cluster Removal
Only remove the rubber mount if instrument cluster. necessary. The bezel is a snap-on assembly and is a serviceable part. 11.12 9925724 R01 — 2014-2015 RZR XP 1000 / RZR XP4 1000 Service Manual © Copyright 2014 Polaris Industries Inc.
-
Page 479: Switches
4. For switch replacement, refer to Chapter 9 “Brakes”. NOTE: Pins 7 and 8 provide power and ground to light the switch lamp. 11.13 9925724 R01 — 2014-2015 RZR XP 1000 / RZR XP4 1000 Service Manual © Copyright 2014 Polaris Industries Inc.
-
Page 480: Ignition (Key) Switch
• Turn the ignition key to START. There should be should be no continuity between any pins. continuity between switch pins A and B; C and D. 11.14 9925724 R01 — 2014-2015 RZR XP 1000 / RZR XP4 1000 Service Manual © Copyright 2014 Polaris Industries Inc.
-
Page 481: Transmission (Gear Position) Switch
WHEN MEASURED AT POSITION SWITCH TERMINALS A AND B HIGH 24 Ω 75 Ω 160 Ω 300 Ω PARK 620 Ω 11.15 9925724 R01 — 2014-2015 RZR XP 1000 / RZR XP4 1000 Service Manual © Copyright 2014 Polaris Industries Inc.
-
Page 482: Seat Belt Switch
2. Using a multi-meter, measure between both pins on switch. SEAT BELT SEAT BELT DISENGAGED ENGAGED Measure between both ∞ (OL) < 1 Ω pins on switch 11.16 9925724 R01 — 2014-2015 RZR XP 1000 / RZR XP4 1000 Service Manual © Copyright 2014 Polaris Industries Inc.
-
Page 483: All Wheel Drive Coil
80% of all electrical issues are caused by bad/failed connections and grounds. 11.17 9925724 R01 — 2014-2015 RZR XP 1000 / RZR XP4 1000 Service Manual © Copyright 2014 Polaris Industries Inc.
-
Page 484: Vehicle Speed Sensor
4. Be sure connections are good and 9V battery is in good condition. If the light flashes, the sensor is good. 11.18 9925724 R01 — 2014-2015 RZR XP 1000 / RZR XP4 1000 Service Manual © Copyright 2014 Polaris Industries Inc.
-
Page 485: Ignition Coil
4. Install the new ignition coil and/or high tension lead (s). Ignition Coil Retaining Bolt: 75 in-lbs (8.5 Nm) 11.19 9925724 R01 — 2014-2015 RZR XP 1000 / RZR XP4 1000 Service Manual © Copyright 2014 Polaris Industries Inc.
-
Page 486: Ignition Coil Tests
7.0 k Ω ± 5% (PTO) Lead Caps Secondary Between High Tension 7.4 k Ω ± 5% (MAG) Lead Caps Primary Test Secondary Test 11.20 9925724 R01 — 2014-2015 RZR XP 1000 / RZR XP4 1000 Service Manual © Copyright 2014 Polaris Industries Inc.
-
Page 487: Lighting System
5. Adjust the beam to the desired position by loosening or tightening the three T-25 adjustment screws and moving the lamp to the appropriate height. 11.21 9925724 R01 — 2014-2015 RZR XP 1000 / RZR XP4 1000 Service Manual © Copyright 2014 Polaris Industries Inc.
-
Page 488: Headlamp Replacement
(see Chapter 10 – Front Bumper XP, page 10.19). 11.22 9925724 R01 — 2014-2015 RZR XP 1000 / RZR XP4 1000 Service Manual © Copyright 2014 Polaris Industries Inc.
-
Page 489: Headlamp Installation
6. Connect headlamp electrical connector to the headlamp assembly. 7. Perform the “Headlight Adjustment” procedure as shown in this chapter. 11.23 9925724 R01 — 2014-2015 RZR XP 1000 / RZR XP4 1000 Service Manual © Copyright 2014 Polaris Industries Inc.
-
Page 490: Dash Light
Dash Light The LED light will remain ON for approximately 30 seconds after key has been switched to the OFF position. 11.24 9925724 R01 — 2014-2015 RZR XP 1000 / RZR XP4 1000 Service Manual © Copyright 2014 Polaris Industries Inc.
-
Page 491: Cooling System
11.25 9925724 R01 — 2014-2015 RZR XP 1000 / RZR XP4 1000 Service Manual © Copyright 2014 Polaris Industries Inc.
-
Page 492: Ect Sensor Test
243 Ω ± 6% system (see Chapter 3 – Cooling System Bleeding Procedure, page 3.18). 212 °F (100 °C) 186 Ω ± 6% 11.26 9925724 R01 — 2014-2015 RZR XP 1000 / RZR XP4 1000 Service Manual © Copyright 2014 Polaris Industries Inc.
-
Page 493: Fuse / Relay Box
20-amp circuit breaker protects the fan motor circuit. Two separate relays located under the dash operate the headlights and the “flash to pass” function on INT’L models. 11.27 9925724 R01 — 2014-2015 RZR XP 1000 / RZR XP4 1000 Service Manual © Copyright 2014 Polaris Industries Inc.
-
Page 494: Fuse Box Detail
ELECTRICAL Fuse Box Detail 11.28 9925724 R01 — 2014-2015 RZR XP 1000 / RZR XP4 1000 Service Manual © Copyright 2014 Polaris Industries Inc.
-
Page 495: Relay Operation
Provides 12 Vdc power for EFI Red / Dark Blue system circuits. FAN RELAY provides power to the following system: • Fan Motor 11.29 9925724 R01 — 2014-2015 RZR XP 1000 / RZR XP4 1000 Service Manual © Copyright 2014 Polaris Industries Inc.
-
Page 496
Yellow in order to operate high beam headlights momentarily. “Normally closed” relay output to Dark Green operate low-beam headlights. 11.30 9925724 R01 — 2014-2015 RZR XP 1000 / RZR XP4 1000 Service Manual © Copyright 2014 Polaris Industries Inc. -
Page 497: Charging System
5. With lights and other electrical loads off, the “break even” point should occur at approximately 1500 RPM or lower. 11.31 9925724 R01 — 2014-2015 RZR XP 1000 / RZR XP4 1000 Service Manual © Copyright 2014 Polaris Industries Inc.
-
Page 498: Charging System Stator (Alternator) Tests
2. Measure the resistance value of each of the stator legs to ground: Y1 to Ground, Y2 to Ground, Y3 to Ground. 11.32 9925724 R01 — 2014-2015 RZR XP 1000 / RZR XP4 1000 Service Manual © Copyright 2014 Polaris Industries Inc.
-
Page 499: Stator (Alternator) Replacement
It is mounted under the LH panel divider. 11.33 9925724 R01 — 2014-2015 RZR XP 1000 / RZR XP4 1000 Service Manual © Copyright 2014 Polaris Industries Inc.
-
Page 500: Charging System Testing Flow Chart
Whenever charging system problems are suspected, proceed with the following system check after verifying that all wires are in good condition, connected and not exposed or pinched. 11.34 9925724 R01 — 2014-2015 RZR XP 1000 / RZR XP4 1000 Service Manual © Copyright 2014 Polaris Industries Inc.
-
Page 501: Battery
Circuit Voltage Test, page 11.36). 5. Charge the battery as recommended (see Chapter 11 – Charging Procedure , page 11.37). 11.35 9925724 R01 — 2014-2015 RZR XP 1000 / RZR XP4 1000 Service Manual © Copyright 2014 Polaris Industries Inc.
-
Page 502: Battery Removal / Installation
The following are two tests which can easily be made on a sealed Maintenance Free battery to determine its condition: OCV Test and a Load Test. 11.36 9925724 R01 — 2014-2015 RZR XP 1000 / RZR XP4 1000 Service Manual © Copyright 2014 Polaris Industries Inc.
-
Page 503: Load Test
Polaris MDX-610P Bosch PN: PU-50296 11.37 9925724 R01 — 2014-2015 RZR XP 1000 / RZR XP4 1000 Service Manual © Copyright 2014 Polaris Industries Inc.
-
Page 504: Starting System
• Faulty starter drive • Faulty starter drive gears or starter motor gear • Faulty flywheel gear or loose flywheel 11.38 9925724 R01 — 2014-2015 RZR XP 1000 / RZR XP4 1000 Service Manual © Copyright 2014 Polaris Industries Inc.
-
Page 505: Starter Motor Removal
NOTE: The (-) negative battery cable is mounted to the engine using the upper starter mounting bolt / stud. 6. Remove the starter from the engine. 11.39 9925724 R01 — 2014-2015 RZR XP 1000 / RZR XP4 1000 Service Manual © Copyright 2014 Polaris Industries Inc.
-
Page 506: Starter Solenoid Bench Test
“ELECTRICAL SYSTEM BREAOUTS: Starter-Interlock” provided in this chapter for starter solenoid operation. Condition: Starter fails to turn over the engine. 11.40 9925724 R01 — 2014-2015 RZR XP 1000 / RZR XP4 1000 Service Manual © Copyright 2014 Polaris Industries Inc.
-
Page 507: Electronic Power Steering (Eps)
Engine Controller, but not the Power Steering Controller, while using Digital Wrench®. NOTE: DO NOT SPLICE OR CUT INTO THE CAN CIRCUITS. 11.41 9925724 R01 — 2014-2015 RZR XP 1000 / RZR XP4 1000 Service Manual © Copyright 2014 Polaris Industries Inc.
-
Page 508: Eps System Breakout
ELECTRICAL EPS System Breakout 11.42 9925724 R01 — 2014-2015 RZR XP 1000 / RZR XP4 1000 Service Manual © Copyright 2014 Polaris Industries Inc.
-
Page 509: Eps Troubleshooting (Power Steering Non-Functional With Mil On)
ELECTRICAL EPS Troubleshooting (Power Steering Non-Functional with MIL ON) 11.43 9925724 R01 — 2014-2015 RZR XP 1000 / RZR XP4 1000 Service Manual © Copyright 2014 Polaris Industries Inc.
-
Page 510: Eps Troubleshooting (Power Steering Non-Functional With Mil Off)
ELECTRICAL EPS Troubleshooting (Power Steering Non-Functional with MIL OFF) 11.44 9925724 R01 — 2014-2015 RZR XP 1000 / RZR XP4 1000 Service Manual © Copyright 2014 Polaris Industries Inc.
-
Page 511: Eps Troubleshooting (Using Digital Wrench®)
ELECTRICAL EPS Troubleshooting (Using Digital Wrench®) 11.45 9925724 R01 — 2014-2015 RZR XP 1000 / RZR XP4 1000 Service Manual © Copyright 2014 Polaris Industries Inc.
-
Page 512: Electrical System Breakout Diagrams
ELECTRICAL ELECTRICAL SYSTEM BREAKOUT DIAGRAMS 11.46 9925724 R01 — 2014-2015 RZR XP 1000 / RZR XP4 1000 Service Manual © Copyright 2014 Polaris Industries Inc.
-
Page 513: Vehicle Speed Sensor
ELECTRICAL Vehicle Speed Sensor 11.47 9925724 R01 — 2014-2015 RZR XP 1000 / RZR XP4 1000 Service Manual © Copyright 2014 Polaris Industries Inc.
-
Page 514: Cooling System
ELECTRICAL Cooling System 11.48 9925724 R01 — 2014-2015 RZR XP 1000 / RZR XP4 1000 Service Manual © Copyright 2014 Polaris Industries Inc.
-
Page 515: Unswitched Chassis Power
ELECTRICAL Unswitched Chassis Power 11.49 9925724 R01 — 2014-2015 RZR XP 1000 / RZR XP4 1000 Service Manual © Copyright 2014 Polaris Industries Inc.
-
Page 516: Key-On Battery Power
ELECTRICAL Key-On Battery Power 11.50 9925724 R01 — 2014-2015 RZR XP 1000 / RZR XP4 1000 Service Manual © Copyright 2014 Polaris Industries Inc.
-
Page 517: Lights
ELECTRICAL Lights 11.51 9925724 R01 — 2014-2015 RZR XP 1000 / RZR XP4 1000 Service Manual © Copyright 2014 Polaris Industries Inc.
-
Page 518: Charging System
ELECTRICAL Charging System 11.52 9925724 R01 — 2014-2015 RZR XP 1000 / RZR XP4 1000 Service Manual © Copyright 2014 Polaris Industries Inc.
-
Page 519
Assembly View ……….3.17 Rear…………..9.29 Bleeding Procedure……….3.18 Removal (Front) ……….9.19 Coolant Strength and Type……..2.26 Brake Pedal Hoses…………..2.27 IX.1 9925724 R01 — 2014-2015 RZR XP 1000 / RZR XP4 1000 Service Manual © Copyright 2014 Polaris Industries Inc. -
Page 520
Connecting Rod Bearing Selection …… 3.63 Assembly…………5.25 Cooling System Troubleshooting ……3.90 Assembly View ……….5.17 Crankcase Assembly………. 3.71 IX.2 9925724 R01 — 2014-2015 RZR XP 1000 / RZR XP4 1000 Service Manual © Copyright 2014 Polaris Industries Inc. -
Page 521
Fan Control Circuit Bypass Test ……11.25 Removal…………10.20 Fan Control Circuit Operation ……. 11.25 Hood / Front Body……….10.10 Final Drive IX.3 9925724 R01 — 2014-2015 RZR XP 1000 / RZR XP4 1000 Service Manual © Copyright 2014 Polaris Industries Inc. -
Page 522
Model Number Designation ……..1.2 Radiator Removal / Installation ……… 3.14 Radiator Inspection / Cleaning …….. 2.28 Valve Clearance Adjustment ……. 3.84 IX.4 9925724 R01 — 2014-2015 RZR XP 1000 / RZR XP4 1000 Service Manual © Copyright 2014 Polaris Industries Inc. -
Page 523
Seat Belt…………11.16 Brakes…………..9.3 Switches Clutching …………. 5.2 AWD/2WD …………11.14 EFI…………..4.3 Gear Position ……….. 11.15 Electrical …………11.3 IX.5 9925724 R01 — 2014-2015 RZR XP 1000 / RZR XP4 1000 Service Manual © Copyright 2014 Polaris Industries Inc. -
Page 524
Instrument Cluster (ETC) ……..4.40 Troubleshooting Brake Noise …………9.5 Brake System ………… 9.40 Clutch…………..5.37 Cooling System……….3.90 Engine…………… 3.89 Fuel Injector…………4.20 IX.6 9925724 R01 — 2014-2015 RZR XP 1000 / RZR XP4 1000 Service Manual © Copyright 2014 Polaris Industries Inc. -
Page 525
2014 RZR XP 1000 (Chassis) -
Page 526
2014 RZR XP 1000 (Chassis) -
Page 528
2014 RZR XP 1000 / XP4 1000 (Box) -
Page 529
2014 RZR XP 1000 INT’L (Chassis) -
Page 530
2014 RZR XP 1000 INT’L (Chassis) -
Page 531
2014 RZR XP 1000 INT’L (Box) -
Page 532
2015 RZR XP4 1000 (Chassis) -
Page 533
2015 RZR XP4 1000 (Chassis) -
Page 534
2015 RZR XP 1000 (Chassis) -
Page 535
2015 RZR XP 1000 (Chassis) -
Page 536
2015 RZR XP 1000 / XP4 1000 (Box) -
Page 537
2015 RZR XP 1000 INT’L (Chassis) -
Page 538
2015 RZR XP 1000 INT’L (Chassis) -
Page 539
2015 RZR XP 1000 INT’L (Box)
инструкцияPolaris RZR RS1 MD (2020)

2020
OWNER’S MANUAL
RZR® RS1 MD
Посмотреть инструкция для Polaris RZR RS1 MD (2020) бесплатно. Руководство относится к категории без категории, 1 человек(а) дали ему среднюю оценку 8.2. Руководство доступно на следующих языках: английский. У вас есть вопрос о Polaris RZR RS1 MD (2020) или вам нужна помощь? Задайте свой вопрос здесь
- 9930796r02_covers
- 9930796r02_text
- 9930796r02_covers
Нужна помощь?
У вас есть вопрос о Polaris а ответа нет в руководстве? Задайте свой вопрос здесь Дай исчерпывающее описание проблемы и четко задайте свой вопрос. Чем детальнее описание проблемы или вопроса, тем легче будет другим пользователям Polaris предоставить вам исчерпывающий ответ.
Количество вопросов: 0

Главная
Не можете найти ответ на свой вопрос в руководстве? Вы можете найти ответ на свой вопрос ниже, в разделе часто задаваемых вопросов о Polaris RZR RS1 MD (2020).
Инструкция Polaris RZR RS1 MD (2020) доступно в русский?
Не нашли свой вопрос? Задайте свой вопрос здесь
ДОБРО ПОЖАЛОВАТЬ Мы признательны вам за приобретение продукции нашей компании и рады приветствовать во всемирном клубе любителей техники Polaris. Обязательно посетите наш веб-сайт www.brandtpolaris.ru, чтобы узнать о последних новостях, новых продуктах, предстоящих событиях, возможности карьерного
POLARIS® и RZR® являются зарегистрированными торговыми марками POLARIS Industries Inc. Copyright 2012 POLARIS Sales Inc. Весь материал в этом издании основан на самой последней информации, доступной на момент издания. Поскольку конструкция и качество выпускаемых нами компонентов непрерывно
СОДЕРЖАНИЕ Введение . . . . . . . . . . . . . . . . . . . . . . . . . . . . . . 4 Безопасность . . . . . . . . . . . . . . . . . . . . . . . . . . 7 Органы управления, узлы и механизмы . . 25 Эксплуатация . . . . . . . . . . . . . . . . . . . . . . . . . 46 Лебедка . . . . . . . . . . . . . . . . .
ВВЕДЕНИЕ Мотовездеход RZR НЕ предназначен для эксплуатации на автомобильных дорогах общего пользования (по дорогам общей сети). Мотовездеход RZR подлежит регистрации в органах Гостехнадзора. Перед началом эксплуатации транспортного средства изучите все местные правила и законы, регламентирующие
ВВЕДЕНИЕ ВНИМАНИЕ Пренебрежение указаниями в данном Руководстве пользователя может привести к серьезным повреждениям квадроцикла, личным травмам и даже смерти. Транспортное средство Polaris не игрушка, и при неправильной эксплуатации может представлять серьезную опасность. Управляемость
ВВЕДЕНИЕ Идентификационные номера Запишите идентификационные номера вашего мотовездехода и номер ключа. Храните запасной ключ в надежном месте. Дубликат ключа зажигания выдается по заказу с использованием бланка для ключа Polaris (используйте номер вашего ключа) и предъявления действующего ключа.
Обучение по безопасности БЕЗОПАСНОСТЬ Прохождение обучения по безопасному вождению — это приоритетное требование Polaris. Polaris настоятельно рекомендует всем пользователям транспортных средств пройти специальное обучение. Рекомендации по прохождению специального обучения всегда можно получить у
БЕЗОПАСНОСТЬ Экипировка водителя Водитель и все пассажиры всегда должны носить шлем, защитные очки, перчатки, куртку с длинными рукавами, длинные брюки, прочные высокие ботинки, а также пристегиваться ремнем безопасности. Защитная экипировка снижает вероятность получения травмы. Длинные рукава
Экипировка водителя БЕЗОПАСНОСТЬ Защита глаз Не пользуйтесь обычными или солнцезащитными очками для защиты глаз. При движении на транспортном средстве Polaris всегда носите защитные очки или шлем с защитным стеклом. Polaris рекомендует использовать защитную экипировку с маркировкой персональных
БЕЗОПАСНОСТЬ Предупредительные таблички и их расположение На корпусе транспортного средства прикреплены таблички с важной информацией, касающейся вашей безопасности. Внимательно прочитайте и тщательно выполняйте приведенные на табличках инструкции и другие предупреждения. Если содержание табличек
БЕЗОПАСНОСТЬ Предупредительные таблички и их расположение Ремень безопасности/Ответственность водителя ВНИМАНИЕ Неправильная эксплуатация транспортного средства может привести к СЕРЬЕЗНОЙ ТРАВМЕ, АВАРИИ или СМЕРТИ. Будьте готовы • Пристегнитесь ремнями безопасности. • Всегда использовать защитный
БЕЗОПАСНОСТЬ Предупредительные таблички и их расположение Предупреждение о надлежащем использовании Переключение передач Предупреждения о надлежащем использовании (RZR) ВНИМАНИЕ Необходимо соблюдать правила эксплуатации Ваша ответственность для предупреждения травм: • Не допускайте небрежного или
БЕЗОПАСНОСТЬ Предупредительные таблички и их расположение Предупреждение о каркасе безопасности для задних пассажиров (RZR 4) Предупреждение о каркасе безопасности для пассажиров (с обеих сторон) ВНИМАНИЕ Не используйте каркас безопасности в качестве поручня. Руки и кисти могут быть серьезно
БЕЗОПАСНОСТЬ Предупредительные таблички ВНИМАНИЕ Пренебрежение предостережениями может привести к потере управления, повреждениям техники, личным травмам или смерти. Обращайте внимание на все предупреждения по технике безопасности, изложенные в данном разделе инструкции по эксплуатации и
БЕЗОПАСНОСТЬ Предупредительные таблички Пренебрежение проверкой состояния транспортного средства перед эксплуатацией Пренебрежение проверкой состояния мотовездехода перед эксплуатацией и нарушение технологии обслуживания мотовездехода повышает вероятность возникновения аварий и несчастных случаев.
БЕЗОПАСНОСТЬ Предупредительные таблички Перевозка пассажиров (RZR 4) Перевозка пассажиров запрещена до получения опыта эксплуатации как минимум в течение 2 часов и до момента прохождения нового курса начинающего водителя на стр. 52-53. Во время езды пассажиры должны находиться на сиденьях и быть
Предупредительные таблички Перевозка пассажиров в кузове БЕЗОПАСНОСТЬ Перевозка пассажиров в кузове может привести к падению или контакту с движущимися частями. Никогда не перевозите пассажира в кузове. Во время езды пассажиры должны находиться на сиденьях и быть пристегнуты ремнями безопасности.
БЕЗОПАСНОСТЬ Предупредительные таблички Неправильная техника выполнения поворота Неправильная техника выполнения поворота может привести к потере контроля над транспортным средством, и как следствие, опрокидыванию или столкновению. При выполнении поворота следуйте инструкциям, приведенным в
БЕЗОПАСНОСТЬ Предупредительные таблички Неправильное пересечение склона и выполнение поворота на склоне Не рекомендуется двигаться вдоль склона. Неправильное движение по склону может привести к потере управления. Старайтесь не двигаться вдоль склона. При движении поперек склона следуйте
БЕЗОПАСНОСТЬ Предупредительные таблички Неправильная техника движения задним ходом Неправильная техника движения задним ходом может привести к наезду на человека или препятствие. При движении задним ходом действуйте так, как рекомендовано настоящим Руководством пользователя. См. стр. 60. Перед
Предупредительные таблички Движение по глубокой воде БЕЗОПАСНОСТЬ Движение по глубокой воде или в быстром водном потоке может привести к всплыванию колес, что приведет к потере сцепления, утрате контроля над транспортным средством и в результате – к аварии или несчастному случаю. Никогда не
БЕЗОПАСНОСТЬ Предупредительные таблички Перегрузка транспортного средства Перегрузка мотовездехода, нарушение правил перевозки или буксировки груза приводит к ухудшению управляемости, возникновению аварии или несчастного случая. • При перевозке груза или буксировке прицепа всегда следуйте
Предупредительные таблички Отработавшие газы БЕЗОПАСНОСТЬ Отработавшие газы ядовиты и могут привести к травме или смерти за короткий период времени. Никогда не запускайте двигатель в закрытых помещениях. Запускайте двигатель только на открытом воздухе или в хорошо проветриваемом помещении. Нагретые
БЕЗОПАСНОСТЬ Предупредительные таблички Модификации оборудования Все транспортные средства Polaris спроектированы так, чтобы при правильной эксплуатации обеспечить безопасность водителя. Изменение конструкции может негативно повлиять на управляемость и стабильность. Не изменяйте конструкцию,
ОРГАНЫ УПРАВЛЕНИЯ, УЗЛЫ И МЕХАНИЗМЫ Расположение основных элементов Поручень для заднего пассажира Защитные сетки Поручень для переднего пассажира Грузовой короб (кузов) Рычаг Крышка топливного бака Боковые дуги Точки крепления груза Расширители бортов (только RZR/RZR EPS) 25
ОРГАНЫ УПРАВЛЕНИЯ, УЗЛЫ И МЕХАНИЗМЫ Расположение основных элементов Защитный каркас Руль Багажное отделение (под капотом) Передние фары Радиатор Защитная решетка Задние фонари Приемник фаркопа Приемная часть фаркопа Данное транспортное средство укомплектовано приемной частью для фаркопа. Остальное
ОРГАНЫ УПРАВЛЕНИЯ, УЗЛЫ И МЕХАНИЗМЫ Задняя панель Задняя панель расположена за сиденьями. Для доступа к задней панели снимите сиденья. Для доступа к двигателю и вариатору необходимо снять саму заднюю панель. Доступ к радиатору/Снятие решетки вариатора Для чистки радиатора переднюю решетку можно
ОРГАНЫ УПРАВЛЕНИЯ, УЗЛЫ И МЕХАНИЗМЫ Руль Рулевая колонка может регулироваться в вертикальном положении для удобства водителя. Для регулировки руля нажмите и удерживайте регулировочный рычаг, отрегулируйте руль, затем отпустите регулировочный рычаг. Отпустите регулировочный рычаг, после установки
ОРГАНЫ УПРАВЛЕНИЯ, УЗЛЫ И МЕХАНИЗМЫ Капот Для доступа к багажному отделению, пробку радиатора и расширительного бачка охлаждающей жидкости, необходимо снять крышку капота. 1. Если ваше транспорБагажный ящик (Модели LE) тного средства оснащено верхними креплениями капота, снимите их, повернув на 1/4
ОРГАНЫ УПРАВЛЕНИЯ, УЗЛЫ И МЕХАНИЗМЫ Крышка топливного бака Заливная горловина топливного бака расположена справа, рядом с пассажирским сиденьем. Пользуйтесь неэтилированным бензином с октановым числом не ниже 95. Не используйте бензин с содержанием этанола более чем 10%, такой как Е85. Защитные
ОРГАНЫ УПРАВЛЕНИЯ, УЗЛЫ И МЕХАНИЗМЫ Ремни безопасности Ваш мотовездеход Polaris оснащен трехточечными ремнями безопасности водителя и пассажира. Перед началом движения убедитесь, что водитель и все пассажиры пристегнуты ремнями. Для правильной подгонки ремня следуйте рекомендациям: 1. Протяните 3-х
ОРГАНЫ УПРАВЛЕНИЯ, УЗЛЫ И МЕХАНИЗМЫ Переключатели Замок зажигания Переключатель фар Цифровой прибор Выключатель системы полного привода AWD Источник питания 12 В Источники питания 12В Ваш мотовездеход оснащен одним или несколькими источниками питания 12В. Ода розетка располагается на приборной
ОРГАНЫ УПРАВЛЕНИЯ, УЗЛЫ И МЕХАНИЗМЫ Переключатели Замок зажигания Замок зажигания имеет 3 положения. Для запуска двигателя поверните ключ зажигания. Процедура запуска двигателя указана на стр. 50. Ключ можно вынуть из замка зажигания только в положении OFF. ВЫКЛ Двигатель выключен. Электросистема
ОРГАНЫ УПРАВЛЕНИЯ, УЗЛЫ И МЕХАНИЗМЫ Рычаг КПП P: Парковочная передача R: Реверс N: Нейтральная передача L: Понижающая передача H: Повышающая передача Во избежание поломки трансмиссии переключайте передачи только при нажатой педали тормоза и холостых оборотах двигателя. Не пытайтесь переключать
ОРГАНЫ УПРАВЛЕНИЯ, УЗЛЫ И МЕХАНИЗМЫ Педаль тормоза Для уменьшения скорости или остановки машины нажмите педаль тормоза. Нажмите педаль тормоза при пуске двигателя. Педаль газа Педаль тормоза Для увеличения оборотов двигателя нажмите педаль акселератора. Отпущенную Педаль газа педаль пружина
ОРГАНЫ УПРАВЛЕНИЯ, УЗЛЫ И МЕХАНИЗМЫ Система полного привода (AWD) Система полного привода управляется переключателем 4X4 switch. Транспортное средство находится в режиме заднего привода, если AWD переключатель находится в положении 2X4. Когда переключатель находится в положении 4X4, у транспортного
ОРГАНЫ УПРАВЛЕНИЯ, УЗЛЫ И МЕХАНИЗМЫ Цифровой прибор ПРИМЕЧАНИЕ: Струя воды под высоким давлением может повредить некоторые детали транспортного средства. Мойте квадроцикл вручную с использованием слабого мыльного раствора. Некоторые химические составы при попадании на цифровой прибор, пластик или
ОРГАНЫ УПРАВЛЕНИЯ, УЗЛЫ И МЕХАНИЗМЫ Цифровой прибор Контрольные лампы Лампа Индикатор Скорость Условие При выборе стандартного режима, скорость будет показана в милях в час. При выборе метрического режима, скорость будет показана в км/ч. Перегрев Эта лампа мигает для индикации состояния перегрева
ОРГАНЫ УПРАВЛЕНИЯ, УЗЛЫ И МЕХАНИЗМЫ Цифровой прибор Информационный центр Информационный дисплей расположен в центральной части цифрового прибора. Все сегменты информационного центра включаться на несколько секунд при включении зажигания. В случае, если сегменты не включаются при включении
ОРГАНЫ УПРАВЛЕНИЯ, УЗЛЫ И МЕХАНИЗМЫ Цифровой прибор Информационный центр 2. Уровень топлива — Сегменты указывают уровень топлива в баке. Когда последний сегмент очистится, включится индикатор низкого уровня топлива Все элементы дисплея будут мигать. Немедленно заправьтесь топливом. Подсказка: Если
ОРГАНЫ УПРАВЛЕНИЯ, УЗЛЫ И МЕХАНИЗМЫ Цифровой прибор Информационный центр Используйте кнопку MODE для переключения между режимами дисплея. Единицы измерения (Стандарт США/ Метрические) Дисплей может выводить данные в любых из указанных выше единицах измерения. Кнопка MODE Подсказка: Для выхода из
ОРГАНЫ УПРАВЛЕНИЯ, УЗЛЫ И МЕХАНИЗМЫ Цифровой прибор Информационный центр Часы Подсказка: Часы сохраняют настройки до тех пор, пока аккумулятор не будет отсоединен или разряжен. 1. Переведите ключ в положение «ON». Используйте кнопку MODE для переключения дисплея в режим одометра. 2. Нажмите и
ОРГАНЫ УПРАВЛЕНИЯ, УЗЛЫ И МЕХАНИЗМЫ Цифровой прибор Информационный центр Режим одометра Одометр фиксирует полный пробег. Режим счетчика суточного пробега Счетчик суточного пробега фиксирует пробег за поездку при условии обнуления перед поездкой. Для сброса выберите режим счетчика суточного пробега.
ОРГАНЫ УПРАВЛЕНИЯ, УЗЛЫ И МЕХАНИЗМЫ Цифровой прибор Информационный центр Программируемые сервисные интервалы Как только наработка двигателя сравняется со значением запрограммированного межсервисного интервала, начнет мигать индикатор в виде гаечного ключа в течение 5 секунд при запуске двигателя,
ОРГАНЫ УПРАВЛЕНИЯ, УЗЛЫ И МЕХАНИЗМЫ Цифровой прибор Информационный центр Коды ошибок Предполагаемый номер Номер кода Индикация ошибок возпараметра (SPN) можна только когда акти- неисправности вен индикатор CHECK ENGINE или он включается-выключается в течение одного цикла включенного зажигания. Коды
ЭКСПЛУАТАЦИЯ ВНИМАНИЕ Пренебрежение предостережениями может привести к потере управления, повреждениям техники, телесным повреждениям или смерти. Соблюдайте все правила безопасности, изложенные в данном разделе Руководства пользователя. Обкатка Периодом обкатки нового транспортного средства Polaris
ЭКСПЛУАТАЦИЯ Обкатка Обкатка двигателя и ходовой части 1. Залейте топливо в бак. См. стр. 30. Соблюдайте следующие правила предосторожности при заправке топливом. 2. Проверьте уровень масла. См. стр. 85. При необходимости долейте масло до требуемого уровня. 3. Новички и неопытные водители должны
ЭКСПЛУАТАЦИЯ Проверки перед поездкой Пренебрежение проверкой состояния мотовездехода перед эксплуатацией и нарушение технологии обслуживания мотовездехода повышает вероятность возникновения аварий и несчастных случаев. Обязательно проверяйте состояние вашего транспортного средства перед каждой
ЭКСПЛУАТАЦИЯ Практика безопасной эксплуатации 1. Обратитесь к дилеру. Перед началом эксплуатации пройдите курс по безопасному управлению транспортным средством. 2. Не позволяйте детям младше 16 лет и лицам без действующего водительского удостоверения использовать данное транспортное средство. 3.
ЭКСПЛУАТАЦИЯ Запуск двигателя 1. Установите транспортное средство на ровной площадке. 2. Сядьте в водительское сиденье и пристегните ремень безопасности. Зафиксируйте боковые защитные сетки. 3. Включите парковочную передачу. 4. Нажмите на педаль тормоза. Не нажимайте педаль газа во время пуска
Парковка транспортного средства ЭКСПЛУАТАЦИЯ 1. Остановите транспортное средство на ровной поверхности. При остановке внутри помещения, убедитесь в наличии достаточной вентиляции и отсутствии поблизости источника открытого пламени или искр, включая электроприборы в режиме ожидания. 2. Включите
ЭКСПЛУАТАЦИЯ Курс начинающего водителя 1. Перед эксплуатацией мотовездехода, необходимо ознакомиться с данным Руководством пользователя и предупредительными табличками. 2. Обратитесь к дилеру. Обратитесь к дилеру. 3. Выполните предэксплуатационные проверки. См. стр. 48. 4. Не перевозите пассажира,
Курс начинающего водителя ЭКСПЛУАТАЦИЯ 13. Нажмите на тормоз и включите понижающую передачу. 14. Осмотрите окружающую местность и спланируйте траекторию движения. 15. Удерживая руль обеими руками, отпустите педаль тормоза и плавно и осторожно нажмите на педаль акселератора для начала движения. 16.
ЭКСПЛУАТАЦИЯ Езда с пассажиром 1. Новички и неопытные водители должны пройти специальный курс обучения перед тем как эксплуатировать данный мотовезедход. См. стр. 52-53. 2. Выполните предэксплуатационные проверки. См. стр. 48. 3. Запрещается перевозка более одного пассажира в 2-местных транспортных
ЭКСПЛУАТАЦИЯ Движение по скользким поверхностям При движении по скользким поверхностям значительно снизьте скорость и будьте чрезвычайно осторожны, чтобы не допустить пробуксовки колес, заноса и потери управления. Если Вы двигаетесь по скользким грунтам (грязь, песок, снег и т.д.), следуйте
ЭКСПЛУАТАЦИЯ Движение вверх по склону При движении вверх по склону следуйте инструкциям: 1. Перед началом подъема внимательно исследуйте рельеф местности. Не пытайтесь преодолеть скользкие склоны. 2. Избегайте чрезмерно крутых холмов. При необходимости подъема на склон включите полный привод (AWD)
Движение поперек склона ЭКСПЛУАТАЦИЯ Не рекомендуется двигаться вдоль склона. Неправильное движение по склону может привести к потере управления. Старайтесь не двигаться вдоль склона. В случае, если вам необходимо проехать поперек склона: 1. Включите полный привод (AWD). 2. Двигайтесь с малой
ЭКСПЛУАТАЦИЯ Преодоление водных преград Ваше транспортное средство Polaris может двигаться по водоему с максимальной глубиной, при которой пол находится выше уровня воды. При пересечении водной преграды соблюдайте следующие правила: 1. Определите глубину и направление потока. Уровень пола 2.
Преодоление препятствий ЭКСПЛУАТАЦИЯ Следуйте инструкциям при преодолении препятствий: 1. Изучите все препятствия на местности перед началом эксплуатации транспортного средства. 2. Научитесь «читать» характер местности. Постоянно будьте готовы к появлению препятствий в виде бревен, камней,
ЭКСПЛУАТАЦИЯ Движение задним ходом При движении задним ходом соблюдайте следующие правила: 1. Всегда проверяйте наличие препятствий или людей позади транспортного средства. 2. Плавно нажимайте на педаль газа. При движении задним ходом не нажимайте резко на рычаг дроссельной заслонки. 3. Двигайтесь
Парковка на склоне ЭКСПЛУАТАЦИЯ Неуправляемый мотовездеход может причинить ущерб имуществу или стать причиной травмы или гибели людей. Не останавливайте транспортное средство на наклонной поверхности. Если вы вынуждены остановиться на склоне, соблюдайте следующие правила: 1. Включите парковочную
ЭКСПЛУАТАЦИЯ Перевозка грузов ВНИМАНИЕ Нарушение правил перевозки груза приводит к потере контроля над машиной и ухудшению эффективности торможения, что, как правило, заканчивается серьезными травмами, увечьями или гибелью людей. Соблюдайте правила техники безопасности при транспортировке грузов:
Перевозка грузов ЭКСПЛУАТАЦИЯ Мотовездеход RANGER разработан с определенными максимальными тяговыми характеристиками и характеристиками грузоподъемности. При движении с грузом снизьте скорость и обеспечьте достаточный тормозной путь. Центр тяжести груза должен находиться как можно ниже, груз должен
ЭКСПЛУАТАЦИЯ Перевозка грузов Буксировка грузов ВНИМАНИЕ Нарушение правил буксировки приводит к потере контроля над машиной и ухудшению эффективности торможения, что, как правило, заканчивается серьезными травмами, увечьями или гибелью людей. Соблюдайте при буксировке следующие правила техники
РУКОВОДСТВО ПО ИСПОЛЬЗОВАНИЮ ЛЕБЕДКИ Данные правила безопасности и инструкции применимы при условии, если на вашем транспортном средстве установлена лебедка, или если вы хотите установить лебедку самостоятельно. ВНИМАНИЕ Неправильная эксплуатация лебедки может привести к СЕРЬЕЗНЫМ ТРАВМАМ или
РУКОВОДСТВО ПО ИСПОЛЬЗОВАНИЮ ЛЕБЕДКИ Меры предосторожности 10. Для фиксации транспортного средства при поднятии грузов с помощью лебедки необходимо использовать стояночный тормоз и/или парковочный механизм. При необходимости используйте упоры для колес. 11. Транспортное средство и лебедка должны
РУКОВОДСТВО ПО ИСПОЛЬЗОВАНИЮ ЛЕБЕДКИ Меры предосторожности 18. Никогда не отпускайте стопор лебедки, если трос находится под нагрузкой. 19. Использовать лебедку для подъема или транспортировки людей запрещается. 20. Использовать лебедку для подъема и подвешивания груза в вертикальном положении
РУКОВОДСТВО ПО ИСПОЛЬЗОВАНИЮ ЛЕБЕДКИ Эксплуатация лебедки Перед началом использования лебедки ознакомьтесь с разделом «Меры предосторожности» на предыдущих страницах Руководства. Подсказка: Изучите теоретические правила использования лебедки перед ее практическим применением. ВНИМАНИЕ Неправильная
РУКОВОДСТВО ПО ИСПОЛЬЗОВАНИЮ ЛЕБЕДКИ Эксплуатация лебедки 4. Используйте крюк только вместе со стропой. ВНИМАНИЕ! Никогда не прикасайтесь к крюку лебедки. Это может привести к серьезным травмам. A. Закрепите груз с помощью крюка или используйте буксиНЕТ ДА ровочный трос или цепь для прикрепления
РУКОВОДСТВО ПО ИСПОЛЬЗОВАНИЮ ЛЕБЕДКИ Эксплуатация лебедки 5. Никогда не снимайте стропу с крюка. 6. Отпустите стопор лебедки и размотайте трос. 7. Всегда отматывайте трос на возможно большее расстояние. Помните, что наибольшее тяговое усилие получается на первых витках (слоях) троса, уменьшаясь с
РУКОВОДСТВО ПО ИСПОЛЬЗОВАНИЮ ЛЕБЕДКИ Эксплуатация лебедки 11. Одновременное движение транспортного средства и работа лебедки возможно только в случае вытягивания самого себя. Для избежания ударной нагрузки на трос запрещается буксировка рывками. См. раздел «Ударная нагрузка» на стр. 74. Для вашей
РУКОВОДСТВО ПО ИСПОЛЬЗОВАНИЮ ЛЕБЕДКИ Эксплуатация лебедки 14. Во время использования лебедки мотор лебедки может нагреться. Если вы осуществляете поднятие груза более 45 секунд, или мотор лебедки глохнет во время использования, прекратите работу и дайте лебедке остыть в течение 10 минут, а после
РУКОВОДСТВО ПО ИСПОЛЬЗОВАНИЮ ЛЕБЕДКИ Уход за тросом лебедки В целях вашей безопасности разрешается производить замену деталей лебедки POLARIS (в т.ч. троса) только оригинальными запчастями POLARIS, доступными у официального дилера POLARIS. ВНИМАНИЕ! Использование порванного или поврежденного троса
РУКОВОДСТВО ПО ИСПОЛЬЗОВАНИЮ ЛЕБЕДКИ Ударная нагрузка ВНИМАНИЕ! Трос вашей лебедке достаточно сильный, но он НЕ предназначен для динамической или «ударной» нагрузки. Ударная нагрузка может привести к перегрузке троса с последующим обрывом. Обрыв троса под высокой нагрузкой может привести к
РУКОВОДСТВО ПО ИСПОЛЬЗОВАНИЮ ЛЕБЕДКИ Правила безопасности и техническое обслуживание лебедки ВНИМАНИЕ! Ненадлежащее обслуживание лебедки может привести к СЕРЬЕЗНЫМ ТРАВМАМ или СМЕРТИ. Соблюдайте все правила безопасности и инструкции по эксплуатации лебедки, указанные в данном разделе. 1. Перед
ЗАЩИТА ОКРУЖАЮЩЕЙ СРЕДЫ Система шумоподавления Самостоятельное изменение конструкции двигателя, системы впуска и системы выпуска выхлопных газов ЗАПРЕЩЕНО! Уровень шума соответствует требованиям 40 CFR 205, а также местным нормам. Система контроля вредных выбросов Картер двигателя выполнен по
ТЕХНИЧЕСКОЕ ОБСЛУЖИВАНИЕ Регламент технического обслуживания В этом разделе приведена справочная информация. Для поддержания гарантии ЗАПРЕЩАЕТСЯ самостоятельно выполнять любые регулировки и производить ремонтные работы. По всем вопросам, связанным с техническим обслуживанием вашего транспортного
ТЕХНИЧЕСКОЕ ОБСЛУЖИВАНИЕ Регламент технического обслуживания Расшифровка символов Символ Описание ► Выполняйте эти операции более часто для транспортных средств, которые эксплуатируются в тяжелых условиях. E Обслуживание компонентов влияющих на чистоту отработавших газов. D Обращайтесь
ТЕХНИЧЕСКОЕ ОБСЛУЖИВАНИЕ Регламент технического обслуживания Необходимо производить операции в соответствие с рекомендациями по периодичности проведения, в зависимости от того, что наступит ранее. Элемент Периодичность (что наступит ранее) Часы Период Примечание Мили (Kм) Рулевое управление — —
ТЕХНИЧЕСКОЕ ОБСЛУЖИВАНИЕ Регламент технического обслуживания Элемент Периодичность (что наступит ранее) Примечание Часы Период Мили (Kм) ► Тросик привода E дросселя/ 50 ч 6 Месяцев 300 (500) Проверьте, при необходимости замените E Корпус дросселя, 50 ч 6 Месяцев 300 (500) Проверьте герметичность
ТЕХНИЧЕСКОЕ ОБСЛУЖИВАНИЕ Регламент технического обслуживания Элемент Периодичность (что наступит ранее) Примечание Часы Период ► Радиатор 100 ч 12 Месяцев 1000 (1600) Проверьте; очистите внешнюю поверхность ► Шланги системы охлаждения. 100 ч 12 Месяцев 1000 (1600) Проверьте отсутствие утечек. ►
ТЕХНИЧЕСКОЕ ОБСЛУЖИВАНИЕ Инструкция по смазке Проверяйте и смазывайте все компоненты через интервалы, указанные в регламенте технического обслуживания на стр. 77, или чаще при эксплуатации в тяжелых условиях. Позиции, не перечисленные в регламенте — через общий интервалы смазки аналогичных узлов.
ТЕХНИЧЕСКОЕ ОБСЛУЖИВАНИЕ Рекомендации по смазке RZR Втулки стабилизатора RZR S/RZR 4 Втулки рычагов RZR 4 Втулки стабилизатора RZR Втулки рычагов RZR S/RZR 4 Втулки рычагов 83
ТЕХНИЧЕСКОЕ ОБСЛУЖИВАНИЕ Масло двигателя Требования к моторному маслу Polaris рекомендует использовать масло Polaris PS-4 Full Synthetic 5W-50 4-cycle. При использовании масел других производителей гарантия POLARIS теряет силу. Используйте только оригинальное масло Polaris. ВНИМАНИЕ! Эксплуатация
Масло двигателя ТЕХНИЧЕСКОЕ ОБСЛУЖИВАНИЕ Выполняйте периодическое техническое обслуживание в соответствии с интервалами, указанными в таблице регламента технического обслуживания, начинающейся на стр. 77. Используйте только рекомендованное масло. Уровень масла Подсказка: В зависимости от угла
ТЕХНИЧЕСКОЕ ОБСЛУЖИВАНИЕ Масло двигателя Замена масла и фильтра Меняйте масло в соответствии с интервалами, указываемыми в таблице регламента технического обслуживания, начинающейся на стр. 77. При замене масла необходимо заменять масляный фильтр. Сливная пробка расположена в нижней части картера.
ТЕХНИЧЕСКОЕ ОБСЛУЖИВАНИЕ Масло двигателя Замена масла и фильтра 8. С помощью специального ключа открутите фильтр. Вращайте фильтр против часовой стрелки для того, чтобы его снять. 9. Используя чистую ткань, очистите посадочное место фильтра. 10. Смажьте уплотнительное кольцо нового фильтра свежим
ТЕХНИЧЕСКОЕ ОБСЛУЖИВАНИЕ Трансмиссия Раздаточная коробка Выполняйте периодическое техническое обслуживание в соответствии с интервалами, указываемыми в таблице регламента технического обслуживания, начинающейся на стр. 77. За информацией по рекомендованному маслу и спецификациями, обратитесь к
ТЕХНИЧЕСКОЕ ОБСЛУЖИВАНИЕ Трансмиссия Раздаточная коробка Замена жидкости Сливная пробка расположена на дне коробки. В защите днища предусмотрено специальное отверстие для доступа к сливной пробке. 1. Снимите заливную пробку. 2. Расположите емкость для использованного масла под сливной пробкой. 3.
ТЕХНИЧЕСКОЕ ОБСЛУЖИВАНИЕ Трансмиссия Трансмиссия (Главная коробка передач) Выполняйте периодическое техническое обслуживание в соответствии с интервалами, указываемыми в таблице регламента технического обслуживания, начинающейся на стр. 77. За информацией по рекомендованному маслу и спецификациями,
ТЕХНИЧЕСКОЕ ОБСЛУЖИВАНИЕ Трансмиссия Трансмиссия (Главная коробка передач) Замена жидкости Для поддержания гарантии на транспортное средство замену масла в коробке передач должен производить дилер. Сливная пробка расположена на дне коробки передач. В защите днища предусмотрено специальное отверстие
ТЕХНИЧЕСКОЕ ОБСЛУЖИВАНИЕ Трансмиссия Жидкость Demand Drive (Передний редуктор) Выполняйте периодическое техническое обслуживание в соответствии с интервалами, указываемыми в таблице регламента технического обслуживания, начинающейся на стр. 77. За информацией по рекомендованному маслу и
ТЕХНИЧЕСКОЕ ОБСЛУЖИВАНИЕ Трансмиссия Масло заднего редуктора Выполняйте периодическое техническое обслуживание в соответствии с интервалами, указываемыми в таблице регламента технического обслуживания, начинающейся на стр. 77. За информацией по рекомендованному маслу и спецификациями, обратитесь к
ТЕХНИЧЕСКОЕ ОБСЛУЖИВАНИЕ Трансмиссия Спецификации элементов трансмиссии Использование других жидкостей приведет к неверной работе узла. На стр. 136 указаны каталожные номера продуктов POLARIS. Коробка Масло Трансмиссия AGL Gearcase (Главная коробка Lubricant & передач) Transmission Fluid
ТЕХНИЧЕСКОЕ ОБСЛУЖИВАНИЕ Свечи зажигания Снятие и замена свечей зажигания 1. Снимите оба сиденья. 2. Снимите заднюю панель. См. стр. 27. 3. Снимите наконечник со свечи зажигания. 4. Свечным ключом снимите свечи вращая их против часовой стрелки. 5. Для установки новой свечи зажигания повторите
ТЕХНИЧЕСКОЕ ОБСЛУЖИВАНИЕ Предохранители В случае, если двигатель выключается и более не запускается, если электроусилитель (если есть) перестал функционировать, или если мели место электрические проблемы, возможно необходима замена предохранителя. Выявите и устраните короткое замыкание цепей,
Предохранители ТЕХНИЧЕСКОЕ ОБСЛУЖИВАНИЕ Монтажный блок предохранителей расположен над электроусилителем. Запасные предохранители поставляются в монтажном блоке. 1. С левой стороны квадроцикла обнаружьте и откройте два фиксатора крышки монтажного блока. 2. Сдвиньте монтажный блок вправо, для того,
ТЕХНИЧЕСКОЕ ОБСЛУЖИВАНИЕ Система охлаждения ЭКСПЛУАТАЦИЯ Уровнем охлаждающей жидкости управляет специальная система. В эту систему входят расширительный бачок, горловина радиатора, клапан сброса давления в крышке и соединительный шланг. При тепловом расширении охлаждающей жидкости, ее часть
ТЕХНИЧЕСКОЕ ОБСЛУЖИВАНИЕ Система охлаждения Радиатор и вентилятор Выполняйте периодическое техническое обслуживание в соответствии с интервалами, указанными в таблице регламента технического обслуживания, начинающейся на стр. 77. Не нарушайте воздушный поток через радиатор установкой нештатных
ТЕХНИЧЕСКОЕ ОБСЛУЖИВАНИЕ Система охлаждения Уровень охлаждающей жидкости Выполняйте периодичеМодель LE ское техническое обслуживание в соответствии с интервалами, указанными в таблице регламента технического обслуживания, начинающейся на стр. 77. Поддерживайте уровень охлаждающей жидкости между
Вариатор (PVT) ТЕХНИЧЕСКОЕ ОБСЛУЖИВАНИЕ ВНИМАНИЕ Не соблюдение инструкций приведенных ниже может привести к серьезным травмам или смерти. Не вносите изменений в конструкцию вариатора. Это может уменьшить его прочность и привести к повреждению. Компоненты этой системы точно отбалансированы. Любое
ТЕХНИЧЕСКОЕ ОБСЛУЖИВАНИЕ Вариатор (PVT) Замена ремня/Очистка При выходе из строя ремня вариатора всегда очищайте элементы вариатора и моторный отсек от останков ремня. ВНИМАНИЕ! Если не удалить все остатки старого ремня при его замене, это может привести к повреждению транспортного средства, потере
ТЕХНИЧЕСКОЕ ОБСЛУЖИВАНИЕ Воздушный фильтр Меняйте масло в соответствии с интервалами, указанными в таблице регламента технического обслуживания, начинающейся на стр. 77. Крышка воздушного 1. Воздушный короб распокороба ложен за левым задним колесом. Прокладка 2. Снимите крышку воздушного фильтра и
ТЕХНИЧЕСКОЕ ОБСЛУЖИВАНИЕ Пламегаситель ВНИМАНИЕ • Пренебрежение рекомендациями в данном разделе может привести к серьезной травме или гибели. • Не производите очистку пламегасителя сразу же после выключения двигателя, т.к. система выпуска будет сильно нагрета. Возможны серьезные ожоги при контакте
ТЕХНИЧЕСКОЕ ОБСЛУЖИВАНИЕ Система привода дроссельной заслонки ВНИМАНИЕ Пренебрежение проверкой и своевременным техническим обслуживанием дроссельной заслонки может привести к заклиниванию рычага акселератора во время движения. Эксплуатация транспортного средства с неисправным приводом дроссельной
ТЕХНИЧЕСКОЕ ОБСЛУЖИВАНИЕ Система привода дроссельной заслонки Корпус дросселя/Холостой ход Холостые обороты выставляются производителем. При ухудшении качества холостого хода, обратитесь к дилеру Polaris. Регулировка свободного хода. 1. Снимите оба сиденья. Снимите заднюю панель. См. стр. 27.
ТЕХНИЧЕСКОЕ ОБСЛУЖИВАНИЕ Тормозная система Передние и задние тормоза — дисковые гидравлические, управляются педалью тормоза. См. стр. 35. Перед эксплуатацией всегда проверяйте уровень тормозной жидкости и ход педали тормоза. При нажатии педаль тормоза должна оказывать заметное сопротивление.
ТЕХНИЧЕСКОЕ ОБСЛУЖИВАНИЕ Тормозная система Тормозная жидкость Перед эксплуатацией всегда проверяйте уровень тормозной жидкости. При понижении уровня тормозной жидкости доливайте только жидкость DOT4. На стр. 136 указаны каталожные номера продуктов POLARIS. ВНИМАНИЕ! После открытия флакона тормозной
ТЕХНИЧЕСКОЕ ОБСЛУЖИВАНИЕ Тормозная система Проверка тормозной системы 1. Проверьте тормозную систему на отсутствие утечек. 2. Проверьте, не увеличен ли ход педали тормоза и не «проваливается» ли рычаг. 3. Проверьте состояние тормозных колодок на предмет износа, повреждений. 4. Проверьте тормозные 1
ТЕХНИЧЕСКОЕ ОБСЛУЖИВАНИЕ Проверка рулевого управления Проверяйте систему выпуска на предмет отсутствия износа или повреждений с периодичностью, установленной в Таблице «Регламент технического обслуживания» на стр. 77. 1. Расположите технику на ровной поверхности. 2. Немного поверните руль налево
ТЕХНИЧЕСКОЕ ОБСЛУЖИВАНИЕ Регулировка подвески (RZR и RZR S — базовые модели) Передняя и задняя подвеска имеют регулировку предварительной затяжки с пятью положениями на каждом колесе. Изначальная регулировка соответствует самому мягкому положению. Это положение подходит для для большинства условий.
ТЕХНИЧЕСКОЕ ОБСЛУЖИВАНИЕ Регулировка подвески (RZR S Premium и RZR 4) Предварительная затяжка пружины переднего/заднего амортизатора Заводская регулировка подходит для для большинства условий. При условии установки на мотовездеходе защитных пластин, дополнительная регулировка не требуется. При
ТЕХНИЧЕСКОЕ ОБСЛУЖИВАНИЕ Регулировка подвески (RZR S Premium и RZR 4) Предварительная затяжка пружины переднего/заднего амортизатора 1. Поднимите транспортное средство так, чтобы подвеска полностью разгрузилась. 2. Ослабьте фиксирующую гайку и переместите ее от регулятора. 3. Вращайте регулятор
ТЕХНИЧЕСКОЕ ОБСЛУЖИВАНИЕ Регулировка подвески (RZR S Premium и RZR 4 Premium) Регулировка хода сжатия аморУменьшить Увеличить тизаторов Регулировочная ручка амортизатора расположена в верхней части корпуса. Поворот ручки по часовой стрелки до упора соответствует самой жесткой настройке. 1. Для
Шины ТЕХНИЧЕСКОЕ ОБСЛУЖИВАНИЕ ВНИМАНИЕ Эксплуатация транспортного средства с изношенными шинами увеличивает вероятность заноса, ведущего к потере управления и смертельным травмам. Шины с глубиной протектора 3 мм и менее должны быть немедленно заменены. Ненадлежащее внутренне давление и применение
ТЕХНИЧЕСКОЕ ОБСЛУЖИВАНИЕ Шины Снятие колеса. Расположите технику на ровной поверхности. Включите парковочную передачу. Выключите двигатель. Немного отпустите гайки колеса. Поднимите сторону рамы и подставьте подставку под часть рамы в районе подножки. 5. Отверните колесные гайки и шайбы. Снимите
Фары ТЕХНИЧЕСКОЕ ОБСЛУЖИВАНИЕ Не используйте это транспортное средство в ночное время или в условиях ограниченного освещения, пока не замените фары. Убедитесь, что фары правильно отрегулированы. Подсказка: В случае наличия в фаре LED влаги, отсоедините разъем проводки от фары на несколько дней пока
ТЕХНИЧЕСКОЕ ОБСЛУЖИВАНИЕ Фары Регулировка дальнего света фар. 7.6 м x x 20 см 1. Установите транспортное средство ровной горизонтальной площадке перед вертикальной стеной на расстоянии 7,6 метра от стены. Включите парковочную передачу. 2. Измерьте расстояние от земли до центра фары и сделайте
Фары Стоп-сигнал ТЕХНИЧЕСКОЕ ОБСЛУЖИВАНИЕ При нажатии на педаль включается индикатор стоп-сигналов. Проверяйте исправность стоп-сигналов перед каждой поездкой. 1. Включите зажигание. 2. Нажмите на педаль тормоза. Стоп- сигналы должны включится в течение первых 10 мм хода педали. При отсутствии
ТЕХНИЧЕСКОЕ ОБСЛУЖИВАНИЕ Батарея ВНИМАНИЕ Электролит батареи ядовит. Он содержит серную кислоту. При контакте с кислотой возможны серьезные ожоги кожи глаз и повреждение одежды. Противодействие поражающим факторам кислоты: Внешнее: Смойте большим количеством воды. Внутреннее: Выпейте большое
Батарея ТЕХНИЧЕСКОЕ ОБСЛУЖИВАНИЕ ВНИМАНИЕ Неправильное подключение кабелей батареи или их ненадежное подключение может привести к взрыву, что приведет к травмам или смерти. При снятии батареи всегда отсоединяйте черный кабель первым. При установке батареи всегда подсоединяйте черный (отрицательный)
ТЕХНИЧЕСКОЕ ОБСЛУЖИВАНИЕ Батарея Установка батареи Использование нового, не полностью заряженного аккумулятора может повредить аккумулятор и сократить срок его службы. Это также может нарушить работу машины. Перед установкой аккумулятора, зарядите его в соответствии с указаниями на стр. 124. 1.
ТЕХНИЧЕСКОЕ ОБСЛУЖИВАНИЕ Батарея Хранение батареи Если транспортное средство не используется более трех месяцев, снимите с него аккумуляторную батарею, убедитесь, что она полностью заряжена, и храните ее в защищенном от солнечных лучей прохладном сухом месте. Во время хранения ежемесячно проверяйте
ТЕХНИЧЕСКОЕ ОБСЛУЖИВАНИЕ Батарея Зарядка батареи (обслуживаемая батарея) 1. Снимите аккумулятор с транспортного средства для предотвращения повреждений из-за возможной утечки электролита в процессе зарядки. См. стр. 121. 2. Заряжайте аккумулятор током не более, чем 1/10 от емкости ампер/час
ТЕХНИЧЕСКОЕ ОБСЛУЖИВАНИЕ Батарея Зарядка батареи (Герметичная батарея) Проверьте состояние аккумулятора до и через 1-2 часа после окончания зарядки. Время заряда (Используя зарядное устройство постоянного тока @ нормальный зарядный ток, указанный на батарее) Состояние зарядки Напряжение Действие
ТЕХНИЧЕСКОЕ ОБСЛУЖИВАНИЕ Очистка и хранение Мойка Чистка не только придает транспортному средству опрятный, привлекательный внешний вид, но и продлевает срок его эксплуатации. Перед мойкой, обнаружьте заборник для вентиляции вариатора над правым задним крылом. Избегайте попадания воды в этот
ТЕХНИЧЕСКОЕ ОБСЛУЖИВАНИЕ Очистка и хранение Мойка При использовании мойки автомобильного типа с водой, подаваемой под высоким давлением, будьте особенно осторожны. Возможно повреждение окрашенных кузовных панелей, и предупредительных табличек. Не направляйте струю на следующие элементы: •
ТЕХНИЧЕСКОЕ ОБСЛУЖИВАНИЕ Очистка и хранение Уход за хромированными колесными дисками (при наличии) Правильный уход защищает хромированные колеса от коррозии и продлевает срок их службы. Ваш мотовездеход всегда будет выглядеть как новый. Подсказка: Дороги, обработанные солевыми составами (или
ТЕХНИЧЕСКОЕ ОБСЛУЖИВАНИЕ Очистка и хранение Рекомендации по хранению ПРИМЕЧАНИЕ: Не запускайте двигатель во время хранения, чтобы не разрушить защитную пленку, созданную при обработке двигателя защитным составом. Не запускайте двигатель, находящийся на консервации. Наружная очистка После проведения
ТЕХНИЧЕСКОЕ ОБСЛУЖИВАНИЕ Очистка и хранение Рекомендации по хранению Осмотр и смазка Осмотрите все тросы, нанесите на них смазку. Места нанесения смазки инструкции по применению универсальной смазки Polaris Premium приведены в настоящем Руководстве на стр. 77. Обработка двигателя защитным составом
ТЕХНИЧЕСКОЕ ОБСЛУЖИВАНИЕ Очистка и хранение Введение в эксплуатацию после хранения 1. Проверьте уровень электролита и при необходимости зарядите аккумулятор. Установите его в транспортное средство. Убедитесь, что трубка вентиляции правильно проложена и не имеет перегибов. 2. Убедитесь, что свеча
СПЕЦИФИКАЦИИ RZR / RZR S Максимально разрешенная масса Сухой вес Тест GVW — защита при опрокидывании система ROSP Грузоподъемность кузова Максимальная грузоподъемность: Вертикальная нагрузка на фаркоп Вертикальная нагрузка на фаркоп Запас топлива Объем масла Заправочный объем системы охлаждения
СПЕЦИФИКАЦИИ RZR / RZR S Система смазки Тип трансмиссии Схема переключения КПП Передаточное число — L Передаточное число — R Передаточное число — H Главная передача — Перед Главная передача — Перед Размер шин — Перед Размер шин — Зад Давление в шинах Тормозная система Передние фары Задние фонари
СПЕЦИФИКАЦИИ RZR 4 Максимально разрешенная масса Сухой вес Тест GVW — защита при опрокидывании (ROPS) Грузоподъемность кузова Максимальная грузоподъемность: Вертикальная нагрузка на фаркоп Вертикальная нагрузка на фаркоп Запас топлива Объем масла Заправочный объем системы охлаждения Объем масла в
СПЕЦИФИКАЦИИ RZR 4 Система смазки Тип трансмиссии Схема переключения КПП Передаточное число — L Передаточное число — R Передаточное число — H Главная передача — Перед Главная передача — Перед Размер шин — Перед Размер шин — Зад Давление в шинах — Перед Давление в шинах — Зад Тормозная система
ПРОДУКЦИЯ POLARIS Артикул 2870791 2876244 2876245 2878920 2878919 2878068 2878069 2877922 2877923 2870465 2871534 2871323 2871312 2871322 2871423 2876160 2872276 2871460 2871515 2871551 2871329 2871326 2870652 2872189 2871956 2859044 136 Описание Масло двигателя Fogging Oil (12 oz./355 мл Aerosol)
ПОИСК И УСТРАНЕНИЕ НЕИСПРАВНОСТЕЙ Износ приводного ремня Возможная причина Погрузка транспортного средства в кузов пикапа или на прицеп на повышающей передаче Решение Во избежание нагрева ремня включите пониженную передачу при погрузке транспортного средства. Троганье с места на склоне Используйте
ПОИСК И УСТРАНЕНИЕ НЕИСПРАВНОСТЕЙ Двигатель не проворачивается Возможная причина Решение Низкий заряд батареи Подзарядите аккумулятор до напряжения 12.8 В пост. тока Плохой контакт аккумулятора Проверьте и подтяните все соединения. Плохой контакт реле Проверьте и подтяните все соединения. Ослабли
ПОИСК И УСТРАНЕНИЕ НЕИСПРАВНОСТЕЙ Детонация в двигателе Возможная причина Решение Низкое качество или низкое октановое число топлива Неверное опережение зажигания Неверный зазор или температурный диапазон свечи Замените рекомендованным топливом Обратитесь к дилеру Установите зазор согласно
ПОИСК И УСТРАНЕНИЕ НЕИСПРАВНОСТЕЙ Двигатель глохнет или не выдает мощность Возможная причина Нет топлива Пережата или заблокирована магистраль вентиляции топливного бака Вода в топливе Загрязнены/неисправны свечи зажигания Изношены или неисправны высоковольтные провода Неверный зазор или
ГАРАНТИЯ Ограниченная гарантия POLARIS обеспечивает ОГРАНИЧЕННУЮ ГАРАНТИЮ сроком 1 год на все узлы транспортного средства POLARIS в отношении дефектов материала и изготовления. Polaris гарантирует соответствие пламегасителя требованиям USFS 5100-1c в течение как минимум 1000 моточасов наработки при
ГАРАНТИЯ Ограничения гарантийных обязательств и возмещений Данная гарантия не покрывает повреждения или неполадки, вызванные нарушением правил эксплуатации, авариями, пожаром или любыми другими причинами, за исключением производственных дефектов, дефектов материалов, а также не распространяется на
ГАРАНТИЯ Порядок получения гарантийного обслуживания Если ваш мотовездеход требует гарантийного обслуживания, Вы должны обратиться к дилеру Polaris, имеющему право на ремонт транспортных средств Polaris. Чтобы запросить гарантийное обслуживание, необходимо представить дилеру вашу копию гарантийной
ГАРАНТИЯ ВЫВОЗИМАЯ ТЕХНИКА ПРИ ОТСУТСТВИИ СПЕЦИАЛЬНЫХ ТРЕБОВАНИЙ ЗАКОНА ГАРАНТИЯ НЕ РАСПРОСТРАНЯЕТСЯ НА ТЕХНИКУ, ЭКСПЛУАТИРУЮЩУЮСЯ В СТРАНАХ, ОТЛИЧНЫХ ОТ СТРАНЫ ПРИОБРЕТЕНИЯ У ОФИЦИАЛЬНОГО ДИЛЕРА POLARIS. Эта политика не распространяется на технику поставляемую через официальную Дилерскую сеть
ГАРАНТИЯ США Ограниченная гарантия по отсутствию превышению уровня вредных выбросов EPA Эта гарантия устанавливается в дополнение к стандартной гарантии Polaris. Polaris Industries Inc. гарантирует, что на момент изначальной покупки это сертифицированное транспортное средство разработано, построено
ГАРАНТИЯ США Ограниченная гарантия по отсутствию превышению уровня вредных выбросов EPA Данные устройства оказывают влияние на вредные выбросы вследствие испарения топлива: • • • • • • • • • Топливный бак Крышка топливного бака Топливные магистрали Коннекторы топливной магистрали Хомуты Клапаны
ГАРАНТИЯ США Ограниченная гарантия по отсутствию превышению уровня вредных выбросов EPA Владельцы несут ответственность за своевременное прохождение технического обслуживания в соответствие с регламентом приведенным в Руководстве Пользователя и замену расходных элементов по мере необходимости
ЖУРНАЛ ТЕХНИЧЕСКОГО ОБСЛУЖИВАНИЯ Используется для отметок о прохождении технического обслуживания. Дата 148 Миль / Км или Моточасов ТЕХНИК КОММЕНТАРИИ
ЖУРНАЛ ТЕХНИЧЕСКОГО ОБСЛУЖИВАНИЯ Дата Миль / Км или Моточасов ТЕХНИК КОММЕНТАРИИ 149