• 14 •
Использование машины – Инструкция пользователя
5
ЧИСТКА И ТЕХНИЧЕСКОЕ
ОБСЛУЖИВАНИЕ
Некоторые компоненты вашего прибора контактируют с
водой и кофе в режиме обычного использования, поэтому
важно регулярно производить чистку машины.
Выполните эти операции до того, как ваш прибор перестанет
работать, поскольку в этом случае ремонт не покрывается
гарантией.
Внимание! Перед проведением любой опе-
рации по техническому обслуживанию и/или
очистке, необходимо выключить машину, отсоеди-
нить ее от электрической сети и дождаться пока она
остынет.
Очистка несъемных элементов и самой машины, если не
указано иначе, производится только холодной или теплой во-
дой с использованием неабразивной губки и влажной ткани.
• Производить очистку можно только в случае, если маши-
на охлаждена и отключена от сети.
• Для чистки прибора пользуйтесь мягкой влажной тряп-
кой.
• Не используйте прямые струи воды.
• Не погружайте машину в воду и не помещайте ее части в
посудомоечную машину.
• При очистке не пользуйтесь острыми предметами и
агрессивными химическими продуктами (растворителя-
ми).
• Для сушки машины и/или ее компонентов не пользуй-
тесь микроволновой и/или обычной печью.
• Все детали машины, подлежащие очистке, легкодоступ-
ны и не требуют применения приспособлений.
• Регулярное техническое обслуживание и очистка обеспе-
чивают и способствуют более длительной эффективной
работе машины, а также гарантируют соблюдение стан-
дартных санитарных норм.
Внимание! Очистка машины и ее компонентов
должна производиться еженедельно.
После определенного периода неиспользо-
вания необходимо произвести очистку и про-
мывку машины и ее компонентов
5.1
Очистка трубки горячей воды/пара
Очистка трубки для подачи горячей воды и пара производит-
ся снаружи при помощи влажной тряпки после каждого ис-
пользования и в любом случае не реже одного раза в неделю.
Внимание! Перед выполнением очистки убе-
дитесь, что трубка холодная; в противном слу-
чае существует риск получения ожогов.
5.2
Очистка контейнера для сбора отходов
Контейнер для сбора отходов необходимо освобождать и очи-
щать всякий раз после подачи машиной сигнала. Информация
по выполнению этой операции приведена в разделе 3.10.
5.3 Очистка поддона для сбора капель
Ежедневно освобождать поддон для сбора капель; эта опе-
рация должна выполняться даже в случае, когда поплавок
поднимается.
1
Достаньте поддон для сбора капель и контейнер для сбора
отходов, как описано в параграфе 3.10.
2
Вылейте жидкость из поддона для сбора капель и помойте
его.
3
Установите контейнер для сбора отходов и поддон для сбо-
ра капель на место.
-
Contents
-
Table of Contents
-
Troubleshooting
-
Bookmarks
Quick Links
02
Type SUP041EU
USER MANUAL
Read these operating instructions carefully before using the machine
Related Manuals for Saeco Lirika
Summary of Contents for Saeco Lirika
-
Page 1: User Manual
Type SUP041EU USER MANUAL Read these operating instructions carefully before using the machine…
-
Page 2
16 17 • 2 •… -
Page 3
• 3 •… -
Page 4
SAFETY INSTRUCTIONS from oil. Do not use the power cord to carry or pull the machine. Do not pull out the plug by the power cord or touch it with wet hands Never allow water to come into contact or feet. Do not let the power cord hang freely with any of the electrical parts of the ma- from tables or shelves. -
Page 5
damage or melt the machine housing. Do chine in a dry place, out of the reach of chil- not use in places where the temperature may dren. Keep it protected from dust and dirt. drop to a level equal to and/or lower than 0°C Repairs / Maintenance or higher than 40°C. -
Page 6: Table Of Contents
Machine Use — User Manual CONTENTS 1 GENERAL INFORMATION ……..7 1.1 Intended Use of the Machine ……….7 1.2 How to Read the Manual……….7 1.3 How to Use this User Manual ……..7 8 HANDLING AND STORAGE ……..33 1.4 Machine Identifi cation ……….7 8.1 Handling …………..33 1.5 Technical Specifi cations ……….8 8.2 Storage …………..33…
-
Page 7: General Information
Machine Use — User Manual Service Provider/Supply Operator: GENERAL INFORMATION Company or person responsible for normal ma- chine installation, start-up and suspension of Intended Use of the Machine service. On detecting machine failures, the Ser- This machine automatically brews: vice Provider should request the assistance of the — Coff ee and espresso coff ee using coff ee beans;…
-
Page 8: Technical Specifi Cations
Machine Use — User Manual Technical Specifi cations MACHINE COMPONENTS Note: The “key to components” includes all ma- Technical Specifi cations chine models; check which one matches your ma- Power Supply and Nominal Voltage-Power Rating chine. Certain functions may not be available. See data plate on the inside of the appliance door Water tank lid Machine Housing Material…
-
Page 9: Control Panel Description
Machine Use — User Manual Control Panel Description USING THE MACHINE Note: All possible controls are described here. Before using the machine, check that the water tank and the cof- Refer to the following sections for the operating fee bean hopper are fi lled and that the machine is properly clean. modes.
-
Page 10: Turning On The Machine
Machine Use — User Manual If the water tank is not inserted, check that no cof- Note: The progress bar indicates that the machine fee beans fall into the tank compartment. If this is performing the rinse cycle of the system. happens, remove them to avoid any malfunctions.
-
Page 11: Eco-Friendly: Stand-By
Machine Use — User Manual Eco-friendly: Stand-by Adjusting the Aroma (Coff ee Strength) The machine is designed for energy saving. The machine auto- Choose your favourite coff ee blend and adjust the amount of coff ee matically turns off after 30 minutes of inactivity. to be ground according to your personal taste.
-
Page 12: Adjusting The Coff Ee Length
Machine Use — User Manual by the machine; the display shows the 2 cups icon. When the “STOP” icon is displayed, press the “ ” button (18) as soon as the desired amount of coff ee is reached. Once the prebrewing cycle has been completed, coff ee begins to come out of the dispensing spout.
-
Page 13: Cappuccinatore
Machine Use — User Manual Inserting the Cappuccinatore Remove the drip tray. (Fig.13, page 3) Remove the coff ee grounds drawer and If the water dispensing spout is installed, remove it as shown empty out the coff ee grounds in a suitable container. in the fi gure: — Press the two side buttons to unlock it and lift it slightly;…
-
Page 14: Brewing A Cappuccino
Machine Use — User Manual Note: When the Cappuccinatore is not being used, 3.13 Brewing a Cappuccino hang the suction tube on the support on the left- The machine can dispense cappuccino quickly and easily with the touch of a button. hand side of the machine.
-
Page 15: Adjusting Cappuccino
Machine Use — User Manual Insert the suction tube into the milk container. Press the “ ” button (18) to stop frothed milk dispensing. Once frothed milk has been dispensed, the machine brews coff ee. Brewing can be stopped by pressing the “ ”…
-
Page 16: Dispensing Latte Macchiato
Machine Use — User Manual 3.15 Dispensing Latte Macchiato Place a cup under the Cappuccinatore. The machine can dispense Latte Macchiato quickly and easily with Press the “ ” button (18) to start dispensing. the touch of a button. The machine requires some preheating time. Danger of burning! Dispensing may be preceded by small jets of hot water.
-
Page 17: Adjusting Latte Macchiato
Machine Use — User Manual Insert the suction tube into the milk container. Press the “ ” button (18) to stop frothed milk dispensing. Once frothed milk has been dispensed, the machine brews coff ee. Brewing can be stopped by pressing the “ ”…
-
Page 18: Dispensing Hot Milk
Machine Use — User Manual 3.17 Dispensing Hot Milk Place a cup under the Cappuccinatore. The machine can dispense hot milk quickly. Press the “ ” button (18) to start dispensing. Danger of burning! Dispensing may be preceded by small jets of hot water. Wait until the end of The machine requires some preheating time.
-
Page 19: Adjusting Hot Milk
Machine Use — User Manual Make sure that the Cappuccinatore is correctly installed. The machine requires some preheating time. Once preheating has been completed, the machine starts dispensing frothed milk directly into the cup. Insert the suction tube into the milk container. Press the “…
-
Page 20: Dispensing Hot Water
Machine Use — User Manual 3.19 Dispensing Hot Water Press and hold the “ ” button (19) until the following screen is displayed: Danger of burning! Dispensing may be preceded by small jets of hot water and steam. Wait until the end of the cycle before removing the water dispens- ing spout.
-
Page 21: Quick Carafe Rinse Cycle
Machine Use — User Manual 3.20 Quick Carafe Rinse Cycle Press the “ ” button (23). The following screen is displayed: After one or more milk-based products have been prepared, the machine allows for a quick cleaning of the carafe ducts. This screen is displayed for 10 seconds to prompt you to execute the quick rinse cycle.
-
Page 22: Using The Machine With Credits
Machine Use — User Manual Press the “ ” button (19). The main screen is displayed. USING THE MACHINE WITH CREDITS Note: This option can be enabled or disabled by the service provider. The machine is designed to manage coff ee brewing by means of a credit system.
-
Page 23: Programming Machine Functions
Machine Use — User Manual Contrast Press the “ ” (18) and “ ” (20) buttons to increase or This function allows you to adjust the contrast of the display to decrease the value of the function. better view the messages. Once the value has been changed, the “OK”…
-
Page 24: Cleaning The Cappuccinatore
Machine Use — User Manual in a dishwasher. • Do not use sharp objects or harsh chemical products (sol- vents) for cleaning. • Do not dry the machine and/or its parts using a microwave and/or standard oven. • All parts requiring cleaning are easily accessible, so no tools are needed.
-
Page 25
Machine Use — User Manual Dispense water from the Cappuccinatore until clear water Remove the fi tting. fl ows out. Press the “ ” button (18) to stop dispensing. Clean the suction tube with a damp cloth. Weekly Cleaning of the Cappuccinatore The weekly cleaning is more thorough since all milk residues are removed from the dispensing spout. -
Page 26
Machine Use — User Manual Clean all the parts thoroughly with lukewarm water. Insert the fi tting into the tube of the Cappuccinatore. Insert the milk frothing device into the support. Insert the lower part into the fi tting. Insert the fi tting into the tube. Insert the lower part into the Cappuccinatore. -
Page 27
Insert the suction tube into the container. You need to perform a more thorough cleaning of the Cappuc- cinatore every month using the “Saeco Milk Circuit Cleaner”. The “Saeco Milk Circuit Cleaner” can be purchased separately. For further details, please refer to the maintenance products page in this user manual. -
Page 28
Machine Use — User Manual Press the “ ” button (18) to start dispensing. Press the “ ” button (24). The following screen is displayed: The machine requires some preheating time. Press the “ ” button (23). The following screen is displayed: Press the “… -
Page 29: Cleaning The Coff Ee Grounds Drawer
Machine Use — User Manual Cleaning the Coff ee Grounds Drawer Open the service door. The coff ee grounds drawer is to be emptied and cleaned when- ever indicated by the machine. To carry out this operation, refer to section 3.11. Cleaning the Drip Tray Empty and clean the drip tray every day.
-
Page 30
Machine Use — User Manual If they do not match, proceed as described in step (10). Remove the coff ee residues drawer and wash it thoroughly. Ensure that the lever is in contact with the brew group base. Clean the inside of the machine with a damp cloth. Make sure that the hook which locks the brew group is in Insert the coff ee residues drawer in its seat and ensure that the correct position;… -
Page 31: Machine Warnings
Machine Use — User Manual MACHINE WARNINGS This chapter describes all the warning messages that the machine may display to the user and the actions that can and/ or must be performed by the user. Warning Signals How to Reset the Message The machine is warming up to brew beverages or dispense hot water.
-
Page 32
Machine Use — User Manual Warning Signals (Red Colour) How to Reset the Message Insert the drip tray and the coff ee grounds drawer into the machine and close the service door. Fill the coff ee bean hopper. This icon appears for 5 seconds, from when the machine detects that there is no more coff ee to be ground. -
Page 33: Handling And Storage
Machine Installation — Service Provider Manual HANDLING AND INSTALLATION STORAGE All the operations described in chapter 9 must be performed exclusively by the service provider All the operations described in chapter 8 must or a specialised technician, who shall organise be performed exclusively by the service provider all the operating steps and use only suitable means to en- or a specialised technician, who shall organise…
-
Page 34
Machine Installation — Service Provider Manual — be used if damaged; — Use the machine in explosive or harsh — be handled with damp or wet hands; environments, or with high concentra- — be wound in a coil when the machine tions of dust or oily substances sus- is in use;… -
Page 35: Stop Functions
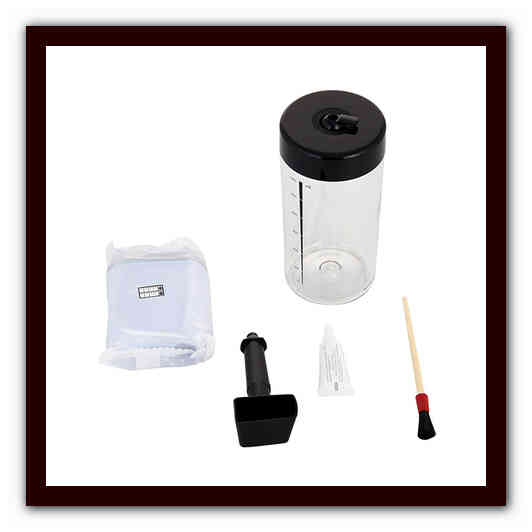
Machine Installation — Service Provider Manual Stop Functions Descaling solution: to remove limescale build-up in the water circuit caused by normal The machine can be stopped by means of the power button. use. List of Accessories 9.3.1 List of Accessories Supplied Manual: instructions on how to use the ma- «Intenza +»…
-
Page 36: Disposal Of Packaging
Machine Installation — Service Provider Manual The following illustration shows the required access distances: Rotate the support 90° until it is properly positioned. • to the keypad on the front of the appliance; • to the service units in the event of malfunction. Disposal of Packaging After opening the outer box, it is recommended that the packag- ing materials are separated according to type and disposed of in…
-
Page 37: Filling The Coff Ee Bean Hopper
Machine Installation — Service Provider Manual Filling the Coff ee Bean Hopper Turning on/off the Machine Before turning on the machine, check that the hopper contains The machine can be turned on/off by pressing the button located enough coff ee beans. to the rear of the machine (Fig.02, page 3).
-
Page 38: Measuring And Adjusting Water Hardness
Machine Installation — Service Provider Manual The machine will brew coff ee through the dispensing spout Fill the water tank again up to the MAX level. (Fig.11, page 3); wait until the procedure has been completed and empty the container. The machine is now ready for use.
-
Page 39: Intenza+» Water Filter
Water is a key element for a good espresso coff ee. Therefore, it should always be fi ltered in a professional manner. That is why all Saeco machines can be equipped with the INTENZA+ fi lter. This fi lter is easy to use and its sophisticated technology is eff ective in preventing limescale build-up.
-
Page 40
Machine Installation — Service Provider Manual 9.12.1 Replacing the “Intenza+” Water Filter Put the fi lter into the empty tank. Press it to its limit stop. If the fi lter is already installed and the machine indicates that it must be replaced, proceed as previously described. When accessing the programming page, the “RESET”… -
Page 41: Adjusting The Coff Ee Grinder
Machine Installation — Service Provider Manual 9.13 Adjusting the Coff ee Grinder 10 MACHINE PROGRAMMING Warning! Do not pour ground and/or instant cof- All the operations described in chapter 10 must fee into the coff ee bean hopper. Do not put any be performed exclusively by the service provider material other than coff ee beans into the hopper.
-
Page 42: Programming Controls
Note: If the PASSWORD is forgotten, you can reset it by entering a PUK code. You have to request the Refer to section 10.4 on how to set the PASSWORD. PUK code to the Saeco service centre, who will guide you through the procedure. 10.2 Programming Controls When the machine menus are accessed, the buttons on the keypad take on new functions.
-
Page 43: Programming Menu
Machine Installation — Service Provider Manual 10.3 Programming Menu This menu allows you to manage certain machine operation parameters. Coff ee Temperature This function allows you to adjust the coff ee brewing temperature. Timer (stand-by) This function allows you to adjust the time taken for the machine to go into stand-by mode after the last brewing.
-
Page 44
Machine Installation — Service Provider Manual Credit Management This function activates credit management. Credit Charging This function activates credit charging. 0 0 0 Note: This function is displayed only if the «Credit Management» function is set to «YES». You can access by pressing the “ ”… -
Page 45: Setting The Password
Machine Installation — Service Provider Manual 10.4 Setting the PASSWORD To enter the password: Press the “ ” (18) or “ ” (20) button to set the desired The PASSWORD must be set by the service provider in order to number.
-
Page 46: Setting Credits
Machine Installation — Service Provider Manual 10.5 Setting Credits Press the “ ” (18) or “ ” (20) button to set the desired number. Credits can be set to allow coff ee to be brewed under the strict control of the service provider. Press the “…
-
Page 47: Cleaning And Maintenance
For improved effi ciency, it is advisable to carry out the cleaning as described in the «Weekly Cleaning of the Brew Group» chapter. and maintenance operations indicated in the following table. Lubricate the brew group guides using Saeco grease only. Every When an…
-
Page 48: Descaling
Also lubricate the shaft. to clear maintenance neglect. Use the Saeco descaling product only. Its formula has been spe- cifi cally designed to ensure better machine performance and op- eration for its whole operating life. If correctly used, it also avoids alterations in the dispensed product.
-
Page 49
” button (22) to exit. You can quit the cycle in any case; see the «Interruption of the Descaling Cycle» chapter. Pour the entire content of the Saeco concentrated descaling If you do not have a container of this capacity, solution into the water tank. -
Page 50
Machine Installation — Service Provider Manual Note: The rinse cycle is performed in order to have The machine will now start dispensing the descaling solution the circuit cleaned with a preset amount of water at intervals (the bar shows the cycle progress). to ensure proper machine performance. -
Page 51: Interruption Of The Descaling Cycle
Machine Installation — Service Provider Manual 11.4 Interruption of the Descaling Cycle Once the descaling cycle has started, it must be completed; do not turn off the machine mid-cycle. If the machine stops, you can quit the cycle by pressing the ON/ OFF button.
-
Page 52: Troubleshooting
13 TROUBLESHOOTING Machine actions Causes Solutions The machine does not turn on. The machine is not connected to the electric Connect the machine to the electric net- network. work. The ON/OFF button is on «0». Switch the ON/OFF button to “I”. The drip tray gets fi lled although no Water is sometimes drained automatically This is a normal behaviour of the machine.
-
Page 53
Machine actions Causes Solutions Coff ee is brewed slowly (see note). The coff ee grind is too fi ne. Change coff ee blend or adjust the grind as explained in the “Adjusting the Coff ee Grinder” chapter. The circuit is not primed. Prime the circuit (see the «First Use — Use Af- ter a Long Period of Inactivity»… -
Page 54
• 54 •… -
Page 55
• 55 •… -
Page 56
The manufacturer reserves the right to make changes without prior notice.
Чистка кофемашины Philips Saeco – обязательная процедура, которая должна проводиться регулярно. Чтобы понимать, что происходит внутри корпуса, достаточно посмотреть внутрь электрического чайника, за которым не проводился уход. На внутренних стенках образуется толстый слой накипи, частицы которой периодически отрываются и попадают в чашку. Накипь образуется быстрее, если пользователи доливают водопроводную жидкость в бак.

Другая проблема – масляный налет, аналог которого появляется на чашках, в которых заваривают чай. Рано или поздно стенки покрываются темным налетом, удаляют который содой.
Кроме чистки узлов кофемашины Филипс необходимо ухаживать за встроенной кофемолкой, внутри которой также оседает кофейное масло и пыль.
Для чего нужна декальцинация
В работе задействованы следующие узлы, из которых периодически необходимо удалять накипь:
- гидросистема;
- варочный блок;
- бойлер.
Кроме этих узлов есть еще контейнер для использованных кофейных таблеток, куда машина автоматически их сбрасывает после приготовления порции кофе.

Поддон для капель также требует ухода. Если в кофеварке Филипс есть встроенный капучинатор, за ним также нужен уход, иначе молочный жир перекроет выходные трубки, а запах испорченного молока будет портить весь процесс кофепития.
Если машина на гарантии, то ухаживать за ней необходимо особенно тщательно. Любые поломки, не связанные с производителем, расцениваются сервисным центром как последствия плохого ухода. В этом случае пользователь заплатит за ремонт полную сумму.
Если внутренние детали покрываются известковым налетом, то процесс приготовления кофе затягивается, так как прибор дольше греет воду, следовательно, расходует больше электричества.
Очистка кофемашины Филипс Саеко проводится раз в 2 месяца, если пользователи заливают бутилированную или дистиллированную воду в контейнер. Водопроводная вода имеет высокую степень жесткости, поэтому накипь образуется быстрее: мероприятие по чистке придется проводить примерно раз в неделю, если кофе варится 5 раз в день.
Если имеется функция самоочистки, это намного облегчает процесс: в контейнер заливается вода с раствором или таблеткой и запускается режим очищения. После этого достаточно просто промыть систему чистой жидкостью.
Видео: Руководство по очистке от накипи
Средства для очистки машины
Лучше всего использовать для чистки кофемашины Саеко Филипс профессиональные средства – жидкости, таблетки, порошки – по инструкции производителя так и надо поступать.
Но пользователи стараются экономить, поэтому добавляют в воду лимонную кислоту. Разница в том, что кроме лимонной кислоты в состав профессиональных средств входят и другие органические вещества, которые растворяют накипь и смывают налет кофейного жира.
Чтобы качественно почистить кофемашину Филипс Саеко, как это происходит при использовании средств производителя, процесс самоочистки требуется запускать 3 – 4 раза. То же самое касается уксусной кислоты.
Таблетки
Таблетки нужны для удаления масляного налета в варочном блоке и в отсеке для молотого кофе. В их состав входят безопасные соединения на основе соды. Делать промывку таблетками необходимо с периодичностью 350 чашек. Обычно машина ведет счет порциям, поэтому вычислить график не сложно.
Плюс таблеток в том, что они защищают поверхности от образования масляного налета, то есть в следующий раз жир будет наслаиваться дольше.
Стоимость одной очистки обойдется примерно в 1 доллар, но продаются таблетки в упаковке по 10 штук.

Жидкие растворы
Очистка кофемашины Philips жидким раствором проводится для удаления накипи. В составе несколько органических кислот, растворяющих известковые отложения. По стоимости одна процедура обойдется примерно в 7 – 8 долларов, но делать ее нужно раз в 2 месяца.

Раствор смешивается с водой и заливается в бак, затем запускается режим чистки, после чего бак заполняют чистой водой и промывают систему.
Второй вид жидкости предназначен для капучинатора. На этом средстве не рекомендуется экономить, особенно, если капучинатор не съемный. Устранить жирный слой полностью достаточно сложно, при этом машина из-за проблем с молочной системой часто выходит из строя и требует ремонта в сервисе.
Заливается жидкость в контейнер для молока, затем туда опускается шланг, и машина втягивает чистящее вещество. После окончания процедуры блок промывается водой.
Смазка для кофемашин
Чтобы улучшить работу внутренних деталей и уберечь их от избыточного трения, в кофеварках применяют обычный вазелин или специальная пищевая смазка. Делать это необходимо через каждые 500 порций. Смазываются уплотнительные кольца, канавки, шестеренки – все, что движется при работе.

Осторожно! Нельзя использовать промышленные масла, так как при попадании их в напиток это может вызвать отравление
Инструкция по очистке
Время очистки занимает примерно 30 минут. В цикл входит 1 этап удаления накипи и 2 этапа промывки чистой водой. Нельзя выключать кофемашину, пока она не закончит весь цикл.
Подготовка перед тем как почистить кофемашину Филипс:
- Освободить поддон от жидкости.
- Приготовить емкость объемом до 2 л для слива использованного раствора.
- Вынуть фильтр для воды, если он есть.
- Съемный капучинатор также удаляют на время проведения процедуры.
Далее:
- Залить раствор в бак и долить воды до максимальной отметки.
- Выключить машину и перевести диск в положение очистки. В Саеко он обозначается как кофейное зерно.
- Снова включить кофеварку.
- Емкость для слива поставить под трубку кипятка.
- Нажать обе кнопки «чашек» и удерживать 5 секунд, пока не начнет мигать восклицательный знак. Он должен гореть весь цикл очистки. После этого жидкость для промывки начнет периодически выливаться в поддон. Когда загорится зеленый цвет на «чашках»
- Перевести диск в режим «кофе». Начнет поступать раствор в емкость для слива.
- Когда зеленый индикатор «чашек» начнет медленно мигать, можно переводить диск в режим «зерна».
- Режим очистки закончен. Можно сливать воду из поддона.
По тому же плану провести два цикла промывки, повторив процедуру с первого пункта.
Понравилась статья? Поделись с друзьями:

Всем привет!
Меня зовут Денис, и я — руководитель проекта «Напитки.NET». Рад видеть каждого из вас на его страницах. Надеюсь, что статья вам понравилась и оказалась полезной.
Являюсь заядлым любителем кофе и чая. Думаю — вы тоже 🙂 Все предложения, замечания, что ещё бы хотелось увидеть на сайте можно направлять мне ВКонтакте или Telegram (иконки ниже). Всех благ, заходите ещё 😉
Код: 113602
44 690
рублей
Бесплатная доставка
по Красноярску
?
![]() под заказ
под заказ
(7-14 дней)
Новости интернет-магазина «Лаукар»:
Дополнительная информация в категории Кофемашина:
В интернет-магазине бытовой техники «Лаукар» Вы можете скачать инструкцию к товару Кофемашина Saeco LIRIKA совершенно бесплатно.
Все инструкции, представленные на сайте интернет-магазина бытовой техники «Лаукар», предоставляются производителем товара.
Перед началом использования товара рекомендуем Вам ознакомиться с инструкцией по применению.
Для того чтобы скачать инструкцию, Вам необходимо нажать на ссылку «скачать инструкцию», расположенную ниже, а в случае, если ссылки нет,
Вы можете попробовать обратиться к данной странице позднее,
возможно специалисты интернет-магазина бытовой техники «Лаукар» еще не успели загрузить для скачивания инструкцию к товару:
Кофемашина Saeco LIRIKA.

Фирма-производитель оставляет за собой право на внесение изменений в конструкцию, дизайн и комплектацию товара: Кофемашина Saeco LIRIKA. Пожалуйста, сверяйте информацию о товаре с информацией на
официальном сайте компании производителя.
-
Contents
-
Table of Contents
-
Troubleshooting
-
Bookmarks
Quick Links
02
Type SUP041EU
USER MANUAL
Read these operating instructions carefully before using the machine
Related Manuals for Saeco Lirika
Summary of Contents for Saeco Lirika
-
Page 1: User Manual
Type SUP041EU USER MANUAL Read these operating instructions carefully before using the machine…
-
Page 2
16 17 • 2 •… -
Page 3
• 3 •… -
Page 4
SAFETY INSTRUCTIONS from oil. Do not use the power cord to carry or pull the machine. Do not pull out the plug by the power cord or touch it with wet hands Never allow water to come into contact or feet. Do not let the power cord hang freely with any of the electrical parts of the ma- from tables or shelves. -
Page 5
damage or melt the machine housing. Do chine in a dry place, out of the reach of chil- not use in places where the temperature may dren. Keep it protected from dust and dirt. drop to a level equal to and/or lower than 0°C Repairs / Maintenance or higher than 40°C. -
Page 6: Table Of Contents
Machine Use — User Manual CONTENTS 1 GENERAL INFORMATION ……..7 1.1 Intended Use of the Machine ……….7 1.2 How to Read the Manual……….7 1.3 How to Use this User Manual ……..7 8 HANDLING AND STORAGE ……..33 1.4 Machine Identifi cation ……….7 8.1 Handling …………..33 1.5 Technical Specifi cations ……….8 8.2 Storage …………..33…
-
Page 7: General Information
Machine Use — User Manual Service Provider/Supply Operator: GENERAL INFORMATION Company or person responsible for normal ma- chine installation, start-up and suspension of Intended Use of the Machine service. On detecting machine failures, the Ser- This machine automatically brews: vice Provider should request the assistance of the — Coff ee and espresso coff ee using coff ee beans;…
-
Page 8: Technical Specifi Cations
Machine Use — User Manual Technical Specifi cations MACHINE COMPONENTS Note: The “key to components” includes all ma- Technical Specifi cations chine models; check which one matches your ma- Power Supply and Nominal Voltage-Power Rating chine. Certain functions may not be available. See data plate on the inside of the appliance door Water tank lid Machine Housing Material…
-
Page 9: Control Panel Description
Machine Use — User Manual Control Panel Description USING THE MACHINE Note: All possible controls are described here. Before using the machine, check that the water tank and the cof- Refer to the following sections for the operating fee bean hopper are fi lled and that the machine is properly clean. modes.
-
Page 10: Turning On The Machine
Machine Use — User Manual If the water tank is not inserted, check that no cof- Note: The progress bar indicates that the machine fee beans fall into the tank compartment. If this is performing the rinse cycle of the system. happens, remove them to avoid any malfunctions.
-
Page 11: Eco-Friendly: Stand-By
Machine Use — User Manual Eco-friendly: Stand-by Adjusting the Aroma (Coff ee Strength) The machine is designed for energy saving. The machine auto- Choose your favourite coff ee blend and adjust the amount of coff ee matically turns off after 30 minutes of inactivity. to be ground according to your personal taste.
-
Page 12: Adjusting The Coff Ee Length
Machine Use — User Manual by the machine; the display shows the 2 cups icon. When the “STOP” icon is displayed, press the “ ” button (18) as soon as the desired amount of coff ee is reached. Once the prebrewing cycle has been completed, coff ee begins to come out of the dispensing spout.
-
Page 13: Cappuccinatore
Machine Use — User Manual Inserting the Cappuccinatore Remove the drip tray. (Fig.13, page 3) Remove the coff ee grounds drawer and If the water dispensing spout is installed, remove it as shown empty out the coff ee grounds in a suitable container. in the fi gure: — Press the two side buttons to unlock it and lift it slightly;…
-
Page 14: Brewing A Cappuccino
Machine Use — User Manual Note: When the Cappuccinatore is not being used, 3.13 Brewing a Cappuccino hang the suction tube on the support on the left- The machine can dispense cappuccino quickly and easily with the touch of a button. hand side of the machine.
-
Page 15: Adjusting Cappuccino
Machine Use — User Manual Insert the suction tube into the milk container. Press the “ ” button (18) to stop frothed milk dispensing. Once frothed milk has been dispensed, the machine brews coff ee. Brewing can be stopped by pressing the “ ”…
-
Page 16: Dispensing Latte Macchiato
Machine Use — User Manual 3.15 Dispensing Latte Macchiato Place a cup under the Cappuccinatore. The machine can dispense Latte Macchiato quickly and easily with Press the “ ” button (18) to start dispensing. the touch of a button. The machine requires some preheating time. Danger of burning! Dispensing may be preceded by small jets of hot water.
-
Page 17: Adjusting Latte Macchiato
Machine Use — User Manual Insert the suction tube into the milk container. Press the “ ” button (18) to stop frothed milk dispensing. Once frothed milk has been dispensed, the machine brews coff ee. Brewing can be stopped by pressing the “ ”…
-
Page 18: Dispensing Hot Milk
Machine Use — User Manual 3.17 Dispensing Hot Milk Place a cup under the Cappuccinatore. The machine can dispense hot milk quickly. Press the “ ” button (18) to start dispensing. Danger of burning! Dispensing may be preceded by small jets of hot water. Wait until the end of The machine requires some preheating time.
-
Page 19: Adjusting Hot Milk
Machine Use — User Manual Make sure that the Cappuccinatore is correctly installed. The machine requires some preheating time. Once preheating has been completed, the machine starts dispensing frothed milk directly into the cup. Insert the suction tube into the milk container. Press the “…
-
Page 20: Dispensing Hot Water
Machine Use — User Manual 3.19 Dispensing Hot Water Press and hold the “ ” button (19) until the following screen is displayed: Danger of burning! Dispensing may be preceded by small jets of hot water and steam. Wait until the end of the cycle before removing the water dispens- ing spout.
-
Page 21: Quick Carafe Rinse Cycle
Machine Use — User Manual 3.20 Quick Carafe Rinse Cycle Press the “ ” button (23). The following screen is displayed: After one or more milk-based products have been prepared, the machine allows for a quick cleaning of the carafe ducts. This screen is displayed for 10 seconds to prompt you to execute the quick rinse cycle.
-
Page 22: Using The Machine With Credits
Machine Use — User Manual Press the “ ” button (19). The main screen is displayed. USING THE MACHINE WITH CREDITS Note: This option can be enabled or disabled by the service provider. The machine is designed to manage coff ee brewing by means of a credit system.
-
Page 23: Programming Machine Functions
Machine Use — User Manual Contrast Press the “ ” (18) and “ ” (20) buttons to increase or This function allows you to adjust the contrast of the display to decrease the value of the function. better view the messages. Once the value has been changed, the “OK”…
-
Page 24: Cleaning The Cappuccinatore
Machine Use — User Manual in a dishwasher. • Do not use sharp objects or harsh chemical products (sol- vents) for cleaning. • Do not dry the machine and/or its parts using a microwave and/or standard oven. • All parts requiring cleaning are easily accessible, so no tools are needed.
-
Page 25
Machine Use — User Manual Dispense water from the Cappuccinatore until clear water Remove the fi tting. fl ows out. Press the “ ” button (18) to stop dispensing. Clean the suction tube with a damp cloth. Weekly Cleaning of the Cappuccinatore The weekly cleaning is more thorough since all milk residues are removed from the dispensing spout. -
Page 26
Machine Use — User Manual Clean all the parts thoroughly with lukewarm water. Insert the fi tting into the tube of the Cappuccinatore. Insert the milk frothing device into the support. Insert the lower part into the fi tting. Insert the fi tting into the tube. Insert the lower part into the Cappuccinatore. -
Page 27
Insert the suction tube into the container. You need to perform a more thorough cleaning of the Cappuc- cinatore every month using the “Saeco Milk Circuit Cleaner”. The “Saeco Milk Circuit Cleaner” can be purchased separately. For further details, please refer to the maintenance products page in this user manual. -
Page 28
Machine Use — User Manual Press the “ ” button (18) to start dispensing. Press the “ ” button (24). The following screen is displayed: The machine requires some preheating time. Press the “ ” button (23). The following screen is displayed: Press the “… -
Page 29: Cleaning The Coff Ee Grounds Drawer
Machine Use — User Manual Cleaning the Coff ee Grounds Drawer Open the service door. The coff ee grounds drawer is to be emptied and cleaned when- ever indicated by the machine. To carry out this operation, refer to section 3.11. Cleaning the Drip Tray Empty and clean the drip tray every day.
-
Page 30
Machine Use — User Manual If they do not match, proceed as described in step (10). Remove the coff ee residues drawer and wash it thoroughly. Ensure that the lever is in contact with the brew group base. Clean the inside of the machine with a damp cloth. Make sure that the hook which locks the brew group is in Insert the coff ee residues drawer in its seat and ensure that the correct position;… -
Page 31: Machine Warnings
Machine Use — User Manual MACHINE WARNINGS This chapter describes all the warning messages that the machine may display to the user and the actions that can and/ or must be performed by the user. Warning Signals How to Reset the Message The machine is warming up to brew beverages or dispense hot water.
-
Page 32
Machine Use — User Manual Warning Signals (Red Colour) How to Reset the Message Insert the drip tray and the coff ee grounds drawer into the machine and close the service door. Fill the coff ee bean hopper. This icon appears for 5 seconds, from when the machine detects that there is no more coff ee to be ground. -
Page 33: Handling And Storage
Machine Installation — Service Provider Manual HANDLING AND INSTALLATION STORAGE All the operations described in chapter 9 must be performed exclusively by the service provider All the operations described in chapter 8 must or a specialised technician, who shall organise be performed exclusively by the service provider all the operating steps and use only suitable means to en- or a specialised technician, who shall organise…
-
Page 34
Machine Installation — Service Provider Manual — be used if damaged; — Use the machine in explosive or harsh — be handled with damp or wet hands; environments, or with high concentra- — be wound in a coil when the machine tions of dust or oily substances sus- is in use;… -
Page 35: Stop Functions
Machine Installation — Service Provider Manual Stop Functions Descaling solution: to remove limescale build-up in the water circuit caused by normal The machine can be stopped by means of the power button. use. List of Accessories 9.3.1 List of Accessories Supplied Manual: instructions on how to use the ma- «Intenza +»…
-
Page 36: Disposal Of Packaging
Machine Installation — Service Provider Manual The following illustration shows the required access distances: Rotate the support 90° until it is properly positioned. • to the keypad on the front of the appliance; • to the service units in the event of malfunction. Disposal of Packaging After opening the outer box, it is recommended that the packag- ing materials are separated according to type and disposed of in…
-
Page 37: Filling The Coff Ee Bean Hopper
Machine Installation — Service Provider Manual Filling the Coff ee Bean Hopper Turning on/off the Machine Before turning on the machine, check that the hopper contains The machine can be turned on/off by pressing the button located enough coff ee beans. to the rear of the machine (Fig.02, page 3).
-
Page 38: Measuring And Adjusting Water Hardness
Machine Installation — Service Provider Manual The machine will brew coff ee through the dispensing spout Fill the water tank again up to the MAX level. (Fig.11, page 3); wait until the procedure has been completed and empty the container. The machine is now ready for use.
-
Page 39: Intenza+» Water Filter
Water is a key element for a good espresso coff ee. Therefore, it should always be fi ltered in a professional manner. That is why all Saeco machines can be equipped with the INTENZA+ fi lter. This fi lter is easy to use and its sophisticated technology is eff ective in preventing limescale build-up.
-
Page 40
Machine Installation — Service Provider Manual 9.12.1 Replacing the “Intenza+” Water Filter Put the fi lter into the empty tank. Press it to its limit stop. If the fi lter is already installed and the machine indicates that it must be replaced, proceed as previously described. When accessing the programming page, the “RESET”… -
Page 41: Adjusting The Coff Ee Grinder
Machine Installation — Service Provider Manual 9.13 Adjusting the Coff ee Grinder 10 MACHINE PROGRAMMING Warning! Do not pour ground and/or instant cof- All the operations described in chapter 10 must fee into the coff ee bean hopper. Do not put any be performed exclusively by the service provider material other than coff ee beans into the hopper.
-
Page 42: Programming Controls
Note: If the PASSWORD is forgotten, you can reset it by entering a PUK code. You have to request the Refer to section 10.4 on how to set the PASSWORD. PUK code to the Saeco service centre, who will guide you through the procedure. 10.2 Programming Controls When the machine menus are accessed, the buttons on the keypad take on new functions.
-
Page 43: Programming Menu
Machine Installation — Service Provider Manual 10.3 Programming Menu This menu allows you to manage certain machine operation parameters. Coff ee Temperature This function allows you to adjust the coff ee brewing temperature. Timer (stand-by) This function allows you to adjust the time taken for the machine to go into stand-by mode after the last brewing.
-
Page 44
Machine Installation — Service Provider Manual Credit Management This function activates credit management. Credit Charging This function activates credit charging. 0 0 0 Note: This function is displayed only if the «Credit Management» function is set to «YES». You can access by pressing the “ ”… -
Page 45: Setting The Password
Machine Installation — Service Provider Manual 10.4 Setting the PASSWORD To enter the password: Press the “ ” (18) or “ ” (20) button to set the desired The PASSWORD must be set by the service provider in order to number.
-
Page 46: Setting Credits
Machine Installation — Service Provider Manual 10.5 Setting Credits Press the “ ” (18) or “ ” (20) button to set the desired number. Credits can be set to allow coff ee to be brewed under the strict control of the service provider. Press the “…
-
Page 47: Cleaning And Maintenance
For improved effi ciency, it is advisable to carry out the cleaning as described in the «Weekly Cleaning of the Brew Group» chapter. and maintenance operations indicated in the following table. Lubricate the brew group guides using Saeco grease only. Every When an…
-
Page 48: Descaling
Also lubricate the shaft. to clear maintenance neglect. Use the Saeco descaling product only. Its formula has been spe- cifi cally designed to ensure better machine performance and op- eration for its whole operating life. If correctly used, it also avoids alterations in the dispensed product.
-
Page 49
” button (22) to exit. You can quit the cycle in any case; see the «Interruption of the Descaling Cycle» chapter. Pour the entire content of the Saeco concentrated descaling If you do not have a container of this capacity, solution into the water tank. -
Page 50
Machine Installation — Service Provider Manual Note: The rinse cycle is performed in order to have The machine will now start dispensing the descaling solution the circuit cleaned with a preset amount of water at intervals (the bar shows the cycle progress). to ensure proper machine performance. -
Page 51: Interruption Of The Descaling Cycle
Machine Installation — Service Provider Manual 11.4 Interruption of the Descaling Cycle Once the descaling cycle has started, it must be completed; do not turn off the machine mid-cycle. If the machine stops, you can quit the cycle by pressing the ON/ OFF button.
-
Page 52: Troubleshooting
13 TROUBLESHOOTING Machine actions Causes Solutions The machine does not turn on. The machine is not connected to the electric Connect the machine to the electric net- network. work. The ON/OFF button is on «0». Switch the ON/OFF button to “I”. The drip tray gets fi lled although no Water is sometimes drained automatically This is a normal behaviour of the machine.
-
Page 53
Machine actions Causes Solutions Coff ee is brewed slowly (see note). The coff ee grind is too fi ne. Change coff ee blend or adjust the grind as explained in the “Adjusting the Coff ee Grinder” chapter. The circuit is not primed. Prime the circuit (see the «First Use — Use Af- ter a Long Period of Inactivity»… -
Page 54
• 54 •… -
Page 55
• 55 •… -
Page 56
The manufacturer reserves the right to make changes without prior notice.
• 14 •
Использование машины – Инструкция пользователя
5
ЧИСТКА И ТЕХНИЧЕСКОЕ
ОБСЛУЖИВАНИЕ
Некоторые компоненты вашего прибора контактируют с
водой и кофе в режиме обычного использования, поэтому
важно регулярно производить чистку машины.
Выполните эти операции до того, как ваш прибор перестанет
работать, поскольку в этом случае ремонт не покрывается
гарантией.
Внимание! Перед проведением любой опе-
рации по техническому обслуживанию и/или
очистке, необходимо выключить машину, отсоеди-
нить ее от электрической сети и дождаться пока она
остынет.
Очистка несъемных элементов и самой машины, если не
указано иначе, производится только холодной или теплой во-
дой с использованием неабразивной губки и влажной ткани.
• Производить очистку можно только в случае, если маши-
на охлаждена и отключена от сети.
• Для чистки прибора пользуйтесь мягкой влажной тряп-
кой.
• Не используйте прямые струи воды.
• Не погружайте машину в воду и не помещайте ее части в
посудомоечную машину.
• При очистке не пользуйтесь острыми предметами и
агрессивными химическими продуктами (растворителя-
ми).
• Для сушки машины и/или ее компонентов не пользуй-
тесь микроволновой и/или обычной печью.
• Все детали машины, подлежащие очистке, легкодоступ-
ны и не требуют применения приспособлений.
• Регулярное техническое обслуживание и очистка обеспе-
чивают и способствуют более длительной эффективной
работе машины, а также гарантируют соблюдение стан-
дартных санитарных норм.
Внимание! Очистка машины и ее компонентов
должна производиться еженедельно.
После определенного периода неиспользо-
вания необходимо произвести очистку и про-
мывку машины и ее компонентов
5.1
Очистка трубки горячей воды/пара
Очистка трубки для подачи горячей воды и пара производит-
ся снаружи при помощи влажной тряпки после каждого ис-
пользования и в любом случае не реже одного раза в неделю.
Внимание! Перед выполнением очистки убе-
дитесь, что трубка холодная; в противном слу-
чае существует риск получения ожогов.
5.2
Очистка контейнера для сбора отходов
Контейнер для сбора отходов необходимо освобождать и очи-
щать всякий раз после подачи машиной сигнала. Информация
по выполнению этой операции приведена в разделе 3.10.
5.3 Очистка поддона для сбора капель
Ежедневно освобождать поддон для сбора капель; эта опе-
рация должна выполняться даже в случае, когда поплавок
поднимается.
1
Достаньте поддон для сбора капель и контейнер для сбора
отходов, как описано в параграфе 3.10.
2
Вылейте жидкость из поддона для сбора капель и помойте
его.
3
Установите контейнер для сбора отходов и поддон для сбо-
ра капель на место.
Посмотреть инструкция для Philips Saeco Lirika бесплатно. Руководство относится к категории кофеварки, 62 человек(а) дали ему среднюю оценку 8.4. Руководство доступно на следующих языках: английский. У вас есть вопрос о Philips Saeco Lirika или вам нужна помощь? Задайте свой вопрос здесь
Главная
Не можете найти ответ на свой вопрос в руководстве? Вы можете найти ответ на свой вопрос ниже, в разделе часто задаваемых вопросов о Philips Saeco Lirika.
Как часто следует очищать кофеварку от накипи?
Какой лучший способ очистки кофеварки от накипи?
Как долго можно хранить кофе в зернах?
Как лучше всего хранить кофе?
Как помол сказывается на вкусе кофе?
Инструкция Philips Saeco Lirika доступно в русский?
Не нашли свой вопрос? Задайте свой вопрос здесь
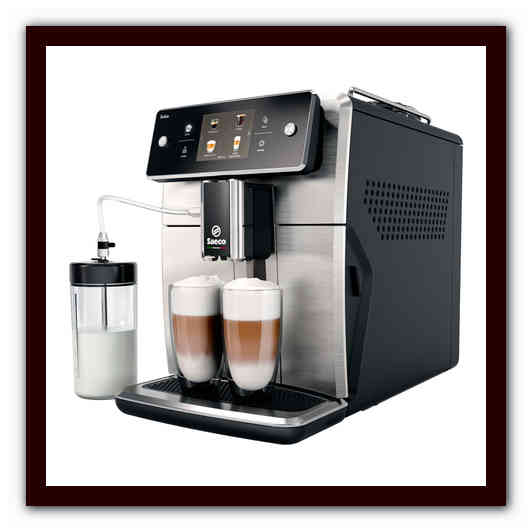
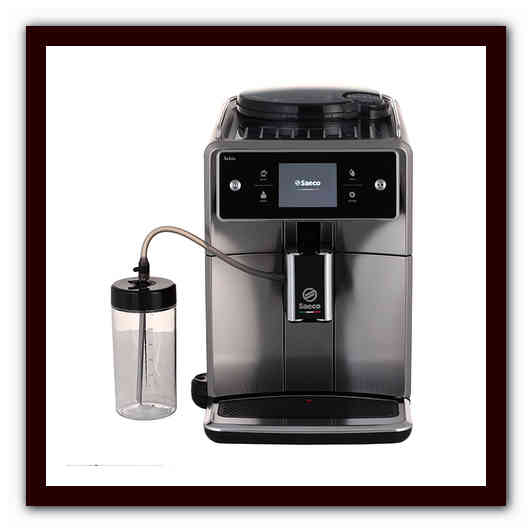
Обзор черт и функций Saeco lirika One Touch Cappuccino.
Philips – очень узнаваемый производитель бытовых устройств самого различного плана. Чайники и утюги, пылесосы и соковыжималки, бритвы и солярии – огромное количество различного оборудования, надежного и комфортного, издавна захватили сердца потребителей. Кофемашина Philips Saeco Lirika One Touch Cappuccino удачно продолжает эту традицию.
Кофемашины Saeco lirika One Touch Cappuccino
Фирменные особенности
Линейку кофеварок от Philips Saeco отличает ряд общих черт, присущих всех моделям:
- варочный модуль является съемным. Его просто снимать и разбирать, а, означает, и ухаживать за ним. Очищать блок рекомендуется под проточной водой более 1 раза в неделю, как показывает аннотация;
- есть функции подготовительного замачивания – итак достигается наибольшая степень извлечения пахнущих веществ из зерна;
- Saeco Lirika One Touch Cappuccino включает глиняную кофемолку, позволяющую перемолоть кофейное зерно. Степень помола регулируется – есть 4 позиции;
- помпа аппарата вне зависимости от страны-изготовителя делается из нержавеющей стали и развивает положенные 15 бар с тем, чтоб получить потрясающий по крепости и яркости эспрессо;
- при включении либо выключении кофемашины автоматом активизируется функция чистки контура. Итак обеспечивается чистота вкуса у каждой последующей чашечки. Но рекомендуется проводить и очистку с разборкой аппарата – в аннотации тщательно описывается процедура;
- предусмотрена возможность получения сходу 2 чашек напитка, также регуляция высоты носика, подающего кофе;
- аннотация для кофемашины Saeco Lirika One Touch Cappuccino тщательно обрисовывает все вероятные манипуляции для получения различных кофейных напитков.

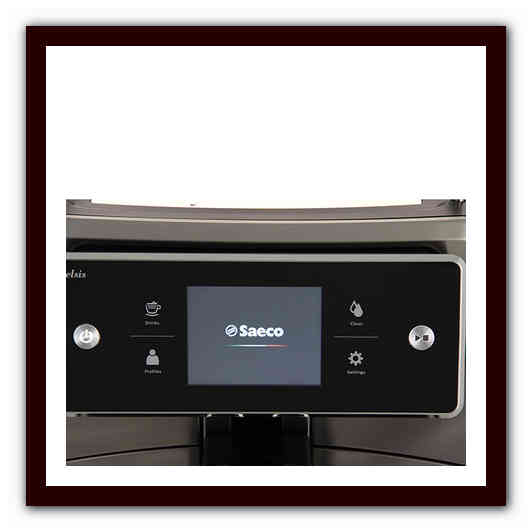
Панель управления Saeco lirika One Touch Cappuccino
Качество и надежность аппаратов не зависят от страны-производителя. Компания строго смотрит за параметрами собственной продукции, что подтверждают отзывы профессионалов.
Свойства кофемашины Saeco Lirika One Touch Cappuccino
Эта линейка кофеварок от Philips обладает дополнительными особенностями, что позволяет считать модели самыми подходящими кандидатами для кабинета.
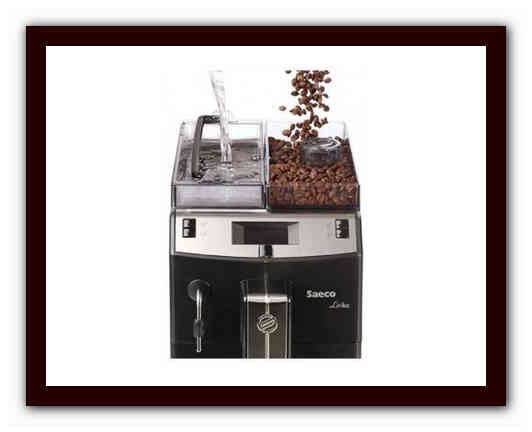
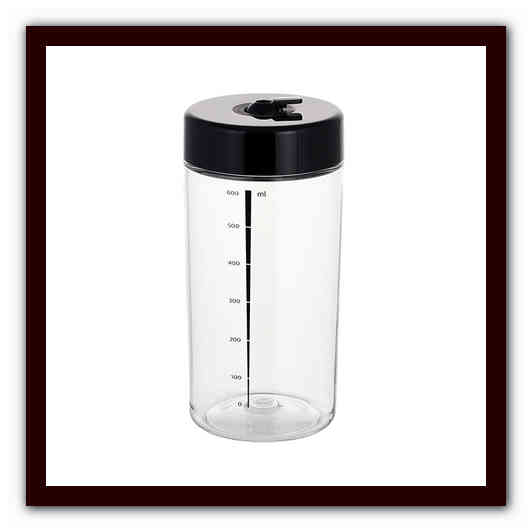
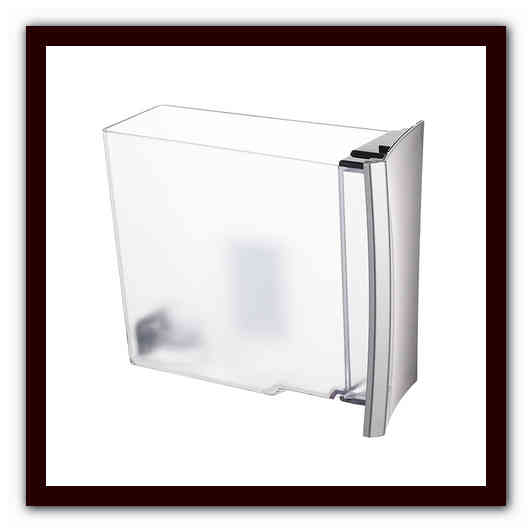
Емкости для воды и кофе
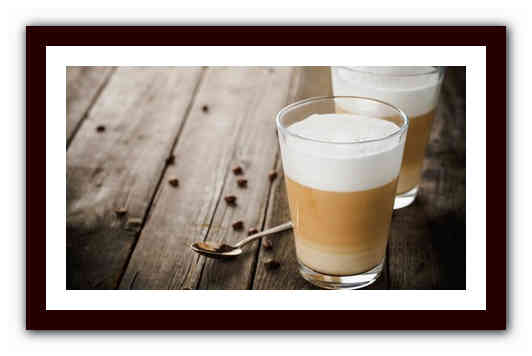
Капучинатор – в модели он автоматический, другими словами, имеется отводная трубка, по которой подается пар, позволяющий взбить молоко в пенку. Но отсутствует емкость для него. Для кабинета, как подтверждают отзывы, таковой вариант вправду является плюсом. Во-1-х, нет надобности мыть емкость каждому любителю капучино раздельно как требуется при автоматическом капучинаторе. Во-2-х, взбивание все равно является запрограммированной функцией и активизируется 2 клавишами. Объем пенки более чем приличный, но для него следует использовать жирное – более 3%, прохладное молоко.
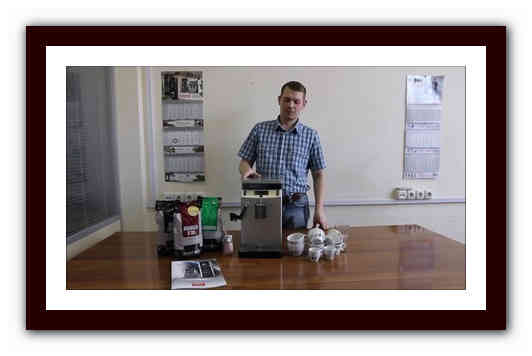
Кофемашина в кабинете
Кофемашина Saeco lirika One Touch Cappuccino Silver приготавливает капучино, латте, традиционный эспрессо, лунго, также зеленоватый и темный чай. При этом получение каждого напитка с самыми подходящими параметрами можно запрограммировать, чтоб в предстоящем получать автоматом. Для этого поначалу регулируют тонкость помола, крепость и объем латте либо эспрессо и потом «запоминают». По аннотации для этого необходимо зажать подходящую кнопку на 2 секунды, а когда объем напитка в чашечке достигнет подходящего объема, надавить повторно.
Дополнительная кнопка позволяет поменять крепость эспрессо прямо во время изготовления – 3 вероятных варианта.
Кофемашина Saeco lirika One Touch Cappuccino снабжена огромным бункером для зерна – 500 г и увеличенным баком для воды – 2,5 л. Отсек для кофейного жмыха вмещает 15 порций. Такие ресурсы позволяют обеспечить кофе многим сотрудникам. При изготовлении традиционного эспрессо такового объема бака хватает на 50 чашечек по 40 мл. Если же юзеры предпочитают американо– 200 мл, то воду придется доливать почаще.
Кофемашина Saeco lirika One Touch Cappuccino оснащается счетчиком приготовленных чашек, также опцией ограничения после определенного количества циклов варения. Это требуется для своевременной очистки аппарата и извещения об этом.
Информация о состоянии машины, времени изготовления кофе, параметрах напитках, также вероятных проблемах и ошибках возникает на сенсорном мониторе машины.
Аппарат выпускается серебристого цвета, за что и получил соответственное обоснование – Silver. На видео показывается изготовление кофе в кофемашине Saeco lirika One Touch Cappuccino Silver.
Аннотация по эксплуатации кофемашина saeco lirika.
Вы стоите на пороге интереснейшего путешествия в мир кофе, кофеварок и кофемашин. Разобраться будет не просто, но мы справимся. Сейчас рынок предлагаем нам столько устройств, что вдуматься самому и сделать верный выбор бывает очень трудно. Современные модели отличаются методом получения бодрящего напитка, ценой, функциональностью, габаритами, внешним обликом и, естественно, вкусом приобретенного результата.
Во-1-х, нам стоит обусловиться, что непосредственно мы желаем от чудо-кофеварки. Эспрессо, капучино, латте, мокачино, помои? Если кофемашина не умеет приготовить хотимое, то вроде бы вы не старались она этого не сделает.
Во-2-х, с выражением «кофе в кровать» у вас будут появляться приятные ассоциации с запахами свежеприготовленного кофе и, заметьте, лежа в кровати, потому что всю работу за вас сделает автоматика.
И в-3-х, пора шагать в ногу с течением времени, забудьте у вечно убегающих турках. Получайте наслаждение от собственного личного бариста у Вас дома.

Оценивайте свои денежные способности и вперед листать наш онлайн-каталог:
Saeco SM7683/00.


Аннотации и файлы
Чтоб ознакомиться с аннотацией изберите файл в перечне, который вы желаете скачать, нажмите на кнопку «Загрузить» и вы перейдете на страничку, где нужно будет ввести код с рисунки. При правильном ответе на месте рисунки появится кнопка для получения файла.
Если в поле с файлом есть кнопка «Просмотр», это означает, что можно просмотреть аннотацию онлайн, без необходимости закачивать ее на компьютер.
В случае если материал по вашему не полный либо нужна дополнительная информация по этому устройству, к примеру драйвер, дополнительные файлы к примеру, прошивка либо микропрограмма, то вы сможете задать вопрос модераторм и участникам нашего общества, которые постараются оперативно отреагировать на ваш вопрос.
Также вы сможете просмотривать аннотации на собственном устройстве Android
Девайсы, 1-ое включение, Чистка – Аннотация по эксплуатации Philips Saeco Royal Digital.
Страничка 2: Устранение дефектов, Saeco royal digital saeco royal digital plus, Для кофемашин, Аннотация по эксплуатации, Корпус чистка от накипи, При изготовлении из молотого кофе, готовится вода, Кофе недостаточно жаркий
Ключ устройства изготовления
SUP 015, SUP 015R,
см. табличку снизу кофемашины
см. табличку снизу кофемашины
Удаление использованного кофе
Доза объёма порции
зернышек кофе 300 г.
контейнер воды 2,4 л
использованного кофе около 300 г
приблизительно 33*45*40 см
приблизительно 70*45*40 см
с открытой дверцей
для молотого кофе
Полоса для определения
Чистка ОТ НАКИПИ
Не используйте моющих средств, которые могут
разрушить корпус либо покрытие кофемашины
Отключите кофемашину от сети питания перед чисткой
Не сушите кофемашину либо ее части
используя нагревательные элементы
1. Откройте сервисную дверцу
Снимите лоток для капель и контейнер
использованного кофе
Не запускается программка
изготовления эспрессо
BREW UNIT BLOCK.
Некорректно установлено устройство изготовления
Свяжитесь с авторизированным сервисным центром
Установите на место контейнер использованного кофе
Свяжитесь с авторизированным сервисным центром
“ENTER” для выхода из режима
При изготовлении из молотого
кофе, готовится вода
Аккуратненько повторите изготовление, следуя аннотации
Кофе недостаточно жаркий
Используйте нагретые чашечки
Измените температуру изготовления
По мере надобности: помойте устройство
По мере надобности: проведите чистку от накипи
Не готовится пар
и жгучая вода
проверьте подключение к сети и положение основного выключателя
закройте сервисную дверцу
Забита трубка пара/жаркой воды. Прочистите трубку с
помощью узкой иглы. Внимание: Прочищайте трубку при
выключенной кофемашине и закрытой ручке пара/жаркой воды.
Установите лоток для капель
Насыпьте зерна кофе
Налейте свежайшей прохладной
полоску в воду, считайте
данные через 1 с
Включите кофемашину в сеть
Установите емкость под
трубку пара/жаркой воды
Открыв ручку, сливайте
воду пока не закончит
Установите удачный язык сообщений и твердость
воды. Подробнее смотрите “Программирование”
Проведите чистку от накипи
1. Закройте сервисную дверцу
2. Выключите кофемашину
3. Включите кофемашину: устройство будет установлено верно
Устройство изготовления
не снимается
Устройство
изготовления
не устанавливается
Совместите опасности на
вращающейся части и
на корпусе устройства,
расположенные под
ручкой устройства
изготовления
1. Установите огромную ёмкость под трубку
2. Наполните контейнер воды веществом средства
для очистки от накипи, согласно аннотации к средству.
НЕ ПРЕРЫВАЙТЕ Программку Чистки ОТ НАКИПИ
1. Нажмите MENU для перехода в режим
2. Изберите пункт меню DESCALING, используя
3. Запустите программку чистки воды, нажав ENTER
MACHINE IS DESCALING
Сброс индикатора
необходимости чистки
1. Перейдите в режим программирования
2. Изберите пункт SIGNAL.DESCAL., нажмите ENTER
3. Изберите RESET QUANTITY YES, нажмите ENTER
Контейнер использованного кофе,
лоток для капель,
контейнер воды
Протрите мягенькой увлажненной тканью
Помойте под струей теплой воды
2. Нажмите на кнопку PRESS
и снимите устройство изготовления
Помойте устройство под струей чуток
теплой воды и оставьте до полного высыхания
2.1 Отвинтите крепление ключом
3. Установите устройство на место и закройте
сервисную дверцу
При установке не жмите кнопки PRESS
2.2 . и снимите ситечко.
Промойте струей воды и установите
на место
1. Отвинтите верхнее крепление
2. Снимите внешнюю часть,
помойте все составляющие
3. Кропотливо высушите и соберите
4. Закрепите панарелло на трубку
пара/жаркой воды, затянув
верхнюю гайку
3 4 раза в год, длительность 5 минут
Для видов кофе с огромным содержанием масел
1. Заполните контейнер воды
2. Установите огромную емкость
(более 1 л) под диспенсер кофе
3. Войдите в режим программирования,
4. Изберите пункт меню RINSING
5. Запустите программку, нажав ENTER
ВНИМАНИЕ: Не прерывайте работу программки промывки
Кофемашина длительно нагревается
Уменьшаются запрограм
мированные объемы порций
Saeco Royal Digital
Saeco Royal Digital Plus
Для Royal Digital Plus
см. “Включение”
1.Откройте ручку регулировки подачи пара/жаркой воды.
Подождите приблизительно 45 минут
Закройте ручку регулировки, нажмите ENTER
Помойте и наполните контейнер воды.
Установите его на место
2. Откройте ручку регулировки
3. Слейте весь контейнер воды
4. Закройте ручку регулировки, нажмите ENTER
Нажмите ESC
Не используйте моющих средств
для промывки устройства изготовления
НЕ ИСПОЛЬЗУЙТЕ УКСУС СОДЕРЖАЩИЕ СРЕДСТВА,
приведёт к поломке.
Проводите чистку не пореже, чем раз в 3 месяца
Используйте только водянистые средства
Проводите чистку только когда кофемашина и все её части
стопроцентно остыли.
Точно следуйте аннотации производителя средства.
Аннотация ПО ЭКСПЛУАТАЦИИ
Пристально прочитайте аннотацию перед подключением кофемашины.
Для изготовления высококачественного кофе и избежания поломок точно следуйте
советам. Помните, что с аннотацией нужно ознакомиться
каждому юзеру кофемашины. Храните аннотацию всегда
эксплуатации кофемашины. В случае утери либо повреждения аннотации
обращайтесь в Авторизованный Сервисный Центр либо к Производителю.
Пристально прочитайте аннотацию
Кофемашина предназначена только
для использования снутри помещений
Эта аннотация защищена законом об авторском праве
и не может быть копирована, переведена или изменена
без письменного разрешения производителя.
Советуем промывать
не пореже 1 го раза в
неделю
Кофемашина SAECO Lirika black.
Традиционная модель SAECO Lirika black обладает всеми необходимыми свойствами, что бы ваш утренний кофе соединял внутри себя прекрасный запах и вкус напитка, придавая для вас бодрости и энергии на целый день. Посреди очевидных плюсов необходимо отметить ее маленькие размеры и оригинальное дизайнерское решение, высочайшая мощность позволяет использовать кофемашину в насыщенном режиме, а количества воды в контейнере хватит в среднем на 25 чашек кофе. Также направьте внимание на простоту обслуживания, разобрать данную модель можно за несколько минут, столько же времени пригодиться, что бы очистить емкость с отработанным кофе.
Область внедрения: кабинеты, хостелы, домашний сектор.
Гарантия: 1 год
Цвет: Темный
Производитель: Италия
Цена:
34 700 рублей Приобрести
Срок доставки по Москве и Санкт-Петербургу — в течение 5-ти рабочих дней, до других городов Рф от 10-и рабочих дней с момента оплаты
Если у Вас появились вопросы, связанные с приобретением кофемашины SAECO Lirika black, Вы сможете задать их через форму оборотной связи либо позвонить нам по телефону 8 (812) 643-33-70 раз в день с 10:00 до 19:00 по столичному времени, не считая субботы и воскресенья. Мы с радостью для вас поможем!