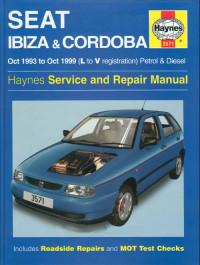
Руководство на английском языке по техническому обслуживанию и ремонту автомобилей SEAT Cordoba и SEAT Ibiza 1993-1999 годов выпуска с бензиновыми и дизельными двигателями.
- Автор: —
- Издательство: Haynes Publishing
- Год издания: 2003
- Страниц: 327
- Формат: DjVu
- Размер: 29,6 Mb
Руководство по эксплуатации автомобилей SEAT Cordoba и SEAT Ibiza.
- Автор: —
- Издательство: SEAT
- Год издания: —
- Страниц: 126
- Формат: PDF
- Размер: 6,5 Mb
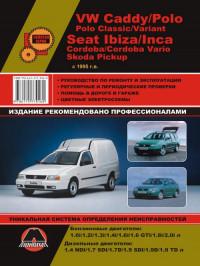
Руководство по эксплуатации и ремонту автомобилей SEAT Ibiza/Inca/Cordoba/Cordoba Vario, Volkswagen Caddy/Polo/Polo Classic/Polo Variant и Skoda Pickup с 1995 года выпуска с бензиновыми и дизельными двигателями.
- Автор: —
- Издательство: Монолит
- Год издания: —
- Страниц: 270
- Формат: —
- Размер: —
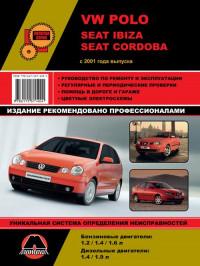
Руководство по эксплуатации и ремонту автомобилей SEAT Cordoba, SEAT Ibiza и Volkswagen Polo с 2001 года выпуска с бензиновыми и дизельными двигателями.
- Автор: —
- Издательство: Монолит
- Год издания: —
- Страниц: 360
- Формат: —
- Размер: —
Руководство по эксплуатации, техническому обслуживанию и ремонту автомобилей SEAT Cordoba/Cordoba Vario/Ibiza/Inca и Volkswagen Polo Classic/Polo Estate/Caddy 1995-2003 годов выпуска с бензиновыми и дизельными двигателями.
- Автор: —
- Издательство: Делия
- Год издания: 2006
- Страниц: 346
- Формат: PDF
- Размер: 51,1 Mb

Для ознакомления с инструкцией необходимо нажать на ссылку «ЗАГРУЗИТЬ», чтобы скачать pdf файл. Если есть кнопка «ПРОСМОТР», то можно просто посмотреть документ онлайн.
Для удобства, Вы можете сохранить данную страницу с файлом руководства по эксплуатации в свой список «избранное» прямо на сайте (доступно для зарегистрированных пользователей).
Смотрите инструкцию для похожих моделей:

Вы можете задать вопрос посетителям сайта по модели SEAT Cordoba. Если Вы являетесь её пользователем, то пожалуйста оставьте, по возможности развёрнутый отзыв:
Перейти к контенту
Руководство по эксплуатации, техническому обслуживанию и ремонту автомобилей SEAT Cordoba/Cordoba Vario/Ibiza/Inca и Volkswagen Polo
Руководство на испанском языке по техническому обслуживанию и ремонту автомобиля SEAT 133. Рекомендуем перед
Руководство по техническому обслуживанию и ремонту автомобилей SEAT Ibiza и SEAT Malaga 1985-1992 годов
Руководство по техническому обслуживанию и ремонту автомобилей SEAT Ibiza и SEAT Malaga 1985-1992 годов
Руководство по эксплуатации, техническому обслуживанию и ремонту автомобилей SEAT Cordoba/Cordoba Vario/Ibiza/Inca и Volkswagen Polo
Руководство по эксплуатации, техническому обслуживанию и ремонту автомобилей SEAT Cordoba/Cordoba Vario/Ibiza/Inca и Volkswagen Polo
- Manuals
- Brands
- Seat Manuals
- Automobile
- 2007 Cordoba
- Owner’s manual
-
Contents
-
Table of Contents
-
Bookmarks
Quick Links
Related Manuals for Seat 2007 Cordoba
Summary of Contents for Seat 2007 Cordoba
-
Page 1
auto emoción… -
Page 3
Foreword This owner’s manual and the corresponding supplements should be read carefully to familiarise yourself with your vehicle. Also, the regular care and maintenance and correct handling of the vehicle will contribute to preserve its value. For safety reasons, note the information concerning accessories, modifications and parts exchange. If selling the vehicle, give all of the onboard documentation to the new owner as this should be kept with the vehicle. -
Page 5: Table Of Contents
Cruise control system (CCS)* ….Seat belts …….
-
Page 6
Contents Cleaning and caring for your vehicle Towing a trailer ……. . . Wheels . -
Page 7: The Structure Of This Manual
The structure of this manual The structure of this manual Before reading this manual it must be understood Caution This manual contains a description of the vehicle equipment at the time of Texts with this symbol draw your attention to a possible risk of damage to publication.
-
Page 8: Content
(e.g. “Air conditioning”). The entire manual is divided into five large parts which are: 1. Safety First Information on the vehicle equipment relating to passive safety such as seat belts, airbags, seats, etc. 2. Controls and equipment…
-
Page 9: Safety First
The This chapter contains important information, tips, suggestions and following list includes most of the safety equipment in your SEAT: warnings that you should read and follow in the interest of your own •…
-
Page 10
– Observe traffic laws and speed limits. size. – Always reduce your speed as appropriate for road, traffic and – Ensure that the passenger in the central rear seat always has the weather conditions. head restraint in position ⇒ page 13. -
Page 11: Proper Sitting Position For Occupants
25 cm between the steering wheel and the centre of your chest and relaxed driving. ⇒ fig. – Move the driver’s seat forwards or backwards so that you are able to press the accelerator, brake and clutch pedals to the floor with your knees still slightly angled ⇒…
-
Page 12
The further the backrests are tilted to the rear, the greater the risk… -
Page 13
• Always keep your feet in the foot well when the vehicle is moving; never rest them on the instrument panel, out the window or on the seat. An incor- WARNING rect sitting position exposes you to an increased risk of injury in the event •… -
Page 14
Safe driving Correct adjustment of head restraints Adjust the head restraint properly to achieve maximum protection. Properly adjusted head restraints are an important part of – Adjust the head restraint so that its upper edge is at the same level as the top of your head, or as close as possible to the same occupant protection and can reduce the risk of injuries in level as the top of your head and, at the very least, at eye level most accident situations. -
Page 15
WARNING • never lean against the dash panel, Whenever a passenger is seated in the rear central seat, the head restraint • never lie on the rear bench, should be placed in the position for use •… -
Page 16: Pedal Area
• Use only floor mats which leave the pedal area free and can be securely never put your feet on the surface of a seat, fastened in the foot well. • never travel in a foot well, •…
-
Page 17: Stowing Luggage
Safe driving WARNING (continued) WARNING • • Always put objects in the luggage compartment. If the pedals are obstructed, you could cause an accident. Risk of • serious injuries. During sudden manoeuvres or accidents, loose objects can be thrown • forward, injuring vehicle occupants or even to third parties.
-
Page 18: Seat Belts
Children must be protected with an appro- priate child restraint system. WARNING • If the seat belts are worn incorrectly or not at all, the risk of severe inju- ries increases. Seat belt warning lamp* •…
-
Page 19
In addition, an acoustic signal can also be heard for a couple of seconds. The warning lamp* does not go out until the driver seat belt is fastened while the ignition is switched on. Safety First Operating instructions… -
Page 20: Why Wear Seat Belts
25 km/h to 50 km/h, for example, the kinetic energy increases by a factor of four. Because the passengers in our example are not restrained by seat belts, the entire amount of kinetic energy has to be absorbed at the point of impact ⇒…
-
Page 21
It is also important for the rear passengers to wear seat belts properly, as they could otherwise be thrown forward violently in an accident. Rear passengers who do not use seat belts endanger not only themselves but also the front ⇒… -
Page 22
• If the seat belts are worn incorrectly or not at all, the risk of severe inju- Our examples describe frontal collisions. Of course, properly worn seat belts ries increases. The optimal protection from seat belts can be achieved only reduce substantially the risk of injury in all other types of accidents. -
Page 23: Seat Belts
• position by a latch. Do not allow the seat belt to be damaged or jammed, or to rub on any sharp edges. • Never wear the seat belt under the arm or in any other incorrect posi- tion.
-
Page 24
• Never put the latch plate in the buckle of another seat. If you do this, the seat belt will not protect you properly and the risk of injury is increased. -
Page 25
• – Insert the latch plate into the buckle for the corresponding seat The lap part of the seat belt must lie across the pelvis, never across the ⇒ page 22, and push it down until it is securely locked with an audible click stomach. -
Page 26
WARNING Never unbuckle a seat belt while the vehicle is in motion. If you do, you – After adjusting, pull the shoulder belt sharply to check that the increase the risk of sustaining severe or fatal injuries. -
Page 27: Belt Tension Devices
Sensors will trigger the belt tension devices during severe head-on, lateral increased when a deploying airbag strikes an occupant who has and rear collisions only if the seat belt is being worn. This retracts and assumed an incorrect sitting position. As driver, you are responsible tightens the seat belts, reducing the forward motion of the occupants.
-
Page 28
The belt tension device and seat belt including its automatic retractor cannot be repaired. • Any work on the belt tension devices and seat belts, including the removal and refitting of system parts in conjunction with other repair work, must be performed by a qualified workshop only. -
Page 29: Airbag System
• sustain critical injuries. Therefore, it is essential that all occupants maintain If you are not wearing a seat belt or if you lean forward or to the side or a correct sitting position while travelling. assume an incorrect sitting position, the risk of injury is increased substantially.
-
Page 30
An enabled front airbag on the front passenger side is potentially a major − Follow the installation instructions of the child seat manufacturer danger to a child. The front passenger seat is life threatening to a child if you and absolutely observe the warnings ⇒ page 42, “Child safety”. -
Page 31
Airbag system Monitoring of airbag and belt tension device system damaged. The consequence may be that, in the event of an accident, the airbag inflates incorrectly or does not inflate at all. The functionality of the airbag and belt tension device system is constantly … -
Page 32: Front Airbags
The airbag system is not a substitute for seat belts, but is an integral part of the vehicle’s overall passive safety system. Please bear in mind that the airbag system can only work effectively when the occupants are wearing their seat belts correctly and have adjusted the head restraints properly.
-
Page 33
• or if the vehicle rolls. WARNING • The seat belts and airbags can only provide maximum protection if the occupants are seated correctly ⇒ page 9, “Proper sitting position for occu- pants”. • If a fault should occur in the airbag system, have the system checked immediately by a qualified workshop. -
Page 34
Airbag system In order to provide the desired extra protection in an accident, the airbags may develop when the airbag deploys. This is normal and is no indication have to deploy extremely rapidly (within fractions of a second). A fine dust that there was a fire in the vehicle. -
Page 35: Side Airbags
• If you are not wearing a seat belt or if you lean forward or to the side or assume an incorrect sitting position, the risk of injury is increased substantially. This increased risk of injury will be further increased if you are struck by an inflating airbag.
-
Page 36
Airbag system The airbag system is not a substitute for seat belts, but is an integral part of WARNING (continued) the vehicle’s overall passive safety system. Please bear in mind that the • airbag system can only work effectively when the occupants are wearing their Never drive the vehicle if the loudspeakers in the door panels have seat belts. -
Page 37
Airbag system Function of side airbags The special design of the airbag allows the controlled escape of the propel- lant gas when an occupant puts pressure on the bag. Thus, the head and Inflated airbags can reduce the risk of head or chest injury in chest are surrounded and protected by the airbag. -
Page 38
Any work on the side airbag system or removal and installation of the If you do not wear a seat belt, if you lean forward, or are not seated airbag components for other repairs (such as removal of the front seat) correctly while the vehicle is in motion, you are at greater risk of injury should only be performed by a qualified workshop. -
Page 39: Curtain Airbags
(airbags with gas generator) for the driver, front curtain airbag system”. passenger and passengers on the rear seats, • The airbag system is not a substitute for seat belts, but is an integral part of in the dash panel insert ⇒ page 28. a warning lamp the vehicle’s overall passive safety system.
-
Page 40
WARNING • In order for the side airbags to provide their maximum protection, the prescribed sitting position must always be maintained with seat belts fastened while travelling. • Fig. 24 Deployed curtain… -
Page 41
Airbag system WARNING (continued) • There must be no other persons, animals or objects between the occu- pants of the outer seats and the deployment space of the curtain airbags so that the curtain airbag can deploy without restriction and provide the greatest possible protection. -
Page 42: Deactivating Airbags
Airbag system Deactivating airbags* Disabling front passenger airbag If you fit a rear-facing child seat to the front passenger seat, the front passenger airbag must be de-activated. Fig. 26 Warning lamp for deactivated passenger airbag in centre console When the passenger airbag is deactivated, this means that only the frontal and side airbags are deactivated.
-
Page 43
• As soon as the child seat is no longer needed on the front passenger seat, enable the front passenger airbag again. • Only deactivate the passenger airbag when the ignition is off, other-… -
Page 44: Child Safety
We recommend that children under 12 years of age be transported on the rear seats. Children travelling on the rear seat must use a child restraint system or the seat belts provided, depending on their age, height and weight. For safety reasons, the child restraint system should be installed in the centre of the rear seat or behind the front passenger’s seat.
-
Page 45
Never allow a child to be transported in a vehicle without being properly injury in an accident! secured, or to stand up or kneel on a seat while travelling. In an accident, the child could be flung through the vehicle, causing possibly fatal injuries As the driver, you are responsible for any children you transport in to themselves and other occupants. -
Page 46: Child Seats
Child seats that have been tested and approved under the ECE R 44 standard Group 0: For babies from about 9 months old and 10 kg in weight the most bear the test mark on the seat (the letter E in a circle with the test number ⇒ fig.
-
Page 47
Children under 7 years of age weighing between 15 and 25 kg are best use in the vehicle wallet and always keep them in the vehicle. protected by group 2 child seats in conjunction with properly adjusted seat belts. WARNING… -
Page 48
The shoulder part of the seat belt must lie approximately on the centre of the shoulder, never across the neck or the arm. The seat belt must lie close to the torso. The lap belt part must lie across the pelvis, not across the stomach, and always fit closely. -
Page 49: Securing Child Seats
Securing child seats Ways to secure a child seat A child seat can be secured differently on the rear seat and on the front passenger seat. • You can secure a child seat to the rear seat or front passenger seat in the Child seats from the groups 0, 0+ and 1 using the “ISOFIX”…
-
Page 50
Securing the child seat using the “ISOFIX” and “Toptether” Two“ISOFIX” retaining rings are fitted on each rear seat. In some vehicles, the rings are secured to the seat frame and in others they are secured to the rear system or the antirotation mechanism/system floor. -
Page 51
Safety First Operating instructions Tips and Maintenance Technical Data… -
Page 52
Fig. 31 Instrument panel… -
Page 53: Operating Instructions
Cockpit Operating instructions Cockpit Overview Radio casing*/Radio navigation system* Passenger airbag* ……..Glove box/Stowage compartment .
-
Page 54: Instruments
Cockpit Instruments Instrument overview The instruments display the vehicle operating status. Fig. 32 Detailed view of dash panel instrument panel The layout of the instruments depends upon the model and engine. Digital clock*/Outside temperature display*/Multifunction display ⇒ page 54 Rev counter* ⇒ page 53 Display field for selector lever position ⇒…
-
Page 55
Cockpit Rev counter Engine coolant temperature display The rev. counter displays the engine speed in revolutions per This gauge shows the engine coolant temperature. minute. ⇒ page 52, fig. 32 The start of the red zone on the dial indicates the maximum engine speed which may be used briefly when the engine is warm and after it has been run in properly. -
Page 56: Digital Display In The Instrument Panel
Cockpit ⇒ fig. 34 When the needle reaches the reserve zone the warning lamp will WARNING light and an acoustic signal will sound reminding the driver to refuel. At this point there are still about 7 litres of fuel in the tank. When working in the engine compartment, always bear in mind the safety warnings ⇒…
-
Page 57
Cockpit Ambient temperature display* Display with multi-function display (MFD)* The outside temperature is displayed when the ignition is The multi-function display (MFD) shows you diverse journey switched on. and consumption data. At descending temperatures between +4°C down to -7°C and at ascending temperatures from -5°C up to +6°C in addition to the outside temperature display, an ice crystal is displayed and if vehicle speed is over 10 km/h an acoustic buzzer is heard. -
Page 58
Cockpit Displays in the multi-function display (MFD)* The multi-function system uses two automatic memories: 1 — Actual memory and 2 — Total memory. The selected memory will be shown in the upper right-hand corner of the display. Selecting memory – With the ignition switched on, briefly press the button ⇒… -
Page 59
Cockpit Memory displays Miles — Fuel range • Time The fuel range is calculated using the figures for tank content and current fuel • consumption. It shows how far the vehicle can travel using the same condi- Journey duration tions as a reference. -
Page 60
Cockpit The lower counter registers the short journeys. The last digit indicates steps Note of 100 metres. The trip recorder counter may be reset by the reset button ⇒ page 52, fig. 32 When the vehicle is stationary or travelling at very low speeds, the tempera- ture displayed may be slightly higher than the actual ambient temperature as Service interval display a result of the heat radiated from the engine. -
Page 61
Cockpit Caution We recommend that the resetting of the service interval indicator be carried out in an Authorised Service Centre to avoid possible faults in the vehicle. Note • The indication can only be reset when a pre-warning or warning is indi- cated. -
Page 62: Warning Lamps
Cockpit Warning lamps Overview of the warning lamps The warning lamps indicate a number of different functions and possible faults. Fig. 40 Instrument panel with warning lamps. Some of the items of equipment listed here are fitted only on certain models/model years or are optional extras.
-
Page 63
Airbag or belt tension device system fault or airbag disabled ⇒ page 25 ⇒ page 28 ⇒ page 16 Seat belt warning lamp* ⇒ page 65 Fault in the emission control system … -
Page 64
Cockpit Item Symbol Meaning of warning and control lamps Further information ⇒ page 66 Pollen accumulation in the diesel engine particulate filter ⇒ page 67 Electronic immobiliser ⇒ page 67 Engine oil pressure ⇒ page 67 Trailer turn signals in operation … -
Page 65
Cockpit There is a fault in the electro-hydraulic steering system if the lamp does not Warning lamp flashes go out or lights up whilst the vehicle is in motion. Take the vehicle to the If a fault develops in the engine management system while you are driving, Authorised Service Centre as soon as possible. -
Page 66
Cockpit Main beam headlights Coolant temperature too high First look at the coolant temperature gauge. The coolant temperature is too This warning lamp lights up when the main beams are on. high if the needle is over the warning area on the dial. Stop the vehicle, switch off the engine and wait for it to cool down. -
Page 67
Cockpit • If the brake fluid level is too low ⇒ page 187 The vehicle can still be braked in the normal way (except that the ABS control function will not function). Please take the vehicle to a qualified workshop as •… -
Page 68
Cockpit Traction control system (TCS)* In this case the ESP can be reactivated by switching the ignition off and then on again. If the warning lamp goes out, this means the system is fully The traction control system prevents the driven wheels from functional. -
Page 69
The warning lamp will not flash if one of the turn signals on the trailer fails. key is used. Note Differential lock fault (EDL)* The vehicle cannot be operated properly if you do not have a genuine SEAT key. EDL operates along with the ABS in vehicles equipped with an Electronic Stabilisation Program (ESP)* … -
Page 70: Audio Control From Controls On The Steering
Steering wheel controls* Steering wheel controls* Audio control from controls on the steering wheel Fig. 41 Controls on the Fig. 42 Controls on the steering wheel steering wheel Short press Long press Button Radio CD Audio CD mp3 Radio CD Audio CD mp3 Volume up Continue volume up…
-
Page 71
Steering wheel controls* Search down- Search down- Previous track Rewind wards for station wards for station Change source cycle No specified function Silence No specified function Change folder Change CD Next preset No function No specified function Previous folder Previous CD Previous preset No function No specified function… -
Page 72: Central Locking
Unlocking and locking Unlocking and locking Doors WARNING (continued) • Closing from the outside without taking care or observing all the Locking and unlocking the vehicle vehicle may cause bruising for other people especially children. • When locking a vehicle, never leave children unaccompanied inside, as From the outside of the vehicle, the driver’s door may be it will be difficult to provide assistance if required.
-
Page 73
Unlocking and locking Auto-locking to prevent involuntary unlocking To activate the system using the remote control, press the lock button on the remote twice. Automatic speed dependent locking and unlocking system* Emergency unlocking system When the “Safe” system is deactivated, the alarm volumetric sensor is also deactivated. -
Page 74
Unlocking and locking Unlocking the boot WARNING See ⇒ page 78 and ⇒ page 83. No one should remain in the vehicle if the “Safe” deadlock mechanism has been activated. It is not possible to open the doors from the inside or the outside and this would make any outside intervention difficult in case of Locking system for involuntary unlocking emergency. -
Page 75
Unlocking and locking Central locking button Each door may be unlocked and opened from the interior (for example when a passenger gets out). For this, simply operate the lever on the inside of the The vehicle can be locked and unlocked from the inside using door twice. -
Page 76
Unlocking and locking • Childproof locks The driver’s door cannot be locked if it is open. This prevents you from locking yourself out of the vehicle. • The childproof lock prevents the rear doors being opened Repeated operation of the central locking will deactivate the central from the inside. -
Page 77
Unlocking and locking This function is independent of the electronic opening and locking systems of the vehicle. It only affects the rear doors. It is only possible to activate it and deactivate it manually, as described below: Activating the childproof lock –… -
Page 78: Keys
Unlocking and locking Keys Key set The set of keys includes a remote control, a key without a remote control and a key tab with the number of the key. Fig. 47 Folding key The key set belonging to your vehicle consists of the following items: •…
-
Page 79
Unlocking and locking Duplicate keys If you need a replacement key, take your key tab to an Authorised Service Centre. WARNING • Incorrect use of the keys can result in critical injuries. • Never leave children or disabled persons in the vehicle; in case of emer- gency they may not be able to leave the vehicle or look after themselves. -
Page 80: Radio Frequency Remote Control
Unlocking and locking Radio frequency remote control Locking and unlocking the vehicle The remote control key can be used to lock and unlock the vehicle from a distance. Fig. 49 Range of the remote control The following functions can be performed using the remote control and without using the key itself.
-
Page 81
Unlocking and locking • ⇒ fig. 48 lock the vehicle, press the lock button briefly . The indicators If the vehicle is unlocked using the button, the vehicle will be flash once. locked again automatically if any of the doors or the tailgate are not opened within 30 seconds of unlocking the vehicle. -
Page 82: Anti-Theft Alarm System
Unlocking and locking Anti-theft alarm system* – Maximum time allowed for synchronising is 30 seconds. – The normal key is used to activate the ignition, and the key with the remote control is the key to be programmed. Description of anti-theft alarm system* –…
-
Page 83
Unlocking and locking Volumetric sensor* The acoustic signals sound and the indicators flash for approx. 30 seconds. How is the alarm switched off? Monitoring or control function incorporated in the anti-theft To deactivate the anti theft alarm, the key must be turned to the open position alarm*, that detects unauthorized vehicle entry using ultra- in the driver’s door and the ignition must be turned on within 15 seconds, or sound. -
Page 84
Unlocking and locking Note • If, after deactivating the volumetric sensor, the vehicle is locked using the remote control or the key in the door lock in under 30 seconds, the volumetric sensor will remain deactivated. The other functions of the antitheft alarm* will remain activated. -
Page 85: Tailgate
Unlocking and locking Tailgate Opening and locking The operation of the tailgate opening system is electric. It is activated by using the handle on the tailgate Fig. 51 Closing the tail- gate Opening the tailgate ⇒ fig. – Pull on the release lever and lift the tailgate 50.
-
Page 86: Windows
Unlocking and locking Windows If the keyhole is in horizontal position, this implies that the tailgate is locked and can only be opened using the main key. Opening or closing the windows electrically* WARNING • The front and rear electric windows can be operated using the Always close the tailgate properly.
-
Page 87
Unlocking and locking Buttons in the driver door WARNING (continued) Button for window in front left door • If necessary, use the safety switch to disable the rear electric windows. Button for window in front right door Make sure that they have been disabled. Buttons for rear windows* Safety switch for deactivating the electric window buttons in the rear Note… -
Page 88
Unlocking and locking – Use the key to lock the vehicle from outside and hold the key in The one-touch function and roll-back function will not work if there is a malfunction in the electric windows. Contact an Authorised Service Centre. the lock position for at least one second. -
Page 89: Sliding/Tilting Roof
Unlocking and locking Sliding/tilting roof* Tilting the sliding/tilting sunroof – Turn the rotary button to position Opening and closing the sliding/tilting roof Always close the sliding/tilting roof fully if you park the vehicle or leave it unattended ⇒ The sliding/tilting sunroof is opened and closed using the rotary button when the ignition is switched on.
-
Page 90
Unlocking and locking Convenience closing* Using the door lock – Hold the key in the door lock of the driver’s door in the locking position until the sliding/tilting sunroof is closed. – Release the key to interrupt this function. Note The sliding/tilting sunroof rotary button remains in the last position selected Fig. -
Page 91: Lights And Visibility
Lights and visibility Lights and visibility Lights Switching on the fog lights* – Turn the switch from position to the first stop. The symbol in the light switch lights up. Switching lights on and off Switching on the rear fog lights (vehicles with front fog lights) …
-
Page 92
Lights and visibility • The rear fog light is so bright that it can dazzle drivers behind you. You Headlight range control should use the rear fog light only when visibility is very poor. Using the electrical headlight range control, you can adjust the headlight •… -
Page 93
Lights and visibility Hazard warning lights The rear window heating only works when the engine is running. When it is switched on, a lamp lights up on the switch. The hazard warning lights are used to draw the attention of After 20 minutes, the heating device of the rear window switches off automat- other road users to your vehicle in emergencies. -
Page 94
Lights and visibility Turn signal and main beam headlight lever 7. Always take the vehicle key with you when you leave the vehicle. The turn signal and main beam lever also operates the You should switch on the hazard warning lights to warn other road users, for parking lights and the headlight flasher. -
Page 95
Lights and visibility Switching main beam on and off signal bulbs are damaged, warning lamp does not light up. You should have the bulb replaced. – Turn the light switch to position • The main beam headlights can only be switched on if the dipped beam ⇒… -
Page 96: Interior Lights
Lights and visibility Interior lights Note If not all the vehicle doors are closed, the interior lights will be switched off Front interior light after approx. 10 minutes, providing the key has been removed and the cour- tesy light position selected. This prevents the battery discharging. Front reading light* Fig.
-
Page 97: Visibility
Lights and visibility Glove box light* Visibility The light in the glove box on the front passenger side will only light up if the Sun visors lights are switched on and the glove box is open. Luggage compartment lighting* The luggage compartment lighting is located in the upper section, on the back of the stowage tray.
-
Page 98: Windscreen Washers
Lights and visibility Windscreen washers – Move the control to the left or right to set the length of the intervals. Control to the left: long intervals; control to the right: short intervals. Four wiper interval stages can be set using switch …
-
Page 99
Lights and visibility Rain sensor* WARNING (continued) • The rain sensor controls the frequency of the windscreen Always note the corresponding warnings on ⇒ page 186. wiper intervals, depending on the amount of rain. Caution In icy conditions, always check that the wiper blades are not frozen to the glass before using the wipers for the first time. -
Page 100: Windscreen
Lights and visibility Windscreen Note • Do not put stickers on the windscreen in front of the sensor. This may Athermic windscreen* cause sensor disruption or faults. Headlight washer system The headlight washers clean the headlight lenses. The headlight washers are activated automatically when the windscreen washer is used and the windscreen wiper lever is pulled towards the steering wheel for at least 1.5 seconds –…
-
Page 101: Mirrors
Lights and visibility Mirrors Automatic anti-dazzle interior mirror* The automatic anti-dazzle function can be switched on and off Adjusting the head restraints as desired. Before beginning any journey, adjust the rear-view mirrors for correct visibility. Interior mirror It is dangerous to drive if you cannot see clearly through the rear window.
-
Page 102
Lights and visibility Electric wing mirrors* Note • The exterior mirrors can be adjusted using the rotary knob in The automatic anti-dazzle function will only work properly if the sun blind* for the rear window is retracted and there are no other objects the centre console. -
Page 103
Lights and visibility – Place the control in position L or R once the mirrors have For the sake of the environment demisted to prevent unnecessary use of the battery. The exterior mirror heating should be switched off when it is no longer needed. -
Page 104: The Importance Of Correct Seat Adjustment
Always keep your feet in the foot well when the vehicle is moving; never Proper seat adjustment optimises the level of protection rest them on the dash panel, out of the window or on the seat. This also offered by seat belts and airbags.
-
Page 105: Head Restraints
Fig. 70 Side view: head restraints and seat belts correctly adjusted – Adjust the head restraint so that its upper edge is at the same level as the top of your head, or as close as possible to the same level as the top of your head and, as a very minimum at eye level ⇒…
-
Page 106
The head restraints can be adjusted by moving them up and down. Adjusting height (rear central seat) – Press the button on the side and pull upwards to the desired position. – To lower the head restraint, press the button and push head restraint downwards. -
Page 107: Front Seats
Please observe the safety warnings ⇒ page 103, “Correct adjustment of head restraints”. Note • To fit and remove the rear head restraints, gently tilt the seat back forwards. • When fitting the head restraints again, insert the tubes as far as possible into the guides without pressing the button.
-
Page 108
To reduce the risk of injury to the driver and front passenger during sudden braking manoeuvres or an accident, never drive with the backrest tilted far to the rear. The maximum protection of the seat belt can be achieved only when the backrests are in an upright position and the driver and front passenger have properly adjusted their seat belts. -
Page 109: Rear Seat Bench
– Insert the head restraints in their fastenings ⇒ page 104. Folding seat forward – Remove the head restraints from their fastening on the seat cushion. Fig. 74 Folding up the – Lift the backrest until it correctly engages in the catches.
-
Page 110: Stowage Compartments
• After raising the backrest, check it has engaged properly in position. • The three point automatic seat belt only works correctly when the back- rest of the central seat is correctly engaged. Object compartment, driver’s side There is an object compartment on the driver’s side…
-
Page 111
Seats and stowage Stowage drawer under front right seat* Seat storage pocket* Fig. 78 Stowage compartment under the Fig. 79 Seat storage front passenger seat pocket To open There is a storage pocket on the rear of the front seats. -
Page 112
Seats and stowage Front cup holder* Rear cup holder* Fig. 80 Front cup holder Fig. 81 Cupholder in the in the centre console centre console To open On the rear part of the centre console, behind the hand brake, there is a ⇒… -
Page 113: Ashtrays, Cigarette Lighter And Electrical Sockets
Seats and stowage Ashtrays, cigarette lighter and electrical Closing – Move the ashtray cover towards the gearstick until it engages. sockets WARNING Front ashtray Never put paper in the ashtray. Hot ash could ignite the paper in the ashtray. Cigarette lighter Fig.
-
Page 114
Seats and stowage Auxiliary audio connection (AUX-IN) WARNING • Improper use of the cigarette lighter can lead to serious injuries or start a fire. • Take care when using the cigarette lighter. Carelessness or negligence when using the cigarette lighter can cause burns, risk of injury. •… -
Page 115: First-Aid Kit, Warning Triangle, Fire Extinguisher
Seats and stowage ® Connector for Apple* iPod USB* connection ® The iPod connector is in the glove compartment on the In the glove box on the passenger side there is a USB port. passenger side. Fig. 86 USB connection* in glove box on passenger Fig.
-
Page 116: Luggage Compartment
Luggage compartment cover well at all times: The tray behind the rear seat back can be used for clothing. – Distribute the load as evenly as possible. The groove between the tray and the rear window heater should never be –…
-
Page 117
Roof carrier* Please observe the following points if you intend to carry loads on the roof: • For safety reasons, only luggage racks and accessories approved by SEAT should be used. • It is imperative to precisely follow the fitting instructions included for the… -
Page 118: Heating, Ventilation And Air Conditioning
Heating, Ventilation and Air conditioning Heating, Ventilation and Air conditioning Heating and ventilation is needed to defrost the windows quickly, is only available when the engine has reached its operating temperature. Blower Controls The air flow can be set at four speeds with switch .
-
Page 119
Heating, Ventilation and Air conditioning – Set the airflow to the desired direction using air distribution WARNING (continued) control • In air recirculation mode, no ambient air enters the vehicle interior. The – Open the relevant air outlets. windows can quickly fog over if the heating is switched off. Therefore, you should never leave the air recirculation mode switched on for longer Heating the interior periods, as this increases the risk of an accident. -
Page 120
Heating, Ventilation and Air conditioning – Close outlets 3 Heating Maximum heat output, which is needed to defrost the windows quickly, is – Open and turn outlets towards side windows only available when the engine has reached its operating temperature. When the windows are demisted and as a preventive measure, the switch Note … -
Page 121: Air Conditioning
Heating, Ventilation and Air conditioning Air conditioning* Air distribution Switch on symbol Main air output through outlets: Controls 1, 2, 5 3, 4 The outlets can be closed or opened separately and the air flow directed according to need. Air vent closed: operating lever vertical.
-
Page 122
Heating, Ventilation and Air conditioning Vehicle interior heating or cooling system – Turn the fan control to one of the two levels depending on the speed required. – Rotate the temperature control to the desired level. – Close outlets 3 –… -
Page 123
Heating, Ventilation and Air conditioning Air recirculation – Turn the temperature control switch until the desired interior temperature is obtained. Air recirculation mode prevents fumes or unpleasant smells – Turn the blower switch to one of the settings 1-4. from entering the vehicle. -
Page 124: Climatronic
Heating, Ventilation and Air conditioning • • If the function is not deactivated by pressing the button, this will be deac- If the vehicle interior has overheated due to excessive solar radiation, it is tivated after about 20 min. best to open the windows or doors to allow the hot air to escape. •…
-
Page 125
Heating, Ventilation and Air conditioning ⇒ page 122, fig. 92 – Turn the temperature selector to set the WARNING desired temperature. For your safety, the windows should never be fogged up or covered with – The functions will be switched on when the buttons are pressed. snow or ice. -
Page 126
Heating, Ventilation and Air conditioning Climatronic maintains a constant temperature level fully automatically. The Blower temperature of the air supplied to the interior, the blower speed and the air The blower can be infinitely adjusted with the blower control . Always have distribution are regulated automatically. -
Page 127: General Notes
Heating, Ventilation and Air conditioning When the outside temperature is high, using air recirculation mode provides Caution more effective cooling by cooling air from the vehicle interior instead of warm • air from outside. If you suspect that the air conditioning is damaged, switch off the air conditioning with button to prevent further damage and have it ECON…
-
Page 128
Heating, Ventilation and Air conditioning • For correct operation of the system, do not block the grille between the AUTO button and the button • When the engine is under extreme strain, switch off the compressor for a moment. -
Page 129: Address
The height and reach of the steering wheel can be freely adjusted to suit the driver. Fig. 94 Proper sitting position for driver – Adjust the driver seat to the correct position. ⇒ fig. 93 down ⇒ – Push the lever under the steering column –…
-
Page 130: Safety
Driving Safety WARNING (continued) • Adjust the driver seat or steering wheel so that there is a distance of at ⇒ page 127, Electronic stabilisation programme (ESP)* least 25 cm between the steering wheel and your breast bone fig. 94. If you fail to observe the minimum distance, the airbag will not ESP helps make driving safer in certain situations.
-
Page 131: Ignition Lock
Driving • Ignition lock when rocking the vehicle backwards and forwards to free it from mud, for example. You should press the button to switch the ESP back on when you no longer Position of the ignition key need wheel spin. The TCS and EDL are also switched off if the ESP is switched off.
-
Page 132: Starting And Stopping The Engine
Wait for the vehicle to come to a standstill before removing the ignition The engine can only be started using a genuine SEAT key with the correct key from the lock. The steering lock could be activated immediately — Risk code.
-
Page 133
10 seconds and try again after about half a minute. If the engine still does not The engine can only be started using a genuine SEAT key with start, the fuel pump fuse should be checked ⇒ page 205, “Fuses”. -
Page 134
Driving Glow plug system for the diesel engine For the sake of the environment To avoid unnecessary load on the battery, do not use any other major elec- Do not warm-up the engine by running the engine with the vehicle stationary. trical equipment while the glow plugs are pre-heating. -
Page 135: Manual Gearbox
Driving – Slide the gearstick to the left, and then into the reverse position Caution shown on the gearstick. If the engine has been driven hard for a long period, the engine could over- heat when it is switched off. Risk of engine damage. For this reason, you Certain versions of the model may include a 6-speed manual gearbox, the should idle the engine for approx.
-
Page 136: Automatic Gearbox
Driving Automatic gearbox* Note A programme will, depending on the driving resistance, be selected automat- Gearbox programmes ically that guarantees more pulling power, thus avoiding having to shift gear constantly. The automatic gearbox has two gearbox programmes. Fig. 98 Centre console: Automatic gearbox selector lever The gearbox management system is equipped with two driving programmes.
-
Page 137
Driving Selector lever lock functions The selector lever lock is released as follows: The selector lever lock in position P or N prevents gears from – Switch on the ignition. being engaged inadvertently, which would cause the vehicle – Press and hold the brake pedal and press the selector lever lock to move. -
Page 138
Driving N — neutral (idling) Note To take the lever out of position N at speeds of below 5 km/h or when the car The selector lever can be placed in positions 3, 2 and 1 when the change is is at a standstill but the ignition is switched on, depress the brake pedal and made manually, but the automatic gearbox does not change to a lower gear press the lock button on the gearstick knob. -
Page 139
Driving • If, while driving, the selector lever accidentally moves to position N, first The gearbox does not automatically engage gears. release the accelerator pedal and wait until the engine slows to idling before In this case they can be changed manually. 3rd gear is only available in posi- selecting a forwards gear ⇒… -
Page 140: Handbrake
Driving Handbrake Always apply the handbrake firmly. This prevents you driving with the hand- brake applied ⇒ The handbrake warning lamp lights up when the handbrake is applied Using the handbrake and the ignition switched on. The warning lamp goes out when the hand- brake is released.
-
Page 141: Cruise Control System (Ccs)
Driving Cruise control system (CCS)* – Switch off the engine and remove the key from the ignition lock. Turn the steering wheel slightly to engage the steering lock. – Always take you car keys with you when you leave the vehicle Description ⇒…
-
Page 142
Driving Switching the cruise control system on and off Setting speed* Fig. 102 Turn signal and Fig. 103 Turn signal and main beam headlight main beam headlight lever switch and rocker lever switch and rocker switch for the cruise switch for the cruise control control ⇒… -
Page 143
Driving Adjusting set speed* When you increase speed with the accelerator and then release the pedal, the system will automatically restore the set speed. This will not be the case, The speed can be altered without touching the accelerator or however, if the vehicle speed is more than 10 km/h higher than the stored speed for longer than 5 minutes. -
Page 144
Driving • if the clutch pedal is depressed, Vehicles with a manual gearbox • The system is completely turned off by moving the control all the way to if the vehicle is accelerated to over 180 km/h, • the right hand side (OFF engaged), or when the vehicle is stationary, ignition when the lever is moved in the direction of OFF without fully being off. -
Page 145: Tips And Maintenance
Intelligent technology Tips and Maintenance Intelligent technology Brakes The brake assist system intervenes here, if you press the brake pedal very quickly, the brake assist system registers an emergency situation. It then very quickly builds up the full brake pressure so that the ABS can be activated Brake servo more quickly and efficiently, thus reducing the braking distance.
-
Page 146: Anti-Lock Brake System And Traction Control Abs
Intelligent technology Anti-lock brake system and traction control WARNING (continued) • The effectiveness of ABS is also determined by the tyres fitted ⇒ page 190. • If the running gear or brakes are modified, the effectiveness of the ABS Anti-lock brake system (ABS) could be severely limited.
-
Page 147: Electronic Stabilisation Programme (Esp)
Intelligent technology The TCS should be switched on again afterwards as soon as possible. Electronic Stabilising Program (ESP)* ESP reduces the danger of skidding by braking the wheels individually. WARNING The system uses the steering wheel angle and road speed to calculate the •…
-
Page 148
Intelligent technology Anti-lock brake system (ABS) WARNING (continued) • Always adapt your driving style to suit road conditions and the traffic The anti-lock brake system prevents the wheels locking during braking ⇒ page 144. situation. Do not let the extra safety afforded by EDL tempt you into taking any risks when driving, this can cause accidents. -
Page 149: Driving And The Environment
Driving and the environment Driving and the environment Running-in Running in tyres and brake pads New tyres should be run-in carefully for the first 500 km. New Running in a new engine brake pads should be run-in carefully for the first 200 km. The engine needs to be run-in over the first 1,500 km.
-
Page 150: Exhaust Gasses Purification System
Driving and the environment Authorised Service Centre more frequently than recommended in the Service WARNING (continued) Schedule. • If a brake circuit fails, the braking distance will be increased consider- If you drive withwet brakes, for example, after crossing areas of water, in ably.
-
Page 151: Driving Abroad
Under normal driving conditions, the filter cleans itself. If the driving conditions do not allow the filter to clean itself (for example, multiple short SEAT importers and distributors will gladly provide information about the trips) the filter will be obstructed by dust and pollen and the indicator technical preparation of your vehicle in addition to necessary maintenance the diesel engine particulate filter indicator will light.
-
Page 152
Driving and the environment Adhesive strips for headlights If you have to drive a right-hand drive vehicle in a left-hand drive country, or vice versa, the asymmetric dipped beam headlights will dazzle oncoming traffic. To prevent dazzling, you must apply stickers to certain parts of the headlight lenses. -
Page 153
Driving and the environment Covering simple headlights for driving on the right* On the left headlight, if you are changing from driving on the left-hand side to the right-hand side. Covering bifocal headlamps for driving on the left* Fig. 109 Right headlight Fig. -
Page 154
Driving and the environment On the right headlight, if you are changing from driving on the right-hand side ⇒ page 151, fig. to the left-hand side 111. On the left headlight, if you are changing from driving on the right-hand side ⇒… -
Page 155
Driving and the environment Covering GDL headlamps for driving on the left* On the left headlight, if you are changing from driving on the right-hand side ⇒ fig. to the left-hand side 116. Covering GDL headlamps for driving on the right* Fig. -
Page 156: Trailer Towing
If the trailer has a 7-pin plug you will need to use an adapter cable. This is standard mirrors. If this is not the case you should have additional mirrors available from any SEAT dealer. fitted. Both exterior mirrors should be mounted on hinged extension brackets.
-
Page 157
Driving and the environment Driving tips Note • Driving with a trailer always requires extra care. Towing a trailer places additional demands on the vehicle. We recom- mend additional services between the normal inspection intervals if the Weight distribution vehicle is used frequently for towing a trailer. •… -
Page 158: Driving Economically And With Respect For The Environment
Driving and the environment Driving economically and with respect for the Avoid idling It is worthwhile switching off the engine when waiting in a traffic jam, at level environment crossings or at traffic lights with a long red phase. The fuel saved after only 30 — 40 seconds is greater than the amount of fuel needed to restart the engine.
-
Page 159
Overall water consumption reduced Environmental friendliness • Heat recovery systems • Water-soluble paint Environmental protection is a top priority in the design, choice of materials and production of your new Seat. Safety First Operating instructions Tips and Maintenance Technical Data… -
Page 160: Cleaning And Caring For Your Vehicle
Cleaning and caring for your vehicle Cleaning and caring for your vehicle General notes WARNING (continued) your vehicle. The use of certain products may produce noxious vapours; Regular washing and care help maintain the value of your these should be used in well ventilated areas. vehicle.
-
Page 161: Care Of The Vehicle Exterior
Cleaning and caring for your vehicle Care of the vehicle exterior – Clean the vehicle with a soft sponge, a glove or a brush. Start on the roof and work your way down. Use only light pressure. – Rinse the sponge or glove as much as possible. Automatic car washes –…
-
Page 162
Cleaning and caring for your vehicle – Do not use a high pressure cleaner to remove ice or snow from Caution windows ⇒ page 161. • Never attempt to remove dirt, mud or dust if the surface of the vehicle is –… -
Page 163
Cleaning and caring for your vehicle Good quality hard wax is available from your Authorised Service Centre. Caution A good coat of wax helps to protects the paintwork from environmental To prevent damage to the paintwork: contaminants ⇒ page 158. It is also effective in protecting against minor •… -
Page 164
Cleaning and caring for your vehicle Wax deposits have to be removed with a special cleaner which is available 2. Apply a specialist care product to the rubber seals. from your Authorised Service Centre. Wax deposits on the windscreen could cause the wiper blades to judder. -
Page 165
Cleaning and caring for your vehicle • Do not clean or polish chrome parts in a sandy or dusty environment. Alloy wheels require regular attention to preserve their appearance. It is important to remove road salt and brake dust by washing the wheels at regular intervals, otherwise the finish will be impaired. -
Page 166: Care Of The Vehicle Interior
Cleaning and caring for your vehicle WARNING (continued) WARNING • Switch off the engine, apply the parking brake firmly and always Do not apply underseal or anti-corrosion coatings to the exhaust pipes, remove the key from the ignition before you open the bonnet. catalytic converter or the heat shields on the exhaust system.
-
Page 167
Cleaning cloth seat covers and fabric trim SEAT does everything possible to preserve the special qualities of leather, as Cloth seat covers and fabric trim on the doors, headlining etc. can be cleaned a natural product. Because of the natural properties of the specially selected with a special interior cleanser or with dry foam and a soft brush. -
Page 168
WARNING (continued) colour variations in high-quality natural leather are normal. • Check the condition of all seat belts at regular intervals. If you notice that the belt webbing, fittings, retractor mechanism or buckle of any of the Caution belts is damaged, the belt must be replaced by a specialist workshop. -
Page 169: Accessories, Parts Replacement And Modifications
Due to the way the electronic components Despite continuous observation of the market, SEAT is not able to assess the are linked together in networks, other systems may be affected by the faults. reliability, safety and suitability of parts not approved by SEAT. For this reason…
-
Page 170: Roof Aerial
You will require an external aerial for mobile phones and two- • transmitting power in excess of 10 watts. way radios. SEAT has approved your vehicle for use with mobile telephones and two-way radios providing the following conditions are observed:…
-
Page 171
Accessories, parts replacement and modifications Note Please observe the operating instructions of your mobile telephone / two-way radio. Safety First Operating instructions Tips and Maintenance Technical Data… -
Page 172: Fitting A Towing Bracket
Accessories, parts replacement and modifications Fitting a towing bracket* It is possible to fit a towing bracket to the rear of the vehicle. Fig. 119 Attachment points for towing bracket…
-
Page 173
Accessories, parts replacement and modifications If a towing bracket is to be fitted after the vehicle is purchased, this must be WARNING (continued) completed according to the instructions of the towing bracket manufacturer. • For your own safety, please observe the instructions provided by the The attachment points for the towing bracket are underneath the vehicle. -
Page 174: Checking And Refilling Levels
Checking and refilling levels Checking and refilling levels Refuelling – Turn the key in the lock, without releasing the cap in the clock- ° wise direction 180 The tank flap is released manually. The tank holds approxi- – Remove the key and close the flap until it clicks into place. The mately 45 litres.
-
Page 175: Petrol
Checking and refilling levels Fuel types are differentiated by the octane rating, e.g: 91, 95, 98 RON (RON WARNING (continued) = “Regulation Octane Number, unit for determining the knock resistance of − Insert the fuel nozzle into the mouth of the canister as far as petrol”).
-
Page 176: Diesel
Checking and refilling levels • Petrol additives DIN is a German abbreviation for “Deutsches Institut für Normung e.V.”, the German standards institute. • Petrol additives improve the quality of the petrol. EN means European Norm. • FAME is the English abbreviation “Fatty Acid Methyl Ester” The quality of the petrol influences running behaviour, performance and service life of the engine.
-
Page 177: Working In The Engine Compartment
All service fluids and consumables, e.g. coolant, engine oil, spark plugs and batteries, are being constantly developed. SEAT provides a constant flow of information to the Authorised Service Centres concerning modifications. For Safety First…
-
Page 178
Checking and refilling levels this reason we recommend that you have service fluids and consumables WARNING (continued) replaced by an Authorised Service Centre. Please observe the relevant instructions ⇒ page 167. The engine compartment of any motor vehicle is a •… -
Page 179
Checking and refilling levels Before opening the bonnet ensure that the windscreen wipers are in Caution rest position. When changing or topping up service fluids, make absolutely certain that you – To release the bonnet, pull the lever under the dashboard fill the fluids into the correct reservoirs. -
Page 180: Engine Oil
Checking and refilling levels If the bonnet does not close, do not press downwards. Open it once more and may have some repercussions on the performance of the engine for example, let it fall as before. long starting time, increased consumption and a higher emission level. If a top up is required then different oils may be mixed as long as they all conform to the VW standards.
-
Page 181
Checking and refilling levels Oil properties Viscosity The viscosity class of the oil is selected according to the diagram. When the ambient temperature falls outside the limits of the scale for a short period, an oil change is not required. Fig. -
Page 182
Checking and refilling levels – Pull out the dipstick. Wipe the dipstick with a clean cloth and Note insert it again, pushing it in as far as it will go. Before a long trip, we recommend finding an engine oil that conforms to the ⇒… -
Page 183
Checking and refilling levels – To avoid over-filling with engine oil, you should top-up using Caution small quantities, wait a while and check the oil level before If the oil level is above the area do not start the engine. This could result adding any more oil. -
Page 184: Coolant
Checking and refilling levels • Changing engine oil Never pour oil down drains or into the ground. • Use a suitable container when draining the used oil. It has to be large The engine oil must be changed at the intervals given in the enough to hold all the engine oil.
-
Page 185
Checking and refilling levels Checking the coolant level and topping up WARNING (continued) • The correct coolant level is important for fault-free func- The coolant additive G 12+ must be added in sufficient quantities to tioning of the engine cooling system. provide anti-freeze protection at the coldest ambient temperatures that can be expected. -
Page 186
Checking and refilling levels – If the level is underneath the “MIN” mark, top up with coolant. WARNING (continued) • Topping up coolant When the engine is warm or hot, the cooling system is pressurised! Do not unscrew the cap on the expansion tank when the engine is hot. This is –… -
Page 187: Washer Fluid And Windscreen Wiper Blades
Checking and refilling levels Washer fluid and windscreen wiper blades WARNING Any work carried out in the engine compartment or on the engine must be Topping up washer fluid carried out cautiously. • When working in the engine compartment, always observe the safety The water for cleaning the windscreen should always be warnings ⇒…
-
Page 188
Checking and refilling levels Changing windscreen wiper blades If the windscreen wipers smear, they should be replaced if they are damaged, or cleaned if they are soiled. If the windscreen wiper blades are in perfect condition, you If this does not produce the desired results, the setting angle of the wind- will benefit from an improved visibility. -
Page 189: Brake Fluid
⇒ page 232. The brake fluid reservoir has a black and It is important that you use only brake fluid compliant with the US standard FMVSS 116 DOT 4. We recommend the use of Genuine SEAT brake fluid. yellow cap.
-
Page 190: Battery
Checking and refilling levels Battery WARNING (continued) • Before opening the bonnet to check the brake fluid level, read and observe the warnings ⇒ page 175. Warnings on handling the battery • Brake fluid should be stored in the closed original container in a safe place out of reach of children.
-
Page 191
Checking and refilling levels • If the vehicle is left standing in cold conditions for a long period, protect WARNING (continued) the battery from frost. If it “freezes” it will be damaged. charge. Never short the battery terminals. High-energy sparks can cause injury. -
Page 192: Wheels
The battery has been developed to suit the conditions of its location and has special safety features. Storing tyres Genuine SEAT batteries fulfil the maintenance, performance and safety spec- – Mark tyres when you remove them to indicate the direction of ifications of your vehicle.
-
Page 193
Checking and refilling levels Checking tyre pressure New tyres New tyres have to be run in ⇒ page 147. The correct tyre pressure can be seen on the sticker on the The tread depth of new tyres may vary, according to the type and make of tyre inside of the tank flap. -
Page 194
Checking and refilling levels Tyre service life Wear indicators The original tyres on your vehicle have 1.6 mm high “tread wear indicators” The service life of tyres is dependent on tyre pressure, driving ⇒ page 192, fig. 129, running across the tread. Depending on the make, style and fitting. -
Page 195
Tyres should be replaced at least in pairs and not individually (i.e. both front approved by SEAT for your model. Failure to do so could impair vehicle tyres or both rear tyres together). A knowledge of tyre designations makes it handling. -
Page 196
The prescribed torque for wheel bolts for steel and alloy wheels is 120 Nm. wheels or tyres which have not been approved by SEAT for use with your model may invalidate the vehicle’s type approval for use on public roads. -
Page 197
Checking and refilling levels Snow chains Information on permitted winter tyre sizes can be found in the vehicle’s regis- tration documents. Use only radial winter tyres. All tyre sizes listed in the vehicle documentation also apply to winter tyres. Snow chains are only permitted on the front wheels and only for tyres 155/80 R13;… -
Page 198: If And When
If and when If and when Vehicle tools, spare wheel WARNING (continued) • The jack supplied by the factory is only designed for changing wheels Vehicle Tools on this model. On no account attempt to use it for lifting heavier vehicles or other loads, risk of injury.
-
Page 199: Wheel Change
If and when Snow chains Note For technical reasons, snow chains must not be used on the compact tempo- • Seek professional assistance if the repair of a tyre puncture is not rary spare wheel. possible with the sealing compound. If you should have a puncture on one of the front wheels when using snow chains, fit the compact temporary spare in place of one of the rear wheels.
-
Page 200
If and when After changing a wheel WARNING After changing the wheel there are still tasks to complete. Put the hazard warning lights on and place the warning triangle in position. This is for your own safety and also warns other road users. –… -
Page 201
If and when Wheel trims Wheel covers* The wheel trims must be removed to gain access to the wheel The wheel covers must be removed for access to the wheel bolts. bolts Fig. 131 Changing the wheel: Removing a hub Fig. -
Page 202
If and when Loosening the wheel bolts WARNING The wheel bolts must be loosened before raising the vehicle. Loosen the wheel bolts only about one turn before raising the vehicle with the jack, loosening the wheel bolts more than one turn can result in an acci- dent. -
Page 203
If and when Raising the vehicle – Locate the jacking point under the door sill closest to the wheel ⇒ fig. being changed 134. The vehicle must be raised with a jack to remove the wheel. – Wind up the jack under the jacking point until the arm of the jack is directly below the vertical rib under the door sill. -
Page 204
If and when Removing and fitting the wheel The wheel bolts should be clean and turn easily. Before fitting the spare wheel, inspect the condition of the wheel and hub mounting surfaces. These For removal and fitting the wheel, the following tasks must be surfaces must be clean before fitting the wheel. -
Page 205: Tyre Repair Kit* (Tyre Mobility System)
If and when Tyre repair kit* (Tyre Mobility System) – Insert the adapter onto the wheel bolt and push it on as far as it ⇒ page 202, fig. will go 137. – Fit the box spanner as far as it will go over the adapter. General information and safety notes –…
-
Page 206
If and when Note Note Seek professional assistance if the repair of a tyre puncture is not possible Please observe legal requirements when doing so. with the sealing compound. Tyre repair Preparation work The following sections describe the procedures for repairing Certain steps must be taken before repairing a tyre. -
Page 207: Fuses
If and when – Replace the blown fuse (which will have a melted metal strip) Note with a new fuse of the same ampere rating. The compressor should never be allowed to run for longer than 6 minutes. The individual electrical circuits are protected by fuses. The fuses are located behind a cover at the left-hand end of the dash panel.
-
Page 208
If and when • If you replace a fuse with a stronger fuse, you could cause damage to another location in the electrical system. • Always keep some spare fuses in the vehicle. These are available from SEAT dealers. -
Page 209
If and when Fuses on left side of dash panel Fuses Number Consumer Amperes Secondary water pump 1.8 20 VT (T16) ABS/ESP Vacant Brake light, clutch switch, relay coils Engine control unit (petrol) Right side light Left side light Mirror heating unit Lambda probe Signal“S”… -
Page 210
If and when Number Consumer Amperes Main beam headlight, left Number plate light/side light indicator Rear windscreen wiper Injectors(fuel) Brake light switch /ESP (Turn sensor) Instrument panel/Diagnosis Switchboard: glovebox light, boot light, interior light Climatronic Power supply central locking unit Left front window control Vacant Self powered alarm horn… -
Page 211
If and when Number Consumer Amperes Windscreen wiper unit Heated rear window unit Indicator unit Cigarette lighter Locking unit Radio/CD/GPS/Telephone Horn Dipped headlight (left side) Right rear window control The signal “S”is a system which includes the starter and steering lock and enables, after the ignition is switched off and without removing the key from the steering and starter lock, certain electrical components to be switched on, including for example, the radio, the courtesy light, etc. -
Page 212
If and when Fuses in engine compartment above battery Fig. 139 Fuse box above battery These fuses may only be changed at an authorised Service Centre Metal fuses Number Consumer Amperes Alternator/Starter motor Power supply voltage distributor inside vehicle Power assisted steering pump Spark plug preheating (diesel) Electroblower clima heater/fan ABS unit… -
Page 213: Bulb Change
If and when Number Consumer Amperes Cable control unit Clima fan Vacant Jatco unit for automatic gearbox Vacant Vacant Vacant Bulb change Rear lights on tailgate small position light 12V/W5W antifog lamp 12V/P21W General notes reverse lamp 12V/P21W Single reflector headlamps* Before changing any bulb, first turn off the equipment concerned.
-
Page 214
Fig. 141 Main headlight lamps On this type of headlight, the bulb changes must be made by the SEAT dealer, given that complex elements must be removed from the vehicle and a reset must be made on the automatic control system incorporated. -
Page 215
If and when Side lights Indicator lights Dipped headlight lamp Fig. 143 Dipped head- light lamp – Raise the bonnet. ⇒ fig. 142 – Remove the loops outwards in the direction of the arrow and remove the cover. Fig. 142 Dipped head- ⇒… -
Page 216
If and when ⇒ fig. 144 Main beam lights – Remove the loops outwards in the direction of the arrow and remove the cover. ⇒ fig. – Remove the lamp cable connector 145. – Undo the retainer spring and remove. –… -
Page 217
If and when ⇒ fig. 146 Side beam lights – Remove the loops in the direction of the arrow and remove the cover. – Pull on the cables to release the lamp holder from the casing ⇒ fig. 147. – Pull on the lamp and replace. –… -
Page 218
If and when ⇒ fig. 148 Turn indicator lamps – Remove the loops in the direction of the arrow and remove the cover. – Turn the lamp holder to the left and remove it from the casing ⇒ fig. 149 –… -
Page 219
If and when ⇒ fig. 150 Fog lights – Undo the two fastening screws and when released unplug the connector – Turn the headlamp cover to the left a quarter turn. – Unplug the lamp cable. – Undo the lamp retainer spring and remove. –… -
Page 220
If and when Side indicator lamps Rear lights on tailgate Fig. 153 Rear light on tailgate Fig. 152 Side indicators – Press the indicator to the left or to the right to remove the lamp. – Remove the lamp holder from the indicator. –… -
Page 221
If and when ⇒ page 218, fig. Rear lights on frame – Remove plastic cover 153, insert finger in opening and pull in the direction of the arrow. ⇒ page 218, fig. 154 – Press the tabs of the lamp holder and remove lampholder. -
Page 222
If and when To remove glass Note – Insert a fine screwdriver between the casing and the glass Make sure that when assembling all seals and rubbers are correctly fitted. ⇒ fig. 156. – Carefully remove the glass, levering it to avoid possible damage. Number plate light To replace the lamps –… -
Page 223: Jump-Starting
If and when Jump-starting – Replace the bulb. – Insert the light on the connector side, first underneath then push at the top until it clicks into place. Jump leads The jump lead must have a sufficient wire cross section. Luggage compartment lighting* If the engine fails to start because of a discharged battery, the battery can be connected to the battery of another vehicle to start the engine.
-
Page 224
If and when How to jump start: description 4. Connect the other end of the black jump lead to a solid metal component which is bolted on to the engine block, or onto the engine block itself of the vehicle with the flat battery. Do not connect it to a point near the battery ⇒… -
Page 225
If and when WARNING • Please note the safety warnings referring to working in the engine compartment ⇒ page 175, “Working in the engine compartment”. • The battery providing assistance must have the same voltage as the flat battery (12V) and approximately the same capacity (see imprint on battery). -
Page 226: Towing And Tow-Starting
If and when Towing and tow-starting Towing eyes Tow-starting* The use of jump leads is preferable to tow-starting. We recommend that you do not tow-start your vehicle. Jump-starting is preferable ⇒ page 221. However, if your vehicle has to be tow-started: –…
-
Page 227
If and when Fitting the front towing eye As the brake servo does not work if the engine is not running, you must apply considerably more pressure to the brake pedal than you normally would. – First remove the right hand cover from the lower part of the bumper. -
Page 228
If and when Rear towline anchorage At the rear, on the right below the rear bumper is a towline point. -
Page 229: Technical Data
General notes on the technical data Technical Data General notes on the technical data What you should be aware of General notes All data in the official vehicle documents take precedence over this data. All data in these documents are valid for the basic model as offered in Spain. The figures may be different if additional equipment is fitted, for different The vehicle data card included in the Maintenance Programme or the vehicle models, for special vehicles and for other countries.
-
Page 230
General notes on the technical data Vehicle identification data Vehicle data The data sticker is placed on the inside of the spare wheel recess in the The most important data are given on the type plate and the luggage compartment. vehicle data sticker. -
Page 231: How Are The Figures Measured
General notes on the technical data How are the figures measured? Fuel consumption The consumption and emission details shown on the vehicle data sticker differ from one vehicle to another. The fuel consumption and CO emissions of the vehicle can be found on the The consumption and emission figures are calculated in accordance with the vehicle data sticker.
-
Page 232: Towing A Trailer
General notes on the technical data Weights Drawbar load The maximum permitted weight exerted by the trailer drawbar on the ball joint of the towing bracket must not exceed 75 kg. Kerb weight refers to the basic model with a fuel tank filled to 90% capacity and without optional extras.
-
Page 233
General notes on the technical data Snow chains Snow chains are only permitted on the front wheels and only for tyres 155/80 R13; 165/70 R14 and 185/80 R14. Snow chains must have fine-pitch links which do not protrude more than 15 mm, including tension device. Remaining tyres can be fitted with chains no thicker than 9 mm. -
Page 234: Technical Data
Technical Data Technical Data Checking fluid levels Overview Further explanations, instructions and restrictions on the technical data are contained as of ⇒ page 227. From time to time, the levels of the different fluids in the vehicle must be checked. Never fill with incorrect fluids, to do so may cause serious damage to the engine.
-
Page 235: Petrol Engine 1.2 51 Kw (69 Bhp)
Technical Data Petrol engine 1.2 51 kW (69 bhp) General engine data Power output in kW (bhp) 51 (69)/ 5400 Maximum torque in Nm at rpm 112/ 3000 No. of cylinders, capacity 3/ 1198 in cm Compression 10,5+/- 0,3 a) b) Fuel Super 95 RON /Normal 91 RON…
-
Page 236: Petrol Engine 1.4 63 Kw (86 Bhp)
Technical Data Engine oil capacity Approximate engine oil capacity with oil filter change 3.2 litres Petrol engine 1.4 63 kW (86 bhp) General engine data Power output in kW (bhp) 63 (86)/ 5000 Maximum torque in Nm at rpm 132/ 3600 No.
-
Page 237: Petrol Engine 1.4 Litre 55 Kw (75 Hp). Automatic
Technical Data Weights Gross vehicle weight in kg 1594 Weight in working order (with driver) in kg 1150 Gross axle weight, front in kg Gross axle weight, rear in kg Permitted roof load in kg Trailer weights With no brakes, gradients up to 12% With brakes, gradients up to 12% Engine oil capacity Approximate engine oil capacity with oil filter change…
-
Page 238
Technical Data Performance figures Maximum speed in km/h Acceleration from 0-80 km/h in sec. 10,3 Acceleration from 0-100 km/h in sec. 15,9 Weights Gross vehicle weight in kg 1623 Weight in working order (with driver) in kg 1182 Gross axle weight, front in kg Gross axle weight, rear in kg… -
Page 239: Petrol Engine 1.4 74 Kw (100 Bhp)
Technical Data Petrol engine 1.4 74 kW (100 bhp) General engine data Power output in kW (bhp) 74 (100)/ 6000 Maximum torque in Nm at rpm 126/ 4400 No. of cylinders, capacity 4/ 1390 in cm Compression 10,5 a)b) Fuel Super 98 RON/Super 95 RON Research-Octane-Number = Measure of the predetonation power of the petrol.
-
Page 240: Petrol Engine 1.6L 77 Kw (105 Bhp)
Technical Data Engine oil capacity Approximate engine oil capacity with oil filter change 3.5 litres Petrol engine 1.6l 77 kW (105 bhp) General engine data Power output in kW (bhp) 77 (105)/ 5600 Maximum torque in Nm at rpm 153/ 3800 No.
-
Page 241: Diesel Engine 1.4 Litre Tdi 51 Kw (70 Bhp)
Technical Data Trailer weights With no brakes, gradients up to 12% With brakes, gradients up to 12% 1000 Engine oil capacity Approximate engine oil capacity with oil filter change 4.0 litres Diesel engine 1.4 litre TDI 51 kW (70 bhp) General engine data Power output in kW (bhp) 51 (70)/ 4000…
-
Page 242: Diesel Engine 1.4 Tdi 59 Kw (80 Bhp)
Technical Data Weights Gross vehicle weight in kg 1662 Weight in working order (with driver) in kg 1219 Gross axle weight, front in kg Gross axle weight, rear in kg Permitted roof load in kg Trailer weights With no brakes, gradients up to 12% With brakes, gradients up to 12% 1200 Engine oil capacity…
-
Page 243
Technical Data Performance figures Maximum speed in km/h Acceleration from 0-80 km/h in sec. Acceleration from 0-100 km/h in sec. 13,2 Weights Gross vehicle weight in kg 1662 Weight in working order (with driver) in kg 1219 Gross axle weight, front in kg Gross axle weight, rear in kg… -
Page 244: Diesel Engine 1.9L Tdi 74 Kw (100 Bhp)
Technical Data Diesel engine 1.9l TDI 74 kW (100 bhp) General engine data Power output in kW (bhp) 74(100)/ 4000 Maximum torque in Nm at rpm 240/ 1800-2400 No. of cylinders, capacity 4/ 1896 in cm Compression Fuel Min. 51 CN Cetane-Number (cetane index) = Measure of the combustion power of the diesel.
-
Page 245: Diesel Engine 1.9L Tdi 96 Kw (131 Bhp)
Technical Data Engine oil capacity Approximate engine oil capacity with oil filter change 4.3 litres Diesel engine 1.9l TDI 96 kW (131 bhp) General engine data Power output in kW (bhp) 96(131)/ 4000 Maximum torque in Nm at rpm 310/ 1900 No.
-
Page 246
Technical Data Trailer weights With no brakes, gradients up to 12% With brakes, gradients up to 12% 1200 Engine oil capacity Engine oil capacity with oil filter change. 4.3 litres… -
Page 247: Dimensions And Capacities
Technical Data Dimensions and capacities Dimensions Length, width 4,280 mm/ 1,698 mm Height at kerb weight 1,447 mm Front and rear projection 831 mm/ 839 mm Wheelbase 2,460 mm Turning circle 10.54 m Front Rear 1,435 mm 1,424 mm Track width 1,419 mm 1,408 mm Capacities…
-
Page 249: Index
Belt tension devices ….. . 25 Adjusting the seat belt height ….24 Anti-lock brake system .
-
Page 250
Emergency unlocking system … . 73 Child seat ……. 44 Clock . -
Page 251
Engine fault seat ……. 28 Driving safety ……8 warning lamp . -
Page 252
Jump leads ……221 Front seat adjustment Removing ……104 Jump-starting . -
Page 253
Warning lamps ……60 Demisting the windscreen and side windows . . Rear seat bench ……107 Rear seats, MFD . -
Page 254
Starting Petrol engines ….131 Seat belts ……. 16 Roof carrier* . -
Page 255
Tyres with directional tread pattern ..191 The danger of not using the seat belt ..19 Washing the vehicle ….. 159 Tightening torque of wheel bolts . -
Page 256
Index Why wear seat belts? ….16, 18 Why wear seatbelts? ….. . 27 Windows . -
Page 257
SEAT S.A. is permanently concerned about continuous development of its types and models. For this reason we ask you to understand, that at any given time, changes regarding shape, equipment and technique may take place on the car delivered. For this reason no right at all may derive based on the data, drawings and descriptions in this current handbook. -
Page 258
auto emoción…
ибиза и кордоба ибиза и кордоба Инструкция по эксплуатации RUS
Вы выбрали автомобиль SEAT. Спасибо за доверие. Дорогой водитель: Ваш автомобиль и природа Добро пожаловать в семью владельцев автомобилей SEAT. Вы выбрали автомобиль, который во всех отношениях радикально отличается от современных машин. Даже во взаимодействии с окружающей средой. Ваша новая
Ваш автомобиль и безопасность Абсолютно все элементы системы пассивной безопасности были проверены на крэш-тесктах, прежде чем поступить на конвейер. Все испытания мы проводили по собственным стандартам, которые зачастую значительно превышают международные. Автомобиль Ваш, Сервис — наш. В вашем
ЛИТЕРАТУРА СТРУКТУРА КНИГИ Перед изучением Инструкции по Эксплуатации Инструкция по эксплуатации Дополнительное оборудование Содержание Вам следует внимательно изучить эту инструкцию и дополнения к ней, чтобы познакомиться со своим новым автомобилем. Эта книга описывает максимальное количество
Содержание Далее мы предлагаем вашему вниманию краткое описание глав, на которые разделена данная Инструкция по Эксплуатации. СОДЕРЖАНИЕ Введение . . . . . . . . . . . . . . . . . . . . . . . 1.2 Ремни безопасности . . . . . . . . . . . . . . 1.3 1. Подушки безопасности. . . . . . . . . . . . 1.16
БЕЗОПАСНОСТЬ БЕЗОПАСНОСТЬ Введение в тему Ремни беопасности Дорогой Водитель, Для чего нужны ремни безопасности? Доказано, что ремни безопасности дают хорошую защиту пассажирам при авариях. Поэтому во многих странах пассажиры обязаны пристегиваться ремнями безопасности по закону. В этой главе вы
БЕЗОПАСНОСТЬ БЕЗОПАСНОСТЬ B1H-119 Тем не менее, скорость автомобиля наиболее важный фактор. Если, например, скорость автомобиля увеличивается с 25 км/ч до 50 км/ч, то величина кинетической энергии увеличивается в четыре раза! Так как пассажиры в нашем примере не используют ремни безопасности, их
БЕЗОПАСНОСТЬ БЕЗОПАСНОСТЬ Наши примеры описывают только лобовые столкновения. Такие физические законы также применимы и к другим видам столкновений. Вот почему вы должны использовать ремни безопасности при любых поездках, даже, если вы собираетесь доехать только до «следующего перекрестка». Также
БЕЗОПАСНОСТЬ • Во время езды ваши ноги всегда должны находиться на полу и никогда — на торпедо или сидении. • Ремни безопасности должны быть всегда чистыми, так как грязь и пыль могут сказаться на работе механизмов. (см. также стр. 3.30). • Отверстие на языке замка не должно быть закрыто бумажными
БЕЗОПАСНОСТЬ БЕЗОПАСНОСТЬ B31-167C B31-119C Внимание! Ремень безопасности должен проходить строго посередине плеча, но не по шее, и он должен плотно прилегать к телу. Ремень должен проходить по грудной клетке, а не по животу. Если необходимо, отрегулируйте ремень. Внимание! • Убедитесь, что ремень
БЕЗОПАСНОСТЬ БЕЗОПАСНОСТЬ B1H-132 Отстёгивание ремня безопасности Для того, чтобы отстегнуть ремень безопасности, нажмите на кнопку красного цвета на замке около сидения. При этом замок ремня безопасности освободится. Катушка около двери должна правильно замотать ремень. Пластиковая головка на
БЕЗОПАСНОСТЬ Натяжение ремней безопасности* Безопасность пристегнутого ремнями безопасности водителя и переднего пассажира увеличивается, в комбинации с системой подушек безопасности, благодаря устройствам натяжения ремней безопасности. В случае лобового столкновения, которое может нести собой
БЕЗОПАСНОСТЬ БЕЗОПАСНОСТЬ Подушки безопасности* Готовность системы подушек безопасности проверяется электроникой: 3 2 4 5 100 80 6 1 120 140 • Каждый раз при включении зажигания 160 180 200 контрольная лампа загорается примерно на 3 секунды (автодиагностика). AIRBAG AIRBAG 220 • Если хотя бы одна
БЕЗОПАСНОСТЬ БЕЗОПАСНОСТЬ Когда срабатывают подушки безопасности? Замечания • При серьёзных лобовых столкновениях срабатывают подушки безопасности водителя и пассажира. При серьёзных боковых ударах страбатывает боковая подушка безопасности* с соответствующей стороны. Система подушек безопасности не
БЕЗОПАСНОСТЬ БЕЗОПАСНОСТЬ Замечания B1H-210 Боковая подушка безопасности* При срабатывании системы подушка наполнится воздухом. Подушка раскрывается в считанные секунды для обеспечения дополнительной безопасности при аварии. При раскрытии подушки инерционное движение прекратится, что значительно
БЕЗОПАСНОСТЬ БЕЗОПАСНОСТЬ Безопасность детей Отключение подушки безопасности В определённых ситуациях подушка бузопасности может быть отключена: • если необходимо использовать детское сидение, в котором ребёнок сидит спиной к направлению движения автомобиля. • если невозможно соблюсти необходимую
БЕЗОПАСНОСТЬ БЕЗОПАСНОСТЬ Используйте только официально одобренные детские кресла соответствующего класса. К детским креслам применяется стандарт ECE-R2) 44.03. Он разделяет их на четыре класса. Группа 0: 0-10 кг Группа I: 9-18 кг Группа II: 15-25 кг Группа III: 22-36 кг Детские кресла,
БЕЗОПАСНОСТЬ БЕЗОПАСНОСТЬ Замечания • Мы рекомендуем ипользовать только те детские кресла, которые продаются у Официального Дилера SEAT. Эти кресла отвечают всем требованиям стандарта ECE-R 44 и были проверены на автомобилях SEAT. • Для правильной установки и использования детского кресла
БЕЗОПАСНОСТЬ БЕЗОПАСНОСТЬ Передние сидения Правильная настройка сидений необходима для: – быстрого доступа к органам управления. – удобного положения тела. – максимальной эффективности ремней безопаспости и подушек безопасности. B1J-095D Крепление детского сидения с помощью системы ISOFIX. На
БЕЗОПАСНОСТЬ Подголовники* B1S-017P Подголовники могут быть настроены по высоте и должны соответствовать росту пассажира. Правильно настроенные подголовники вместе с ремнями безопасности обеспечивают эффективную защиту. Вы также можете отрегулировать угол наклона подголовников на передних сидениях.
СОДЕРЖАНИЕ ВОДИТЕЛЬСКОЕ МЕСТО Внешний вид . . . . . . . . . . 2.3/2.5 СИДЕНИЯ И ОТСЕКИ ДЛЯ ВЕЩЕЙ Приборы . . . . . . . . . . . . . . . . . 2.6 Передние сидения. . . . . . . . . 2.60 Дополнительные приборы . . . 2.11 Подголовники* . . . . . . . . . . . . 2.63 Бортовой компьюьер* . . . . . . 2.12
Volkswagen Technical Site: http://volkswagen.msk.ru http://vwts.info http://vwts.ru ОБОРУДОВАНИЕ огромный архив документации по автомобилям Volkswagen, Skoda, Seat, Audi ОБОРУДОВАНИЕ Внешний вид 1 2 3 4 5 6 7 3 2 4 8 9 5 100 80 6 1 120 140 10 11 2 12 13 2 14 15 16 17 160 180 200 220 AIRBAG AIRBAG
ОБОРУДОВАНИЕ Позиция Стр. 1 — Дверная ручка …………………..2.27 2 — Вентиляционные отверстия……… 2.76/2.81/2.85/2.90 3 — Выключатель фар………………2.49 4 — Регулировка подсветки панели приборов* …………………………2.50 5 — Регулировка наклона фар* …2.50 6 — Рычаг
ОБОРУДОВАНИЕ ОБОРУДОВАНИЕ Панель приборов 1 3 2 2 – Температура охлаждающей жидкости 4 1 1/2 90 60 3 2 4 0 120 1/1 5 70 140 Km/h EPC 7 6 40 7 200 30 ! 220 20 240 10 0 8 260 0 P 160 180 50 5 1 80 60 6 Rpm x 1000 90100 120 km IB9-022 Содержание панели приборов зависит от версии и от установленного
ОБОРУДОВАНИЕ ОБОРУДОВАНИЕ • Чтобы установить минуту, поверните 1 1/2 20 1/1 0 d 60 IB9-036 кнопку до упора по часовой стрелке. Однократный поворот переводит часы на минуту врерёд. Вы можете установить часы с точностью до секунды: • Настройте часы так, чтобы они отставали на одну минуту. • Поверните
ОБОРУДОВАНИЕ ОБОРУДОВАНИЕ Дополнительные приборы* 7 – Пробег за поездку Верхний индикатор отображает общий пробег автомобиля, нижний пробег за данную поездку. Показания нижнего индикатора могут быть обнулены нажатием на кнопку сброса, которая находится рядом со спидометром. 7 – Индикатор сервисных
ОБОРУДОВАНИЕ ОБОРУДОВАНИЕ Бортовой компьютер* 100 120 140 160 180 200 1 220 et Res 2 IB9-039 Бортовой компьютер* Бортовой компьютер работает при включённом зажигании. Кнопка выбора функций (стрелка 1) и кнопка сброса (стрелка 2) находятся на подрулевом выключателе стклоочистителя. Последовательное
ОБОРУДОВАНИЕ ОБОРУДОВАНИЕ Контрольные лампы л/100 км – Текущий расход топлива Текущий расход топлива измеряется в литрах на 100 км. Компьютер рассчитывает реальный расход каждые 30 метров. При остановке автомобиля будет отображаться поседний результат. Вы можете использовать этот индикатор для
ОБОРУДОВАНИЕ 8 9 ОБОРУДОВАНИЕ 10 11 12 17 18 50 22 7 21 40 1330 EPC 1420 ! 10 20 19 18P 17 16 15 IB9-024 Стр. 8 – Ремень безопасности* ……….2.19 9 – Генератор ………………………..2.19 10 – Тормоза / ручной тормоз ……2.20 11 – Давление масла………………..2.20 12 – Открытый
ОБОРУДОВАНИЕ 3 – Индикатор прицепа 1 Контрольная лампа* мигает при включении указателей поворота, если вы передвигаетесь с прицепом. Если на вашем автомобиле или на прицепе не работают указатели поворота, контрольная лампа не загорится. 8 9 9 – Генератор 10 11 12 50 22 7 21 40 1330 EPC 1420 ! 10 4
ОБОРУДОВАНИЕ i 10 – Тормозная система ОБОРУДОВАНИЕ Контрольная лампа загорается, когда уровень тормозной жидкости становится слишком низким. Зажигание должно быть включено. На автомобилях, оборудованных системой ABS*, контрольная лампа загорается на несколько секунд при каждом включении зажигания.
ОБОРУДОВАНИЕ 17 – Анти-блокировочная система (ABS)* ОБОРУДОВАНИЕ ABS Эта контрольная лампа распространяется на системы ABS и EDL*. ABS* ABS Контрольная лампа загорается на несколько секунд при включении зажигания или запуске двигателя. Лампа гаснет после завершения процедуры самодиагностики. Если
ОБОРУДОВАНИЕ ОБОРУДОВАНИЕ Ключи 20 – Задние противотуманные огни* 22 – Система предварительного нагрева Контрольная лампа загорается при включении задних противотуманных огней — см. стр. 2.51. (Только дизельные двигатели) При холодном двигателе контрольная лампа включается во время включения
ОБОРУДОВАНИЕ ОБОРУДОВАНИЕ Двери Дубликаты ключей Электронный иммобилайзер По причинам безопасности, дубликаты ключей могут быть изготовлены только Официальными Дилерами SEAT. Иммобилайзер защитит ваш автомобиль от использования чужими людьми. Микрочип, находящийся в головке ключа автоматически
ОБОРУДОВАНИЕ ОБОРУДОВАНИЕ Центральный замок* Места запирания автомобиля снаружи: Передние двери, крышка баганика или с помощью пульта дистанционного управления*. внутри: Кнопка центрального замка на ручке водительской двери (см. стр. 2.29). Открывание B11-004D При запирании или окрывании передних
ОБОРУДОВАНИЕ • Запертые двери не откроются при аварии. И они предотвратят доступ посторонних лиц в автомобиль на светофорах. С другой стороны, они могут значительно затруднить оказание помощи пассажирам при аварии. • В автомобилях, оборудованных подушками безопасности, при их срабатывании
ОБОРУДОВАНИЕ c ОБОРУДОВАНИЕ A a b B IB9-015 Крышка багажника • Если цилиндр замка (a) находится в вертикальном положении, то замок багажника будет открываться и запираться централизованно через центральный замок. • Если цилиндр замка находится в горизонтальном положении (b), то замок можно открыть
ОБОРУДОВАНИЕ ОБОРУДОВАНИЕ Багажник c Противоугонная сигнализация* Благодаря противоугонной сигнализации взлом и угон автомобиля становятся очень сложными занятиями. При попытке несанкционированного проникновения в автомобиль сисема включает звуковую и световую сигнализацию. a Включение сигнализации
ОБОРУДОВАНИЕ ОБОРУДОВАНИЕ Дистанционное управление* Датчик объёма Данная функция является частью системы противоугонной сигнализации. С помощью ультразвуковых сигналов она определяет несанкционированный доступ в автомобиль (например, через окно). Система состоит из двух датчиков: приёмника и
ОБОРУДОВАНИЕ ОБОРУДОВАНИЕ B7M-043C Открывание и запирание автомобиля Чтобы открыть автомобиль, направьте ключ в его сторону и нажмите на кнопку “открыть” (стрелка 1). Указатели поворотов включатся и погаснут. Чтобы запереть автомобиль, нажмите на кнопку “закрыть” (стрелка 2). Замечания
ОБОРУДОВАНИЕ ОБОРУДОВАНИЕ Электрические стеклоподъёмники* Незапрограммированные ключи вы можете купить у Официальных Дилеров SEAT. Эти ключи, тем не менее, должны быть настроены в Официальном Сервисном Центре, так как новый ключ необходимо настроить на работу с иммобилайзером. Всего для каждого
ОБОРУДОВАНИЕ Внимание! • Всегда вынимайте ключ из замка зажигания, когда покидаете автомобиль — даже на короткое время. Никогда не оставляйте детей одних в автомобиле. • Будьте осторожны при открывании окон! Невнимательность и неосторожность могут привести к травмам. • При закрывании автомобиля
ОБОРУДОВАНИЕ Внимание! • Будьте осторожны при открывании окон! Невнимательность и неосторожность могут привести к травмам. • Водитель должен предупредить пассажиров о необходимости соблюдения осторожности при открывании и закрывании окон. Замечание Если вы подождёте более 10 секунд между
ОБОРУДОВАНИЕ ОБОРУДОВАНИЕ Люк* C Чтобы открыть — B Поверните выключатель по часовой стрелке. С — комфортное положение. Чтобы полностью открыть люк, переместите выключатель в положение B. Но в этом положении вас могут раздражать шумы, создаваемые ветром при движении. B D A B1J-096D При включённом
ОБОРУДОВАНИЕ ОБОРУДОВАНИЕ Выключатели Задние противотуманные фары* 1 2 3 Автомобили без передних противотуманных фар При включении габаритных огней или ближнего света, потяните выключатель на себя до упора. O IB9-041 B1J-068D Экстренное закрывание Сначала проверьте состояние соответствующего
ОБОРУДОВАНИЕ 1 ОБОРУДОВАНИЕ 2 5 4 3 6 5 – Обогрев заднего стекла 8 7 O TCS 3:42 RDS FM/AM TAPE CD TRACK– IB9-041 2 – Подсветка приборов С помощью этого выключателя вы можете настроить интесивность подсветки панели приборов. 3 – Регулировка фар по высоте* Данная регулировка позволяет настроить
ОБОРУДОВАНИЕ ОБОРУДОВАНИЕ Противосолнечные козырьки Указатели поворота и выключатель дальнего света Световая сигнализация Переместите рычаг на себя (3) – загорится контрольная лампа дальнего света. 1 4 3 5 2 1 При включённом ближнем или дальнем свете переместите рычаг в напралении (3). При
ОБОРУДОВАНИЕ ОБОРУДОВАНИЕ Стеклоочиститель и стеклоомыватель Внутреннее освещение B – Лампа для чтения* Освещение багажника* Лампа включается при открытии багажника (даже если фары и зажигание выключены). Поэтому всегда следите за тем, чтобы багажник был закрыт. B1H-037 A – Освещение передней части
ОБОРУДОВАНИЕ CОБОРУДОВАНИЕ Щётки стеклоочистителя Заднее окно* При нажатии на рычаг в направлении 5 включится очиститель заднего стекла, который будет работать в прерывистом режиме с интервалами в 6 секунд. Рычаг должен оставаться нажатым. Чтобы отключить очиститель заднего стекла, слегка надавите
ОБОРУДОВАНИЕ ОБОРУДОВАНИЕ Зеркала Регулировка зеркал Перед началом движения убедитесь, что зеркала настроены правильно это обеспечит максимальный обзор ситуации позади автомобиля. L O Неослепляющее внутреннее зеркало Рычаг на нижней стороне заркала в базовом положении должен быть направлен на вас.
ОБОРУДОВАНИЕ ОБОРУДОВАНИЕ Передние сидения Правильная регулировка сидений важна для: – быстрого и безопасного доступа к органам управления – удобного положения тела – максимальной эффективности ремней безопасности и Системы Подушек Безопасности. Внимание! • По вышеуказанным причинам сидения не
ОБОРУДОВАНИЕ ОБОРУДОВАНИЕ Подголовники* 3 – Регулировка сидения по высоте* С помощью специальной ручки сидение может быть приподнято или опущено. Поднимание: потяните ручку вверх. Опускание: надавите ручку вниз. Внимание! • По причинам безопасности водительское кресло должно настраиваться только во
ОБОРУДОВАНИЕ ОБОРУДОВАНИЕ Регулируемая рулевая колонка* Обогрев сидений* 5 4 6 8 7 TCS A 3:42 RDS FM/AM TAPE CD TRACK– BASS TREB TRACK+ IB9-027 7 – Подогрев* левого сидения Подушка и спинка передних сидений могут быть оборудованы электроподогревом, который работает при включённом зажигании.
ОБОРУДОВАНИЕ ОБОРУДОВАНИЕ Задняя полка Важные замечания Внимание! • Ни при каких обстоятельствах максимально допустимые нагрузки не должны превышаться. • Важно помнить, что перевозка тяжелых грузов изменит управление автомобилем из-за смещения центра тяжести. Стиль езды и скорость должны быть
ОБОРУДОВАНИЕ ОБОРУДОВАНИЕ Заднее сидение B6N-008C Увеличение объёма багажника Для увеличения объёма багажника вы можете разложить заднее сидение: спинка разделена на две части, каждая из которых может быть разложена отдельно. Перед разложением сидения необходимо снять подголовники. См. стр. 2.63.
ОБОРУДОВАНИЕ ОБОРУДОВАНИЕ Багажник на крыше* При перевозке грузов на крыше необходимо учитывать следующее: • Поскольку для повышения обтекаемости канавки для стока дождевой воды сформированы в крыше во время ее изготовления, здесь невозможно использовать решетчатые багажники обычного типа. Во
ОБОРУДОВАНИЕ Зажигалка/ розетка Зажигалка включится, если нажать на нее. Когда нагревательный элемент зажигалки раскалится докрасна, верхняя часть зажигалки выскочит из гнезда. Выньте зажигалку и немедленно воспользуйтесь ею. Внимание! • Будьте очень осторожны, пользуясь электрической зажигалкой!
ОБОРУДОВАНИЕ ОБОРУДОВАНИЕ Отопление и вентиляция A C B 1 2 3 4 0 D IB9-083 Внимание! • Для безопасного движения все окна должны быть очищены ото льда, снега и пара. Только так гарантируется максимальный обзор. Для этого вам необходимо научиться правильно использовать систему отопления и вентиляции
ОБОРУДОВАНИЕ ОБОРУДОВАНИЕ 1 1 1 A 1 2 3 2 4 5 100 80 6 1 4 120 140 2 1 160 180 200 220 3 2 Поддержание комфортной температуры воздуха в салоне C B После того, как окна станут прозрачными и воздух в салоне нагреется до нужной температуры, рекомендуются следующие положения регуляторов: • Выключатель
ОБОРУДОВАНИЕ ОБОРУДОВАНИЕ Кондиционирование* Общие замечания • Воздушные отверстия вне салона должны быть чистыми ото льда, снега и листьев для обеспечения правильной работы системы вентиляции. • Только выключатели A и C могут принимать промежуточные положения. • Для предотвращения запотевания окон
ОБОРУДОВАНИЕ ОБОРУДОВАНИЕ C – Распределение потока Позиция Отверстия полностью открыты 1, 2 Отверстия немного открыты 4 5 1, 2, 4 3, 4, 5 1, 2 3, 4 – Расположение вентиляционных отверстий приведено на следующей странице. Кнопка D – включение / выключение кондиционера Кондиционер включается нажатием
ОБОРУДОВАНИЕ A ОБОРУДОВАНИЕ 1 2 Поддержание комфортной температуры воздуха в салоне C B 3 4 0 AC D E IB9-084 Быстрый обогрев салона • • • Выключатель C в ………………… • Если лобовое стекло запотело, Выключатель B в положение 3. Выключатель A полностью вправо. Нормальное охлаждение то
ОБОРУДОВАНИЕ ОБОРУДОВАНИЕ Климатроник* Экономичное использование кондиционера • • В режиме охлаждения компрессор кондиционера оказывает влияние на работу двигателя и, следовательно, на расход топлива. • Если температура воздуха в салоне очень высока из-за стоянки на солнечном месте, рекомендуется
ОБОРУДОВАНИЕ ОБОРУДОВАНИЕ 1 Ext ° 5:1 27.5 OFF BASS TREB OFF FAD RDS FM/AM TAPE CD TRACK– 3 1 2 3 4 5 6 COLD LOUD BAL 1 TRACK+ 3 4 PAUSE CD SCAN MHz 10 0 . 0 AS Оборудование отключено 3 Интенсивность воздушного потока. 12 3 4 5 6 Вентилятор выключен. OFF Рециркуляция включена. Выбранный режим
ОБОРУДОВАНИЕ ОБОРУДОВАНИЕ Инструкции по настройке Оттаивание ветрового стекла и боковых окон • Нажимайте кнопки блока A пока не установите 4 уровень. • Нажмите кнопку C (с красной точкой), чтобы полукруг, изображённый на экране, заполнился. • Выключатель B в …………………. • Вы также можете
ОБОРУДОВАНИЕ ОБОРУДОВАНИЕ Контроль температуры* 1 1 1 1 Ext 2 3 2 4 5 100 80 6 1 4 120 140 ° 5:1 27.5 2 160 180 200 220 3 AIRBAG AIRBAG 22.0C BASS TREB BAL FAD 12:00 FM BAND RDS FM/AM TAPE CD DX 9 8 .MAN 0 RDS FM/AM TAPE CD AUTO 3 AIRBAG AIRBAG O 1 ° 4 BASS TREB AS AC OFF TRACK– TRACK+ 20 OFF 1 2 3
ОБОРУДОВАНИЕ 1 TRACK SCAN ОБОРУДОВАНИЕ 2 TRACK RND + 3 4 PAUSE CD SCAN AC 5 B CD RND PTY 6 1 TP REPEAT TRACK SCAN AUTO – 2 TRACK RND + A 3 4 PAUSE CD SCAN AC – IB9-030 Рекомендуемые установки на все сезоны: После включения зажигания. • Установите температуру в 22°C (71°F) и • Нажмите кнопку AUTO. С
ОБОРУДОВАНИЕ Замечание Если система отключится, например из-за чрезмерных нагрузок на двигатель, нажмите снова на кнопку рециркуляции. Распределение потока — B В ноги …………………………………. Отверстия 5 открыты. Для того, чтобы весь воздух шёл в ноги, отверстия 3 и 4 должны быть
ОБОРУДОВАНИЕ ОБОРУДОВАНИЕ Механическая коробка передач + – AC 1 3 Автоматическая* коробка передач Автоматический выбор программ 5 AUTO R 2 4 IB9-048 • Задний ход можно включать только тогда, когда автомобиль неподвижен. При работающем двигателе выжмите полностью педаль сцепления и подождите
ОБОРУДОВАНИЕ ОБОРУДОВАНИЕ R — Задний ход Эту передачу следует включать только тогда, когда автомобиль стоит и двигатель работает на холостом ходу. Перед тем, как перевести рычаг в положение “R” из положения “P” или “N”, необходимо нажать на педаль тормоза и на кнопку на рычаге. При включенном
ОБОРУДОВАНИЕ ОБОРУДОВАНИЕ Ручной тормоз Внимание! • Если двигатель работает, то при любом положении рычага необходимо удерживать нажатой педаль тормоза, так как в автоматических коробках передача мощности не прекращается полностью даже на холостом ходу, и автомобиль начинает «ползти». Если передача
ОБОРУДОВАНИЕ ОБОРУДОВАНИЕ Пуск двигателя Замок зажигания В процессе прогревания не следует включать другие устройства, потребляющие электроэнергию, чтобы не расходовать без необходимости энергию аккумулятора. 3 – Пуск двигателя. Для всех моделей: B8D-005 Электронная блокировка При включении
ОБОРУДОВАНИЕ ОБОРУДОВАНИЕ Остановка двигателя Дизельные двигатели Система предварительного нагрева При включении зажигания предварительный нагрев включится на необходимое время, о чём будет сигнализировать контрольная лампа — см. стр. 2.24. Запуск холодного двигателя Температура больше +5°C:
СОДЕРЖАНИЕ ЗАПРАВКА БАКА Характеристики масел. . . . . . 3.41 Заправка бака . . . . . . . . . . . . . 3.2 Система охлаждения. . . . . . . 3.44 Бензин. . . . . . . . . . . . . . . . . . . 3.4 Вентилятор . . . . . . . . . . . . . . 3.46 Дизель. . . . . . . . . . . . . . . . . . . 3.5 Тормозная
ПРАКТИЧЕСКИЕ СОВЕТЫ ПРАКТИЧЕСКИЕ СОВЕТЫ Заправка топливного бака B1H-040 Горловина топливного бака находится на правой боковой панели. Запираемая крышка горловины бака находится за дверцей бензобака (см. иллюстрацию). Емкость топливного бака примерно 45 литров. Когда наконечник автоматического
ПРАКТИЧЕСКИЕ СОВЕТЫ ПРАКТИЧЕСКИЕ СОВЕТЫ Бензин В главе “Технические характеристики” и на внутренней поверхности крышки бензобака вы найдёте информацию по необходимому октановому числу топлива для вашего двигателя. Общие замечания • Неэтилированный бензин должен отвечать требованиям DIN EN1) 228, а
ПРАКТИЧЕСКИЕ СОВЕТЫ ПРАКТИЧЕСКИЕ СОВЕТЫ Тормоза Езда зимой Фильтр-подогреватель* Общие замечания Когда температура наружного воздуха опускается ниже 0°C, при использовании летнего дизельного топлива могут возникнуть проблемы, связанные с тем, что из-за выделения парафина топливо становится слишком
ПРАКТИЧЕСКИЕ СОВЕТЫ Перегрев тормозов Внимание! • Не позволяйте тормозам “тереться”, слегка нажимая на педаль, когда этого не требуется — тормоза могут перегреться, что приведёт к увеличению тормозного пути и более высокому износу накладок. • Перед началом отрезка пути в холмистой местности,
ПРАКТИЧЕСКИЕ СОВЕТЫ ПРАКТИЧЕСКИЕ СОВЕТЫ Электронная Блокировка Дифференциала (EDL)* Система Контроля Тяги (TCS)* Автомобили, оснащенные системой ABS, могут, в дополнение к этой системе, иметь электронную блокировку дифференциала (EDL). Система EDL значительно облегчает трогание с места, ускорение и
ПРАКТИЧЕСКИЕ СОВЕТЫ ПРАКТИЧЕСКИЕ СОВЕТЫ Программа Электронной Стабилизации (ESP)* Гидроусилитель руля* Система ESP увеличивает уровень контроля над автомобилем в процессе ускорений и поворотов. ESP расширяет функции ABS/TCS и уменьшает риск бокового скольжения. Результатом этого является повышенная
ПРАКТИЧЕСКИЕ СОВЕТЫ ПРАКТИЧЕСКИЕ СОВЕТЫ Очистка выхлопов Первые 1500 км – и далее Обкатка От 1000 до 1500 км В первые часы работы двигателя внутреннее трение выше, чем впоследствии, когда все движущиеся части приработаются друг к другу. Насколько хорошо пройдет процесс обкатки в значительной
ПРАКТИЧЕСКИЕ СОВЕТЫ ПРАКТИЧЕСКИЕ СОВЕТЫ Экономичная и экологичная езда Расход топлива, уровень выхлопов и износ двигателя зависят от трёх факторов: • Индивидуального стиля вождения. • Условий эксплуатации автомобиля. • Технических требований. Расход топлива может быть снижен на 10-15 процентов за
ПРАКТИЧЕСКИЕ СОВЕТЫ ПРАКТИЧЕСКИЕ СОВЕТЫ Рекомендация 7 l/100km –10°C +20°C km 5 15 25 30 B45-356P Рекомендация 6 Избегайте коротких поездок Для снижения расхода топлива и вредных выбросов двигатель и катализатор должны достигнуть оптимальной рабочей температуры. Расход топлива в холодном двигателе
ПРАКТИЧЕСКИЕ СОВЕТЫ ПРАКТИЧЕСКИЕ СОВЕТЫ Езда с прицепом Этот автомобиль предназначен, главным образом, для перевозки людей и багажа, однако можно использовать его для буксировки прицепа, если на нем установлены необходимые технические приспособления и не превышены максимально допустимые веса (см.
ПРАКТИЧЕСКИЕ СОВЕТЫ ПРАКТИЧЕСКИЕ СОВЕТЫ Путешествия за рубеж • Давление в шинах автомобиля с прицепом должно соответствовать полной нагрузке. Проверяйте также давление в шинах прицепа. • Перед поездкой с прицепом следует также проверить наклон фар и, при необходимости, отрегулировать его.
ПРАКТИЧЕСКИЕ СОВЕТЫ Изменение угла рассеивателя фар Если вы путешествуете по стране с противоположным направлением движения, ассиметричные рассеиватели ваших фар могут ослеплять водителей, движущихся по встречной полосе. Для избежания этого, необходимо заклеить непрозрачной лентой некоторые участки
ПРАКТИЧЕСКИЕ СОВЕТЫ ПРАКТИЧЕСКИЕ СОВЕТЫ Обычные линзы 8,5 2,5 2 6,5 1 11 11 3,8 4 17,5 1,7 8,5 4 1 4 4,5 1,5 8,5 10 IBA-004 IBA-005 IBA-006 Переход от езды слева на езду справа — левая фара. Переход от езды справа на езду слева — правая фара. 3.26 ———————————————- ВАШ
ПРАКТИЧЕСКИЕ СОВЕТЫ ПРАКТИЧЕСКИЕ СОВЕТЫ Забота об автомобиле 11 12 4 8 4 2,5 17 2,5 IBA-007 Переход от езды слева на езду справа — правая фара. IBA-008 Переход от езды слева на езду справа — левая фара. Чтобы сохранить хорошее техническое состояние вашего автомобиля, необходимо ухаживать за ним
ПРАКТИЧЕСКИЕ СОВЕТЫ или на ней появились царапины, вы должны немедленно поставить в известность об этом оператора моечной установки. Следующий раз воспользуйтесь услугами другой мойки. Замечания • Перед тем, как завести машину в автоматическую мойку, не забудьте об обычных мерах предосторожности
ПРАКТИЧЕСКИЕ СОВЕТЫ Обивка и текстильная отделка Обивку сидений и текстильную отделку панелей дверей, облицовку багажного отсека, обшивку подголовников нужно чистить только специальными очистителями или сухой пеной и мягкой щеткой. Натуральная кожа В зависимости от интенсивности использования
ПРАКТИЧЕСКИЕ СОВЕТЫ Мыть двигатель следует только при выключенном зажигании. Не направляйте водяную струю на фары, чтобы избежать их повреждения. После того, как отсек двигателя очищен при помощи снимающих жир очистителей1) или вымыт, результаты антикоррозионной обработки почти всегда теряются.
ПРАКТИЧЕСКИЕ СОВЕТЫ ПРАКТИЧЕСКИЕ СОВЕТЫ Капот Отсек двигателя A B IB9-082 Отпирание Чтобы освободить капот, потяните за рычаг, который находится под приборным щитком со стороны водителя. Капот слегка приподнимется. Открывание Приподнимите капот и переместите рычажок B в направлении стрелки (см.
ПРАКТИЧЕСКИЕ СОВЕТЫ ПРАКТИЧЕСКИЕ СОВЕТЫ MPI 1 3 4 5 2 6 IB9-009 Бензиновый двигатель 1.0 MPI Стр. 1 – Бачок омывателя стекла ……..3.53 2 – Расширительная камера для охлаждаюшей жидкости……………….3.44 3 – Щуп-указатель уровня масла.3.42 4 – Отверстие для залива масла.3.42 5 – Резервуар
ПРАКТИЧЕСКИЕ СОВЕТЫ ПРАКТИЧЕСКИЕ СОВЕТЫ Моторное масло Характеристики масел Вязкость и спецификация Характеристики масел На заводе в двигатели заливают специальное высококачественное многоцелевое масло, которое можно использовать круглый год за исключением стран с очень холодным климатом. Поскольку
ПРАКТИЧЕСКИЕ СОВЕТЫ ПРАКТИЧЕСКИЕ СОВЕТЫ Когда двигатель работает с большой нагрузкой, например, летом при езде в течение длительного времени по скоростной магистрали, при езде с прицепом или при подъеме по горной дороге, уровень масла следует поддерживать в области (c), но не выше. c b a Доливка
ПРАКТИЧЕСКИЕ СОВЕТЫ ПРАКТИЧЕСКИЕ СОВЕТЫ Система охлаждения На заводе система охлаждения заполняется постоянной охлаждающей жидкостью, менять которую не нужно. Эта охлаждающая жидкость состоит из воды и 40 % добавки G 12 A8D (антифриз на основе гликоля) с антикоррозионными добавками. Этот состав
ПРАКТИЧЕСКИЕ СОВЕТЫ ПРАКТИЧЕСКИЕ СОВЕТЫ Вентилятор Если вытекло много охлаждающей жикости, доливать её следует только когда двигатель остынет — это предотвратит его повреждение. Уровень жидкости не должен превышать отметку max. Лишняя жидкость будет вытеснена давлением через отверстие в крышке
ПРАКТИЧЕСКИЕ СОВЕТЫ ПРАКТИЧЕСКИЕ СОВЕТЫ Аккумулятор Важные замечания Надевайте защитные очки. Следите за тем, чтобы частицы кислоты или свинца не попали на кожу или одежду. Аккумуляторная кислота очень едкая. Всегда надевайте защитные перчатки и очки. Не наклоняйте аккумулятор кислота может
ПРАКТИЧЕСКИЕ СОВЕТЫ Зарядка аккумулятора Перед зарядкой следует выключить двигатель и все электроприборы. При зарядке слабыми токами (например, при помощи небольшого зарядного устройства) обычно необязательно отсоединять кабели аккумулятора. Следует, однако, выполнять инструкции изготовителя
ПРАКТИЧЕСКИЕ СОВЕТЫ ПРАКТИЧЕСКИЕ СОВЕТЫ Омыватель лобового стекла B1J-082D • Затем отсоедините отрицательный кабель A (обычно чёрный, коричневый или синий). • Затем ослабьте болт B на положительном кабеле. • Отсоедините ближний держатель (стрелка 1), а затем — дальний держатель (стрелка 2). •
ПРАКТИЧЕСКИЕ СОВЕТЫ ПРАКТИЧЕСКИЕ СОВЕТЫ Аксессуары. Изменения и модификации. IB9-072 Настройка разбрызгивателей Когда автомобиль стоит, вода должна попадать на лобовое стекло примерно так, как показано на рисунке. Положение разбрызгивателей системы омывания фар* можно отрегулировать только при
ПРАКТИЧЕСКИЕ СОВЕТЫ Свечи зажигания Свечи зажигания заменяются в Сервисных Центрах SEAT во время контрольного осмотра. Если возникает необходимость заменить свечи между осмотрами, необходимо учитывать следующее: • Характеристики двигателя, свечей и системы зажигания согласованы друг с другом. Во
ПРАКТИЧЕСКИЕ СОВЕТЫ ПРАКТИЧЕСКИЕ СОВЕТЫ Аптечка, Аварийный знак D D E В некоторых странах правила предписывают использование отражающего треугольника в качестве знака аварийной остановки. В правилах может также содержаться требование иметь аптечку первой помощи и запасные лампы. Аптечка и аварийный
ПРАКТИЧЕСКИЕ СОВЕТЫ ПРАКТИЧЕСКИЕ СОВЕТЫ Инструменты, запасное колесо Инструменты находятся в ящике внутри запасного колеса, который зафиксирован резиновой лентой. Внимание! Убедитесь, что инструменты и запасное колесо надёжно закреплены — это поможет избежать травм при резком торможении или
ПРАКТИЧЕСКИЕ СОВЕТЫ ПРАКТИЧЕСКИЕ СОВЕТЫ Колёса Общие замечания • B11-063D Запасное колесо Колесо расположено под поликом багажника. Оно закреплено с помощью гайки. Автомобиль укомплектован колесомдокаткой. Оно не только занимает меньше места багажнике, чем полноразмерное колесо, но и легче его по
ПРАКТИЧЕСКИЕ СОВЕТЫ Проверяя внутреннее давление шин, не забывайте проверять и запасное колесо: • Полноразмерное запасное колесо всегда должно иметь максимальное внутреннее давление, которое указано в спецификации данного автомобиля. • Давление всегда следует проверять на холодных шинах. Не
ПРАКТИЧЕСКИЕ СОВЕТЫ • Совместно использовать следует только шины одинакового типа и размера и, по возможности, с одинаковым рисунком протектора. • Никогда не используйте старые шины неизвестного происхождения. • Зная маркировку шины и смысл ее отдельных элементов, легче правильно выбрать шины. Шины
ПРАКТИЧЕСКИЕ СОВЕТЫ ПРАКТИЧЕСКИЕ СОВЕТЫ Замена колес При установке зимних шин необходимо всегда соблюдать следующие правила: • Чтобы обеспечить наилучшие рабочие характеристики при езде, зимние шины надо обязательно устанавливать на все четыре колеса. • Зимние шины в значительной степени утрачивают
ПРАКТИЧЕСКИЕ СОВЕТЫ ПРАКТИЧЕСКИЕ СОВЕТЫ Если болты колеса затянуты очень туго, осторожно подтолкните ключ вниз, надавив на конец ручки ногой. Следите за тем, чтобы стоять устойчиво, и крепко держитесь за автомобиль. Ослабьте болты колеса примерно на один оборот. B11-065D – Снимите колпачки
ПРАКТИЧЕСКИЕ СОВЕТЫ ПРАКТИЧЕСКИЕ СОВЕТЫ B A IB9-052 • Места установки домкрата: Внимание! Установка домкрата в других точках может привести к повреждению автомобиля или к травмам. – Точки крепления для установки домкрата находятся под покрышкой нижнего лонжерона в точках, указанных на рисунке
ПРАКТИЧЕСКИЕ СОВЕТЫ ПРАКТИЧЕСКИЕ СОВЕТЫ IB9-075 IB9-074 • Отвинтите болты, которыми крепится колесо, сложите их на чистую поверхность (например, на колпак ступицы, тряпку, бумагу и т.д.) рядом с домкратом и снимите колесо. • Наденьте запасное колесо и слегка затяните все болты с использованием
ПРАКТИЧЕСКИЕ СОВЕТЫ ПРАКТИЧЕСКИЕ СОВЕТЫ Предохранители При использовании колесадокатки помните: • Так как размер такого колеса меньше стандартного, соответственно меньше и расстояние от оси до земли. Постарайтесь не ездить на докатке по дорогам с колдобинами или большими рытвинами, чтобы не
ПРАКТИЧЕСКИЕ СОВЕТЫ Расположение предохранителей – Блок предохранителей № Прибор A1) 1- Двигатель/электроника ……….. 15 2- Двигатель/электроника ……….. 15 3- Клапана …………………………….. 10 4- Преобразователь зажигания .. 15 5- Автоматич. коробка передач / огни заднего хода
ПРАКТИЧЕСКИЕ СОВЕТЫ ПРАКТИЧЕСКИЕ СОВЕТЫ Замена ламп Перед заменой лампы выключите соответствующее осветительное устройство. Не прикасайтесь к стеклянной части новой лампы голыми руками, потому что отпечатки пальцев, которые остаются на стекле, при нагревании лампы испаряются и конденсируются на
ПРАКТИЧЕСКИЕ СОВЕТЫ ПРАКТИЧЕСКИЕ СОВЕТЫ 1 2 2 3 IB9-064 • Отключите электрический кабель 2. • Отсоедините зажим 3. • Извлеките перегоревшую лампу и вставьте новую, совместив выступ на боковой части лампы с отверстием в держателе. • Зафиксируйте зажим 3. • Подключите кабель. • Закройте крышку. •
Volkswagen Technical Site: http://volkswagen.msk.ru http://vwts.info http://vwts.ru ПРАКТИЧЕСКИЕ СОВЕТЫ огромный архив документации по автомобилям Volkswagen, Skoda, Seat, Audi 2 A C 2 2 3 3 D ПРАКТИЧЕСКИЕ СОВЕТЫ B IB9-063 Бифокальные фары На иллюстрации показана задняя часть левой фары. A – Лампа
ПРАКТИЧЕСКИЕ СОВЕТЫ ПРАКТИЧЕСКИЕ СОВЕТЫ A IB9-069 D – Лампа указателя поворота • Откройте капот. • Снимите крышку*. • Поверните патрон лампы вправо и извлеките его из держателя. • Поверните лампу влево и замените её. • Проделайте предыдущие шаги в обратном порядке. • Установите крышку. IB9-088
ПРАКТИЧЕСКИЕ СОВЕТЫ ПРАКТИЧЕСКИЕ СОВЕТЫ • Вставьте фару левой стороной вперёд, чтобы язычок встал на место. • Закрутите винты A. • Осторожно поместите на место заглушку. 1 2 IB9-061 IB9-056 IB9-057 Боковые указатели Задние фары лампу и вставьте новую, совместив выступ на боковой части лампы с
ПРАКТИЧЕСКИЕ СОВЕТЫ ПРАКТИЧЕСКИЕ СОВЕТЫ Подсветка номерного знака Лампа для чтения* (B) • Замена лампы • Когда вы снимите линзу, отсоедините кабель. • Поверните патрон на 1/4 влево. • Замените лампу и, вставив патрон, поверните его на 1/4 вправо. • Посоедините кабель и установите линзу на место.
ПРАКТИЧЕСКИЕ СОВЕТЫ ПРАКТИЧЕСКИЕ СОВЕТЫ Установка радиоприёмника Третий стоп-сингал* Из-за сложности операции эту лампу следует менять в Официальном Сервисном Центре SEAT. Лампа в перчаточном ящике Из-за сложности операции эту лампу следует менять в Официальном Сервисном Центре SEAT. Освещение
ПРАКТИЧЕСКИЕ СОВЕТЫ ПРАКТИЧЕСКИЕ СОВЕТЫ Мобильные телефоны и рации Экстренный запуск двигателя Работы по установке мобильных телефонов и раций должны производиться в авторизованных мастерских, например, в Официальном Сервисном Центре SEAT. SEAT допускает использование в автомобиле мобильных
ПРАКТИЧЕСКИЕ СОВЕТЫ ПРАКТИЧЕСКИЕ СОВЕТЫ Буксировка X 4. 1. A B 2. 3. B1H-236C A – Разряженный аккумулятор B – Заряженный аккумулятор Аккумулятор находится в отсеке двигателя слева по ходу движения автомобиля. Пусковой кабель должен быль подключён в следующем порядке: Перед тем, как подсоединять
ПРАКТИЧЕСКИЕ СОВЕТЫ ПРАКТИЧЕСКИЕ СОВЕТЫ Запуск двигателя с помощью буксировки A IB9-049 Переднее буксировочное кольцо Для того, чтобы иметь возможность буксировать автомобиль необходимо снять заглушку в нижней правой части бампера. Для того, чтобы снять заглушку вставьте плоскую отвёртку, как
ПРАКТИЧЕСКИЕ СОВЕТЫ ПРАКТИЧЕСКИЕ СОВЕТЫ Подъём автомобиля Подъёмник Во избежание повреждения днища автомобиля перед тем, как поднимать автомобиль тельфером, нужно подложить под зажим достаточно объёмную резиновую прокладку. Ни при каких обстоятельствах нельзя поднимать автомобиль, устанавливая
СОДЕРЖАНИЕ ИДЕНТИФИКАЦИЯ АВТОМОБИЛЯ Идентификация автомобиля . . 4.2 ТЕХНИЧЕСКИЕ ХАРАКТЕРИСТИКИ ————————————————————— 4.1
ТЕХНИЧЕСКИЕ ХАРАКТЕРИСТИКИ ТЕХНИЧЕСКИЕ ХАРАКТЕРИСТИКИ Идентификация автомобиля 2 SEAT S.A. A B VSSZZZ 1MZWB000 149 3 12Typ H 3 1 – Табличка с типом. 2 – Идентификационные данные. 3 – Номер двигателя. Информационная наклейка находится на внутренней части запасного колеса или на полу багажника. На