-
Contents
-
Table of Contents
-
Troubleshooting
-
Bookmarks
Quick Links
DIGITAL MULTIFUNCTIONAL SYSTEM
OPERATION GUIDE
MODEL: AR-5516
AR-5520
AR-5516D
AR-5520D
Related Manuals for Sharp AR-5516
Summary of Contents for Sharp AR-5516
-
Page 1: Operation Guide
MODEL: AR-5516 AR-5520 AR-5516D AR-5520D DIGITAL MULTIFUNCTIONAL SYSTEM OPERATION GUIDE…
-
Page 3: Table Of Contents
CONTENTS BEFORE USING THE MACHINE PRINTER FUNCTIONS PART NAMES AND FUNCTIONS ….. 4 BASIC PRINTING ……….35 ● OPERATION PANEL ……..6 ● OPENING THE PRINTER DRIVER FROM THE «Start» BUTTON ……….36 POWER ON AND OFF……..8 ● POWER ON …………8 PRINTER DRIVER SETTING SCREEN ..
-
Page 4
USER SETTINGS PERIPHERAL DEVICES AND SUPPLIES ADJUSTING THE AUTOMATIC EXPOSURE PERIPHERAL DEVICES ……… 85 ● SINGLE PASS FEEDER/REVERSING SINGLE LEVEL ………….. 55 PASS FEEDER ……….86 CUSTOMISING SETTINGS (System Settings)..56 ● 250-SHEET PAPER FEED UNIT/2 X 250- ● SYSTEM SETTINGS ……..56 SHEET PAPER FEED UNIT …… -
Page 5
INTRODUCTION This manual describes the copier, printer, and scanner functions of the AR-5516/AR-5520 and AR-5516D/AR-5520D digital multifunctional system. • Where «AR-XXXX» appears in this manual, please substitute the name of your model for «XXXX». For the name of your model, see «DIFFERENCES BETWEEN MODELS» in the Start Guide. -
Page 6: Before Using The Machine
Chapter 1 BEFORE USING THE MACHINE This chapter contains basic information that should be read before using the machine. PART NAMES AND FUNCTIONS Glass cleaner (when the SPF/RSPF is installed) Paper trays Use to clean the original scanning glass. (p.83) Each tray holds 250 sheets of paper.
-
Page 7
BEFORE USING THE MACHINE Document feeder tray (when the SPF/RSPF is Fusing unit release levers installed) To remove a paper misfeed from the fusing unit, push Place the original(s) that you wish to scan face up down on these levers and remove the paper. (p.76) here. -
Page 8: Operation Panel
BEFORE USING THE MACHINE OPERATION PANEL 6 7 8 9 10 SCAN MENU key SORT/GROUP key ( ) / indicators Use to scan by means of the provided Button Press to select the «SORT» or «GROUP» mode. (p.29) Manager software. (p.48) 2 IN 1 / 4 IN 1 key ( ) / indicators…
-
Page 9
BEFORE USING THE MACHINE 29 30 31 When there are two or more paper trays Display PRESET RATIO selector keys ( indicators Shows the set number of copies, as well as the copy ratio, system setting function or setting code, or an Use to select preset reduction/enlargement copy error code when an error occurs. -
Page 10: Power On And Off
POWER ON AND OFF The power switch is located on the left side of the machine. POWER ON POWER OFF Make sure that the machine is not in Turn the power switch to the «ON» operation and then turn the power switch position.
-
Page 11: Loading Paper
● There are many varieties of special paper available on the market, and some cannot be used with this machine. Before using special paper, contact your authorised service representative. ● Before using other than SHARP recommended paper, make a test copy to see if the paper is suitable.
-
Page 12: Loading Paper
BEFORE USING THE MACHINE LOADING PAPER Make sure that the machine is not copying or printing, and then follow these steps to load paper. Loading the paper tray Gently lift and pull out the paper tray Gently push the paper tray into the until it stops.
-
Page 13: Loading The Bypass Tray
• When loading envelopes, make sure that they are straight and flat and do not have loosely glued construction flaps (not the closure flap). • Special papers except SHARP recommended transparency film, labels, and envelopes must be fed one sheet at a time through the bypass tray.
-
Page 14: Changing A Tray’s Paper Size Setting
BEFORE USING THE MACHINE Envelopes Do not use the following envelopes, as misfeeds will occur. • Envelopes with metal tabs, clasps, strings, holes, or windows. • Envelopes with rough fibres, carbon paper, or glossy surfaces. • Envelopes with two or more flaps. •…
-
Page 15
BEFORE USING THE MACHINE Use the [ORIGINAL] key ( ) to Squeeze the lock lever of the front select the paper size. guide and slide the front guide to match the width of the paper, and The indicator of the move the left guide to the appropriate selected paper size lights slot as marked on the tray. -
Page 16: Operation In Copy, Printer, And Scanner Modes
OPERATION IN COPY, PRINTER, AND SCANNER MODES Some operations cannot be performed simultaneously when the machine is being used in printer mode, copy mode, or scanner mode. Scanning from Scanning from Modes Copying Printing a computer the machine Copy key input Copy During copying Printer…
-
Page 17: Copy Functions
Chapter 2 COPY FUNCTIONS This chapter explains how to use the copy functions. NORMAL COPYING This section explains how to make a regular copy. If «Auditing mode» has been enabled (p.60), enter your 3-digit account number. Copying from the document glass Open the document cover/SPF/RSPF, Press the [ORIGINAL] key ( ) and…
-
Page 18
COPY FUNCTIONS Copying from the SPF/RSPF Make sure that an original has not Press the [START] key ( ) to begin been left on the document glass. copying. Close the SPF/RSPF. The copy is delivered to the paper output tray. Adjust the original guides to the size The default output mode for copying from the… -
Page 19
COPY FUNCTIONS Auto paper select mode (when there are two or more paper trays) When the AUTO PAPER SELECT indicator ( ) lights up, «Auto paper select mode» is enabled. This function AUTO automatically selects the paper that is the same size as the original A5, B5, B5R, A4, A4R, B4, A3 paper. «Auto paper select mode»… -
Page 20: Making A Copy Darker Or Lighter
COPY FUNCTIONS MAKING A COPY DARKER OR LIGHTER Automatic exposure adjustment is initially enabled. This function automatically adjusts the copy image according to the original being copied. If you wish to select the exposure level yourself, follow the steps below. (Select from two original types and five exposure levels for each original type.) The exposure level used in automatic exposure adjustment can also be changed.
-
Page 21: Setting The Number Of Copies
COPY FUNCTIONS SETTING THE NUMBER OF COPIES Press the numeric keys to set the number of copies. Important note when making a large number of copies When the maximum number of pages (about 250 pages) that can be held in the paper output tray are output, copying will temporarily stop.
-
Page 22: Manual Ratio Selection
COPY FUNCTIONS Press the [AUTO IMAGE] key ( Set the number of copies and other AUTO % copy settings, and then press the [START] key ( The AUTO IMAGE indicator ( ) lights The copy will be delivered to the paper output AUTO % up and the appropriate tray.
-
Page 23: Selecting The Vertical And Horizontal Copy Ratios Separately (Xy Zoom Copying)
COPY FUNCTIONS SELECTING THE VERTICAL AND HORIZONTAL COPY RATIOS SEPARATELY (XY ZOOM Copying) The XY ZOOM feature allows the horizontal and vertical copy ratios to be changed independently. Example: Reduction only in the horizontal direction. Original Copy • This feature cannot be used with the 2 IN 1 or 4 IN 1 feature. (p.31) Note •…
-
Page 24
COPY FUNCTIONS Use the [PRESET RATIO] selector keys ( ) and [Zoom] keys ( ) to change the copy ratio in the horizontal direction. Press the [PRESET RATIO] selector keys ( ) to select a ratio close to the desired ratio, and then press the [Zoom] keys ( ) to adjust the ratio in increments of 1%. -
Page 25: Automatic Two-Sided Copying (Ar-5516D/Ar-5520D)
AUTOMATIC TWO-SIDED COPYING (AR-5516D/AR-5520D) Two originals placed on the document glass can be copied onto each side of a single sheet of paper. In addition, an RSPF can be used to copy two originals onto one sheet of paper, or one two-sided original onto two sheets of paper, or one two-sided original onto each side of one sheet of paper.
-
Page 26: Using The Rspf
COPY FUNCTIONS Using the document glass Using the RSPF Place the original that you wish to Place originals in the RSPF. (p.16) copy onto the front side of the paper on the document glass and close the If you place an odd number of originals for one-sided to two-sided copying, the last page will document cover.
-
Page 27: Image Rotation In Duplex Copying
COPY FUNCTIONS IMAGE ROTATION IN DUPLEX COPYING This function is used to invert the top and bottom of the image on the front side of the paper during two-sided copying. Hold down the [ORIGINAL TO COPY] key until the indicator blinks. The currently set setting code blinks in the first digit of the number of…
-
Page 28: Two-Sided Copying Using The Bypass Tray
TWO-SIDED COPYING USING THE BYPASS TRAY To perform manual two-sided copying, follow these steps. Example: Copying originals A and B onto each side of one sheet of paper Copy Original A Original B Copy original A. Turn the copy of original A over, and without changing the position of the edge closest to you, insert it in the bypass tray.
-
Page 29: Dual Page Copying
DUAL PAGE COPYING A dual page original can be automatically separated into two pages during copying. This feature is convenient for making copies of books and other dual page originals on individual sheets of paper. Copy Original • A4 paper is used for dual page copying. Note •…
-
Page 30: Interrupting A Copy Run (Interrupt Copying)
INTERRUPTING A COPY RUN (Interrupt Copying) A copy run can be temporarily interrupted to allow another copy job to be performed. When the other job is finished, the copy run will resume using the original copy settings. Interrupt copying is not possible when sort/group copying, 2 IN 1 / 4 IN 1 copying, or two-sided copying is being Note performed.
-
Page 31: Convenient Copy Functions
CONVENIENT COPY FUNCTIONS This section explains major convenient copy functions. ROTATING THE IMAGE 90 DEGREES (Rotation Copy) When «Auto paper select mode» or «automatic ratio selection» are in operation and the original is placed in a different orientation (vertical or horizontal) than the paper, the original image will be automatically rotated 90 degrees to enable correct copying onto the paper.
-
Page 32: Using The Document Glass
COPY FUNCTIONS Using the document glass Using the SPF/RSPF Place the first original. (p.15) Place the originals. (p.16) Sort mode is normally the default output mode, Select the original size. (p.15) and thus the SPF/RSPF and SORT indicators light up. •…
-
Page 33: Copying Multiple Originals Onto A Single Sheet Of Paper
COPY FUNCTIONS COPYING MULTIPLE ORIGINALS ONTO A SINGLE SHEET OF PAPER (2 IN 1 / 4 IN 1 Copy) Multiple originals can be copied onto a single sheet of paper in a selected layout pattern. This function is convenient for compiling multi-page reference materials into a compact format, or for providing an overview of all pages of a document on a single page.
-
Page 34: Setting The Layout Pattern
COPY FUNCTIONS Using the SPF/RSPF Place the originals. (p.16) • To cancel 2 IN 1 / 4 IN 1 copying, press the Note [CLEAR] key • To cancel 2 IN 1 / 4 IN 1 copy mode, press Press the [2 IN 1 / 4 IN 1] key the [2 IN 1 / 4 IN 1] key ( repeatedly until the 2 IN 1 / 4 IN 1 indicators ) to select the mode.
-
Page 35: Creating Margins When Copying (Margin Shift)
COPY FUNCTIONS CREATING MARGINS WHEN COPYING (Margin Shift) The MARGIN SHIFT feature, in its initial setting, automatically shifts the text or image to increase the margin by approximately 10mm. The location of the margin to be increased can be selected to be either at the left edge or the top of the page (AR-5516D/5520D only).
-
Page 36: Erasing Shadows Around The Edges Of Acopy
COPY FUNCTIONS ERASING SHADOWS AROUND THE EDGES OF A COPY (Erase Copy) ● This feature is used to erase shadows that appear around the edges of copies of books and other thick originals. (EDGE ERASE) ● The feature can also erase the shadow that appears down the centre of books and other originals that open up. (CENTRE ERASE) ●…
-
Page 37: Printer Functions
Before printing, make sure that the correct size of paper for your document has been loaded in the machine. Make sure that the ON LINE indicator Make sure that «SHARP AR-XXXX» is on the operation panel is lit. selected as the printer.
-
Page 38: Opening The Printer Driver From The «Start» Button
Click the «Start» button and select Click the «SHARP AR-XXXX» printer «Control Panel» and then select driver icon.
-
Page 39: Printer Driver Setting Screen
PRINTER DRIVER SETTING SCREEN Some restrictions exist on the combinations of settings that can be selected in the printer driver setup screen. When a restriction is in effect, an information icon ( ) will appear next to the setting. Click the icon to view an explanation of the restriction.
-
Page 40: Setting Advanced Print Functions
SETTING ADVANCED PRINT FUNCTIONS This section explains major advanced print functions. The explanations assume that the paper size and other basic settings have already been selected. For the basic procedure for printing and the steps for opening the printer driver, see «BASIC PRINTING»…
-
Page 41: Fitting The Printed Image To The Paper (Fit To Paper Size)
PRINTER FUNCTIONS FITTING THE PRINTED IMAGE TO THE PAPER (Fit To Paper Size) The printer driver can adjust the size of the printed image to match the size of the paper loaded in the machine. Follow the steps shown below to use this function. The explanation below assumes that you intend to print an A3 size document on A4 size paper.
-
Page 42: Enlarging/Reducing The Print Image (Zoom)
PRINTER FUNCTIONS ENLARGING/REDUCING THE PRINT IMAGE (Zoom) This function is used to enlarge or reduce the image to a selected percentage. This allows you to enlarge a small image or add margins to the paper by slightly reducing an image. Note The «Zoom»…
-
Page 43: Adjusting The Brightness And Contrast Of The Image (Image Adjustment)
PRINTER FUNCTIONS ADJUSTING THE BRIGHTNESS AND CONTRAST OF THE IMAGE (Image Adjustment) The brightness and contrast can be adjusted in the print settings when printing a photo or other image. These settings can be used for simple corrections when you do not have image editing software installed on your computer.
-
Page 44: Two-Sided Printing (Ar-5516D/Ar-5520D)
PRINTER FUNCTIONS TWO-SIDED PRINTING (AR-5516D/AR-5520D) The machine can print on both sides of the paper. This function is useful for many purposes, and is particularly convenient when you want to create a simple pamphlet. Two-sided printing also helps conserve paper. Note When using two-sided printing, select a source other than «Bypass Tray»…
-
Page 45: Saving Frequently Used Print Settings
SAVING FREQUENTLY USED PRINT SETTINGS Settings configured on each of the tabs at the time of printing can be saved as user settings. Saving frequently used settings or complex colour settings under an assigned name makes it easy to select those settings the next time you need to use them.
-
Page 46: Outline Of The Print Status Window
OUTLINE OF THE PRINT STATUS WINDOW When printing begins, the Print Status Window automatically opens. The Print Status Window is a utility that monitors the machine and shows the name of the document being printed and any error messages that occur. Status window Provides information on the current status of the Click a tab to bring it to the front.
-
Page 47: Scanner Functions
Chapter 4 SCANNER FUNCTIONS This chapter explains how to use the scanner functions. • Scan jobs received while the machine is copying or printing will be stored in memory. When the copy job is Note finished, the scan jobs will begin. •…
-
Page 48: Scanning Using The Keys On The Machine
SCANNING USING THE KEYS ON THE MACHINE When scanning is performed by this method, the application that has been set in Button Manager will automatically start and the scanned image will be pasted into the application. For the steps to allocate applications using the Button Manager or other settings, see «BUTTON MANAGER SETTINGS»…
-
Page 49: Outline Of Button Manager
SCANNER FUNCTIONS OUTLINE OF BUTTON MANAGER Button Manager is a software utility that allows you to use the scanner function at the machine. Button Manager allows you to configure six sets of scanning settings as a scan menu on the machine. To view Help for a setting, click the button in the upper right-hand corner of the window and then click the setting.
-
Page 50: Button Manager Settings
If the Button Manager icon does not appear Note on the task bar, click the «Start» button, select «All Programs» («Programs» in Windows 2000), select «Sharp Button Manager U», and then click «Button Manager» to start Button Manager. Click the tab of the scan menu that you want to set up.
-
Page 51: Scanning From Your Computer
Windows Help. SCANNING FROM A TWAIN-COMPLIANT APPLICATION The SHARP scanner driver is compatible with the TWAIN standard, allowing it to be used with a variety of TWAIN-compliant applications. Place the original(s) that you wish to In the «Scanning Source»…
-
Page 52
SCANNER FUNCTIONS Specify the scanning area and set the scan preferences. For information on specifying the scan area and setting the scan preferences, see scanner driver Help. «Scanner driver settings» (p.51) Scanning a large area at high resolution results in a large quantity of data and a Caution prolonged scanning time. -
Page 53: Scanner Driver Settings
SCANNER FUNCTIONS Scanner driver settings The scanner driver setup screen consists of the «Set-up screen», which lets you select scan settings, and the «Preview screen», which shows the scanned image. For details on the scan settings, click the «Help» button in the preview screen to display Help.
-
Page 54
SCANNER FUNCTIONS Preview screen Preview screen «Auto Scan Area Judgement» button Click the «Preview» button in the Set-up screen to Click when the preview screen is displayed to display the scanned image. You can specify the automatically set the scanning area to the entire scanning area by dragging the mouse inside the preview image. -
Page 55: Scanning From A Wia-Compliant Application (Windows Xp/Vista)
• In Windows XP, you can view Help for a installed in your computer, the «Select Device» setting. Click the button in the upper screen will open. Select «SHARP AR-XXXX» right-hand corner of the window and then and click the «OK» button. click the setting.
-
Page 56: Scanning From The «Scanner And Camera Wizard» (Windows Xp)
To begin Hardware», and then click «Scanners scanning, click the «Next» and Cameras». button. Click the «SHARP AR-XXXX» icon and then click «Get pictures» in «Imaging Tasks». The «Scanner and When scanning ends, the following Camera Wizard» will screen will appear.
-
Page 57: User Settings
Chapter 5 USER SETTINGS This chapter explains how to set the automatic exposure level and the system settings, which are custom settings that control fine points of the machine’s operation. ADJUSTING THE AUTOMATIC EXPOSURE LEVEL The exposure level used in automatic exposure adjustment, which automatically adjusts the copy exposure according to the original, can be adjusted.
-
Page 58: Customising Settings (System Settings)
CUSTOMISING SETTINGS (System Settings) The system settings allow you to customise the machine to match your needs. SYSTEM SETTINGS Setting codes Program Program name (factory default setting Explanation number appears in bold) 1: OFF • «Auto clear time» automatically returns the 2: 10 sec.
-
Page 59
USER SETTINGS Setting codes Program Program name (factory default setting Explanation number appears in bold) • When the auto paper select function is enabled and there is no paper that is the same size as the original and loaded in the same orientation, this function will automatically select paper of the same size that is loaded in the opposite orientation, and rotate the image… -
Page 60
SPF/RSPF. 3: Group When the SPF/RSPF is installed. AR-5516/AR-5516D is as follows: 1: Upper tray (factory default), 2: 250-sheet paper feed unit/Upper paper tray of 2 x 250-sheet paper feed unit, 3: Lower paper tray of 2 x 250-sheet paper feed unit,… -
Page 61: Setting
USER SETTINGS SELECTING A SETTING FOR A SYSTEM SETTING Hold down the [Light] key ( ) until Enter the desired setting code by the alarm indicators ( , pressing a numeric key. ) blink. • For the setting codes, «SYSTEM The display shows «- -«…
-
Page 62: Settings For Auditing Mode
SETTINGS FOR AUDITING MODE AUDITING MODE When «Auditing mode» is enabled, a count is kept of the number of copies made by each account (up to 20 accounts can be established), and the counts can be displayed and totalled as necessary. In «Auditing mode», the display shows «- — -«, and this indicates that a 3-digit account number must be entered in order to use the machine for copying.
-
Page 63: Selecting Auditing Mode Settings
USER SETTINGS SELECTING AUDITING MODE SETTINGS Hold down the [Light] key ( ) until Press the [Light] key ( ) to complete the alarm indicators ( , the settings. ) blink. The alarm indicators ( , ) go off and the display returns to the number of The display shows «- -«…
-
Page 64
USER SETTINGS Auditing mode Account number deletion (program No.10) (program No.13) 1 Press the [1] key to enable «Auditing Use this procedure to delete account numbers. A mode» or the [0] key to disable it, and then single account number can be deleted, or all account press the [START] key ( numbers at once. -
Page 65: Resetting Account
USER SETTINGS Resetting account Copying when «Auditing mode» is enabled (program No.15) The copy count of a single account or all accounts can When «Auditing mode» is enabled, «- — -» appears in the be reset to 0. If no account numbers have been display.
-
Page 66: Troubleshooting
Chapter 6 TROUBLESHOOTING This chapter describes troubleshooting and misfeed removal. TROUBLESHOOTING If you experience difficulty using the machine, check the following troubleshooting guide before calling for service. Many problems can be easily resolved by the user. If you are unable to solve the problem using the troubleshooting guide, turn off the power switch and unplug the machine, and contact your authorised service representative.
-
Page 67: Machine/Copying Problems
TROUBLESHOOTING MACHINE/COPYING PROBLEMS The following problems are related to the general operation of the machine and copying. Problem Cause and solution Page The machine is not plugged into a power outlet. – → Plug the machine into a grounded outlet. Power switch OFF.
-
Page 68: Paper Misfeed
TROUBLESHOOTING Problem Cause and solution Page Misfeed occurs. → To remove the misfeed, see «MISFEED REMOVAL». The paper is outside of the specified size and weight range. → Use copy paper within the specified range. Paper curled or damp. → Do not use curled or crimped paper. Replace with dry copy paper. –…
-
Page 69: Copies Are Smudged Or Dirty
TROUBLESHOOTING Problem Cause and solution Page The document glass or the underside of the document cover/SPF/RSPF is dirty. → Clean regularly. Copies are smudged or dirty. Original smudged or blotchy. – → Use a clean original. The scanner glass for the SPF/RSPF is dirty. →…
-
Page 70: Printing And Scanning Problems
In Windows 2000, click the «Start» button, select «Settings» and then click «Printers». 2 If the «SHARP AR-XXXX» printer driver icon is shown but you still cannot print, the printer driver may not have been installed correctly. In this case, delete the software and then reinstall it.
-
Page 71: A Notice Page (Np-001) Has Been Printed, But The Print Data Has Not Been Printed Completely
TROUBLESHOOTING Problem Cause and solution Page A print job containing more data than can be held in the print memory is sent to the machine. A Notice Page (NP-001) has been → Disable the ROPM function on the «Configuration» tab of the printed, but the print data has not printer driver setup screen.
-
Page 72: Poor Scanning Quality
TROUBLESHOOTING Problem Cause and solution Page The document glass or the underside of the document cover/SPF/RSPF is dirty. → Clean regularly. Original smudged or blotchy. – → Use a clean original. You have not specified a suitable resolution. → Make sure that the resolution setting in the scanner driver is –…
-
Page 73: Unable To Scan The Image
TROUBLESHOOTING Problem Cause and solution Page If scanning is not possible, shut down your computer, turn off the machine’s power switch, and unplug the machine’s power cord. Next, start your computer, restore – power to the machine, and try scanning again. If scanning is still not possible, check the following items.
-
Page 74: Indicators And Display Messages
Paper required indicator Developer replacement Misfeed indicator required indicator Display Indication Cause and solution Page Maintenance Steadily Service by an authorised SHARP service technician is – indicator required. Developer Steadily Developer is required. Contact your authorised service replacement – representative.
-
Page 75: Misfeed Removal
MISFEED REMOVAL When a misfeed occurs, the misfeed indicator ( ) and a misfeed location indicator ( ) will blink and the machine will automatically stop. Check the blinking misfeed location indicator to identify the location of the misfeed and remove it. The paper may tear when you remove a misfeed.
-
Page 76: Misfeed In The Bypass Tray
TROUBLESHOOTING Return the originals indicated by the Section C Remove the misfed original from the exit area. minus number in the display to the document feeder tray and press the [START] key ( Copying will resume from the originals that still remained when the misfeed occurred.
-
Page 77: Misfeed In The Machine
TROUBLESHOOTING MISFEED IN THE MACHINE Open the bypass tray and the side Check the misfeed location. Remove cover. the misfed paper following the instructions for each location in the illustration below. If paper is misfed here, go to «B. Misfeed in the fusing area».
-
Page 78
TROUBLESHOOTING B. Misfeed in the fusing area Push gently on both ends of the front Lift the fusing unit release levers, to cover and open it. return them to their operating positions. Turn the roller rotating knob in the direction of the arrow. Close the front cover and side cover. -
Page 79
TROUBLESHOOTING C. Misfeed in the transport area Open the fusing paper guide by pressing down the green-labeled projection on the guide and remove the misfed paper. Be careful not to tear the misfed paper during removal. The fusing unit is hot. Do not touch Warning the fusing unit when removing misfed paper. -
Page 80: Misfeed In The Upper Paper Tray
TROUBLESHOOTING MISFEED IN THE UPPER PAPER TRAY Note Make sure that there is no misfed paper in the tray before pulling it out. (p.75) Lift and pull out the upper paper tray and remove the misfed paper. Be careful not to tear the misfed paper during removal.
-
Page 81: Misfeed In The Lower Paper Tray
TROUBLESHOOTING MISFEED IN THE LOWER PAPER TRAY • Make sure that there is no misfed paper in the tray before pulling it out. (p.75) Note • Use the following procedure to remove misfeeds that occur in the 250-sheet paper feed unit/2 x 250-sheet paper feed unit.
-
Page 82: Replacing The Toner Cartridge
REPLACING THE TONER CARTRIDGE When the toner cartridge replacement required indicator ( ) lights up, the toner cartridge will need replacement soon. Obtain a new cartridge. When the toner cartridge replacement required indicator ( ) blinks, the toner cartridge must be replaced before copying can be resumed. Replace the toner cartridge by following the procedure below.
-
Page 83: Routine Maintenance
Chapter 7 ROUTINE MAINTENANCE This chapter explains how to keep the machine operating smoothly, including viewing copy count, and scan count, the toner level indicator, and cleaning the machine. CHECKING THE TOTAL OUTPUT COUNT AND TONER LEVEL CHECKING THE TOTAL OUTPUT COUNT When «Auditing mode»…
-
Page 84: Checking The Toner Level
ROUTINE MAINTENANCE CHECKING THE TONER LEVEL The toner level is indicated by a 6-level display. Use it as a guideline for replacing the toner cartridge. Hold down the [Light] key ( ) until Hold down the [Copy ratio display] key the alarm indicators ( , ) for more than 5 seconds.
-
Page 85: Routine Maintenance
ROUTINE MAINTENANCE CLEANING THE DOCUMENT GLASS AND SPF/RSPF/DOCUMENT COVER If the document glass, underside of the document cover/SPF/RSPF, or the scanner for originals coming from the SPF/RSPF (the long narrow glass surface on the right side of the document glass) become dirty, the dirt may appear on copies.
-
Page 86: Cleaning The Bypass Tray Paper Feed Roller
ROUTINE MAINTENANCE CLEANING THE BYPASS TRAY PAPER FEED ROLLER If misfeeds occur frequently when feeding envelopes, thick paper, etc. through the bypass tray, wipe the paper feed roller at the feed slot of the bypass tray with a soft, clean cloth dampened with alcohol or water. Paper feed roller CLEANING THE TRANSFER CHARGER If copies start becoming streaky or blotchy, the transfer charger may be dirty.
-
Page 87: Peripheral Devices
PERIPHERAL DEVICES As a part of our policy of continuous improvement, SHARP reserves the right to make design and specification Note changes for product improvement without prior notice. The performance specification figures indicated are nominal values of production units.
-
Page 88: Single Pass Feeder/Reversing Single Pass Feeder
PERIPHERAL DEVICES AND SUPPLIES SINGLE PASS FEEDER/REVERSING SINGLE PASS FEEDER For the names of the parts of the SPF/RSPF, see «PART NAMES AND FUNCTIONS» (p.4). Specifications AR-RP10 (Reversing single pass AR-SP10 (Single pass feeder) feeder) 56 g/m to 90 g/m Weight Acceptable Size…
-
Page 89: Storage Of Supplies
STORAGE OF SUPPLIES Standard supplies for this product that are to be replaced by the user are paper and toner cartridge. For best copying results, be sure to use only SHARP products. Only genuine SHARP consumables carry the Genuine Supplies label.
-
Page 90
OPERATION GUIDE AR5520D-GB3…
 Contents:
1. General;
2. Configuration;
3. Specifications;
4. Consumable Parts;
5. External Views and Internal Structures;
6. Adjustments;
7. Simulations;
8. User Programs (The user programs allow the parameters of certain functions to be set, changed, or canceled as desired);
8.1 List of user programs;
8.2 Setting the user programs;
8.3 Toner cartridge life;
9. Trouble Code List for Sharp AR-5516 / AR-5520.;
10. Maintenance;
11. Disassembly and Assembly;
12. Flash ROM Version up Procedure;
13. Electrical Section.
Download Sharp AR-5516 / AR-5520. Service Manual
Все материалы на сайте представлены исключительно для ознакомления. Все торговые марки и права на публикуемые материалы принадлежат их владельцам.
All materials on the site are presented solely for information. All trademarks and copyrights in the published materials belong to their respective owners.
![]()
ЦИФРОВАЯ МНОГОФУНКЦИОНАЛЬНАЯ СИСТЕМА
НАЧАЛО РАБОТЫ
МОДЕЛЬ:AR 5516S AR 5520S AR 5516 AR 5520 AR 5516D AR 5520D AR 5516N AR 5520N
ПОДГОТОВКА К ЭКСПЛУАТАЦИИ
В этом разделе приводятся сведения о безопасной эксплуатации аппарата и пояснения относительно пользования данным руководством.
УСТАНОВКА
В этом разделе приводятся сведения об установке программного обеспечения и подключении аппарата к компьютеру.
ПРИЛОЖЕНИЕ
Этот раздел содержит информацию об устранении возможных неполадок, а также о спецификациях.
Сохраните это руководство в доступном месте для дальнейших обращений к нему при необходимости.

Оборудование нужно установить рядом с легко доступной розеткой для простоты отключения питания.

ОГЛАВЛЕНИЕ
ПОДГОТОВКА К ЭКСПЛУАТАЦИИ
|
МЕРЫ ПРЕДОСТОРОЖНОСТИ ………….. |
2 |
● ИСПОЛЬЗУЕМЫЕ МЕРЫ ПРЕДОСТОРОЖНОСТИ… 2 ● ВАЖНЫЕ ЗАМЕЧАНИЯ ОТНОСИТЕЛЬНО
ВЫБОРА МЕСТА УСТАНОВКИ АППАРАТА …2
●МЕРЫ ПРЕДОСТОРОЖНОСТИ ПРИ ОБРАЩЕНИИ С АППАРАТОМ 3
●МЕРЫ БЕЗОПАСНОСТИ ПРИ РАБОТЕ С ЛАЗЕРОМ. 3
● СВЕДЕНИЯ ОБ ОХРАНЕ ОКРУЖАЮЩЕЙ СРЕДЫ …. 4
СВЕДЕНИЯ ОБ ОХРАНЕ ОКРУЖАЮЩЕЙ СРЕДЫ4
|
● СВЕДЕНИЯ О РУКОВОДСТВАХ ……………… |
4 |
|
ИСПОЛЬЗОВАНИЕ РУКОВОДСТВА ПО |
|
|
ЭКСПЛУАТАЦИИ………………………….. |
5 |
|
● ЗНАЧЕНИЕ СИМВОЛА «R» ПРИ |
|
|
ОБОЗНАЧЕНИИ ФОРМАТОВ ОРИГИНАЛОВ |
|
|
И БУМАГИ………………………………………….. |
5 |
●СПЕЦИАЛЬНЫЕ ОБОЗНАЧЕНИЯ, ИСПОЛЬЗУЕМЫЕ В ЭТОМ РУКОВОДСТВЕ6
●SPF (ARK5516S/ARK5520S, ARK5516/ARK5520)6
●RSFP (ARK5516D/ARK5520D/ARK5516N/ARK5520N). 6
|
● РАЗЛИЧИЯ МЕЖДУ МОДЕЛЯМИ …………… |
6 |
|
УСТАНОВКА |
|
|
ПЕРЕД УСТАНОВКОЙ ПРОГРАММНОГО |
|
|
ОБЕСПЕЧЕНИЯ……………………………. |
7 |
|
● ПРОГРАММНОЕ ОБЕСПЕЧЕНИЕ ……………. |
7 |
|
● ТРЕБОВАНИЯ К АППАРАТНЫМ СРЕДСТВАМ |
|
|
И ПРОГРАММНОМУ ОБЕСПЕЧЕНИЮ ……… |
7 |
|
● ВКЛЮЧЕНИЕ АППАРАТА ………………………. |
7 |
|
УСТАНОВКА ПРОГРАММНОГО ОБЕСПЕЧЕНИЯ |
|
|
(AR 5516S/AR 5520S/AR 5516/AR 5520/AR 5516D/AR 5520D).8 |
ПОДКЛЮЧЕНИЕ ККОМПЬЮТЕРУ (AR 5516S/AR 5520S/AR 5516/AR 5520/AR 5516D/AR 5520D)…10
|
● |
ПОДКЛЮЧЕНИЕ USB КАБЕЛЯ ……………… |
10 |
|
● ИСПОЛЬЗОВАНИЕ АППАРАТА В КАЧЕСТВЕ |
||
|
СОВМЕСТНОГО ПРИНТЕРА ……………….. |
11 |
|
|
УСТАНОВКА ПРОГРАММНОГО ОБЕСПЕЧЕНИЯ |
||
|
(AR 5516N/AR 5520N) ………………………….. |
12 |
КОНФИГУРИРОВАНИЕ ДРАЙВЕРА ПРИНТЕРА18
УСТАНОВКА УТИЛИТЫ BUTTON MANAGER 19
ПРИЛОЖЕНИЕ
НЕИСПРАВНОСТИ И МЕТОДЫ ИХ УСТРАНЕНИЯ 21
|
СПЕЦИФИКАЦИЯ……………………….. |
23 |
1
ПОДГОТОВКА К ЭКСПЛУАТАЦИИ
МЕРЫ ПРЕДОСТОРОЖНОСТИ
При использовании данного аппарата следуйте приведенным ниже мерам предосторожности.
ИСПОЛЬЗУЕМЫЕ МЕРЫ ПРЕДОСТОРОЖНОСТИ
 Осторожно:
•Секция термозакрепления нагревается до высокой температуры. Будьте осторожны при извлечении из нее застрявшего листа.
•Не смотрите непосредственно на источник света. Это может негативно отразиться на Вашем зрении.
 Внимание:
•Не допускайте быстрого включения и выключения аппарата. После выключения аппарата подождите от 10 до 15 секунд, прежде чем вновь включите питание.
•Перед установкой любого устройства выключите питание аппарата.
•Разместите аппарат на прочной и ровной поверхности.
•Не устанавливайте аппарат во влажном или пыльном помещении.
•Если предполагается долгое время не использовать аппарат, например, во время праздников, выключите аппарат выключателем и отключите шнур питания от сетевой розетки.
•При перемещении аппарата не забудьте выключить его и отключить шнур питания от сетевой розетки.
•Не накрывайте аппарат противопылевой крышкой, тканью или пленкой при включенном питании. В этом случае тепло от аппарата не будет рассеиваться, что приведет к его повреждению.
•Использование методов управления, настроек или операций, описание которых не приводится в данном руководстве, может привести к случайному выбросу лазерного излучения.
•Сетевая розетка должна быть установлена рядом с аппаратом; доступ к ней должен быть беспрепятственным.
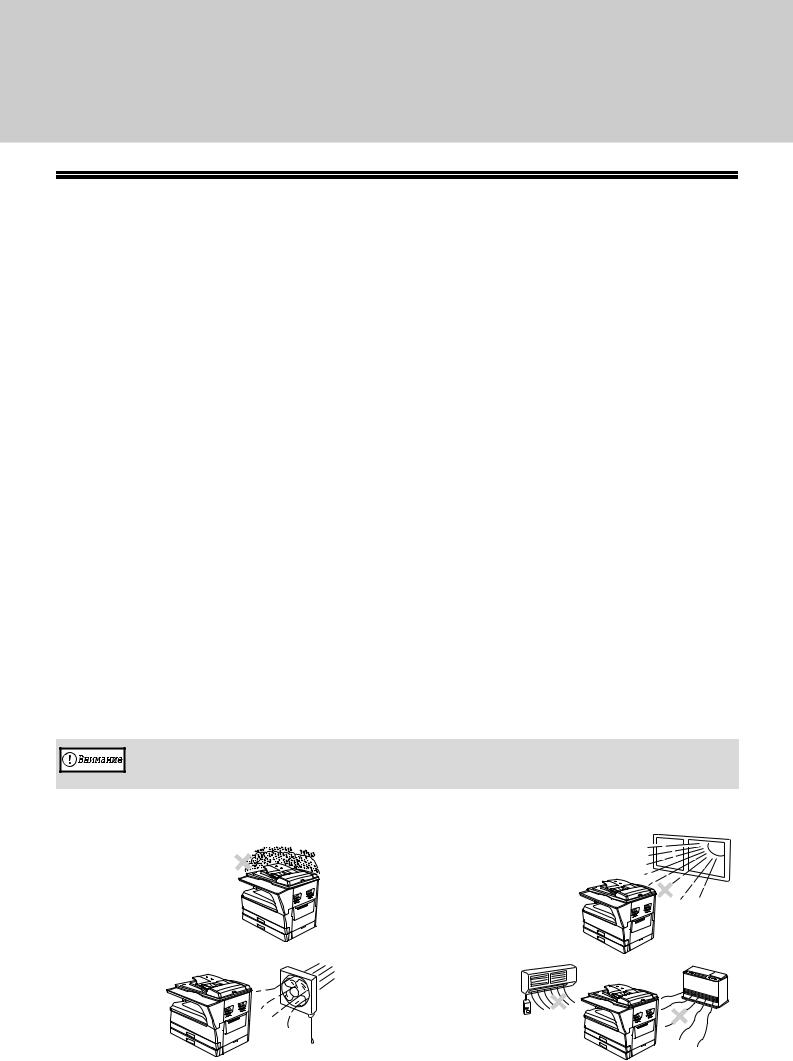
ВАЖНЫЕ ЗАМЕЧАНИЯ ОТНОСИТЕЛЬНО ВЫБОРА МЕСТА УСТАНОВКИ АППАРАТА
Неправильно выполненная установка может привести к повреждению аппарата. При начальной установке и перемещении аппарата необходимо обратить внимание на следующее.
При перемещении из холодного помещения в теплое внутри аппарата может образоваться конденсат. В этом случае возможно ухудшение качества копий и даже возникновение неполадок. Перед продолжением работы оставьте аппарата при комнатной температуре неработающим в течение, как минимум, 2 часов.
Не устанавливайте аппарат в местах:
|
• сырых, влажных или |
• доступных прямым солнечным |
|
очень пыльных |
лучам |
|
• плохо |
• подверженных резким |
|
проветривае |
изменениям |
|
мых |
температуры или |
|
влажности, например, |
|
|
рядом с кондиционером |
|
|
или нагревательным |
|
|
прибором |
2
ПОДГОТОВКА К ЭКСПЛУАТАЦИИ
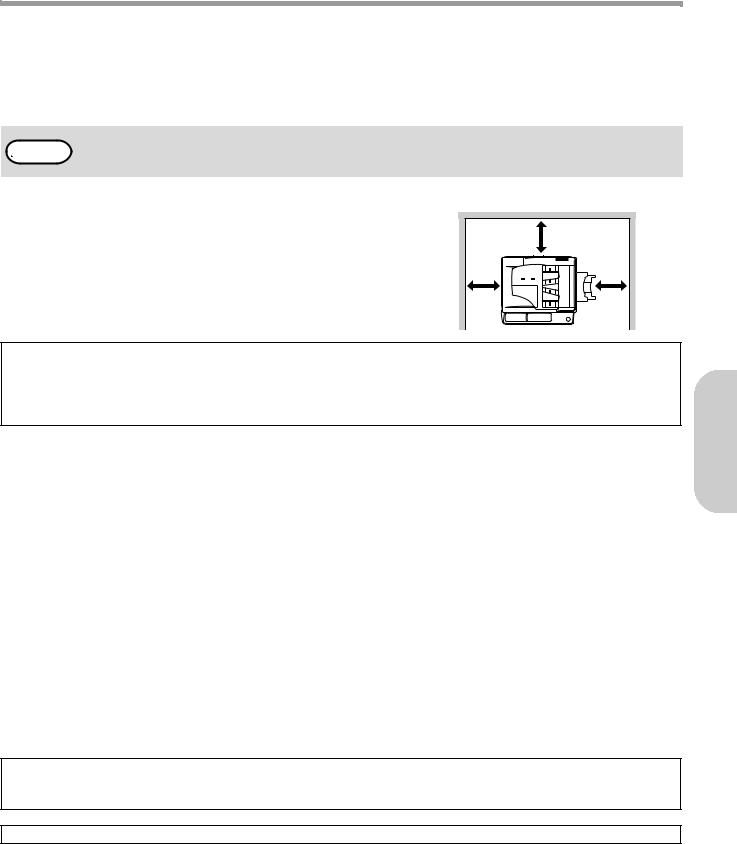
Необходимо установить аппарат рядом с легко доступной сетевой розеткой для упрощения операции подключения и отключения.
Шнур питания должен быть подключен только к розетке, отвечающей требованиям относительно напряжения и силы тока. Убедитесь также в том, что розетка правильно заземлена.
Подключите аппарат к индивидуальной сетевой розетке, не используемой для подключения других 


 электрических приборов. При подключении к ней осветительных приборов может наблюдаться
мерцание света в помещении.
|
Около аппарата должно быть оставлено пространство, |
20 см |
|
необходимое для проведения сервисного |
|
|
обслуживания и достаточное для вентиляции. |
|
|
20 см |
20 см |
При работе внутри устройства выделяется небольшое количество озона, недостаточное для того, чтобы причинить какой(либо вред здоровью.
Внимание :
Даже незначительное количество выделяемого озона приводит к образованию в комнате нежелательного запаха, поэтому рекомендуем устанавливать аппарат в проветриваемом помещении.
МЕРЫ ПРЕДОСТОРОЖНОСТИ ПРИ ОБРАЩЕНИИ С АППАРАТОМ
Соблюдайте необходимые меры предосторожности при обращении с аппаратом для поддержания его рабочих характеристик.
Не допускайте падения аппарата, не подвергайте его соударению с другими предметами.
Храните картриджи с тонером в сухом, прохладном месте; извлекайте их из упаковки только непосредственно перед установкой.
•Попадание на них прямых солнечных лучей или воздействие избыточного тепла может привести к резкому ухудшению качества копий.
Не прикасайтесь к фотопроводящему барабану (той его части, которая окрашена в зеленый цвет).
• Появление царапин и пятен на поверхности барабана приведет к образованию грязи на копиях.
МЕРЫ БЕЗОПАСНОСТИ ПРИ РАБОТЕ С ЛАЗЕРОМ
|
Длина волны |
785 нм ± 15 нм |
|
Частота пульсации |
(10,32 μсек. ± 10,32 μсек.)/7 мм |
|
Выходная мощность |
Max 0,6 mW |
Внимание
Использование методов управления, настроек или операций, описание которых не приводится в данном руководстве, может привести к случайному выбросу лазерного излучения.
Данное цифровое оборудование относится к ЛАЗЕРНЫМ ИЗДЕЛИЯМ 1 КЛАССА (МЭК 60825 [1 Издание 1.2[2001)
Сведения о торговых марках
Использование следующих торговых марок и зарегистрированных торговых марок связано непосредственно с аппаратом, периферийными устройствами и дополнительными принадлежностями.
•Microsoft®, Windows®, Windows® 2000, Windows® XP и Windows Vista® являются зарегистрированными торговыми марками или торговыми марками Microsoft Corporation в США и других странах.
•IBM, PC/AT и PowerPC являются торговыми марками International Business Machines Corporation.
•Adobe, логотип Adobe, Acrobat, логотип Adobe PD и Reader являются зарегистрированными торговыми марками или торговыми марками Adobe Systems Incorporated в Соединенных Штатах и других странах.
•Все прочие торговые марки и обозначения авторских прав являются собственностью соответствующих владельцев.
3

ПОДГОТОВКА К ЭКСПЛУАТАЦИИ
СВЕДЕНИЯ ОБ ОХРАНЕ ОКРУЖАЮЩЕЙ СРЕДЫ
Изделия, отмеченные знаком ENERGY STAR®, разработаны с учетом мер по охране окружающей среды отличаются максимальной эффективностью энергопотребления.
Изделия, соответствующие требованиям ENERGY STAR®, отмечены логотипом, изображение которого показано выше. Изделия без логотипа не соответствуют требованиям ENERGY STAR®..
О ПОЛЬЗОВАНИИ РУКОВОДСТВОМ
Данный аппарат разработан с целью обеспечить удобство копирования на минимальной площади офисного пространства с максимально достижимой легкостью. Для того, чтобы полностью использовать все возможности аппарата, внимательно ознакомьтесь с этим руководством и самим аппаратом. Для быстрого получения нужных сведений во время дальнейшей работы сохраните настоящее руководство.
СВЕДЕНИЯ О РУКОВОДСТВАХ
К аппарату относятся следующие руководства:
Руководство по подготовке к эксплуатации (данное руководство)
Вэтом руководстве приводятся:
•Сведения об установке программного обеспечения, позволяющего использовать аппарат в качестве принтера и сканера при подключении к Вашему компьютеру
•Описание неполадок, возникающих при использовании аппарата и методы их устранения
•Спецификации
•Меры по безопасности эксплуатации аппарата
Руководство для пользователя(на дополнительном диске CD6ROM)
Вэтом руководстве приводятся:
•Наименование узлов и деталей аппарата
•Типы бумаг, используемых при работе с аппаратом
•Базовая операция и усовершенствованные функции копирования (Например: поворот изображения на 90 градусов, копирование нескольких оригиналов на один лист бумаги)
•Базовая операция и наиболее часто используемые функции печати (Например, изменение масштаба изображения в соответствии с форматом бумаги, увеличение/уменьшение печатаемого изображения)
•Сканирование на аппарате и с компьютера
•Замена картриджа тонера и периферийные устройства
• Содержимое экрана, сообщения и название клавиш, изображенные в данном руководстве, могут отличаться от настоящих, в связи с тем, что устройство модифицируется и улучшается.
•Если на страницах руководства Вам встретилось обозначение «AR%XXXX», замените «XXXX» на наименование.
ЛИЦЕНЗИЯ НА ПРОГРАММНОЕ ОБЕСПЕЧЕНИЕ
Текст ЛИЦЕНЗИИ НА ПРОГРАММНОЕ ОБЕСПЕЧЕНИЕ появится при установке программного обеспечения с диска CD?ROM. Использование всего программного обеспечения или любой его части в аппарате означает Ваше согласие со всеми условиями, содержащимися в тексте ЛИЦЕНЗИИ НА ПРОГРАММНОЕ ОБЕСПЕЧЕНИЕ.
4
ПОДГОТОВКА К ЭКСПЛУАТАЦИИ
ИСПОЛЬЗОВАНИЕ РУКОВОДСТВА ПО ЭКСПЛУАТАЦИИ
В Руководстве по эксплуатации приводятся подробные указания по работе с аппаратом. Прочтите это руководство после того, как приступите к эксплуатации аппарата по завершении начальной установки.
Ознакомление с руководством
На диске «CDKROM», входящем в комплект поставки аппарата, записано руководство по эксплуатации в формате PDF. Для просмотра руководства в этом формате необходимо наличие программы Acrobat Reader или Adobe Reader компании Adobe Systems Incorporated. Если ни одна из этих программ не установлена на Вашем компьютере, Вы можете загрузить их со следующего URL:
http://www.adobe.com/
1 Включите Ваш компьютер.
2 Установите диск CD ROM из комплекта поставки в Вашем CD ROM дисководе.
3 Щелкните на кнопке «Пуск», на пиктограмме «Компьютер», а затем дважды на пиктограмме CD ROM (  ).
).
•В ОС Windows XP щелкните на кнопке «пуск», на пиктограмме «Мой компьютер», а затем дважды K на пиктограмме CDKROM.
•В ОС Windows 2000 дважды щелкните на пиктограмме «Мой компьютер», а затем дважды K на пиктограмме CDKROM.
4 Дважды щелкните на папке «Manual», дважды на папке «Russian», а затем дважды на пиктограмме «AR_5516_5520.pdf» Для моделей AR 5516S/5520S/5516/5516D/ 5520D) или «AR_5516N_5520N.pdf» Для моделей AR 5516N/5520N).
• При частом появлении на экране Руководства по эксплуатации Вы можете счесть более удобным скопировать файл этой программы на Ваш компьютер.
•Текст Руководства по эксплуатации может быть распечатан при помощи программы Acrobat Reader. SHARP рекомендует Вам распечатать разделы, к которым Вы обращаетесь наиболее часто.
•Для правильного использования программы Acrobat Reader обратитесь к файлу «Справка» программы Acrobat Reader.
ЗНАЧЕНИЕ СИМВОЛА «R» ПРИ ОБОЗНАЧЕНИИ ФОРМАТОВ ОРИГИНАЛОВ И БУМАГИ
Символ «R», появляющийся в конце обозначения формата оригинала или бумаги (A4R и т.п.), указывает на ориентацию оригинала или бумаги в горизонтальном направлении, как это показано ниже.
<Ориентация по горизонтали
Форматы, которые могут быть расположены только в горизонтальном направлении (альбомные форматы) (B4, A3), не содержат символа «R» в своем обозначении.
5
ПОДГОТОВКА К ЭКСПЛУАТАЦИИ
СПЕЦИАЛЬНЫЕ ОБОЗНАЧЕНИЯ, ИСПОЛЬЗУЕМЫЕ В ЭТОМ РУКОВОДСТВЕ
Предупреждает пользователя о возможной опасности для здоровья в случае несоблюдения указанных предписаний.
Информирует пользователя о возможном повреждении аппарата или одной из его составляющих в случае несоблюдения указанных предупреждений.
Примечания содержат сведения об аппарате, касающиеся спецификации, функциональных особенностей, производительности, эксплуатации и прочую полезную для Вас информацию.
SPF (AR 5516S/AR 5520S, AR 5516/AR 5520)
В настоящем руководстве автоподатчик оригиналов обозначается аббревиатурой «SPF».
RSPF (AR 5516D/AR 5520D/AR 5516N/AR 5520N)
Автоподатчик с функцией переворота оригиналов обозначается в руководстве, как «RSPF».
РАЗЛИЧИЯ МЕЖДУ МОДЕЛЯМИ
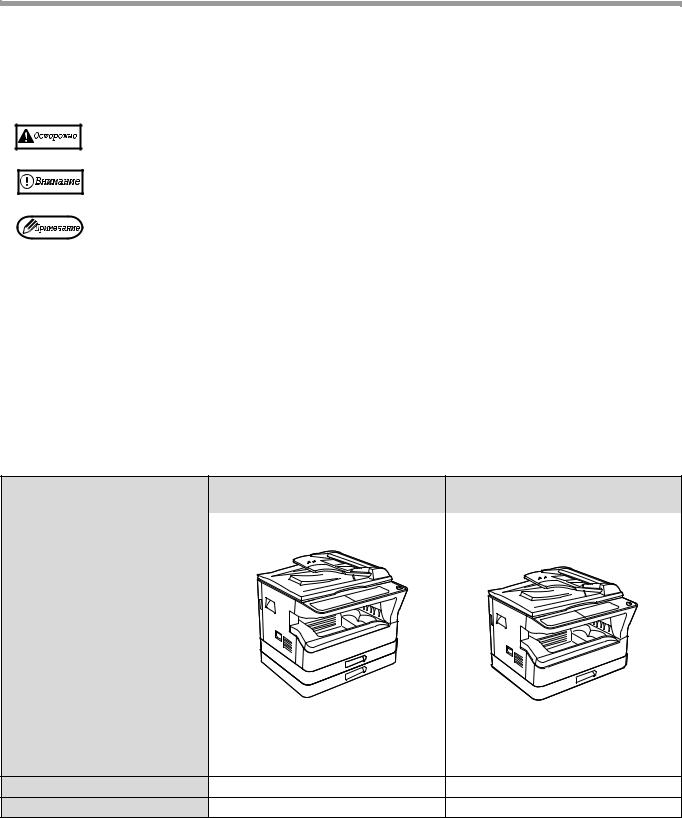
В этом руководстве приводится описание следующих моделей.
|
Модель |
AR 5520S/AR 5520/ |
AR 5516S/AR 5516/ |
|
|
AR 5520D/AR 5520N |
AR 5516D/AR 5516N |
||
|
(При установке дополнительного |
(При установке дополнительного |
||
|
автоподатчика SPF/RSPF) |
автоподатчика SPF/RSPF) |
|
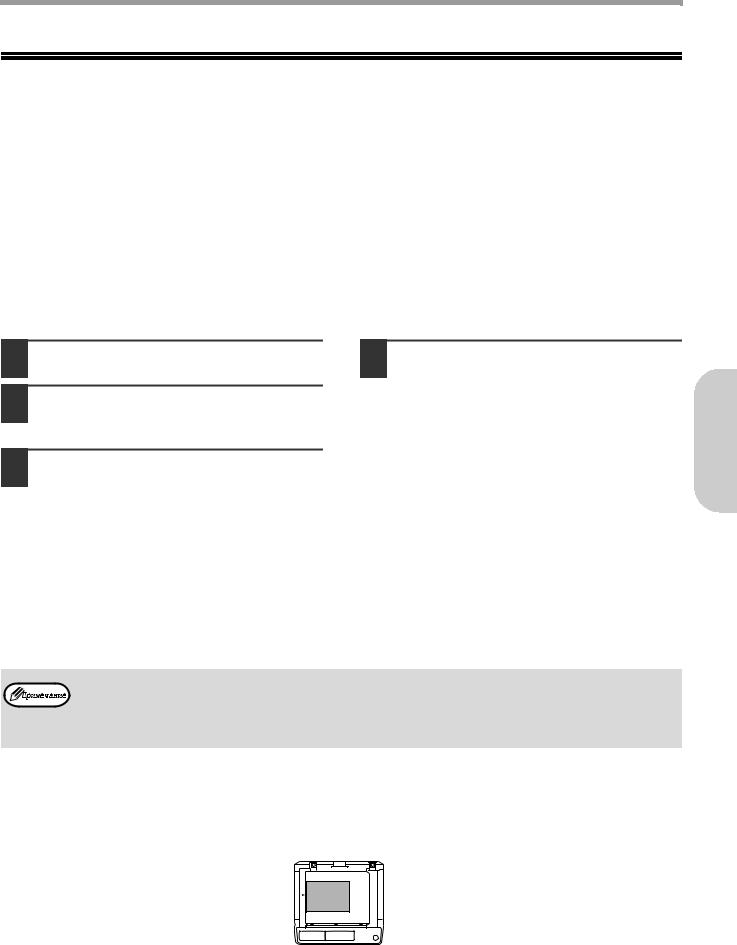
Появление |
||
|
Приведенная выше иллюстрация |
||
|
используется в случаях, когда |
||
|
функциональные и/или |
||
|
эксплуатационныесвойствааппарата |
||
|
одинаковы для обеих моделей. |
||
|
Скорость копирования |
20 копий/мин. |
16 копий/мин. |
|
Лотки для бумаги |
Два (250 x 2) |
Один (250 x 1) |
6
УСТАНОВКА
ПЕРЕД УСТАНОВКОЙ ПРОГРАММНОГО ОБЕСПЕЧЕНИЯ
В этой главе приводится информация об установке и конфигурировании программного обеспечения, необходимого для использования аппарата в качестве принтера и сканера.
• Использование функции сканирования невозможно в моделях ARK5516S/ARK5520S.


 • В этом руководстве диск CDKROM, входящий в комплект поставки аппарата, обозначается просто как «CDKROM».
ПРОГРАММНОЕ ОБЕСПЕЧЕНИЕ
На диске CDKROM, входящем в комплект поставки аппарата, содержится следующее программное обеспечение:
AR-5516S/AR-5520S
Драйвер принтера
Драйвер принтера позволит Вам использовать функцию принтера при работе с аппаратом.
Драйвер принтера включает в себя утилиту Print Status Window, которая осуществляет наблюдение за аппаратом и информирует пользователя о состоянии процесса печати, имени документа, распечатываемого в данный момент, а также выводит на дисплей сообщения об ошибках.
AR-5516/AR-5520, AR-5516D/AR-5520D
MFP driver
Драйвер принтера
Драйвер принтера позволит Вам использовать функцию принтера при работе с аппаратом.
Драйвер принтера включает в себя утилиту Print Status Window, которая осуществляет наблюдение за аппаратом и информирует пользователя о состоянии процесса печати, имени документа, распечатываемого в данный момент, а также выводит на дисплей сообщения об ошибках.
Драйвер сканера
Драйвер сканера позволит Вам использовать функцию сканирования при работе с аппаратом, используя при этом TWAINKсовместимые и WIAKсовместимые приложения.
Утилита Button Manager
Утилита Button Manager позволит использовать меню сканера при сканировании документа в аппарате.
AR-5516N/AR-5520N
Драйвер принтера
Драйвер принтера позволит Вам использовать функцию принтера при работе с аппаратом.
Драйвер сканера
Драйвер сканера позволит Вам использовать функцию сканирования при работе с аппаратом, используя при этом TWAINKсовместимые и WIAKсовместимые приложения.
Утилита Button Manager
Утилита Button Manager позволит использовать меню сканера при сканировании документа в аппарате.
ТРЕБОВАНИЯ К АППАРАТНЫМ СРЕДСТВАМ И ПРОГРАММНОМУ ОБЕСПЕЧЕНИЮ
Перед установкой программного обеспечения ознакомьтесь со следующими требованиями к оборудованию и программному обеспечению.
|
ARK5516S/ARK5520S/ARK5516/ARK5520/ARK5516D/ARK5520D : |
||
|
Тип компьютера |
IBM PC/AT или совместимый с ним компьютер, оборудованный разъемом USB 2.0*1/1.1*2 |
|
|
ARK5516N/ARK5520N : |
||
|
IBM PC/AT или совместимый компьютер, оборудованный разъемом 10BASEKT/100BASEKTX LAN |
||
|
Операционная система*3 |
Windows 2000 Professional, Windows XP Professional, Windows XP Home Edition, Windows Vista |
|
|
Прочие требования к аппаратным средствам |
Среда, в которой беспрепятственно функционирует любая из перечисленных выше операционных систем |
|
*1 Порт аппарата USB 2.0 будет передавать данные на скорости, указанной в спецификации USB 2.0 (Высокоскоростной режим) только при наличии предварительно установленного в компьютере драйвера Microsoft USB 2.0 или драйвера USB 2.0 для Windows 2000 Professional/XP/Vista, установленного через webKстраницу Microsoft «Обновление Windows».
*2 Модели с предустановленными ОС Windows 2000 Professional, Windows XP Professional, Windows XP Home Edition или Windows Vista, оборудованные стандартным USB интерфейсом. *3 Аппарат не поддерживает печать из окружения Macintosh.
Для установки программного обеспечения с использованием программыKустановщика необходимо обладать правами администратора.
ВКЛЮЧЕНИЕ АППАРАТА
Выключатель находится на аппарате слева.

 Переключите выключатель в позицию «ВКЛ.».
7

УСТАНОВКА
УСТАНОВКА ПРОГРАММНОГО ОБЕСПЕЧЕНИЯ
(AR-5516S/AR-5520S/AR-5516/AR-5520/AR-5516D/AR-5520D)
• В этом руководстве приведены экранные изображения, главным образом относящиеся к ОС Windows Vista. Для других версий Windows некоторые экранные изображения могут отличаться от приведенных в этом руководстве.
•Если появляется сообщение об ошибке, то для разрешения проблемы выполните указания, приведенные на экране. После устранения проблемы установка будет продолжена. В зависимости от характера проблемы может оказаться необходимым щелкнуть на кнопке «Отменить» для выхода из программы установщика. В этом случае, после разрешения проблемы начните установку программного обеспечения с самого начала.
1 USB кабель не должен быть подключен к аппарату. Перед началом операции убедитесь в том, что кабель не подключен.
Если кабель подключен, появится окно Plug and Play. В этом случае щелкните на кнопке «Отменить» для того, чтобы закрыть окно, а затем отключите кабель.
Кабель будет подключен на этапе 12 операции.
|
2 |
Установите диск CD ROM в Вашем CD ROM |
|
дисководе. |
|
|
3 |
Щелкните на кнопке «Пуск», на пиктограмме |
|
«Компьютер», а затем дважды на пиктограмме |
CD ROM (  ).
).
•В ОС Windows XP щелкните на кнопке «пуск», на пиктограмме «Мой компьютер», а затем дважды K на пиктограмме CDKROM.
•В ОС Windows 2000 дважды щелкните на «Мой компьютер», а затем дважды K на пиктограмме CDKROM.
4 Дважды щелкните на пиктограмме «Установка» ( ).
).
В ОС Windows Vista, если появится экранное сообщение о необходимости подтверждения, щелкните на «Разрешить».
5 Появится окно «ЛИЦЕНЗИЯ НА ПРОГРАММНОЕ ОБЕСПЕЧЕНИЕ». Убедитесь в том, что Вам понятно содержание лицензии, а затем щелкните на кнопке «Да».
«ЛИЦЕНЗИЯ НА ПРОГРАММНОЕ ОБЕСПЕЧЕНИЕ» может 


 быть выведена на дисплей на другом языке, если Вы
выберете нужный язык из языкового меню. Для выполнения установки на выбранном языке продолжайте установку с его использованием.
6 Прочтите сообщение в окне «Приветствие», а затем щелкните на кнопке «Далее».
|
7 |
Для того, чтобы установить все программное |
|
обеспечение полностью, щелкните на кнопке |
|
|
«Стандартная установка» и перейдите к этапу |
|
|
11. Для установки отдельных пакетов |
|
|
программ щелкните на кнопке «Выборочная |
|
|
установка» и перейдите к следующему этапу. |
|
|
Для моделей ARK5516S/ARK5520S |
|
|
Для прямого подключения аппарата к компьютеру |
|
|
через USB кабель достаточно щелкнуть на кнопке |
|
|
«Стандартное» и перейти к этапу 11. Если Вы |
|
|
щелкнули на кнопке «Пользовательское», то |
|
|
перейдите к следующему этапу операции. |
8 Щелкните на кнопке «драйверa MFP».
Щелкните на кнопке «Показать Readme» для вывода на дисплей информации о выбранных пакетах программ.
Для моделей ARK5516S/ARK5520S
Щелкните на кнопке «Драйвер принтера».
Щелкните на кнопке «Показать Readme» для вывода на дисплей информации о выбранных пакетах программ.
8
 Loading…
-
Драйверы
4
-
Руководства по ремонту
1

Sharp AR-5516 сервис-мануал
(94 страницы)
- Языки:Английский
-
Тип:
PDF -
Размер:
7.18 MB
Просмотр
Sharp AR-5516 (МФУ) сервис мануалы в PDF-формате помогут найти неполадки и ошибки, а также осуществить ремонт Sharp AR-5516 и восстановить работу устройства.
22
23
Document feeder tray (when the SPF/RSPF is
17
installed)
Place the original(s) that you wish to scan face up
here. Holds up to 40 originals.
Original guides (when the SPF/RSPF is
18
installed)
Adjust to the size of the originals.
Feeding roller cover (when the SPF/RSPF is
19
installed)
Open to remove misfed originals.
Right side cover (when the SPF/RSPF is
20
installed)
Open to remove misfed originals.
Exit area (when the SPF/RSPF is installed)
21
Originals exit the machine here after copying.
Toner cartridge lock release lever
22
To replace the toner cartridge, pull out the toner
cartridge while pushing on this lever.
Toner cartridge
23
Contains toner.
(p.80)
Roller rotating knob
24
Turn to remove misfed paper.
17
18
24
25
(p.17)
(p.16)
(p.73)
(p.73)
(p.80)
(p.75, p.76)
BEFORE USING THE MACHINE
19
20
Fusing unit release levers
25
To remove a paper misfeed from the fusing unit, push
down on these levers and remove the paper.
The fusing unit is hot. Do not touch
Warning
the fusing unit when removing misfed
paper. Doing so may cause a burn or
injury.
Photoconductive drum
26
Copy images are formed on the photoconductive
drum.
Fusing unit paper guide
27
Open to remove misfed paper.
The model name can be seen on the machines
Note
front cover.
1
21
26
27
(p.76)
(p.77)
5