-
Contents
-
Table of Contents
-
Bookmarks
Quick Links
Related Manuals for Sharp WF-939ZP
Summary of Contents for Sharp WF-939ZP
-
Page 2: Table Of Contents
ENGLISH INTRODUCTION Thank you for purchasing this SHARP Product. We hope it will give you many years of trouble-free enjoyment. But for the best performance, read this Manual carefully. It will guide you in operating your SHARP product. CONTENTS Page…
-
Page 3: Name Of Controls
NAME OF CONTROLS 1. Hour/Sleep Off Button — HOUR/OFF 13. Tuning Control — TUNING 24. Tape 1) Direction Switch — DIRECTION 2. Clock Adjust Button-CLOCK 14. Fine Tuning Control — FINE TUNING 25. Tape 1) Reverse Mode Switch — REV 3.
-
Page 4
38. Cassette Compartment 44. Pause Button — PAUSE II 35. Super Tweeter 36.Tweeter 39. Pause Button — PAUSE I I 45. Stop/Eject Button — STOP/EJECT • 46. Fast Wind Buttons — 37. Woofer 40. Stop/Eject Button — STOP/EJECT • 4 1 . Fast Wind Buttons — 47. -
Page 5: Power Source
POWER SOURCE • AC Power 1 Set AC voltage selector to the voltage in your area. Loos- en screw securing voltage selector panel, slide panel until cor- rect voltage range appears, and tighten screw. 2 Connect AC power lead to AC power input, then connect AC power lead plug to an AC outlet.
-
Page 6: Speakers
SPEAKERS Turn the POWER switch OFF/SLEEP before connecting the speakers. • Mounting the speakers 1 Align the channels on the speakers with the guides on the main unit. 2 Slide the speakers down into position until the tops of the speakers and main unit are flush.
-
Page 7: Radio Operation
RADIO OPERATION 1 Turn the power switch on. 5 For FM broadcasts, raise and extend telescopic rod anten- na, then adjust position and length for best reception. For SW1 2 Set FUNCTION switch to RADIO. or SW2, raise antenna vertically to full height. For MW or SW 1, move and rotate unit for best sound.
-
Page 8: Cassette Operation
CASSETTE OPERATION • Be sure to use quality tapes for best results. • The use of tapes longer than C-90 (90 minutes) is not recommended. • Before loading tape into cassette compartment, tighten slack tape with pen or pencil. • Cassettes have removable tabs which allow recording to take place.
-
Page 9: Playback
PLAYBACK О Advance tape to the place you want by pressing • When playing a tape on TAPE 1, set the DUBBING SPEED STOP/EJECT button first, then FAST WIND button. selector to NORMAL. The equalizer circuit for high speed dub- bing will attenuate the high end when playing tapes with the 7 Press STOP/EJECT button, then PLAY button.
-
Page 10: Continuous Playback
• Continuous playback • Playback of TAPE 2 will begin automatically if TAPE 1 is played through side A and to the end of side B. 1 Press for TAPE 1. This also engages the PLAY button. • The audio of both tapes can be mixed by pressing the PLAY button of TAPE 1 while listening to TAPE 2.
-
Page 11: Cue And Review
• Cue and review (Possible only on TAPE 2) REVIEW Press the FAST WIND button opposite to the direction of tape CUE and REVIEW can be used when fast forwarding or rewind- playback. ing through short sections of the tape. CUE and REVIEW can •…
-
Page 12: To Skip An Undesirable Programme With Apld And Apps During Dubbing
• To Skip an Undesirable Programme with • Making Blank Spaces for APLD and APPS APLD and APPS During Dubbing Blanks of at least 4 seconds are required for APLD and APPS to function. Follow the procedure below to enter these blanks Certain materials can be dubbed with the APLD or APPS func- in your own recordings.
-
Page 13: How To Use The Built-In Timer
HOW TO USE THE BUILT-IN TIMER 1 Press TIMER button. The lower dot in the colon between the hour and minutes in the clock will go out. 2 While pressing TIMER button, press HOUR and MINUTE to set the desired time. 3 Set TIMER switch to ON.
-
Page 14: Use With External Audio Components
USE WITH EXTERNAL AUDIO COMPONENTS • Turn the power off before connecting or disconnecting any 3 Adjust the volume using the volume control of the exter other component. nal amplifier. • Turntable or Compact Disc player Recording From Another Amplifier 1 Make sure the turntable uses a magnetic cartridge.
-
Page 15: Maintenance
MAINTENANCE • Internal care • Dirty heads, capstans and pinch rollers cause poor sound and tape jams. Clean these parts with cotton swab moistened with commercial head/pinch roller cleaner or isopropyl alchohol. • After long use, the deck’s heads and capstans will become magnetised, which causes poor sound.
-
Page 16
MEMO… -
Page 17
SHARP CORPORATION…
-
Инструкции по эксплуатации
1
Sharp WF-939Z инструкция по эксплуатации
(43 страницы)
- Языки:Английский, Испанский, Французский
-
Тип:
PDF -
Размер:
1.76 MB
Просмотр
На NoDevice можно скачать инструкцию по эксплуатации для Sharp WF-939Z. Руководство пользователя необходимо для ознакомления с правилами установки и эксплуатации Sharp WF-939Z. Инструкции по использованию помогут правильно настроить Sharp WF-939Z, исправить ошибки и выявить неполадки.
35. Super Tweeter
36.Tweeter
37. Woofer
50. Speaker Release Lever
5 1 . FM/SW1/SW2 Telescopic Rod
Antenna
52. Line Output Sockets — LINE OUT
53.Input Selector — INPUT
38. Cassette Compartment
39. Pause Button — PAUSE I I
40. Stop/Eject Button — STOP/EJECT •
4 1 . Fast Wind Buttons —
42. Play Button — PLAY •
43. Record Button — RECORD •
54. Line Input Sockets
55. Earth Terminal — GND (PHONO)
56. Beat Cancel Switch — BEAT CANCEL
57. External Speaker Terminals —
SPEAKERS
44. Pause Button — PAUSE II
45. Stop/Eject Button — STOP/EJECT •
46. Fast Wind Buttons —
47. Play Button — PLAY •
48. Play Button (Auto-Reverse continu-
ing to TAPE 2)
49. Cassette Compartment
58. Speaker Release Lever
59. AC Power Input
60. External DC Power Input — DC 15 V
6 1 . Timer and Main Battery Com-
partment
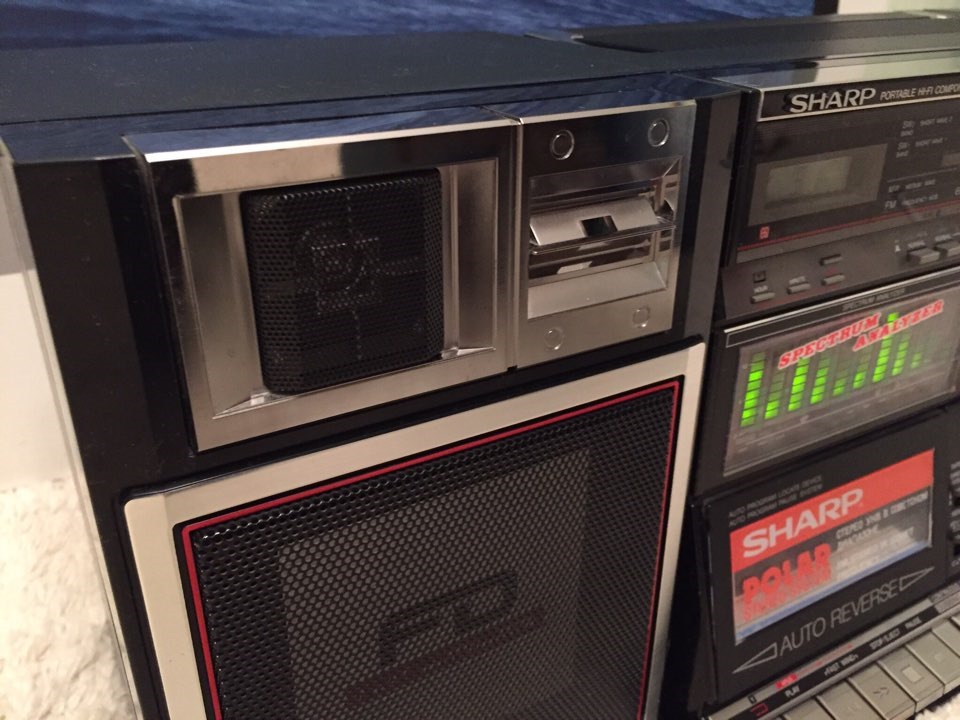
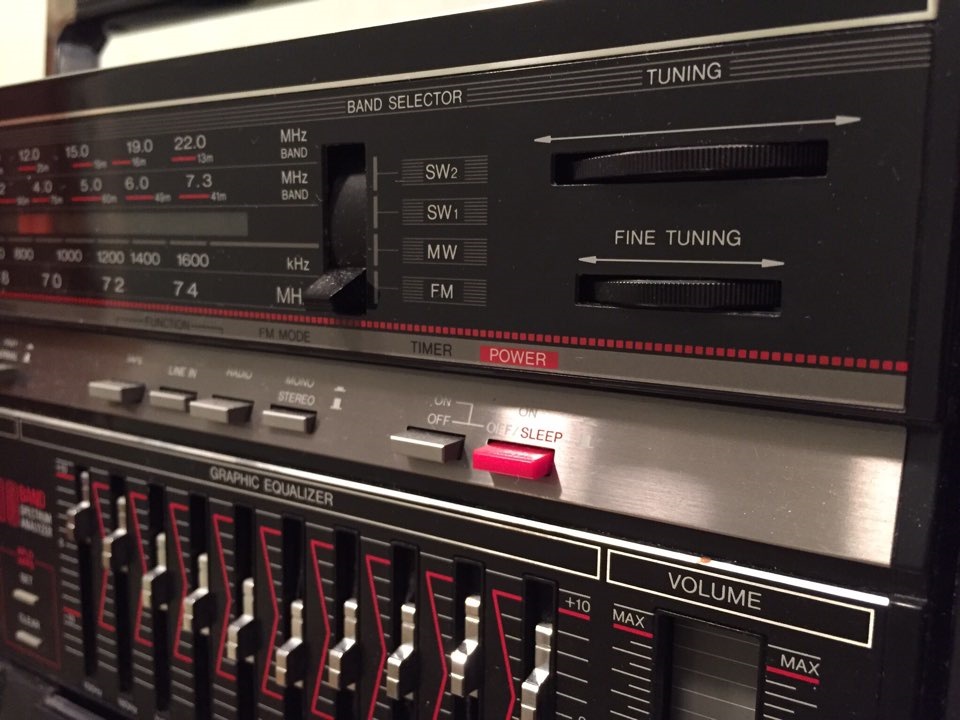
Эта магнитола, выпущенная 30 лет назад, не уступает, а по чистоте звука даже превосходит многие современные системы класса hi-fi! В 1986 году их было не достать и цена была просто космическая! Но, кто очень хотел, покупал дороже у спекулянтов, коих сейчас мы называем бизнесменами)). И вот минуло 30 лет, а именно 939-я модель оказалась в цене, на неё огромный спрос, её покупают коллекционеры, просто люди того поколения, кому взгрустнулось или наоборот. И это дорого стоит: получить вещь из прошлого, из твоей, как правило, не загруженной вечными делами молодости, где ты мог просто делать то, что захотелось) И вот он, SHARP, 1986 год, лето, ты его купил, а мог бы жигули купить, друзья с открытым ртом, разговоры только о нем…
Прошло 30 лет и вот ТЫ вновь обретаешь всё это, на уровне чувств, ты получаешь эмоции, которые не купишь не за какие деньги!
«Времени нет, есть ощущение времени, но стоит его заменить другими ощущениями, всё — времени нет!» (Бренер Евгений)
(описание под видео)
BRENER HISTORY
»
Файлы
» AUDIO: Схемы, документация » Sharp
Sharp 939
| [ Скачать с сервера (889.8 Kb) ] | 04.05.2015, 23:50 |
| Категория: Sharp | Добавил: admin | |
| Просмотров: 3261 | Загрузок: 1062 |


