Для ознакомления с инструкцией необходимо нажать на ссылку «ЗАГРУЗИТЬ», чтобы скачать pdf файл. Если есть кнопка «ПРОСМОТР», то можно просто посмотреть документ онлайн.
Для удобства, Вы можете сохранить данную страницу с файлом руководства по эксплуатации в свой список «избранное» прямо на сайте (доступно для зарегистрированных пользователей).
Смотрите инструкцию для похожих моделей:

Вы можете задать вопрос посетителям сайта по модели CASIO CTK-671. Если Вы являетесь её пользователем, то пожалуйста оставьте, по возможности развёрнутый отзыв:
(скачивание инструкции бесплатно)
Формат файла: PDF
Доступность: Бесплатно как и все руководства на сайте. Без регистрации и SMS.
Дополнительно: Чтение инструкции онлайн

Страница:
(1 из 50)
навигация

1

2

3

4

5

6

7

8

9

10

11

12

13

14

15

16

17

18

19

20

21

22

23

24

25

26

27

28

29

30

31

32

33

34

35

36

37

38

39

40

41

42

43

44

45

46

47

48

49

50
Оглавление инструкции
- Страница 1 из 51
- Страница 2 из 51
ОФИЦИАЛЬНОЕ УВЕДОМЛЕНИЕ Данное устройство было испытано и признано соответствующим ограничениям, установленным для цифровых уст ройств Класса В, в соответствии с Частью 15 Правил FCC. Эти требования были разработаны в целях обеспечения надлежащей защиты от нежелательных электромагнитных помех при - Страница 3 из 51
Введение Примите наши поздравления в связи с выбором вами данного музыкального инструмента CASIO. Этот клавишный инструмент предоставляет в ваше распоряжение следующие свойства и функции. ❐ 348 инструментальных тембров, в том числе 100 «улучшенных тембров» Общим числом 238 стандартных тембров, в - Страница 4 из 51
Меры безопасности ● ● Символы В Руководстве для пользователя и на самом музыкаль ном инструменте применяются различные символы, призванные обеспечить безопасное и правильное исполь зование инструмента, предотвратить нанесение телесных повреждений пользователю и иными лицами, равно как и ущерба их - Страница 5 из 51
● ● ● До упора вставляйте адаптер в настенную розетку электросети. Вынимайте адаптер из розетки электросети во время грозы, а также перед отъездом в путешествие или перед иным продолжитель ным отсутствием. По крайней мере один раз в год вынимайте адаптер из розетки электросети и вытирай те пыль, - Страница 6 из 51
Путеводитель по общему устройству инструмента Содержание Добро пожаловать ………………………… 1 Введение …………………………………… 2 Меры безопасности ………………………. 4 Забота о музыкальном инструменте …… 7 Использование режима редактирования параметров - Страница 7 из 51
● Названия клавиш, кнопок и иных объектов указываются в тексте данного Руководства жирным шрифтом. 1. Акустическая система 2. Кнопка «POWER» [Электропита ние] 3. Индикатор электропитания 4. Переключатель «MODE» [Режим] 5. Ползунковый регулятор «VOLUME» [Громкость] 6. Список ритмов 7. Таблица - Страница 8 из 51
Воспроизведение демонстрационных мелодий Нажатие кнопки «DEMO» [Демонстрационные мелодии] запускает воспроизведение демонстрационных мело дий. Имеются две демонстрационные мелодии, которые непрерывно воспроизводятся по очереди. Для того что бы остановить воспроизведение демонстрационных мелодий, - Страница 9 из 51
Основные рабочие параметры музыкальO ного инструмента Номер тембра, наложение тембров, разделение клавиатуры, точка разделения клавиатуры, чув ствительность клавиш к силе нажатия, ревербера ция, хорусэффект, эффектпроцессор, эквалай зер, номер ритма, темп, установки режима микшера - Страница 10 из 51
Гнездо «SUSTAIN/ASSIGNABLE JACK» [Правая педаль/Многофункциональi ный разъем] Основные операции К контактному гнезду «SUSTAIN/ASSIGNABLE JACK» вы можете подключить дополнительную правую педаль фортепьяно (SP2 или SP10), чтобы обрести новые исполнительские возможности, описанные ниже. Подробные - Страница 11 из 51
Применение эффектов к тембрам Использование модифицированO ного тембра 100 из заранее запрограммированных тембров относят ся к числу «модифицированных тембров», которые пред ставляют собой вариации стандартных тембров, создан ные путем программирования цифровых эффектов (DSP). Например, тембр - Страница 12 из 51
❚ ПРИМЕЧАНИЕ ● Изменение установок параметров для эффектов «REVERB» и «CHORUS» Вы можете управлять относительной силой эффекта и тем, как он применяется. Параметры, которыми вы мо жете управлять, зависят от конкретного эффекта. Более подробные сведения об этом смотрите в следующем раз деле, - Страница 13 из 51
Использование эквалайзера ❚ ПРИМЕЧАНИЯ ● Применяется или не применяется некий эффект к тем партиям, которые звучат в текущий момент, зависит также от текущих установок режима микшера «Reverb Send» [Посыл реверберации], «Chorus Send» [Посыл хорусэффекта] и «DSP on/off» [Эффектпроцессор вклю - Страница 14 из 51
Автоаккомпанемент ❚ ПРИМЕЧАНИЕ ● Одновременное нажатие обеих кнопок «TEMPO» ( и ) возвращает темп к его исходной величине для текущего выбранного ритма. Использование автоаккомпанемента Приведенная ниже процедура описывает, как пользовать ся функцией автоаккомпанемента данного музыкально го - Страница 15 из 51
Êíîïêè «INTRO/ENDING» [Âñòóïëåíèå/Êîíöîâêà] 1 è 2 ❚ ПРИМЕЧАНИЕ Во время исполнения минорных аккордов и септаккор дов не имеет значения, нажимаете ли вы черные или бе лые клавиши справа от клавиши мажорного аккорда. «FINGERED» «FULL RANGE CHORD» Пример: Как исполнить аккорд «C» [Домажор]. Этот - Страница 16 из 51
Завершение исполнения при помоO щи модели концовки Использование функции «Auto Harmonize» [Автогармонизация] Вы можете закончить свое исполнение моделью заклю чительной части (концовки), что приведет используе мый вами ритм к естественно звучащему завершению. Когда вы пользуетесь - Страница 17 из 51
Функция «Mixer» [Микшер] О нотах и тембрах функции «Auto Harmonize» [Автогармонизация] Ноты, которые вы играете на клавиатуре, называются «нотами мелодии», тогда как ноты, добавляемые к мело дии функцией автогармонизации, называются «нотами гармонизации». Функция «Auto Harmonize» обычно ис - Страница 18 из 51
■ «Part On/Off» [Партия включена/выключена] (Установки: «On», «Off») Данный параметр может быть использован для включе ния (звучит) или выключения (не звучит) любой партии. Текущий статус «On/Off» каждой партии указывается на дисплее, как описано ниже. ■ «Volume» [Громкость] (Диапазон: от 000 до - Страница 19 из 51
Режим «Synthesizer» [Синтезатор] Режим «Synthesizer» данного музыкального инструмента предоставляет в ваше распоряжение инструменты для создания ваших собственнных оригинальных тембров. Для создания собственного оригинального звука, про сто выберите один из встроенных тембров и изменяйте его - Страница 20 из 51
■ «Vib.Depth» [Глубина вибрато] (Диапазон: от P 64 до +63) Глубина эффекта вибрато. Êíîïêà «SYNTH» [Ñèíòåçàòîð] [왗]/[왘] Êíîïêè «CURSOR» ■ «Reverb Send» [Посыл реверберации] (ДиапаP зон: от 000 до 127) Этот параметр регулирует реверберацию. V i bDe p t h Êíîïêè [+] è [-] ■«Vib.Rate» [Интенсивность - Страница 21 из 51
Êíîïêà «SYNTH» [Ñèíòåçàòîð] [왔] Êíîïêà «ENTER» [Ââîä êîìàíäû] Êíîïêè [+] è [-] Советы относительно создания тембi ра пользователя Сохранение тембра пользователя в памяти Приведенные ниже полезные советы помогут вам сде лать процесс создания тембров пользователя чутьчуть более быстрым и простым. - Страница 22 из 51
Регистрационная память Адресные названия регистраций Вы можете назначить очередную динамическую выбор ку параметров (регистрацию) в одну из 16 зон, которую вы можете выбрать в одном из четырех банков памяти (с 1го по 4й) с помощью кнопки «BANK» [Банк] и четы рех кнопок «REGISTRATION» - Страница 23 из 51
Функция «Song Memory» [Память песен] Основные операции памяти песен Текущее состояние функции «Song Memory» меняется каждый раз, когда вы нажимаете кнопку «SONG MEMORY». 3. Для того чтобы выбрать 1ю дорожку, нажмите кнопку CHORD/TR1 «CHORD/TR1 CHORD/TR1» [Аккорд/Дорожка 1] из группы кнопок SONG - Страница 24 из 51
Воспроизведение записей из памяO ти песен Запись мелодии и аккордов с помоi щью режима пошаговой записи Записав дорожки в памяти песен, вы можете воспроизве сти их, чтобы услышать, как они звучат. С помощью режима пошаговой записи вы можете запи сывать аккорды автоаккомпанемента и ноты и даже - Страница 25 из 51
Пример 1: Для того чтобы ввести Gm7, удерживайте нажатой клавишу G на регистре ввода основных тонов аккордов и нажмите клавишу m7 на регистре ввода типов аккордов. 5. Исполняйте аккорд. ● ● Используйте тот метод исполнения аккордов, кото рый задан текущей установкой переключателя «MODE» - Страница 26 из 51
2. Используйте кнопки группы «SONG SONG MEMORY TRACK TRACK» для выбора дорожки, на которую вы хотите записывать (со 2й по 6ю). Пример: Выбрана дорожка 2. 3. Задайте номер тембра. Многоканальная запись 1я дорожка памяти песен данного музыкального инст румента записывает автоаккомпанемент и - Страница 27 из 51
Как стереть конкретные нотные данные 1. Выполните этапы 1 и 2 процедуры, изложенной выше под заголовком «Как исправлять ошибки во время пошаго вой записи», чтобы вывести на дисплей ту ноту, которую вы хотите стереть. 4. Используйте кнопки [ ] и [ ] «CURSOR CURSOR CURSOR» для переме щения к тому - Страница 28 из 51
Редактирование песни В режиме редактирования песни вы можете выполнять следующие операции: ● Стереть песню ● Стереть дорожку ● Записать заново данные заголовка песни (процедура «Panel Record» [Запись с пульта]) Как стереть песню Методы редактирования и состав дисплея Ниже излагаются технические - Страница 29 из 51
Установка рабочих параметров клавиатуры РАЗДЕЛЕНИЕ КЛАВИАТУРЫ 5. Теперь попробуйте сыграть чтонибудь на клавиатуре. ● Этот раздел описывает, как пользоваться функциями наложения тембров (как исполнять два тембра с помо щью одной клавиши) и разделения клавиатуры (как на значать различные тембры - Страница 30 из 51
Как разделить клавиатуру, а затем произвести наложение тембров 1. Нажмите кнопку «TONE TONE TONE» [Тембр], а затем введите но мер основного тембра. Пример: В качестве основного задан тембр «065 BRASS SECTION». 2. Нажмите кнопку «SPLIT SPLIT SPLIT» [Разделение клавиатуры], а за тем введите номер - Страница 31 из 51
Пункты меню установок Îñíîâíîå ìåíþ Ñóáìåíþ Êîíòðàñò (ñóáìåíþ «Contrast») Äèñï./Ïåäàëü (ìåíþ «LCD/Jack») Ìíîãîôóíêöèîíàëüíûé ðàçúåì (ñóáìåíþ «Jack») Как пользоваться меню установок параметров клавиатуры 1. Нажмите кнопку «TOUCH/TRANSPOSE/SETTING TOUCH/TRANSPOSE/SETTING TOUCH/TRANSPOSE/SETTING». 2. - Страница 32 из 51
MIDI Что такое MIDI? MIDIiканалы Сочетание букв MIDI это аббревиатура выражения «Musical Instrument Digital Interface» [Цифровой Интер фейс Музыкальных Инструментов], представляющего собой название всемирного стандарта для цифровых сиг налов и соединительных устройств, который делает воз - Страница 33 из 51
Использование сервиса загрузки данных Музыкальные данные аккомпанементов, песен, тембров, цифровых эффектов и регистраций (динамических вы борок параметров), а также программное обеспечение для передачи данных между вашим компьютером и му зыкальным инструментом всегда доступны для загрузки с - Страница 34 из 51
Технические характеристики 64 65 - Страница 35 из 51
66 Код кома Тип нды Старший Макс. Тип цифро «Program байт No Группа тембров Название тембра Change» выбора поли диапа вого фония зона эффекта [Смена банка тембра] Штатные тембры музыкального инструмента Список тембров Код кома Тип нды Старший Макс. Тип цифро «Program байт No Группа тембров - Страница 36 из 51
68 69 Код кома Тип нды Старший Макс. Тип цифро «Program байт поли диапа No Группа тембров Название тембра Change» выбора вого фония зона эффекта [Смена банка тембра] Модифицированные тембры Код кома Тип нды Старший Макс. Тип цифро «Program байт поли диапа No Группа тембров Название тембра - Страница 37 из 51
70 71 Код кома Тип нды Старший Макс. Тип цифро «Program байт No Группа тембров Название тембра Change» выбора поли диапа вого фония зона эффекта [Смена банка тембра] Тембры системы General MIDI (GMiтембры) Код кома Тип нды Старший Макс. Тип цифро «Program байт поли диапа No Группа тембров - Страница 38 из 51
Тембры ударных Обычный 1 октава вниз 2 октавы вниз 1 октава вверх 2 октавы вверх 1/2 октавы 1/4 октавы Значение Символ Диапазоны ❚ ПРИМЕЧАНИЕ Код кома Тип нды Старший Макс. Тип цифро «Program байт поли диапа No Группа тембров Название тембра Change» выбора вого фония зона эффекта [Смена банка - Страница 39 из 51
Названия тембров «GRAND PIANO» [Ðîÿëü] «GRAND PIANO WIDE» [Ðàñøèðåíèå ðîÿëÿ] «MELLOW PIANO» [Ñî÷íîå ôîðòåïüÿíî] «BRIGHT PIANO» [ßðêîå ôîðòåïüÿíî] «MODERN PIANO» [Ñîâðåìåííîå ôîðòåïüÿíî] «HONKY-TONK» [Êàáàöêîå ïèàíèíî] «ELEC.GRAND PIANO» [Ýëåêòðîííûé ðîÿëü] «ELEC.PIANO» [Ýëåêòðîííîå ôîðòåïüÿíî] - Страница 40 из 51
76 77 :Вы можете изменять клавиатурный регистр уменьшенных аккордов «dim7» для основных тонов A, B и B, а также увеличенных аккордов «aug» для основных тонов B и B посредством регулирования установки точки разделения клавиатуры (стр. 54). Данная таблица показывает аппликатуры общераспространенных - Страница 41 из 51
Список цифровых (DSP) эффектов 78 Список эффектов группы «CHORUS» [Хорусiэффект] Список эффектов группы «REVERB» [Реверберация] Список эффектов Устанавливаемые параметры зависят от типа DSPэффекта. Кроме того, параметры для каждого типа DSPэффекта зависят от алгоритма*, ассоциируемого с данным - Страница 42 из 51
80 [52] [53] [54] [55] [56] [57] Идентификатор алгоритма 12 12 M17 M17 M17 M16 Дисплейное имя OdRot1 OdRot2 RotRef1 RotRef2 RotRef3 OdRtRef1 [58] M16 OdRtRef2 [59] M16 OdRtRef3 Уохэффект [60] [61] [62] 04 05 M21 LFOWah AutoWah AWhChDly [63] M22 LWhChDly Гитарные эффекты [64] [65] [66] [67] [68] - Страница 43 из 51
82 83 ■ Параметры 0 : «Speed» [Режим скорости] (Диапазон: «Slow» [Мед ленная], «Fast» [Быстрая]) Переключает режим между быстрой и медленной скоростью. 1 : «Break» [Остановка] (Диапазон: «Rotate» [Вращать ся], «Stop» [Остановиться]) Прекращает вращение акустической системы. 2 : «Fall Accell» - Страница 44 из 51
84 85 ■ Функция Линия задержки с перекрестной обратной связью для стереофонического входного и выходного сиг нала. 21: «Stereo Delay 2» [Стереофоническая линия задержки 2] ■ Параметры 0 : «Delay Time» [Время задержки] (Диапазон: от 0 до 127) Регулирует время задержки. 1 : «Wet Level» [Уровень - Страница 45 из 51
86 87 ■ Параметры 0 : Интенсивность НЧмодуляции хорусэффекта 1 : Глубина НЧмодуляции хорусэффекта 2 : Контур обратной связи хорусэффекта 3 : Уровень обработанного сигнала хорусэффекта 4 : Время задержки 5 : Уровень обработанного сигнала линии задержки 6 : Контур обратной связи линии задержки - Страница 46 из 51
88 89 ■ Функция Мультиэффектор, который связывает эффекторы «Низкокачественный звук» «Отражение звука». M14: Multi14 (Низкокачественный звук O ОтO ражение звука) ■ Параметры 0 : Частота встроенного генератора кольцевого моду лятора 1 : Интенсивность НЧмодуляции кольцевого модуля тора 2 : - Страница 47 из 51
90 91 ■ Параметры 0 : Глубина компрессора 1 : Атака компрессора 2 : Уровень компрессора 3 : Интенсивность НЧмодуляции хорусэффекта ■ Функция Мультиэффектор, который связывает эффекторы «Автоматический Уохэффект» «2фазный хорус эффект треугольного сигнала» «Линия задержки с 2 отводами». ■ - Страница 48 из 51
92 93 - Страница 49 из 51
94 95 - Страница 50 из 51
96 - Страница 51 из 51
Инструкции и руководства похожие на CASIO CTK-671
Другие инструкции и руководства из категории Синтезатор
© 2023 manuals-help.ru, Все права защищены
-
Contents
-
Table of Contents
-
Troubleshooting
-
Bookmarks
Quick Links
USER’S GUIDE
GUÍA DEL USUARIO
P
CTK671-ES-1
CTK671_es_cover.p65
Page 1
01.8.1, 3:53 PM
Adobe PageMaker 6.5J/PPC
Related Manuals for Casio CTK-671
Summary of Contents for Casio CTK-671
-
Page 1
USER’S GUIDE GUÍA DEL USUARIO CTK671-ES-1 CTK671_es_cover.p65 Page 1 01.8.1, 3:53 PM Adobe PageMaker 6.5J/PPC… -
Page 2
GUIDELINES LAID DOWN BY FCC RULES FOR USE OF THE UNIT IN THE U.S.A. (not applicable to other areas). NOTICE This equipment has been tested and found to comply with the limits for a Class B digital device, pursuant to Part 15 of the FCC Rules. -
Page 3: Welcome
Welcome… To the happy family of satisfied CASIO electronic musical instrument owners! To get the most out of the many features and functions of the keyboard, be sure to carefully read this manual and keep it on hand for future reference.
-
Page 4: Introduction
Introduction Congratulations upon your selection of this CASIO musical instrument. This keyboard provides you with the following features and functions. 348 tones, including 100 “Advanced Tones” A total of 238 standard tones including piano, organ, brass, and other presets provide you with the sounds you need, while memory for 10 user tones lets you store your own original creations.
-
Page 5: Registration Memory
Keyboard setups can be stored in memory for later recall and instant settings when- ever you need them. Up to 16 setups (4 setups x 4 banks) can be stored in registration memory. Data download from your computer You can use your computer to download data from the CASIO MUSIC SITE. 703A-E-005A…
-
Page 6: Safety Precautions
Safety Precautions Symbols Various symbols are used in this user’s guide and on the product itself to ensure that the product is used safely and correctly, and to prevent injury to the user and other persons as well as damage to property. Those sym- bols along with their meanings are shown below.
-
Page 7
2. If you are using the AC adaptor for power, unplug it from the wall outlet. 3. Contact your original retailer or an authorized CASIO Service Pro- vider. AC Adaptor Misuse of the AC adaptor creates the risk of fire and electric shock. -
Page 8
2. If you are using the AC adaptor for power, unplug it from the wall outlet. 3. Contact your original retailer or an authorized CASIO Service Pro- vider. Disassembly and Modification Never try to take this product apart or modify it in any way. Doing so… -
Page 9
CAUTION AC Adaptor Misuse of the AC adaptor creates the risk of fire and electric shock. Always make sure you observe the following precautions. • Do not locate the electric cord near a stove or other sources of heat. • Never pull on the cord when un- plugging from the electrical out- let. -
Page 10
Display Screen • Never push on the display screen’s LCD panel or subject it to strong impact. Doing so can cause the LCD panel’s glass to crack, creating the risk of personal injury. • Should the LCD panel ever crack or break, never touch the liquid inside of the panel. -
Page 11: Care Of Your Instrument
Care of your Instrument Avoid heat, humidity or direct sunlight. Do not overexpose the instrument to direct sunlight, or place it near an air conditioner, or in any extremely hot place. Do not use near a TV or radio. This instrument can cause video or audio interference with TV and radio reception. If this happens, move the instrument away from the TV or radio.
-
Page 12: Table Of Contents
Contents Welcome..E-1 Introduction … E-2 Safety Precautions … E-4 Care of your keyboard … E-9 Contents … E-10 General Guide … E-12 About the display …E-14 Playing a Demo Tune … E-15 Power Supply… E-16 Using batteries …E-16 Using the AC Adaptor …
-
Page 13
Song Memory Function … E-46 Tracks …E-46 Basic Song Memory operations … E-46 Using Real-time Recording …E-47 Mixer Mode Settings …E-48 Playing Back from Song Memory … E-49 Recording Melody and Chords with Step Recording … E-49 Recording Multiple Tracks … E-52 Correcting Mistakes While Step Recording …E-54 Editing Memory Contents … -
Page 14: General Guide
General Guide BANK E-12 BANK STORE STORE 703A-E-014A…
-
Page 15
• Key, button, and other names are indicated in the text of this manual using bold type. 1 Speaker C Tone list 2 POWER button D a) INTRO/ENDING 1/2 buttons 3 Power indicator 4 MODE switch 5 VOLUME slider 6 Rhythm list 7 Equalizer list E a) BANK button 8 a) SONG MEMORY button… -
Page 16: About The Display
About the display Indicators appear here to show when reverb, chorus, DSP, the Mixer Mode, Song Memory, or Touch Response is being used. The TONE indicator appears when you are selecting or viewing the TONE setting, while RHYTHM appears for the RHYTHM setting. The AD and TONE indicators both appear when you are select- ing or viewing an Advanced Tone.
-
Page 17: Playing A Demo Tune
The number of beats per minute are indicated while a rhythm, Auto-accompaniment, or Song Memory Mode is being used. • The tempo area is also used to indicate the Song Memory function’s clock. REC flashes on the display during Song Memory record standby. REC remains on the display without flashing while recording is in progress.
-
Page 18: Power Supply
Power Supply This keyboard can be powered by current from a standard household wall outlet (using the specified AC adaptor) or by batteries. Always make sure you turn the keyboard off when- ever you are not using it. Using batteries Always make sure you turn off the keyboard before loading or replacing batteries.
-
Page 19: Using The Ac Adaptor
Using the AC Adaptor Make sure that you use only the AC adaptor specified for this keyboard. Specified AC Adaptor: AD-5 DC 9V jack AC adaptor AD-5 SUSTAIN/ PHONES/ DC 9V MIDI ASSIGNABLE JACK OUTPUT Also note the following important warnings and precautions when using the AC adaptor.
-
Page 20: Memory Contents
Memory Contents In addition to the above settings, data stored in the Registra- tion Mode and Song Memory Mode is also retained when keyboard power is turned off. Electrical Power The settings and memory data described above are retained as long as the keyboard is being supplied with electrical pow- er.
-
Page 21: Connections
703A-E-021A When connected to a musical instrument amplifier, set the volume of the keyboard to a relatively low level and make output volume adjustments using the amplifier’s controls.
-
Page 22: Accessories And Options
Sustain/Assignable jack Terminal You can connect an optional sustain pedal (SP-2 or SP-10) to the SUSTAIN/ASSIGNABLE JACK terminal to enable the ca- pabilities described below. For details on how to select the pedal function you want, see “Changing Other Settings” on page E-63. SUSTAIN/ASSIGNABLE JACK Terminal SUSTAIN/ PHONES/…
-
Page 23: Basic Operations
Basic Operations VOLUME MODE POWER This section provides information on performing basic key- board operations. To play the keyboard Press the POWER button to turn the keyboard Set the MODE switch to NORMAL. Use the VOLUME slider to set the volume to a relatively low level.
-
Page 24: Using An Advanced Tone
Using an Advanced Tone 100 of the preset tones are “Advanced Tones,” which are vari- ations of standard tones created by programming in effects (DSP) and other settings. For example, PIANO is modified into STEREO PIANO, ORGAN becomes ROTARY SPEAK- ER ORGAN, and so on.
-
Page 25: Applying Effects To Tones
Applying Effects to Tones REVERB CHORUS This keyboard provides you with a selection of effects that you can apply to tones. The built-in effects include a wide variety of variations that give you access to a selection of general digital effects. Effect Blocks The following shows how the effects of this keyboard are or- ganized.
-
Page 26
REVERB CHORUS Changing the Settings of REVERB and CHORUS Parameters You can control the relative strength of an effect and how it is applied. The parameters you can control depend on the ef- fect. See the following section titled “REVERB and CHORUS Parameters”… -
Page 27: Selecting A Dsp Type
Selecting a DSP Type Perform the following steps to select a DSP type. Press the DSP button so the indicator appears next to DSP on the display. Use the [+] and [–] buttons or number buttons to select the type of DSP you want. •…
-
Page 28
NOTE • Whether or not an effect is applied to the parts that are sound- ing also depends on Mixer Mode Reverb Send, Chorus Send, and DSP on/off settings. See “Mixer Function” on page E-35 for more information. • Playing a demo tune (page E-15) automatically changes the effect to the one that is assigned to the tune. -
Page 29: Using The Equalizer
Using the Equalizer EQUALIZER The equalizer is another type of effect that you can use to make adjustments in tone quality. Frequencies are divided among a number of bands, and raising and lowering the lev- el of each frequency band alters the sound. You can reproduce the optimal acoustics for the type of mu- sic you are playing (classics, for example) by selecting the applicable equalizer setting.
-
Page 30: Auto Accompaniment
Auto Accompaniment MODE VARIATION/FILL-IN 1/2 This keyboard automatically plays bass and chord parts in accordance with the chords you finger. The bass and chord parts are played using sounds and tones that are automati- cally selected to select the rhythm you are using. All of this means that you get full, realistic accompaniments for the melody notes you play with your right hand, creating the mood of a one-person ensemble.
-
Page 31: Using Auto Accompaniment
• The accompaniment keyboard can be used for playing chords only. No sound will be produced if you try playing single melo- dy notes on the accompaniment keyboard. Chord Types CASIO CHORD accompaniment lets you play four types of chords with minimal fingering. Chord Types Example…
-
Page 32
INTRO/ENDING 1/2 NOTE • It makes no difference whether you press black or white keys to the right of a major chord key when playing minor and sev- enth chords. FINGERED FINGERED provides you with a total of 15 different chord types. -
Page 33: Using An Intro Pattern
FULL RANGE CHORD This accompaniment method provides a total of 38 different chord types: the 15 chord types available with FINGERED plus 23 additional types. The keyboard interprets any input of three or more keys that matches a FULL RANGE CHORD pattern to be a chord.
-
Page 34: Using A Fill-In Pattern
Before starting, you should first select the rhythm you want to use, set the tempo, and use the MODE switch to select the chord play method you want to use (NORMAL, CASIO CHORD, FINGERED, FULL RANGE CHORD). To use synchro start Press the SYNCHRO/FILL-IN NEXT button to put the keyboard into synchro start standby.
-
Page 35: Finishing With An Ending Pattern
• Auto Harmonize turns off temporarily whenever you start demo tune play. It turns back on as soon as the operation or function that caused it to turn off is finished. • Auto Harmonize is enabled only when the Auto Accompani- ment mode is FINGERED or CASIO CHORD. E-33…
-
Page 36: Adjusting The Accompaniment Volume
ACCOMP VOLUME About Auto Harmonize notes and tones The notes you play on the keyboard are called “melody notes,” while the notes added to the melody by Auto Har- monize is called the “harmonize notes.” Auto Harmonize normally uses the tone you selected for the melody notes as the tone for the harmonize notes, but you can use the Mixer (page E-35) to specify a different tone for the harmonize notes.
-
Page 37: Mixer Function
• When this keyboard is being used as the sound source for an externally connected computer or other MIDI device, all 16 channels are assigned musical instrument parts. The notes played over the channel selected by steps 1 and 2 under “Turn- ing Channels On and Off”…
-
Page 38: Using The Parameter Edit Mode
MIXER Use the [+]/[–] buttons to select on or off. Example: To turn the channel off. C h a n n e l • Press [ ] (EXIT) to return to the channel selection screen. • Pressing the MIXER button returns to the Tone Screen. NOTE •…
-
Page 39: How Parameters Work
How Parameters Work The following are the parameters whose settings can be changed in the Parameter Edit Mode. Tone Parameters Tone (Range: 000 to 247) This parameter controls the tones assigned to each part. T o n e N o . NOTE •…
-
Page 40: Synthesizer Mode
Synthesizer Mode The Synthesizer Mode of this keyboard provides the tools for creating your own original tones. Simply select one of the built-in tones and change its parameters to create your own original sound. You can even store your sounds in memory and select it using the same procedure as that used to select a preset tone.
-
Page 41
Resonance Resonance enhances the harmonic components in the vicini- ty of the cutoff frequency, which creates a distinctive sound. A larger resonance value enhances the sound as shown in the figure. Level Cut off frequency Small Value Large Value Resonance NOTE •… -
Page 42: Creating A User Tone
Creating a User Tone Use the following procedure to select a preset tone and change its parameters to create a user tone. First, select the preset tone you want to use as a basis for your user tone. Press the SYNTH button. •…
-
Page 43
Vib.Depth (Vibrato Depth) (Range: –64 to 00 to +63) Depth of the vibrato effect V i b D e Vib.Rate (Vibrato Rate) (Range: –64 to 00 to +63) Rate (speed) of the vibrato effect V i b . R a t e Cut Off Freq. -
Page 44: Storing A User Tone In Memory
User Tone Creation Hints The following hints provide helpful advice on making user tone creation a bit quicker and easier. Use a preset tone that is similar to the one you are trying to create. Whenever you already have a rough idea of the tone you are trying to create, it is always a good idea to start with a preset tone that is similar.
-
Page 45
E-43 703A-E-045A… -
Page 46: Registration Memory
Registration Memory Registration Memory Features Registration memory lets you store up to 16 keyboard setups (4 sets x 4 banks) for instant recall whenever you need them. The following is a list of settings that are saved in registra- tion memory. Registration Memory Settings •…
-
Page 47: To Save A Setup In Registration Memory
Setup Names You can assign setups into one of 16 areas, which you can select using BANK buttons 1 through 4 and the four REGIS- TRATION buttons. Area names range from 0-1 through 3-4 as shown below. BANK STORE BANK 0 BANK 1 BANK 2 BANK 3…
-
Page 48: Song Memory Function
Song Memory Function SONG MEMORY START/STOP This keyboard lets you record up to two separate songs in song memory for later playback. There are two methods you can use to record a song: real-time recording where you record the notes as you play them on the keyboard, and step record- ing where you input chords and notes one-by-one.
-
Page 49: Using Real-Time Recording
Using Real-time Recording With real-time recording, the notes you play on the keyboard are recorded as you play them. To record with real-time recording Press the SONG MEMORY button twice to enter real-time record standby. • Perform step 2, below, within five seconds after en- tering record standby.
-
Page 50: Mixer Mode Settings
SONG MEMORY SYNCHRO/FILL-IN NEXT START/STOP Mixer Mode Settings Channel 1 Mixer parameters (page E-36) are automatically recorded to Track 1. You can use the Mixer to change each of the parameters. Memory Capacity The keyboard has memory for approximately 3,500 notes. You can use all 3,500 notes for a single song, or you can divide memory between two different songs.
-
Page 51: Playing Back From Song Memory
Playing Back from Song Memory Once you record tracks to song memory, you can play them back to see what they sound like. To play back from song memory Use the SONG MEMORY button to enter play- back standby, and then use the [+] and [–] but- tons to select a song number (0/1).
-
Page 52
When the MODE switch is set to NORMAL during step re- cording, you can specify chords using a method that is dif- ferent from CASIO CHORD and FINGERED fingerings. This chord specification method can be used to input 18 different chord types using only two keyboard keys, so chords can be specified even if you don’t know how to actually play them. -
Page 53
Example 1: To input Gm7, hold down G on the root input keyboard and press the m7 key on the chord type input keyboard. (m7) Press key to specify chord Hold down key to specify chord root. type. Example 2: To input Gm/C, hold down C and G on the root input keyboard and press the m key on the chord type input keyboard. -
Page 54: Recording Multiple Tracks
SONG MEMORY START/STOP Recording Multiple Tracks Track 1 of the keyboard’s song memory records Auto Accom- paniment and keyboard play. In addition, there are five oth- er melody tracks that you can use to record melody parts only. You can record different tones to the melody tracks and build a full ensemble of instruments for your recordings.
-
Page 55
Use the SONG MEMORY TRACK buttons to se- lect the track you want to record to (2 through Example: Select Track 2. Flash Specify a tone number. • After changing the tone number, press any keyboard key to clear the tone number and name screen, and return to the note input screen. -
Page 56: Correcting Mistakes While Step Recording
SONG MEMORY SONG MEMORY TRACK Correcting Mistakes While Step Re- cording Memory data can be thought of as a musical score that progresses from left to right, with the input point normally at the far right of the recorded data. The procedure described here lets you move the input point to the left in order to make changes in data you have already input.
-
Page 57: Editing Memory Contents
To delete specific note data Perform steps 1 and 2 under “To correct mis- takes while step recording” above to display the note you want to delete. Press the [ ] (ENTER) button. In response to the “Delete?” message that ap- pears on the screen, press the YES button to de- lete the displayed note.
-
Page 58
Should this happen, you will have to re-record the entire track. To change a chord Use the chord fingering method selected by the MODE switch (FINGERED, CASIO CHORD, etc.) to input a chord. C h o r d E-56 [ ]/[ ] CURSOR [+]/[–]… -
Page 59: Editing A Song
Editing a Song You can perform the following operations in the song edit- ing mode. • Delete a song • Delete a track • Song header data rewrite (Panel Record) To delete a song Press the SONG MEMORY button once to enter playback standby.
-
Page 60
SONG MEMORY To rewrite song header data (Panel Record) You can use a procedure called “Panel Record” to change the initial Mixer, tempo and other settings stored in the song header. Press the SONG MEMORY button once to enter playback standby. Use the [+] and [–] buttons to select the number of the song that contains the header data you want to rewrite. -
Page 61: Keyboard Settings
Keyboard Settings This section describes how to use layer (to play two tones with a single key) and split (to assign different tones to ei- ther end of the keyboard), and how to make touch response, transpose, and tuning settings. Using Layer Layer lets you assign two different tones (a main tone and a layered tone) to the keyboard, both of which play whenever…
-
Page 62: Using Layer And Split Together
• Split cannot be used while standing by for recording or while recording is being performed in the Memory Mode. • When the MODE switch is set to CASIO CHORD or FINGERED, the accompaniment keyboard range is in accordance with the split point you specify with the above procedure.
-
Page 63: Using Touch Response
To split the keyboard and then layer tones Press the TONE button and then input the tone number of the main tone. Example: To set “065 BRASS SECTION” as the main tone. B r s S e c t Press the SPLIT button and then input the num- ber of the split tone.
-
Page 64: Transposing The Keyboard
[+]/[–] TOUCH/TRANSPOSE/SETTING Tuning the Keyboard The tuning feature lets you fine tune the keyboard to match the tuning of another musical instrument. To tune the keyboard Press the TOUCH/TRANSPOSE/SETTING but- ton. Use the [ ] and [ ] (CURSOR) buttons to dis- play the tuning screen.
-
Page 65: Changing Other Settings
Changing Other Settings Setting Types The table below shows the parameters whose settings you can change. Setting menu Touch Response Specifies of how sound should change with keyboard pressure. (Touch) Transpose Adjusts of overall keyboard tuning by semitone units. (Trans.) Tune Fine adjustment of overall keyboard tuning.
-
Page 66
To use the keyboard settings menu Press the TOUCH/TRANSPOSE/SETTING button. Use the [ ] and [ ] (CURSOR) buttons, and the [ ] (EXIT) and [ ] (ENTER) buttons to recall the items whose settings you want to change. T o u c h T r a n s . -
Page 67
Setting Menu Items Main menu Sub menu Contrast (Contrast) Display/ Pedal Assignable Jack (LCD/Jack) (Jack) Keyboard Channel (Keybd Ch) MIDI In Chord Judge MIDI (Chord) (MIDI) Accomp MIDI Out (AccompOut) Local Control Setting (Local) Mixer Reset (InitMix?) Parameter Reset (InitPar?) User Rhythm No. -
Page 68: Midi
MIDI What is MIDI? The letters MIDI stand for Musical Instrument Digital Inter- face, which is the name of a worldwide standard for digital signals and connectors that make it possible to exchange musical data between musical instruments and computers (devices) produced by different manufacturers.
-
Page 69: Sending And Receiving Midi Messages
• on … Outputs auto accompaniment as MIDI messages through the keyboard’s MIDI OUT terminal. • oFF … Does not output auto accompaniment. NOTE • For details, go to the CASIO Website at the URL below. http://world.casio.com E-67…
-
Page 70: Using The Data Download Service
Application Software You can run the application software on your computer and transfer data you download from the CASIO MUSIC SITE to the keyboard, and also use your computer’s hard disk for long-term storage of data you transfer from the keyboard to your computer.
-
Page 71: Troubleshooting
1. Power supply problem. 2. Power is not turned on. 3. Volume setting is too low. 4. The MODE switch is in the CASIO CHORD or FINGERED position. 5. Local Control is off. 6. Mixer channel 1 is turned off.
-
Page 72
Problem The key or tuning does not match 1. The tuning or transpose parameter when playing along with another is set to a value other than 00. MIDI machine. 2. Mixer coarse tune, fine tune, and/ or octave shift settings are values other than 00. -
Page 73: Specifications
Rhythm Patterns: 104 (internal, 4 user areas) Tempo: Variable (226 steps, = 30 to 255) Chords: 3 fingering methods (CASIO CHORD, FINGERED, FULL RANGE CHORD) Rhythm Controller: START/STOP, INTRO/ENDING 1 and 2, VARIATION/FILL-IN 1 and 2, SYNCHRO/ FILL-IN NEXT Accomp Volume:…
-
Page 74
Mixer Function Channels: Parameters: Channel on/off; tone; part on/off; volume; pan pot; octave shift; coarse tune; fine tune; reverb send; chorus send; DSP line MIDI: 16 multi-timbre receive, GM Level 1 standard Other Functions Transpose: 49 steps (–24 semitones to +24 semitones) Tuning: Variable (A4 = approximately 440Hz ±100 cents) LCD:… -
Page 75: Appendix
Appendix/Apéndice 703A-E-147A…
-
Page 76
703A-E-148A… -
Page 77
703A-E-149A… -
Page 78
703A-E-150A… -
Page 79
703A-E-151A… -
Page 80
703A-E-152A… -
Page 81
703A-E-153A… -
Page 82
703A-E-154A… -
Page 83
703A-E-155A… -
Page 84
A-10 703A-E-156A… -
Page 85
A-11 703A-E-157A… -
Page 86
A-12 703A-E-158A… -
Page 87
A-13 703A-E-159A… -
Page 88
A-14 703A-E-160A… -
Page 89
A-15 703A-E-161A… -
Page 90
A-16 703A-E-162A… -
Page 91
A-17 703A-E-163A… -
Page 92
A-18 703A-E-164A… -
Page 93
A-19 703A-E-165A… -
Page 94
A-20 703A-E-166A… -
Page 95
A-21 703A-E-167A… -
Page 96
703A-E-178A… -
Page 97
703A-E-179A… -
Page 98
This recycle mark indicates that the packaging conforms to the environmental protection legislation in Germany. Esta marca de reciclaje indica que el empaquetado se ajusta a la legislación de protección ambiental en Alemania. CASIO COMPUTER CO.,LTD. 6-2, Hon-machi 1-chome MA0105-B Printed in Malaysia…
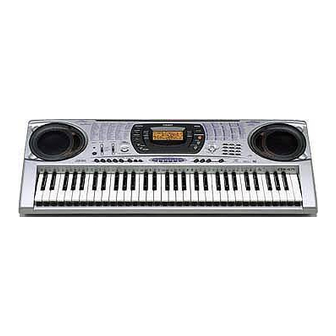
Синтезаторы Casio CTK-671 — инструкция пользователя по применению, эксплуатации и установке на русском языке. Мы надеемся, она поможет вам решить возникшие у вас вопросы при эксплуатации техники.
Вы можете скачать инструкцию к Casio CTK-671 по ссылке ниже, если не хотите ждать загрузки. Если остались вопросы, задайте их в комментариях после инструкции.
«Загружаем инструкцию», означает, что нужно подождать пока файл загрузится и можно будет его читать онлайн. Некоторые инструкции очень большие и время их появления зависит от вашей скорости интернета.
Остались вопросы?
Не нашли свой ответ в руководстве или возникли другие проблемы? Задайте свой вопрос в форме ниже с подробным описанием вашей ситуации, чтобы другие люди и специалисты смогли дать на него ответ. Если вы знаете как решить проблему другого человека, пожалуйста, подскажите ему


Часто задаваемые вопросы

Как посмотреть инструкцию к Casio CTK-671?
Необходимо подождать полной загрузки инструкции в сером окне на данной странице или скачать кликнув по специальной кнопке.
Руководство на русском языке?
Все наши руководства представлены на русском языке или схематично, поэтому вы без труда сможете разобраться с вашей моделью
Как можно распечатать инструкцию?
Скачайте ее по специальной кнопке над формой чтения на ваше устройства и отправьте на печать.

249 ₽
Инструкция (руководство пользователя) на Электронный музыкальный инструмент Casio CTK-671
Артикул: casio-ctk-671
Категория: Casio
-
Описание
-
Детали
Описание
Инструкцию по эксплуатации Casio CTK-671 на русском языке можно будет скачать в личном кабинете после оформления и оплаты заказа.
Детали
| Формат файла |
|
|---|---|
| Размер инструкции в кб |
8202 |