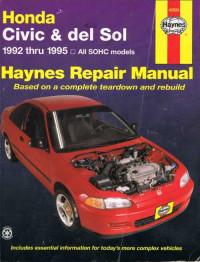
Руководство на английском языке по техническому обслуживанию и ремонту Honda Civic 1992-1995 годов выпуска.
- Автор: Mike Stubblefield, J.H. Haynes
- Издательство: Haynes Publishing
- Год издания: —
- Страниц: 274
- Формат: PDF
- Размер: 426,2 Mb
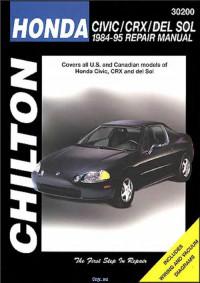
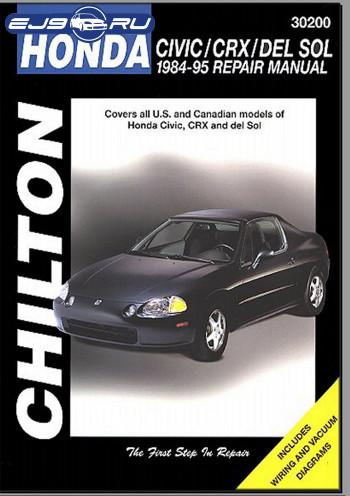
Руководство на английском языке по техническому обслуживанию и ремонту Honda Civic и Honda CRX 1984-1995 годов выпуска.
- Автор: —
- Издательство: Honda Motor Co., Ltd.
- Год издания: 1996
- Страниц: 359
- Формат: PDF
- Размер: 32,4 Mb
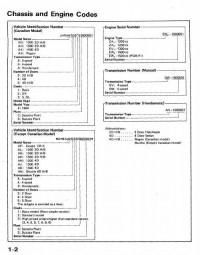
Подборка руководств на английском языке по техническому обслуживанию и ремонту Honda Civic и Honda CRX 1984-1987 годов выпуска.
- Автор: —
- Издательство: Honda Motor Co., Ltd.
- Год издания: 1984/1985/1986/1987
- Страниц: —
- Формат: PDF
- Размер: 42,6 Mb
Подборка руководств на английском языке по техническому обслуживанию и ремонту Honda Civic 1991-1995 годов выпуска.
- Автор: —
- Издательство: Honda Motor Co., Ltd
- Год издания: 1991/1991/1992/1993
- Страниц: 1258/2284/1434/355
- Формат: PDF
- Размер: 263,9 Mb
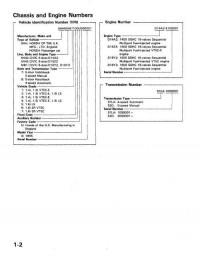
Руководство на английском языке по техническому обслуживанию и ремонту Honda Civic 1995-1997 годов выпуска.
- Автор: —
- Издательство: Honda Motor Co., Ltd.
- Год издания: —
- Страниц: —
- Формат: PDF
- Размер: 46,8 Mb
Руководство на английском языке по техническому обслуживанию и ремонту Honda Civic 1996-2000 годов выпуска.
- Автор: —
- Издательство: Honda Motor Co., Ltd.
- Год издания: 1999
- Страниц: 2191
- Формат: PDF
- Размер: 64,6 Mb
Руководство на английском языке по техническому обслуживанию и ремонту Honda Civic 2002-2003 годов выпуска.
- Автор: —
- Издательство: Honda Motor Co., Ltd.
- Год издания: 2002
- Страниц: 1139
- Формат: PDF
- Размер: 28,2 Mb
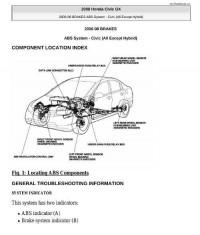
Руководство на английском языке по техническому обслуживанию и ремонту Honda Civic 2006-2009 годов выпуска.
- Автор: —
- Издательство: Honda Motor Co., Ltd.
- Год издания: —
- Страниц: 4763
- Формат: PDF
- Размер: 175,4 Mb
Руководство на английском языке по техническому обслуживанию и ремонту Honda Civic Type-R в кузове EP3 2002-2003 годов выпуска.
- Автор: —
- Издательство: Honda Motor Co., Ltd.
- Год издания: 2002
- Страниц: 1182
- Формат: PDF
- Размер: 25,4 Mb
Подборка руководств на английском языке по техническому обслуживанию и ремонту Honda Civic и Honda CRX 1988-1990 годов выпуска.
- Автор: —
- Издательство: Honda Motor Co., Ltd
- Год издания: 1987/1990
- Страниц: 681/361
- Формат: PDF
- Размер: 20,5 Mb

Руководство по эксплуатации, техническому обслуживанию и ремонту Honda Civic 2001-2005 годов выпуска.
- Автор: —
- Издательство: Алфамер
- Год издания: —
- Страниц: 416
- Формат: —
- Размер: —
Мультимедийное руководство на английском, французском и итальянском языках по техническому обслуживанию и ремонту Honda Civic 2001-2005 годов выпуска.
- Автор: —
- Издательство: —
- Год издания: —
- Страниц: —
- Формат: multimedia
- Размер: 162,7 Mb
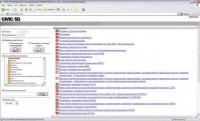
Мультимедийное руководство по техническому обслуживанию и ремонту Honda Civic с 2006 года выпуска. Многоязычный интерфейс (русский присутствует).
- Автор: —
- Издательство: —
- Год издания: —
- Страниц: —
- Формат: MDF
- Размер: 202,5 Mb
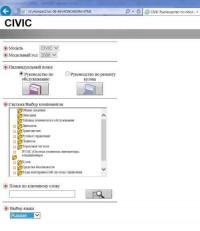
Мультимедийное руководство на русском, английском, чешском и португальском языках по техническому обслуживанию и ремонту Honda Civic с 2006 года выпуска.
- Автор: —
- Издательство: —
- Год издания: —
- Страниц: —
- Формат: multimedia
- Размер: 34,5 Mb
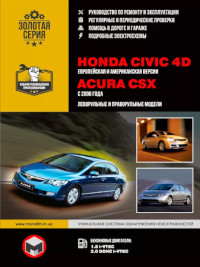
Руководство по эксплуатации и ремонту Honda Civic в кузове седан и Acura CSX c 2006 года выпуска с бензиновыми двигателями объемом 1,8/2,0 л.
- Автор: —
- Издательство: Монолит
- Год издания: —
- Страниц: 496
- Формат: —
- Размер: —
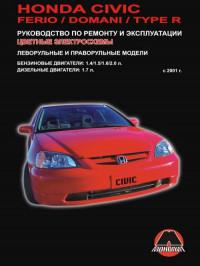
Руководство по эксплуатации и ремонту Honda Civic/Civic Ferio/Civic Type-R/Domani c 2001 года выпуска с бензиновыми и дизельными двигателями.
- Автор: —
- Издательство: Монолит
- Год издания: —
- Страниц: 487
- Формат: —
- Размер: —
Руководство по эксплуатации Honda Civic в кузове седан 2012 года выпуска.
- Автор: —
- Издательство: Honda Motor Co., Ltd.
- Год издания: —
- Страниц: 413
- Формат: PDF
- Размер: 12,4 Mb

Руководство по эксплуатации Honda Civic в кузове седан с 2006 года выпуска.
- Автор: —
- Издательство: Honda Motor Co., Ltd.
- Год издания: —
- Страниц: 356
- Формат: PDF
- Размер: 4,6 Mb
Руководство по эксплуатации Honda Civic в кузове хетчбек 2012 года выпуска.
- Автор: —
- Издательство: Honda Motor Co., Ltd.
- Год издания: —
- Страниц: 413
- Формат: PDF
- Размер: 40,8 Mb

Руководство по эксплуатации Honda Civic в кузове хетчбек с 2006 года выпуска.
- Автор: —
- Издательство: Honda Motor Co., Ltd.
- Год издания: —
- Страниц: 480
- Формат: PDF
- Размер: 5,8 Mb

Руководство по эксплуатации Honda Civic Type-R с 2006 года выпуска.
- Автор: —
- Издательство: Honda Motor Co., Ltd.
- Год издания: —
- Страниц: 510
- Формат: PDF
- Размер: 9,8 Mb

Руководство по эксплуатации Honda Civic с 2006 года выпуска.
- Автор: —
- Издательство: MoToR
- Год издания: —
- Страниц: 476
- Формат: —
- Размер: —
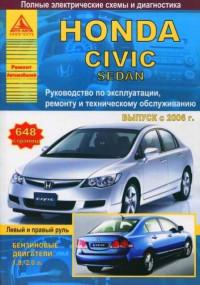
Руководство по эксплуатации и ремонту Honda Civic sedan c 2006 года выпуска с бензиновыми двигателями объемом 1,8/2,0 л.
- Автор: —
- Издательство: Арго-Авто
- Год издания: —
- Страниц: 648
- Формат: —
- Размер: —

Руководство по эксплуатации и ремонту Honda Civic hatchback c 2006 года выпуска с бензиновыми двигателями объемом 1,4/1,8 л.
- Автор: —
- Издательство: Арго-Авто
- Год издания: —
- Страниц: 688
- Формат: —
- Размер: —
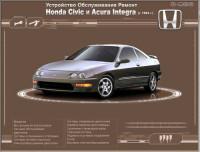
Мультимедийное руководство по техническому обслуживанию и ремонту Acura Integra и Honda Civic с 1994 года выпуска.
- Автор: —
- Издательство: —
- Год издания: —
- Страниц: —
- Формат: multimedia
- Размер: 218,8 Mb

Руководство по техническому обслуживанию и ремонту Honda Civic в кузове седан с 2006 года выпуска с бензиновым двигателем объемом 1,8 л.
- Автор: —
- Издательство: Легион-Автодата
- Год издания: 2009
- Страниц: 409
- Формат: —
- Размер: —
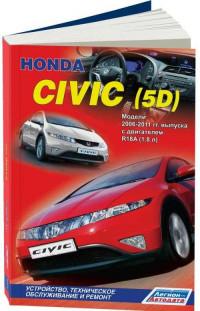
Руководство по техническому обслуживанию и ремонту Honda Civic в кузове хетчбек 2006-2011 годов выпуска с бензиновым двигателем объемом 1,8 л.
- Автор: —
- Издательство: Легион-Автодата
- Год издания: 2012
- Страниц: 359
- Формат: —
- Размер: —
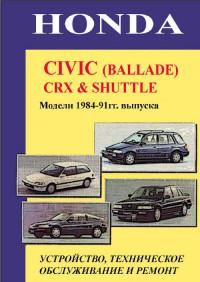
Руководство по техническому обслуживанию и ремонту Honda Ballade/Civic/Civic Shuttle/CRX 1984-1991 годов выпуска.
- Автор: —
- Издательство: Техинформ
- Год издания: 1996
- Страниц: 163
- Формат: —
- Размер: —

Руководство по техническому обслуживанию и ремонту Honda Civic 1991-1999 годов выпуска с бензиновыми двигателями.
- Автор: —
- Издательство: Техинформ
- Год издания: 2000
- Страниц: 375
- Формат: —
- Размер: —
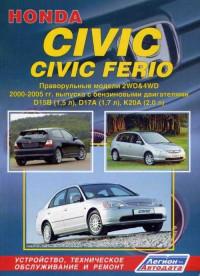
Руководство по техническому обслуживанию и ремонту Honda Civic и Honda Civic Ferio с правым рулем 2000-2005 годов выпуска с бензиновыми двигателями объемом 1,5/1,7/2,0 л.
- Автор: —
- Издательство: Легион-Автодата
- Год издания: 2008
- Страниц: 431
- Формат: —
- Размер: —

Руководство по техническому обслуживанию и ремонту Honda Civic с левым рулем 2001-2005 годов выпуска с бензиновыми двигателями объемом 1,4/1,6/1,7/2,0 л.
- Автор: —
- Издательство: Легион-Автодата
- Год издания: 2007
- Страниц: 398
- Формат: —
- Размер: —
Комментарии
15
Войдите или зарегистрируйтесь, чтобы писать комментарии, задавать вопросы и участвовать в обсуждении.
Здравствуйте а у кого нибудь есть мануал на левый руль Цивик такой же, на русском языке?
Я езжу на Toyota Estima (I)
Я езжу на Toyota Estima (I)
Большое спасибо за мануал!
Перезалейте пожалуйста, если не трудно
Заранее спасибо.
на Гугл диске есть, вторая ссылка
Перезалейте, если не трудно.
Я езжу на Honda Civic Ferio (7G)
Привет всем, если у кого есть книжка, можете перезалить или скинуть на почту jekamc@mail.ru
Заранее спасибо
Привет, если осталась ссылка, можешь пожалуйста перезалить
Я езжу на Honda Civic Ferio (7G)
Рад что пригодилась книжка)
-
Contents
-
Table of Contents
-
Bookmarks
Quick Links
Owner’s Guide
for Quick Reference
2020 CIVIC
Hatchback
Related Manuals for Honda Civic 2020
Summary of Contents for Honda Civic 2020
-
Page 1
Owner’s Guide for Quick Reference 2020 CIVIC Hatchback… -
Page 2
The information and data contained herein are believed to be accurate and may also be combined with data from other sources for research purposes, but reliable. American Honda Motor Co., Inc. makes no warranty of any kind and it remains confidential. Some diagnostic and maintenance information is accepts no responsibility for the results obtained through application of this uploaded to Honda upon vehicle start up. -
Page 3
Honda dealer. Honda Automobile Customer Service Your authorized Honda dealer should be able to answer any questions you have about your vehicle. However, if you are dissatisfied with the information you receive, you can call Honda Automobile Customer Service. Call (800) 999-1009 (U.S.) or (888) 946-6329 (Canada). -
Page 4
VISUAL INDEX VISUAL INDEX Steering Wheel and Nearby Controls This page intentionally left blank. 1. Lights/Turn Signals 3. Horn 2. Wipers/Washers 4. Brightness Control… -
Page 5: Safety Information
VISUAL INDEX SAFETY INFORMATION SAFETY INFORMATION Dashboard and Nearby Controls Your safety, and the safety of others, is very important and operating this vehicle safely is an important responsibility. While we strive to help you make informed decisions about safety, it is not practical or possible to warn you about all the hazards associated with operating or maintaining your vehicle.
-
Page 6
SAFETY INFORMATION SAFETY INFORMATION Carbon Monoxide Gas Lap/Shoulder Seat Belts The engine exhaust from this vehicle contains carbon monoxide, a All four or five seating positions are equipped with lap/shoulder seat belts colorless, odorless, and highly toxic gas. As long as you properly maintain with emergency locking retractors. -
Page 7
SAFETY INFORMATION SAFETY INFORMATION Any belt that is not in good condition or working properly will not provide 3. Position the lap part of the belt as proper protection and should be replaced as soon as possible. low as possible across your hips, then pull up on the shoulder part of A belt that has been worn during a crash may not provide the same level of the belt so the lap part fits snugly. -
Page 8
SAFETY INFORMATION SAFETY INFORMATION are housed in the center of the steering wheel for the driver and in the Side Airbags dashboard for the front passenger. Both airbags are marked SRS AIRBAG. The side airbags help protect the upper torso and pelvis of the driver or a SRS (Supplemental Restraint System) indicates that the airbags are front passenger during a moderate-to-severe side impact. -
Page 9
SAFETY INFORMATION SAFETY INFORMATION Do not attach any objects to the side windows or roof pillars. They can If the indicator comes on at any other interfere with the proper operation of the side curtain airbags. time besides vehicle start-up or does not come on at all, have the system When side curtain airbags deploy in a frontal collision checked by a dealer as soon as… -
Page 10
SAFETY INFORMATION SAFETY INFORMATION • There are no objects hanging from the front passenger’s seat. 4. An electronic control unit that, when the vehicle is ON, continually monitors information about the various impact sensors, seat and buckle • Only small, lightweight objects are in the seat-back pocket. sensors, rollover sensor, airbag activators, seat belt tensioners, and Have your vehicle checked by a dealer as soon as possible if: other vehicle information. -
Page 11
Honda dealer. For U.S. vehicles, call Honda Automobile Customer Service at (800) 999-1009. For Canadian vehicles, call Honda Canada Customer Children who are unrestrained or improperly restrained can be seriously Relations at (888) 946-6329. -
Page 12
SAFETY INFORMATION SAFETY INFORMATION leave it unoccupied. Or, you may wish to get a smaller rear-facing child seat. designed so that they can be secured with a lap belt or the lap part of a lap/ shoulder belt. In addition, the child seat manufacturer may advise that a seat belt be used to attach a LATCH-compatible seat once a child reaches a Placing a rear-facing child seat in the front seat can result in serious injury specified weight. -
Page 13
SAFETY INFORMATION SAFETY INFORMATION 4. Route the tether strap over the top of the head restraint and secure the The inner and outer anchors are spaced apart at a standard distance of 11 tether strap hook to the anchor. Make sure the strap is not twisted. inches (280 mm). -
Page 14
SAFETY INFORMATION SAFETY INFORMATION 6. Make sure the child seat is firmly Installing a Child Seat with a Lap/Shoulder Seat Belt secured by rocking it forward and A child seat can be installed with a lap/shoulder belt in any rear seat or, if back, and side to side;… -
Page 15
SAFETY INFORMATION SAFETY INFORMATION 3. Route the tether strap over the head restraint. Make sure the strap is not • The child’s knees bend comfortably twisted. over the edge of the seat. • The shoulder belt crosses between the child’s neck and arm. •… -
Page 16
In Canada If you believe that your vehicle has a defect which could cause a crash or could cause injury or death, you should immediately inform Honda Canada, Inc., and you may also inform Transport Canada. If Transport Canada receives similar complaints, it may open an investigation, and if it finds that a safety defect exists in a group of vehicles, it may lead to a recall and remedy campaign. -
Page 17
INSTRUMENT PANEL INSTRUMENT PANEL INSTRUMENT PANEL Brake system (red) • Comes on for a few seconds when you turn the ignition switch to U.S. Indicators, gauges, and displays related to driving the vehicle. , then goes off if the parking brake has been released. •… -
Page 18
INSTRUMENT PANEL INSTRUMENT PANEL Charging System Indicator Malfunction Indication Lamp (check engine light) Comes on when the battery is not charging. 1.5 L engine models: • Comes on when you turn the ENGINE START/STOP button • Comes on when you turn the ENGINE START/STOP button ignition switch to ON and goes off when the engine starts or ignition switch… -
Page 19
INSTRUMENT PANEL INSTRUMENT PANEL ™ ™ Low Tire Pressure / Tire Pressure Monitoring System (TPMS) Collision Mitigation Braking System (CMBS ™ • Stays on constantly without the CMBS off — Have your vehicle U.S. models checked by a dealer. Comes on and stays on when: ™… -
Page 20
INSTRUMENT PANEL INSTRUMENT PANEL Road Departure Mitigation (RDM) Adaptive Cruise Control (ACC) with Low Speed Follow • Comes on if there is a problem with the RDM system. • Comes on if there is a problem with ACC with Low Speed Follow. •… -
Page 21
INSTRUMENT PANEL INSTRUMENT PANEL Condition Indicators Immobilizer These indicators may require you to perform an action. Your key or remote transmitter cannot be recognized by the vehicle. Parking Brake • Blinks — You cannot start the engine. Turn the ignition switch to Release the parking brake before driving. -
Page 22
INSTRUMENT PANEL VEHICLE CONTROLS VEHICLE CONTROLS Driver Information Interface Various controls necessary for operating and driving the vehicle. Using the Key or Remote Transmitter Lock or unlock the doors and hatch. Leaving the remote transmitter in the vehicle can result in theft or accidental movement of the vehicle. -
Page 23
VEHICLE CONTROLS VEHICLE CONTROLS Unlocking/Locking the Doors and Hatch Customizing Door Lock and Unlock Settings To unlock: Grab the driver’s door handle Customize the auto door lock and door unlock settings to your preference. to unlock the driver’s door. Grab the front passenger’s door handle to unlock Models with Color Audio all the doors and the hatch. -
Page 24
VEHICLE CONTROLS VEHICLE CONTROLS to ON, only the remote transmitter that was used to unlock the driver’s door Using the Master Door Lock Switch prior to the setting change can activate auto lock. To turn on this feature, To unlock: Press the unlock side of the follow the steps below: switch to unlock all doors and the hatch. -
Page 25
VEHICLE CONTROLS VEHICLE CONTROLS Using the Hatch Release Button Power Window Operation When all the doors are unlocked or press Power windows can be opened and closed by using the switches on the doors the hatch unlock button on the remote when the vehicle is on. -
Page 26
VEHICLE CONTROLS VEHICLE CONTROLS Power Moonroof Operation Interior and Exterior Lights The moonroof can be opened and closed when the vehicle is on by using the Operate interior and exterior lights when the vehicle is on or off. switch on the ceiling. Brightness Control Automatic Operation Adjust instrument panel brightness… -
Page 27
VEHICLE CONTROLS VEHICLE CONTROLS OFF position: The interior lights remain off regardless of whether the doors Exterior Lights are open or closed. Rotate the switches on the lever to operate the exterior lights. Map Lights Push the lever forward to turn on the Press the map lights to turn on or off. -
Page 28
VEHICLE CONTROLS VEHICLE CONTROLS Auto High Beam Switching to high beam The front sensor camera detects the light sources ahead of the vehicle such as All of the following conditions must be met before the high beams turn on. the lights of a preceding or oncoming vehicle, or street lights. When you are •… -
Page 29
VEHICLE CONTROLS VEHICLE CONTROLS Turning the System On or Off Headlight Integration with Wipers Make sure the headlight lever is in the When the headlights are in the AUTO position, they automatically turn on low beam position with the switch when the front wipers operate several times within a certain interval. -
Page 30
VEHICLE CONTROLS VEHICLE CONTROLS Adjusting the Front Seats Front Manual Seat(s) Always make seat adjustments before driving. Adjust the driver’s seat as far back as possible while allowing you to maintain full control of the vehicle. You should be able to sit upright and well back in the seat, adequately press the pedals without leaning forward, and grip the steering… -
Page 31
VEHICLE CONTROLS VEHICLE CONTROLS Do not put a cushion, or other object, between the seat-back and your back. Adjusting the Front Head Restraints Doing so may interfere with proper seat belt or airbag operation. To raise: Pull it upward. To lower: Push it down while pressing the release button. -
Page 32
VEHICLE CONTROLS VEHICLE CONTROLS Maintain a Proper Seating Position Adjusting the Rear Seats After all occupants have adjusted their seats and head restraints , and put on Folding Down the Rear Seats their seat belts, it is very important that they continue to sit upright, well back in 1. -
Page 33
VEHICLE CONTROLS VEHICLE CONTROLS Floor Mats Adjusting the Mirrors The driver’s floor mat hooks over the floor Adjust the angle of the mirrors for the best visibility when you are sitting in the anchors, which keep the mat from sliding correct driving position. -
Page 34
Universal Transceiver To retrain a button or erase codes, see the Owner’s Manual at Program your vehicle to operate up to three owners.honda.com (U.S.) or honda.ca (Canada). If you need help, call remote-controlled devices around your www.homelink.com . HomeLink at (800) 355-3515 or visit… -
Page 35
VEHICLE CONTROLS VEHICLE CONTROLS Climate Control System The automatic climate control system maintains the interior temperature you select. The system also selects the proper mix of heated or cooled air that raises or lowers the interior temperature to your preference as quickly as possible. -
Page 36
VEHICLE CONTROLS VEHICLE CONTROLS Front Seat Heaters Rear Seat Heaters The power mode must be in ON to use the Press the seat heater button to cycle through settings. seat heaters. • Once — The HI setting (three indicators There is no heater in the rear center seating position. -
Page 37
VEHICLE CONTROLS VEHICLE CONTROLS Customized Features To Change a Setting When you customize settings, make sure that the vehicle is at a complete stop Models with Color Audio and shift to Park (P). Use the selector knob to make and enter selections. Models with Color Audio 1. -
Page 38
VEHICLE CONTROLS AUDIO AND CONNECTIVITY AUDIO AND CONNECTIVITY Setting the Clock On vehicles with navigation, the time is automatically set using GPS signals. How to operate the vehicle’s audio system. To manually adjust the clock, use the following steps: Basic Audio Operation Models with Color Audio Connect audio devices and operate buttons and displays for the audio system. -
Page 39
AUDIO AND CONNECTIVITY AUDIO AND CONNECTIVITY Tip: To prevent any potential issues, be sure to use an Apple MFi Certified Models with Display Audio ® Lightning Connector for Apple CarPlay or a USB cable certified by USB-IF 1. Press the Sound button. ™… -
Page 40
AUDIO AND CONNECTIVITY AUDIO AND CONNECTIVITY Audio/Information Screen Color Audio System Displays each mode status and wallpaper. From this screen, you can go to Use the buttons to control the color audio system. various setup options. Switching the Display Models with Color Audio 1. -
Page 41
See ® dealer for details. Only use Apple CarPlay when conditions allow you to do so safely. See your Owner’s Manual at owners.honda.com (U.S.) or honda.ca (Canada) for further license and warranty *1 — If equipped terms. 74 |… -
Page 42
Android Auto software/Android operating system, service interruptions, or incompatibility or obsolescence of vehicle-integrated hardware or software. See dealer for details. Only use Android Auto when conditions allow you to do so safely. See your Owner’s Manual at owners.honda.com (U.S.) or honda.ca (Canada) for further license and warranty terms. -
Page 43
AUDIO AND CONNECTIVITY AUDIO AND CONNECTIVITY AM/FM Radio Models with Display Audio Models with Color Audio 1. Volume/Power Knob — Push to turn 3. Preset Buttons/Icon — Tune to the the audio system on and off. Turn selected station. 1. Volume/Power Knob — Push to turn 3. -
Page 44
AUDIO AND CONNECTIVITY AUDIO AND CONNECTIVITY ® ® Bluetooth SiriusXM Audio ® Available on a subscription basis only. For more information or to subscribe, Play audio from your compatible phone when it is paired to Bluetooth ® www.sirius.com/subscribenow (U.S.) handsfreelink.com to check phone contact your dealer, or visit HandsFreeLink (see Pairing a Phone). -
Page 45
If your vehicle’s airbags deploy or if the unit detects that the vehicle is severely impacted, your vehicle automatically attempts to connect to an operator. Your phone must be paired to the system and have good cellular www.hondalink.com (U.S.) or honda.ca/hondalinkassist connection. Visit (Canada) for more information. -
Page 46: Bluetooth Handsfreelink
® ® ® ® BLUETOOTH HANDSFREELINK BLUETOOTH HANDSFREELINK ® ® BLUETOOTH HANDSFREELINK Models with Display Audio How to operate the vehicle’s hands-free calling system. Basic HFL Operation Make and receive phone calls using the vehicle’s audio system, without handling your phone. Visit handsfreelink.com to check phone compatibility.
-
Page 47
® ® ® ® BLUETOOTH HANDSFREELINK BLUETOOTH HANDSFREELINK • Speak in a clear, natural voice. Models with Display Audio • Reduce all background noise. Use the touchscreen to make and enter selections. • Adjust the dashboard vents away from the microphone on the ceiling. 1. -
Page 48
® ® ® ® BLUETOOTH HANDSFREELINK BLUETOOTH HANDSFREELINK Making a Call Pairing an Additional Phone You can make calls by inputting any phone number, or by using the imported Models with Color Audio phonebook, call history, speed dial entries, or redial. 1. -
Page 49
® ® ® ® BLUETOOTH HANDSFREELINK BLUETOOTH HANDSFREELINK Models with Color Audio Models with Color Audio 1. Press the Phone button. 1. Press the Phone button. 2. Select Phonebook. 2. Select Speed Dial. 3. The phonebook is stored 3. Select Add New. alphabetically. -
Page 50
® ® ® ® BLUETOOTH HANDSFREELINK BLUETOOTH HANDSFREELINK Models with Display Audio Models with Display Audio 1. Go to the Phone Menu screen. 1. Go to the Phone Menu screen. 2. Select Speed Dial. 2. Select Speed Dial. 3. Select New Entry. 3. -
Page 51
® ® ® ® BLUETOOTH HANDSFREELINK BLUETOOTH HANDSFREELINK ™ SMS Text Messaging and E-Mail Siri Eyes Free ® Certain phones can receive and send text messages and e-mails while paired Activate Siri through your vehicle when an iPhone is paired to the system. Visit handsfreelink.com to check phone compatibility. -
Page 52: Voice Command Index
VOICE COMMAND INDEX NAVIGATION VOICE COMMAND INDEX NAVIGATION Learn about the available voice commands to help you operate the vehicle. The Learn how to enter a destination and operate the navigation system system recognizes only those commands shown here. Press the TALK button Basic Navigation Operation before you say a command.
-
Page 53
NAVIGATION NAVIGATION 1. Select Navigation. Navigation Display and Controls 2. Select the search icon. Touch icons on the screen to enter information and make selections. 3. Select Address. 4. Enter an address. Routing After a destination is set, you can alter or cancel your route. Map Legend Entering Your Destination There are several methods to enter a destination. -
Page 54
DRIVING DRIVING DRIVING • Everyone in the vehicle must fasten their seat belt. • Make sure that the indicators in the instrument panel come on when you Learn about preparation for driving, as well as other features. start the vehicle, and go off soon after. In addition: Before Driving •… -
Page 55
DRIVING DRIVING Maximum Load Limit 6. If your vehicle will be towing a trailer, load from your trailer will be transferred to your vehicle. Consult the Owner’s Manual to determine Carrying too much cargo or improperly storing it can affect your vehicle’s how this reduces the available cargo and luggage load capacity of your handling, stability, stopping distance, and tires, and make it unsafe. -
Page 56
DRIVING DRIVING Towing a Trailer If there are buildings and obstacles between your vehicle and the remote, the range will be reduced. Your vehicle is not designed to tow a trailer. Attempting to do so can void your The range may be less when the vehicle is running. vehicle warranties. -
Page 57
DRIVING DRIVING Starting to Drive Stopping the Engine Turn on the vehicle and start the engine to begin driving. Starting the Engine — Continuously Variable Transmission Models Models without smart entry system 1. Make sure the parking brake is applied. The parking brake and brake system indicator (red) comes on for 15 seconds when you pull up the… -
Page 58
DRIVING DRIVING Starting the Engine — Manual Transmission Models Models with smart entry system 1. Make sure the parking brake is 1. Make sure the parking brake is applied. applied. The electric parking brake indicator comes on for 15 seconds when you pull up to electric parking brake switch. -
Page 59
DRIVING DRIVING Ignition Switch Manual transmission models Removing the key from the ignition switch while driving locks the steering. This can cause you to lose control of the vehicle. Remove the key from the ignition switch only when parked. Shifting Change the position based on your driving needs. -
Page 60
DRIVING DRIVING Park (P): Used for parking or starting/ stopping the engine. Press the brake pedal, then press the release button to shift. Do not shift to Reverse (R) before the vehicle comes to a complete stop. This Reverse (R): Used for reversing. can damage the transmission. -
Page 61
DRIVING DRIVING Shift Up/Down Indicators To apply: 1. Pull the parking Comes on while the vehicle is in the 7- brake switch up. speed manual shift mode to indicate when a speed position change is appropriate to maintain the most fuel efficient driving style. -
Page 62
DRIVING DRIVING Manual transmission models Keeps the brake applied after releasing the brake pedal until you shift into Activating the automatic brake hold system on steep hills or slippery roads one of the gears other than N and: may still allow the vehicle to move if you remove your foot from the brake pedal. -
Page 63
These are the components of Honda ® Sensing Adaptive Cruise Control (ACC) with Low Speed Follow… -
Page 64
Helps maintain a constant vehicle speed and a set following interval behind a vehicle detected ahead of yours and, if the detected vehicle comes to a stop, ® Honda Sensing is deactivated and a message appears when: can decelerate and stop your vehicle, without you having to keep your foot on Radar Obstructed and Clean Front Windshield the brake or the accelerator. -
Page 65
DRIVING DRIVING Activating and Setting the Vehicle Speed During Operation 1. Press the MAIN button. The ACC ACC with Low Speed Follow monitors if indicator appears. a vehicle ahead of you enters the ACC with Low Speed Follow range. If a 2. -
Page 66
DRIVING DRIVING Adaptive Cruise Control (ACC) beep sounds and a message appears on the driver information interface. Helps maintain a constant vehicle speed and a set following-interval behind a vehicle detected ahead of yours, without you having to keep your foot on the Exiting a vehicle that has been stopped while the ACC with Low Speed brake or the accelerator. -
Page 67
DRIVING DRIVING Activating and Setting the Vehicle Speed During Operation 1. Press the MAIN button. The ACC ACC monitors if a vehicle ahead of you indicator appears. enters the ACC range. If a vehicle is detected doing so, the ACC system 2. -
Page 68
DRIVING DRIVING Lane Keeping Assist System (LKAS) Important Safety Reminder LKAS is for your convenience only. It is not a substitute for your vehicle Provides steering input to help keep the vehicle in the middle of a detected lane control. The system does not work if you take your hands off the steering and provides audible and visual alerts if the vehicle is detected drifting out of its wheel or fail to steer the vehicle. -
Page 69
DRIVING DRIVING Road Departure Mitigation (RDM) Important Safety Reminder The RDM system has limitations. Over-reliance on it may result in a Alerts and helps to assist you if the system collision. It is always your responsibility to keep your vehicle within the determines a possibility of your vehicle driving lane. -
Page 70
DRIVING DRIVING ™ ™ Collision Mitigation Braking System (CMBS Can assist you when there is a possibility of your vehicle colliding with a vehicle Models with Display Audio ™ or a pedestrian detected in front of yours. CMBS is designed to alert you to a 1. -
Page 71
DRIVING DRIVING ™ LaneWatch Changing Settings Customize the display and how and when the display appears. Allows you to check the passenger side rear areas displayed on the audio/ information screen when the turn signal is activated to the passenger’s side. 1. -
Page 72
DRIVING DRIVING Improving Fuel Economy and Reducing CO Emissions view. Do not rely on the rearview display, which does not give you all the information about conditions at the rear of your vehicle. Achieving fuel economy and reducing CO emissions is dependent on several factors, including driving conditions, load weight, idling time, driving habits, and Changing Settings vehicle condition. -
Page 73
7. Shut the fuel fill door by hand. Use of unleaded gasoline of 91 octane or higher is recommended. • Honda recommends TOP TIER Detergent Gasoline where available. • Do NOT use gasoline containing more than 15% ethanol. • Do NOT use gasoline containing methanol. -
Page 74: Handling The Unexpected
HANDLING THE UNEXPECTED HANDLING THE UNEXPECTED HANDLING THE UNEXPECTED Smart Entry System Battery Strength Models with Smart Entry System Learn about what to do in critical or emergency situations. If the battery life in your remote transmitter is weak, a message appears in the Shift Lever Does Not Move driver information interface with information on how to start the engine.
-
Page 75
HANDLING THE UNEXPECTED HANDLING THE UNEXPECTED 3. Connect the other end of the first jumper cable to the booster battery (+) 4. Disconnect the other end of the jumper cable from the booster battery (+) terminal. terminal. When using an automotive battery charger, select a charging voltage lower Have your vehicle inspected by a nearby service station or a dealer. -
Page 76
HANDLING THE UNEXPECTED HANDLING THE UNEXPECTED Overheating Use water as an emergency/temporary measure only. Have a dealer flush the system with proper antifreeze as soon as possible. Signs your engine is overheating: • The temperature gauge needle is at the H mark. •… -
Page 77
HANDLING THE UNEXPECTED HANDLING THE UNEXPECTED Emergency Towing Continuously Variable Transmission Models: The power mode is in ACCESSORY when the engine is stopped. To change the mode to VEHICLE OFF, put the Call a professional towing service if you need to tow your vehicle. transmission into P after the vehicle comes to a complete stop. -
Page 78
HANDLING THE UNEXPECTED HANDLING THE UNEXPECTED The TPMS may not function properly if tire type and size are mixed. Make sure Driving on a significantly under-inflated tire causes the tire to overheat and to use the same size and type of tire. can lead to tire failure. -
Page 79
HANDLING THE UNEXPECTED HANDLING THE UNEXPECTED Fixing a Tire 4. Pull the strap on the cargo area and open the lid. If a tire goes flat while driving, grasp the steering wheel firmly and brake gradually to reduce speed. Then stop in a safe place. Use the temporary repair kit to temporarily repair the tire. -
Page 80
HANDLING THE UNEXPECTED HANDLING THE UNEXPECTED Injecting Sealant and Air 1. Remove the valve cap from the tire valve stem. Do not operate the temporary tire repair kit compressor for more than 15 minutes. The compressor can overheat and become permanently damaged. 2. -
Page 81
HANDLING THE UNEXPECTED HANDLING THE UNEXPECTED 4. Models with tool case: Open the cargo area floor lid. 6. Take the tool case or bag out. Take the jack handle bar and wheel nut Models with tool bag: Pull the strap on the cargo area floor lid and open wrench out of the tool case or bag. -
Page 82
HANDLING THE UNEXPECTED HANDLING THE UNEXPECTED 10. Loosen each wheel nut about one Setting Up the Jack turn using the wheel nut wrench. 1. Place the jack under the jacking point closest to the tire to be changed. 2. Turn the end bracket clockwise (as 2.0 L engine models: Do not mount the compact spare on the front. -
Page 83
HANDLING THE UNEXPECTED HANDLING THE UNEXPECTED 3. Raise the vehicle, using the jack Replacing the Flat Tire handle bar and the jack handle, until 1. Remove the wheel nuts and flat tire. the tire is off the ground. 2. Wipe the mounting surfaces of the The vehicle can easily roll off the jack, seriously injuring anyone wheel with a clean cloth. -
Page 84
HANDLING THE UNEXPECTED HANDLING THE UNEXPECTED Handling of the Jack Storing the Flat Tire 1. Remove the center cap. How to Set Up the Jack 1. Turn and pull the tab to open the compartment cover located on the left side of the cargo area. 2. -
Page 85
HANDLING THE UNEXPECTED HANDLING THE UNEXPECTED 4. Place the jack under the jacking The following instructions must be followed to use the jack safely: point closest to the tire to be • Do not use the jack with people or luggage in the vehicle. changed. -
Page 86
Locate the fuse in question by the fuse number and box cover number. Refer to 3. Check the large fuse in the engine compartment. owners.honda.com for a complete fuse chart. the Owner’s Manual at If the fuse is blown, use a Phillips-head screwdriver to remove the Engine Compartment Fuse Box screws and replace the fuse with a new one. -
Page 87
MAINTENANCE MAINTENANCE MAINTENANCE Maintenance Minder When maintenance is due, the system message indicator comes on and a Learn about basic maintenance that you can perform on the vehicle yourself, as message appears on the display every time you turn the vehicle on. The well as information about how to best maintain the vehicle. -
Page 88
MAINTENANCE MAINTENANCE Maintenance Minder Service Codes These codes indicate what services are due on your vehicle. U.S. Models 168 | | 169… -
Page 89
MAINTENANCE MAINTENANCE Canadian Models Under the Hood 170 | | 171… -
Page 90
MAINTENANCE MAINTENANCE Do not press the engine cover forcibly. This may damage the engine cover Opening the Hood and component parts. 1. Park the vehicle on a level surface and set the parking brake. 2. Pull the hood release handle under the lower left corner of the dashboard. -
Page 91
This seal indicates the oil is energy conserving and that it meets the 1. Remove the dipstick (orange or black). American Petroleum Institute’s latest requirements. Use Genuine Honda Motor Oil or another commercial engine oil of suitable viscosity for the ambient temperature. -
Page 92
MAINTENANCE Engine Coolant Park the vehicle on level ground. Check the reserve tank and the coolant level in the radiator. Use Honda Long Life Antifreeze/Coolant Type 2. Checking the Reserve Tank 1. Make sure the engine and radiator are cool. -
Page 93
MAINTENANCE MAINTENANCE Window Washer Fluid Adding Coolant 1. Make sure the engine and radiator are cool. Check the amount of window washer fluid by using the washer fluid level gauge on 2. Turn the radiator cap 1/8 turn counterclockwise and relieve any the cap. -
Page 94
The fluid level should be between the MIN and MAX marks on the side of the If the wiper blade rubber has deteriorated, it will leave streaks and the hard tank. We recommend using Honda Heavy Duty Brake Fluid DOT 3. surfaces of the blade may scratch the window glass. -
Page 95
MAINTENANCE MAINTENANCE Tire Information 5. Pull the end of the wiper blade in the direction of the arrow in the image until To safely operate your vehicle, your tires must be of the proper type and size, in it unfastens from the holder’s end cap. good condition with adequate tread, and properly inflated. -
Page 96
MAINTENANCE MAINTENANCE Inspection Guidelines Tire and Loading Information Label Every time you inflate the tires, check for the following: The label attached to the driver’s doorjamb provides necessary tire and loading information. • Any damage to tires, including bumps, bulges, cuts, splits, or cracks in the side or tread. -
Page 97
MAINTENANCE MAINTENANCE In addition to regular inspections and inflation pressure maintenance, it is If your vehicle is equipped with summer tires, be aware that these tires are recommended that you have annual inspections performed once the tires not designed for winter driving conditions. For more information, contact a reach five years old. -
Page 98
MAINTENANCE MAINTENANCE Tire Labeling Recommended Inflation Pressure – The cold tire inflation pressure recommended by the manufacturer. The tires that came on your vehicle have a number of markings. Those you Treadwear Indicators (TWI) – The projections within the principal grooves should be aware of are described below. -
Page 99
MAINTENANCE MAINTENANCE go through the testing just after the battery has gone dead or been Temperature disconnected. The temperature grades are A (the highest), B, and C, representing the tire’s To check if they are set, turn the ignition switch to ON without starting the resistance to the generation of heat and its ability to dissipate heat when engine. -
Page 100
(for a total of 90 seconds). While the vehicle is traveling in with other devices that Honda has approved. Use of any other type of this speed range, shift to 6th gear and then accelerate and decelerate 5 device may adversely affect the vehicle’s electronic systems or allow them times, each time making sure you do not exceed 60 mph (97km/h). -
Page 101: Specifications
SPECIFICATIONS SPECIFICATIONS SPECIFICATIONS 194 | | 195…
-
Page 102: Customer Information
Warranty Coverages Below is a brief summary of the warranties covering your new vehicle. Learn about information specific to you as a Honda customer and how to get New Vehicle Limited Warranty: Covers your new vehicle, except for the help.
-
Page 103
Anti-Lock Brake System (ABS)..118 HFL…………84–95 Walk Away Auto Lock……39 Fastening a Seat Belt……6 Brake Assist System……. 118 HomeLink Universal Transceiver..60 Warranty……….197 Inspection……….5 CMBS……….132 Honda Sensing……..119 Warranty Coverages……197 Lap/Shoulder Belts……5 Foot Brake………114 HondaLink……….83 Window……….43 Proper Use……….5 Parking Brake……..114 HondaLink Assist……. 83 Power Windows…….. -
Page 104
You may opt out of the arbitration provisions within 30 days of your initial use of the Software by sending a signed, written notice to HONDA at American Honda Motor Co., Inc. Honda Automobile Customer Services Mail Stop 100-5E-8A, 1919… -
Page 105
(U.S.) honda.ca (Canada) 31TGGG30 OG-12609 2020 Honda Civic Hatchback Owner’s Guide 00X31-TGG-G301 © 2019 Honda Motor Co., Ltd. — All Rights Reserved Printed in U.S.A.
Мануалы по Civic и другим Honda 1992 1995 1996 1998 2000

Скачать книгу
Скачать книгу
Honda двигатели D13 D14 D15 D16 D17
Скачать книгу

Скачать книгу
Скачать книгу
Скачать книгу
Скачать книгу
Results 1-20 of 307
Honda CIVIC Emergency Response Manual (24 pages)
Natural gas vehicles
Type, Size, and Appearance
Engine
1998-2000 CIVIC Cng
2001-2005 CIVIC Cng
2006-2011 CIVIC Cng
Manual is suitable for 15 more products:
1998 Civic1999 Civic2000 Civic2001 Civic2002 Civic2003 Civic2004 Civic2005 Civic2006 Civic2007 Civic2008 Civic2009 Civic2010 Civic2011 Civic2012 Civic
Brand:
Honda |
Category:
Automobile |
Size: 2.1 MB

Honda Civic Service Manual (1139 pages)
2002-2003 hatchback
Circuit Diagram
Manual is suitable for 2 more products:
2002 Civic2003 Civic
Brand:
Honda |
Category:
Automobile |
Size: 29.56 MB

Honda Civic Owner’s Manual (470 pages)
Sedan
Interior Fuse Box Circuit Protected/Fuse Rating
Manual is suitable for 2 more products:
2014 CivicCivic 2005
Brand:
Honda |
Category:
Automobile |
Size: 65.11 MB

Honda Civic Owner’s Manual (270 pages)
2006 civic 4-door sedan
Your Vehicle at a Glance
Immobilizer System
Security System
Manual is suitable for 1 more product:
2006 Civic
Brand:
Honda |
Category:
Automobile |
Size: 5.82 MB

Honda Civic Service Manual (2191 pages)
1996-2000
U.s. 1996 Model (2-Door Hatchback)
U.s. 1996 Model (4-Door Sedan)
Manual is suitable for 5 more products:
1996 Civic1997 Civic1999 Civic1998 Civic2000 Civic
Brand:
Honda |
Category:
Automobile |
Size: 73.21 MB

Honda Civic Service Manual (1435 pages)
1992-1995
Engine
Troubleshooting
Electrical
Manual is suitable for 4 more products:
1992 Civic1993 Civic1994 Civic1995 Civic
Brand:
Honda |
Category:
Automobile |
Size: 107.87 MB

Honda Civic Owner’s Manual (390 pages)
2011 sedan
Adjust the Head Restraints
Using the Cruise Control
Manual is suitable for 2 more products:
2010 Civic Sedan2011 Civic
Brand:
Honda |
Category:
Automobile |
Size: 7.29 MB

Honda Civic Owner’s Manual (332 pages)
2008 coupe
Adjusting the Sound
Setting the Clock
Security System
Engine Coolant
Manual is suitable for 2 more products:
2008 Civic Coupe2008 Civic
Brand:
Honda |
Category:
Automobile |
Size: 7.74 MB

Honda Civic Owner’s Manual (314 pages)
4-door automobile
Your Vehicle at a Glance
Installing a Child Seat
Installing a Child Seat Using LATCH
Manual is suitable for 1 more product:
2007 Civic
Brand:
Honda |
Category:
Automobile |
Size: 6.96 MB

Honda Civic Owner’s Manual (300 pages)
2008 hybrid
Instrument Panel Indicators
Manual is suitable for 1 more product:
2008 Civic Hybrid
Brand:
Honda |
Category:
Automobile |
Size: 7.82 MB

Honda Civic Owner’s Manual (274 pages)
2007 hybrid
Immobilizer System
Manual is suitable for 1 more product:
2007 Civic Hybrid
Brand:
Honda |
Category:
Automobile |
Size: 6.52 MB

Honda Civic Navigation Manual (144 pages)
2008
Manual Overview
System Overview
System Controls
Clock Settings
Manual is suitable for 1 more product:
2008 Civic
Brand:
Honda |
Category:
Automobile |
Size: 6.6 MB

Honda Civic Navigation Manual (141 pages)
2007 hybrid
Manual is suitable for 1 more product:
2007 Civic Hybrid
Table Of Contents |
Troubleshooting |
Brand:
Honda |
Category:
Automobile |
Size: 10.11 MB

Honda Civic Owner’s Manual (377 pages)
Honda civic
Instrument Panel
Outside Temperature
Adjusting Steering Wheel
Brand:
Honda |
Category:
Automobile |
Size: 18.66 MB

Honda Civic Owner’s Manual (511 pages)
Civic 5d 2006
Inside View
Program Service Name Display
Program Type Display Function
Brand:
Honda |
Category:
Automobile |
Size: 7.11 MB

Honda Civic User’s Information Manual (31 pages)
Remote engine starter system accord / civic / cr-v / pilot / fit
Table Of Contents |
Troubleshooting |
Brand:
Honda |
Category:
Remote Starter |
Size: 1.4 MB

Honda Civic Service Manual (174 pages)
1995 year
Electrical
Brand:
Honda |
Category:
Automobile |
Size: 6.15 MB

Honda Civic Installation Instructions Manual (36 pages)
Fog lights
Brand:
Honda |
Category:
Automobile |
Size: 2.91 MB

Honda CIVIC Service Manual (11 pages)
1996-2000
U.s. 1996 Model (4-Door Sedan)
Brand:
Honda |
Category:
Automobile |
Size: 0.75 MB

Edelbrock Honda Civic 67342 Installation Instructions (2 pages)
One-piece pro-flo header for 1992-1995 honda civic lx, dx, ex, si
Manual is suitable for 4 more products:
Honda Civic DxHonda Civic ExHonda Civic LxHonda Civic Si
Brand:
Edelbrock |
Category:
Automobile Parts |
Size: 0.02 MB


