Для ознакомления с инструкцией необходимо нажать на ссылку «ЗАГРУЗИТЬ», чтобы скачать i-Manual файл. Если есть кнопка «ПРОСМОТР», то можно просто посмотреть документ онлайн.
Для удобства, Вы можете сохранить данную страницу с файлом руководства по эксплуатации в свой список «избранное» прямо на сайте (доступно для зарегистрированных пользователей).
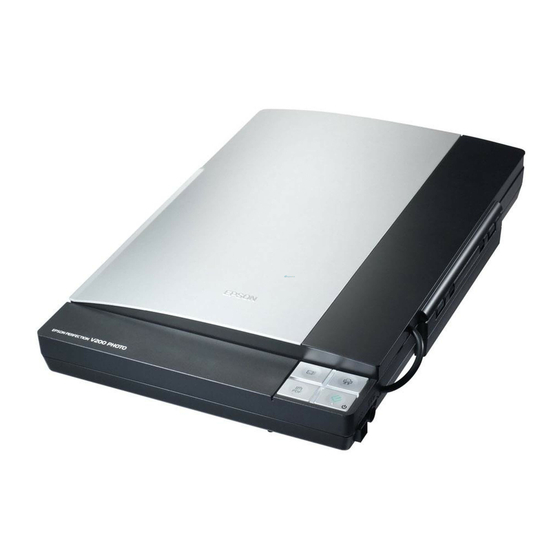
Смотрите инструкцию для похожих моделей:

Вы можете задать вопрос посетителям сайта по модели EPSON Perfection V10. Если Вы являетесь её пользователем, то пожалуйста оставьте, по возможности развёрнутый отзыв:
Дата: 05 сентября 2006 года | Язык: RU
Интерактивное руководство, в котором в доступной форме изложены основные характеристики устройства и правила его эксплуатации
Дата: 05 сентября 2006 года | Язык: UA
Интерактивное руководство, в котором в доступной форме изложены основные характеристики устройства и правила его эксплуатации
Дата: 05 сентября 2006 года | Язык: EN
Интерактивное руководство, в котором в доступной форме изложены основные характеристики устройства и правила его эксплуатации
Дата: 05 сентября 2006 года | Язык: RU | Размер: 2.29 Mb
Интерактивное руководство, в котором в доступной форме изложены основные характеристики устройства и правила его эксплуатации
Дата: 05 сентября 2006 года | Язык: UA | Размер: 2.29 Mb
Интерактивное руководство, в котором в доступной форме изложены основные характеристики устройства и правила его эксплуатации
Дата: 05 сентября 2006 года | Язык: EN | Размер: 2.25 Mb
Интерактивное руководство, в котором в доступной форме изложены основные характеристики устройства и правила его эксплуатации
-
Contents
-
Table of Contents
-
Troubleshooting
-
Bookmarks
Quick Links
Service Manual
Color Image Scanner
EPSON Perfection V10
Perfection V100 Photo
Perfection V200 Photo
Perfection V350 Photo
SESC06-002
Related Manuals for Epson Perfection V10
Summary of Contents for Epson Perfection V10
-
Page 1
Service Manual Color Image Scanner EPSON Perfection V10 Perfection V100 Photo Perfection V200 Photo Perfection V350 Photo SESC06-002… -
Page 2
SEIKO EPSON CORPORATION. All effort have been made to ensure the accuracy of the contents of this manual. However, should any errors be detected, SEIKO EPSON would greatly appreciate being informed of them. -
Page 3
REPAIRS ON EPSON PRODUCT SHOULD BE PERFORMED ONLY BY AN EPSON CERTIFIED REPAIR TECHNICIAN. MAKE CERTAIN THAT THE SOURCE VOLTAGES IS THE SAME AS THE RATED VOLTAGE, LISTED ON THE SERIAL NUMBER/RATING PLATE. IF THE EPSON PRODUCT HAS A PRIMARY AC RATING DIFFERENT FROM AVAILABLE POWER SOURCE, DO NOT CONNECT IT TO THE POWER SOURCE. -
Page 4
CHAPTER 6.MAINTENANCE May indicate an operating or maintenance procedure, practice or Provides preventive maintenance procedures and the lists of Epson- condition that is necessary to accomplish a task efficiently. It may also approved lubricants and adhesives required for servicing the product. -
Page 5
Revision Status Description Revision Date of Issue June 14, 2006 First release May 9, 2007 [All chapters] • The model name; Perfection V200 Photo is added. [Chapter 1] • Perfection V200 Photo specs are added to Table 1-1 “Scanning Speed” (p. •… -
Page 6: Table Of Contents
EPSON Perfection V10/V100 Photo/V200 Photo/V350 Photo Revision B Contents Chapter 1 PRODUCT DESCRIPTION 4.3.6 Main Board ………………..37 4.3.7 CR Motor………………..39 1.1 Features……………………8 4.3.8 Driven Pulley………………..41 1.2 Basic Specifications………………..9 4.3.9 Carriage Unit ………………..41 1.3 Exterior Specifications ………………12 4.4 Disassembly of TPU………………..
-
Page 7: Chapter 1 Product Description
C H A P T E R PRODUCT DESCRIPTION…
-
Page 8: Features
TPU (Perfection V100 Photo) Film holders can be stored in the Lid TPU The EPSON Perfection V10/V100 Photo/V200 Photo/V350 Photo are color image • 35mm x 6 frames (strip film) scanners equipped with 180° openable scanner cover. The main features are as follows.
-
Page 9: Basic Specifications
EPSON Perfection V10/V100 Photo/V200 Photo/V350 Photo Revision B 1.2 Basic Specifications Command Interpreter API (ESC/I-D2 FS support) Dimensions/Weight Refer to Figure 1-5 «External Dimensions» Main unit Reliability (MCBF) 10,000 cycles of carriage movement Product Type Flatbed color image scanner Note *1: The maximum output resolution of Perfection V200 Photo is 21,000 x 30,000 pixels.
-
Page 10
EPSON Perfection V10/V100 Photo/V200 Photo/V350 Photo Revision B TPU (Perfection V100 Photo / V200 Photo) AC Adapter • Rated voltage 100-120 VAC (100 V) Product type Lid-type scanning unit for transparent documents 220-240 VAC (200 V) • Input voltage range 100-120 VAC ±… -
Page 11
EPSON Perfection V10/V100 Photo/V200 Photo/V350 Photo Revision B INTERFACE OPERATING ENVIRONMENT REQUIREMENTS USB2.0 Interface Operating System USB 1.1 • Microsoft Windows 98 SE (Second Edition) /Me • Microsoft Windows 2000 Professional • Microsoft Windows XP Home Edition/XP Professional/ XP Professional x64 Edition •… -
Page 12: Exterior Specifications
Note *1: Pressing the required buttons simultaneously can move the carriage. See “Compulsory Carriage movement” (p22) for the details. *2: Perfection V10/V100 Photo/V350 Photo are powered On/Off by plugging/ unplugging the power code into/from a receptacle. Only Perfection V200 Photo can Figure 1-3. Buttons and LED (Perfection V10/V100 Photo/V350 Photo) be turned On/Off by the Start button, however, the button cannot turn it Off during EPSON Scan is running.
-
Page 13: Maximum Document Size And Placement
EPSON Perfection V10/V100 Photo/V200 Photo/V350 Photo Revision B 1.4 Maximum Document Size and Placement Dimensions Table 1-5. Dimensions and Weight Scanning Range for Reflective Document Perfection V100 Photo Perfection V10 Perfection V350 Photo Size 216 x 297 mm (horizontal x vertical)
-
Page 14
EPSON Perfection V10/V100 Photo/V200 Photo/V350 Photo Revision B TPU Model (Perfection V100 Photo/V200 Photo) Scanning Range for Transparent Document AFL Model (Perfection V350 Photo) Scanning Range for Transparent Document Size 32.9 x 244.4 mm (horizontal x vertical) Size Strip film 36.83 x 44.5mm(horizontal x vertical) Slide film 36.83 x 112mm(horizontal x vertical) -
Page 15: Control Codes
EPSON Perfection V10/V100 Photo/V200 Photo/V350 Photo Revision B 1.5 Control Codes Category Command Name Code Set data format ESC D i Control Specifications Set resolution ESC R n1 n2 Set data form The scanner is controlled through the following system hierarchy.
-
Page 16: Error Handling
EPSON Perfection V10/V100 Photo/V200 Photo/V350 Photo Revision B 1.6 Error Handling Table 1-6. Error Definition and Remedy List Error type Cause Scanner Action Recovery Command error Received an undefined command or undefined command • No LED indication occurs. The scanner recovers from the error by receiving parameter.
-
Page 17
C H A P T E R OPERATING PRINCIPLES… -
Page 18: Engine Operation Outline
EPSON Perfection V10/V100 Photo/V200 Photo/V350 Photo Revision B 2.1 Engine Operation Outline Inverter Board This section explains the functions and operating principles of the Perfection V10/ Perfection V100 Photo/Perfection V200 Photo/Perfection V350 Photo. CCD Sensor 2.1.1 Outline CCD Board CARRIAGE UNIT OUTLINE…
-
Page 19
EPSON Perfection V10/V100 Photo/V200 Photo/V350 Photo Revision B TPU OUTLINE (PERFECTION V100 PHOTO/V200 PHOTO) AFL OUTLINE (PERFECTION V350 PHOTO) The TPU consists of TPU Inverter Board and Lamp (light source). The AFL consists of AFL Inverter Board and Lamp (light source). -
Page 20: Outline Of Mechanical Operation
CARRIAGE UNIT MECHANISM for scanning an image is determined by the CR HP Sensor which is located on the (PERFECTION V10 / V100 PHOTO / V200 PHOTO / V350 PHOTO) Control Board. The scanning of an image on document is carried out with the combination of the main…
-
Page 21
EPSON Perfection V10/V100 Photo/V200 Photo/V350 Photo Revision B Here are descriptions of mechanical operations from when setting document, and AFL FILM FEEDING MECHANISM (PERFECTION V350 PHOTO) scanning, and to the time of taking out the document. The AFL Film Feeding Mechanism is a mechanism to feed 35mm strip films by the The Film Sensor (Front) detects the film inserted into the film entry. -
Page 22: Carriage Protection Operation
Note «*1»: After pushing the Push Button, no action was taken even with the event selection window opened in the PC display. «*2»: The Carriage will move to the center and lamp will turn off if the EPSON Scan is shut down, Figure 2-8. Push Button event settings regardless of any action taken or passed time.
-
Page 23
The Push Button was pushed during save energy standby, and warm up was The Epson Scan was active, but shut down without any preview or scan within 30 started. The Epson Scan was not activated 13 seconds after warm up completion… -
Page 24
Moves to the center power-On Moves to the home Running At startup of EPSON Scan When EPSON Scan is started up while the carriage has moved to the center. position Running Upon receiving a command 14.5 minutes Moves to the center… -
Page 25: Control Circuit
EPSON Perfection V10/V100 Photo/V200 Photo/V350 Photo Revision B 2.2 Control Circuit 2.2.1 Image Processing Operation The sequence of scanned image processing is explained in order below. The Control Circuit of this scanner consists of the following circuits. CCD Board (CCD Image Sensor)
-
Page 26
C H A P T E R TROUBLESHOOTING… -
Page 27: Outline
EPSON Perfection V10/V100 Photo/V200 Photo/V350 Photo Revision B 3.1 Outline FATAL ERROR Table 3-2. Fatal error This chapter explains the remedies for errors detected by the self-diagnostic function as well as the check points on a fault phenomenon basis, which are required for efficient…
-
Page 28: Troubleshooting
EPSON Perfection V10/V100 Photo/V200 Photo/V350 Photo Revision B 3.2 Troubleshooting Table 3-5. The Main Unit does not perform initialization operation. Step Cause Point to be checked Result Corrective Action This section is organized by troubles to determine the causes. Find out the trouble you Connect the connectors.
-
Page 29
EPSON Perfection V10/V100 Photo/V200 Photo/V350 Photo Revision B Table 3-8. The Fluorescent Lamps does not light up (the Main Unit). Table 3-10. The films are not fed or ejected (AFL). Step Cause Point to be checked Result Corrective Action Step… -
Page 30
C H A P T E R DISASSEMBLY/ASSEMBLY… -
Page 31: Overview
Before starting the disassembly or reassembly of the product, always read the 4.1.3 Screws following precautions given under the headings “WARNING” and “CAUTION”. The following table indicate the screws used in the EPSON Perfection V10/V100 Photo/ Before disassembling or reassembling this product, always W A R N I N G V200 Photo/V350 Photo.
-
Page 32: Packaging And Shipping Cautions
Carriage movement method Turn on the power of Perfection V10/V100 Photo/V200 Photo/V350 Photo. Hold down the following buttons simultaneously for more than three seconds. Perfection V10 / V100 Photo / V350 Photo…
-
Page 33: Disassembly Procedure
Cover Lower Assy/AFL AFL Inverter Board/AFL Harness AFL/AFL Main Eject Button(P.55) Damper/Film Holder(P.53) Lamp Assy(P.49) Inverter Board Cover(P.48) Board(P.47) Sensor A(P.51) Film Holder Lock(P.54) Film Ejection Cover(P.51) AFL Sensor B(P.50) Figure 4-1. Perfection V10/V100 Photo/V350 Photo Disassembly/Reassembly Flowchart DISASSEMBLY/ASSEMBLY Disassembly Procedure…
-
Page 34: Disassembly Of Main Unit
EPSON Perfection V10/V100 Photo/V200 Photo/V350 Photo Revision B 4.3 Disassembly of Main Unit Push the Document Cover/TPU Unit/AFL Unit towards the main unit, releasing the 2 shafts from the hooks of the Hinge one by one. 4.3.1 Hinge Disengagement When disengaging the Hinge, the Document Cover/TPU Unit/AFL C A U T I O N Unit may hit the scanner main unit and damage it.
-
Page 35: Document Cover
Perfection V350 Photo: below. 4.5.1 Separation of AFL Upper Housing Assy/AFL Lower Housing The Perfection V10 was used to illustrate the disassembly of the Assy P46 scanner main unit, therefore the color or some parts may differ Disengage the Hinge (4.3.1 Hinge Disengagement on page…
-
Page 36: Hinge
EPSON Perfection V10/V100 Photo/V200 Photo/V350 Photo Revision B 4.3.4 Hinge On the bottom side of the Upper Housing, disengage the four hooks that secure the Button Cover, and remove the Optical Plate, Function Buttons, and Button Cover. Remove the Upper Housing.
-
Page 37: Main Board
EPSON Perfection V10/V100 Photo/V200 Photo/V350 Photo Revision B 4.3.5 Panel Board 4.3.6 Main Board Remove the Upper Housing. Remove the Panel Board. (4.3.5 Panel Board on page 37) (4.3.3 Upper Housing on page 35) Remove the two screws (C.B.P. 3×8, 5-7 kgf.cm/C.B.S 3×5, 6-8 kgf.cm) that Remove the screw (C.B.P.
-
Page 38
EPSON Perfection V10/V100 Photo/V200 Photo/V350 Photo Revision B When reassembling the Upper Main Board Shield Plate, match Perfection V10 is equipped with a different Main Board to C H E C K the guide pin and the positioning hole, and insert the plate… -
Page 39: Cr Motor
EPSON Perfection V10/V100 Photo/V200 Photo/V350 Photo Revision B 4.3.7 CR Motor The Main Board differs between the Perfection V10, the Perfection Remove the Panel Board (4.3.5 Panel Board on page 37) V100 Photo/V350 Photo and the Perfection V200 Photo. When replacing the Man Board, make sure to replace with a correct Remove the two screws (C.B.P.
-
Page 40
EPSON Perfection V10/V100 Photo/V200 Photo/V350 Photo Revision B Remove the three screws (C.C.P. 3X8, 5-7 kgf.cm) that secure the CR Motor Assy. After replacing the CR Motor, make sure to apply G-45 grease Remove the CR Motor Assy from the Lower Housing. -
Page 41: Driven Pulley
EPSON Perfection V10/V100 Photo/V200 Photo/V350 Photo Revision B 4.3.8 Driven Pulley 4.3.9 Carriage Unit Remove the Upper Housing. Remove the Main Board. (4.3.6 Main Board on page 37) (4.3.3 Upper Housing on page 35) Remove the CR Motor. (4.3.7 CR Motor on page 39) Remove the two screws (C.B.P.
-
Page 42
EPSON Perfection V10/V100 Photo/V200 Photo/V350 Photo Revision B Remove the Carriage Unit from the Lower Housing following the steps below. Remove the Clamp that secures the Timing Belt to the Carriage Unit in the direction of the arrow. Lift up the Carriage Shaft from the Driven Pulley side, and move it in the direction of the arrow, to get it out from the shaft holder. -
Page 43: Disassembly Of Tpu
EPSON Perfection V10/V100 Photo/V200 Photo/V350 Photo Revision B 4.4 Disassembly of TPU Using a flat-blade screwdriver, push outward on the left and right sides of the TPU Upper Housing frame to widen it and release the two Hook A. Disengage the two Hook B by pinching them.
-
Page 44: Harness Tpu/Tpu Inverter Board
EPSON Perfection V10/V100 Photo/V200 Photo/V350 Photo Revision B 4.4.2 Harness TPU/TPU Inverter Board Reassemble the Harness TPU following the steps below. Remove the TPU Upper Housing. (4.4.1 TPU Upper Housing on page 43) Insert the Stopper of the Harness TPU into the socket of the TPU Lower Housing.
-
Page 45: Lamp Assy
EPSON Perfection V10/V100 Photo/V200 Photo/V350 Photo Revision B 4.4.3 Lamp Assy Disconnect CN1 connector from the TPU Inverter Board. Remove the screw (C.B.P 3×8, 5-7 kgf.) that secures the TPU Inverter Board, and Remove the TPU Upper Housing. remove the TPU Inverter Board.
-
Page 46: Disassembly Of Afl
EPSON Perfection V10/V100 Photo/V200 Photo/V350 Photo Revision B 4.5 Disassembly of AFL Open the Film Ejection Cover following the steps below. Push the knobs of the Film Ejection Cover from both sides. Open the Film Ejection Cover. 4.5.1 Separation of AFL Upper Housing Assy/AFL Lower Housing Assy Disengage the Hinge.
-
Page 47: Harness Afl/Afl Main Board
EPSON Perfection V10/V100 Photo/V200 Photo/V350 Photo Revision B 4.5.2 Harness AFL/AFL Main Board When installing the Harness AFL, insert the Stopper with the Separate the AFL Upper Housing Assy/AFL Lower Housing Assy. stopper’s chipped side facing upwards into the socket of the AFL (4.5.1 Separation of AFL Upper Housing Assy/AFL Lower Housing Assy on page…
-
Page 48: Afl Inverter Board/Afl Inverter Board Cover
EPSON Perfection V10/V100 Photo/V200 Photo/V350 Photo Revision B 4.5.3 AFL Inverter Board/AFL Inverter Board Cover When installing the AFL Main Board, match the guide pin and Separate the AFL Upper Housing Assy/AFL Lower Housing Assy. the positioning hole. (4.5.1 Separation of AFL Upper Housing Assy/AFL Lower Housing Assy on page When reassembling the AFL Main Board Cover, match the two guide pins and the positioning holes.
-
Page 49: Lamp Assy
EPSON Perfection V10/V100 Photo/V200 Photo/V350 Photo Revision B 4.5.4 Lamp Assy Remove the screw (C.B.P. 3×8, 5-7 kgf.cm.) that secures the AFL Inverter Board. Disconnect CN2 connector, and remove the AFL Inverter Board. Separate the AFL Upper Housing Assy/AFL Lower Housing Assy.
-
Page 50: Afl Sensor B
EPSON Perfection V10/V100 Photo/V200 Photo/V350 Photo Revision B 4.5.5 AFL Sensor B When installing the Lamp Assy, match the two guide pins and Remove the Lamp Assy. (4.4.3 Lamp Assy on page 45) the positioning holes. Route the Lamp Assy cables through the two hooks, six ribs, Disconnect CN4 connector from the AFL Main Board.
-
Page 51: Film Ejection Cover
EPSON Perfection V10/V100 Photo/V200 Photo/V350 Photo Revision B 4.5.6 Film Ejection Cover 4.5.7 Cover Lower Assy/AFL Sensor A Remove the Harness AFL/AFL Main Board. Separate the AFL Upper Housing Assy/AFL Lower Housing Assy. (4.5.2 Harness AFL/AFL Main Board on page 47) (4.5.1 Separation of AFL Upper Housing Assy/AFL Lower Housing Assy on page…
-
Page 52
EPSON Perfection V10/V100 Photo/V200 Photo/V350 Photo Revision B Lift up the AFL Sensor A Cover with a flat-blade screwdriver, disengage the four When reassembling the AFL Sensor A, route the cables toward the hooks, and remove the AFL Sensor A Cover. -
Page 53: Damper/Film Holder
EPSON Perfection V10/V100 Photo/V200 Photo/V350 Photo Revision B 4.5.8 Damper/Film Holder Install the Damper/Film Holder following the steps below. Separate the AFL Upper Housing Assy/AFL Lower Housing Assy. (4.5.1 With the Film Holder wide open, insert the shaft of the Film Separation of AFL Upper Housing Assy/AFL Lower Housing Assy on page 46) Holder into the hole of the AFL Upper Housing.
-
Page 54: Film Holder Lock
EPSON Perfection V10/V100 Photo/V200 Photo/V350 Photo Revision B 4.5.9 Film Holder Lock Insert the two guide pins of the AFL Upper Housing into the Remove the Damper/Film Holder. (4.5.8 Damper/Film Holder on page 53) positioning holes of the Damper, and screw the Damper.
-
Page 55: Eject Button
EPSON Perfection V10/V100 Photo/V200 Photo/V350 Photo Revision B 4.5.10 Eject Button Separate the AFL Upper Housing Assy/AFL Lower Housing Assy. (4.5.1 Separation of AFL Upper Housing Assy/AFL Lower Housing Assy on page 46) Disengage the hook that secures the Eject Button, then release it from the two dowels of the AFL Upper Housing, and remove the Eject Button.
-
Page 56: Chapter 5 Adjustment
C H A P T E R ADJUSTMENT…
-
Page 57
EPSON Perfection V10/V100 Photo/V200 Photo/V350 Photo Revision B This product does not require any adjustment in the range of the disassembly and reassembly explained in Chapter 4. ADJUSTMENT… -
Page 58: Chapter 6 Maintenance
C H A P T E R MAINTENANCE…
-
Page 59: Overview
EPSON Perfection V10/V100 Photo/V200 Photo/V350 Photo Revision B 6.1 Overview 6.1.2 Lubrication Lubrication is required when any part of the Carriage Unit of the scanner has been This chapter explains the maintenance work necessary to keep this product in the best replaced or the Carriage moves with noticeably large operation noise.
-
Page 60
EPSON Perfection V10/V100 Photo/V200 Photo/V350 Photo Revision B <Lubrication <Lubrication point> point> Driven Pulley Carriage Shaft (Refer to (Refer to 4.3.9 4.3.8 Driven Carriage Unit P41) Pulley P41) Lubrication Point <Oil type> <Oil type> G-45 Lubrication G-45 Point <Tool> <Tool>… -
Page 61: Chapter 7 Appendix
C H A P T E R APPENDIX…
-
Page 62: Connector Configuration
EPSON Perfection V10/V100 Photo/V200 Photo/V350 Photo Revision B 7.1 Connector Configuration 7.1.2 Connector Connection Table Table 7-1. The Main Unit Connection Table The wiring assembly of the connectors on the major circuit board are shown below. (Perfection V10/V100 Photo/V200 Photo/V350 Photo) 7.1.1 Connector Configuration…
-
Page 63: Connection Table
EPSON Perfection V10/V100 Photo/V200 Photo/V350 Photo Revision B 7.1.3 Connection Table Table 7-6. Main Board CN3-AC Input Pin No. Signal The following tables are connection tables of connectors on the respective boards. 13.5VDC Table 7-4. Main Board CN1-CCD Board Pin No.
-
Page 64
EPSON Perfection V10/V100 Photo/V200 Photo/V350 Photo Revision B Table 7-9. Main Board CN6-USB Connector Table 7-14. TPU Inverter Board CN2-Lamp Pin No. Signal Pin No. Signal LAMP LAMP Table 7-15. AFL Main Board CN2-AFL Motor Pin No. Signal Table 7-10. Main Board CN7-CR Motor Pin No. -
Page 65: Circuit Diagrams
EPSON Perfection V10/V100 Photo/V200 Photo/V350 Photo Revision B 7.2 Circuit Diagrams The control electrical circuit diagrams of this product are show on the following pages. Main Board Perfection V10 Perfection V100 Photo/V350 Photo Perfection V200 Photo CCD Board Perfection V10/V100 Photo…
-
Page 66
Model : GT-S600 Perfection V10 Board : Main Board Rev. Sheet : 1/1… -
Page 67
Model : GT-F650/GT-F700 Perfection V100 Photo/V350 Photo Board : Main Board Rev. Sheet : 1/1… -
Page 68
Model : GT-F670 Perfection V200 Photo Board : Main Board Rev. : C Sheet : 1/1… -
Page 69
Model : GT-S600/GT-F650 Perfection V10/V100 Photo Board : CCD Board Rev. Sheet : 1/1… -
Page 70
Model : GT-F700 Perfection V350 Photo Board : CCD Board Rev. Sheet : 1/1… -
Page 71
Model : GT-F670 Perfection V200 Photo Board : CCD Board Rev. : A Sheet : 1/1… -
Page 72
Model : GT-S600/GT-F650/GT-F700 Perfection V10/V100 Photo/V350 Photo Board : Panel Board Rev. Sheet : 1/1… -
Page 73
Model : GT-F700 Perfection V350 Photo Board : AFL Main Board Rev. Sheet : 1/1… -
Page 74
Model : GT-F700 Perfection V350 Photo Board : AFL Sensor B Rev. Sheet : 1/1… -
Page 75
Model : GT-F700 Perfection V350 Photo Board : AFL Sensor A Rev. Sheet : 1/1… -
Page 76
Model : GT-F670 Perfection V200 Photo Board : Panel Board Rev. : B Sheet : 1/1… -
Page 77: Exploded Diagram/Service Parts List
EPSON Perfection V10/V100 Photo/V200 Photo/V350 Photo Revision B 7.3 Exploded Diagram/Service Parts List This manual does not provide the exploded diagrams and the parts list. See SPI (Service Parts Information) for details. APPENDIX Exploded Diagram/Service Parts List…
В представленном списке руководства для конкретной модели Сканера — Epson Perfection V10. Вы можете скачать инструкции к себе на компьютер или просмотреть онлайн на страницах сайта бесплатно или распечатать.
В случае если инструкция на русском не полная или нужна дополнительная информация по этому устройству, если вам нужны
дополнительные файлы: драйвера, дополнительное руководство пользователя (производители зачастую для каждого
продукта делают несколько различных документов технической помощи и руководств), свежая версия прошивки, то
вы можете задать вопрос администраторам или всем пользователям сайта, все постараются оперативно отреагировать
на ваш запрос и как можно быстрее помочь. Ваше устройство имеет характеристики:Тип: планшетный, Тип датчика: CCD, Интерфейс: USB 2.0, Совместимость: PC, MAC, Linux, Максимальный формат бумаги: A4, Максимальный размер документа: 216×297 мм, полные характеристики смотрите в следующей вкладке.
Для многих товаров, для работы с Epson Perfection V10 могут понадобиться различные дополнительные файлы: драйвера, патчи, обновления, программы установки. Вы можете скачать онлайн эти файлы для конкретнй модели Epson Perfection V10 или добавить свои для бесплатного скачивания другим посетителями.
Если вы не нашли файлов и документов для этой модели то можете посмотреть интсрукции для похожих товаров и моделей, так как они зачастую отличаются небольшим изменениями и взаимодополняемы.
Обязательно напишите несколько слов о преобретенном вами товаре, чтобы каждый мог ознакомиться с вашим отзывом или вопросом. Проявляйте активность что как можно бльше людей смогли узнать мнение настоящих людей которые уже пользовались Epson Perfection V10.

[email protected]
2018-03-19 17:39:04
[email protected]
Bujhm
2018-08-01 21:44:29
lинструкция потеряна
кирдым-бердым
2018-09-26 11:07:45
пока не знаю
Александр
2019-05-28 18:43:05
Спасибо
Инструкция утеряна
Инструкция утеряна. Сканером доволен.
Инструкция утеряна. Сканером доволен
Основные и самые важные характеристики модели собраны из надежных источников и по характеристикам можно найти похожие модели.
| Общее | |
| Тип | планшетный |
| Тип датчика | CCD |
| Интерфейс | USB 2.0 |
| Совместимость | PC, MAC, Linux |
| Характеристики | |
| Максимальный формат бумаги | A4 |
| Максимальный размер документа | 216×297 мм |
| Разрешение | 3200×9600 dpi |
| Разрешение (улучшенное) | 12800×12800 dpi |
| Максимальная оптическая плотность | 3.2 D |
| Скорость сканирования (цветн.) | А4, 300 dpi — 22 сек |
| Скорость сканирования (ч/б) | А4, 300 dpi — 20 сек |
| Глубина цвета | 48 бит |
| Дополнительно | |
| Мощность при работе | 16 Вт |
| Размеры (ШxВxГ) | 430x41x280 мм |
| Вес | 2.2 кг |
Здесь представлен список самых частых и распространенных поломок и неисправностей у Сканеров. Если у вас такая поломка то вам повезло, это типовая неисправность для Epson Perfection V10 и вы можете задать вопрос о том как ее устранить и вам быстро ответят или же прочитайте в вопросах и ответах ниже.
| Название поломки | Описание поломки | Действие |
|---|---|---|
| Неисправность Печатающей Головки | ||
| Не Включается | ||
| Зажевывает Бумагу | ||
| Не Передает Информацию В Комп | ||
| Не Захватывает Бумагу | Нужно Подпихивать Рукой | |
| Сканирует Сантиметров 10 И Завершает Действие | Сканирует Сантиметров 10 И Завершает Действие | |
| Трещит При Сканировании | Стал Трещать При Просмотре Документа И При Сканировании. Качество Ухудшилось, Т.е. Некоторые Строки Становятся Вытянутыми, Как Будто Деформация Текста. | |
| Трещит После Сканирования | При Возвращении, Сканирующая Планка Доходит До Исходного Положения, Двигатель Трещит, Пока Включено Питание. При Отключении Питания И Включении Вновь Треск Пропадает, Но Повторяется После Очередного Копирования | |
| Не Сканирует Фотографии | Пленку Хорошо Сканирует. Фото Нет. Просто Получается Черный Кадр | |
| Не Включается Основная Лампа | При Сканировании С Помощью Программы Vuescan Не Включается Основная Лампа | |
| Не Работает Кнопка Вкл/Выкл | Не Выключается При Нажатии На Кнопку | |
| Замена Накладки | Пишет Замените Накладку | |
| Печатает Пустые Листы | При Копировании И Распечатывания С Компютера Печатает Пустые Листы | |
| Ошибка Code: 10077 Не Удается Выполнить Сканирование, Так Как Документ Находится В Рабочей Папке. Выведите Или Удалите Все Документы. | ||
| При Сканировани Пачки Документов Сканер Захватывает Всю Пачку | ||
| Canon Dr-M140 | Пишит Не Достаочно Памяти, Что Делать |
В нашей базе сейчас зарегестрированно 18 353 сервиса в 513 города России, Беларусии, Казахстана и Украины.

РАДИО СЕРВИС
⭐
⭐
⭐
⭐
⭐
Адресс:
Ореховый бульвар, д. 111
Телефон:
74953918659
Сайт:
n/a
Время работы
Будни: с 1000 до 1900
Суббота: выходной
Воскресенье: выходной
НАРОДНАЯ КОМПАНИЯ
⭐
⭐
⭐
⭐
⭐
Адресс:
локомотивный проезд, 4
Телефон:
74957809503
Сайт:
n/a
Время работы
Время работы не указано
АМПЕРВОЛЬТ
⭐
⭐
⭐
⭐
⭐
Адресс:
Бутырская ул., д.84
Телефон:
74957965532
Сайт:
n/a
Время работы
Время работы не указано
Сеть сервисных центров «РУКИ ИЗ ПЛЕЧ»
⭐
⭐
⭐
⭐
⭐
Адресс:
ул. Пятницкая, д. 18, стр. 4
Телефон:
74951202639
Сайт:
n/a
Время работы
Будни: с 0900 до 2100
Суббота: с 1000 до 2000
Воскресенье: с 1000 до 2000
ЯУЗАОРГСЕРВИС
⭐
⭐
⭐
⭐
⭐
Адресс:
ул. Радио, 24 к. 1
Телефон:
74996410071
Сайт:
n/a
Время работы
Будни: с 0900 до 1800
Суббота: выходной
Воскресенье: выходной
-
Page 1
Service Manual Color Image Scanner EPSON Perfection V10 Perfection V100 Photo Perfection V200 Photo Perfection V350 Photo SESC06-002… -
Page 2
SEIKO EPSON CORPORATION. All effort have been made to ensure the accuracy of the contents of this manual. However, should any errors be detected, SEIKO EPSON would greatly appreciate being informed of them. -
Page 3
REPAIRS ON EPSON PRODUCT SHOULD BE PERFORMED ONLY BY AN EPSON CERTIFIED REPAIR TECHNICIAN. MAKE CERTAIN THAT THE SOURCE VOLTAGES IS THE SAME AS THE RATED VOLTAGE, LISTED ON THE SERIAL NUMBER/RATING PLATE. IF THE EPSON PRODUCT HAS A PRIMARY AC RATING DIFFERENT FROM AVAILABLE POWER SOURCE, DO NOT CONNECT IT TO THE POWER SOURCE. -
Page 4
CHAPTER 6.MAINTENANCE May indicate an operating or maintenance procedure, practice or Provides preventive maintenance procedures and the lists of Epson- condition that is necessary to accomplish a task efficiently. It may also approved lubricants and adhesives required for servicing the product. -
Page 5
Revision Status Description Revision Date of Issue June 14, 2006 First release May 9, 2007 [All chapters] • The model name; Perfection V200 Photo is added. [Chapter 1] • Perfection V200 Photo specs are added to Table 1-1 “Scanning Speed” (p. •… -
Page 6: Table Of Contents
EPSON Perfection V10/V100 Photo/V200 Photo/V350 Photo Revision B Contents Chapter 1 PRODUCT DESCRIPTION 4.3.6 Main Board ………………..37 4.3.7 CR Motor………………..39 1.1 Features……………………8 4.3.8 Driven Pulley………………..41 1.2 Basic Specifications………………..9 4.3.9 Carriage Unit ………………..41 1.3 Exterior Specifications ………………12 4.4 Disassembly of TPU………………..
-
Page 7: Chapter 1 Product Description
C H A P T E R PRODUCT DESCRIPTION…
-
Page 8: Features
TPU (Perfection V100 Photo) Film holders can be stored in the Lid TPU The EPSON Perfection V10/V100 Photo/V200 Photo/V350 Photo are color image • 35mm x 6 frames (strip film) scanners equipped with 180° openable scanner cover. The main features are as follows.
-
Page 9: Basic Specifications
EPSON Perfection V10/V100 Photo/V200 Photo/V350 Photo Revision B 1.2 Basic Specifications Command Interpreter API (ESC/I-D2 FS support) Dimensions/Weight Refer to Figure 1-5 «External Dimensions» Main unit Reliability (MCBF) 10,000 cycles of carriage movement Product Type Flatbed color image scanner Note *1: The maximum output resolution of Perfection V200 Photo is 21,000 x 30,000 pixels.
-
Page 10
EPSON Perfection V10/V100 Photo/V200 Photo/V350 Photo Revision B TPU (Perfection V100 Photo / V200 Photo) AC Adapter • Rated voltage 100-120 VAC (100 V) Product type Lid-type scanning unit for transparent documents 220-240 VAC (200 V) • Input voltage range 100-120 VAC ±… -
Page 11
EPSON Perfection V10/V100 Photo/V200 Photo/V350 Photo Revision B INTERFACE OPERATING ENVIRONMENT REQUIREMENTS USB2.0 Interface Operating System USB 1.1 • Microsoft Windows 98 SE (Second Edition) /Me • Microsoft Windows 2000 Professional • Microsoft Windows XP Home Edition/XP Professional/ XP Professional x64 Edition •… -
Page 12: Exterior Specifications
Note *1: Pressing the required buttons simultaneously can move the carriage. See “Compulsory Carriage movement” (p22) for the details. *2: Perfection V10/V100 Photo/V350 Photo are powered On/Off by plugging/ unplugging the power code into/from a receptacle. Only Perfection V200 Photo can Figure 1-3. Buttons and LED (Perfection V10/V100 Photo/V350 Photo) be turned On/Off by the Start button, however, the button cannot turn it Off during EPSON Scan is running.
-
Page 13: Maximum Document Size And Placement
EPSON Perfection V10/V100 Photo/V200 Photo/V350 Photo Revision B 1.4 Maximum Document Size and Placement Dimensions Table 1-5. Dimensions and Weight Scanning Range for Reflective Document Perfection V100 Photo Perfection V10 Perfection V350 Photo Size 216 x 297 mm (horizontal x vertical)
-
Page 14
EPSON Perfection V10/V100 Photo/V200 Photo/V350 Photo Revision B TPU Model (Perfection V100 Photo/V200 Photo) Scanning Range for Transparent Document AFL Model (Perfection V350 Photo) Scanning Range for Transparent Document Size 32.9 x 244.4 mm (horizontal x vertical) Size Strip film 36.83 x 44.5mm(horizontal x vertical) Slide film 36.83 x 112mm(horizontal x vertical) -
Page 15: Control Codes
EPSON Perfection V10/V100 Photo/V200 Photo/V350 Photo Revision B 1.5 Control Codes Category Command Name Code Set data format ESC D i Control Specifications Set resolution ESC R n1 n2 Set data form The scanner is controlled through the following system hierarchy.
-
Page 16: Error Handling
EPSON Perfection V10/V100 Photo/V200 Photo/V350 Photo Revision B 1.6 Error Handling Table 1-6. Error Definition and Remedy List Error type Cause Scanner Action Recovery Command error Received an undefined command or undefined command • No LED indication occurs. The scanner recovers from the error by receiving parameter.
-
Page 17
C H A P T E R OPERATING PRINCIPLES… -
Page 18: Engine Operation Outline
EPSON Perfection V10/V100 Photo/V200 Photo/V350 Photo Revision B 2.1 Engine Operation Outline Inverter Board This section explains the functions and operating principles of the Perfection V10/ Perfection V100 Photo/Perfection V200 Photo/Perfection V350 Photo. CCD Sensor 2.1.1 Outline CCD Board CARRIAGE UNIT OUTLINE…
-
Page 19
EPSON Perfection V10/V100 Photo/V200 Photo/V350 Photo Revision B TPU OUTLINE (PERFECTION V100 PHOTO/V200 PHOTO) AFL OUTLINE (PERFECTION V350 PHOTO) The TPU consists of TPU Inverter Board and Lamp (light source). The AFL consists of AFL Inverter Board and Lamp (light source). -
Page 20: Outline Of Mechanical Operation
CARRIAGE UNIT MECHANISM for scanning an image is determined by the CR HP Sensor which is located on the (PERFECTION V10 / V100 PHOTO / V200 PHOTO / V350 PHOTO) Control Board. The scanning of an image on document is carried out with the combination of the main…
-
Page 21
EPSON Perfection V10/V100 Photo/V200 Photo/V350 Photo Revision B Here are descriptions of mechanical operations from when setting document, and AFL FILM FEEDING MECHANISM (PERFECTION V350 PHOTO) scanning, and to the time of taking out the document. The AFL Film Feeding Mechanism is a mechanism to feed 35mm strip films by the The Film Sensor (Front) detects the film inserted into the film entry. -
Page 22: Carriage Protection Operation
Note «*1»: After pushing the Push Button, no action was taken even with the event selection window opened in the PC display. «*2»: The Carriage will move to the center and lamp will turn off if the EPSON Scan is shut down, Figure 2-8. Push Button event settings regardless of any action taken or passed time.
-
Page 23
The Push Button was pushed during save energy standby, and warm up was The Epson Scan was active, but shut down without any preview or scan within 30 started. The Epson Scan was not activated 13 seconds after warm up completion… -
Page 24
Moves to the center power-On Moves to the home Running At startup of EPSON Scan When EPSON Scan is started up while the carriage has moved to the center. position Running Upon receiving a command 14.5 minutes Moves to the center… -
Page 25: Control Circuit
EPSON Perfection V10/V100 Photo/V200 Photo/V350 Photo Revision B 2.2 Control Circuit 2.2.1 Image Processing Operation The sequence of scanned image processing is explained in order below. The Control Circuit of this scanner consists of the following circuits. CCD Board (CCD Image Sensor)
-
Page 26
C H A P T E R TROUBLESHOOTING… -
Page 27: Outline
EPSON Perfection V10/V100 Photo/V200 Photo/V350 Photo Revision B 3.1 Outline FATAL ERROR Table 3-2. Fatal error This chapter explains the remedies for errors detected by the self-diagnostic function as well as the check points on a fault phenomenon basis, which are required for efficient…
-
Page 28: Troubleshooting
EPSON Perfection V10/V100 Photo/V200 Photo/V350 Photo Revision B 3.2 Troubleshooting Table 3-5. The Main Unit does not perform initialization operation. Step Cause Point to be checked Result Corrective Action This section is organized by troubles to determine the causes. Find out the trouble you Connect the connectors.
-
Page 29
EPSON Perfection V10/V100 Photo/V200 Photo/V350 Photo Revision B Table 3-8. The Fluorescent Lamps does not light up (the Main Unit). Table 3-10. The films are not fed or ejected (AFL). Step Cause Point to be checked Result Corrective Action Step… -
Page 30
C H A P T E R DISASSEMBLY/ASSEMBLY… -
Page 31: Overview
Before starting the disassembly or reassembly of the product, always read the 4.1.3 Screws following precautions given under the headings “WARNING” and “CAUTION”. The following table indicate the screws used in the EPSON Perfection V10/V100 Photo/ Before disassembling or reassembling this product, always W A R N I N G V200 Photo/V350 Photo.
-
Page 32: Packaging And Shipping Cautions
Carriage movement method Turn on the power of Perfection V10/V100 Photo/V200 Photo/V350 Photo. Hold down the following buttons simultaneously for more than three seconds. Perfection V10 / V100 Photo / V350 Photo…
-
Page 33: Disassembly Procedure
Cover Lower Assy/AFL AFL Inverter Board/AFL Harness AFL/AFL Main Eject Button(P.55) Damper/Film Holder(P.53) Lamp Assy(P.49) Inverter Board Cover(P.48) Board(P.47) Sensor A(P.51) Film Holder Lock(P.54) Film Ejection Cover(P.51) AFL Sensor B(P.50) Figure 4-1. Perfection V10/V100 Photo/V350 Photo Disassembly/Reassembly Flowchart DISASSEMBLY/ASSEMBLY Disassembly Procedure…
-
Page 34: Disassembly Of Main Unit
EPSON Perfection V10/V100 Photo/V200 Photo/V350 Photo Revision B 4.3 Disassembly of Main Unit Push the Document Cover/TPU Unit/AFL Unit towards the main unit, releasing the 2 shafts from the hooks of the Hinge one by one. 4.3.1 Hinge Disengagement When disengaging the Hinge, the Document Cover/TPU Unit/AFL C A U T I O N Unit may hit the scanner main unit and damage it.
-
Page 35: Document Cover
Perfection V350 Photo: below. 4.5.1 Separation of AFL Upper Housing Assy/AFL Lower Housing The Perfection V10 was used to illustrate the disassembly of the Assy P46 scanner main unit, therefore the color or some parts may differ Disengage the Hinge (4.3.1 Hinge Disengagement on page…
-
Page 36: Hinge
EPSON Perfection V10/V100 Photo/V200 Photo/V350 Photo Revision B 4.3.4 Hinge On the bottom side of the Upper Housing, disengage the four hooks that secure the Button Cover, and remove the Optical Plate, Function Buttons, and Button Cover. Remove the Upper Housing.
-
Page 37: Main Board
EPSON Perfection V10/V100 Photo/V200 Photo/V350 Photo Revision B 4.3.5 Panel Board 4.3.6 Main Board Remove the Upper Housing. Remove the Panel Board. (4.3.5 Panel Board on page 37) (4.3.3 Upper Housing on page 35) Remove the two screws (C.B.P. 3×8, 5-7 kgf.cm/C.B.S 3×5, 6-8 kgf.cm) that Remove the screw (C.B.P.
-
Page 38
EPSON Perfection V10/V100 Photo/V200 Photo/V350 Photo Revision B When reassembling the Upper Main Board Shield Plate, match Perfection V10 is equipped with a different Main Board to C H E C K the guide pin and the positioning hole, and insert the plate… -
Page 39: Cr Motor
EPSON Perfection V10/V100 Photo/V200 Photo/V350 Photo Revision B 4.3.7 CR Motor The Main Board differs between the Perfection V10, the Perfection Remove the Panel Board (4.3.5 Panel Board on page 37) V100 Photo/V350 Photo and the Perfection V200 Photo. When replacing the Man Board, make sure to replace with a correct Remove the two screws (C.B.P.
-
Page 40
EPSON Perfection V10/V100 Photo/V200 Photo/V350 Photo Revision B Remove the three screws (C.C.P. 3X8, 5-7 kgf.cm) that secure the CR Motor Assy. After replacing the CR Motor, make sure to apply G-45 grease Remove the CR Motor Assy from the Lower Housing. -
Page 41: Driven Pulley
EPSON Perfection V10/V100 Photo/V200 Photo/V350 Photo Revision B 4.3.8 Driven Pulley 4.3.9 Carriage Unit Remove the Upper Housing. Remove the Main Board. (4.3.6 Main Board on page 37) (4.3.3 Upper Housing on page 35) Remove the CR Motor. (4.3.7 CR Motor on page 39) Remove the two screws (C.B.P.
-
Page 42
EPSON Perfection V10/V100 Photo/V200 Photo/V350 Photo Revision B Remove the Carriage Unit from the Lower Housing following the steps below. Remove the Clamp that secures the Timing Belt to the Carriage Unit in the direction of the arrow. Lift up the Carriage Shaft from the Driven Pulley side, and move it in the direction of the arrow, to get it out from the shaft holder. -
Page 43: Disassembly Of Tpu
EPSON Perfection V10/V100 Photo/V200 Photo/V350 Photo Revision B 4.4 Disassembly of TPU Using a flat-blade screwdriver, push outward on the left and right sides of the TPU Upper Housing frame to widen it and release the two Hook A. Disengage the two Hook B by pinching them.
-
Page 44: Harness Tpu/Tpu Inverter Board
EPSON Perfection V10/V100 Photo/V200 Photo/V350 Photo Revision B 4.4.2 Harness TPU/TPU Inverter Board Reassemble the Harness TPU following the steps below. Remove the TPU Upper Housing. (4.4.1 TPU Upper Housing on page 43) Insert the Stopper of the Harness TPU into the socket of the TPU Lower Housing.
-
Page 45: Lamp Assy
EPSON Perfection V10/V100 Photo/V200 Photo/V350 Photo Revision B 4.4.3 Lamp Assy Disconnect CN1 connector from the TPU Inverter Board. Remove the screw (C.B.P 3×8, 5-7 kgf.) that secures the TPU Inverter Board, and Remove the TPU Upper Housing. remove the TPU Inverter Board.
-
Page 46: Disassembly Of Afl
EPSON Perfection V10/V100 Photo/V200 Photo/V350 Photo Revision B 4.5 Disassembly of AFL Open the Film Ejection Cover following the steps below. Push the knobs of the Film Ejection Cover from both sides. Open the Film Ejection Cover. 4.5.1 Separation of AFL Upper Housing Assy/AFL Lower Housing Assy Disengage the Hinge.
-
Page 47: Harness Afl/Afl Main Board
EPSON Perfection V10/V100 Photo/V200 Photo/V350 Photo Revision B 4.5.2 Harness AFL/AFL Main Board When installing the Harness AFL, insert the Stopper with the Separate the AFL Upper Housing Assy/AFL Lower Housing Assy. stopper’s chipped side facing upwards into the socket of the AFL (4.5.1 Separation of AFL Upper Housing Assy/AFL Lower Housing Assy on page…
-
Page 48: Afl Inverter Board/Afl Inverter Board Cover
EPSON Perfection V10/V100 Photo/V200 Photo/V350 Photo Revision B 4.5.3 AFL Inverter Board/AFL Inverter Board Cover When installing the AFL Main Board, match the guide pin and Separate the AFL Upper Housing Assy/AFL Lower Housing Assy. the positioning hole. (4.5.1 Separation of AFL Upper Housing Assy/AFL Lower Housing Assy on page When reassembling the AFL Main Board Cover, match the two guide pins and the positioning holes.
-
Page 49: Lamp Assy
EPSON Perfection V10/V100 Photo/V200 Photo/V350 Photo Revision B 4.5.4 Lamp Assy Remove the screw (C.B.P. 3×8, 5-7 kgf.cm.) that secures the AFL Inverter Board. Disconnect CN2 connector, and remove the AFL Inverter Board. Separate the AFL Upper Housing Assy/AFL Lower Housing Assy.
-
Page 50: Afl Sensor B
EPSON Perfection V10/V100 Photo/V200 Photo/V350 Photo Revision B 4.5.5 AFL Sensor B When installing the Lamp Assy, match the two guide pins and Remove the Lamp Assy. (4.4.3 Lamp Assy on page 45) the positioning holes. Route the Lamp Assy cables through the two hooks, six ribs, Disconnect CN4 connector from the AFL Main Board.
-
Page 51: Film Ejection Cover
EPSON Perfection V10/V100 Photo/V200 Photo/V350 Photo Revision B 4.5.6 Film Ejection Cover 4.5.7 Cover Lower Assy/AFL Sensor A Remove the Harness AFL/AFL Main Board. Separate the AFL Upper Housing Assy/AFL Lower Housing Assy. (4.5.2 Harness AFL/AFL Main Board on page 47) (4.5.1 Separation of AFL Upper Housing Assy/AFL Lower Housing Assy on page…
-
Page 52
EPSON Perfection V10/V100 Photo/V200 Photo/V350 Photo Revision B Lift up the AFL Sensor A Cover with a flat-blade screwdriver, disengage the four When reassembling the AFL Sensor A, route the cables toward the hooks, and remove the AFL Sensor A Cover. -
Page 53: Damper/Film Holder
EPSON Perfection V10/V100 Photo/V200 Photo/V350 Photo Revision B 4.5.8 Damper/Film Holder Install the Damper/Film Holder following the steps below. Separate the AFL Upper Housing Assy/AFL Lower Housing Assy. (4.5.1 With the Film Holder wide open, insert the shaft of the Film Separation of AFL Upper Housing Assy/AFL Lower Housing Assy on page 46) Holder into the hole of the AFL Upper Housing.
-
Page 54: Film Holder Lock
EPSON Perfection V10/V100 Photo/V200 Photo/V350 Photo Revision B 4.5.9 Film Holder Lock Insert the two guide pins of the AFL Upper Housing into the Remove the Damper/Film Holder. (4.5.8 Damper/Film Holder on page 53) positioning holes of the Damper, and screw the Damper.
-
Page 55: Eject Button
EPSON Perfection V10/V100 Photo/V200 Photo/V350 Photo Revision B 4.5.10 Eject Button Separate the AFL Upper Housing Assy/AFL Lower Housing Assy. (4.5.1 Separation of AFL Upper Housing Assy/AFL Lower Housing Assy on page 46) Disengage the hook that secures the Eject Button, then release it from the two dowels of the AFL Upper Housing, and remove the Eject Button.
-
Page 56: Chapter 5 Adjustment
C H A P T E R ADJUSTMENT…
-
Page 57
EPSON Perfection V10/V100 Photo/V200 Photo/V350 Photo Revision B This product does not require any adjustment in the range of the disassembly and reassembly explained in Chapter 4. ADJUSTMENT… -
Page 58: Chapter 6 Maintenance
C H A P T E R MAINTENANCE…
-
Page 59: Overview
EPSON Perfection V10/V100 Photo/V200 Photo/V350 Photo Revision B 6.1 Overview 6.1.2 Lubrication Lubrication is required when any part of the Carriage Unit of the scanner has been This chapter explains the maintenance work necessary to keep this product in the best replaced or the Carriage moves with noticeably large operation noise.
-
Page 60
EPSON Perfection V10/V100 Photo/V200 Photo/V350 Photo Revision B <Lubrication <Lubrication point> point> Driven Pulley Carriage Shaft (Refer to (Refer to 4.3.9 4.3.8 Driven Carriage Unit P41) Pulley P41) Lubrication Point <Oil type> <Oil type> G-45 Lubrication G-45 Point <Tool> <Tool>… -
Page 61: Chapter 7 Appendix
C H A P T E R APPENDIX…
-
Page 62: Connector Configuration
EPSON Perfection V10/V100 Photo/V200 Photo/V350 Photo Revision B 7.1 Connector Configuration 7.1.2 Connector Connection Table Table 7-1. The Main Unit Connection Table The wiring assembly of the connectors on the major circuit board are shown below. (Perfection V10/V100 Photo/V200 Photo/V350 Photo) 7.1.1 Connector Configuration…
-
Page 63: Connection Table
EPSON Perfection V10/V100 Photo/V200 Photo/V350 Photo Revision B 7.1.3 Connection Table Table 7-6. Main Board CN3-AC Input Pin No. Signal The following tables are connection tables of connectors on the respective boards. 13.5VDC Table 7-4. Main Board CN1-CCD Board Pin No.
-
Page 64
EPSON Perfection V10/V100 Photo/V200 Photo/V350 Photo Revision B Table 7-9. Main Board CN6-USB Connector Table 7-14. TPU Inverter Board CN2-Lamp Pin No. Signal Pin No. Signal LAMP LAMP Table 7-15. AFL Main Board CN2-AFL Motor Pin No. Signal Table 7-10. Main Board CN7-CR Motor Pin No. -
Page 65: Circuit Diagrams
EPSON Perfection V10/V100 Photo/V200 Photo/V350 Photo Revision B 7.2 Circuit Diagrams The control electrical circuit diagrams of this product are show on the following pages. Main Board Perfection V10 Perfection V100 Photo/V350 Photo Perfection V200 Photo CCD Board Perfection V10/V100 Photo…
-
Page 66
Model : GT-S600 Perfection V10 Board : Main Board Rev. Sheet : 1/1… -
Page 67
Model : GT-F650/GT-F700 Perfection V100 Photo/V350 Photo Board : Main Board Rev. Sheet : 1/1… -
Page 68
Model : GT-F670 Perfection V200 Photo Board : Main Board Rev. : C Sheet : 1/1… -
Page 69
Model : GT-S600/GT-F650 Perfection V10/V100 Photo Board : CCD Board Rev. Sheet : 1/1… -
Page 70
Model : GT-F700 Perfection V350 Photo Board : CCD Board Rev. Sheet : 1/1… -
Page 71
Model : GT-F670 Perfection V200 Photo Board : CCD Board Rev. : A Sheet : 1/1… -
Page 72
Model : GT-S600/GT-F650/GT-F700 Perfection V10/V100 Photo/V350 Photo Board : Panel Board Rev. Sheet : 1/1… -
Page 73
Model : GT-F700 Perfection V350 Photo Board : AFL Main Board Rev. Sheet : 1/1… -
Page 74
Model : GT-F700 Perfection V350 Photo Board : AFL Sensor B Rev. Sheet : 1/1… -
Page 75
Model : GT-F700 Perfection V350 Photo Board : AFL Sensor A Rev. Sheet : 1/1… -
Page 76
Model : GT-F670 Perfection V200 Photo Board : Panel Board Rev. : B Sheet : 1/1… -
Page 77: Exploded Diagram/Service Parts List
EPSON Perfection V10/V100 Photo/V200 Photo/V350 Photo Revision B 7.3 Exploded Diagram/Service Parts List This manual does not provide the exploded diagrams and the parts list. See SPI (Service Parts Information) for details. APPENDIX Exploded Diagram/Service Parts List…