- Manuals
- Brands
- Spirax Sarco Manuals
- Temperature Controller
- SX90
Manuals and User Guides for Spirax Sarco SX90. We have 3 Spirax Sarco SX90 manuals available for free PDF download: Installation And Maintenance Instructions Manual, Quick Start Manual, Installation And Maintenance Instructions
-
IM-P323-35 CH Issue 3 1
SX80
SX90
SX80 and SX90 Controllers
Installation and Maintenance Instructions
1. Installation and basic operation
2. Step 2: Wiring 3. Safety and EMC
information4. Switch on 5. Operator level 2 6. Access to
furtherparameters 7. Controller block diagram 8. Process (temperature
orpressure) input 9. Output parameters 10. Setpoint generator 11.
Control 12. Alarms 13. Timer 14. Recipe 15. Digital communications
16. Calibration 17. Access parameters 18. Appendix A technicalspecification19. Parameter index 20. General index
IM-P323-35CH Issue 3
3231354/3
Copyright 2013
Printed in France
-
IM-P323-35 CH Issue 32
-
IM-P323-35 CH Issue 3 1
SX80/90
IM-P323-35: Part No 3231354 Issue 7.0 (CN29611) Feb-13 1
SX80/90 PID Temperature and Pressure Controllers IM-P323-35 User
Manual Part Number 3231354 Issue 7.0 Feb-13Contents 1. Installation and Basic Operation
………………………………………………………………………………..
51.1 What Instrument Do I Have?
…………………………………………………………………………………………………..
5 1.2 Unpacking Your Controller
……………………………………………………………………………………………………..
5 1.3 Dimensions
……………………………………………………………………………………………………………………………
5 1.4 Step 1: Installation
………………………………………………………………………………………………………………..
5 1.4.1 Panel Mounting the Controller
……………………………………………………………………………………………………………………
5 1.4.2 Panel Cut Out Sizes
…………………………………………………………………………………………………………………………………
5 1.4.3 Recommended minimum spacing of controllers
……………………………………………………………………………………………
5 1.4.4 To Remove the Controller from its Sleeve
……………………………………………………………………………………………………
52. Step 2: Wiring
…………………………………………………………………………………………………………..
6 2.1 Terminal Layout SX80 Controller
…………………………………………………………………………………………….
6 2.2 Terminal Layout SX90 Controller
…………………………………………………………………………………………….
6 2.3 Wire Sizes
……………………………………………………………………………………………………………………………..
7 2.4 Precautions
……………………………………………………………………………………………………………………………
7 2.5 Sensor Input (Measuring Input) SX80 and SX90
………………………………………………………………………
7 2.5.1 Thermocouple Input
…………………………………………………………………………………………………………………………………
7 2.5.2 RTD Input
………………………………………………………………………………………………………………………………………………
7 2.5.3 Linear Input (mA or mV)
……………………………………………………………………………………………………………………………
7 2.6 Relay Output (IO1) SX80 and SX90
………………………………………………………………………………………..
7 2.7 Output 2 (OP2) (4-20mA) SX80 and SX90
………………………………………………………………………………..
7 2.8 Outputs 3 & 4 (OP3/4) SX80 only
……………………………………………………………………………………………
7 2.9 Transmitter Power Supply SX80
……………………………………………………………………………………………..
7 2.10 Output 3 (OP3) 4-20mA — SX90 only
…………………………………………………………………………………………
8 2.11 Output 4 (OP4) — SX90 only
……………………………………………………………………………………………………..
8 2.12 Outputs 5 & 6 (OP5/6) — SX90 only
…………………………………………………………………………………………..
8 2.13 Transmitter Power Supply- SX90 only
……………………………………………………………………………………..
8 2.14 Potentiometer Input — SX90 only
……………………………………………………………………………………………..
8 2.15 Digital Inputs A & B SX80 only
……………………………………………………………………………………………..
8 2.16 Digital Inputs B. C & D — SX90 only
………………………………………………………………………………………….
8 2.17 Remote Setpoint Input — SX90 only
………………………………………………………………………………………….
8 2.18 Digital Communications — SX90 only
……………………………………………………………………………………….
8 2.18.1 General Note About Relays and Inductive Loads
……………………………………………………………………………………..
9 2.19 Controller Power Supply
………………………………………………………………………………………………………..
9 2.20 Digital Communications
…………………………………………………………………………………………………………
9 2.20.1 EIA422 Connections — SX90 only
…………………………………………………………………………………………………………..
9 2.21 Wiring Examples
……………………………………………………………………………………………………………………
10 2.21.1 Pressure Control
…………………………………………………………………………………………………………………………………
10 2.21.2 Valve Position
…………………………………………………………………………………………………………………………………….
10 2.21.3 Cascade Control Temperature/Pressure
…………………………………………………………………………………………………
11 2.21.4 Cascade Control Back Pressure/Pressure Reduction
………………………………………………………………………………..
123. Safety and EMC Information
………………………………………………………………………………………
13 3.1 Installation Safety Requirements
…………………………………………………………………………………………….
134. Switch On
…………………………………………………………………………………………………………………
15 4.1 New Controller
……………………………………………………………………………………………………………………….
15 4.1.1 Quick Start Code
……………………………………………………………………………………………………………………………………..
15 4.2 To Re-Enter Quick Code mode
……………………………………………………………………………………………….
16 4.3 Pre-Configured Controller or Subsequent Starts
……………………………………………………………………..
16 4.4 Front Panel Layout
…………………………………………………………………………………………………………………
16 4.4.1 To Set The Target Temperature.
………………………………………………………………………………………………………………..
16 4.4.2 Alarms
…………………………………………………………………………………………………………………………………………………..
17 4.4.3 Alarm Indication
………………………………………………………………………………………………………………………………………
17 4.4.4 To Acknowledge an Alarm
………………………………………………………………………………………………………………………..
17 4.4.5 Auto, Manual and Off Mode
………………………………………………………………………………………………………………………
18 4.4.6 To Select Auto, Manual or Off Mode
…………………………………………………………………………………………………………..
18SX80 and SX90 PID Temperature and Pressure Controllers
IM-P323-35 CH Issue 3User Manual Part Number 3231354 Issue 3 March
2013 -
IM-P323-35 CH Issue 32
SX80/90
2 IM-P323-35: Part No 3231354 Issue 7.0 Feb-13
4.4.7 Level 1 Operator Parameters
……………………………………………………………………………………………………………………..19
5. Operator Level 2
………………………………………………………………………………………………………..195.1 To Enter Level 2
……………………………………………………………………………………………………………………..
19 5.2 To Return to Level 1
……………………………………………………………………………………………………………….
19 5.3 Level 2 Parameters
…………………………………………………………………………………………………………………
19 5.4 Soft Start Timer
……………………………………………………………………………………………………………………..
22 5.4.1 To Operate the Timer
Manually…………………………………………………………………………………………………………………..226. Access to Further Parameters
……………………………………………………………………………………23
6.1.1 Level 3
……………………………………………………………………………………………………………………………………………………23
6.1.2 Configuration Level
…………………………………………………………………………………………………………………………………..23
6.1.3 To Select Access Level 3 or Configuration Level
…………………………………………………………………………………………..24
6.2 Parameter lists
……………………………………………………………………………………………………………………….
25 6.2.1 To Choose Parameter List Headers
…………………………………………………………………………………………………………….25
6.2.2 To Locate a Parameter
……………………………………………………………………………………………………………………………..25
6.2.3 How Parameters are
Displayed…………………………………………………………………………………………………………………..25
6.2.4 To Change a Parameter
Value……………………………………………………………………………………………………………………25
6.2.5 To Return to the HOME Display
………………………………………………………………………………………………………………….25
6.2.6 Time Out
…………………………………………………………………………………………………………………………………………………25
6.3 Navigation Diagram
………………………………………………………………………………………………………………..
267. Controller Block Diagram
…………………………………………………………………………………………..27
8. Process (Temperature or Pressure) Input
…………………………………………………………………..288.1 Process Input Parameters
………………………………………………………………………………………………………
28 8.1.1 Input Types and Ranges
……………………………………………………………………………………………………………………………29
8.1.2 Operation of Sensor Break
…………………………………………………………………………………………………………………………30
8.1.3 PV Offset
………………………………………………………………………………………………………………………………………………..31
8.1.3.1 Example: To Apply an Offset:-
………………………………………………………………………………………………………………………………………………
31 8.1.4 PV Input Scaling
………………………………………………………………………………………………………………………………………31
8.1.4.1 Example: To Scale a Linear Input
………………………………………………………………………………………………………………………………………….
319. Output Parameters
…………………………………………………………………………………………………….32
9.1 Relay Output List (IO-1) — SX80 and SX90
……………………………………………………………………………….
32 9.1.1 Remote Digital Setpoint Select and Remote Fail
……………………………………………………………………………………………33
9.1.2 Sense
…………………………………………………………………………………………………………………………………………………….33
9.1.3 Source
……………………………………………………………………………………………………………………………………………………33
9.1.4 Power
Fail……………………………………………………………………………………………………………………………………………….33
9.1.5 Example: To Configure IO-1 Relay to Operate on Alarms 1 and
2:-
…………………………………………………………………33
9.1.6 Output List 2 (OP-2) — SX 80 and SX90
……………………………………………………………………………………………………….34
9.1.7 Output List 3 (OP-3) — SX90 only
………………………………………………………………………………………………………………..34
9.1.8 AA Relay (AA) (Output 4) — SX90 only
…………………………………………………………………………………………………………35
9.1.9 OP-5 and OP-6 (Outputs 5 and 6) SX90 only
……………………………………………………………………………………………….36
9.1.10 OP-3 and OP-4 (Outputs 3 and 4) SX80 only
…………………………………………………………………………………………..37
9.1.11 Digital Input Parameters LA and LB SX80 and LB, LC and LD —
SX90
……………………………………………………….3810. Setpoint Generator
…………………………………………………………………………………………………….39
10.1 Setpoint Parameters
……………………………………………………………………………………………………………….
39 10.1.1 Examples
……………………………………………………………………………………………………………………………………………41
10.1.2 Example: To Set an Increasing Rate of Change of Setpoint
……………………………………………………………………….41
10.2 Servo to PV
……………………………………………………………………………………………………………………………
42 10.2.1 Example 1, changes to the Local Setpoint(s) SP1, SP2 or
SP3
…………………………………………………………………..42
10.2.2 Example 2, changes writing directly to the Target Setpoint
(TgtSP)
……………………………………………………………..43
10.2.3 Example 3, changes writing directly to the Alternate
(Remote) Setpoint (AltSP)
…………………………………………….43 10.3
Holdback
……………………………………………………………………………………………………………………………….
4411. Control
………………………………………………………………………………………………………………………45
11.1 PID Control
…………………………………………………………………………………………………………………………….
45 11.2 Tuning
…………………………………………………………………………………………………………………………………..
45 11.2.1 Automatic Tuning
…………………………………………………………………………………………………………………………………45
11.2.2 How To Tune
………………………………………………………………………………………………………………………………………46
11.2.3 Calculation of the cutback values
……………………………………………………………………………………………………………46
11.2.4 Manual Tuning
…………………………………………………………………………………………………………………………………….46
11.2.5 Setting the Cutback Values
……………………………………………………………………………………………………………………46
11.3 Integral Action and Manual Reset
……………………………………………………………………………………………
47 11.4 Relative Cool Gain
………………………………………………………………………………………………………………….
47 11.5 Control Action
……………………………………………………………………………………………………………………….
47 -
IM-P323-35 CH Issue 3 3
SX80/90
IM-P323-35: Part No 3231354 Issue 7.0 Feb-13 3
11.6 On/Off Control
……………………………………………………………………………………………………………………….
47 11.7 Valve Position Control
……………………………………………………………………………………………………………
47 11.8 Loop Break
……………………………………………………………………………………………………………………………
47 11.9 Cooling Algorithm
………………………………………………………………………………………………………………….
47 11.10 Control Parameters
…………………………………………………………………………………………………………….
48 11.11 Example: To Configure Heating and Cooling
………………………………………………………………………
51 11.11.1 Effect of Control Action, Hysteresis and Deadband
…………………………………………………………………………………..
5212. Alarms
………………………………………………………………………………………………………………………
53 12.1 Types of Alarm
………………………………………………………………………………………………………………………
54 12.1.1 Alarm Relay Output
……………………………………………………………………………………………………………………………..
55 12.1.2 Alarm Indication
………………………………………………………………………………………………………………………………….
55 12.1.3 To Acknowledge An Alarm
……………………………………………………………………………………………………………………
55 12.2 Behaviour of Alarms After a Power Cycle
………………………………………………………………………………..
56 12.2.1 Example 1
………………………………………………………………………………………………………………………………………….
56 12.2.2 Example 2
………………………………………………………………………………………………………………………………………….
56 12.2.3 Example 3
………………………………………………………………………………………………………………………………………….
56 12.3 Alarm
Parameters…………………………………………………………………………………………………………………..
57 12.3.1 Example: To Configure Alarm 1
…………………………………………………………………………………………………………….
58 12.4 Diagnostic Alarms
………………………………………………………………………………………………………………….
59 12.4.1 Out of Range Indication
………………………………………………………………………………………………………………………..
59 12.4.2 EEPROM Write Frequency Warning, E2.Fr
……………………………………………………………………………………………
59 12.4.3 Remote Setpoint Fail, rEm.F
………………………………………………………………………………………………………………..
5913. Timer
………………………………………………………………………………………………………………………..
60 13.1 Timer Parameters
…………………………………………………………………………………………………………………..
6014. Recipe
………………………………………………………………………………………………………………………
61 14.1 List of Default Recipe Parameters:
………………………………………………………………………………………….
61 14.2 To Save Current Values in a Recipe
………………………………………………………………………………………..
61 14.3 To Save Values in a Second Recipe
………………………………………………………………………………………..
62 14.4 To Select a Recipe to Run
………………………………………………………………………………………………………
6215. Digital Communications
…………………………………………………………………………………………….
63 15.1 Wiring EIA422 (EIA485 5-wire)
………………………………………………………………………………………………..
63 15.2 Digital Communications Parameters
……………………………………………………………………………………….
63 15.3 Example To Set Up Instrument Address
………………………………………………………………………………….
64 15.4 Broadcast Communications
……………………………………………………………………………………………………
65 15.4.1 Broadcast Master Communications
………………………………………………………………………………………………………..
65 15.4.2 Wiring Connections
……………………………………………………………………………………………………………………………..
65 15.4.3 EEPROM Write Cycles
…………………………………………………………………………………………………………………………
66 15.5 DATA ENCODING
…………………………………………………………………………………………………………………..
67 15.6 Parameter Modbus Addresses
………………………………………………………………………………………………..
6816. Calibration
………………………………………………………………………………………………………………..
76 16.1 Offsets
…………………………………………………………………………………………………………………………………..
76 16.1.1 Two Point Offset
………………………………………………………………………………………………………………………………….
76 16.1.2 To Apply a Two Point Offset
………………………………………………………………………………………………………………….
77 16.1.3 To Remove the Two Point Offset
……………………………………………………………………………………………………………
77 16.2 Feedback Potentiometer (Valve Position Control)
……………………………………………………………………
78 16.2.1 To Calibrate the Feedback Potentiometer.
………………………………………………………………………………………………
78 16.3 Input Calibration
…………………………………………………………………………………………………………………….
79 16.4 To Verify Input Calibration
……………………………………………………………………………………………………..
79 16.4.1 Precautions
………………………………………………………………………………………………………………………………………..
79 16.4.2 To Verify mV Input Calibration
……………………………………………………………………………………………………………….
79 16.4.3 To Verify Thermocouple Input
Calibration………………………………………………………………………………………………..
80 16.4.4 To Verify RTD Input Calibration
……………………………………………………………………………………………………………..
80 16.5 To Re-calibrate an Input
…………………………………………………………………………………………………………
81 16.5.1 To Calibrate mV Input
………………………………………………………………………………………………………………………….
81 16.5.2 To Calibrate Thermocouple Input
…………………………………………………………………………………………………………..
82 16.5.3 To Calibrate RTD Input
………………………………………………………………………………………………………………………..
83 16.5.4 To Calibrate Remote Setpoint
Input………………………………………………………………………………………………………..
84 16.6 Output Calibration
………………………………………………………………………………………………………………….
85 16.6.1 To Calibrate mA Outputs
………………………………………………………………………………………………………………………
85 16.7 To Return to Factory Calibration
…………………………………………………………………………………………….
86 -
IM-P323-35 CH Issue 34
SX80/90
4 IM-P323-35: Part No 3231354 Issue 7.0 Feb-13
16.8 Calibration Parameters
…………………………………………………………………………………………………………..
87 17. Access Parameters
……………………………………………………………………………………………………8817.1.1 Home Display Configuration
…………………………………………………………………………………………………………………..89
17.1.2 Edit keys locked.
………………………………………………………………………………………………………………………………….89
17.1.3 Mode key locked.
…………………………………………………………………………………………………………………………………89
17.1.4 Meter Configuration
……………………………………………………………………………………………………………………………..90
17.1.5 Feature Passcodes.
……………………………………………………………………………………………………………………………..9018. Appendix A TECHNICAL SPECIFICATION
…………………………………………………………………91
19. Parameter Index
…………………………………………………………………………………………………………93
20. General Index
…………………………………………………………………………………………………………….95
Summary of specific features included in SX seriesSoft Start algorithm. This takes the form of an output limit
applied for a fixed duration after start up. Duration and threshold
level may be set by the user. This is achieved by the internal
timer as detailed in sections 5.4 and 13.When moving between setpoints (as forced by logic inputs, etc) a
limited rate of change can be applied. Two parameters, one defining
the rising rate of change (SP.RRT) and one defining falling rate of
change (SP.FRT), are available in SX series. These parameters are
found in the level 2 operator list section 5.3 and also in the
Setpoint list section 10.1.Holdback is available in SX90 only to stop the ramp when the PV
deviates from SP more than a set threshold value. The holdback
parameter (HOLD.B) is found in the Setpoint list section 10.1.There are three local setpoints in SX80 and SX90 and the ability
to take a remote setpoint in SX90 only. See also level 2 parameter
section 5.3 and sections 9.1.11, and 10.A forced output may be activated when the controller is switched
into Manual mode. The forced output is defined by parameters (F.MOD
& F.OP) in the Control list section 11.10.In SX90 only and when the controller is configured for bounded
valve position control a remote analogue input may be configured to
read valve position. This is defined by a parameter (VPB.IN) in the
Control list section 11.10.EIA422 digital communications is only available in SX90. See
section 15.Issue History of this Manual
Issue 1 applies to firmware versions V1.02.
Issue 2 updates Part Number and Reference Number.
Issue 3 corrects humidity rating in section 1.4.
Issue 4 changes supply frequency from 50/60Hz to 48 to 62Hz.
Issue 5 Correct description of enumerations for parameter IM
section 15.6. Correct Fahrenheit ranges in section 8.1.1. Change to
definition of LOC.T. in section 10.1.Issue 6 applies to firmware version V1.04. This version allows
the instruments to be used in cascade applications shown in
sections 2.21.3 and 2.21.4. Further parameters have been added to
the Setpoint list section 10. These are Loc.t Local Setpoint with
Remote as a trim and rEn.t; Remote Setpoint with Local as a trim;
RATIO and BIAS.Issue 7 adds Digital Inputs A & B and updates the Safety and
EMC section. -
IM-P323-35 CH Issue 3 5
SX80/90
IM-P323-35: Part No 3231354 Issue 7.0 Feb-13 5
1. Installation and Basic Operation 1.1 What Instrument Do I
Have? The SX series provide precise control of temperature or
pressure in industrial processes and is available in two standard
DIN sizes:-1/16 DIN Model Number SX80
1/8 DIN Model Number SX90 A universal input accepts various
thermocouples, RTDs or process inputs. Up to three (SX80) or six
(SX90) outputs can be configured for control, alarm or
re-transmission purposes. Digital communications is included in
SX90 only. On start up the controller may be configured using a
Quick Start code. It is possible, however, to add further features
by configuring the controller in deeper levels of access. This is
described in this manual.1.2 Unpacking Your Controller The controller is supplied
with:-Sleeve (with the controller fitted in the sleeve)
Two panel retaining clips and IP65 sealing gasket mounted on the
sleeveComponent packet containing two snubbers for use with relay
outputs (see section 2.18.1) and a 2.49 resistor for current input
(see section 2.5.3)Installation sheet Part Number 3231351.
1.3 DimensionsGeneral views of the controllers are shown below
together with overall dimensions.SX80
SX90
c Latching ears d IP65 Sealing Gasket e Panel retaining clips f
SleeveA 48mm (1.89inch) C 11mm (0.44 inch)
B 96mm (3.78 inch) D 90mm (3.54 inch)
1.4 Step 1: Installation This instrument is intended for
permanent installation, for indoor use only, and enclosed in an
electrical panel Select a location which is subject to minimum
vibrations the ambient temperature is within 0 and 55oC (32 —
131oF) and humidity 5 to 85% RH non condensing. The instrument can
be mounted on a panel up to 15mm thick. To ensure IP65 and NEMA 4
front protection, mount on a non-textured surface. Please read the
safety information in section 3 before proceeding. The EMC Booklet
is available for further installation information.1.4.1 Panel Mounting the Controller 1. Prepare a cut-out in the
mounting panel to the sizeshown. If a number of controllers are to be mounted in the same
panel observe the minimum spacing shown.2. Fit the IP65 sealing gasket behind the front bezel of the
controller3. Insert the controller through the cut-out 4. Spring the panel
retaining clips into place. Secure thecontroller in position by holding it level and pushing both
retaining clips forward.5. Peel off the protective cover from the display.
1.4.2 Panel Cut Out Sizes
1.4.3 Recommended minimum spacing of controllers
1.4.4 To Remove the Controller from its Sleeve
The controller can be unplugged from its sleeve by easing the
latching ears outwards and pulling it forward out of the sleeve.
When plugging it back into its sleeve, ensure that the latching
ears click back into place to maintain the IP65 sealing.A
A c
d
fe
ee
C D
A
B c
d
e
e
f
e
C D
45 mm — 0.0 + 0.61.77 in -0.00, +0.02
Model SX80
45 mm — 0.0 + 0.61.77 in -0.00, +0.02 92 mm
— 0.0 + 0.83.62 in -0.00, +0.03
Model SX90
45 mm — 0.0 + 0.61.77 in -0.00, +0.02
Applies to all models.
H
G
(Not to scale)
G 38mm (1.5in)
H 10mm (0.4in)
-
IM-P323-35 CH Issue 36
SX80/90
6 IM-P323-35: Part No 3231354 Issue 7.0 Feb-13
2. Step 2: Wiring
2.1 Terminal Layout SX80 Controller
2.2 Terminal Layout SX90 Controller
! Ensure that you have the correct supply for your
controller! Ensure that you have the correct supply for your
controllerThermocouple —
+
Pt100
Line Supply 100 to 230Vac +15% 48 to 62Hz
Transmitter power supply18V +15%
Output 2 Analogue 4-20mA
—
—
+
+
I
V
1A
1B
2A
2B
L
N
AA
AB
AC
VI
V+
V-
LA
LB
LC
HE
HF +
—
mA
R = 2.49
IO1 Relay Output Output 3
Output 4
Sensor input
Normally open relays
A
B
Digital Inputs A & B
Sensor input
Digital Communications EIA422
Output 4 (Changeover Relay)
Line Supply 100 to 230Vac +15% 48 to 62Hz
Digital Input B
Output 3 Analogue 4-20mA
Transmitter Supply 24V +10%
I
AA
AB
AC
RV
RI
RC
PH
PW
PL
VI
V+
V-
3A
3B
3C
3D
L
N
+
—
+
-HB
HC
HD
HE
HF
1A
1B
2A
2B
LB
LC
V
VI
I
4A
4B
4C
5A
5B
5C
IO1 Relay Output
Output 2 Analogue 4-20mA
—
+
Thermocouple Pt100 mA
Digital InputsC & D
Outputs5 & 6
Potentiometer inputValve position control
Remote setpoint input0-10V; 4-20mA
+
-R = 2.49
C
D
-
IM-P323-35 CH Issue 3 7
SX80/90
IM-P323-35: Part No 3231354 Issue 7.0 Feb-13 7
2.3 Wire Sizes The screw terminals accept wire sizes from 0.5 to
1.5 mm (16 to 22AWG). Hinged covers prevent hands or metal making
accidental contact with live wires. The rear terminal screws should
be tightened to 0.4Nm (3.5lb in).2.4 Precautions Do not run input wires together with power
cablesWhen shielded cable is used, it should be grounded at one point
onlyAny external components (such as zener barriers, etc) connected
between sensor and input terminals may cause errors in measurement
due to excessive and/or un-balanced line resistance or possible
leakage currentsNot isolated from the logic outputs & digital inputs
Pay attention to line resistance; a high line resistance may
cause measurement errors2.5 Sensor Input (Measuring Input) SX80 and SX90
2.5.1 Thermocouple Input
Positive
Negative
Use the correct compensating cable preferably shielded
2.5.2 RTD Input
PRT
PRT
Lead compensation
The resistance of the three wires must be the same. The line
resistance may cause errors if it is greater than 222.5.3 Linear Input (mA or mV)
If shielded cable is used it should be grounded in one place
only as shownFor a mA input connect the 2.49 burden resistor supplied between
the V+ and V- terminals as shown2.6 Relay Output (IO1) SX80 and SX90
Output 1 is supplied as standard as a normally open relay
configured for temperature alarm.Isolated output 300Vac CATII
Contact rating: 2A 264Vac resistive
For alarm type see Quick Code Set 3.
2.7 Output 2 (OP2) (4-20mA) SX80 and SX90
OP2 is supplied as standard as a 4-20mA analogue output. For
functionality see Quick Code Set 2.Isolated output 300Vac CAT II
Configurable 0-20mA or 4-20mA
Max load resistance: 500 Calibration accuracy: < +(1% of
reading +200A)2.8 Outputs 3 & 4 (OP3/4) SX80 only
Outputs 3 and 4 are normally open (Form A) relays which share a
common connection. They are intended to control motor driven
valves. For function see Quick Code Set 2.Isolated output 300Vac CATII
Contact rating: 2A 264Vac resistive — any terminal limited to
2A2.9 Transmitter Power Supply SX80
The transmitter power supply provides an 18V supply to power an
external transmitter.Isolated output 300Vac CATII
Output 18V +15%
VI
V+
V-
AA
AB
AC
OP3
OP4
—
+V+
V-
1A
1B
+2A
2B —
—
2.49+
V+
V-
Shield
+mA / mV input —
HE
HF V
+
—
-
IM-P323-35 CH Issue 38
SX80/90
8 IM-P323-35: Part No 3231354 Issue 7.0 Feb-13
2.10 Output 3 (OP3) 4-20mA — SX90 only OP3 is a 4-20mA analogue
output in SX90 only. For functionality see Quick Code Set 2.Isolated output 300Vac CATII
Configurable 0-20mA or 4-20mA
Max load resistance: 500 Calibration accuracy: < +(1% of
reading+200A)
2.11 Output 4 (OP4) — SX90 only Output 4 is a changeover (Form
C) relay fitted in SX90 only. For functionality see Quick Start
Code.Isolated output 300Vac CATII
Contact rating: 2A 264Vac resistive
2.12 Outputs 5 & 6 (OP5/6) — SX90 only Outputs 5 and 6 are
supplied as normally open (Form A) relays and are to control motor
driven valves. They share a common connection and are, therefore,
not isolated from each other. For alarm type see Quick Code Set
3.Isolated output 300Vac CATII
Contact rating: 2A 264Vac resistive — any terminal limited to
2A2.13 Transmitter Power Supply- SX90 only
The transmitter power supply provides an 24V supply to power an
external transmitter.Isolated output 300Vac CATII
Output 24V +10%, 30mA
2.14 Potentiometer Input — SX90 only The potentiometer input
provides feedback of the valve positionPotentiometer resistance: 100-10k Excitation voltage: 0.46 to
0.54VShort circuit detection: 2M Open circuit wiper detection
>5M2.15 Digital Inputs A & B SX80 only These are contact
closure inputs which may be configured for functions listed in
section 9.1.11.Switching: LA 12Vdc at 12mA max LB 12Vdc at 40mA
Contact open > 1200. Contact closed < 300
2.16 Digital Inputs B. C & D — SX90 only These are contact
closure inputs which may be configured for functions listed in
section 9.1.11.Not isolated from the sensor input
LC and LD not isolated from each other
Switching:
LC/LD 12Vdc at 6mA max
LB 12Vdc at 12mA
Contact open > 1200. Contact closed < 300
2.17 Remote Setpoint Input — SX90 only There are two inputs;
4-20mA and 0-10Volts which can be fitted in place of digital communications
It is not necessary to fit an external burden resistor to the
4-20mA inputIf the 4-20mA remote setpoint input is connected and valid
(>3.5mA; < 22mA) it will be used as the main setpoint (if
configured). If it is not valid or not connected the controller
will try to use the Volts input. Volts sensor break occurs at +11V.
The two inputs are not isolated from each otherIf neither remote input is valid the controller will fall back
to the internal setpoint, SP1 or SP2 and flash the alarm beacon.
The alarm can also be configured to activate a relay (see section
12.1.1) or read over digital communications.To calibrate the remote setpoint, if required, see section
16.5.4A local SP trim value is available in access level 3 (see
section 10.1).Isolated 300Vac CATII.
2.18 Digital Communications — SX90 only Digital communications
uses Modbus protocol. It is available in SX90 only as EIA422
(EIA485 5-wire).EIA422 (5-wire)
Isolated 300Vac CATII.
RV
RI
RC
VI
AA
AB
AC
Rx+
Rx-
Com.
Tx+
Tx-
HB
HC
HD
HE
HF
5A
5B
5C
OP5
OP6
3A
3B
+
—
V
+
-3C
3D
PH
PW
PL
D
4A
4C
4B
BLB
LC
C
4A
4C
4B
BLB
LC
ALA
LC
-
IM-P323-35 CH Issue 3 9
SX80/90
IM-P323-35: Part No 3231354 Issue 7.0 Feb-13 9
2.18.1 General Note About Relays and Inductive Loads
High voltage transients may occur when switching inductive loads
such as some contactors or solenoid valves. Through the internal
contacts, these transients may introduce disturbances which could
affect the performance of the instrument. For this type of load it
is recommended that a snubber is connected across the normally open
contact of the relay switching the load. The snubber recommended
consists of a series connected resistor/capacitor (typically
15nF/100). A snubber will also prolong the life of the relay
contacts. A snubber should also be connected across the output
terminal of a triac output to prevent false triggering under line
transient conditions.WARNING When the relay contact is open or it is connected to a
high impedance load, the snubber passes a current (typically 0.6mA
at 110Vac and 1.2mA at 230Vac). You must ensure that this current
will not hold on low power electrical loads. If the load is of this
type the snubber should not be connected.2.19 Controller Power Supply 1. Before connecting the instrument
to the power line,make sure that the line voltage corresponds to the description
on the identification label.2. Use copper conductors only.
3. The power supply input is not fuse protected. This should be
provided externallyHigh voltage supply: 100 to 230Vac, +/-15%,
48 to 62 Hz
Recommended external fuse ratings are:-
Fuse type: T rated 2A 250V.
2.20 Digital Communications Digital communications uses the
Modbus protocol. The interface is EIA422 (5-wire).Cable screen should be grounded at one point only to prevent
earth loops.Isolated 240Vac CAT II.
2.20.1 EIA422 Connections — SX90 only
The KD485 communications converter is recommended for:
Interfacing 5-wire to 2-wire connections. To buffer an EIA422
network when more than 32instruments on the same bus are required
Line Neutral
Power Supply
L
N
Com
Tx
Com Rx Tx
Screen
Rx+(A)
Rx-(B)
Common
Tx+(A)
Tx-(B)
Daisy Chain to further controllers
Twised pairs
220 termination resistor
220 termination resistor on last controller in the line
EIA232 to EIA422/EIA485 4-wire communications converter Eg Type
KD485RxB Com TxA RxA TxB
Com Tx Rx
HB
HC
HD
HE
HF
Screen
-
IM-P323-35 CH Issue 310
SX80/90
10 IM-P323-35: Part No 3231354 Issue 7.0 Feb-13
2.21 Wiring Examples 2.21.1 Pressure Control This example shows
a controller connected to a 4-20mA pressure control valve.Safety requirements for permanently connected equipment
state:A switch or circuit breaker shall be included in the building
installationIt shall be in close proximity to the equipment and within easy
reach of the operatorIt shall be marked as the disconnecting device for the
equipmentA single switch or circuit breaker can drive more than one
instrument2.21.2 Valve Position This diagram shows an example of wiring
for a valve position motor.All wiring diagrams are intended for general guidance only.
SX80N
N
Auxiliary circuit fuse
Controller fuse
Thermocouple
Valve motor
L
Alarm relay
JA
JF
B
AA
AB
AC
VI
V+
V-
1A
1B
2A
2B
L
N
Contactor
N*
*
—
+
* Snubber, see section 2.18.1
Valve motor fuse
HE
HF
LA
LB
LC
N
N
Auxiliary circuit fuse
Controller fuse
4-20mA input from pressure transducer
4-20mA pressure control valve
L
2.49
—
Alarm relay
JA
JF
B
HE
HF
AA
AB
AC
VI
V+
V-
1A
1B
2A
2B
L
N
+
Contactor
SX80 LA
LB
LC
-
IM-P323-35 CH Issue 3 11
SX80/90
IM-P323-35: Part No 3231354 Issue 7.0 Feb-13 11
2.21.3 Cascade Control Temperature/Pressure The application of
temperature control, with pressure limitation can be used when
there is a pressure or temperature limit on anitem of equipment, or
a temperature limit of a sensitive product. This application is
described as Cascade Control. The application uses a single control
valve to control both temperature and pressure. The example below
shows the physical layoutand the associated wiring connections for
a typical temperature/pressure application:SX 90 Pressure
Controller
SX 80 Temperature Controller
Pressure Transmitter
PT 100
SX90 LN
2A
2B
V+
V-
RI
RC
LNSX80
+
—
a
b
b
a
b
b
Two wire Pressure transmitter
4-20mA
2.49
4-20mA
Control valve
Temperature sensor (RTD)
Live Neutral
Controller fuse
Note: SX80 setting using Quick Code 12345 = PHXXE
SX90 setting using Quick Code 1 = Select number that matches the
range of the pressure transducer 2 = H; 3 = X; 4 = X; 5 = ESee Quick Code section 4.1.1 for further details.
+-
+-
Remote SP input
Temp control output
Pressure control output
3C
3D
VI
V+
V-
2A
2B
+
-4-20mA
1
2
-
IM-P323-35 CH Issue 312
SX80/90
12 IM-P323-35: Part No 3231354 Issue 7.0 Feb-13
2.21.4 Cascade Control Back Pressure/Pressure Reduction The
objective here is to reduce the steam pressure but not to exceed
the output of the boiler.The SX80 is set to the pressure necessary to maintain good
boiler operating conditions. If the load exceeds the boiler
capacity and the pressure at the boiler drops the control valve
closes and maintains a suitable upstream pressure. When the steam
demand falls,and allows the boiler pressure to return to its normal
operating pressure, the valve will re-open.Consider the boiler pressure to be 10 bar g and the reduced
pressure 5 bar g. The minimum allowable boiler pressure is 8 bar
gwhich means that if this pressure is reached the valve is fully
shut.The SX90 remote setpoint limit will represent the downstream
setpoint, 5 bar g The SX80 local setpoint will represent the
upstream setpoint, 8 bar gMinimum Pressure
8 bar g
Boiler Pressure 10 bar g
SX 90 Pressure Controller
SX 80 Direct Acting Back Pressure
Controller
Reduced Pressure 5 bar g
Live Neutral
SX90 LN
2A
2B
V+
V-
RI
RC
LNSX80
+
—
Two wire Pressure transmitter
4-20mA
2.49
1
24-20mA
Control valve
Controller fuse
Note: SX80 & SX90 setting using Quick Code
1 = Select number that matches the range of the pressure
transducer 2 = H; 3 = X; 4 = X; 5 = ESee Quick Code section 4.1.1 for further details.
+-
+-
Remote SP input
Back pressure control output
Pressure control output
3C
3D
2A
2B
4-20mA HE
HF
V+
V- 2.49
+-
12
Two wire Pressure transmitter
+
-4-20mA
-
IM-P323-35 CH Issue 3 13
SX80/90
IM-P323-35: Part No 3231354 Issue 7.0 Feb-13 13
3. Safety and EMC Information This controller is intended for
industrial temperature and process control applications when it
will meet the requirements of the European Directives on Safety and
EMC. Use in other applications, or failure to observe the
installation instructions of this manual may impair safety or EMC.
The installer must ensure the safety and EMC of any particular
installation.Safety This controller complies with the European Low Voltage
Directive 2006/95/EC, by the application of the safety standard EN
61010.Electromagnetic compatibility This controller conforms with the
essential protection requirements of the EMC Directive 2004/108/EC,
by the application of a Technical Construction File. This
instrument satisfies the general requirements of the industrial
environment defined in EN 61326. For more information on product
compliance refer to the Technical Construction File.GENERAL The information contained in this manual is subject to
change without notice. While every effort has been made to ensure
the accuracy of the information, your supplier shall not be held
liable for errors contained herein.Unpacking and storage The packaging should contain an instrument
mounted in its sleeve, two mounting brackets for panel installation
and an Installation & Operating guide. Certain ranges are
supplied with an input adapter. If on receipt, the packaging or the
instrument are damaged, do not install the product but contact your
supplier. If the instrument is to be stored before use, protect
from humidity and dust in an ambient temperature range of -30oC to
+75oC.SERVICE AND REPAIR This controller has no user serviceable
parts. Contact your supplier for repair.Caution: Charged capacitorsBefore removing an instrument from
its sleeve, disconnect the supply and wait at least two minutes to
allow capacitors to discharge. It may be convenient to partially
withdraw the instrument from the sleeve, then pause before
completing the removal. In any case, avoid touching the exposed
electronics of an instrument when withdrawing it from the sleeve.
Failure to observe these precautions may cause damage to components
of the instrument or some discomfort to the user.Electrostatic discharge precautions When the controller is
removed from its sleeve, some of the exposed electronic components
are vulnerable to damage by electrostatic discharge from someone
handling the controller. To avoid this, before handling the
unplugged controller discharge yourself to ground.Cleaning Do not use water or water based products to clean
labels or they will become illegible. Isopropyl alcohol may be used
to clean labels. A mild soap solution may be used to clean other
exterior surfaces of the product.3.1 Installation Safety Requirements
Safety Symbols Various symbols may be used on the controller.
They have the following meaning:Helpful hints
Personnel Installation must only be carried out by suitably
qualified personnel in accordance with the instructions in this
manual.Enclosure of Live Parts To prevent hands or metal tools touching
parts that may be electrically live, the controller must be
enclosed in an enclosure.Caution: Live sensors The controller is designed to operate if
the temperature sensor is connected directly to an electrical
heating element. However you must ensure that service personnel do
not touch connections to these inputs while they are live. With a
live sensor, all cables, connectors and switches for connecting the
sensor must be mains rated for use in 230Vac +15%. .Wiring It is important to connect the controller in accordance
with the wiring data given in this guide. Take particular care not
to connect AC supplies to the low voltage sensor input or other low
level inputs and outputs. Only use copper conductors for
connections (except thermocouple inputs) and ensure that the wiring
of installations comply with all local wiring regulations. For
example in the UK use the latest version of the IEE wiring
regulations, (BS7671). In the USA use NEC Class 1 wiring
methods.Power Isolation The installation must include a power isolating
switch or circuit breaker. This device should be in close proximity
to the controller, within easy reach of the operator and marked as
the disconnecting device for the instrument.Overcurrent protection The power supply to the system should be
fused appropriately to protect the cabling to the units.Voltage rating The maximum continuous voltage applied between
any of the following terminals must not exceed 230Vac +15%:relay output to logic, dc or sensor connections;
any connection to ground. The controller must not be wired to a
three phase supply with an unearthed star connection. Under fault
conditions such a supply could rise above 264Vac with respect to
ground and the product would not be safe.Equipment protected throughout by DOUBLE INSULATION
! Caution, (refer to accompanying documents)
-
IM-P323-35 CH Issue 314
SX80/90
14 IM-P323-35: Part No 3231354 Issue 7.0 Feb-13
Conductive pollution Electrically conductive pollution must be
excluded from the cabinet in which the controller is mounted. For
example, carbon dust is a form of electrically conductive
pollution. To secure a suitable atmosphere in conditions of
conductive pollution, fit an air filter to the air intake of the
cabinet. Where condensation is likely, for example at low
temperatures, include a thermostatically controlled heater in the
cabinet. This product has been designed to conform to BSEN61010
installation category II, pollution degree 2. These are defined as
follows:-Installation Category II (CAT II)
The rated impulse voltage for equipment on nominal 230V supply
is 2500V.Pollution Degree 2
Normally only non conductive pollution occurs. Occasionally,
however, a temporary conductivity caused by condensation shall be
expected.Grounding of the temperature sensor shield In some installations
it is common practice to replace the temperature sensor while the
controller is still powered up. Under these conditions, as
additional protection against electric shock, we recommend that the
shield of the temperature sensor is grounded. Do not rely on
grounding through the framework of the machine.Over-temperature protection When designing any control system it
is essential to consider what will happen if any part of the system
should fail. In temperature control applications the primary danger
is that the heating will remain constantly on. Apart from spoiling
the product, this could damage any process machinery being
controlled, or even cause a fire. Reasons why the heating might
remain constantly on include:the temperature sensor becoming detached from the process
thermocouple wiring becoming short circuit;
the controller failing with its heating output constantly on
an external valve or contactor sticking in the heating
conditionthe controller setpoint set too high. Where damage or injury is
possible, we recommend fitting a separate over-temperature
protection unit, with an independent temperature sensor, which will
isolate the heating circuit. Please note that the alarm relays
within the controller will not give protection under all failure
conditions.Installation requirements for EMC To ensure compliance with the
European EMC directive certain installation precautions are
necessary as follows:For general guidance an EMC Installation Guide is available —
contact your supplier.When using relay outputs it may be necessary to fit a filter
suitable for suppressing the emissions. The filter requirements
will depend on the type of load.If the unit is used in table top equipment which is plugged into
a standard power socket, then it is likely that compliance to the
commercial and light industrial emissions standard is required. In
this case to meet the conducted emissions requirement, a suitable
mains filter should be installed.Routing of wires To minimise the pick-up of electrical noise,
the low voltage DC connections and the sensor input wiring should
be routed away from high-current power cables. Where it is
impractical to do this, use shielded cables with the shield
grounded at both ends. In general keep cable lengths to a
minimum. -
IM-P323-35 CH Issue 3 15
SX80/90
IM-P323-35: Part No 3231354 Issue 7.0 Feb-13 15
4. Switch On A brief start up sequence consists of a self test
during which the software version number and the Spirax instrument
type is shown. The way in which the controller starts up depends on
factors described below in sections 4.1, 4.2 and 4.3.4.1 New Controller If the controller is new AND has not
previously been configured it will start up showing the Quick
Configuration codes. This is a built in tool which enables you to
configure the input type and range, control type and output
functions alarm operation and language.! Incorrect configuration can result in damage to the process
and/or personal injury and must be carried out by a competent
person authorised to do so. It is the responsibility of the person
commissioning the controller to ensure the configuration is
correct.4.1.1 Quick Start Code The quick start code consists of a SET of
five characters. The upper section of the display shows the set
selected (in the SX series there is only one set), the lower
section shows the five digits which make up the set.Adjust these as follows:-.
1. Press any button. The characters will change to -, the first
one flashing.2. Press or to change the flashing character to the required
code shown in the quick code tables see below. Note: An x indicates
that the option is not fitted.3. Press to scroll to the next character.
You cannot scroll to the next character until the current
character is configured.To return to the first character press 4. When the last digit
has been entered press again,the display will show . To repeat the process press either or
.When satisfied with the configuration, press or to
.
The controller will then automatically go to the operator level
1, section 4.3.SET 1
* Language — scrolling alarm and timer messages are in the
language selected. Names of parameters are in English.2. Control type and I/O
_
D Boundless VP, on OP3/4 (SX80)
Boundless VP, on OP5/6 (SX90)
Alarm relay on IO1
V SX90 only
Bounded VP on OP5/6
Alarm relay on IO1. Analogue feedback
P SX90 only
Bounded VP on OP5/6
Alarm relay on IO1. Potentiometer feedback
A SX90 only
Analogue Heat/Cool PID output on OP2/OP3
Alarm relay on IO1
Alarm relay on OP4
H Analogue Heat only PID output on OP2 (SX80)
OP2 tracks OP3 (SX90)
Alarm relay on IO1
Alarm relay on OP4
1 2 3 4 5
1. Input type, range and DP
_
P PT100 RTD
99.9 to 300.0OC,2DP
K K t/c -200 to 1372 OC, 2DP
0 4-20mA 0 to 1.60 BAR, 2DP
1 4-20mA 0 to 2.50 BAR, 2DP
2 4-20mA 0 to 4.00 BAR, 2DP
3 4-20mA 0 to 6.00 BAR, 2DP
4 4-20mA 0 to 10.00 BAR, 2DP
5 4-20mA 0 to 16.00 BAR, 2DP
6 4-20mA 0 to 25.00 BAR, 2DP
7 4-20mA 0 to 40.00 BAR, 2DP
8 4-20mA -50 to 500 OC 0DP
9 4-20mA 0 to 100 OC 0DP
A 4-20mA 100 to 250 OC 0DP
3. IO1 alarm relay
Manual Latching
X Unconfigured
_
0 Full scale high
1 Full scale low
2 Deviation high
3 Deviation low
4 Deviation band
5. Language *
_
E English
F French
S Spanish
I Italian
G German
OP4 alarm relay (not if SX80 and VP)
Manual Latching
X Unconfigured
_
0 Full scale high
1 Full scale low
2 Deviation high
3 Deviation low
4 Deviation band
p H 0 1 e Example
-
IM-P323-35 CH Issue 316
SX80/90
16 IM-P323-35: Part No 3231354 Issue 7.0 Feb-13
4.2 To Re-Enter Quick Code mode If you need to re-enter the
Quick Configuration mode this can always be done as follows:- 1.
Power down the controller2. Hold down the button, and power up the controller again.
3. Keep the button pressed until code is displayed. 4. Enter the
configuration code (this is defaulted to 4 in anew controller) 5. The quick start codes may then be set as
describedpreviously
Parameters may also be configured using a deeper level of
access. This is described in later chapters of this manual.If the controller is started with the button held down, as
described above, and the quick start codes are shown with dots
(e.g. K.D.0.1.E), this indicates that the controller has been
re-configured in a deeper level of access and, therefore, the quick
start codes may not be valid. If thequick start codes are accepted by scrolling to then the quick
start codes are reinstated.4.3 Pre-Configured Controller or Subsequent Starts
After the brief start up sequence the quick start codes are
normally shown. It will then proceed to Operator Level 1.You will
see the display similar to the one shown below. It is called the
HOME display.4.4 Front Panel Layout ALM Alarm active (Red) OP1 lit when
output 1 is ON (heating or VP raise) OP2 lit when output 2 is ON
(cooling or VP lower ) OP3 not used OP4 not used SPX Alternative
setpoint in use (e.g. setpoint 2) REM Remote digital setpoint. Also
flashes whendigital communications active RUN Timer is running
RUN (flashing) Timer is in hold MAN Manual mode selected
Operator Buttons:- From any display — press to return to HOME
Press to select a new parameter. If held down itwill continuously scroll through parameters.
Press to decrease a value
Press to increase a value
4.4.1 To Set The Target Temperature. The controller can be run
from either internal or remote setpoints. Depending on the
configuration, the Working Setpoint will show:1. The Local Setpoint value (SP1, SP2 or SP3 depending on the
setpoint selected)2. The Remote Setpoint value 3. A combination of both Local and
Remotesetpoints 4. Local setpoint with the Remote as a trim 5. Remote
setpoint with the Local as a trimIf mode 1 above is selected, then from the HOME display:-
Press
to raise the setpoint
Press
to lower the setpoint
The new setpoint is entered when the button is released and is
indicated by a brief flash of the display.When a Remote setpoint is configured (modes 2, 3, 4 or 5 above)
the REM beacon is illuminated and the setpoint can only be adjusted
by the voltage or current level on the Remote Input terminals or by
adjusting the internal setpoints SP1, SP2 or SP3 shown in section
10.Measured Temperature or Pressure (Process Value PV)
Target Temperature or Pressure (Working Setpoint SP)
Meter (SX90 only) by default this shows valve position.
The meter may be configured to show other functions — see
section 17.1.4 Meter Configuration — Access List -
IM-P323-35 CH Issue 3 17
SX80/90
IM-P323-35: Part No 3231354 Issue 7.0 Feb-13 17
4.4.2 Alarms Up to two process alarms may be configured using
the Quick Start Codes section 4.1.1. Each alarm can be configured
for:-Full Scale Low
The alarm is shown if the process value falls below a set
thresholdFull Scale High
The alarm is shown if the process value rises above a set
thresholdDeviation Low
The alarm is shown if the process value deviates below the
setpoint by a set thresholdDeviation High
The alarm is shown if the process value deviates above the
setpoint by a set thresholdDeviation Band
The alarm is shown if the process value deviates above or below
the setpoint by a set thresholdIf an alarm is not configured it is not shown in the list of
operator level parameters, section 4.4.7 and 5.3.It is also possible to configure two further alarms, see section
12, by selecting configuration level. Additional alarm messages may
be shown such as CONTROL LOOP BROKEN. This occurs if the controller
does not detect a change in process value following a change in
output demand after a suitable delay time. Another alarm message
may be INPUT SENSOR BROKEN (SBr). This occurs if the sensor becomes
open circuit; the output level will adopt a SAFE value which can be
set up in Operator Level 3, see section 11.10.Two further alarm types are also available. These are:-
Rising rate of change rrc
An alarm will be detected if the rate of change (units/minute)
in a positive direction exceeds the alarm thresholdFalling rate of change
Frc
An alarm will be detected if the rate of change (units/minute)
in a negative direction exceeds the alarm thresholdThese alarms cannot be configured by the Quick Start Code they
can only be configured in Configuration Mode, see section 12.3.4.4.3 Alarm Indication If an alarm occurs, the red ALM beacon
will flash. A scrolling text message will describe the source of
the alarm. Any output (usually a relay) attached to the alarm will
operate. When configured using the Quick Start Code the relay is
de-energised in alarm so that an alarm is indicated if power to the
controller fails. Also using the Quick Start Code alarms are
configured as manual latching.Manual Latching
The alarm continues to be active until both the alarm condition
is removed AND the alarm is acknowledged. The acknowledgement can
only occur AFTER the condition causing the alarm is removed.4.4.4 To Acknowledge an Alarm
Press and (ACK) together.
If the alarm is still present when acknowledged it is still
indicated as above. If the alarm is no longer present when
acknowledged the ALM beacon will go off, the scrolling message
disappears and the relay is reset.To configure any other type of alarm, refer to section 12.3.1.
These may be:-Non latching
A non latching alarm will reset itself when the alarm condition
is removed.Auto Latching
An auto latching alarm requires acknowledgement before it is
reset. The acknowledgement can occur BEFORE the condition causing
the alarm is removed. -
IM-P323-35 CH Issue 318
SX80/90
18 IM-P323-35: Part No 3231354 Issue 7.0 Feb-13
4.4.5 Auto, Manual and Off Mode
The controller can be put into Auto, Manual or Off mode see next
section.Auto mode is the normal operation where the output is adjusted
automatically by the controller in response to changes in the
process value.In Auto mode all the alarms and the special functions (auto
tuning, soft start and timer) are operativeManual mode means that the controller output power is manually
set by the operator. The input sensor is still connected and
reading the process value but the control loop is open.In manual mode the MAN beacon will be lit, Band and deviation
alarm are masked, the auto-tuning, timer and programmer functions
are disabled.The power output can be continuously increased or decreased
using the or buttons.! Manual mode must be used with care. The power level must not
be set and left at a value that can damage the process or cause
excess process condition. The use of a separate over-process
controller is recommended.Off mode means that the heating and cooling (or raise/lower)
outputs are turned off. The process alarm and analogue
retransmission outputs will, however, still be active while Band
and deviation alarm will be OFF.4.4.6 To Select Auto, Manual or Off Mode
Press and hold and (Mode) together for more than 1 second. This
can only be accessed from the HOME display.1. Auto is shown in the upper display. After 5 seconds the lower
display will scroll the longer description of this parameter. ie lo
op m ode au to m anua l o ff2. Press to select mAn. Press again to select OFF. This is shown
in the upper display.3. When the desired Mode is selected, do not push any other
button. After 2 seconds the controller will return to the HOME
display.4. If OFF has been selected, OFF will be shown in the lower
display and the heating/cooling (raise/lower) outputs will be
off5. If manual mode has been selected, the MAN beacon will light.
The upper display shows the process value and the lower display the
demanded output power.The transfer from Auto to manual mode is bumpless. This means
the output will remain at the current value at the point of
transfer. Similarly when transferring from Manual to Auto mode, the
current value will be used. This will then slowly change to the
value demanded automatically by the controller.6. To manually change the power output, press or to lower or
raise the output. The output power iscontinuously updated when these buttons are pressed
7. To return to Auto mode, press and together. Then press to
select Auto.t + u
t
t + u
t
-
IM-P323-35 CH Issue 3 19
SX80/90
IM-P323-35: Part No 3231354 Issue 7.0 Feb-13 19
4.4.7 Level 1 Operator Parameters
A minimal list of parameters are available in operator Level 1
which is designed for day to day operation. Access to these
parameters is not protected by a pass code.Press to step through the list of parameters. The mnemonic of
the parameter is shown in the lower display. After five seconds a
scrolling text description of the parameter appears.The value of
the parameter is shown in the upper display. Press or to adjust
this value. If no key is pressed for 30 seconds the controller
returns to the HOME displayThe parameters that appear depend upon
the functions configured, for example, the Timer and Alarm
parameters are not shown if the function is not configured. They
are:-Parameter Mnemonic
Scrolling Display and Description
Alterability
WRK.OP WORKING OUTPUT The active output value
Read only. Appears when the controller is in AUTO or OFF mode.
In a motorised valve controller this is the inferred position of
the valveWKG.SP WORKING SETPOINT The active setpoint value.
Read only. Only shown when the controller is in MAN or OFF
mode.SP1 SETPOINT 1 Alterable
SP2 SETPOINT 2 Alterable
SP3 SETPOINT 3 Alterable
DWELL SET TIME DURATION Timer set time
Alterable. Only shown if the timer is configured.
T.REMN TIME REMAINING Time to end of set period
Read only 0:00 to 99.59 hh:mm or mm:ss
A1.xxx ALARM 1 SETPOINT
Read only. Only shown if the alarm is configured. xxx = alarm
type as follows:- HI = High alarm LO = Low alarm d.HI = Deviation
high d.LO = Deviation low d.HI = Deviation high rrc = Rising rate
of change (units/minute) Frc = Falling rate of change
(units/minute)A2.xxx ALARM 2 SETPOINT
A3.xxx ALARM 3 SETPOINT
A4.xxx ALARM 4 SETPOINT
Note: Alarm 3 and 4 can only be configured in
Conf(Configuration) level and, therefore, are not normally shown.
Alarms 1 and 2 can only be configured as rate of change alarms in
Conf level. rrc and Frc will not, therefore, normally be seen.5. Operator Level 2 Level 2 provides access to additional
parameters. Access to these is protected by a security code.5.1 To Enter Level 2 1. From any display press and hold .
2. After a few seconds the display will show:-
3. Release .
(If no button is pressed for about 45 seconds the display
returns to the HOME display)4. Press or to
choose Lev 2 (Level 2)
5. After 2 seconds the
display will show:-
6. Press or to enter the
pass code. Default = 2
If an incorrect code is entered the controller reverts to Level
1.5.2 To Return to Level 1 1. Press and hold
2. Press to select LEv 1The controller will return to the level
1 HOME display. Note: A security code is not required when going
from a higher level to a lower level.5.3 Level 2 Parameters Press to step through the list of
parameters. The mnemonic of the parameter is shown in the lower
display. After five seconds a scrolling text description of the
parameter appears.The value of the parameter is shown in the upper
display. Press or to adjust this value. If no key is pressed for 30
seconds the controller returns to the HOME display.Backscroll is achieved when you are in this list by pressing
while holding down .The following table shows a list of all
possible parameters available in Level 2. -
IM-P323-35 CH Issue 320
SX80/90
20 IM-P323-35: Part No 3231354 Issue 7.0 Feb-13
Mnemonic Scrolling Display and description Range
WKG.SP WORKING SETPOINT is the active setpoint value and appears
when the controller is in Manual mode. It may be derived from SP1
or SP2, or, if the controller is ramping (see SP.RRT or SP.FRT), it
is the current ramp value.Settable between SP.HI to SP.LO
WRK.OP WORKING OUTPUT is the output from the controller
expressed as a percentage of full output. It appears when the
controller is in Auto mode. In a motorised valve controller it is
the inferred position of the valve For a time proportioning output,
50% = relay output on or off for equal lengths of time. For On/Off
control: OFF = 1%Read only value 0 to 100% for heating 0 to 100% for cooling -100
(max cooling) to 100% (max heatingUNITS DISPLAY UNITS — Temperature display units. Percentage is
provided for linear inputs.OC Degrees C OF Degrees F Ok Degrees K
nonE None
PErc Percentage
SP.HI SETPOINT HIGH — High setpoint limit applied to SP1 and
SP2. Alterable between the controller range limits. These are
defined in the Quick Code section 4.1.1.SP.LO SETPOINT LOW — Low setpoint limit applied to SP1 and
SP2By default the remote setpoint is scaled between SP.HI and
SP.LO. Two further parameters (REM.HI and REM.LO) are available in
access level 3 to limit the Remote SP range if required. See
section 10.1.SP1 SETPOINT 1 allows control setpoint 1 value to be adjusted
Alterable: SP.HI to SP.LOSP2 SETPOINT 2 allows control setpoint 2 value to be adjusted
Alterable: SP.HI to SP.LOSP3 SETPOINT 3 allows control setpoint 3 value to be adjusted
Alterable: SP.HI to SP.LOSP.RRT SETPOINT RISING RATE LIMIT — This allows a rate of change
to be applied to the setpoint value in an increasing direction. It
allows the process (temperature or pressure) to increase at a
controlled rate.OFF to 3000 display units per minute. Default OFF.
SP.FRT SETPOINT FALLING RATE LIMIT — This allows a rate of
change to be applied to the setpoint value in an decreasing
direction. It allows the process (temperature or pressure) to
decrease at a controlled rate.OFF to 3000 display units per minute. Default OFF.
HOLD.B HOLDBACK — SX90 ONLY. This stops the setpoint ramp if the
deviation between the setpo
- Manuals
- Brands
- Spirax Sarco Manuals
- Controller
- SX100
- Quick setup manual
-
Contents
-
Table of Contents
-
Bookmarks
Quick Links
2230053/2
Printed in the UK
IM-S27-06 CH Issue 2
SX100
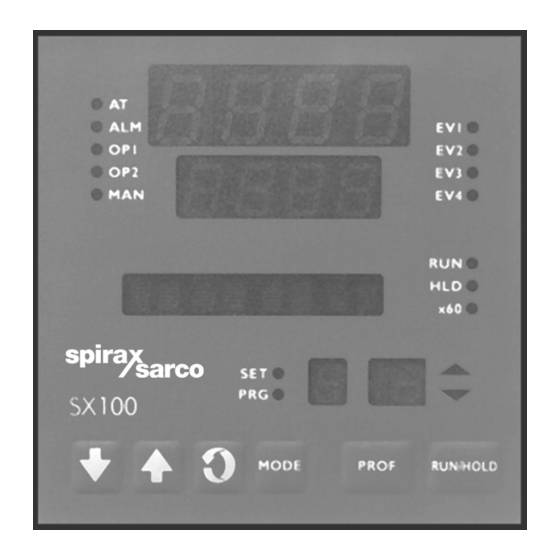
Controller
Quick Set-up Manual
1. Introduction
2. Controller
IM-S27-06
CH Issue 2
© Copyright 2003
1
Related Manuals for Spirax Sarco SX100
Summary of Contents for Spirax Sarco SX100
-
Page 1
2230053/2 IM-S27-06 CH Issue 2 SX100 Controller Quick Set-up Manual 1. Introduction 2. Controller Printed in the UK © Copyright 2003 IM-S27-06 CH Issue 2… -
Page 2
1. Introduction The purpose of this manual is to allow quick set-up of the SX100 controller, providing information on the most commonly used functions when used for control of the EasiHeat unit. See the SX100 Operator’s Manual and Site Manual. -
Page 3: Selecting And Running A Program
Press SCROLL key to return to BASE MODE. 2.2 Selecting and running a program (Refer to SX100 Operator’s Manual) Note: if a program is already running, (i.e the ‘RUN’ indicator is lit), first press the RUN /HOLD key for more than 5 seconds to return unit to BASE MODE.
-
Page 4: Adjusting The Setpoint
2.3 Adjusting the setpoint (Refer to SX100 Operator’s Manual) Note: This setting is normally set to 0°C . It does not represent the running setpoint temperature. Setting the temperature at this level will prevent the steam valve opening with no circulating pump running.
-
Page 5
Table 1 Parameters common to all programs (‘P No.’ = A) (PROGRAM DEFINE MODE) To enter from BASE MODE: Press UP and SCROLL buttons together. Press UP button to select unlock code. Press SCROLL button. Press PROF button repeatedly until ‘A’ is visible in the ‘P No.’ display. This permits the user to view / modify parameters common to all programs. -
Page 6
Table 2 Parameters which apply to a specific program No. (‘P No.’ = 1 — (PROGRAM DEFINE MODE) To enter from BASE MODE: Press UP and SCROLL buttons together. Press UP button to select unlock code. Press SCROLL button. Press PROF button repeatedly until required program no.
 -
Page 7: Parameters In Any / Each Segment In A Specific Program
Table 3 Parameters which apply to segments in a specific program (‘P No.’ = 1 — 8, SEG No. = 1 — 5) (PROGRAM DEFINE MODE) To enter from BASE MODE: Start from Table 2, with SEG window blank, then to move on to the Segment No. parameters, press the RUN / HOLD button (Segment No.
-
Page 8
2.5 Example of how to set a program: In this example we wish to create a program which will turn on domestic hot water heating in a building. (This example is the same program as is factory set in Program No. 1). The required settings are that: Start time = 0800 hrs Days hot water is required = Monday to Friday… -
Page 9
Segment 1 Press the RUN / HOLD button so that ‘1’ appears in the SEG window (This means we are programming the settings for Segment No. 1). Use UP and DOWN buttons to set the required ‘Final SP’, i.e. 65. This is the desired temperature for the end of the segment. -
Page 10: Controller Parameters
Table 4 CONTROLLER DEFINE MODE To enter from BASE MODE: — Press UP and SCROLL buttons together. — Press UP button to select unlock code. — Press SCROLL button. — Press MODE button. Controller parameters These are independent of Program or Segment Nos. (‘P No.’ 1 — 8), SET led on, SEG display blank.
-
Page 11
Table 4 (Cont’d) CONTROLLER DEFINE MODE Message Factory Parameter Function display setting Process high HiAlarm1 Alarm level alarm 1 value Process low LoAlarm1 Alarm level alarm 1 value Band alarm 1 value BaAlarm1 Band alarm Deviation alarm DeAlarm1 Deviation alarm Alarm 1 hysteresis value All Hyst Hysteresis band… -
Page 12: Entry Into Configuration Mode
2.6 Example of how to set the PID settings (Refer to Table 4, pages 10 and 11) It is a good idea to set the PID values to their optimum values, using for example, the Ziegler-Nicholls frequency response method (see DB-S27-08). In order to adjust the settings, from BASE MODE, or RUN MODE: Press UP and SCROLL buttons together.
-
Page 13
Table 5 Configuration mode parameters Message Factory Parameter Function display setting Primary input Code displayed defines Input 7220 range input type / range Control action Control Specifies control action of output 1 Stdr Alarm 1 type Alarm 1 Specifies alarm 1 operation P_hi Alarm 2 type Alarm 2… -
Page 14: Manual Control
2.8 Hardware definition parameters (Refer to SX100 Site Manual) This is a special facility which specifies the hardware fitted (input type, output types etc.); this must be compatible with the hardware actually fitted. It can be accessed, in CONFIGURATION MODE by pressing the DOWN and SCROLL keys together.
-
Page 15
IM-S27-06 CH Issue 2… -
Page 16
IM-S27-06 CH Issue 2…
 (PROGRAM DEFINE MODE) To enter from BASE MODE: Press UP and SCROLL buttons together. Press UP button to select unlock code. Press SCROLL button. Press PROF button repeatedly until required program no.
 |
Detail Specifications: 738/738315-sx80.pdf file (20 Mar 2023) |
Accompanying Data:
Spirax Sarco SX80 Controller, Temperature Controller PDF Installation And Maintenance Instructions Manual (Updated: Monday 20th of March 2023 08:03:44 AM)
Rating: 4.9 (rated by 54 users)
Compatible devices: TN2000RH, LC3050, IP2AM, SP500, LC1350, LC2650, PN 3000 Series, PN9400E Series.
Recommended Documentation:
Text Version of Installation And Maintenance Instructions Manual
(Ocr-Read Summary of Contents, UPD: 20 March 2023)
-
94, IM-P323-35 CH Issue 3 92 SX80/90 92 IM-P323-35: Part No 3231354 Issue 7.0 Feb-13 Linear input range 0-10V, 0-20mA Zero offset User adjustable …
-
97, IM-P323-35 CH Issue 3 95 SX80/90 IM-P323-35: Part No 3231354 Issue 7.0 Feb-13 95 20. General Index 1 1.FUNC 32 1.PLS 32, 74 1.SENS 32, 74 1.SRC.…
-
95, IM-P323-35 CH Issue 3 93 SX80/90 IM-P323-35: Part No 3231354 Issue 7.0 Feb-13 93 19. Parameter Index This is a list of parameters used in SX series controll…
-
83, IM-P323-35 CH Issue 3 81 SX80/90 IM-P323-35: Part No 3231354 Issue 7.0 Feb-13 81 16.5 To Re-calibrate an Input If it considered nece…
-
11, Spirax Sarco SX80 IM-P323-35 CH Issue 3 9 SX80/90 IM-P323-35: Part No 3231354 Issue 7.0 Feb-13 9 2.18.1 General Note About Relays and Inductive…
-
50, IM-P323-35 CH Issue 3 48 SX80/90 48 IM-P323-35: Part No 3231354 Issue 7.0 Feb-13 11.10 Control Parameters The following table shows the parameters avai…
-
53, IM-P323-35 CH Issue 3 51 SX80/90 IM-P323-35: Part No 3231354 Issue 7.0 Feb-13 51 11.11 Example: To Configure Heating and Cooling Enter conf…
-
66, Spirax Sarco SX80 IM-P323-35 CH Issue 3 64 SX80/90 64 IM-P323-35: Part No 3231354 Issue 7.0 Feb-13 15.3 Example To Set Up Instrument Address This can be done in …
-
93, Spirax Sarco SX80 IM-P323-35 CH Issue 3 91 SX80/90 IM-P323-35: Part No 3231354 Issue 7.0 Feb-13 91 18. Appendix A TECHNICAL SPECIFICATION Analogue Input Sample rate 4…
-
17, IM-P323-35 CH Issue 3 15 SX80/90 IM-P323-35: Part No 3231354 Issue 7.0 Feb-13 15 4. Switch On A brief start up sequence consists of a self tes…
Recommended Instructions:
EFOY GO!, KDC-C100, V960-N Series, GT86, Powermate PM0525302.18, EP Caliber 400 ARF


-
TEMPERATURE CONTROLLER N321S OPERATING MANUAL — V1.9x A Man 5001244 The N321S is a controller intended for solar water heating applications. It controls the water circulation system based on the difference of temperature between the solar collector and the storage tank (or swimming pool). The instrument contains two NTC-type temperature sensors and a control output for a …
N321S 2
-
SERVICE MANUALNo. OCH725INDOOR UNITREMOTE CONTROLLER(Option)[Service Ref.]PCA-M71HAPCA-M71HA-ET CONTENTS 1. REFERENCE MANUAL……………………………… 2 2. SAFETY PRECAUTION……………………………… 3 3. PARTS NAMES AND FUNCTIONS………………8 4. SPECIFICATIONS……………………………………. 14 5. NOISE CRITERION CURVE …
PCA Series 38
-
Artisan Technology Group is your source for quality new and certied-used/pre-owned equipment• FAST SHIPPING AND DELIVERY• TENS OF THOUSANDS OF IN-STOCK ITEMS• EQUIPMENT DEMOS• HUNDREDS OF MANUFACTURERS SUPPORTED• LEASING/MONTHLY RENTALS• ITAR CERTIFIED SECURE ASSET SOLUTIONSSERVICE CENTER REPAIRSExperienced engineers and technicians on staff at our full-service …
SD Series 62
-
LEKLEKLEKECS 40/ECS 41SEInstallatörshandbok Extra KlimatsystemGBInstaller manual Extra climate systemDEInstallateurhandbuch Extra mischgruppeFIAsentajan käsikirja LisälämmitysjärjestelmäIHB 1716-8231401 …
ECS 40 64