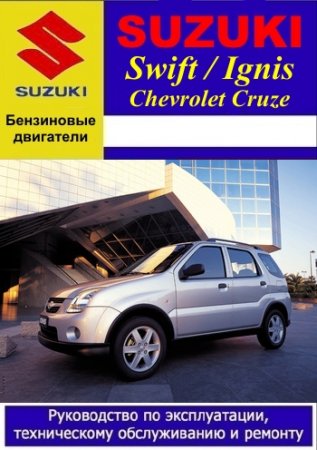
Руководство по эксплуатации, техническому обслуживанию и ремонту Suzuki Swift
Выпуск: с 2000 года по 2005 год
Бензиновые двигатели М13А 1.3 л и М15А 1.5 л
Модели 2WD, 4WD
Язык: Русский
Формат: PDF
Размер: 129 Мб
Скачать документацию Suzuki Swift
для распаковки используйте пароль — avtoproblem-net.ru
Всех автолюбителей-свифтоводов категорически приветствую!
По случаю оказалась у меня интересная книга. Чисто для ознакомления и совершенно безвоздмездно (а-ля Пух) можно качнуть здесь 3d_generation_pdf_61mB
Надеюсь, пригодится для самостоятельного ремонта. Правда по-английски все.
Может у кого есть переведенная?
Мануал здесь мануалСвифт2004-
От нашего коллеги с Драйва появилась знатная информация, цитирую:
Arnii:
Вот тут есть инструкция, сам пол года искал. может поможет. Очень хорошая книга.Есть все схемы, как и где что мерить по электрике и какие должны быть показатели. Сам по ней робота восстанавливал после ДТП.
Ссылка (сделать копипаст в браузерную строку и нажать ентер): yadi.sk/i/wVWAHB7A3ZWMVE
Цена вопроса: 0 ₽
Руководство на английском языке по техническому обслуживанию и ремонту автомобиля Suzuki Swift 1300GTi 1989 года выпуска.
- Автор: —
- Издательство: Suzuki Motor Co., Ltd.
- Год издания: 1988
- Страниц: 377
- Формат: PDF
- Размер: 108,0 Mb

Руководство на английском языке по техническому обслуживанию и ремонту автомобиля Suzuki Swift SF413.
- Автор: —
- Издательство: Motorist
- Год издания: —
- Страниц: 672
- Формат: PDF
- Размер: —
Мультимедийное руководство на английском языке по техническому обслуживанию и ремонту автомобиля Suzuki Swift серии RS 2004-2010 годов выпуска.
- Автор: —
- Издательство: Suzuki
- Год издания: 2008
- Страниц: —
- Формат: MDF
- Размер: 1,0 Gb
Руководство на испанском языке по техническому обслуживанию и ремонту автомобиля Suzuki Swift в кузове SF416 1992 года выпуска.
- Автор: —
- Издательство: Suzuki Motor Corporation
- Год издания: 1991
- Страниц: 743
- Формат: PDF
- Размер: 36,3 Mb
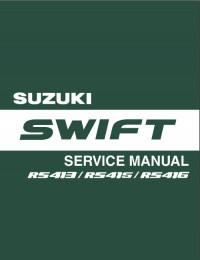
Сборник руководств на английском языке по техническому обслуживанию и ремонту автомобиля Suzuki Swift 2004-2010 годов выпуска.
- Автор: —
- Издательство: Suzuki Motor Corporation
- Год издания: —
- Страниц: —
- Формат: PDF
- Размер: 434,0 Mb
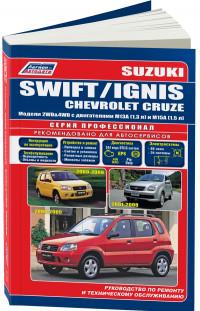
Руководство по эксплуатации, техническому обслуживанию и ремонту автомобилей Chevrolet Cruze 2001-2008, Suzuki Swift 2000-2005 и Suzuki Ignis 2000-2008 годов выпуска с бензиновыми двигателями объемом 1,3/1,5 л.
- Автор: —
- Издательство: Легион-Автодата
- Год издания: —
- Страниц: 430
- Формат: —
- Размер: —

Руководство по эксплуатации и техническому обслуживанию автомобиля Suzuki Swift с 2004 года выпуска.
- Автор: —
- Издательство: MoToR
- Год издания: —
- Страниц: 188
- Формат: —
- Размер: —
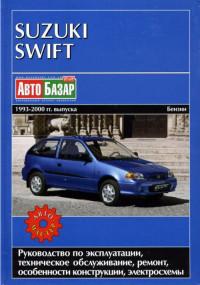
Руководство по эксплуатации, техническому обслуживанию и ремонту автомобиля Suzuki Swift 1993-2004 годов выпуска с бензиновыми двигателями.
- Автор: —
- Издательство: Автомастер
- Год издания: 2003
- Страниц: 169
- Формат: PDF
- Размер: 331,5 Mb
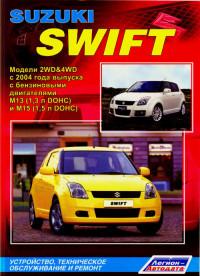
Руководство по техническому обслуживанию и ремонту автомобиля Suzuki Swift с 2004 года выпуска с бензиновыми двигателями объемом 1,3/1,5 л.
- Автор: —
- Издательство: Легион-Автодата
- Год издания: 2009
- Страниц: 404
- Формат: —
- Размер: —
Get your hands on the complete Suzuki factory workshop software
Safety check questions for practical car tests & other
information on Suzuki Swift controls etc
The information in this booklet is specifically for the
Suzuki Swift DDiS and gives the Q&As required for the
“Show me / tell me” section of the practical test, which
will be conducted at the beginning of the test.
Page 1 of 17
Safety check questions for practical car tests
Background:
Vehicle safety checks have always been part of the officially
recommended syllabus for learning to drive.
The source material can be found in the Driving Standards Authority
(DSA) publication ‘Driving the essential skills’ and ‘ The official DSA
driving test’. Advice and information on how to carry out vehicle
safety checks can also be found in the manufacturer’s handbook.
However, as from September 2003, the DSA introduced the safety
check questions as part of the practical car test.
These are basic safety checks that a driver should carry out to ensure
the vehicle is safe for use. Although some checks may involve the
candidate in opening the bonnet to identify where fluid levels would
be checked, pupils will not be asked to touch a hot engine or
physically check fluid levels.
This booklet tells you about the type of questions which are asked at
the beginning of the practical test – you will be asked to answer 2
questions. If you fail to answer either or both correctly then the
examiner will mark a maximum of 1 driving fault on your marking
sheet (DL25) (You can only make15 driving faults during the test — 16 or more results
in failure).
The numbers in brackets refer to the appendices at the back of the
booklet e.g. “Open the bonnet(1)”, refers to Appendix 1 which gives more
information on that procedure. The appendices also give additional information
on other aspects of the controls of the Suzuki Swift.
Page 2 of 17
Suzuki Swift Diesel DDiS
windscreen
washer
reservoir
Oil top-up
brake fluid
reservoircheck level
against high/low
markings
Dip-stick to check
oil level against the
minimum/maximum
markers.
Page 3 of 17
engine coolant
levelIdentify high/low level
markings on header
tank
Q1 Open the bonnet(1), identify where you would check the engine oil level
and tell me how you would check that the engine has sufficient oil.
A
The handle of the dipstick is coloured yellow for easy identification.
Explain that you pull out the dipstick, wipe oil off with a clean cloth or tissue,
replace the dipstick all the way into the engine, then remove it again.
1. MIN 2. MAX 3.DIPSTICK
The oil on the stick should be between the MIN and MAX limits shown at the
bottom of the stick. If the level is close to ‘MIN’ limit, then add enough oil to bring
the level to the ‘MAX’ limit. If the oil is constantly having to be topped up then the
car should be examined by an approved dealer to investigate the cause.
(Note that in order to obtain an accurate reading the car must be parked on a
level surface and the engine must be switched off! If the engine has only just
been switched off then the oil must be allowed to return to the ‘sump’ where the
dipstick ‘dips’ into. Allow about 5 minutes for this to happen)
Page 4 of 17
Q2 Show me / explain how you would check that the power assisted
steering is working before starting a journey.
A If the steering becomes heavy the system may not be working properly.
Before starting a journey two simple checks can be made. Gentle pressure on
the steering wheel, maintained while the engine is started, should result in a
slight but noticeable change in the sound of the engine as the system begins to
operate – the revs reduce as the power transfers to the steering mechanism.
Alternatively turning the steering wheel just after moving off will give an immediate
indication that the power assistance is functioning.
Q3
Open the bonnet(1), identify where you would check the engine
coolant(2) level and tell me how you would check that the engine has the
correct level.
A After opening the bonnet, Identify high/low level markings on header tank and
explain that, with the engine cool, the coolant level should be between High and
Low marks. If the coolant level is Low more coolant should be added. With the
engine cooled, remove the header tank cap slowly to release the pressure. Add
coolant until it reaches Full / High mark. Never over-fill above High/Full mark.
High/
Full
Low
Q4
Show me how you would check the parking brake (handbrake) for
excessive wear.
A
Demonstrate by applying parking brake (handbrake) that when it is fully
applied it secures itself, and is not at the end of the working travel. The Swift’s
handbrake should secure the rear wheels between the 4th and the 9th ratchet
‘click’. If it does not, then it needs adjustment by an approved technician.
Page 5 of 17
Q5 Identify where the windscreen washer reservoir is and tell me how you
would check the windscreen washer level.
A
Open the bonnet(1) and identify reservoir. Explain that windscreen washer
fluid(3) is poured into the reservoir, which has the blue cap, until it can be seen to
be full.
Q6
Show me how you would check that the horn is working (off road
only).
A Press horn pad on steering wheel (don’t keep your hand on it for too long and
there is no need to turn on ignition key ! )
Page 6 of 17
Q7 Open the bonnet, identify where the brake fluid reservoir is and tell me
how you would check that you have a safe level of hydraulic brake fluid.
A Identify reservoir, check level against high/low markings.
Q8
Show me how you would check that the direction indicators are
working.
Right side
indicators
Left side
indicators
A Turn the ignition key(4) to the ‘on’ position (don’t start the engine!). Apply the
indicators by moving the stalk on the left of the steering column up (right
indicators) or down (left indicators). Walk around the car to check the operation
of the lights.
Page 7 of 17
Q9 Tell me how you would check that the brake lights are working on this
car.
A
Explain that you press the brake pedal and make use of reflections in
windows, garage doors, etc, or ask someone to look whilst you press the
footbrake !
Q10 Tell me how you would check that the brakes are working before
starting a journey.
A
Explain that brakes should not feel spongy or slack and that they can be
tested as you set off. The car should not pull to one side.
Q11 Show me how you would check that the headlights (or sidelights) &
tail lights are working.
A Operate switch, walk round vehicle. (See Appendix 5)
Q12 Tell me where you would find the information for the recommended
tyre pressures for this car and how tyre pressures should be checked.
A
Explain that it can be found in the manufacturer’s guide (also on column
between driver and rear door on Suzuki Swift.
Use a reliable
pressure gauge,
check
and
adjust pressures
when tyres are
cold,
don’t
forget
spare
tyre, remember
to refit valve
caps.
Page 8 of 17
Q13
Tell me how you would check the tyres to ensure that they have
sufficient tread depth and that their general condition is safe to use on the
road.
A Explain
that you would examine tyres visually looking for cuts and bulges.
Also 1.6mm of tread depth across the central ¾ of the breadth of the tyre and
around the entire outer circumference. If you aren’t sure ask at a garage
specializing in tyres e.g. ATS
Q14
Tell me how you make sure your head restraint is
correctly adjusted so it provides the best protection in the
event of a crash.
A The head restraint should be adjusted so the rigid part of the
head restraint is at least as high as your eyes or the top of your
ears, and as close to the back of the head as is comfortable.
Q15 Show me how you would clean the windscreen using the windscreen
washer and wipers.
A Make sure that the ignition key is in the “on” position – two turns clockwise
from the “lock” position.
(dashboard lights come on).
Gently pull the wiper control lever towards
you until the screen wash and wipers
commence, then let go of it. The wipers will
stop after one wipe and you may need to
repeat the process or lift the lever to give
another screen wipe to get rid of excess
screen wash. The lever will then return to the
“off” position
Page 9 of 17
Q16Show me how you would set the demister controls to clear all the
windows effectively, this should include both front and rear screens.
Set all relevant controls including; fan, temperature, air direction / source and
heated screen to clear windscreen and windows. Engine does not have to be
started for this demonstration.
3
2
1
Air vent
direction
controller
Hot
4
Heater
Temperature
controller
Position on
windscreen
& window
vents
Fan speed
controller
Rear window
heater/demister
switch
A quick all-round demist would be set as shown above i.e.
1. Make sure the temperature controller is on the hot air setting by turning dial
clockwise as shown
2. Ensure that the fan speed controller is on at number 2 speed or higher
3. Switch on the rear window heater/demister (a light will show on it when it’s on)
4. Turn the air vent direction controller to windscreen and
window vents
5. Window vents pointing to side windows.
5
Page 10 of 17
Q17 Show me how you would switch on the rear fog light and explain
when you would use it. (No need to exit vehicle, Please don’t start the
engine.)
The lights stalk on the left of the steering column must be on the headlights
position and then you can twist the rear-fog lamp ring-switch anticlockwise so
that the rear fog lamp is activated.
You will see the fog
light indicator appear
on the dashboard
(There’s no need to switch on the ignition for this one.)
You would then need to explain that this can only be used when visibility is
100metres or less and must be switched off as soon as the visibility is more
than 100metres
Q18 Show me how you switch your headlight from dipped to main beam
and explain how you would know the main beam is on whilst inside the car
Twist the end of the light
switch lever until the white
dot is in-line with the
headlights symbol. If the
blue light symbol does not
appear on the rev counter
then the main beam is
dipped. Flick the lever
towards the dashboard and
the main beam lights will
come on, which will be
confirmed by the blue light on
the dash as shown.
Page 11 of 17
Q19 Tell me how you would know if there was a problem with your antilock braking system
Explain that a light appears on the dashboard showing a symbol as follows:
Page 12 of 17
Appendix 1
Opening and closing bonnet(1)
To open the bonnet, pull the handle located above and to the right of the gas
pedal :
Push the under-bonnet release lever up with your finger, as shown in the
illustration below. Then release the prop rod from its holding clip and secure the
bonnet in its upright position with the prop rod.
To close the bonnet, lift the bonnet slightly and remove the prop rod from the
hole. Replace the prop rod in its holding clip! Lower the bonnet to about
12-15 inches from its closed position then let it drop down. Make sure the bonnet
is locked after closing, by applying pressure down on the bonnet ( just above the
bonnet release lever) with your hand. If there is movement then it is not closed
properly. Press down firmly to secure in locked position.
Failure to close the bonnet properly can result in it lifting up
whilst driving and obscuring your vision! A serious fault in a
practical test and maybe a fatal one as well!
Page 13 of 17
Appendix 2
Coolant(2)
It is dangerous to remove the expansion / reservoir cap when the water
temperature is high, because scalding fluid and steam may be blown out under
pressure. Wait until the coolant temperature has lowered before removing the
cap. The mixture you use should contain 50% antifreeze and water.
If the coolant needs to be topped up often, then the vehicle should be checked by
an approved dealer, as there is a fault in the system. If the engine is run with
insufficient coolant levels, serious engine damage will follow.
After a while the antifreeze properties of the coolant diminish and a full coolant
replacement will be required. Since special procedures are needed, it is
recommended in the Suzuki Swift’s handbook that the vehicle is taken to a
Suzuki dealer for coolant replacement as specified in the service manual.
Appendix 3
Windscreen Washer Fluid(3)
This is simply windscreen washer (available at all good car accessory shops)
which you dilute with water. It is also possible to buy it already diluted and can
therefore be placed directly into the reservoir. Some fluids have frost-free
properties, which can be useful, but not to be used in place of purpose made
defroster liquids. These are sprayed directly onto the windscreen when frozen
over. Using the windscreen washer to ‘defrost’ the windscreen is not
recommended as the windscreen wipers will also be turned on and the rubber
blades can become frayed on contact with the abrasive screen frost!!
Appendix 4
Ignition key positions
Page 14 of 17
(4)
LOCK
— This is the normal parking position. It is the only position in which the key can be removed.
ACC
— Accessories such as the CD player / radio can be operated but the engine will be off.
ON
— This is the normal operating position. All electrical systems are on – such as indicators.
START — This is the position for starting the engine using the starter motor. The key must be released from
this position as soon as the engine starts.
Appendix 5
Lights control lever
Twist controller –
Anticlockwise = ON
ON
Position 3 = Headlights
Position 2 =
Side / tail / instruments
Position 1 = off
This ‘dot’ lets you know
which position the
selector is in OFF in this example !
Sidelights
Page 15 of 17
Taillights
Headlights
Appendix 6
Wipers control lever
Front wipers twist controller
1 POSITION UP FROM RESTING
GIVES ONE-OFF WIPE
OFF or RESTING POSITION
INTERMITTENT WIPE – OPERATES
AUTOMATICALLY WITH DELAY
CONSTANT WIPE AT LOW SPEED
Page 16 of 17
CONSTANT WIPE AT HIGH SPEED
Rear Wiper – twist controller
Twist clockwise 1 to obtain
intermittent wipe
twist clockwise 2 times for constant
wipe
twist all the way forward & hold to
activate screenwash
Appendix 7
The Dashboard Lights
Just before the car starts (when the key is in the “on” position) the following lights are
displayed, some temporarily, others stay on if there’s a problem.
e.g. you have forgotten to put on your seatbelt or there may be a problem with some
component of the car. If any lights remain on after putting on the seat belt and
starting the car, then you need to have the car inspected by a qualified Suzuki
mechanic.
3
7
2
5
6
8
1
4
9
1.Electronic Power Steering 2. Service Soon Light or minor problem (SVS) 3. Diesel heater plugs on 4. Engine
oil 5. Battery 6. Seat belt 7. Engine Management system (EMS) 8. Brake function light 9. Anti-lock Braking
System (ABS)
Page 17 of 17
Размещено: 26 сентября 2012
Просмотров: 9 446
Комментариев: 0
Руководство по эксплуатации, ремонту, техобслуживанию, а также схемы электрооборудования автомобиля Suzuki Swift начиная с 2000 по 2005 год выпуска, автомобиля Suzuki Ignis с 2000 года выпуска, Chevrolet Cruze начиная с 2001 по 2008 год выпуска, оборудованных бензиновыми двигателями серий М13А (1,3 л.) и М15А (1,5 л).
Приводится необходимая информация по ремонту и проведению регулировки элементов системы управления двигателем, автоматических коробок передач (АКПП), системы подключения заднего моста, инструкции по использованию самодиагностики системы управления двигателем, АКПП, ABS, электроусилителя рулевого управления (EPS), системы подключения заднего моста (EMCD), системы кондиционирования и системы SRS, рекомендации по регулировке и ремонту АКПП, элементов тормозной системы (включая ABS), рулевого управления, подвески. СОдержатся сведения по проверке параметров в разъемах электронных блоков управления систем управления двигателем, АКПП, ABS, электроусилителя рулевого управления (EPS).
Язык: русский
Формат: PDF
Страниц: 427
Размер: 129.7 Mb
Скачать руководство по ремонту автомобилей Suzuki Swift, Suzuki Ignis и Chevrolet Cruze:
Внимание! У Вас нет прав для просмотра скрытого текста.
- Manuals
- Brands
- Suzuki Manuals
- Automobile
- Swift
Manuals and User Guides for Suzuki Swift. We have 6 Suzuki Swift manuals available for free PDF download: User Manual, Owner’s Manual
Suzuki Swift User Manual (558 pages)
Swift Suzuki
Brand: Suzuki
|
Category: Automobile
|
Size: 15.04 MB
Table of Contents
-
Related Manuals
3
-
Table of Contents
4
-
General Information
5
-
-
How to Use this Manual
6
-
Diagnosis
7
-
Precaution for Vehicles Equipped with a Supplemental Restraint (Air Bag) System
7
-
Handling and Servicing
8
-
General Precautions
10
-
Precautions for Catalytic Converter
13
-
Precautions for Electrical Circuit Service
13
-
Electrical Circuit Inspection Procedure
16
-
Open Circuit Check
16
-
Continuity Check
17
-
Voltage Check
17
-
Short Circuit Check (Wire Harness to Ground)
18
-
Voltage between
18
-
-
Intermittent and Poor Connection
19
-
Precaution for Installing Mobile Communication Equipment
20
-
Precaution in Servicing Full-Time 4Wd Vehicle
21
-
Switching from 4Wd to 2Wd
21
-
-
Identification Information
22
-
Vehicle Identification Number
22
-
Engine Identification Number
22
-
Transmission Identification Number
22
-
Identification Whether Vehicle Equipped with WU-TWC or Not
22
-
-
Warning, Caution and Information Labels
23
-
Vehicle Lifting Points
24
-
Abbreviations and Symbols May be Used in this Manual
26
-
Symbols
28
-
Wire Color Symbols
28
-
Fastener Strength Identification
29
-
Metric Fasteners
29
-
-
Fastener Information 0A-25
29
-
Standard Tightening Torque
30
-
Tightening Torque Chart
30
-
-
General Information
31
-
Maintenance and Lubrication
31
-
Maintenance Schedule
32
-
Normal Condition Schedule
32
-
Maintenance Recommended under Severe Driving Conditions
34
-
Severe Condition Code
34
-
Maintenance Service
35
-
Drive Belt Inspection and Replacement
35
-
A/C Compressor And/Or Power Steering Pump Drive Belt Inspection (if Equipped)
35
-
A/C Compressor And/Or Power Steering Pump Drive Belt Replacement
35
-
Water Pump Belt Replacement
36
-
Camshaft Timing Belt Replacement
36
-
Valve Lash Inspection (1.3 Liter Engine Only)
36
-
Engine Oil and Filter Change
37
-
Engine Oil Capacity
38
-
Engine Coolant Change
38
-
Exhaust System Inspection
39
-
-
Ignition System
40
-
Spark Plugs Replacement
40
-
Distributor Cap and Rotor Inspection (if Equipped)
40
-
Air Cleaner Filter Inspection
40
-
Fuel System
40
-
Air Cleaner Filter Replacement
41
-
Fuel Lines Inspection
41
-
Fuel Tank Inspection
41
-
-
Emission Control System
42
-
Brake
42
-
PCV (Positive Crankcase Ventilation) Valve Inspection
42
-
Fuel Evaporative Emission Control System Inspection
42
-
Brake Hoses and Pipes Inspection
43
-
Brake Fluid Change
43
-
Brake Lever and Cable Inspection
44
-
Parking Brake Lever
44
-
Parking Brake Cable
44
-
Clutch Pedal Free Travel Inspection
44
-
Wheel Bearing Inspection
45
-
Propeller Shaft Inspection (4WD Vehicle Only)
45
-
Drive Shaft Boot Inspction
45
-
Suspension System Inspection
45
-
Steering System Inspection
46
-
Power Steering (P/S) System Inspection (if Equipped)
46
-
Manual Transmission Oil Inspection and Change
47
-
Rear Differential Oil Inspection and Change
47
-
Automatic Transmission
48
-
All Latches, Hinges and Locks Inspection
49
-
Doors
49
-
Engine Hood
49
-
Final Inspection
50
-
Seats
50
-
Seat Belt
50
-
Battery Electrolyte Level Check
50
-
Recommended Fluids and Lubricants
51
-
Body, Wheels and Power Transmitting System
51
-
Meters and Gauge
51
-
Windshield Defroster
51
-
Engine General Information and Diagnosis (Tbi for G10)
52
-
Statement on Cleanliness and Care
54
-
General Information on Engine Service
54
-
Precaution on Fuel System Service
55
-
Hose Connection
55
-
Fuel Pressure Relief Procedure
56
-
Fuel Leakage Check Procedure
56
-
Engine Diagnosis
57
-
General Description
57
-
On-Board Diagnostic System
57
-
Warm-Up Cycle
58
-
Driving Cycle
58
-
2 Driving Cycles Detection Logic
58
-
Pending DTC
58
-
Freeze Frame Data Clearance
59
-
Data Link Connector (DLC)
59
-
Precaution in Diagnosing Trouble
60
-
Engine Diagnostic Flow Table
61
-
Customer Complaint Analysis
62
-
Visual Inspection
62
-
Trouble Symptom Confirmation
62
-
Engine Basic Inspection and Engine Diagnosis Table
62
-
Customer Problem Inspection Form (Example)
63
-
Vehicle/Environmental Condition When Problem Occurs
63
-
Malfunction Indicator Lamp (MIL) Check
64
-
Diagnostic Trouble Code (DTC) Check
64
-
Diagnostic Trouble Code (DTC) Clearance
65
-
Diagnostic Trouble Code (DTC) Table
66
-
Fail-Safe Table
69
-
Engine Basic Inspection
71
-
Engine Diagnosis Table
73
-
Scan Tool Data
80
-
Scan Tool Data Definitions
83
-
Calc Load (Calculated Load Value, %)
83
-
Short Ft B1 (Short Term Fuel Trim, %)
83
-
Long Ft B1 (Long Term Fuel Trim, %)
83
-
Closed Throttle Position (On/Off)
84
-
Fuel Cut (On/Off)
84
-
Electric Load (On/Off)
84
-
Fuel Tank Level (%)
84
-
Inspection of Ecm (Pcm) and Its Circuits
85
-
Resistance Check
89
-
-
Component Location
90
-
Malfunction Indicator Lamp Circuit Check – Lamp Does Not Come “On” at Ignition Switch on (but Engine at Stop)
91
-
Malfunction Indicator Lamp Circuit Check – Lamp Remains “On” after Engine Starts
92
-
Ecm (Pcm) Power and Ground Circuit Check – Mil Doesn’t Light at Ignition Switch on and Engine Doesn’t Start Though It Is Cranked up
93
-
Manifold Absolute Pressure (Map) Circuit Malfunction
95
-
Intake Air Temp. (IAT) Circuit Malfunction
97
-
Engine Coolant Temperature (ECT) Circuit Malfunction
99
-
Throttle Position Circuit Malfunction
101
-
Throttle Position Circuit Range/Performance Problem
103
-
Heated Oxygen Sensor (Ho2S) Circuit Malfunction (Sensor-1)
105
-
Heated Oxygen Sensor (Ho2S) Circuit Slow Response (Sensor-1)
106
-
Heated Oxygen Sensor (Ho2S) Circuit no Activity Detected (Sensor-1)
107
-
Heated Oxygen Sensor (Ho2S) Heater Circuit Malfunction (Sensor-1)
108
-
Heated Oxygen Sensor (Ho2S) Circuit Malfunction (Sensor-2)
110
-
Heated Oxygen Sensor (Ho2S) Heater Circuit Malfunction (Sensor-2)
113
-
DTC P0171 Fuel System too Lean
115
-
DTC P0172 Fuel System too Rich
115
-
DTC P0300 Random Misfire Detected (Misfire Detected at 2 or more Cylinders)
119
-
DTC P0301 Cylinder 1 Misfire Detected
119
-
DTC P0302 Cylinder 2 Misfire Detected
119
-
DTC P0303 Cylinder 3 Misfire Detected
119
-
DTC P0335 Crankshaft Position (Ckp) Sensor Circuit Malfunction
123
-
DTC P0340 Camshaft Position (Cmp) Sensor Circuit Malfunction
125
-
DTC P0420 Catalyst System Efficiency below Threshold
127
-
DTC P0443 Purge Control Valve Circuit Malfunction
130
-
DTC P0480 Radiator Fan Control System Malfunction
131
-
DTC P0500 Vehicle Speed Sensor (Vss) Malfunction (M/T)
133
-
DTC P0500 Vehicle Speed Sensor (Vss) Malfunction for A/T Vehicle (A/T)
135
-
DTC P0505 Idle Control System Malfunction
137
-
DTC P0510 Closed Throttle Position (Ctp) Switch Malfunction
139
-
DTC P0601 Internal Control Module Memory Check Sum Error
140
-
DTC P1250 Early Fuel Evaporation (Efe) Heater Circuit Malfunction
141
-
DTC P1450 Barometric Pressure Sensor Low/High Input
143
-
DTC P1451 Barometric Pressure Sensor Performance Problem
143
-
DTC P1500 Engine Starter Signal Circuit Malfunction
144
-
DTC P1510 ECM (PCM) Back-Up Power Supply Malfunction
145
-
Table B-1 Fuel Injector Circuit Check
147
-
Table B-2 Fuel Pump and Its Circuit Check
149
-
Table B-3 Fuel Pressure Check
151
-
Table B-4 A/C Signal Circuits Check (Vehicle with A/C)
153
-
Table B-5 Power Steering Pressure (PSP) Switch Signal Circuit Check (if Equipped)
154
-
Special Tool
155
-
Engine General Information and Diagnosis (TBI for G13)
156
-
Engine General Information and Diagnosis (SFI for G13)
157
-
MAP Sensor Individual Check
200
-
DTC P0110 Intake Air Temp. (IAT) Circuit Malfunction
202
-
DTC P0115 Engine Coolant Temperature (Ect) Circuit Malfunction
204
-
DTC P0120 Throttle Position Circuit Malfunction
206
-
DTC P0121 Throttle Position Circuit Range/Performance Problem
208
-
DTC P0130 Heated Oxygen Sensor (HO2S) Circuit Malfunction (Sensor-1)
210
-
DTC P0133 Heated Oxygen Sensor (Ho2S) Circuit Slow Response (Sensor-1)
212
-
DTC P0135 Heated Oxygen Sensor (Ho2S) Heater Circuit Malfunction (Sensor-1)
214
-
DTC P0136 Heated Oxygen Sensor (Ho2S) Circuit Malfunction (Sensor-2)
216
-
DTC P0141 Heated Oxygen Sensor (Ho2S) Heater Circuit Malfunction (Sensor-2)
219
-
DTC P0443 Evap Purge Control Valve Circuit Malfunction
240
-
DTC P0480 Radiator Cooling Fan Control System Malfunction
241
-
DTC P0500 Vehicle Speed Sensor (Vss) Malfunction for M/T Vehicle
243
-
DTC P0500 Vehicle Speed Sensor (Vss) Malfunction for A/T Vehicle
245
-
Special Tools
264
-
-
Engine Mechanical
265
-
Oil Pressure Check
266
-
Cylinder Head Cover
268
-
Exhaust Manifold
272
-
-
Unit Repair Overhaul
288
-
Engine Assembly
288
-
Special Tools
294
-
Engine Mechanical (G13B, 1-CAM 16-VALVES ENGINE)
296
-
-
-
General Description
298
-
Engine Lubrication
298
-
Cylinder Block
299
-
Crankshaft and Main Bearings
299
-
Pistons, Rings, Piston Pins and Connecting Rods
299
-
Cylinder Head and Valve Train
299
-
-
On Vehicle Service
300
-
On-Vehicle Service
300
-
Compression Check
300
-
Engine Vacuum Check
301
-
Oil Pressure Check
302
-
-
Valve Lash (Clearance)
304
-
Air Cleaner Element Removal
306
-
Air Cleaner Element Inspection
306
-
Air Cleaner Element Clean
306
-
Air Cleaner Element Installation
306
-
Air Cleaner Outlet Hose Removal
307
-
Air Cleaner Outlet Hose Installation
307
-
Cylinder Head Cover Removal
308
-
Cylinder Head Cover Installation
308
-
Throttle Body and Intake Manifold
309
-
Exhaust Manifold Removal
312
-
Exhaust Manifold Installation
313
-
Timing Belt and Belt Tensioner Removal
314
-
Timing Belt and Belt Tensioner Inspection
316
-
Timing Belt and Belt Tensioner Installation
316
-
Oil Pan and Oil Pump Strainer Removal
320
-
Oil Pan and Oil Pump Strainer Cleaning
321
-
Oil Pan and Oil Pump Strainer Installation
321
-
Oil Pump Removal
323
-
Oil Pump Disassembly
324
-
Oil Pump Measurement
325
-
Oil Pump Assembly
325
-
Oil Pump Installation
326
-
Rocker Arms, Rocker Arm Shaft and Camshaft Removal
328
-
Rocker Arms, Rocker Arm Shaft and Camshaft Inspection
330
-
Adjusting Screw and Rocker Arm
330
-
Rocker Arm Shaft Runout
330
-
Rocker Arm-To-Rocker Arm Shaft Clearance
331
-
Cam Wear
331
-
Camshaft Runout
331
-
Camshaft Journal Wear
331
-
Rocker Arms, Rocker Arm Shaft and Camshaft Installation
333
-
Valves and Cylinder Head Removal
336
-
Valves and Cylinder Head Disassembly
339
-
Valves and Cylinder Head Inspection
340
-
Valve Guides
340
-
Valve Springs
344
-
Valves and Cylinder Head Assembly
345
-
Valves and Cylinder Head Installation
347
-
-
Piston, Piston Rings, Connecting Rods and Cylinders
349
-
Piston Pin
352
-
Ring Groove Clearance
352
-
Piston Rings
353
-
Connecting Rod
353
-
Crank Pin and Connecting Rod Bearings
354
-
Flywheel
371
-
Distortion of Gasketed Surface
371
-
Honing or Reboring Cylinders
371
-
-
Engine Cooling
378
-
Cooling System Circulation
379
-
Thermostat
380
-
Cooling Fan
380
-
Coolant (Water) Temp. Gauge
381
-
Coolant Maintenance
382
-
Anti-Freeze Proportioning Table
382
-
Cooling System Flush and Refill
383
-
Cooling Water Pipes or Hoses Removal/Installation
384
-
Thermostat Removal
384
-
Thermostat Inspection
385
-
Thermostat Installation
385
-
Water Pump Inspection
386
-
Water Pump Installation
386
-
-
Engine Fuel
388
-
Fuel System
388
-
Fuel Pump Assembly (with Fuel Level Gauge)
388
-
Fuel Tank Removal
389
-
Fuel Lines
389
-
Fuel Tank Installation
390
-
Fuel Pump Assembly Removal
391
-
Fuel Pump Assembly Inspection
391
-
Fuel Pump Assembly Installation
391
-
Engine and Emission Control System (TBI for G10)
392
-
Air and Fuel Delivery System
395
-
Electronic Control System
396
-
-
-
On-Vehicle Service
399
-
Diagnosis
399
-
Accelerator Cable Adjustment
399
-
Idle Speed Inspection
399
-
Fuel Pressure Inspection
400
-
Fuel Pump On-Vehicle Inspection
402
-
Fuel Pump Removal
402
-
Fuel Pump Inspection
402
-
Fuel Pump Installation
402
-
Throttle Body On-Vehicle Inspection
403
-
Throttle Body Removal
403
-
Throttle Body Disassembly
404
-
Throttle Body Cleaning
404
-
Throttle Body Assembly
405
-
Throttle Body Installation
405
-
Fuel Injector On-Vehicle Inspection
406
-
Fuel Injector Removal
407
-
Fuel Injector Inspection
407
-
Fuel Injector Installation
407
-
Engine Control Module (Ecm) Removal
408
-
Engine Control Module (Ecm) Installation
408
-
Manifold Absolute Pressure Sensor (Map Sensor)
409
-
Throttle Position Sensor (Tp Sensor) Inspection
410
-
Throttle Position Sensor (Tp Sensor) Removal
410
-
Throttle Position Sensor (Tp Sensor) Installation
410
-
Throttle Position Sensor (Tp Sensor) Adjustment
410
-
Intake Air Temperature Sensor (IAT Sensor) Removal
411
-
Intake Air Temperature Sensor (IAT Sensor) Inspection
412
-
Intake Air Temperature Sensor (IAT Sensor) Installation
412
-
Engine Coolant Temperature Sensor (ECT Sensor) Removal
412
-
Engine Coolant Temperature Sensor (ECT Sensor) Inspection
413
-
Engine Coolant Temperature Sensor (ECT Sensor) Installation
413
-
Heated Oxygen Sensor (Sensor-1 and Sensor-2)
414
-
Oxygen Sensor Heater Inspection
414
-
Vehicle Speed Sensor (VSS) for M/T
415
-
Vehicle Speed Sensor (VSS) for A/T
415
-
Crankshaft Position Sensor Inspection
416
-
Crankshaft Position Sensor Removal
416
-
Crankshaft Position Sensor Installation
416
-
Main Relay Inspection
416
-
Fuel Pump Relay Inspection
417
-
Fuel Injector Resistor Inspection
417
-
Fuel Cut Operation Inspection
417
-
Idle Speed Control System Inspection
417
-
ISC Actuator Inspection
418
-
Closed Throttle Position (CTP) Switch, Idle Switch (in Isc Actuator)
419
-
Isc Actuator Relay Inspection
420
-
Efe Heater Control System Circuit Inspection
420
-
Efe Heater On-Vehicle Inspection
420
-
Efe Heater Removal
420
-
Efe Heater Inspection
421
-
Efe Heater Installation
421
-
Efe Heater Relay Inspection
421
-
Radiator Fan Control System Inspection
421
-
Radiator Fan Control Relay Inspection
422
-
Radiator Fan Inspection
422
-
Evaporative Emission Control System
423
-
EVAP Canister Purge Inspection
423
-
Vacuum Passage Inspection
423
-
Vacuum Hose Inspection
423
-
EVAP Canister Purge Valve Inspection
424
-
EVAP Canister Inspection
425
-
Tank Pressure Control Valve Inspection
425
-
PCV System
425
-
PCV Hose Inspection
425
-
PCV Valve Inspection
426
-
Engine and Emission Control System (TBI for G13)
428
-
Engine and Emission Control System (SFI for G13)
429
-
-
Advertisement
Suzuki Swift Owner’s Manual (359 pages)
Brand: Suzuki
|
Category: Automobile
|
Size: 17.98 MB
Table of Contents
-
Various Models
2
-
Recommendation of Genuine Suzuki Parts and Accessories Use
6
-
Service Station Guide
7
-
Table of Contents
9
-
Illustrated Table of Contents
10
-
Exterior
10
-
Interior Overview
11
-
Instrument Panel
12
-
Tire Changing Tool
14
-
Fuel Recommendation
15
-
Gasoline Engine
16
-
Gasoline/Ethanol Blends
16
-
Gasoline/Methanol Blends
16
-
Diesel Engine
17
-
Before Driving
19
-
Keys
20
-
Immobilizer System
20
-
Ignition Key Reminder
21
-
Side Door Locks
21
-
Central Door Locking System
22
-
Dead Lock System
23
-
Child-Proof Locks
24
-
Tailgate
25
-
Keyless Push Start System Remote Controller
26
-
Central Door Locking System with the Dead Lock System
27
-
Keyless Unlocking/Locking Using the Request Switches
28
-
Request Switch Warning Buzzer
30
-
Reminder Function
30
-
Replacement of the Battery
31
-
Keyless Entry System Transmitter (Type B)
32
-
Theft Deterrent Light
35
-
Manual Window Control
36
-
Electric Window Controls
36
-
Pinching Prevention Function
38
-
The Pinching Prevention Function Initialization
39
-
Inside Rearview Mirror
39
-
Outside Rearview Mirrors
40
-
Outside Rearview Mirrors Folding Switch
41
-
Front Seat Adjustment
41
-
Adjusting Seat Position
41
-
Adjusting Seatbacks
42
-
Walk-In Type Seats
42
-
Head Restraints
43
-
Front Seat Heater
44
-
Rear Seats Head Restraints
45
-
Folding Rear Seats
46
-
Split Seat
46
-
Bench Seat
47
-
Seat Belts and Child Restraint Systems
48
-
Lap-Shoulder Belt
50
-
Emergency Locking Retractor (ELR)
50
-
All Seat Belts
51
-
Driver’s Seat Belt Reminder Light
52
-
Front Passenger’s Seat Belt Reminder Light
52
-
Shoulder Anchor Height Adjuster
53
-
Driver’s Seat Belt Reminder
53
-
Front Passenger’s Seat Belt Reminder
53
-
Seat Belt Hanger
54
-
Seat Belt Inspection
54
-
Child Restraint Systems
55
-
Infant Restraint — Rear Seat Only
55
-
Child Restraint
55
-
Booster Seat
55
-
Child Restraint System for EU Countries
57
-
Installation with Lap-Shoulder Seat Belts
61
-
Installation with ISOFIX Type Anchorages
61
-
Installation of Child Restraint with Top Strap
63
-
Seat Belt Pretensioner System
64
-
Supplemental Restraint System (Air Bags)
66
-
Front Air Bags
67
-
Frontal Collision Range
68
-
Front Air Bags will Not Inflate
68
-
Front Air Bags will Probably Not Inflate
68
-
Side Air Bags and Side Curtain Air Bags
69
-
Air Bag Symbol Meaning
69
-
Side Collision Range
70
-
Side Air Bags and Side Curtain Air Bags will Not Inflate
70
-
Side Air Bags and Side Curtain Air Bags will Probably Not Inflate
70
-
How the System Works
71
-
Servicing the Air Bag System
72
-
Front Passenger Air Bag Deactivation System
73
-
Air Bag Deactivation Switch
74
-
Instrument Cluster
75
-
Warning and Indicator Lights
76
-
Braking System Warning Light
76
-
Anti-Lock Brake System (ABS) Warning Light
77
-
ESP Warning Light
77
-
ESP off Indicator Light
78
-
Oil Pressure Light
78
-
Charging Light
78
-
AIR BAG Light
79
-
Malfunction Indicator Light
79
-
Immobilizer/Keyless Push Start System Warning Light
79
-
Open Door Warning Light
80
-
Low Fuel Warning Light
80
-
Electric Power Steering Light
80
-
«CRUISE» Indicator Light
81
-
Automatic Headlight Leveling System Warning Light
81
-
Rear Fog Light Indicator Light
81
-
Turn Signal Indicators
82
-
Main Beam (High Beam) Indicator Light
82
-
Transaxle Warning Light
82
-
Oil Change Request Light (for Diesel Engine Model)
82
-
Glow Plug Indicator Light (for Diesel Engine Model)
83
-
Diesel Particulate (DPF) Warning Light (for Diesel Engine Model)
83
-
«ENG A-Stop» Indicator Light/Warning Light
84
-
Keyless Push Start System Remote Controller Battery Consumption Warning Light
84
-
«PUSH» Indicator Light
85
-
«ACC» Indicator Light
85
-
Ignition «ON» Indicator Light
85
-
Speedometer
86
-
Tachometer
86
-
Fuel Gauge
87
-
Temperature Gauge
87
-
Brightness Control
88
-
Information Display
88
-
Thermometer
89
-
Transaxle Selector Position Indicator
90
-
Trip Meter
91
-
Instantaneous Fuel Consumption
91
-
Average Fuel Consumption
92
-
Driving Range
93
-
Distance until the Next Changing Engine Oil
93
-
Odometer
93
-
Lighting Control Lever
94
-
Clock
94
-
Lighting Operation
95
-
Automatic Lights Operation
96
-
Auto-On Headlight System
98
-
Light Reminder Buzzer
98
-
Daytime Running Light (D.R.L.) System
98
-
Rear Fog Light Switch
98
-
Front Fog Light Switch
99
-
Headlight Leveling Switch
99
-
Headlight Washer Switch
100
-
Turn Signal Control Lever
100
-
Turn Signal Operation
100
-
Normal Turn Signal
100
-
Hazard Warning Switch
101
-
Windshield Wiper and Washer Lever
101
-
Lane Change Signal
101
-
Windshield Wipers
102
-
Windshield Washer
102
-
Rear Window Wiper/Washer Switch
103
-
Tilt/Telescoping Steering Lock Lever
104
-
Horn
104
-
Heated Rear Window and Heated Outside Rearview Mirrors Switch
105
-
Operating Your Vehicle
107
-
Exhaust Gas Warning
108
-
Daily Inspection Checklist
108
-
Engine Oil Consumption
109
-
Ignition Switch (Vehicle Without Keyless Push Start System)
110
-
Manual Transaxle
111
-
Engine Switch (Vehicle with Keyless Push Start System)
112
-
Keyless Push Start System
113
-
Engine Switch Illumination
113
-
Selection of Ignition Modes
114
-
If the PUSH Indicator Light Blinks and the Ignition Modes Cannot be Selected
114
-
«Remote Controller Outside» Warning
115
-
Parking Brake Lever
116
-
Interior Workable Area for Engine Starting, Ignition Mode Selection and «Remote Controller Outside» Warning
116
-
Parking Brake Reminder Buzzer
117
-
Clutch Pedal
118
-
Brake Pedal
118
-
Accelerator Pedal
118
-
Before Starting the Engine
119
-
Starting a Cold and Warm Engine (for Gasoline Engine Model)
119
-
Starting the Engine (Vehicle with Keyless Push Start System)
120
-
Caution When Stopping the Engine with Turbocharger
120
-
Restarting Diesel Engine after Fuel-Empty Stop
120
-
Stopping the Engine
121
-
Returning the Ignition Mode to «LOCK» (Off)
123
-
«LOCK» (Off) Mode Reminder Buzzer
124
-
Steering Lock Warning Buzzer
124
-
Diesel Particulate Filter (DPF)
124
-
Using the Transaxle
125
-
Downshifting Maximum Allowable Speeds
126
-
4-Speed Automatic Transaxle
127
-
Overdrive off Switch
127
-
If You Cannot Shift Automatic Transaxle Gearshift Lever out of «P» (Park)
129
-
Eng A-Stop System (Engine Auto Stop Start System)
130
-
Automatically Stopping the Engine
130
-
Automatically Restarting the Engine
131
-
Cruise Control
132
-
To Deactivate the Eng A-Stop System
132
-
«ENG A-STOP» Warning Light
132
-
To Set Cruising Speed
133
-
«SET» Indicator Light
133
-
To Change Speed Temporarily
133
-
To Change Cruising Speed
134
-
Using the Accelerator Pedal
134
-
Using the Brake Pedal
134
-
Using the Cruise Control Switch
134
-
Braking
135
-
Power-Assisted Brakes
135
-
Brake Assist System
135
-
Anti-Lock Brake System (ABS)
135
-
Electronic Stability Program (ESP)
137
-
How the ABS Works
137
-
Stability Control System
137
-
Traction Control System
137
-
Anti-Lock Braking System (ABS)
138
-
ESP off Switch
139
-
ABS Warning Light/Brake System Warning Light
139
-
Hill Hold Control System
140
-
Driving Tips
141
-
Running-In
142
-
Catalytic Converter
142
-
Improving Fuel Economy
143
-
Highway Driving
144
-
Driving on Hills
144
-
Driving on Slippery Roads
145
-
Tire Chains
145
-
If Your Vehicle Gets Stuck
146
-
Other Controls and Equipment
147
-
Heating and Air Conditioning System
148
-
Air Outlet
148
-
Side Outlet
149
-
Center Outlet
149
-
Heating System Description of Controls
150
-
Temperature Selector
150
-
Blower Speed Selector
150
-
Aur Flow Selector
150
-
System Operating Instructions
151
-
Heat & Defrost
151
-
Air Intake Selector
151
-
Manual Hearing and Air Conditioning System Description of Controls
152
-
Defrosting/Feet Warmed Heating
152
-
Manual Hearing and Air Conditioning Maintenance
156
-
Automatic Heating and Air Conditioning System (Climate Control) Description of Controls
157
-
Fresh Air
159
-
Ventilation
159
-
Automatic Heating and Air Conditioning System (Climate Control) Manual Operation
162
-
Automatic Heating and Air Conditioning System (Climate Control) Maintenance
162
-
Radio Antenna
163
-
Installation of Radio Frequency Transmitters
163
-
Audio System
164
-
FM/LW/MW CD Player
164
-
Safety Information
165
-
Notes on Discs
165
-
Information of Disposal for Users of Waste Electrical & Electronic Equipment
169
-
Basic Operations
170
-
Turning Power On/Off
171
-
Adjusting the Volume
171
-
Mute
171
-
Adjusting Bass/Treble/Balance/Fader
171
-
Listening to the Radio
172
-
Selecting the Reception Band
173
-
Seek Tuning
173
-
Manual Tuning
173
-
Preset Memory
173
-
Using the RDS Functions
174
-
TA (Traffic Announcement) On/Off
175
-
PTY (Program Type) Search
175
-
AF (Alternative Frequency) On/Off
175
-
TA Standby
176
-
EON (Enhanced Other Network)
176
-
Emergency Announcement Reception
176
-
Listening to a CD
177
-
Selecting a CD Mode
178
-
Loading a CD
178
-
Ejecting a CD
178
-
Selecting a Track
179
-
Fast Forwarding/Rewinding a Track
179
-
Random Playback
179
-
Repeat Playback
179
-
Listening to an MP3/WMA Disc
180
-
Selecting a Folder
181
-
Display Change
182
-
Notes on MP3/WMA
183
-
Points to Remember When Making MP3/WMA Files
183
-
Recording MP3/WMA Files on a CD Media
183
-
Compression Formats
183
-
Supported File Systems
184
-
Maximum Number of Files/Folders
184
-
Listening to Files Stored in a USB Device
185
-
Notes on USB Device
187
-
USB Device Connection
187
-
Recording MP3/WMA Files on a USB Device
187
-
Listening to an Ipod
188
-
Selecting an Ipod Mode
189
-
Notes on Ipod
190
-
Supported Ipods
190
-
Ipod Connection
190
-
Change the Audio Output Channel of the Bluetooth Hands-Free Device
191
-
Adjusting the Listening Volume
191
-
Adjusting the Ring Volume
191
-
Adjusting the Playback Volume
192
-
Dialing Using Redial/Callback
192
-
Registration in Phonebook
193
-
Name Change (Change Name)
193
-
Making a Call by Phonebook
194
-
Deletion of Registered Data (Delete Entry)
194
-
Registration in Speed Dial
194
-
One-Touch Call (Speed Dial)
195
-
Deletion of Speed Dial (del Spd Dial)
195
-
Security Number (PIN)
195
-
Phonebook Lock
196
-
Phonebook Unlock
196
-
Display of Device Data (Device Name)
197
-
Reset to the Factory Defaults
197
-
Selection of Phone (Select Phone)
197
-
Change of Phone Name (Change Name)
198
-
List of Phones (List Phones)
198
-
Passkey Setting (Set Passkey)
199
-
Deletion of Phone Information (Delete Phone)
199
-
HF Function On/Off (HF Power)
200
-
Phone Call Using Voice Command
200
-
Bluetooth Audio
201
-
Steering Switch
201
-
Registration of Audio Devices (Pair Audio, When no Phone Is Registered)
202
-
Registration of Audio Devices (Pair Audio, When a Phone Is Registered)
202
-
Selecting the Bluetooth Audio Mode
203
-
Selection of Audio Device (Select Audio)
204
-
Change of Audio Device Name (Change Name)
204
-
List of Audio Devices (List Audio)
205
-
Deletion of Audio Device Information (Delete Audio)
206
-
Remote Audio Controls
207
-
Selecting the Mode
207
Suzuki Swift Owner’s Manual (480 pages)
Brand: Suzuki
|
Category: Automobile
|
Size: 35.57 MB
Table of Contents
-
Table of Contents
7
-
Fuel Recommendation
17
-
-
Before Driving
19
-
Keys
20
-
Door Locks
21
-
Keyless Push Start System Remote Controller / Keyless Entry System Transmitter (if Equipped)
26
-
Theft Deterrent Light
35
-
Windows
35
-
Mirrors
39
-
Front Seats
41
-
Rear Seats
44
-
Seat Belts and Child Restraint Systems
47
-
Supplemental Restraint System (Air Bags)
68
-
Instrument Cluster (Type A) (if Equipped)
81
-
Fuel Gauge
82
-
Speedometer
82
-
Tachometer
82
-
Brightness Control
83
-
Information Display
83
-
Instrument Cluster (Type B) (if Equipped)
92
-
Fuel Gauge
93
-
Speedometer
93
-
Tachometer
93
-
Brightness Control
94
-
Temperature Gauge
94
-
Information Display
95
-
Instrument Cluster (Type C) (if Equipped)
109
-
Fuel Gauge
110
-
Speedometer
110
-
Tachometer
110
-
Brightness Control
111
-
Temperature Gauge
111
-
Information Switch (if Equipped)
112
-
Information Display
113
-
Warning and Indicator Lights
137
-
Lighting Control Lever
152
-
Headlight Leveling Switch (if Equipped)
164
-
Turn Signal Control Lever
164
-
Hazard Warning Switch
166
-
Windshield Wiper and Washer Lever
166
-
Tilt/Telescoping (if Equipped) Steering Lock Lever
168
-
Heated Rear Window Switch / Heated Outside Rearview Mirror Switch (if Equipped)
169
-
Horn
169
-
-
Operating Your Vehicle
171
-
Daily Inspection Checklist
172
-
Exhaust Gas Warning
172
-
Engine Oil Consumption
173
-
Ignition Switch (Vehicle Without Keyless Push Start System) (if Equipped)
174
-
Engine Switch (Vehicle with Keyless Push Start System) (if Equipped)
176
-
Keyless Push Start System (if Equipped)
178
-
Parking Brake Lever
181
-
Pedal
183
-
Starting Engine (Vehicle Without Keyless Push Start System) (if Equipped)
184
-
Starting Engine (Vehicle with Keyless Push Start System) (if Equipped)
185
-
Using Transaxle
188
-
Gearshift Indicator
197
-
SHVS (Smart Hybrid Vehicle by Suzuki) (if Equipped)
201
-
ENG A-STOP System
203
-
Adaptive Cruise Control System (if Equipped)
210
-
Speed Limiter (if Equipped)
222
-
Radar Brake Support System (if Equipped)
223
-
Dual Sensor Brake Support System (if Equipped)
239
-
Emergency Stop Signal (ESS)
258
-
Rearview Camera (if Equipped)
259
-
Braking
262
-
Electronic Stability Program (ESP ® )
264
-
Tire Pressure Monitoring System (TPMS)
268
-
-
Driving Tips
277
-
Catalytic Converter
278
-
Running-In
278
-
Improving Fuel Economy
279
-
Driving on Hills
280
-
Highway Driving
280
-
Driving on Slippery Roads
281
-
Off-Road Driving
283
-
-
Other Controls and Equipment
285
-
Fuel Filler Cap
286
-
Engine Hood
287
-
Sun Visor
289
-
Interior Light
290
-
Accessory Socket
291
-
Assist Grips (if Equipped)
292
-
AUX/USB Socket (if Equipped)
292
-
Glove Box
292
-
Cup Holder and Storage Area
293
-
Footrest
294
-
Floor Mats (if Equipped)
295
-
Luggage Compartment Hook
295
-
Frame Hooks
296
-
Luggage Compartment Carpet
296
-
Luggage Compartment Cover (if Equipped)
296
-
Heating and Air Conditioning System
299
-
Heating System
300
-
Manual Heating and Air Conditioning System
304
-
Automatic Heating and Air Conditioning System (Climate Control)
310
-
Radio Antenna
316
-
Installation of Radio Frequency Transmitters
317
-
Audio System (Type a / Type B) (if Equipped)
318
-
Vehicle Loading and Towing
371
-
Advertisement
Suzuki Swift Owner’s Manual (316 pages)
Brand: Suzuki
|
Category: Automobile
|
Size: 22.49 MB
Table of Contents
-
Table of Contents
9
-
Fuel Recommendation
19
-
-
Before Driving
21
-
Keys
22
-
Door Locks
23
-
Keyless Push Start System Remote Controller / Keyless Entry System Transmitter (if Equipped)
27
-
Theft Deterrent Alarm System (if Equipped)
35
-
Theft Deterrent Light (if Equipped)
39
-
Windows
39
-
Mirrors
41
-
Front Seats
43
-
Rear Seats
45
-
Seat Belts and Child Restraint Systems
47
-
Supplemental Restraint System (Air Bags)
62
-
Instrument Cluster (Type A) (if Equipped)
73
-
Fuel Gauge
74
-
Speedometer
74
-
Tachometer
74
-
Brightness Control
75
-
Information Display
76
-
Instrument Cluster (Type B) (if Equipped)
82
-
Fuel Gauge
83
-
Speedometer
83
-
Tachometer
83
-
Brightness Control
84
-
Temperature Gauge
84
-
Information Display
85
-
Information Switch (if Equipped)
101
-
Warning and Indicator Lights
101
-
Lighting Control Lever
110
-
Headlight Leveling Switch (if Equipped)
111
-
Turn Signal Control Lever
112
-
Hazard Warning Switch
113
-
Windshield Wiper and Washer Lever
113
-
Tilt/Telescoping (if Equipped) Steering Lock Lever
116
-
Heated Rear Window Switch (if Equipped)
117
-
Horn
117
-
-
Operating Your Vehicle
119
-
Daily Inspection Checklist
120
-
Exhaust Gas Warning
120
-
Engine Oil Consumption
121
-
(Vehicle Without Keyless Push Start System)
122
-
Ignition Switch
122
-
(Vehicle with Keyless Push Start System)
124
-
Engine Switch
124
-
Keyless Push Start System (if Equipped)
125
-
Parking Brake Lever
129
-
Pedal
130
-
(Vehicle Without Keyless Push Start System)
131
-
Starting Engine
131
-
(Vehicle with Keyless Push Start System)
132
-
Starting Engine
132
-
Using Transaxle
135
-
ENG A-STOP System (Engine Auto Stop Start System)
139
-
Cruise Control (if Equipped)
144
-
Braking
146
-
Electronic Stability Program (ESP ® )
148
-
-
Driving Tips
153
-
Catalytic Converter
154
-
Running-In
154
-
Improving Fuel Economy
155
-
Driving on Hills
156
-
Highway Driving
156
-
Driving on Slippery Roads
157
-
Off-Road Driving
159
-
-
Other Controls and Equipment
161
-
Fuel Filler Cap
162
-
Engine Hood
163
-
Sun Visor
165
-
Interior Light
166
-
Accessory Socket
167
-
Assist Grips (if Equipped)
168
-
AUX/USB Socket (if Equipped)
168
-
Glove Box
168
-
Cup Holder and Storage Area
169
-
Footrest
170
-
Floor Mats (if Equipped)
171
-
Luggage Compartment Hook
171
-
Frame Hooks
172
-
Luggage Compartment Carpet
172
-
Luggage Compartment Cover (if Equipped)
172
-
Heating and Air Conditioning System
175
-
Manual Heating and Air Conditioning System
176
-
Automatic Heating and Air Conditioning System (Climate Control)
181
-
Radio Antenna
187
-
Audio System (Type a / Type B) (if Equipped)
188
-
Vehicle Loading and Towing
235
-
Suzuki Swift Owner’s Manual (199 pages)
Brand: Suzuki
|
Category: Automobile
|
Size: 3.34 MB
Table of Contents
-
Table of Contents
7
-
Before Driving 1
11
-
Before Driving
12
-
Fuel Recommendation
12
-
Keys: 8
13
-
Door Locks
14
-
Windows
18
-
Mirrors
19
-
Seat Adjustment: 3
21
-
Adjustable Head Restraints (if Equipped)
28
-
Seat Belts and Child Restraint Systems: 3
29
-
Supplemental Restraint System (Air Bags)
38
-
-
Steering Column Controls
51
-
Ignition Switch: 8
52
-
Lighting/Turn Signal Control Lever: 8
54
-
Windshield Wiper and Washer Lever: 8
55
-
Rear Window Wiper/Washer Switch (if Equipped)
58
-
Horn
59
-
Tilt Steering Lock Lever
59
-
Remote Audio Controls (if Equipped)
60
-
-
Instrument Panel
61
-
Instrument Panel
62
-
Instrument Cluster: 8
63
-
Warning and Indicator Lights: 8
64
-
A/T Selector Position Indicator (if Equipped)
68
-
Speedometer/Odometer/Trip Meter/Meter Illumination Control
68
-
Fuel Gauge: 8
70
-
Tachometer: 8
70
-
Hazard Warning Switch: 8
71
-
Temperature Gauge: 8
71
-
Front Fog Light Switch (if Equipped)
72
-
Glove Box: 3
72
-
Heated Rear Window Switch (if Equipped)
72
-
Information Display
73
-
Clock (if Equipped)
74
-
Heating and Air Conditioning System
75
-
Manual Heating and Air Conditioning System
75
-
(Climate Control) (if Equipped)
79
-
Automatic Heating and Air Conditioning System
79
-
-
Other Controls and Equipment
85
-
Parking Brake Lever: 6
86
-
Pedal: 6
87
-
Fuel Filler Cap: 5
88
-
Gearshift Lever: 10
88
-
Folding Rear Seats
89
-
Interior Light Switch: 7
93
-
Sun Visor: 5
93
-
Accessory Socket (if Equipped)
94
-
Cigarette Lighter and Ashtray (if Equipped)
94
-
Assist Grips (if Equipped)
95
-
Engine Hood: 5
95
-
Cup Holder (if Equipped)
96
-
Frame Hooks
97
-
Tire Changing Tool
99
-
Front Seat Back Pocket (if Equipped)
100
-
Seatback Shopping Hook (if Equipped)
100
-
Luggage Compartment Cover (if Equipped)
101
-
Luggage Compartment Light (if Equipped)
101
-
Underseat Tray (if Equipped)
101
-
Radio Antenna (if Equipped)
102
-
-
Operating Your Vehicle
105
-
Daily Inspection Checklist
106
-
Exhaust Gas Warning
106
-
Engine Oil Consumption
107
-
Starting the Engine: 1
108
-
Using the Transaxle: 10
109
-
Braking: 6
111
-
Catalytic Converter (if Equipped)
114
-
Running-In
114
-
Improving Fuel Economy
115
-
Driving Tips
117
-
Vehicle Loading and Towing
121
-
Suzuki Swift Owner’s Manual (14 pages)
Brand: Suzuki
|
Category: Automobile
|
Size: 9.19 MB
Advertisement
Related Products
-
Suzuki Swift Sport
-
Suzuki swift 2009
-
Suzuki Swift 2015
-
Suzuki SWIFT 2022 Series
-
Suzuki SWIFT 2005
-
Suzuki SX4 SEDAN 2008
-
Suzuki SX4 S-Ccross
-
Suzuki Swift Sport 2004
-
Suzuki Swift Sport 2008
-
Suzuki SQ416 2001
Suzuki Categories
Motorcycle
Automobile
Motorcycle Accessories
Musical Instrument
Offroad Vehicle
More Suzuki Manuals


