-
Contents
-
Table of Contents
-
Bookmarks
Quick Links
Related Manuals for TC-Helicon VoiceLive Rack
Summary of Contents for TC-Helicon VoiceLive Rack
-
Page 1
USER’S MANUAL v1.0… -
Page 2: Safety
Safety Safety Instructions Caution 1 Read these instructions. You are cautioned that any change or modifica- tions not expressly approved in this manual could 2 Keep these instructions. void your warranty. 3 Heed all warnings. 4 Follow all instructions. EMC/EMI 5 Do not use this apparatus near water.
-
Page 3: Introduction
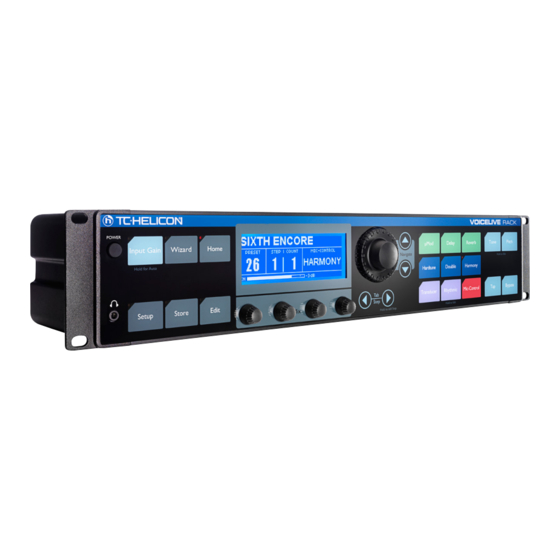
• Mic Control feature allows remote effects con- Thank You trol with included MP-75 mic • 400 user presets Thank you for purchasing VoiceLive Rack, a • USB for audio streaming, updates, and backup complete, programmable mic channel and vo- to computer cal effects processor.
-
Page 4: Table Of Contents
HIGH GAIN ……..18 VoiceLive Rack and Digital Audio ….32 HIGH FREQ .
-
Page 5
Table of Contents THE WIZARD BUTTON . . . . . . . . . . .36 REVERB Tab Overview . . . . . . . . . . . . . . . . . . 45 Overview. -
Page 6
Table of Contents EDITING . . . . . . . . . . . . . . . . . . .54 SPEED . -
Page 7
Table of Contents MIDI IMPLEMENTATION . . . . . . . . . .78 V1 to V4 VOICING……. . 69 MAP IN SOURCE / MAP IN NOTE . -
Page 8: Front Panel
Front Panel Touch to browse Touch to access input Touch Home to exit presets based on tags gain adjustment screen any menu and set or to load presets on or hold to enter auto screen to show main demand. input gain feature. preset display.
-
Page 9
Front Panel Touch to activate adap- Touch any to engage Touch to activate auto- tive EQ, compression, effects or hold to jump chromatic pitch cor- de-ess and gate or hold directly to the effect’s rection or hold to edit to edit. edit menu. -
Page 10: Back Panel
S/PDIF digital input can Connect optional TC-Helicon Connect supplied AC be fed dry to analog mix Switch 3 footswitch here for adaptor here. outs or used as vocal and…
-
Page 11: Quick Start
Quick Start f a . Connections 1. Turn down your mixer channel or main PA volume. 2. Connect a Mic or Line level input from the mixer to the respective input jack on VoiceLive Rack. 3. Connect the XLR or TRS stereo outputs to your mixer/PA.
-
Page 12: Basic Operation
VoiceLive Rack. This can be There are over 200 factory programmed presets either: in VoiceLive Rack. Presets are loaded as soon as • A guitar connected to the GUITAR IN the name appears in the LCD window.
-
Page 13: Modifying Presets
Basic Operation f Changing the global mix 6. Sing while the accompaniment plays. * There are 3 major scales and 3 minor scales; There are 4 global mix levels adjustable with the generally Major 2 and Minor 2 will work for more front panel Mix knobs.
-
Page 14: Phantom, Mono, Midi Etc. — The Setup Menu
Basic Operation f Phantom, Mono, MIDI etc . — the f Preset chaining with the Step feature Setup menu Each preset can consist of up to 10 steps that you can step through using the Tab/Step arrow Global parameters are adjusted in the Setup buttons or a footswitch.
-
Page 15: Restoring Individual Presets To Factory Settings
Basic Operation f Restoring individual presets to factory settings To reset a preset to its original settings: 1. Locate the Manage Preset tab in the Store menu. 2. Use Erase User Preset to select the preset to restore and set Confirm to Yes. 3.
-
Page 16: The Tone Button
All EQ and compression enhancements applied here will f The ADAPTIVE Check Boxes affect the overall sound of VoiceLive Rack includ- These show whether the automatically-adjusting ing Harmony, Doubling, Reverb etc. Adaptive feature is enabled for the SHAPE or The suite of effects that make up Tone are: COMPRESS controls.
-
Page 17: Compress
The adaptive Shape feature of VoiceLive Rack pression used in a live mic setting. If you have a listens continually to your voice through your mic…
-
Page 18: Gate
PA. When you aren’t singing, the gate will close and block sounds around you. The Adaptive Gate in VoiceLive Rack works au- tomatically with your singing style to provide the optimum balance between how loud you have to sing to open the gate and how much other noises are reduced.
-
Page 19: Eq Tab Overview
The Tone Button EQ Tab Overview EQ Tab With ADAPTIVE Off The EQ tab is where you control the tone shap- Turning ADAPTIVE off presents manual paramet- ing of your voice. It is where you can turn the ric EQ controls for users who understand this ADAPTIVE feature on and off for the SHAPE EQ.
-
Page 20: High Freq
The Tone Button f HIGH FREQ Defines the frequency range for the high shelf with the selection of the lowest frequency above which boosting or cutting is possible. f PARA GAIN Boosts or cuts the band of frequencies centered at the setting of the PARA FREQ control and its associated WIDTH.
-
Page 21: Compress Tab Overview
RATIO control will occur. The range is 0 dB to -30 dB: 0 dB being the loudest input signal VoiceLive Rack can accept without distortion and -30 dB being a very quiet signal. If you sing con- sistently more quietly than the THRESHOLD, you…
-
Page 22: Gate Tab Overview
The Tone Button GATE Tab Overview you aren’t singing . The factory default attenua- tion amount of -10 dB should work well in many situations, but you can further reduce the level if The Gate feature can assist in: you still hear harmonized instrumental chattering 1.
-
Page 23: The Pitch Button
The Pitch Button Pitch Button Overview Pressing the Pitch button activates Auto Chro- matic pitch correction. For most applications, this is all that is required to set this feature. There is no need to set Key or Scale; all notes that you sing in the 12 tone western chromatic scale are corrected to the nearest scale tone.
-
Page 24: The Tap Button
The Tap Button Tap Button Overview This button provides convenient access to tempo setting for the Delay and Rhythmic effects. You can tap it at any time to synchronize these effect blocks to the beats of a song. The display will temporarily show the BPM (Beats Per Minute) derived from your most recent two taps.
-
Page 25: The Bypass Button
The Bypass Button Bypass Button Overview Pressing the Bypass button will mute all active ef- fects blocks from the vocal audio path except Tone if it’s active. This is done so that your basic tone remains the same as you address the audience during Bypass.
-
Page 26: Detailed Operation
Harmony and Hardtune Guided If you hear a buzz from either your guitar amplifi- by a Guitar er or the PA VoiceLive Rack is connected to, press the GND LIFT (ground lift) button to silence it. TC-Helicon’s NaturalPlay algorithm can listen to…
-
Page 27: Midi Hookup And Channel Selection
Rack’s MIDI IN. Play a note on your keyboard and will sound can be 4 or 8 depending on which check VoiceLive Rack’s display to see if the MIDI preset you load. This in turn is due to whether indicator lights. If it doesn’t, set the MIDI transmit Harmony Doubling is activated in the HARMO- channel of your keyboard to 1 (VoiceLive Rack’s…
-
Page 28
You should be singing with musical backing and stay true to a A=440Hz reference. This could be 5. Note the prompt in VoiceLive Rack’s display a CD or other musicians. Choose a simple song and use the footswitches to input your key. -
Page 29: Singing To Music Playback
If this is an issue, you could use a preamp out or effects loop output from the amp. VoiceLive Rack can derive musical information from fully mixed music tracks. For this alternative Alternatively, you can run a MIDI cable from your you’ll need:…
-
Page 30: Steps Overview
Detailed Operation Steps Overview Next time you load the preset, it will have the “al- ternate personality” you can access quickly with the TAB/STEP arrow buttons. The Step feature allows you to create a series of up to 10 linked effect changes associated with To delete a single step, a preset.
-
Page 31: External Control Overview
Now you can browse through the presets while singing and pressing the button on the mic. The display will show the factory setting of the MIC- VoiceLive Rack can be controlled by three exter- CONTROL target in each preset. nal sources: •…
-
Page 32: Midi Remote Control
3. Send a MIDI message such as a preset change message to VoiceLive Rack to confirm MIDI reception is working. If successful, the word “MIDI” will show briefly in the display with…
-
Page 33: The Usb Computer Connection
1. Connect VoiceLive Rack to your computer via To install VoiceSupport on a PC or Mac: USB. 2. Assign VoiceLive Rack as the audio input and output device in your audio application. 3. Connect your mic and headphones or mixer to VoiceLive Rack and pick a preset you like.
-
Page 34: Digital Input Notes
2. Set VoiceLive Rack’s I/O tab parameters as Processing recorded vocals: such: You can send a dry vocal track to VoiceLive Rack DIGITAL IN: USB: FULL MIX for effect processing then record a new pro- cessed vocal track in your audio application via DIGITAL OUT: VOCAL &…
-
Page 35: Audio Device Name
“Analog Connector (n) VoiceLive Rack” or “USB Audio Device”. USB and MIDI Control To use VoiceLive Rack’s MIDI IN jack for harmony, preset change or realtime control while USB is connected, enter the I/O tab in the SETUP menu and set USB CONTROL to OFF.
-
Page 36: The Input Gain Button
Overview To set input gain automatically: 1. Touch the Bypass button so it flashes. Trimming the input level entering VoiceLive Rack’s 2. Hold the Input Gain button until the SING analog to digital converter is essential for prevent- YOUR LOUDEST prompt is visible in the ing unwanted distortion and minimizing noise.
-
Page 37: The Wizard Button
The Wizard Button Overview 4. Highlight a preset name with the Data Wheel. 5. Press the Wizard button to load the preset. The Wizard allows you to: 6. Press Home to exit or remain in the Wizard • Search for appropriate presets for your appli- menu to load browse and load further presets.
-
Page 38: The Tag Tab
The Wizard Button f The TAG tab This tab allows you to assign or remove the assignment of tag criteria for each preset. The Factory presets have been assigned tags but you can change them as you like for easier browsing in the Wizard.
-
Page 39: The Setup Button
The Setup Button Overview The Setup menu brings together all of the global configuration settings. Changes made in these tabs are automatically stored for the next power up session. If you want to store and recall differ- ent configurations, see the STORE menu descrip- tions.
-
Page 40: The I/O Tab
VoiceLive Rack. When process- with condenser microphones. ing an analog input such as the MIC and sending to VoiceLive Rack’s digital out, sending a short bit f AUX LEVEL of audio from your recording application to either Digital input will set the sample rate.
-
Page 41: Lead Dly
The Setup Button f MIC/LINE PHASE or when VoiceLive Rack is being fed by an aux send from a mixer channel where the lead level is Selects between NORMAL and INVERTED to mixed in at the mixing console. help reduce feedback in live performance. This…
-
Page 42: The Midi Tab
MIDI In/Thru chain with a Sysex editor, each one should have its own ID or they all will be Sets the MIDI channel that VoiceLive Rack uses edited in the same way. for preset change and MIDI harmony control.
-
Page 43: The System Tab
The Setup Button The SYSTEM Tab f TUNEREF This trims the overall tuning reference for Har- mony and Hardtune with respect to A-440 Hz. f LCD CONTRAST This is used when an accompanying instrument has changed overall pitch such as a piano that is Sets the contrast level of the LCD display.
-
Page 44: Guitar Tab Overview
These effects are only applicable when the guitar is mixed through the f REVERB LEVEL signal path of VoiceLive Rack and not externally Turn the Mix/Edit knob below this parameter to via the GUITAR THRU jack and on to an ampli- raise and lower the amount of Reverb on your fier.
-
Page 45: Eq Low Gain
The Setup Button f EQ PARA WIDTH overcome room or undesirable guitar resonances. This smooths the sound and can help overcome Defines how narrow or wide the parametric guitar feedback. band is to be. The ends of the control range are The 3 GAIN controls allow +/- 12 dB of adjust- labelled “NARROW”…
-
Page 46: Reverb Tab Overview
The Setup Button REVERB Tab Overview nature of Reverb algorithms, a decay time of 4 seconds may sound quiet different from one style to the next, even when the rest of the settings This tab allows you to configure a global Reverb are identical.
-
Page 47: Pre Dly
The Setup Button f LEAD to REV introduce more discrete echo-like motion to the tail where high values (0 to 25) make the tail Sets the amount of lead level sent into the Re- smoother-sounding. verb block. This and the remaining send and Lead Level parameters are not stored as part of the f PRE DLY styles.
-
Page 48: Mic-Control Tab Overview
Note that this will also turn on phantom power effect while the button is held. All other functions in VoiceLive Rack if it is not already active. To will remain on or off after tapping the Mic-Con- avoid unexpected audio pops, mute your mixer trol button.
-
Page 49: Switch3 Tab Overview
Mic- Control button. This edit tab allows you to globally set the target for each of the 3 switches on the TC-Helicon Switch3 footswitch. f GLOBAL Turns global assignment of the footswitches on f SWITCH 1 FUNCTION or off.
-
Page 50: The Store Button
This allows you to store your preset edit at any of If you don’t want to change the name of the pre- the 400 preset locations in VoiceLive Rack. As you set, press Store again then Home. This completes turn the knob you will see the name of the preset the Store operation.
-
Page 51: Manage Preset Tab
USB or by the physical MIDI OUT jack This function will periodically run automatically on on the back panel of VoiceLive Rack. When con- VoiceLive Rack when a large number of preset necting with a computer via a USB cable ensure stores have been executed.
-
Page 52: Store Setup Overview
400 preset loca- tions. This allows you to store your profile at any of the 10 profile locations in VoiceLive Rack. As you turn To store a setup profile: the knob you will see the name of the profile 1.
-
Page 53: Load Setup Tab Overview
The Store Button LOAD SETUP Tab Overview In this tab you can load a previously stored setup profile. If no user profiles have been stored, load- ing any available EMPTY profile will result in all Setup values going to default values. Ensure that any connected audio system is muted when loading setup profiles because input and output levels can vary dramatically.
-
Page 54: Manage Setup Tab Overview
The Store Button MANAGE SETUP Tab Overview This menu allows you to erase user setup profiles and restore them to default settings. This opera- tion is not undo-able so back up your setups using VoiceSupport if you want to store them. To erase user setup profiles: You must have stored a user setup profile in order to erase it.
-
Page 55: Editing
Editing Editing Overview You can rename the preset and store to another location by pressing Store once and changing the values at the bottom of the Store menu. When Basic editing, menu navigation and concepts are you’ve edited the name and found a new place to briefly discussed in the Quick Start and Basic Op- store your edited preset, press Store again.
-
Page 56: The Edit Button
The Edit Button µMOD Tab Overview f DEPTH-L / DEPTH-R These set the amount of modulation of the delay µMod is short for micro-modulation (“µ” is the time for the left and right delays. If one delay is scientific symbol for micro). The µMod effect is set to 10mS, for example, a setting of 50% will capable of creating many different sounds that vary the delay time between 15mS and 5mS at…
-
Page 57: Wave
The Edit Button f WAVE This lets you choose the modulation waveform from Square,Triangle or Sine to vary the periodic nature of the modulation effect. f XFB L / XFB R These send cross feedback from the left and right delay lines (XFL L) and from right to left (XFR L).
-
Page 58: Delay Tab Overview
The Edit Button DELAY Tab Overview TIME: This allows you to set the exact delay time for the left and right delay lines manually with the TIME L and TIME R controls. The delay effect is a configurable echo. You can control how far apart the echoes occur (Delay TAP: This allows you to tap the Tap button when Time), and whether the echoes fade out quickly…
-
Page 59: Feedback L / Feedback R
The Edit Button f FEEDBACK L / FEEDBACK R f HARM TO DELAY Re-introduces a portion of the audio output Sets the amount of harmony level sent into the signal of the Delay block back to the input to add Delay block.
-
Page 60: Reverb Tab Overview
The Edit Button REVERB Tab Overview f LO COLOR / HI COLOR These are preset-frequency filters inserted into Reverb is the arguably the most common vocal the Reverb feedback path that tailor the low and effect. It can add a spaciousness that softens the high frequency response and decay of the tails.
-
Page 61: Pre Dly
The Edit Button f PRE DLY f HARM to REV Pre Delay introduces a short (up to 100 ms) Sets the amount of harmony level sent into the delay between the dry audio signal and the onset Reverb block. Harmonies must be on to feed this of reverb to help simulate larger spaces and to send.
-
Page 62: Hardtune Tab
HardTune sound, set it to 100% Most pitch correction products require either scale information, offline editing or MIDI perfor- mance to yield correction. VoiceLive Rack goes f HARDTUNE SHIFT one further and allows you to play your guitar or…
-
Page 63: Note & Enabled
The Edit Button The key that is set in the HARMONY tab will be displayed but not editable when the current pre- set is based on Scale Harmony and HARDTUNE KEY is set to FOLLOW HARMONY f NOTE & ENABLED These are applicable when you wish to edit a custom scale for HARDTUNE.
-
Page 64: Double Tab Overview
The Edit Button DOUBLE Tab Overview f V1 to V4 LEVEL These settings control the volume of each of the The Double effect uses the same type of Human- voices and are used to set the number of voices ization technology as in the Harmony effect to active for Doubling.
-
Page 65: Lead Level
The Edit Button f LEAD LEVEL Controls the lead (dry + Tone) voice level when the individual effect is turned on with its respec- tive footswitch. This allows a unique wet/dry mix for individual effects. When multiple effects are active, the lowest LEAD LEVEL value will deter- mine the value.
-
Page 66: Harmony Tab Overview
0 dB (Full). Typically all voices are set at the same level unless you want to highlight or minimize a particular voicing interval. The Harmony block in VoiceLive Rack produces up to 8 harmony voices and is the home of the Choir effect.
-
Page 67: Humanize Style
The Edit Button f HUMANIZE AMOUNT activates the style and level set by the CHOIR STYLE and CHOIR LEV parameters respectively. You can vary the amount of humanization for To create a convincing choir performance, it helps the harmony voices. All the styles except for the to sing legato (sustained) phrases as opposed to last one: TIME &…
-
Page 68: Guitar Chords
The Edit Button required to help soften note to note transitions boards are designed to produce. This tuning unless a robot-like effect is desired. Higher values mode allows you to play and sing in any key offer progressively less correction. Like Portamen- without completely retuning your instrument for to, setting each voice with a unique value of the every chord.
-
Page 69: Naturalplay
In the case where you have a MIDI sequencer and MIDI pitch bend movement. and guitar into VoiceLive Rack, this will cause it to ignore the MIDI input for harmony control. • MIDI — This forces the current preset to look only to the MIDI IN for musical input.
-
Page 70: Naturalplay Settings And Parameter Changes
The Edit Button NATURALPLAY Settings and f MAP IN SOURCE / MAP IN NOTE Parameter Changes These allow to customize individual harmony note intervals relative to your input note and cre- Following are the parameters that change when ate a custom scale. A custom scale is not share- able with other presets until the preset is copied the NATURALPLAY mode is set to a value other than AUTO INPUT SENSE, GUITAR, MIDI and…
-
Page 71: Modes
This feature is most useful when singing to a commercial MIDI file that is controlling the har- mony voices in VoiceLive Rack. Often the MIDI notes used to control harmony cut off where the singer might prefer to hold the notes longer and this makes for a more singer-oriented MIDI performance.
-
Page 72: Transducer Tab Overview
The Edit Button TRANSDUCER Tab Overview f LOW CUT and HIGH CUT Sets the cut-off frequency for these very steep The Transducer effects block uses distortion low and high shelving filters. TIP: these and the and steep filters to emulate the sound of radios, PRESENCE filters can be used without Distortion phones and devices that generally degrade the effects to apply more radical EQ to your presets.
-
Page 73: Transducer In And Out Gain
The Edit Button f TRANSDUCER IN and OUT GAIN These act similarly to a guitar distortion pedal or an amplifier with input gain and master level con- trols. IN GAIN boosts or attenuates the amount of distortion for the distortion type selected. When you adjust the IN GAIN parameter, just like a guitar amplifier, the overall level of the effect goes up and down.
-
Page 74: Rhythmic Tab Overview
The Edit Button RHYTHMIC Tab Overview Turning the effect off then on again clears the previous sample and loops the new segment. Using the Rhythmic features, tap tempo can pro- duce stuttering and panning effects on your lead, MODE = RHYTHM Harmony and Double voices in time with your music.
-
Page 75: Mode = Sample
The Edit Button f PATH from SQUARE to SAWTOOTH DOWN. The SAMPLE AND HOLD option produces a ran- When this is set to POST, the captured sample dom value on every beat division. Following these will be a composite of all effects that were on are the syncopated one bar patterns.
-
Page 76: Mic-Control Tab Overview
• PITCH Note that this will also turn on phantom power • BYPASS in VoiceLive Rack if it is not already active. To The MOMENT functions will only activate the avoid unexpected audio pops, mute your mixer effect while the button is held. All other functions first.
-
Page 77: Switch3 Tab Overview
This edit tab allows you to set the target for each * Harmony Hold is a feature that sustains the last of the 3 switches on the TC-Helicon Switch3 harmony syllable indefinitely as you hold the Mic- footswitch while the current preset is loaded.
-
Page 78: Preset Tab
The Edit Button PRESET Tab f LEAD LEVEL This allows the overall lead (dry with Tone) voice level to be reduced for the current preset. There are additional LEAD LEVEL parameters in the ef- fect tabs (µMOD, DELAY etc) which may be used to reduce lead level further but only when their respective effect is active.
-
Page 79: Midi Implementation
MIDI Implementation Parameter Range Comments Effects On/Off Harmony 0-63 off 64-127 on Double “ “ Reverb “ “ HardTune “ “ µMod 0-63 off 64-127 on Delay “ “ Trans “ “ Rhythmic “ “ Block Edits µMod Style 0-24 Level 0-127 Delay…
-
Page 80
MIDI Implementation Parameter Range Comments Gender “ “ 64=Gender off, <64=Male, >64=Female Voice1 Gender “ “ “ “ Voice2 Gender “ “ “ “ Voice3 Gender “ “ “ “ Voice4 Humanize Style Human Lvl 20 maps to 127 Vib Style Vib Amt maps to 127 Vib Style must not be 0… -
Page 81
MIDI Implementation Parameter Range Comments Delay/Re- “ “ verb Lvl Dry Pan “ “ 127 MIDI values map to 201 pan values, Center = 64 Output “ “ Level Bypass 0-63 off 64-127 on Harmony “ “ Hold Sustain “ “ Active in MIDI Naturalplay and MIDI Notes, MIDI Notes 4 Chan modes. -
Page 82: Preset List
Preset List ANOTHER BRICK Showcase DRONE & ECHO KANYE LOCKDOWN OCTAVE CHILD CLOSE UP 3RD CHORALE TWO Harmony TWO HIGH 3RD UP GROUP BRIGHT DOUBLE 3RD UP LADIES NOW HEAR THIS! POP DUO DISTORTO 3RD OCT BELOW BOP-A-LULA BASS & 3RD UP TAP TEMPO 1/4 CLOSE BELOW OCT UP DOUBLE…
-
Page 83
Preset List HARD TUNE DELAY TOE PLASTIC CROONER Character HIGHERCHOIR WET THINNER YOU BIG BOTTM CHOIR POPEYE + OLIVE 3RD UP CHOIR VALKYRIE DUO 4TH DOWN CHOIR DEEPER YOU 6TH DOWN CHOIR OCT DOWN MALE BASSY CHOIR POPEYE LIVES TUNED HARMONY DEEPEST YOU GREGORIAN THINNEST YOU… -
Page 84
Preset List CLOCK RADIO CHOIR PAN RAND DISTORTED RADIO TWO HIGH PANNER DIRTY SCREAM HARD LR PAN TRASH-IT SALSA HARMONY OCTAVE TRASH FUN FOR HOURS PANNED ANGELS GENDER DOUBLES CHAOS BASIC NOTES 8V Notes Harmony SPIRAL DOWN NOTES 1V FEMALE BOLLYWOOD EASY NOTES 8V VOCALFUZZ… -
Page 85: Scales Diagram
Scales Diagram The table at right shows harmony notes in the key of C for the three major and three minor scales. The shades cells indicate harmony intervals that illustrate the differences between scales. The term “nc” means “no change”. This indicates that the harmony note will remain at the previous interval even though the input note has changed from the adjacent upper or lower note.
-
Page 86
Where can I find support for this product? The Mic Control parameter seems to be triggering on its own when I sing, what’s TC-Helicon has a comprehensive support system happening? for our products. Go toand click on the links below either Support by Product or FAQ and A few input devices may cause this. -
Page 87: Specifications
Specifications f Analog Inputs Connectors, balanced Mic.: XLR, Line: 1/4” phone jack, Guitar: 1/4” phone jack, Aux: 1/8” stereo mini jack Input Impedance: Bal./Unbal. Mic.: 2.14/1.07 kOhm, Line: 13/6.5 kOhm Mic Input Level @ 0 dBFS -49dBu to +10dBu Line Input Level @ -37 dBu to +22 dBu -37 dBu to +22 dBu EIN @ Max Mic Gain Rg = 150 Ohm -126 dBu…
-
Page 88
Specifications f Environment Operating Temperature 32° F to 122° F (0° C to 50° C) Storage Temperature -22° F to 167° F (-30° C to 70° C) Humidity Max. 90 % non-condensing f Control Interface USB-B MIDI In/Out/Thru: 5 Pin DIN Pedal 1/4”…
Руководство пользователя на русском языке для продукта TC-Helicon VoiceLive Rack.
Спецификация:
Оригинальное руководство пользователя на русском языке.
Формат листа A4.
Плотность бумаги 80 гр/м2.
Цвет печати — монохромный.
Обложки — пластиковые 2 шт.
Переплёт — пластиковая пружина.
Общее количество страниц 89 (45 листов).
* это печатное руководство пользователя мы прилагаем бесплатно к одноимённому продукту, покупаемому клиентами в нашем магазине.

Инструкция и руководство для
TC Electronic voicelive  на русском

56 страниц подробных инструкций и пользовательских руководств по эксплуатации
 10:17
10:17
VoiceLive Play video manual — Part 1
 32:28
32:28
TC Helicon VoiceLive Play часть 1 НА РУССКОМ—NICKBROKE PRODUCTION
 09:04
09:04
TC Electronic Voicelive Play demo and tour
 09:30
09:30
mmag.ru: Вокальный процессор tc helicon voicelive play — видео обзор и демо
 13:18
13:18
Обзор вокального процессора TC Helicon Voice live play
 05:13
05:13
TC Electronic Voice Live Vocal Effects FX Processor
 23:40
23:40
Обзор TC Helicon Voice Live 1
 14:54
14:54
TC Helicon VoiceLive Play GTX — Demo by Christine Havrilla at Guitar Showcase
VoiceLive
Гармонизация | Коррекция | Эффекты
Руководство по эксплуатации

3
ИНСТРУКЦИЯ ПО ТЕХНИКЕ БЕЗОПАСНОСТИ
Пожалуйста, прочтите, сохраните и следуйте данной инструкции до того, как подключите
устройство. С полным вниманием отнеситесь к рекомендациям и предупреждениям.
Данный символ, вне зависимости от того, где он изображен, предупреждает о
наличии опасных напряжений внутри прибора.
Данный символ, вне зависимости от того, где он изображен, предупреждает о
необходимости обращения к Руководству по эксплуатации (техническому
обслуживанию) и/или сопровождающей литературе. Внимательно изучите данное
Руководство!
ВНИМАНИЕ!
— Во избежание поражения электротоком не снимайте кожух (заднюю стенку) прибора.
Внутри корпуса отсутствуют какие-либо регулировки, доступные пользователю.
Обслуживание изделия должно осуществляться квалифицированным специалистом.
—
Во избежание поражения электротоком не подвергайте аппарат воздействию дождя или
влаги.
—
Аппарат должен быть заземлен.
—
Убедитесь в соответствии рабочего напряжения устройства напряжению в сети.
—
При установке в рэковой стойке сверху и снизу должно оставаться пространство для
должной вентиляции.
—
Не устанавливайте рядом с нагревательными приборами!
—
Протирайте поверхность от пыли только сухой тряпочкой.
—
При транспортировке не надейтесь на передние винты, укрепите устройство в стойке и
сзади тоже!
—
При длительном бездействии или при крутых перепадах напряжения в электросети
обязательно отключите устройство из розетки.

4
Содержание
ПРЕДИСЛОВИЕ
РЕДАКТИРОВАНИЕ ОБЩИХ ПАРАМЕТРОВ
Содержание
3
Меню редактирования параметров входа-выхода 37
Предисловие
5
Меню редактирования утилит
40
Лицевая панель
6
Задняя панель
8
Принципиальная схема
9
РЕЖИМ ПЕСНИ (SONG MODE)
Режим песни
45
ЖК-дисплей в режиме песни
45
БЫСТРЫЙ СТАРТ
ЖК-дисплей в режиме редактирования Song Edit 45
Как добыть звук из VoiceLive
10
Функции редактирования песни
46
Концертное применение VoiceLive
10
Пресетный режим (Preset Mode)
10
Режим песни (Song Mode)
12
ГАРМОНИЯ И СТРОЙ
Кнопка USER
13
О гармонии
48
Педаль Expression
13
Функция Harmone Hold
48
Настройка пресетов типа Scale
14
Режимы гармонизации
48
Основные концепции редактирования
15
Нотный режим (Notes Mode)
48
Shift Mode
48
Chordal
48
ПРИМЕРЫ ИСПОЛЬЗОВАНИЯ
Scale
49
На концерте с гитарой
16
Диатоническая и хроматическая гаммы
50
На концерте с MIDI-клавиатурой
16
Безусловный строй
51
РАБОТА С ПРЕСЕТАМИ
ТАБЛИЦЫ ФУНКЦИЙ НОЖНЫХ ПЕДАЛЕЙ
Типы параметров
17
Функции в пресетном (Preset) режиме
52
Типы пресетов
17
Функции в режиме песни (Song)
53
Архивация и восстановление данных по MIDI
17
Установка гловабльного эффекта
17
Сохранение в памяти
18
ТЕХНИЧЕСКИЕ ХАРАКТЕРИСТИКИ
MIDI-спецификация
54
Технические характристики
57
ПРЕСЕТНЫЙ РЕЖИМ (PRESET MODE)
Пресетный режим
19
Режим прямого доступа к пресетам
20
Режим пресетных голосов
20
МЕНЮ РЕДАКТИРОВАНИЯ ПРЕСЕТОВ
Меню конфигурации
21
Меню редактирования голосов 22
Меню редактирования гармонизации 26
Меню редактирования «уплотнения» голоса 28
Меню редактирования эффектов
29
Меню редактирования высотной коррекции 33
Специальные меню редактирования 35

5
Предисловие
Благодарим Вас за покупку VoiceLive – процессора гармонизации, коррекции и эффектов,
созданного командой TC-Helicon специально для гастрольных поездок. В этот прибор
вложено
немало
труда.
Инженеры
и
технические
специалисты TC-Helicon
консультировались с ведущими музыкантами в стремлении сделать VoiceLive
инструментом, способным максимально улучшить качество и возможности сценического
вокала. Аналоговый и цифровой тракты разработаны по тем же стандартам, что и наши
студийные процессоры. Однако в каждом аспекте VoiceLive – начиная от алгоритма
лимитирования VOS™ до инструментального входа – учтены специфические требования
концертных выступлений. Мы надеемся, что VoiceLive понравится Вам и Вашим
поклонникам!
Мы регулярно обновляем руководства по эксплуатации и различные материалы по поддержке
пользователей. Самую свежую информацию Вы всегда можете найти на нашем сайте
www.tc-
helicon.com
Функциональные особенности процессора:
• Микрофонный предусилитель студийного качества (на основе микросхемы Burr Brown INA163) с
лимитером VOS™ и источником фантомного питания 48 В;
• Технология обработки вокала, основанная на VoiceWorks и включающая:
∗ наиболее естественно звучащая вокальная гармонизация, выполняемая при помощи
запатентованной технологии TC-Helicon
— алгоритм HybridShift, создание гармонических голосов
— тонкая вокальная ньюансировка при помощи алгоритмов FlexTime™, Human-
Modeled Vibrato, Inflection, Pitch randomization, Portamento и Gender
— четыре режима управления для подчинения вокальному голосоведению и/или
MIDI
— два переключаемых режима темперации
— алгоритм HarmonyHold™, фиксация интервалов в целях создания более
интересной гармонической фразировки
∗ автоматическая коррекция высоты тона в соответствии с фабричными и
пользовательскими гаммами (ладами)
∗ «уплотнение» ведущего голоса
∗ 3-полосный эквалайзер TC-Electronic, обрезной НЧ-фильтр и компрессор/гейт
∗ Реверберация и задержка TC-Electronic
• Восемь ножных переключателей с плавным ходом
• Четыре ручки и один энкодер для редактирования пресетов
• MIDI-управление всеми параметрами через СС и SYSEX
• Микрофонный выход (pass-thru) для подачи сигнала на FOH-пульт в зале
• Инструментальный вход на реверберацию/задержку
• 24-битовая гармоническая обработка
• Цифровые входы/выходы S/PDIF
Данное руководство поможет Вам разобраться в многочисленных функциях VoiceLive и возможностях
их использования. Кроме того, на нашем сайте можно получить дополнительную поддержку, найти
различные примеры применения и ознакомиться с другими приборами компании TC-Helicon.
Желаем Вам творческих успехов!
Команда TC-Helicon
www.tc-helicon.com

6
Лицевая панель
СВЕТОДИОД THICKEN
Отображает статус (вкл./откл.)
режима уплотнения ведущего
голоса.
СВЕТОДИОД EFFECTS
Отображает статус (вкл./откл.)
реверберации и задержки.
СВЕТОДИОД
PITCH CORRECT
Отображает статус (вкл./откл.)
коррекции высоты тона.
СВЕТОДИОД I/O
Горит,
когда
пользователь
находится
в
меню
редактирования
параметров
входа/выхода.
СВЕТОДИОД UTILITIES
Горит,
когда
пользователь
находится
в
меню
редактирования
параметров
утилит.
РУЧКИ LEVEL/EDIT
В концертных режимах служат
для
регулировки
уровней
ведущего
голоса (Lead
Voice),
гармонических
голосов (Harmony Voice),
инструментального
входа
(Instrument input) и общего
выходного уровня (Output
level).
Чтобы сохранить в памяти
уровни, сохраните установки
IO/UTIL. Для этого нажмите
кнопку STORE.
В режимах редактирования эти
ручки служат для регулировки
значений
параметров.
Обратите внимание, что в
конце траектории вращения
этих ручек значения начинают
быстро «прокручиваться». Для
остановки прокрутки поверните
ручку
обратно
и
точно
установите требуемое значение
параметра.
СВЕТОДИОД OUTPUT CLIP
Указывает
на
внутреннюю
перегрузку
процессора
цифровой обработки. Следует
уменьшить
общий
уровень
гармонических
голосов
и
вокальных эффектов.
СВЕТОДИОД MIDI IN
Указывает
на
поступление
MIDI-информации.
ТЕКСТОВЫЙ ЖК-ДИСПЛЕЙ
Отображает
важнейшую
пресетную
информацию
(режим пресета), подробную
информацию о пресете (меню
редактирования пресетов),
системную
конфигурацию
(меню
входа/выхода
и
утилит),
данные
песни
(режим Song), а также
важные сообщения о статусе
прибора.
СВЕТОДИОДЫ VOICE (1-4)
Отображают статус (вкл./откл.)
отдельных
гармонических
голосов. При нажатии кнопки
HARMONY MUTE/HOLD FOR
BYPASS мигают все 4 зеленых
светодиода,
указывая
на
отключение всех голосов.
КРАСНЫЕ
СВЕТОДИОДЫ
VOICE EFFECTS
Указывают
на
наличие
голосовых эффектов в данном
пресете. При удерживании
нажатой
кнопки HARMONY
MUTE/HOLD FOR BYPASS
мигают
все 4 красных
светодиода, указывая на обход
(BYPASS) всех эффектов.
СВЕТОДИОД HARMONY
Отображает
общий
статус
(вкл./откл.)
алгоритмов
гармонизации.
СВЕТОДИОДНЫЙ
ТЕКСТОВЫЙ ДИСПЛЕЙ
Отображает
важнейшие
характеристики и информацию о
редактировании.
ТОЧКА GLOBAL FX
Наличие этой точки (нижний ряд
дисплея,
крайняя
слева)
указывает на выбор глобального
пресета эффектов. Это означает,
что
при
смене
пресетов
параметры
задержки
и
реверберации изменяться не
будут.
ТОЧКА EDITED
Данная точка указывает на то,
что
пресет
подвергался
редактированию.
Выключение
прибора
или
переключение
пресета приведет к потере
сделанных изменений.
ТОЧКА MIC IN
Указывает
на
выбор
микрофонного входа.
ТОЧКА LIMIT
Указывает
на
активность
лимитера.
ИНДИКАТОР INPUT
Пиковый индикатор отображает
входной уровень – микрофонный
или
линейный.
Диапазон
индикации: от –40 до 0 дБ.
СВЕТОДИОДНЫЙ
ИНДИКАТОР INPUT CLIP
Указывает на перегрузку по
входу
(микр./лин.
или
инструментальному), способную
вызвать
искажения.
Для
коррекции следует уменьшить
входной уровень. Индикатор
Input Clip может мигать при
включенном лимитере, что в
данном случае указывает на
«отсечку»
кратковременных
пиков
и
не
ведет
к
значительному
ухудшению
звучания.

7
Лицевая панель
НОЖНЫЕ ПЕРЕКЛЮЧАТЕЛИ
Служат для управления VoiceLive во время выступления. Выполняют
различные функции в зависимости от рабочего режима VoiceLive.
Понять принципы их работы поможет глава
«Вводный курс по
концертному применению VoiceLive» в разделе «Быстрый старт» данного
руководства. Подробное описание работы ножных переключателей в
различных режимах приводится в главе
«Таблицы функций ножных
переключателей» в конце руководства по эксплуатации.
Пожалуйста, обратите внимание, что ножные переключатели
имеют разнообразные функции. Для ясности в дальнейшем они
будут именоваться в данном руководстве как «кнопки 1-8», в
соответствии с приведенной выше нумерацией.
КНОПКА EDIT
Служит для перехода в режим
редактирования и выхода из
него.
КНОПКА STORE
Нажмите кнопку STORE, чтобы
начать процесс сохранения. При
помощи этой кнопки можно
сохранять пресеты, песни и
параметры меню IO/Utility. После
первого нажатия кнопки можно
изменить ячейку сохранения
каждого
пресета
и
название/номер
песни.
Операцию сохранения завершает
повторное
нажатие
кнопки
STORE.
КОДЕР DATA (ВВОД ДАННЫХ)
Служит для выбора пресетов в
пресетном режиме, песен в
режиме Song и того или иного
меню редактирования в режиме
редактирования.
В
режиме
сохранения он служит для
выбора сохраняемых параметров
—
пресетов,
песен
или
параметров IO/Utility. При
помощи кодера можно менять
параметры,
заключенные
в
треугольные скобки (например,
<STEP INS>).
НАЖАТИЕ НА КОДЕР DATA
Нажатие
на
кодер DATA
активирует
специальные
функции
в
режимах
редактирования
пресетов
и
песен. При нажатии кодера
параметры,
заключенные
в
треугольные скобки (например,
<EXECUTE> MIDI-Dump),
выполняют свои функции.

8
Задняя панель
Балансные входы BALANCED INPUT (1/4”)
Line (линейный) – в качестве основного входа Вы
можете выбрать этот вход или микрофонный вход.
Instrument (инструментальный) – предназначен для
подключения выходных сигналов от следующих
источников:
• Микшерный пульт
• Гитарная педаль или предусилитель
• Активные
звукосниматели
(гитара
с
батарейками)
• Акустическая гитара с предусилителем
• Клавишные инструменты
Подключение к этому входу электрической или
акустической гитары с пассивными звукоснимателями
не даст оптимального качества звучания.
(См.
примечание на стр. 16.)
Балансные выходы BALANCED OUTPUT (1/4”)
Left/Right разъемы представляют собой стереовыход
VoiceLive. При необходимости работы в моно
используйте любой из них, при этом установив для
параметра OUTPUT значение Mono
(меню
редактирования IO9). Эти выходы можно напрямую
соединять с балансными микрофонными входами (с
переходниками TRS – XLR),
если на входе
отсутствует фантомное питание. При подключении
микрофонных входов необходимо также установить
для параметра OUTPUT RANGE более низкое
значение (меню редактирования IO9). При наличии
фантомного
питания
для
соединения
с
микрофонным входам необходимы директ-боксы.
Цифровые вход/выход DIGITAL I/O
Служат для приема и передачи цифровых сигналов в
формате S/PDIF.
MIDI
Разъемы In, Out, Thru – стандартный MIDI-интерфейс
Гнездо PEDAL IN
Служит для подключения пассивных (passive volume
pedal) и активных (expression pedal) педалей.
Режим работы педали можно запрограммировать –
только на пресет, в меню редактирования XPED, или
на все параметры системы (глобально), в меню
редактирования UT1.
Гнездо Mic Pass Thru
Непосредственно связано с микрофонным входом и
служит для прямого подключения к микшерному
пульту. Если по какой-либо причине отключится
электропитание VoiceLive, микрофон
останется
звучащим.
При
работе
с
конденсаторными
микрофонами можно выбирать между источником
фантомного питания VoiceLive или микшерного
пульта.
Пожалуйста, обратите внимание, что при
одновременном использовании на этом разъеме
фантомного питания с микшерного пульта и VoiceLive
на микрофон будет подаваться слишком большое
напряжение!
Микрофонный вход Mic Input
Гнездо — балансный микрофонный вход.
Ручка MIC LEVEL – регулировка
входной
чувствительности.
Кнопка –20 дБ ослабляет входной сигнал на 20 дБ при
работе
с
конденсаторными
микрофонами.
Ослабление также бывает необходимо при
действительно громком пении с использованием
динамического микрофона.
Кнопка MIC IN SELECT служит для активизации
микрофонного входа. Когда кнопка не нажата,
VoiceLive по умолчанию использует линейный
вход (Line).
Кнопка LIMITER включает на микрофонном входе
лимитер VOS™.
Кнопка +48V включает на микрофонном входе
источник фантомного питания.
При включенном
фантомном питании никогда не подключайте к
микрофонному
входу
однопроводные
(несимметричные) микрофоны или инструменты,
а также процессоры обработки (симметричные
или несимметричные)!
Примечание:
оптимальное подключение к симметричному оборудованию обеспечивается использованием
симметричных кабелей. Однако если Вы используете НЕсимметричное оборудование, то как правило, это не
должно вызывать проблем.


10
Быстрый старт
Как «добыть» из VoiceLive звук
Необходимы:
• Процессор VoiceLive
• Сетевой кабель
• Микрофон
• Микрофонный кабель
• Два кабеля с разъемами 1/4″
• Система звукоусиления
1. Подключите сетевой кабель к VoiceLive и к
розетке. У VoiceLive нет выключателя, так что
он включается сразу при включении кабеля в
розетку.
2. Подключите два кабеля с разъемами 1/4″ к
левому и правому выходам VoiceLive и ко
входам системы звукоусиления.
3. Переведя ручки MIC LEVEL и OUTPUT в
минимальное положение (полностью против
часовой стрелки), подключите один конец
микрофонного кабеля к микрофону. Другой
конец кабеля подключите к микрофонному
(MIC) входу VoiceLive.
4. Нажмите кнопки «MIC IN SELECT» и «LIMITER»
на
задней
панели
(лимитер
облегчит
установку
уровней).
Если
микрофону
требуется фантомное питание, нажмите также
кнопку «PHANTOM POWER».
5. Во время пения увеличивайте громкость
микрофонного сигнала при помощи ручки MIC
LEVEL, пока индикатор уровня на дисплее не
начнет колебаться в районе – 20 дБ, но ещё не
будет «краснеть» из-за перегрузки. Если
уровень микрофона и без того чрезмерно
высок, нажмите кнопку «–20dB» на задней
панели.
6. Установив
систему
звукоусиления
на
номинальный уровень, пойте в микрофон и
одновременно регулируйте уровни ведущего
голоса (Lead), голосов
гармонайзера
(Harmony), эффектов (Effects) и общий
выходной (Output).
7. Для перехода к другим пресетам нажимайте
кнопки PREVIOUS/NEXT (5, 6) или вращайте
энкодер DATA.
Вводный
курс
по
концертному
применению VoiceLive
VoiceLive разрабатывался как безупречный прибор для
концертирующих вокалистов. Ножное управление
вокальными эффектами и гармонзауцией голосов
имеет различные уровни сложности. Основной
уровень – пресетный, на котором можно пролистывать
пресеты. На расширенном уровне в режиме сонга
песни (Song) можно упорядочить последовательность
переключения пресетов при помощи меток. Кроме
расширенных возможностей доступа к пресетам в
процессоре имеется назначаемая функциональная
кнопка USER и ножная педаль EXPRESSION.
Пояснения к настройкам
Основная часть настроек может быть выполнена при
помощи ножных переключателей. Подключите к
VoiceLive микрофон, установите его на стойку и
возьмите в руки данное руководство по эксплуатации.
Попробуйте
выполнить
дальнейшие
действия
одновременно с пением в микрофон.
В кратком руководстве приведены описания установок
тех или иных параметров. Чаще всего это относится к
«меню редактирования», доступ к которым
осуществляется нажатием кнопки EDIT и вращением
кодера DATA.
Пресетный режим (Preset Mode)
Это основной концертный режим VoiceLive. При
включении VoiceLive переходит в пресетный режим.
• Для изменения номера пресета нажимайте
кнопки PREVIOUS/NEXT (5 и 6 на
вышеприведенном рисунке)
• Выберите пресет 11 – пресет типа Scale.

11
Быстрый старт
• Нажмите кнопку USER. Вы услышите эффект
«телефонного голоса» (Telephone Voice). В
данном пресете кнопка USER установлена на
выполнение этой функции (продолжайте петь,
чтобы слышать, что происходит).
• Нажмите кнопку HARMONY MUTE (8), чтобы
отключить голоса гармонизации.
• Нажмите кнопку USER и затем кнопку
HARMONY MUTE, чтобы включить голоса
гармонизации
и
отключить
эффект
«телефонного голоса».
• Для обхода всех эффектов VoiceLive некоторое
время удерживайте нажатой кнопку HOLD FOR
BYPASS (8).
• Для повторного включения (отмены обхода)
всех эффектов VoiceLive снова некоторое
время удерживайте нажатой кнопку HOLD FOR
BYPASS (8).
• Для изменения тональности гаммы, по которой
создаётся гармонизация, нажмите кнопку KEY
(2), затем – кнопки PREVIOUS/NEXT.
• Для изменения типа гаммы, по которой
создаётся гармонизация, нажмите кнопку
SCALE (3), затем – кнопки PREVIOUS/NEXT.
• Для изменения номера пресета нажмите
кнопку PRESET SELECT (1), затем – кнопки
PREVIOUS/NEXT.
Примечание: параметры Key (тональность) и Scale
(гамма) могут быть изменены только в пресетах
гаммаобразного типа (scale type). Нажатие кнопок KEY
и SCALE в пресетах другого типа не возымеет
никакого эффекта.
Режим прямого доступа к пресетам (Preset
Direct Mode)
В режиме прямого доступа к пресетам верхние кнопки
VoiceLive обеспечивают доступ к пресетам – подобно
тому, как кнопки автомагнитолы программируются на
определенные радиостанции.
• Находясь в пресетном режиме, некоторое
время удерживайте нажатой кнопку DIRECT
(3), пока на светодиодном текстовом дисплее
не замигает надпись
DRCT
., означающая
переход VoiceLive в режим прямого доступа к
пресетам.
• Для доступа к запрограммированным пресетам
прямого доступа нажмите любую из 4 верхних
кнопок.
• Для выбора требуемого пресета нажимайте
кнопки PREVIOUS/NEXT; при этом вторым
символом на светодиодном текстовом дисплее
должен быть символ «*».
• Удерживайте нажатой одну из 4 верхних
кнопок, пока второй символ на светодиодном
текстовом дисплее не изменится на А, В, С или
D. Теперь эта кнопка запрограммирована на
вызов требуемого пресета.
Примечание: удерживание кнопки DIRECT в том
случае, если пресет не был изменен (на дисплее не
отображался символ «*») приведет к тому, что
VoiceLive выйдет из режима прямого доступа к
пресетам.
Вот пример того, как светодиодный текстовый
дисплей работает в режиме прямого доступа к
пресетам:
Надпись на дисплее:
Р:
Этот символ указывает на то, что VoiceLive
находится в пресетном режиме.
А:
Буквы А, В, С или D указывают на то, что
вызван пресет прямого доступа. При этом
удерживание нажатой одной из 4 верхних
кнопок переведет VoiceLive в новый режим.
Если вместо букв на дисплее отображается
символ «*», то пресет прямого доступа не
вызван. Удерживание нажатой одной из 4
верхних кнопок запрограммирует эту кнопку
на вызов текущего пресета.
23:
Указывает номер текущего пресета.
• При помощи кнопок PREVIOUS/NEXT найдите
пресет
по
своему
вкусу
с
большим
количеством гармоник.
• Удерживая нажатой одну из 4 верхних кнопок,
запрограммируйте прямой вызов данного
пресета.
Режим пресетных голосов (Preset Voice Mode)
• Удерживайте некоторое время нажатой кнопку
VOICE (4), пока на светодиодном текстовом
дисплее
не
замигает
надпись
VOIC
,
означающая переход VoiceLive в режим
пресетных голосов.
• Нажмите любую из 4 верхних кнопок, чтобы
включить/отключить гармонический голос.
Обратите внимание, что на то, какой из
голосов включен, указывают светодиодные
индикаторы Vocal (1-4) с правой стороны
жидкокристаллического дисплея.
• Для смены пресетов нажимайте кнопки
PREVIOUS/NEXT. Обратите внимание на то, что
при
смене
пресетов
комбинация
включенных/отключенных
голосов
не
изменяется.
Вот пример того, как светодиодный текстовый
дисплей работает в режиме к пресетных голосов:
Надпись на дисплее:
Р:
Этот символ указывает на то, что VoiceLive
находится в пресетном режиме.
V:
Этот символ указывает на то, что VoiceLive
находится в режиме пресетных голосов.
23:
Текущий номер пресета.

Комментарии
VoiceLive
Гармонизация | Коррекция | Эффекты
Руководство по эксплуатации
инструкцияTC Helicon VoiceLive Rack

USER’S MANUAL
v1.0

Руководство пользователя
89 страниц(ы)
EN

Краткое руководство пользователя
19 страниц(ы)
EN
Посмотреть инструкция для TC Helicon VoiceLive Rack бесплатно. Руководство относится к категории hi-fi системы, 1 человек(а) дали ему среднюю оценку 5.1. Руководство доступно на следующих языках: английский. У вас есть вопрос о TC Helicon VoiceLive Rack или вам нужна помощь? Задайте свой вопрос здесь
- Safety
- Introduction
- Front Panel
- Back Panel
- Quick Start
- Basic Operation
- The Tone Button
- The Pitch Button
- The Tap Button
- The Bypass Button
- Detailed Operation
- The Input Gain Button
- The Wizard Button
- The Setup Button
- The Store Button
- Editing
- The Edit Button
- MIDI Implementation
- Preset List
- Scales Diagram
- Frequently Asked Questions (FAQ)
- Specifications
Нужна помощь?
У вас есть вопрос о TC Helicon а ответа нет в руководстве? Задайте свой вопрос здесь Дай исчерпывающее описание проблемы и четко задайте свой вопрос. Чем детальнее описание проблемы или вопроса, тем легче будет другим пользователям TC Helicon предоставить вам исчерпывающий ответ.
Количество вопросов: 0


Главная
| TC Helicon | |
| VoiceLive Rack | |
| hi-fi система | |
| английский | |
| Руководство пользователя (PDF), Краткое руководство пользователя (PDF) |
Не можете найти ответ на свой вопрос в руководстве? Вы можете найти ответ на свой вопрос ниже, в разделе часто задаваемых вопросов о TC Helicon VoiceLive Rack.
Когда звук считается слишком громким?
Могут ли устройства разных марок подключаться друг к другу при помощи Bluetooth?
Что такое Bluetooth?
Что такое HDMI?
Как лучше всего выполнять чистку hi-fi система?
Что такое Dolby Atmos?
Инструкция TC Helicon VoiceLive Rack доступно в русский?
Не нашли свой вопрос? Задайте свой вопрос здесь
Нет результатов

TC Helicon VoiceLive Play
инструкция40 страниц(ы)

TC Helicon Voicelive 3
инструкция202 страниц(ы)

TC Helicon Voicelive
инструкция59 страниц(ы)

TC Helicon VoiceLive 3 Extreme
инструкция218 страниц(ы)

TC Helicon Voicelive 2
инструкция109 страниц(ы)

TC Helicon Voicelive Touch
инструкция62 страниц(ы)

TC Helicon Voicelive Touch 2
инструкция111 страниц(ы)

TC Helicon Play Acoustic
инструкция81 страниц(ы)

TC Helicon Perform-VK
инструкция16 страниц(ы)

TC Helicon Harmony Singer 2
инструкция8 страниц(ы)
Посмотреть все TC Helicon руководства Посмотреть все TC Helicon hi-fi система руководства