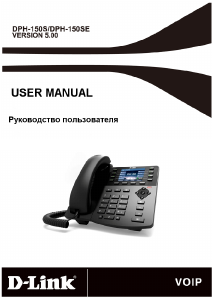
- Manuals
- Brands
- D-Link Manuals
- IP Phone
- DPH-150SE
- User manual
-
Contents
-
Table of Contents
-
Troubleshooting
-
Bookmarks
Quick Links
Related Manuals for D-Link DPH-150SE
Summary of Contents for D-Link DPH-150SE
-
Page 2: Table Of Contents
INTRODUCTION …………………………….5 GETTING STARTED…………………………5 1.1………………………..5 ACKAGE ONTENTS 1.2……………………….6 HONE PECIFICATIONS 1.3…………………………7 HONE IAGRAM 1.4…………………..8 EFINITION AND NTRY CONNECTING THE IP PHONE ……………………..10 INITIAL SETUP …………………………… 11 3.1. IP P ……………………….11 HONE ETUP 3.2…………………………12 ISPLAY 3.3.
-
Page 3
3.14. M2~M12 S …………………………18 ETTING 3.15. MAC A …………………………18 DDRESS 3.16…………………………..19 ERSION 3.17……………………….19 ANGUAGE ELECTION 3.18…………………………19 ORMAT 3.19……………………….20 OLUME DJUSTMENT 3.19.1. Ringer Volume ……………………….20 3.19.2. Speaker Volume ……………………….20 3.19.3. Handset Volume ……………………….20 OPERATING THE PHONE ……………………….21 4.1. -
Page 4
5.4……………………….27 ELETING A UMBER USING THE WEB CONFIGURATION ……………………29 6.1………………….29 CCESSING THE ONFIGURATION 6.2…………………………..30 OGIN 6.3. – M ………………………31 YSTEM ANAGEMENT 6.4. – R ………………….32 YSTEM ESTORE ACTORY EFAULT 6.5. – A ……………………..32 YSTEM ROVISION 6.6. – R ……………………..33 YSTEM ESTART… -
Page 5
TROUBLESHOOTING ………………………..56 APPENDIX A: WALL MOUNT INSTALLATION ………………….57 APPENDIX B: INTERNET RADIO………………………60 FCC STATEMENT: …………………………..62… -
Page 6: Introduction
VoIP (Voice over Internet Protocol; also known as Internet Phone) is a technology that allows anyone to make a telephone call over the Internet environment. This is an operation manual for the DPH-150SE IP Phone. It is intended to help you configure the telephone. Please follow the user guide carefully as troubleshooting the telephone can be very difficult and time consuming.
-
Page 7: Phone Specifications
1.2. Phone Specifications Protocol Handset / Speakerphone NAT Traversal IETF SIP (RFC3261) Volume adjustment UPnP Speed dial (10 records) STUN Network Interface Phone book (200 records) Static port mapping RJ45 x 2, 10/100BaseT Multi-line (up to 12 lines) Call history (Incoming calls / TCP/IP LCD Display Outgoing calls / Missed…
-
Page 8: Phone Diagram
G.711µ-law DTMF Physical Dimensions G.711a-law Ring Tone, 9 selectable Size: 200(L) x 220(W) x 100 G.729a/b tones (H) mm Ring Back Tone Wall Mount Phone Functions (local and remote) Weight: 860g Multi-user (4 SIP accounts) Dial Tone Color: Dark Gray One-Touch Dial (up to Busy Tone…
-
Page 9: Key Pad Definition And Text Entry
Cycle through the phone menu, adjust volume Enable 3-way conference 3-Way Conference Confirm setting change, exit menu, dial, save changes OK / Right Access the phone menu Menu Disable user’s microphone so that the person on the other line can not hear anything, access Mute/Function the language selection, access the time format Transfer…
-
Page 10
defDEF wxyzWXYZ WXYZ @ . _ - * # () % & + ghiGHI / $ , jklJKL mnoMNO In Normal and Numeric modes, each time you quickly enter the same key, the next character available on that key will be displayed. If you do not press a key for more then 1 sec, the current character will be selected and the cursor will move right for the next selection. -
Page 11: Connecting The Ip Phone
2. Connecting the IP Phone Connect the IP Phone as shown in the following diagram:…
-
Page 12: Initial Setup
3. Initial Setup 3.1. IP Phone Setup Map NOTE 1: If you made any modifications, you may quit setup at any time by pressing MENU to save and exit or MENU CANCEL to quit…
-
Page 13: Display Name
without saving. The phone will automatically exit from the menu screen if there are no inputs from the user. NOTE 2: Use to select ENABLE or DISABLE. NOTE 3: The left arrow key can be used as the Backspace key. 3.2.
-
Page 14: Setup Adsl Password
3.3.3. Setup ADSL Password Press ADSL Password: Enter ADSL Password ******* 3.3.4. Disable ADSL Dialup Press ADSL DIALUP: to select “Disable” DISABLE 3.4. DHCP (Dynamic Host Configuration Protocol) DHCP allows the network administrator to distribute IP addresses when a computer is plugged into a different place in the network. If your ISP provides a static IP address, you must disable DHCP and enter the IP address provided.
-
Page 15: Disable Dhcp
Press Subnet mask automatically acquired Subnet Mask: 255.255.255. 0 Press Router IP: Router IP automatically acquired 192.168.001.161 3.4.2. Disable DHCP Press to set DHCP “Disable” DHCP: DISABLE Press IP Address: Enter the IP address 192.168.001.161 Press Enter the subnet mask Subnet Mask: 255.255.255.000 Press…
-
Page 16: Dns Server Ip
3.5. DNS Server IP The domain name system (DNS) is the way that Internet domain names are located and translated into Internet Protocol addresses. There is probably a DNS server within close geographic proximity to your ISP that maps the domain names in your Internet requests or forwards them to other servers on the Internet.
-
Page 17: Cf (Call Forward) Busy
Press CF Unconditional: to select “Enable” or “Disable” ENABLE / DISABLE Press to enter the number where the call Unconditional No will be forwarded 3.9. CF (Call Forward) Busy Forward all the incoming calls to another number when user is busy on the phone. Press CF User Busy: to select “Enable”…
-
Page 18: Anonymous Call
CF No Answer: to select “Enable” or “Disable” ENABLE / DISABLE Press to enter the number where the call No Answer No will be forwarded 3.11. Anonymous Call Enables the caller (user) to hide the name and phone number from the receiver. Press o select “Enable”…
-
Page 19: M2~M12 Setting
NOTE: At this point, you may save the settings and exit. The next two sections explain how to obtain the MAC address and firmware version. Press to exit the menu When asked to save or cancel, press to save 3.14. M2~M12 Setting Select the functionality of the line keys.
-
Page 20: Version
3.16. Version The version menu displays the firmware version. You cannot modify the version number. Press The firmware version is displayed on the screen Version: V: 01.00 3.17. Language Selection The VoIP Phone supports 2 languages: English and Russian. Language: Press followed by English…
-
Page 21: Volume Adjustment
3.19. Volume Adjustment 3.19.1. Ringer Volume While the handset is in place, Press to increase the ringer volume and to decrease the ringer volume 3.19.2. Speaker Volume While the handset is in place, Speaker Press Press to increase the speaker volume and to decrease the speaker volume 3.19.3.
-
Page 22: Operating The Phone
4. Operating the Phone 4.1. Dialing an IP Address Speaker Lift the handset or press the SPEAKER button Dial an IP address For example: dialing 192.168.0.1 WXYZ Press OK or wait until the timer expires to dial. 4.2. Dialing a SIP Number Speaker Lift the handset or press the SPEAKER button…
-
Page 23: Speed Dialing
4.3. Speed Dialing Speaker Lift the handset or press the SPEAKER button Dial Speed Dial number with the prefix code “*”. For example: dialing * and speed dial number 08, 4.4. Answer a Phone Call Note: The CANCEL key may be used to reject a call. When the phone rings: Speaker Lift the handset…
-
Page 24: Transfer
4.7. Transfer While having a conversation: Transfer Press Transfer to put the person on the other line on hold. Dial the IP address or the extension number where you would like the call to be transferred. Transfer Press Transfer to transfer the call. 4.8.
-
Page 25: On Hold
Redial Press Redial again to cycle through the dialed, missed, and received calls. Press DOWN key to scroll down through the dialed, missed, or received lists until the number is displayed on the screen. Pick up the handset or press OK 4.9.
-
Page 26
Person A After Person A pick up the phone, press Conference key to place Person A on hold. Dial the extension or phone number of Person B and wait until Person B picks up the phone. Press the Conference key to begin the 3-way conference. -
Page 27: Using The Phone Book
5. Using the Phone Book 5.1. Dialing from the Phone Book Press the PHONE BOOK key to access the phone book. Press to scroll down through the list until the name is displayed on the screen. Press OK to dial. 5.2.
-
Page 28: Editing A Number
5.3. Editing a Number Press the PHONE BOOK key to access the phone book. Press until the name is displayed on the screen. Press the PHONE BOOK key again. Select “Edit” to edit. Enter a new name and press Enter the new phone number and press Choose a new Ringer type Press the PHONE BOOK key to save and override the previous name and phone number.
-
Page 29
Select “Delete” and press OK to delete. Press OK again to save the new list on the phone book. -
Page 30: Using The Web Configuration
6. Using the Web Configuration The web configuration interface can be accessed using a web browser. 6.1. Accessing the Configuration Menu Open browser (Internet Explorer, Netscape, Opera, Firefox, etc.) Type in the IP Address of the phone The IP address is provided by your Internet Service Provider (ISP). If your ISP supports DHCP, you may obtain the IP address from your phone.
-
Page 31: Web Login
Hardware Version Hardware version of the IP phone Firmware Version The current firmware version installed on the DPH-150SE The current version of the DSP application installed on the DPH-150SE DSP Version MAC address of the IP phone MAC Address The NAT mode (Router or Bridge) of the LAN interface…
-
Page 32: System — Management
6.3. System – Management User Name Configuration menu login name Configuration menu login password Current Password New Password Enter a new password to replace the current one Confirm Password Enter the new password again to confirm the change Get time setting from SIP or NTP server Get Time From Network Time Protocol (NTP) is a protocol used to help synchronize your NTP Server IP…
-
Page 33: System — Restore Factoryd
Time Zone Select your time zone. If there is daylight saving in your area, tick the check Check to enable daylight saving Daylight Saving 6.4. System – Restore Factory Default Restore Factory Setting Restores all the settings back to the factory default settings 6.5.
-
Page 34: System — Restart System
The key provided by the administrator for decrypting the encrypted Encryption Key configuration files Refresh Time The time at which the DPH-150SE connects to the auto provision system to check for updates. 6.6. System – Restart System Restart System Click Restart to update all the modifications and reboot the system…
-
Page 35: Dhcp
6.7. Network – Network Settings / DHCP DNS Server 1~2 DNS address provided by your ISP WAN MAC MAC address of the WAN interface LAN MAC MAC address of the LAN interface…
-
Page 36: Ppp O E
6.8. Network – Network Settings / PPPoE PPPoE ID PPPoE ID/username provided by your ISP. PPPoE Password PPPoE password. DNS address provided by your ISP DNS Server 1~2…
-
Page 37: Static Ip
6.9. Network – Network Settings / Static IP IP Address IP address provided by your ISP. Router IP Router IP address provided by your ISP Subnet Mask Subnet mask provided by your ISP DNS Server 1~2 DNS address provided by your ISP…
-
Page 38: Network — Qos Settings
6.10. Network – QoS Settings Voice ToS Sets the type of service for this Internet datagram. SIP ToS Sets the type of service for this higher priority of signaling packet. VLAN Enable or disable VLAN VLAN Priority 8 classes are supported for prioritization on VLAN. VLAN ID The identification of VLAN.
-
Page 39: Ettings
6.11. Network – NAT Traversal Settings Simple Traversal of User Datagram Protocol through Network Address STUN Translation (STUN) is a protocol that allows applications to determine the types of NATs and firewalls that are in between them and the Internet. STUN also provides applications the ability to determine the public IP addresses allocated to them by NAT.
-
Page 40
Use UPnP to get external IP address. External SIP Port External SIP port External Media Port External media port Enable or disable universal plug and play. Some NAT supports UPnP so STUN UPnP is not required and must be disabled Always send keep-alive Enable or disable to keep the SIP signaling channel alive. -
Page 41: Network — Nat Traversals
6.12. Network – NAT NAT mode can be set to ROUTE Mode or Bridge Mode.
-
Page 42: Server & O P Server )
6.13. VoIP – SIP Settings (SIP Phone Setting, Registrar & Outbound Proxy Server) SIP Phone Port Number SIP phone port number. Registrar server domain name or IP address. Registrar Server Domain Name/IP Address Registrar server listening port. Registrar Server Port Number Authentication Expire The time after which the registration on SIP Registrar expires.
-
Page 43
Outbound Proxy Port Outbound proxy listening port. Number Send message via Select Enable to send all SIP requests through Outbound Proxy. Outbound Proxy 6.14. VoIP – SIP Settings (Message Server) MWI Message Server Message server domain name or IP address. Domain Name/IP address MWI Message Server Port Message server listening port. -
Page 44: Oip — Sip Settings (Others )
6.15. VoIP – Park Server & Presence Server Park server host name or IP address. Park Server Domain Name / IP Address Park Account The number of the parking area on Park server Presence Server Domain Name / IP Address Presence server host name or IP address.
-
Page 45
sending repeated INVITE requests. These INVITE requests allow the user agent or proxies to determine the status of the SIP session. Media Port Real-time Transport Protocol port number. Provides end-to-end transfer of data with real-time audio. Prack A SIP method which is applied to the condition of acknowledging provisional responses such as 180 Ringing. -
Page 46: Oip — Sip Account Settings
6.17. VoIP – SIP Account Settings Default Account When you dial a number, the default account is used to dial. The User Name of default account is displayed on the receiver’s IP phone. Account Active Enable or disable this account. Name displayed on the LCD screen of the called party.
-
Page 47: Advance — Voice Settings
Register Status Displays if the current phone is registered or unregistered with SIP server. 6.18. Advance – Voice Settings Codec (Priority 1 ~ 3) Voice Compression Algorithm priority settings. Select from the most used codec to the least used codec. RTP Packet Length The payload size for each RTP packet.
-
Page 48: Hone Setting )
6.19. Advance – Phone Settings (Phone Setting) Select the tone for your particular country Tone Setting Select the ring type (Tone 1 ~ 4, Melody 5 ~ 8, and MP3 9). Ringer Type Hold Tone Select melody or tone when the phone is on hold.
-
Page 49
Do Not Disturb Reject all incoming calls. Call Waiting Enable or disable call waiting. Call Waiting Notify Enable or disable the reminding tone for Call Waiting Anonymous Call If DISABLE is selected, full URI and name are sent to the receiver’s phone when the user makes a phone call. -
Page 50: Advance — Phone Settings
phone number automatically Transfer end of Conference Enable or disable the feature of transferring calls after the three-way Call conference call ends. Pound Key Dial Enable or disable Pound key Dial. Pound Key ( # ) can be defined as a <send>…
-
Page 51: Advance — Phone Book
will automatically disconnect. Incoming No Answer Timer The time interval that the receiver’s phone will ring. If the receiver fails to answer the phone during this time interval, the phone will automatically disconnect. Hold Recall Timer The recall time interval for the call party which is put on hold. The time interval that the speaker phone stays on before turning off Auto Speaker Off Timer automatically (due to inactivity).
-
Page 52: Line Keys Settings
Number Phone number that corresponds to the name. Ring Type Ring type of the number 6.22. Line Keys Settings Type It supports four types for those programmable keys that are “Line”, “Park”, “One Touch Dial” and “Extension”. Default is “Line”. The phone number of the parking area that is currently saved to “Park”.
-
Page 53: Advance — Speed Dial
Monitor Number The phone number of the monitored extension that is currently saved to “Extension”. Park: It is an advanced feature to park the active call in the parking area which is a special extension on Park server. The phones which have been assigned to monitor the parking area can retrieve calls if there are calls on parked.
-
Page 54: Advance — Music Station
6.24. Advance – Music Station An easy-to-memorize name for the station, ex: Station1. Station Name A complete URL used to access the station It accepts 20 stations maximum. (10 default stations are provided). Please see “Appendix B” for more details.
-
Page 55: Advance — Mp3 Ring
6.25. Advance – MP3 Ring Click “Browse” to choose one MP3 file and click “Upload File”. The maximum size of the Ring File MP3 file is 30KB. The MP3 file is used for the Ringer type “MP3 Ring 9” (in sections 6.16, 6.18 and 6.20)
-
Page 56
6.26. Call Log – Call Tracing Log Call Tracing Log keeps a record of all the phone activities. This log is used by engineers to troubleshoot hardware problems. -
Page 57: Troubleshooting
7. Troubleshooting The following troubleshooting information can be used to help solve most common problems. QUESTION RECOMMENDED ACTION There is no DIAL tone 1. Check if there are any loose connections. Nothing is displayed on the 1. Check if the power cord is connected properly. LCD screen 2.
-
Page 58: Appendix A: Wall Mount Installation
IP segment of the PhoneA LAN port. Appendix A: Wall Mount Installation The appendix herein provides an illustrated step by step installation guide for mounting the DPH-150SE on the wall. Please print out this page (Figure A1) prior to the installation 1.
-
Page 59
Attention Do not scale the size of this page when you are printing. Be sure that the distance between the two keyholes is 100 mm. -
Page 60
3. Place the mount on the wall as shown in Figure A3 and the keyholes of the mount are above the mounting screws. 4. Slide down the mount until it stops against the top of the keyhole 5. Place the DPH-150SE on the wall mount as shown in Figure A4. -
Page 61: Appendix B: Internet Radio
Figure A3 Figure A4 Appendix B: Internet Radio 1. How do I use the Internet Radio? Press to turn on the Internet Radio to select the preferred station Press to turn off the Internet Radio. 2. Key Definition Definition Definition Turn on the Internet Radio Increase / decrease the volume…
-
Page 62
Display the name of the current Pause / Play station Tune the Internet Radio to the Turn off the Internet Radio preferred station The ten numeral keys 0, 1~9 are the quick access keys to the first ten preferred stations Numeral keys on web configuration “Music Station”. -
Page 63: Fcc Statement
FCC Statement: This equipment has been tested and found to comply with the limits for a Class B digital device, pursuant to part 15 of the FCC Rules. These limits are designed to provide reasonable protection against harmful interference in a residential installation. This equipment generates, uses, and can radiate radio frequency energy and, if not installed and used in accordance with the instructions, may cause harmful interference to radio communication.
На чтение 8 мин Просмотров 1.6к. Опубликовано 06.08.2021
Содержание
- Снаружи телефон, а внутри маршрутизатор
- Комплектность
- Характеристики
- Процедура сброса параметров IP-телефона
- Как подключить?
- Процедура настройки
Снаружи телефон, а внутри маршрутизатор
Модель DPH-150S от D-Link имеет незначительный внешний вид. Производитель по-дружески сэкономил на всем, кроме качественного оснащения самого устройства.
В результате конечный потребитель получил мощное устройство с отличными характеристиками, но по доступной цене. Дизайн телефона полностью подчинен практическим задачам. Коробка также выглядит очень аскетично снаружи.

D-Link, в отличие от своих конкурентов, даже не инвестирует в рекламу, считая, что качественный продукт сам по себе способен пробиться и завоевать популярность среди пользователей.
Устройством можно управлять через полный веб-конфигуратор. Особенно приятно, что в его настройках есть возможность установить русский язык.
Кроме того, IP-телефоном легко управлять через встроенный монитор с помощью кнопок на самом устройстве.

На рисунке ниже показаны примеры значков, используемых для навигации по встроенному монитору.

Несмотря на небольшой размер экрана, он информативен, например позволяет видеть номер телефона, с которого идет звонок, телефонную книгу (объемом около 0,5 тыс. Записей) и т.д.
Комплектность
Если внешний вид упаковки не пугает пользователя, внутри он обнаружит само устройство и следующие сопутствующие элементы, необходимые для его быстрого ввода в эксплуатацию:
- Трубки, соединенные спиралью;

- Спиральный кабель для подключения телефона к IP-телефону;
- Источник питания;
- Сетевой кабель;
- ДПХ-150С;
- Ноги;
- Инструкции записаны на компакт-диске;
- Крепежные расходники;
- Документы, подтверждающие гарантийную поддержку устройства.

Характеристики
Корпус выполнен из прочного пластика черного цвета, его конструкция подходит как для настенного, так и для настольного использования. Устройство весит около 1500 граммов.
Технология, используемая для связи, отражена в названии устройства «VoIP-Phone», что означает «Передача звука через IP (сети связи)». На языке оригинала — «Voice over IP».
Глядя на нижнюю крышку устройства, владелец обнаруживает порт «WAN», через который устройство может подключаться к роутеру. Рядом находится разъем «LAN» для подключения к ПК.

Оборудование относится к категории стационарных, поэтому требует постоянного электропитания. Его хват не запутает даже новичка, так как он имеет круглое сечение.
Для использования внешней гарнитуры устройство оснащено разъемом RJ-9.
Помимо поддержки полного набора стандартных функций, следует отметить, что благодаря наличию акустического эхоподавления и тишины передача звука имеет высокую четкость. Устройство поддерживает HD-голос.

Удобно реализованная переадресация и переадресация вызовов без сопровождения и помощи. Профессионалы оценят функцию ожидания вызова и трехстороннюю конференц-связь.
Независимо от того, где используется устройство, дома или на работе, пользователи часто используют встроенную функцию анонимного вызова и удобную функцию «Не беспокоить».
После включения этого режима входящие звонки будут отклоняться, но сохраняются в журнале. В телефоне эта функция называется «Не беспокоить».
Если к телефону имеют доступ несколько человек одновременно, администратор может заблокировать некоторые исходящие вызовы.
Процедура сброса параметров IP-телефона
Если вы хотите восстановить заводские настройки, вам необходимо выполнить следующие действия:
- Выключите устройство;
- Включите устройство и во время запуска, когда на мониторе появится сообщение «POST MODE», введите команду «* # 168»;
- Появится уведомление: «Восстановить конфигурацию»;
- Выключите устройство;
- Включите устройство;
- Подождите, пока устройство загрузится;
- Готовый. Параметры сброшены до заводского состояния.
Недавно «Ростелеком» представил услугу «Новая телефония», также известная как «Облачная телефония». Он позволяет быстро и легко подключить виртуальный номер обычного городского формата или целый виртуальный коммутатор с возможностью выделения 8-800 номеров. В этом случае нет необходимости проводить отдельную линию. Вам просто необходим выход в интернет, и не обязательно от Ростелекома — облачная АТС будет работать с одним из крупнейших российских провайдеров. Для этой услуги в наш филиал прибыла партия VoIP-телефонов D-Link DPH-150S версии F2. На первый взгляд это обычный телефон.
Под привычной для обывателя маской скрывается очень интересное устройство с очень хорошей функциональностью, которое позволяет одновременно подключать два номера. Помимо обычных для сетевых устройств, поддерживаются следующие протоколы: — SIP RFC 3261 — SDP RFC 2327 — RTP RFC 1889 — STUN, статическое отображение портов Поддерживаемые аудиокодеки: — G.711a / u (64 Кбит / с) — G. 729A / B (8 Кбит / с) — G.723.1 (высокий / низкий) — G.726-32 — G.722 Управление D-Link DPH-150S осуществляется через веб-интерфейс пользователя (поддерживается русский язык) или с экрана и клавиатура. На экране, помимо даты и времени, можно просмотреть номер звонящего, историю звонков (до 100), телефонную книгу (до 500 записей). Устройство поддерживает возможность смены мелодии звонка (9 мелодий и 3 мелодии) и установки 9 номеров для быстрого набора.
Как подключить?
Процедура не займет много времени, так как все необходимое производитель положил в комплект с устройством.

Вам необходимо сделать следующее:
- Вставьте вилку блока питания в соответствующую розетку;

- Подключите порт «WAN» телефона к «LAN» маршрутизатора с помощью интернет-кабеля;
- Дождитесь завершения процесса загрузки;
- Готовый. Вы можете приступить к настройке работы оборудования.

По умолчанию на маршрутизаторах включен DHCP-сервер, поэтому машине автоматически будет назначен динамический IP-адрес.
Если DHCP не включен, вам необходимо войти в веб-интерфейс маршрутизатора и включить его.
Назначенный IP-адрес очень легко распознается через встроенный экран. Для просмотра главного меню устройства необходимо нажать кнопку «4» или «Ok», как показано на рисунке ниже.

Затем перейдите на вкладку «Статус» (в разделы меню можно войти, нажав кнопку «ОК» или через соответствующую кнопку под монитором, например, на изображении ниже «3»).

Появится IP-адрес, с которого можно будет получить доступ к веб-конфигуратору телефона.

Для выхода из запущенного меню необходимо нажать «Назад» (на изображении выше кнопка «4» отмечена»).
Готовый. Затем с помощью ПК вы можете ввести необходимые параметры в интерфейс IP-телефона. Главное условие для этого — ПК и устройство находятся в одной сети.
Процедура настройки
В соответствии с рекомендациями D-Link, текущая версия прошивки должна быть установлена на устройстве до начала процесса ввода сетевых параметров.
Последняя версия прошивки доступна бесплатно на dlink.ru. На официальном сайте производитель рекомендует сразу после обновления прошивки восстановить параметры до заводских.
После выполнения этих предварительных шагов вы можете перейти к непосредственной настройке.
Для этого вам потребуется выполнить следующие последовательные действия:
- Откройте интернет-браузер на своем ПК и перейдите по IP-адресу, который был обнаружен в процессе подключения;

- Введите «admin» в колонку имени»;
- В следующей строке с надписью «Пароль» введите то же слово еще раз и нажмите «Enter»;
- Будет отображен веб-интерфейс на английском языке;

- Во вкладке «ОСНОВНОЙ» откройте вкладку «СОСТОЯНИЕ». Здесь появится информация о ссылке;
- Последняя версия прошивки поддерживает русский язык. Чтобы использовать это, вам нужно открыть вкладку «ЯЗЫК»;

- В выпадающем списке языков укажите «Русский»;
- Нажмите «Применить»;
- После этого все разделы будут отображаться на русском языке;

- Затем перейдите во вкладку «МАСТЕР», здесь вы сможете быстро настроить параметры устройства;

- Пользователь может отслеживать звонки через встроенный в интерфейс регистратор;

- Затем перейдите во вкладку «СЕТЬ»;

- Откройте вкладку «WAN» и введите параметры сети;

- Во вкладке «LAN» укажите режим работы и используемые адреса;
- Дополнительные настройки выполняются через вкладки: «QOS и VLAN»,


«Управляющие двери»;

«DHCP»;

«SNTP»;

Параметры, указанные в соглашении с оператором связи, вводятся во вкладке «VOIP;
- Установка кодеков, используемых провайдером, доступна во вкладке «Настройки кодека»;
- Настройка провайдера производится в колонках глобальных и расширенных настроек SIP;


В случае конфликтов с сетевым брандмауэром будет полезно изменить настройки во вкладке «STUN»;
- Маршрутизация звонков настраивается на одноименной вкладке;

- Текущие параметры самого телефона настраиваются через вкладку «ТЕЛЕФОН» во вкладке «АУДИО»;

- Изменение широкого набора функций производится в разделе «ФУНКЦИИ»;

- Правила работы с набираемыми номерами включены в подраздел «СОСТАВ»;

- В телефонном справочнике хранится не менее 0,5 тыс. Номеров;

- Если встроенного каталога недостаточно, создаются ссылки на внешние источники;

- Звонки можно совершать прямо из веб-конфигуратора;

- Действия кнопок настраиваются через меню ФУНКЦИОНАЛЬНЫЕ КЛАВИШИ»;

- В устройстве предусмотрено подключение к нему блока управления расширением клавиш, который настраивается через одноименную страницу интерфейса;

- Виртуальные кнопки меню интегрированного экрана настраиваются в подразделе «ПРОГРАММНЫЕ КЛАВИШИ»;

- Если вам необходимо удаленно управлять устройством и назначить режим автоматического обновления, вам нужно будет зайти на вкладку «Управление системой» и перейти на вкладку «Автоматическая настройка»;

- Чтобы сохранить журнал на внешний сервер, используйте отдельное меню, предусмотренное для этой цели;

- Настройки можно сохранить в виде отдельных файлов, это облегчит ввод устройства в эксплуатацию при необходимости восстановления заводского состояния;

- Есть отдельная страница для обновления прошивки;

- При использовании устройства более чем одним человеком рекомендуется ограничить права обычных пользователей через вкладку «КОНТРОЛЬ ДОСТУПА»;

- Раздел для перезагрузки устройства поможет устранить возникшие программные проблемы;

- Во вкладке «БЕЗОПАСНОСТЬ» вы вводите параметры для разделов:


«ВЕБ-фильтр»,

«БРАНДМАУЭР»;

«NAT»;

«VPN»;

«БЕЗОПАСНОСТЬ»;

Для правильного выхода из веб-конфигуратора предусмотрена отдельная вкладка.

Источники
- https://nastoysam.ru/kompyutery/voip-telefon-d-link-dph-150s
- https://nastrojkin.ru/equip/dlink/d-link-dph-150s.html
- Manuals
- Brands
- D-Link Manuals
- IP Phone
- DPH-150SE
Manuals and User Guides for D-Link DPH-150SE. We have 8 D-Link DPH-150SE manuals available for free PDF download: User Manual, Quick Installation Manual
D-Link DPH-150SE User Manual (87 pages)
Brand: D-Link
|
Category: IP Phone
|
Size: 2.05 MB
Table of Contents
-
Safety Notices
2
-
Table of Contents
3
-
1 Introducing Dph-150S/Dph-150Se Voip Phone
6
-
Thank You for Your Purchasing
6
-
Dph-150S/Dph-150Se
6
-
-
Delivery Content
6
-
Keypad
7
-
Port for Connecting
8
-
Icon Introduction
9
-
Led Introduction
9
-
-
2 Initial Connecting and Settings
11
-
Connect the Phone
11
-
Connect to Network
11
-
Power Adaptor Connection
12
-
-
Basic Initialization
12
-
Network Settings
12
-
-
-
3 Basic Function
14
-
Making a Call
14
-
Call Device
14
-
Call Methods
14
-
-
Answering a Call
14
-
Dnd
15
-
Call Forward
15
-
Call Hold
15
-
Call Waiting
15
-
Mute
15
-
Call Transfer
16
-
3-Way Conference Call
16
-
Multiple-Way Call
16
-
-
4 Advanced Function
17
-
Call Pickup
17
-
Join Call
17
-
Redial / Unredial
17
-
Click to Dial
18
-
Call Back
18
-
Auto Answer
18
-
Hotline
18
-
Application
18
-
Sms
18
-
Memo
19
-
Voice Mail
19
-
-
Programmable Key Configuration
19
-
-
5 Other Functions
22
-
Auto Handdown
22
-
Ban Anonymous Call
22
-
Dial Plan
22
-
Dial Peer
22
-
Auto Redial
22
-
Call Completion
23
-
Ring from Headset
23
-
Power Light
23
-
Hide Dtmf
23
-
Password Dial
23
-
Action Url & Active Uri
24
-
Push Xml
24
-
-
6 Basic Settings
25
-
Keyboard
25
-
Screen Settings
25
-
Ring Settings
25
-
Voice Volume
25
-
Time & Date
25
-
Greeting Words
26
-
Language
26
-
-
7 Advanced Settings
27
-
Accounts
27
-
Network
27
-
Security
27
-
Maintenance
27
-
Factory Reset
27
-
-
8 Web Configuration
28
-
Introduction of Configuration
28
-
Ways to Configure
28
-
Password Configuration
28
-
-
Setting Via Web Browser
28
-
Configuration Via Web
29
-
Basic
29
-
Status
29
-
Wizard
30
-
Call Log
32
-
Language
32
-
-
Network
33
-
Wan
33
-
Lan
35
-
Lan Config
35
-
Qos&Vlan
36
-
Qos Configuration
37
-
Service Port
38
-
Dhcp Service
39
-
Time&Date
40
-
-
Voip
42
-
Sip
42
-
Sip Config
45
-
Stun
50
-
Dial Peer
52
-
-
Phone
55
-
Audio
55
-
Audio Configuration
56
-
Feature
57
-
Dial Plan
61
-
Contact
63
-
Remote Contact
65
-
Web Dial
66
-
-
Function Key
67
-
Softkey
69
-
-
Maintenance
69
-
Auto Provision
69
-
Syslog
72
-
Config
73
-
Update
74
-
Access
75
-
Access Configuration
76
-
Reboot
77
-
-
Security
77
-
Web Filter
77
-
Firewall
78
-
Nat
79
-
Vpn
82
-
Vpn Configuration
82
-
Security
83
-
-
Logout
84
-
-
-
9 Appendix
85
-
Specification
85
-
Hardware
85
-
Voice Features
85
-
Network Features
86
-
Maintenance and Management
87
-
-
Digit Character Map Table
87
-
Advertisement
D-Link DPH-150SE Quick Installation Manual (68 pages)
Brand: D-Link
|
Category: IP Phone
|
Size: 4.01 MB
Table of Contents
-
Safety Notices
2
-
Table of Contents
3
-
Introducing Dph-150S/Dph-150Se Voip Phone
7
-
Thank You for Your Purchasing Dph-150S/Dph-150Se
7
-
Delivery Content
7
-
Keypad
7
-
Port for Connecting
9
-
Icon Introduction
9
-
Led Introduction
10
-
-
Initial Connecting and Settings
11
-
Connect the Phone
11
-
Connect to Network
11
-
Power Adaptor Connection
12
-
-
Basic Initialization
12
-
Network Settings
12
-
-
3 Basic Function
14
-
Making a Call
14
-
Call Device
14
-
Call Methods
14
-
-
Answering a Call
14
-
Dnd
15
-
Call Forward
15
-
Call Hold
15
-
Call Waiting
15
-
Mute
15
-
Call Transfer
16
-
3-Way Conference Call
16
-
Multiple-Way Call
16
-
-
4 Advanced Function
17
-
Redial / Unredial
17
-
Call Back
17
-
Auto Answer
17
-
Hotline
17
-
Application
17
-
Sms
17
-
Memo
18
-
Voice Message
18
-
-
Ping
18
-
Programmable Key Configuration
18
-
-
Other Functions
21
-
Auto Handdown
21
-
Ban Anonymous Call
21
-
Dial Plan
21
-
Dial Peer
21
-
Auto Redial
22
-
Call Completion
22
-
Ring from Headset
22
-
Power Light
22
-
Hide Dtmf
22
-
Password Dial
22
-
Action Url & Active Uri
23
-
Push Xml
23
-
-
6 Basic Settings
23
-
Keyboard
23
-
Screen Settings
23
-
Ring Settings
23
-
Voice Volume
24
-
Time & Date
24
-
Greeting Words
24
-
Language
24
-
-
7 Advanced Settings
24
-
Accounts
24
-
Network
25
-
Security
25
-
Maintenance
25
-
Reset to Default
25
-
-
8 Web Configuration
25
-
Introduction of Configuration
25
-
Ways to Configure
25
-
Password Configuration
26
-
-
Setting Via Web Browser
26
-
Configuration Via Web
26
-
System
26
-
Information
26
-
Account
27
-
Configurations
28
-
Upgrade
29
-
Auto Provision
30
-
Tools
32
-
-
Network
33
-
Basic
33
-
Advanced
34
-
Vpn
36
-
-
Line
38
-
Sip
38
-
Dial Peer
44
-
Dial Plan
47
-
Basic Settings
49
-
-
Phone Setting
50
-
Features
50
-
Audio
53
-
Mcast
54
-
Time/Date
57
-
Advanced
59
-
Trusted Certificates
60
-
-
Phonebook
60
-
Contacts
60
-
Cloud Phonebook
61
-
Blacklist
62
-
Advanced
62
-
-
Call Logs
63
-
Function Key
63
-
EXT Key
65
-
Softkey
65
-
-
-
-
9 Appendix
66
-
Specification
66
-
Hardware
66
-
Voice Features
66
-
Network Features
67
-
Maintenance and Management
68
-
-

D-Link DPH-150SE User Manual (90 pages)
UOIP
Brand: D-Link
|
Category: IP Phone
|
Size: 1 MB
Table of Contents
-
General Information
11
-
Package List
11
-
Power Supply
11
-
Environment Condition
11
-
Your Phone
12
-
Using the Menu
23
-
Getting Started
25
-
Basic Functions
26
-
Making a Call
26
-
Answering a Call
28
-
Muting a Call
28
-
Transferring a Call
29
-
Setting up a Conference Call
29
-
Hold a Conference Call
30
-
End a Conference Call
30
-
Volume Adjustment
30
-
Menu Operation
31
-
View Entry
31
-
New Entry
31
-
Search Entry
32
-
Memory Check
32
-
Delete All
32
-
Call Records
33
-
Missed Calls
33
-
Received Calls
33
-
Dialed Calls
33
-
Network Setting
36
-
Set IP Mode
36
-
DNS Setting
37
-
Pppoe Setting
37
-
NTP Setting
37
-
Sip Setting
38
-
Proxy Setting
38
-
Phone Setting
39
-
Disable All
40
-
Memory Key
42
-
Factory Default
43
-
Web Setting
43
-
Default Username and Password
44
-
Static IP Setting
47
-
Dhcp Setting
49
-
Bridge Mode
51
-
Quality of Service
53
-
Router Mode
54
-
WAN Settings
55
-
LAN Settings
55
-
Advanced Setting
57
-
Account Setting
59
-
Server Settings
60
-
NAT Traversal
60
-
Voice Settings
61
-
General Settings
63
-
Forward Settings
65
-
Function Keys
66
-
Alarm Settings
67
-
System Information
70
-
Routing Table
72
-
Missed Calls
73
-
Redial List
73
-
Received Calls
74
-
Account Control
75
-
System Log Settings
75
-
Date and Time
76
-
Firmware Update
78
-
Function Key
81
-
Troubleshooting
89
Advertisement

D-Link DPH-150SE User Manual (63 pages)
Brand: D-Link
|
Category: IP Phone
|
Size: 1.68 MB
Table of Contents
-
Table of Contents
2
-
Introduction
6
-
Package Contents
6
-
Phone Specifications
7
-
Phone Diagram
8
-
Key Pad Definition and Text Entry
9
-
-
1 Getting Started
6
-
2 Connecting the Ip Phone
11
-
3 Initial Setup
12
-
Ip Phone Setup Map
12
-
Display Name
13
-
Adsl Dialup
13
-
Enable ADSL Dialup
13
-
Setup ADSL ID
13
-
Setup ADSL Password
14
-
Disable ADSL Dialup
14
-
-
DHCP (Dynamic Host Configuration Protocol)
14
-
Enable DHCP
14
-
Disable DHCP
15
-
-
Dns Server Ip
16
-
Sntp Server Ip
16
-
Do Not Disturb
16
-
CF (Call Forward) Unconditional
16
-
CF (Call Forward) Busy
17
-
CF (Call Forward) no Answer
17
-
Anonymous Call
18
-
Anony Call Rej. (Anonymous Call Rejection)
18
-
Ringing Type
18
-
M2~M12 Setting
19
-
Mac Address
19
-
Version
20
-
Language Selection
20
-
Time Format
20
-
Volume Adjustment
21
-
Ringer Volume
21
-
Speaker Volume
21
-
Handset Volume
21
-
-
-
4 Operating the Phone
22
-
Dialing an Ip Address
22
-
Dialing Asip Number
22
-
Speed Dialing
23
-
Answer a Phone Call
23
-
Switch to Another Line
23
-
Mute
23
-
Transfer
24
-
Redial
24
-
Last Dialed Number
24
-
Through Call History
24
-
-
On Hold
25
-
Call Forward
25
-
Three Way Conference
25
-
-
5 Using the Phone Book
27
-
Dialing from the Phone Book
27
-
Storing a Number
27
-
Editing a Number
28
-
Deleting a Number
28
-
-
6 Using the Web Configuration
30
-
Accessing the Configuration
30
-
Menu
30
-
-
Web Login
31
-
System — Management
32
-
System — Restore Factoryd
33
-
System — Auto Provision
33
-
Efault
33
-
-
System — Restart System
34
-
Dhcp
35
-
Ppp O E
36
-
Static Ip
37
-
-
Network — Qos Settings
38
-
Ettings
39
-
-
Network — Nat Traversals
41
-
Nat
41
-
Server & O P Server )
42
-
-
-
Oip — Sip Settings (Others )
44
-
Oip — Sip Account Settings
46
-
Advance — Voice Settings
47
-
Hone Setting )
48
-
-
Advance — Phone Settings
50
-
Imer )
50
-
-
Advance — Phone Book
51
-
Line Keys Settings
52
-
Advance — Speed Dial
53
-
Advance — Music Station
54
-
Advance — Mp3 Ring
55
-
-
7 Troubleshooting
57
-
Appendix A: Wall Mount Installation
58
-
Appendix B: Internet Radio
61
-
Fcc Statement
63

D-Link DPH-150SE Quick Installation Manual (22 pages)
Brand: D-Link
|
Category: IP Phone
|
Size: 14.07 MB
Table of Contents
-
Before You Begin
2
-
Check Your Package Contents
2
-
Wall Mounting
4
-
ADSL Dialup
6
-
Крепление К Стене
14
D-Link DPH-150SE Quick Installation Manual (17 pages)
Brand: D-Link
|
Category: IP Phone
|
Size: 6.05 MB
Table of Contents
-
Before You Begin
2
-
Check Your Package Contents
2
-
Front View and Keypad Function
3
-
Text Entry
4
-
Connecting IP Phone
5
-
IP Phone Setup Menu
6
-
Web Login
8
-
SIP Settings
10
-
SIP Account Settings
11
-
Make a Phone Call
12
D-Link DPH-150SE Quick Installation Manual (20 pages)
Brand: D-Link
|
Category: IP Phone
|
Size: 18.81 MB
D-Link DPH-150SE Quick Installation Manual (8 pages)
Brand: D-Link
|
Category: IP Phone
|
Size: 3.17 MB
Advertisement
Related Products
-
D-link DPH-100H
-
D-link DPH-100M
-
D-link EXPRESS ETHERNETWORK DPH-140S
-
D-Link DPH-150S
-
D-Link DPH-10U
-
D-Link DPH-120S
-
D-Link DPH-100
-
D-Link DPH-130S
-
D-Link DPH-70
-
D-Link DPH-400S
D-Link Categories
![]()
Network Router
Wireless Router
![]()
Switch
Adapter
![]()
Security Camera
More D-Link Manuals

 Safety Notices
Please read the following safety notices before installing or using this phone. They are crucial for the safe and reliable operation of the device.
Please use the external power supply that is included in the package. Other powers supplies may cause damage to the phone, affect the behavior or induce noise.
Before using the external power supply in the package, please check with home power voltage. Inaccurate power voltage may cause fire and damage.
Please do not damage the power cord. If power cord or plug is impaired, do not use it, it may cause fire or electric shock.
The plug-socket combination must be accessible at all times because it serves as the main disconnecting device.
Do not drop, knock or shake it. Rough handling can break internal circuit boards.
Do not install the device in places where there is direct sunlight. Also do not put the device on carpets or cushions. It may cause fire or breakdown.
Avoid exposure the phone to high temperature, below 0 or high humidity. Avoid wetting the unit with any liquid.
Do not attempt to open it. Non-expert handling of the device could damage it. Consult your authorized dealer for help, or else it may cause fire, electric shock and breakdown.
Do not use harsh chemicals, cleaning solvents, or strong detergents to clean it. Wipe it with a soft cloth that has been slightly dampened in a mild soap and water solution.
When lightning, do not touch power plug or phone line, it may cause an electric shock.
Do not install this phone in an ill-ventilated place.
You are in a situation that could cause bodily injury. Before you work on any equipment, be aware of the hazards involved with electrical circuitry and be familiar with standard practices for preventing accidents.
Table of Content
|
1 INTRODUCING DPH-150S/DPH-150SE VOIP PHONE ………………………………………………………. |
6 |
|
|
1.1 |
THANK YOU FOR YOUR PURCHASING DPH-150S/DPH-150SE………………………………………………. |
6 |
|
1.2 |
DELIVERY CONTENT……………………………………………………………………………………………………….. |
6 |
|
1.3 |
KEYPAD………………………………………………………………………………………………………………………… |
7 |
|
1.4 |
PORT FOR CONNECTING …………………………………………………………………………………………………… |
8 |
|
1.5 |
ICON INTRODUCTION ………………………………………………………………………………………………………. |
9 |
|
1.6 |
LED INTRODUCTION……………………………………………………………………………………………………….. |
9 |
|
2 INITIAL CONNECTING AND SETTINGS…………………………………………………………………………. |
11 |
|
|
2.1 |
CONNECT THE PHONE …………………………………………………………………………………………………….. |
11 |
|
2.1.1 |
Connect to network……………………………………………………………………………………………………. |
11 |
|
2.1.2 |
Power adaptor connection………………………………………………………………………………………….. |
12 |
|
2.2 |
BASIC INITIALIZATION……………………………………………………………………………………………………. |
12 |
|
2.2.1 |
Network settings ……………………………………………………………………………………………………….. |
12 |
|
3 BASIC FUNCTION ……………………………………………………………………………………………………………. |
14 |
|
|
3.1 |
MAKING A CALL ……………………………………………………………………………………………………………. |
14 |
|
3.1.1 |
Call Device ………………………………………………………………………………………………………………. |
14 |
|
3.1.2 |
Call Methods…………………………………………………………………………………………………………….. |
14 |
|
3.2 |
ANSWERING A CALL ………………………………………………………………………………………………………. |
14 |
|
3.3 |
DND……………………………………………………………………………………………………………………………. |
15 |
|
3.4 |
CALL FORWARD ……………………………………………………………………………………………………………. |
15 |
|
3.5 |
CALL HOLD ………………………………………………………………………………………………………………….. |
15 |
|
3.6 |
CALL WAITING……………………………………………………………………………………………………………… |
15 |
|
3.7 |
MUTE ………………………………………………………………………………………………………………………….. |
15 |
|
3.8 |
CALL TRANSFER ……………………………………………………………………………………………………………. |
16 |
|
3.9 |
3-WAY CONFERENCE CALL………………………………………………………………………………………………. |
16 |
|
3.10 |
MULTIPLE—WAY CALL……………………………………………………………………………………………………… |
16 |
|
4 ADVANCED FUNCTION…………………………………………………………………………………………………… |
17 |
|
|
4.1 |
CALL PICKUP ………………………………………………………………………………………………………………… |
17 |
|
4.2 |
JOIN CALL…………………………………………………………………………………………………………………….. |
17 |
|
4.3 |
REDIAL / UNREDIAL……………………………………………………………………………………………………….. |
17 |
|
4.4 |
CLICK TO DIAL………………………………………………………………………………………………………………. |
18 |
|
4.5 |
CALL BACK…………………………………………………………………………………………………………………… |
18 |
|
4.6 |
AUTO ANSWER………………………………………………………………………………………………………………. |
18 |
|
4.7 |
HOTLINE………………………………………………………………………………………………………………………. |
18 |
|
4.8 |
APPLICATION………………………………………………………………………………………………………………… |
18 |
|
4.8.1 |
SMS…………………………………………………………………………………………………………………………. |
18 |
|
4.8.2 |
Memo ………………………………………………………………………………………………………………………. |
19 |
|
4.8.3 |
Voice Mail ……………………………………………………………………………………………………………….. |
19 |
|
4.9 |
PROGRAMMABLE KEY CONFIGURATION……………………………………………………………………………. |
19 |
|
5 OTHER FUNCTIONS………………………………………………………………………………………………………… |
22 |
|
|
5.1 |
AUTO HANDDOWN ………………………………………………………………………………………………………… |
22 |
|
5.2 |
BAN ANONYMOUS CALL…………………………………………………………………………………………………. |
22 |
|
5.3 |
DIAL PLAN……………………………………………………………………………………………………………………. |
22 |
|
5.4 |
DIAL PEER ……………………………………………………………………………………………………………………. |
22 |
|
5.5 |
AUTO REDIAL……………………………………………………………………………………………………………….. |
22 |
|
5.6 |
CALL COMPLETION ………………………………………………………………………………………………………… |
23 |
|
5.7 |
RING FROM HEADSET…………………………………………………………………………………………………….. |
23 |
|
5.8 |
POWER LIGHT……………………………………………………………………………………………………………….. |
23 |
|
5.9 |
HIDE DTMF …………………………………………………………………………………………………………………. |
23 |
|
5.10 |
PASSWORD DIAL……………………………………………………………………………………………………………. |
23 |
|
5.11 |
ACTION URL & ACTIVE URI…………………………………………………………………………………………… |
24 |
|
5.12 |
PUSH XML …………………………………………………………………………………………………………………… |
24 |
|
6 BASIC SETTINGS……………………………………………………………………………………………………………… |
25 |
|
|
6.1 |
KEYBOARD …………………………………………………………………………………………………………………… |
25 |
|
6.2 |
SCREEN SETTINGS …………………………………………………………………………………………………………. |
25 |
|
6.3 |
RING SETTINGS……………………………………………………………………………………………………………… |
25 |
|
6.4 |
VOICE VOLUME …………………………………………………………………………………………………………….. |
25 |
|
6.5 |
TIME & DATE ……………………………………………………………………………………………………………….. |
25 |
|
6.6 |
GREETING WORDS…………………………………………………………………………………………………………. |
26 |
|
6.7 |
LANGUAGE …………………………………………………………………………………………………………………… |
26 |
|
7 ADVANCED SETTINGS……………………………………………………………………………………………………. |
27 |
|
|
7.1 |
ACCOUNTS……………………………………………………………………………………………………………………. |
27 |
|
7.2 |
NETWORK…………………………………………………………………………………………………………………….. |
27 |
|
7.3 |
SECURITY …………………………………………………………………………………………………………………….. |
27 |
|
7.4 |
MAINTENANCE ……………………………………………………………………………………………………………… |
27 |
|
7.5 |
FACTORY RESET…………………………………………………………………………………………………………….. |
27 |
|
8 WEB CONFIGURATION…………………………………………………………………………………………………… |
28 |
||
|
8.1 |
INTRODUCTION OF CONFIGURATION …………………………………………………………………………………. |
28 |
|
|
8.1.1 |
Ways to configure ……………………………………………………………………………………………………… |
28 |
|
|
8.1.2 |
Password Configuration…………………………………………………………………………………………….. |
28 |
|
|
8.2 SETTING VIA WEB BROWSER ……………………………………………………………………………………………. |
28 |
||
|
8.3 CONFIGURATION VIA WEB……………………………………………………………………………………………… |
29 |
||
|
8.3.1 |
BASIC ……………………………………………………………………………………………………………………… |
29 |
|
|
8.3.1.1 |
STATUS……………………………………………………………………………………………………………………….. |
29 |
|
|
8.3.1.2 |
WIZARD ………………………………………………………………………………………………………………………. |
30 |
|
|
8.3.1.3 |
CALL LOG …………………………………………………………………………………………………………………… |
32 |
|
|
8.3.1.4 |
LANGUAGE…………………………………………………………………………………………………………………. |
32 |
|
|
8.3.2 |
NETWORK ………………………………………………………………………………………………………………. |
33 |
|
|
8.3.2.1 |
WAN ……………………………………………………………………………………………………………………………. |
33 |
|
|
8.3.2.2 |
LAN……………………………………………………………………………………………………………………………… |
35 |
|
|
8.3.2.3 |
QoS&VLAN………………………………………………………………………………………………………………….. |
36 |
|
8.3.2.4 |
SERVICE PORT ……………………………………………………………………………………………………………. |
38 |
|
|
8.3.2.5 |
DHCP SERVICE……………………………………………………………………………………………………………. |
39 |
|
|
8.3.2.6 |
TIME&DATE………………………………………………………………………………………………………………… |
40 |
|
|
8.3.3 |
VOIP……………………………………………………………………………………………………………………….. |
42 |
|
|
8.3.3.1 |
SIP ……………………………………………………………………………………………………………………………….. |
42 |
|
|
8.3.3.2 |
STUN……………………………………………………………………………………………………………………………. |
50 |
|
|
8.3.3.3 |
DIAL PEER…………………………………………………………………………………………………………………… |
52 |
|
|
8.3.4 |
PHONE……………………………………………………………………………………………………………………. |
55 |
|
|
8.3.4.1 |
AUDIO …………………………………………………………………………………………………………………………. |
55 |
|
|
8.3.4.2 |
FEATURE …………………………………………………………………………………………………………………….. |
57 |
|
|
8.3.4.3 |
DIAL PLAN ………………………………………………………………………………………………………………….. |
61 |
|
|
8.3.4.4 |
CONTACT…………………………………………………………………………………………………………………….. |
63 |
|
|
8.3.4.5 |
REMOTE CONTACT …………………………………………………………………………………………………….. |
65 |
|
|
8.3.4.6 |
WEB DIAL……………………………………………………………………………………………………………………. |
66 |
|
|
8.3.5 |
FUNCTION KEY ………………………………………………………………………………………………………. |
67 |
|
|
8.3.5.1 |
FUNCTION KEY…………………………………………………………………………………………………………… |
67 |
|
|
8.3.5.2 |
SOFTKEY …………………………………………………………………………………………………………………….. |
69 |
|
|
8.3.6 |
Maintenance …………………………………………………………………………………………………………….. |
69 |
|
|
8.3.6.1 |
Auto Provision……………………………………………………………………………………………………………….. |
69 |
|
|
8.3.6.2 |
SYSLOG ………………………………………………………………………………………………………………………. |
72 |
|
|
8.3.6.3 |
CONFIG ……………………………………………………………………………………………………………………….. |
73 |
|
|
8.3.6.4 |
UPDATE ………………………………………………………………………………………………………………………. |
74 |
|
|
8.3.6.5 |
ACCESS……………………………………………………………………………………………………………………….. |
75 |
|
|
8.3.6.6 |
REBOOT ………………………………………………………………………………………………………………………. |
77 |
|
|
8.3.7 |
SECURITY……………………………………………………………………………………………………………….. |
77 |
|
|
8.3.7.1 |
WEB FILTER………………………………………………………………………………………………………………… |
77 |
|
|
8.3.7.2 |
FIREWALL…………………………………………………………………………………………………………………… |
78 |
|
|
8.3.7.3 |
NAT……………………………………………………………………………………………………………………………… |
79 |
|
|
8.3.7.4 |
VPN……………………………………………………………………………………………………………………………… |
82 |
|
|
8.3.7.5 |
SECURITY……………………………………………………………………………………………………………………. |
83 |
|
|
8.3.8 |
LOGOUT …………………………………………………………………………………………………………………. |
84 |
|
|
9 APPENDIX |
………………………………………………………………………………………………………………………… |
85 |
|
|
9.1 |
SPECIFICATION ……………………………………………………………………………………………………………… |
85 |
|
|
9.1.1 |
Hardware…………………………………………………………………………………………………………………. |
85 |
|
|
9.1.2 |
Voice features …………………………………………………………………………………………………………… |
85 |
|
|
9.1.3 |
Network features……………………………………………………………………………………………………….. |
86 |
|
|
9.1.4 |
Maintenance and management ……………………………………………………………………………………. |
87 |
|
|
9.2 |
DIGIT—CHARACTER MAP TABLE………………………………………………………………………………………… |
87 |
1 Introducing DPH-150S/DPH-150SE VoIP
Phone
1.1Thank you for your purchasing DPH-150S/DPH-150SE
Thank you for your purchasing DPH-150S/DPH-150SE. DPH-150S/DPH-150SE is a full-feature telephone that provides voice communication over the same data network that your computer uses. This phone’s functions not only much like a traditional phone, allowing to place and receive calls, and enjoy other features that traditional phone has, but it also own many data services features which you could not expect from a traditional telephone.
This guide will help you easily use the various features and services available on your phone.
1.2 Delivery Content
Please check whether the delivery contains the following parts:
|
Item |
Description |
|||
|
IP Phone |
DPH-150S/DPH-150SE Phone wit display and |
|||
|
keypad. |
||||
|
Power Adapter |
Power supply for telephone. |
|||
|
Network Cable |
Used to access network for the phone. |
|||
|
Handset |
Make phone calls with the phone’s basic functions. |
|||
|
Handset Cord |
Connected with the handset and the phone. |
|||
|
Quick Installation Guide |
Quick install the DPH-150S/DPH-150SE guide. |
|||
|
CD |
Containing manual and quick installation guide. |
|||
|
Warranty Safety Information |
Warranty |
Safety |
Information |
for |
|
DPH-150S/DPH-150SE. |
IP Phone are designed to look like conventional phones, the following photo shows a broad overview of the IP Phone.

1.3 Keypad
|
Key |
Key name |
Function Description |
|
Navigation key assist users for operating. |
||
|
In desktop, dialer, calling, desktop long pressed |
||
|
Navigation |
state they have special function. |
|
|
You can configure through the web page according |
||
|
to your patterns of use. |
||
|
Access to phone book, check the record list and |
||
|
Directory |
add new records and revise the record. When check |
|
|
the phone book record, press this key again will |
||
|
return to idle mode. |
||
|
Mute |
Press this key in calling mode, you can hear the |
|
|
other side, and the other side cannot hear you. |
||
|
Volume -/+ |
Turn down or turn up the volume by pressing these |
|
|
two keys. |
||
|
1. In the hook off /hands-free mode, use the key |
||
|
Redial |
to dial the last call number; |
|
|
2. In stand-by mode, it has a function to check the |
||
|
Outgoing Call. |
|
Hands-free |
Make the phone into hands-free mode. |
|
|
Keys combination, include functions such as |
||
|
History/Directory/DND/Menu/Del/Redial/Send/ |
||
|
Soft key 1/2/3/4 |
Quit/Answer/Divert/Reject/Hold/Transfer/Conf/Cl |
|
|
ose and so on. |
||
|
History |
View the Missed call, Incoming Call and dialed |
|
|
Call. |
||
|
Digital |
||
|
keyboard |
Inputting the phone number or DTMF. |
|
You can configure them in the web page.
DSS keys
1.4 Port for connecting
|
Port |
Port name |
description |
|
Power switch |
Input: 5V AC, 1A |
|
|
WAN |
10/100M Connect it to Network |
|
|
LAN |
10/100M Connect it to PC |
|
|
External console |
Port type: RJ-11 direct connector |
|
|
interface |
||
|
Headset |
Port type: RJ-9 connector |
|
|
Handset |
Port type: RJ-9 connector |
|
1.5 Icon introduction
|
Icon |
Description |
|
Call out |
|
|
Call in |
|
|
Call hold |
|
|
Auto answer |
|
|
Call mute |
|
|
Contact |
|
|
DND(Do not Disturb) |
|
|
In hand-free mode |
|
|
In handset mode |
|
|
In headset mode |
|
|
SMS |
|
|
Missed call |
|
|
Call forward |
1.6 LED introduction
Table 1 Programmable key LEDs for BLF
|
LED Status |
Description |
|
Steady green |
The object is in idle status. |
|
Slow blinking red |
The object is ringing. |
|
Steady red |
The object is active. |
|
Fast blinking red |
The object is failed. |
|
Off |
No subscribe. |
Table 2 Programmable key LEDs for Presence
|
LED Status |
Description |
|
Steady green |
The object is online. |
|
Slow blinking red |
The object is ringing. |
|
Steady red |
The object is active. |
|
Fast blinking red |
The object is failed. |
|
Off |
No subscribe. |
|
Table 3 Programmable key LEDs for line |
|
|
LED Status |
Description |
|
Steady green |
The account is active. |
|
Fast Blinking red |
There is an incoming call to the account. |
|
Slow Blinking red |
The call is on hold. |
|
Slow Blinking red |
Registration is unsuccessful. |
|
Off |
The line is not unapplied or idle. |
|
Table 4 Programmable key LEDs for MWI |
|
|
LED Status |
Description |
|
Blinking red |
There are new voice mails. |
|
Off |
There is no new voice mail. |
![]()
2 Initial Connecting and Settings
2.1 Connect the phone
2.1.1 Connect to network
Step 1: Connect the IP Phone to the corporate IP telephony network. Before you connect the phone to the network, please check if your network can work normally.
You can do this in one of two ways, depending on how your workspace is set up. Direct network connection—by this method, you need at least one available Ethernet port in your workspace. Use the Ethernet cable in the package to connect WAN port on the back of your phone to the Ethernet port in your workspace. Since this VoIP Phone has router functionality, whether you have a broadband router or not, you can make direct network connect. The following two figures are for your reference.
Shared network connection—Use this method if you have a single Ethernet port in your workspace with your desktop computer already connected to it. First, disconnect the Ethernet cable from the computer and attach it to the WAN port on the back of your phone. Next, use the Ethernet cable in the package to connect LAN port on the back of your phone to your desktop computer. Your IP Phone now shares a network connection with your computer. The following figure is for your reference.
Step 2: Connect the handset to the handset port by the handset cable in the package.
Step 3: connect the power supply plug to the AC 5V adapter port on the back of the phone. Use the power cable to connect the power supply to a standard power outlet in your workspace.
Step 4: push the on/off switch on the back of the phone to the one side, then the phone’s LCD screen displays “Initializing wait logon”. Later, a ready screen typically displays the date, time.
If your LCD screen displays different information from the above, you need refer to the next section “Initial setting” to set your network online mode.
If your VoIP phone registers into corporate IP telephony Server, your phone is ready to use.
2.1.2 Power adaptor connection
Make sure that the power you use is comply with the parameters of power adaptor.
1.Plug power adaptor to power socket.
2.Plug power adaptor’s DC output to the DC5V port of DPH-150S/DPH-150SE to start up.
3.There will be displayed black line and “INITIALIZING” on the screen. After finishing startup, phone will show greeting, current date and time and so forth.
4.If phone has registered to the server, you can place or answer calls.
2.2 Basic Initialization
DPH-150S/DPH-150SE is provided with a plenty of functions and parameters for configuration. User needs some network and VoIP knowledge so that user could understand the meanings of parameters. In order to make user use the phone more easily and convenient, there are basic configurations introduced which is mandatory to ensure phone calls.
2.2.1 Network settings
Make sure that network is connected already before setting network of phone. DPH-150S/DPH-150SE uses DHCP to get WAN IP configurations, so phone could access to network as long as there is DHCP server in it. If there is no DHCP server available, phone has to be changed WAN network setting to Static IP or PPPoE.
Setting PPPoE mode (for ADSL connection)
1.Get PPPoE account and password first.
2.Press Menu->Settings->Advanced Settings, then enter passwords, and choose
network ->WAN settings->Connection Mode, enter and choose PPPoE through navigation keys and press the Save key.
3.Press Back, then choose PPPoE Set, press Enter.
4.The screen will show the current information. Press Del to delete it, then input your PPPoE user and password and press Save.
5.Press Back six times to return to the idle screen.
6.Check the status. If the screen shows “Negotiating…” it shows that the phone is
trying to access to the PPPoE Server; if it shows an IP address, then the phone has already get IP with PPPoE.
Setting Static IP mode (static ADSL/Cable, or no PPPoE / DHCP network)
1.Prepare the network’s parameters first, such as IP Address, Net mask, Default Gateway and DNS server IP address. If you don’t know this information, please contact the service provider or technician of network.
2.Press Menu->Settings->Advanced Settings, then enter passwords, and choose network ->WAN settings->Connection Mode, enter and choose Static through navigation keys and press the Save key.
3.Press Back, then choose Static Set, press Enter.
4.The screen will show the current information, and then press Del to delete. Input your IP address, Mask, Gateway, DNS and press Save to save what you input.
5.Press Back six times to return to the idle screen.
6.Check the status, the screen shows “Static” .the screen shows the IP address
and gateway which were set just now, if the phone could display the right time, it shows that Static IP mode takes effect.
Setting DHCP mode
1.Press Menu->Settings->Advanced Settings, then enter passwords, and choose network ->WAN settings->Connection Mode, enter and choose DHCP through navigation keys and press the Save key.
2.Press back six times to return to the idle screen.
3.Check the status, the screen shows “DHCP”, if the screen shows the IP address
and gateways which were set just now, it shows that DHCP mode takes effect.
3 Basic Function
3.1 Making a call
3.1.1 Call Device
You can make a phone call via the following devices:
1.Pick up the handset,  icon will be showed in the idle screen.
2.Press the Speaker button,  icon will be showed in the idle screen.
3.Press the Headset button if the headset is connected to the Headset Port in
advance. The icon  will be showed in the idle screen.
You can also dial the number first, and then choose the method you will use to speak to the other party.
3.1.2 Call Methods
You can press an available line button if there is more than one account, then
1.Dial the number you want to call.
2.Press History softkey, use the navigation buttons to highlight your choice (press Left/Right button to choose Missed Calls, Incoming Calls and Outgoing Calls.
3.Press the R/SEND button to call the last number called.
4.Press the programmable keys which are set as speed dial button.
Then press the Send button or Dial softkey to make the call if necessary.
3.2 Answering a call
Answering an incoming call
1.If you are not on another phone, lift the handset using, or press the Speaker button/ Answer softkey to answer using the speaker phone, or press the headset button to answer the headset.
2.If you are on another call, press the answer softkey.
During the conversation, you can alternate between Headset, Handset and Speaker phone by pressing the corresponding buttons or picking up the handset.
3.3 DND
Press DND softkey to active DND Mode. Further incoming calls will be rejected and the display shows:  icon. Press DND softkey twice to deactivate DND mode. You can find the incoming call record in the Call History.
3.4 Call Forward
This feature allows you to forward an incoming call to another phone number. The display showed  icon.
icon.
The following call forwarding events can be configured: Off: Call forwarding is deactivated by default.
Always: Incoming calls are immediately forwarded.
Busy: Incoming calls are immediately forwarded when the phone is busy. No Answer: Incoming calls are forwarded when the phone is not answered after a specific period.
To configure Call Forward via Phone interface:
1.Press Menu ->Features->Enter->Call Forwarding->Enter.
2.There are 4 options: Disabled, Always, Busy, and No Answer.
3.If you choose one of them (except Disabled), enter the phone number you want to forward your call to. Press Save to save the changes.
3.5 Call Hold
1. Press the Hold button or Hold softkey to put your active call on hold.
2. If there is only one call on hold, press the hold softkey to retrieve the call.
3. If there are more than one call on hold, press the line button, and the Up/Down button to highlight the call, then press the Unhold button to retrieve the call.
3.6 Call Waiting
1.Press Menu ->Features->Enter->Call Waiting->Enter.
2.Use the navigation keys to active or inactive call waiting.
3.Then press the Save to save the changes.
3.7 Mute
Press Mute button during the conversation, icon  will be showed in the LCD.
Then the called will not hear you, but you can hear the called. Press it again to get the phone to normal conversation.
3.8 Call transfer
1. Blind Transfer
During talk, press the key Transf, and then dial the number that you want to transfer to, and finished by «#». Phone will transfer the current call to the third party. After finishing transfer, the call you talk to will be hanged up. User cannot select SIP line when phone transfers call.
2. Attended Transfer
During talk, press the key Transf, then input the number that you want to transfer to and press Send. After that third party answers, then press Transfer to complete the transfer. (You need enable call waiting and call transfer first). If there are two calls, you can just talk to one, and keep hold to the other one. The one who is keep hold cannot speak to you or hear from you. In other way, if user wants to invite the third party during the call, they can press Conf to make calls mode in conference mode. If user wants to stop conference, user can press Split. (User must enable call waiting and three way call first).
Note: the server that user uses must support RFC3515 or it might not be used 3. Alert Transfer
During the talk, press Transf firstly, and then press Send after inputting the number that you want to transfer. You are waiting for connection, now, press Transf and the transfer will be done. (To use this feature, you need enable call waiting and call transfer first).
3.9 3-way conference call
1. Press the Conf softkey during an active call.
2. The first call is placed on hold. Then you will hear a dial tone. Dial the number to conference in, then press Send key.
3. When the call is answered, press Conf and add the first call to the conference. 4. If you want to release the conference, press Split key.
3.10 Multiple-way call
If user has 2 line calls and wants to invite the three party during the call, they can press Conf or Transf “New Call”, press OK, enter the number ,then press Send and wait for the other party to answer. When the multiple-way calls, you can press the arrow keys to select a call.

4 Advanced Function
4.1 Call pickup
Call pickup is implemented by simulating pickup function of PBX. it’s that, when A calls B, B rings but no answer, at this moment, C can hook off and input an appointed prefix plus B’s number, pick up A’s call and talk with A.
The following chart shows how to configure an appointed prefix in dial peer to have call pick up function.
*1* means appointed prefix code. After making the above configuration, C can dial *1* plus B’s phone number to pick up A’s call. User can set prefix in random, in the case of no affecting current dialing rules.
4.2 Join call
When B is calling C, A can join in the existing call by inputting an appointed prefix numbers plus B or C number, if B or C also supports join call.
The following chart shows how to configure an appointed prefix in dial peer to have join call function.
*2* means appointed prefix code. After making the above configuration, A can dial *2* plus B or C number to join B and C’s call. User can set prefix in random, in the case of no affecting current dialing rules.
4.3 Redial / Unredial
If B is in busy line when A calls B, A will get notice: busy, please hang up. If A want to connect B as soon as B is in idle, he can use redial function at the moment and he can dials an appointed prefix number plus B’s number to realize redial function.
What is redial function? A can’t not build a call with B when B is in busy, then A will subscribe B’s calling mode at 60 second intervals. Once B is available, A will get reminder of rings to hook off, while a hooks off, A will call B automatically. If at this time A is occupied temporarily and unwilling to contact B, A also can cancel the redial function by dialing an appointed prefix plus B’s number before making the redial function.

*3* is appointed prefix code. After making the above configuration, A can dial *3* plus B’s phone number to make the redial function.
*4* is appointed prefix code. After configuration, A can dial *4* to cancel redial function.
User can set prefix in random, in the case of no affecting current dialing rules.
4.4 Click to dial
When user A browses in an appointed Web page, user A can click to call user B via a link (this link to user B), then user A’s phone will ring, after A hooks off, the phone will dial to B.
4.5 Call back
This function allows you dial out the last phone call you received.
4.6 Auto answer
When there is an incoming call, after no answer time, the phone will answer the call automatically.
4.7 Hotline
You can set hotline number for every sip, and then enter the dialer interface and after Warm Line Time, the phone will call out the hotline number automatically.
4.8 Application
4.8.1 SMS
1)Press Menu ->Applications->Enter->SMS->Enter.
2)Use the navigation keys to highlight the options. You can read the message in the Inbox/Outbox.
3)After view the new message, you can press Reply to reply the message, and use the 2aB softkey to change the Input Method, when enter the reply message, press OK, then use the navigation keys to select the line from which you want to send, then Send.
4)If you want to write a message, you can press New and enter message. Use the 2aB softkey to change the Input Method. When you input the message you want to send, press OK, then use the navigation keys to select the line from which you want to send, then Send.
5)If you want to delete the message, after view the message, press Del, then you have three options to choose: Yes, All, No.
4.8.2 Memo
You can add some memos to record some important things to remind you. Press Menu->Application->Memo->Enter->Add.
There are some options to configure: Mode, Date, Time, text, Ring. When the configuration is completed, press Save.
4.8.3Voice Mail
1)Press Menu->Application->Voice Mail->Enter.
2)Use the navigation keys to highlight the line for which you want to set, press Edit, and use the navigation key to turn on the mode, and the input the number. Press 2aB softkey to choose the proper input method.
3)Press Save to save the change.
4)To view the new voicemail, Press the Voicemail softkey directly. Press Dial, then you may be prompted to enter the password, then you can listen to your new and old messages.
4.9 Programmable Key Configuration
The phone has 4 programmable keys which are able to set up to many functions per key. The following list shows the functions you can set on the programmable keys and provides a description for each function. The default configuration for each key is N/A which means the key hasn’t been set for any functions.
1. Set the type as Memory Key
Press Menu->Settings->Basic Settings->Enter->Keyboard->DSS Key Settings, you have two options: Line Key Settings and Function Key Settings, choose one you want to make the assignment, use the navigation key to choose the type as memory key. In the Dial field, you have some options, such as Normal, Speed Dial, Intercom, BLF, Presence, and MWI.
Speed dial
You can configure the key as a simplified speed dial key. This key function allows you to easily access your most dialed numbers.
Intercom
You can configure the key for Intercom code and it is useful in an office
environment as a quick access to connect to the operator or the secretary.
BLF
BLF is also called “Busy lamp field”, and it is used to prompt the user to pay attention to the state of the object than has been subscribed, and used to cooperate with the server to pick up the phone call. You can configure the key for Busy Lamp Field (BLF) which allows you to monitor the status (idle, ringing, or busy) of other SIP account. User can dial out on a BLF configured key. Please refer to “LED Instruction” for more detail about the LED status in different situation. Note: In the Web interface, you can also set the pickup number to active the pickup function. For example, if you set the BLF number as 212, and the pickup number is 189, then when there is an incoming call to 212, press the BLF key, it will call out the 189 automatically to pick up the incoming call on 212.
Presence
Presence is called present, and compared to the BLF, it can also check whether object online.
Note: You can subscribe the BLF and presence station of the same number at the same time.
MWI
When the key is configured as MWI, you are allowed to access voicemail quickly by pressing this key.
2. Set the type as Line
You can set these keys as line keys, and press it, it will enter dialer interface. 3. Set the type as Key Event
You can set these keys as Key Event, and the subtype have many options. Choose one and it will have corresponding function.
None
Auto Redial Off
Auto Redial On
Call Back
Call Forward
DND
Flash
Headset
History
Hold
Hot Desking: Pressing the key, you can clear all sip information and register yourself sip information.
Join
Lock: Pressing the key, you can lock the keyboard.
Memo
MWI
Phonebook
Pickup
Prefix
Redial
Release: Pressing the key, you can end the call.
SMS
Transfer
4. Set the type as Dtmf
You can configure the key as Dtmf. This key function allows you to easily dial or edit dial number.
5. Set the type as URL
You need to match a XML Phonebook address, pressing the button you can directly access the corresponding remote phonebook.
6. Set the type as BLF List Key
It needs the cooperation with the Broadsoft server. The traditional BLF is that every number will need to be subscribed, so if the numbers that subscribed is so many that it will cause to obstruction. However, BLF List Key will put the numbers that needed to be subscribed in a group, and the phone use the URL of the group to subscribe and analyze the specific information of each number such as number, name, state and so on according to the notifications from the server. Then set the idle Memory key as BLF List Key, later if the state of an object changes, the corresponding LED will change.
5 Other Functions
5.1 Auto Handdown
1. Press Menu ->Features-> Enter->Auto Handdown-> Enter.
2. Set the Mode Enable through the navigation key, then set Time, unit is minute, then press Save.
3. When the call ends, after the time that you have set, the phone will back to the idle interface.
5.2 Ban Anonymous Call
1. Press Menu ->Features-> Enter->Ban Anonymous Call-> Enter.
2. Choose which sip you want to enable Ban Anonymous Call, and then press Enter, choose Enabled or Disabled through navigation key.
3. If you choose Enabled, the others can’t call the phone by anonymous. If you choose Disabled, the others can call the phone by anonymous.
5.3 Dial Plan
1. Press Menu ->Features-> Enter->Dial Plan-> Enter.
2. The following plans you can set: Press # to Send, Timeout to Send, Timeout, Fixed Length Number, Press # to Do BXFER, BXFER On Onhook, AXFER On Onhook. You can enable or disable each dial plan.
5.4 Dial Peer
1.Press Menu ->Features-> Enter->Dial Peer-> Enter.
2.Press Add to enter the Edit interface, and then input some information. For example: Number: 1T, Dest.: 0.0.0.0, Port: 5060, Mode: SIP, Alisa: all:3333, Suffix: no suffix, Del Len: 0. Then press Save. Then press Save.
3.Input 1+number (1234) in the dial interface, you can dial out 3333.
You can refer to 8.3.3.4 DIAL PEER.
5.5 Auto Redial
1.Press Menu ->Features-> Enter->Auto Redial-> Enter.
2.Choose Mode Enabled or Disabled through the navigation key. If you choose
Enable, you also need to set Interval and Times, and then press Save.
3. After enable auto redial, calling out someone, if he is in busy, it will pop up a prompt box whether to auto redial, press OK, the phone will call out him according the Interval and Times that you set.
5.6 Call completion
1. Press Menu ->Features-> Enter->Call Completion-> Enter.
2. Enable the function through the navigation key, and then Save.
3. Call out others, if he is in busy, it will pop up a prompt Call Completion Waiting number? Press OK, when he is in idle, it will pop up a prompt Call Completion Call number? Press OK, the phone will call out the number automatically.
5.7 Ring From Headset
1. Press Menu ->Features-> Enter->Ring From Headset-> Enter.
2. Enable this function through the navigation key, the phone connects the headset, when the phone has an incoming call, it will ring from the headset.
5.8 Power Light
1. Press Menu ->Features-> Enter->Power Light-> Enter. 2. Enable this function through the navigation key.
5.9 Hide DTMF
1. Press Menu ->Features-> Enter->Hide DTMF-> Enter.
2. Through the navigation key to choose: Disabled, All, Delay, Last Show. When you set up a call with others and need to input the DTMF, the DTMF will show as you have set.
5.10 Password Dial
1.Press Menu ->Features-> Enter->Password Dial-> Enter.
2.Enable this function, you can also set Prefix and Length. For example you want
call out 1234567 and you set Password Dial Prefix 123 and Password Length 3, then enter the dial interface and input 1234567, and then the screen will show 123***7.
5.11 Action URL & Active URI
1. Action URL: The action that the phone carries out e.g. open dnd can produces one URL, then the phone can send the HTTP Get of the URL to PC, then the phone can report the action to the PC.
2. Active URI: Enter the web page of the phone, PHONE->FEATURE, input Active URL Limit IP, You can input internet server (e.g. PC’IP), PC can send one URL to the phone, the phone will produce one action for example open dnd, so PC can control the phone.
5.12 Push XML
Enter the web page of the phone->PHONE->FEATURE, input Push XML Server(e.g. PC’IP), then PC can push text, SMS, phonebook, advertisement,, execute etc. to phone to update the message or the phone makes an action.
6 Basic Settings
6.1 Keyboard
1. Press Menu ->Settings-> Enter->Basic Settings-> Enter->Keyboard->Enter.
2. There are four items: DSS Key settings, Programmable Keys, Desktop Long Pressed, SoftKey, You can set up respectively on them. Press the key Enter to the interface, then use the navigation keys to choose the function for the key according to you want.
3. Press the key OK to save.
6.2 Screen Settings
1. Press Menu ->Settings-> Enter->Basic Settings-> Enter->Screen Settings->Enter.
2. You can set Contrast, Contrast Calibration and Backlight, press Enter and use the navigation keys to set, then press the key Save.
6.3 Ring Settings
1. Press Menu ->Settings-> Enter->Basic Settings-> Enter->Ring Settings->Enter. 2. You can set Ring Volume and Ring Type, press Enter and use the navigation keys to set, then press the key Save. In the Ring Type, the default system rings have nine and the custom ringtones have three that can be set through the web page.
6.4 Voice Volume
1. Press Menu ->Settings-> Enter->Basic Setting-> Enter->Voice Volume->Enter. 2. Use the navigation keys to turn down or turn up the voice volume, then press the key Save.
6.5 Time & Date
1.Press Menu ->Settings->Enter->Basic Settings-> Enter->Time & Date->Enter.
2.You have two options to choose: Auto and Manual, use the navigation keys to choose, then press Save.
6.6 Greeting Words
1. Press Menu ->Settings-> Enter->Basic Settings-> Enter->Greeting Words->Enter.
2. You can enter the message and press Save, it will display in the phone screen when the phone start up.
6.7 Language
1.Press Menu ->Settings-> Enter->Basic Settings-> Enter->Language ->Enter.
2.DPH-150S/DPH-150SE support only one languages, you cann’t use the navigation keys to choose. The default one languages is English
7 Advanced Settings
7.1 Accounts
Press Menu->Enter->Advanced settings, and then input the password to enter the interface, the default password is 123. You can set it through the web page. Then choose Account then press Enter, you can do some sip settings.
7.2 Network
Press Menu->Enter->Advanced settings, and then input the password to enter the interface. Then choose Network and press Enter, you can do network settings, you can refer to 2.2.1 Network settings.
7.3 Security
Press Menu->Enter->Advanced settings, and then input the password to enter the interface. Then choose Security, you can configure Menu Password, Key lock Password, Key lock Status and whether to ban Outgoing.
7.4 Maintenance
Press Menu->Enter->Advanced settings, and then input the password to enter the interface. Then choose Maintenance and press Enter, you can configure Auto Provision, Backup, and Upgrade.
7.5 Factory Reset
Press Menu->Enter->Advanced settings, and then input the password to enter the interface. Then choose Factory Reset and press Enter, you can choose Yes or No.
 Loading…
Требуется руководство для вашей D-Link DPH-150SE IP телефон? Ниже вы можете просмотреть и загрузить бесплатно руководство в формате PDF. Кроме того, приведены часто задаваемые вопросы, рейтинг изделия и отзывы пользователей, что позволит оптимально использовать ваше изделие. Если это не то руководство, которое вы искали, – свяжитесь с нами.
Ваше устройство неисправно, и в руководстве отсутствует решение? Перейдите в Repair Café для получения бесплатных ремонтных услуг.
Руководство

Рейтинг
Сообщите нам, что вы думаете о D-Link DPH-150SE IP телефон, оставив оценку продукта. Хотите поделиться вашими впечатлениями от данного изделия или задать вопрос? Вы можете оставить комментарий в нижней части страницы.
Довольны ли вы данным изделием D-Link?
Да Нет
Будьте первым, кто оценит это изделие
0 голоса
Часто задаваемые вопросы
Наша служба поддержки выполняет поиск полезной информации по изделиям и отвечает на часто задаваемые вопросы. Если вы заметили неточность в наших часто задаваемых вопросах, сообщите нам об этом с помощью нашей контактной формы.
Что такое VoIP? Проверенный
VoIP — это сокращение от английского «Voice over Internet Protocol» («телефонная связь по протоколу IP»), которым обозначают технологию передачи речи по Интернету и прочим IP-сетям.
Это было полезно (11)