- Manuals
- Brands
- Eonon Manuals
- Portable TV
- 9» TFT LCD COLOR MONITOR
- Operating instructions manual
-
Bookmarks
Quick Links
TFT
TFT
LCD COLOR TV
LCD COLOR TV
MENU
Operating instructions
Before operating this set, please read these instructions completely
Related Manuals for Eonon TFT LCD Color TV
Summary of Contents for Eonon TFT LCD Color TV
-
Page 1
LCD COLOR TV LCD COLOR TV MENU Operating instructions Before operating this set, please read these instructions completely… -
Page 2
TFT LCD COLOR TV TFT LCD COLOR TV Welcome your using of our on-board TFT LCD Color TV. Please carefully read this Instruction for a fully and long-term using for no troubles. Please well reserve it for future use. Important Cautions 1. -
Page 3
TFT LCD COLOR TV TFT LCD COLOR TV 12. Specifications and Parameters Appearance and functions Name: 7-inch TFT LCD COLOR TV CT-V70W8: NTSC Organic PAL Organic 55.25-163.25MHZ 49.75-160.25MHZ OPEN 163.25-469.25MHZ 160.25-464.25MHZ COLOR TV 471.25-855.25MHZ 471.25-863.25MHZ System: CT-V70W8P: PAL (B/G. H. D/K. I) CT-V70W8N: NTSC-M Display device: Color TFT-LCD Screen dimension: Broad 7-inch… -
Page 4
TFT LCD COLOR TV TFT LCD COLOR TV Installation and connection methods Descriptions Reasons Please refer to the Body Figure AC adapter or vehicle adapter are wrongly connected. No pictures Uncertified power is under using. or sounds If TV/AV is correctly selected? If channel is rightly selected? No pictures Auto reset receiving channel. -
Page 5
TFT LCD COLOR TV TFT LCD COLOR TV SKIP Function Remote controller 1. Press MENU for seconds and PRESET mode will appear. 2. Press CH+ or CH- to select SKIP options. 3. Press V+ or V-, the mode will convert in following turns OFF, and programme number set to ON will be set to SKIP, if you want to close SKIP off, you may first choose programme number and set SKIP mode to OFF. -
Page 6
TFT LCD COLOR TV TFT LCD COLOR TV 3. Key functions and display descriptions 6. Reset Receiving Channel For the LCD TV you can use Screen Display to adjust picture 1. Standby key (remote control) and sound, and set up channel and other characteristics. 1). -
Page 7
TFT LCD COLOR TV TFT LCD COLOR TV 6. Control brightness, color, contrast, and hue If you select the same number with current programme number, CPU will reread memory information relevant to current programme number from EEPROM. Press MENU key During programme being converted, (0-9) keys may be used for directly selecting the programme number required. -
Page 8
TFT LCD COLOR TV TFT LCD COLOR TV 2). Description: When it is used for controlling output value of volume, to push it one time for increasing / decreasing one step Press Channel View key (output value includes 100 steps). If output value has reached the top 100, VOL+ is non- effectual, contrary to which if output value has reached 0, VOL- is non-effectual. -
Page 9
TFT LCD COLOR TV TFT LCD COLOR TV Main Menu 4. Power Selection Housing AC Please provide power source from housing standard power by AC adapter (please refer to Instruction of Adapter). Vehicle accumulator (DC 12V) BRIGHTNESS Please provide power source from vehicle accumulator CONTRAST through vehicle cigar lighter by vehicle adapter (be applicable COLOR… -
Page 10
TFT LCD COLOR TV TFT LCD COLOR TV Press CH+ and CH+ to select items required adjusted, and V+ 8. Channel Skip and V- to change parameter of adjusted items, among which Press V+/V- to control Skip State of current programme, hue is only appeared under NTSC organic. -
Page 11
TFT LCD COLOR TV TFT LCD COLOR TV 1. Color organic Press CH+ and CH- to select items required to adjust, and V+ Press V+ and V- to convert between color organics. and V- to change parameter of adjusted items. There is a 2. -
Page 12
TFT LCD COLOR TV TFT LCD COLOR TV Descriptions for games: Channel exchange menu a. Under game state press AV/TV to select the next game. b. Press MENU to return original state. c. Press MUTE for exiting. Clock Menu C-SYS AUTO S-SYS CHANNEL…
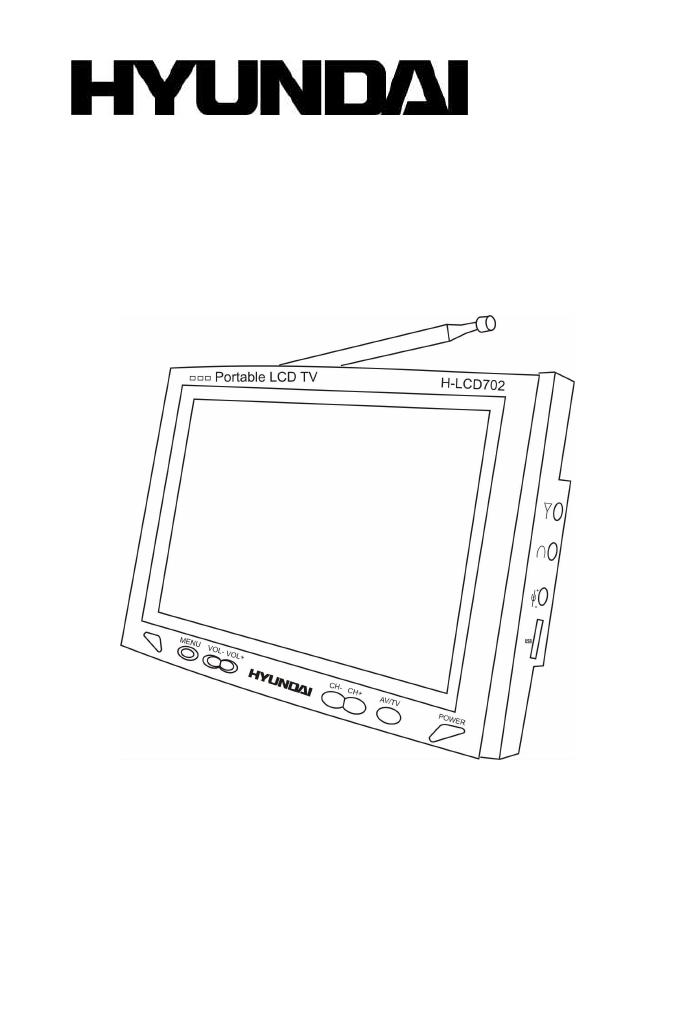
H-LCD702
Portable LCD Color TV
Instruction manual

2
Dear consumer!
Thank you for purchasing the TFT-LCD color television. To enjoy the features of this
unit and to ensure safety and years of trouble-free operation, be sure to carefully read
this manual and follow the instructions contained herein
Contents
Contents ………………………………………………………………………………………………………………2
Precautions…………………………………………………………………………………………………………..3
Accessories ………………………………..………………………………..………………………………………3
Aspect ………………………………………………………………..……………………………………………….4
Remote control …………………………………………………………………………………………………….5
Power Selection……………………………………………………………………………………………………7
Menu operation………….……………………..………………………………………………………………….7
In order to receive clearer picture ……………………………………………………..…………………12
Before you request repair service…………………………………………………………………………12
Specification ……………………….…………………………………………………………….……………….13

3
Precautions
1. Never attempt your own maintenance. If something appears strange, please
turn the TV off and consult your TV dealer. The TV is composed of many
delicate electronic components that can be damaged or broken if you open the
TV or attempt to modify it.
2. Do not exposing the TV to high humidity, dust, steam, oil, smoke, direct
sunlight etc.
3. Do not use thinners or other chemical reagent. Wipe the TV off with a soft
cloth if it gets dirty.
4. Do not leave the TV in excessively hot or cold places. Permissible storage
temperatures are within the range of 25
0
C to +60
0
C. Permissible operation
temperatures are within the range of
0
to +40
0
.
5. Only use specified adapters and power sources.
6. Turn power OFF when not in use and unplug the adapter.
7. Avoid dropping and strong impact.
8. For your safety, the driver should not watch TV or operate the controls while
driving.
9. Please note that watching and operating the TV while driving are prohibited by
law in some countries.
10. That doesn’t mean the TV is broken with some light or dark color dots on the
LCD, it’s a popular condition with the TFT-LCD technology.
Earphone operation precautions
1. Please don’t tune your headphone / earphone to too high volume, otherwise it
may lead inconvenience and danger to yourself and other people.
2. For open-designed earphone, to avoid influencing your periphery, please tune
down the volume.
3. In case of any tinnitus, please tune down the volume or stop using this
machine.
4. It is strongly recommended that never use the earphone continuously for a long
time.
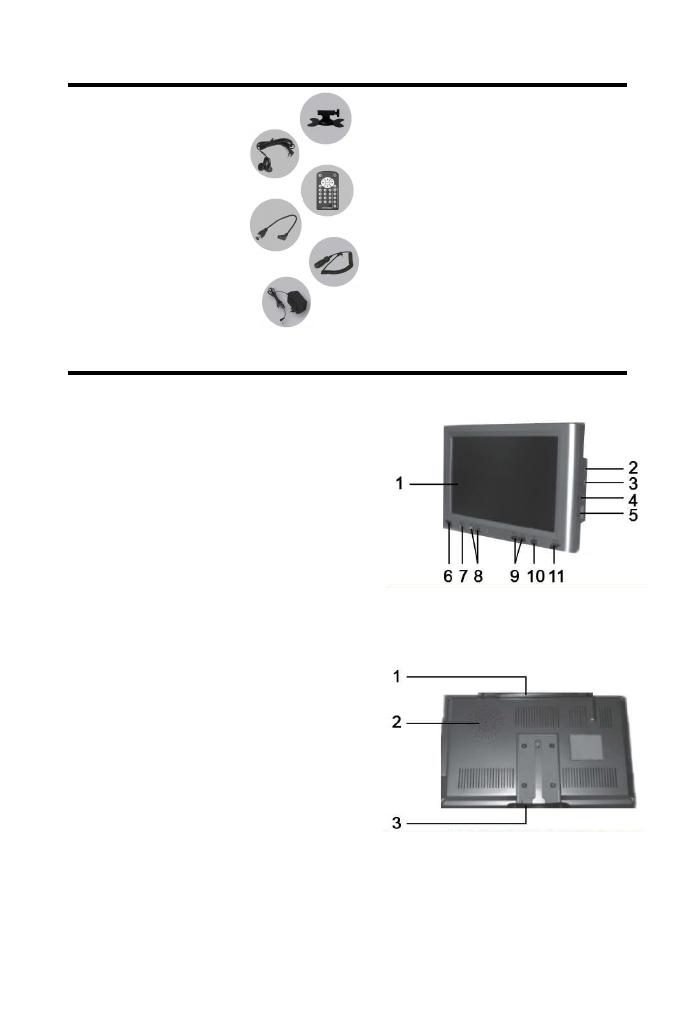
Accessories
1. Stand
2. Earphones
3. Remote control
4. Antenna adapter
5. Car adapter
6. AC adapter
4
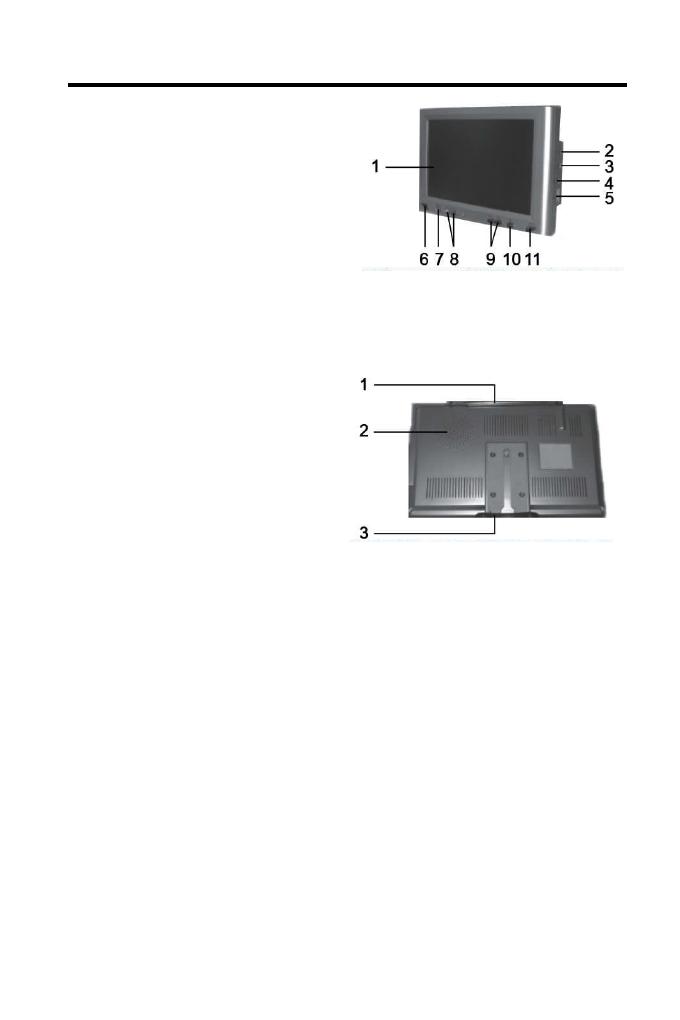
Aspect
Front
1. LCD screen
2. External antenna jack
3. Earphone jack
4. DC 12V input jack
5. AV jack
6. IR sensor
7. Menu button
8. Volume adjustment
9. Channel selection
10. TV/AV selection
11. Power button
Back
1. Antenna
2. Speaker
3. Stand mount
5
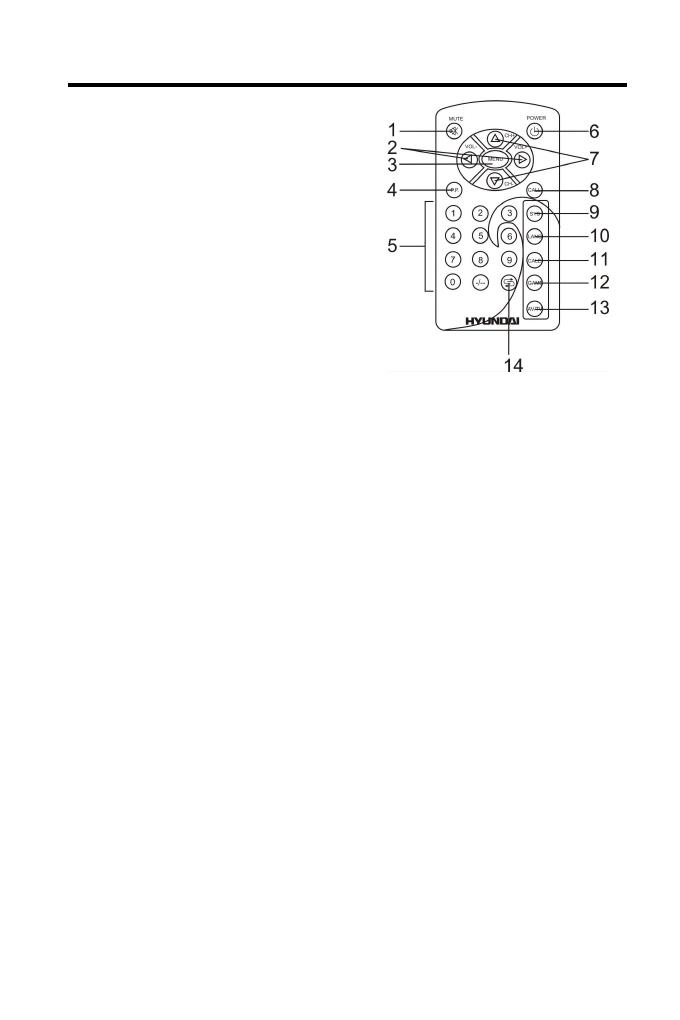
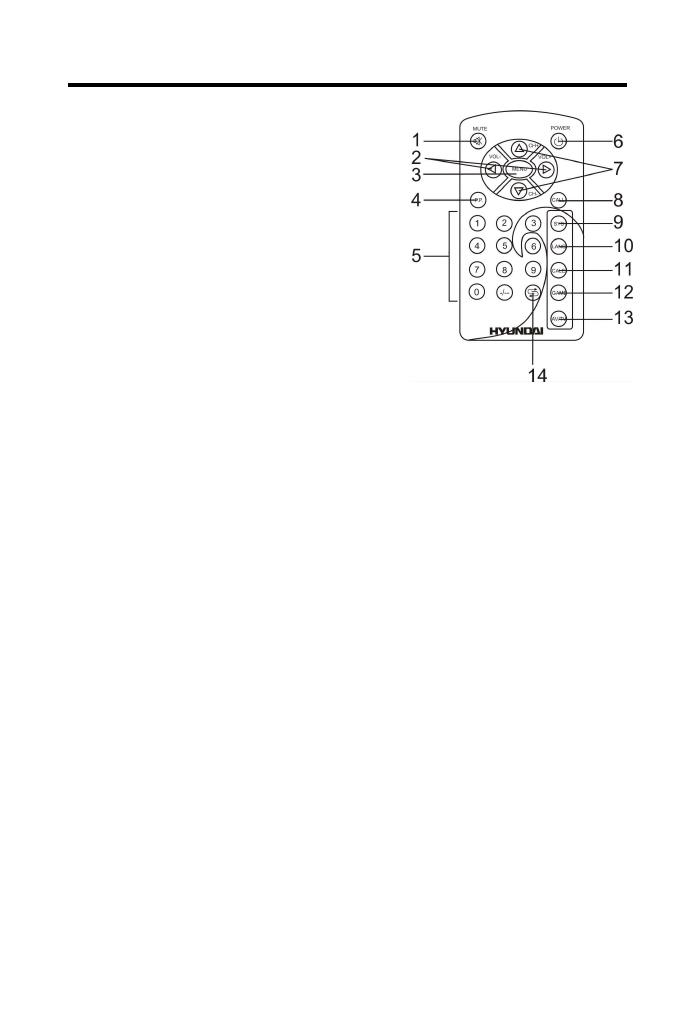
Remote control
1. Mute
2. Vol +/— selection
3. Menu button
4. Picture mode
5. Channel selection
6. Power button
7. CH +/- selection
8. Call (Game exit)
9. Sys button
10. Lang button
11. Cale button
12. Game button
13. AV/TV selection
14. Return (Game start)
Caution: Please align the remote control with the infrared-receiving window on TV
set in operation.
1. Never oppress, drop, wet or disassembly the remote control.
2. Never press any button continuously and swiftly. Operation interval is at least
2 seconds.
3. Press Power to turn on the machine before pressing CH+/- for channel
selection.
Channel keys (digit keys (0-9) and — / — — )
There are 0 ~ 255 in total of 256 channels available on the remote controller for your
option by the 11 buttons of 0-9 and — / — — on the remote control. When the channel is a
one-digit figure, just press the corresponding digit key. If the channel is a two-digit
figure, you should press — / — — first to show — — on the display screen before further
pressing the corresponding digit keys.
CH +/- (Channel selection)
Press CH +, the number of TV channel increases.
Press CH -, the number of TV channel decreases.
Vol +/- (Volume adjust)
Press VOL + , the volume of TV set increases.
Press VOL — , the volume of TV set decreases.
Picture mode (Mode)
By pressing this button, users can realize the five picture mode of Standard, Soft,
Vivid, Light and Personal.
Power (Power switch)
Press this button to turn on the TV set, press it again to turn off the machine.
Mute
Press this button, sound disappears, press it again or VOL +/- to resume normal
sound.
Call
Press this button to display the character of program currently watching.

6
Lang
Press this button can realize the switch of English and Russian OSD menu.
AV/TV
Press this button to realize switch between AV/ TV pictures.
Cale (Calendar)
Press this button to review the calendar.
Return
Press this button to return to previous channel, press it again return to current channel.
Game: Use CH +/- buttons to select this item, then press VOL +/- buttons to enter
into this mode. The button operations are as follows: To move left press VOL-, to
move right press VOL+, to turn the pieces press CH+ and to speed up press
CH-.
7
Power Selection
1. AC adapter
AC adapter supplies power to the television from 220 V alternating current.
Plug AC adapter into ypur domestic wall socket.
2. Car Adapter (DC 12V):
The car adapter (apply to the car with «-» polarity connected to the ground)
allows the TV to be powered by a car battery through the vehicle’ s cigarette
lighter.
Menu operation
1. Connect the power and turn on the power switch.
2. Extend the antenna.
3. Use the Regulate the CH +/— buttons to find the necessary channel.
4. Use the VOL +/— button to regulate the volume level.
5. Press the MENU button on the unit or remote control to select among different
Menu pages, i. e. Picture, Option, Clock, System and Preset.
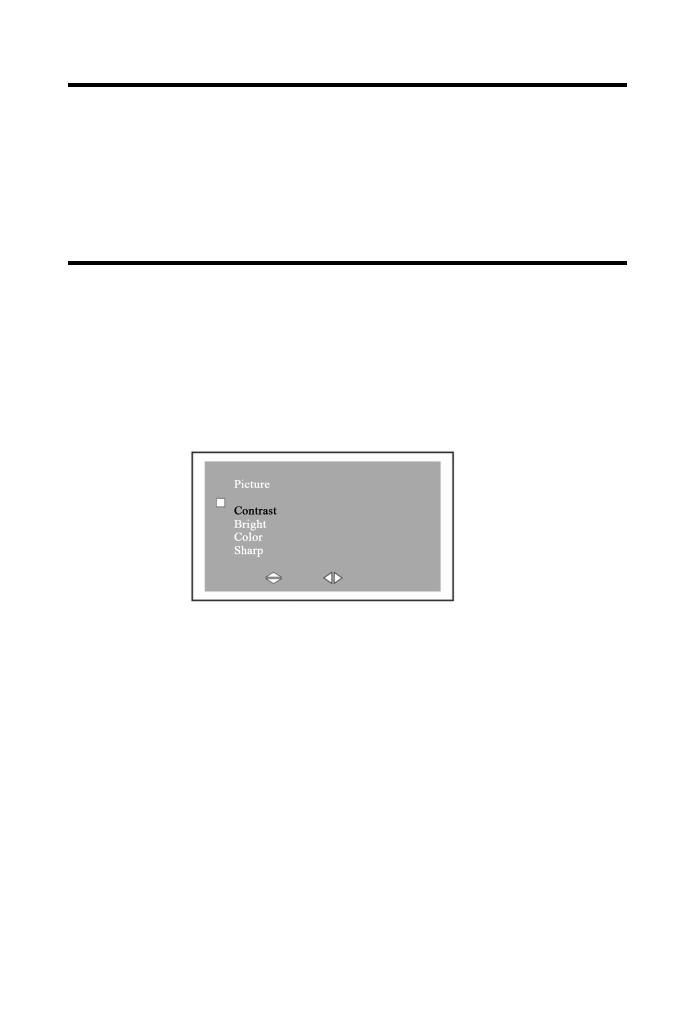
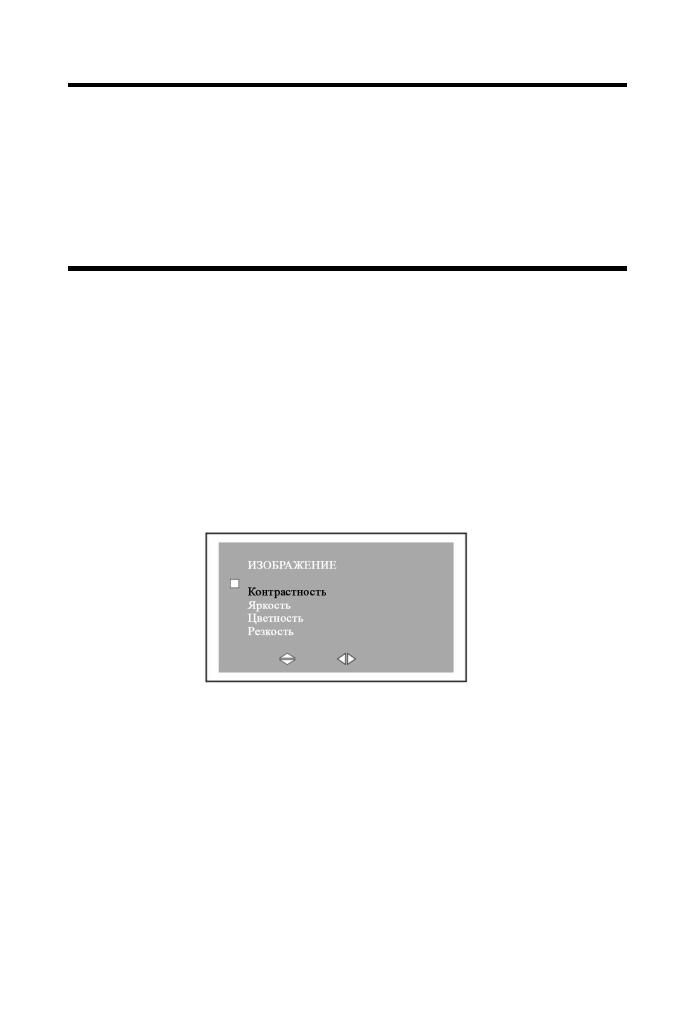
Menu Picture
Press MENU to enter into menu Picture. Press CH +/— to select and press VOL +/- to
change setting.
a. Contrast: Use CH +/- buttons to select this item, then press VOL +/- to
increase/decrease the contrast.
b. Brightness: Use CH +/- buttons to select this item, then press VOL +/- to
increase/decrease the brightness.
c. Color: Use CH +/- buttons to select this item, then press VOL +/- to
increase/decrease the color saturation.
d. Sharp: CH +/- buttons to select this item, then press VOL +/- to
increase/decrease the sharp.
8
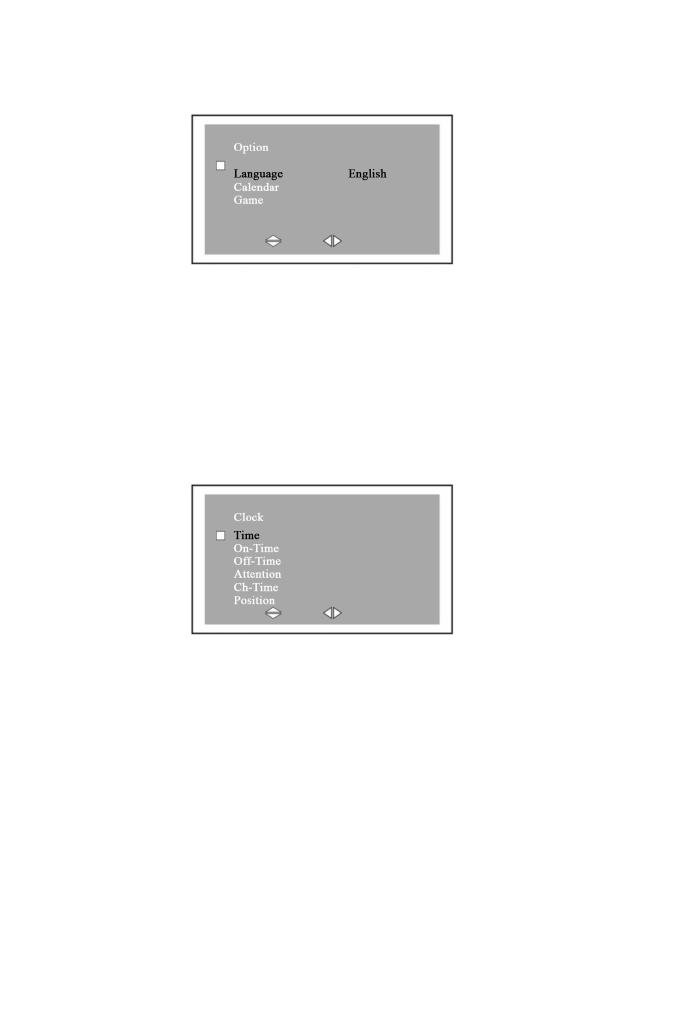
Menu Option
Press MENU to enter into menu Option. Press CH +/- to select and press VOL +/- to
change setting.
a. Language: Change OSD menu language among English, Russian, Chinese,
German, Portuguese, Spanish, Italian and Arabic.
b. Calendar: Press CH +/- to select Calendar and press VOL +/- to display a
calendar. Press CH +/- to change year and press VOL +/- to change month.
Press other buttons to exit Calendar or it will always show on the screen.
c. Game: Press CH +/-, VOL +/- to navigate in the game. When the game is over,
press CH+ to play again.
Menu Clock
Press MENU to enter into menu Clock. Press CH +/- to select and press VOL +/- to
change setting.
a. Time: Press the VOL +/- buttons to set it to «00:00″, and then use the VOL +
button again to increase the time by one minute in turn to maximum of 59 min.
Once you have reached the maximum and the button is pressed again the clock
will go back to zero minute. Now use the VOL — button again to increase the
time by one hour in turn to maximum of 23 hours. Once you have reached the
maximum of 23 hours and the button is pressed again it will go back to zero
hour.
Note: If time has not been set, all items will be yellow and can not be changed. Once
the time is set, all items become green and can be changed.
b. On-Time: When you have adjusted the time, you can set time for «On-Time».
Use CH +/- buttons to enter this item, then press the VOL +/- buttons to set into
«00:00«. Press the VOL + button again to increase the time by one minute in
turn to maximum of 59 min. Once you have reached the maximum of 59
minutes and the button is pressed again the clock will go back to zero minute.
Press the VOL — button to increase the time by one hour in turn to maximum of

9
23 hours. Once you have reached the maximum of 23 hours and the button is
pressed again it will go back to zero hours. Once you have set a specified time,
the device will start automatically at that designated time.
c. Off-Time: When you have adjusted the time, you can set time for «Off-Time».
Use CH +/- buttons to enter this item, then press the VOL +/- buttons to set it to
«00:00«. Press the VOL + button again to increase the time by one minute in
turn to maximum of 59 min. Once you have reached the maximum of 59
minutes and the button is pressed again the clock will go back to zero minute.
Press the VOL — button to increase the time by one hour in turn to maximum of
23 hours. Once you have reached the maximum of 23 hours and the button is
pressed again it will go back to zero hours. Once you have set a specified time,
the device will turn off automatically at that designated time.
Note: The time that has been set will return back to the default time (00:00) if you
unplug the unit from its power socket.
d. Attention: press CH- to find th original condition of this item, then press
VOL +/- to make it to zero, press VOL + to add one minute, the max can be 59
minutes, then press the button once more, it come back to zero. Press VOL — to
add one hour, the max can be 23 hours, then press the button once more, it come
back to original condition. The unit will alarm you automatically when the
ATTENTION time comes.
e. Ch-Time: press CH+ to find the original condition of this item, then press VOL
+/- to make it to zero, press VOL + to add one minute, the max can be 59
minutes, then press the button once more, it come back to zero. Press VOL — to
add one hour, the maximum hour can be 23 hour, then press the button once
more, it come back to original condition. The unit will alarm you automatically
when the booking time comes.
f. Position: press CH +/- to select Position. Press VOL +/- to change channel
number or press 1 to 9 buttons to insert the channel number directly. The unit will
turn on automatically to the preset channel at the preset time.

Menu System
Press MENU to enter into menu System. Press CH +/- to select and press VOL +/- to
change setting.
a. Color-Sys: select color system in your country as follows: AUTO, PAL, N3.58,
N4.43, SECAM.
b. Sound-Sys: Select appropriate sound system in your country as follows: 5.5 m,
6.0 m, 5.5 m.
In the System menu, press CH +/- to select Sound system and press VOL +/- to
select appropriate sound system in your country.
c. Blue back: switch on this item. When the receiving signal is very low, you will
see the blue screen.
d. Zoom: you can choose the picture size as l (l6:9) and 2 (4:3).
Menu Preset
Press MENU to enter into menu Preset. Press CH +/- to select and press VOL +/- to
change setting.
a. Position: Please choose the number of channel you want to set.
b. Remember: Turn on to remember the set channel.
c. Band: You may choose the band where to search the channel. You can choose
V-L, V-H, UHF.
d. Swap: Press CH +/- to choose the program swap item. The function allow you to
the currently channel number to the channel number which you need to swap.
Press CH +/— to choose target channel (it means the channel has been chosen,
when the color of the channel number’s change to red), press VOL +/- to add or
reduce the number, then press CH +/- to choose currently channel number, press
VOL +/— to realize the function.
e. Fine: press CH +/- to choose this item, then press VOL +/-, you can adjust the
program conditions while you are watching by hand.
f. Search: press CH +/- to choose this item, then press VOL +/- to proceed to
search channels by hand.
g. Auto-Search: the original set is auto search, press VOL +/- to make it auto
search. It would search all the currently TV channels and store them.
Caution:
1. When performing manual search, press VOL +/— can reverse the searching
direction. Press MENU to stop manual search.
2. Use CH +/- to select channel number. If a channel is preset, the channel number
will become red.
Note:
1. Hue setting applies to NTSC input only.
2. Volume can simply be adjusted by pressing VOL +/-.
3. OSD menu will automatically exit in 10 seconds.
Using the Earphones
Please insert the provided earphones to the earphone jack on the unit in order to enjoy
programs without disturbing other people. The sound quality is not guaranteed if you
use earphones other than the provided.
Using an outdoor antenna
If the wireless TV signal is too weak for the built-in antenna, you may use an outdoor
antenna. You can connect the outdoor antenna and the TV using an antenna connector
through the antenna jack of the LCD TV.
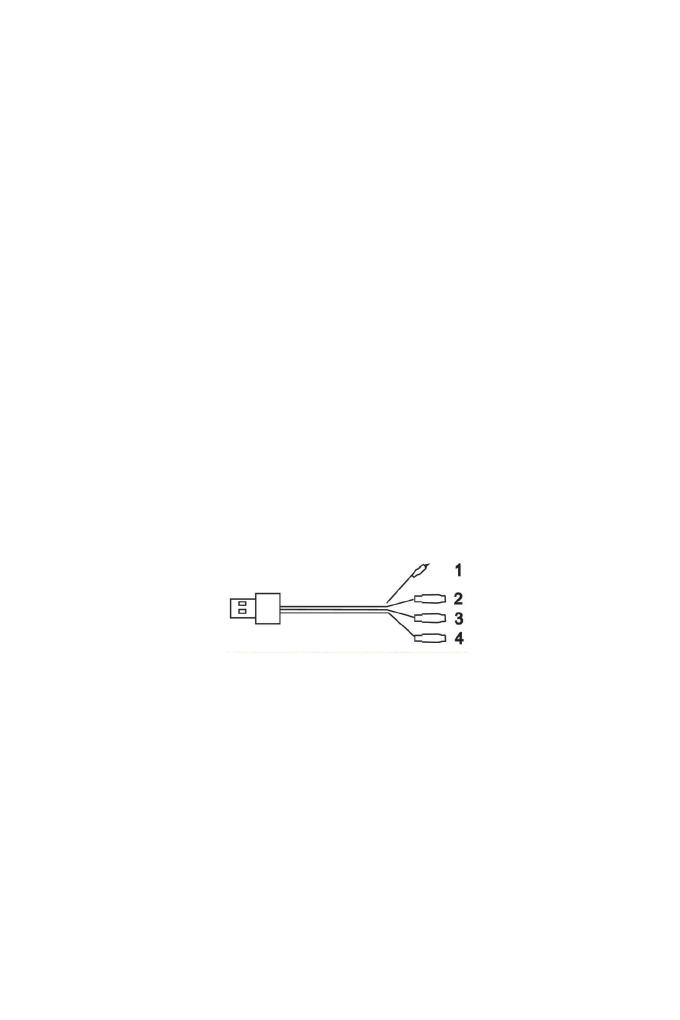
Rear vision
a. AV cable connection
1. Slug pin
2. RCA (red) Audio input
3. RCA (yellow) Video 1 input
4. RCA (white) Video 2 input (can be used for connecting the rearview
camera)
b. Rear vision
Whenever necessary, you may watch the rearview by pressing the TV/AV key to
switch to AV2, if AV2 is connected to the rearview camera.
c. Auto rear vision
Connect the slug pin of the AV cable to the reverse gear wire of your car. The
TV will automatically switch to AV2 while backing the car.
In order to receive clearer picture
Adjust the length, angle and direction of the telescopic antenna to obtain optimum
image. Draw back the antenna from the butt end after usage.
Caution:
In case the signal intensity is too weak, the image will remain inferior whatever you
adjust the antenna, and cause loud noise wave, shaking image and inferior sound, etc.,
which is not TV fault. If the image remains inferior when using telescopic antenna,
please try to use the external antenna or CATV.
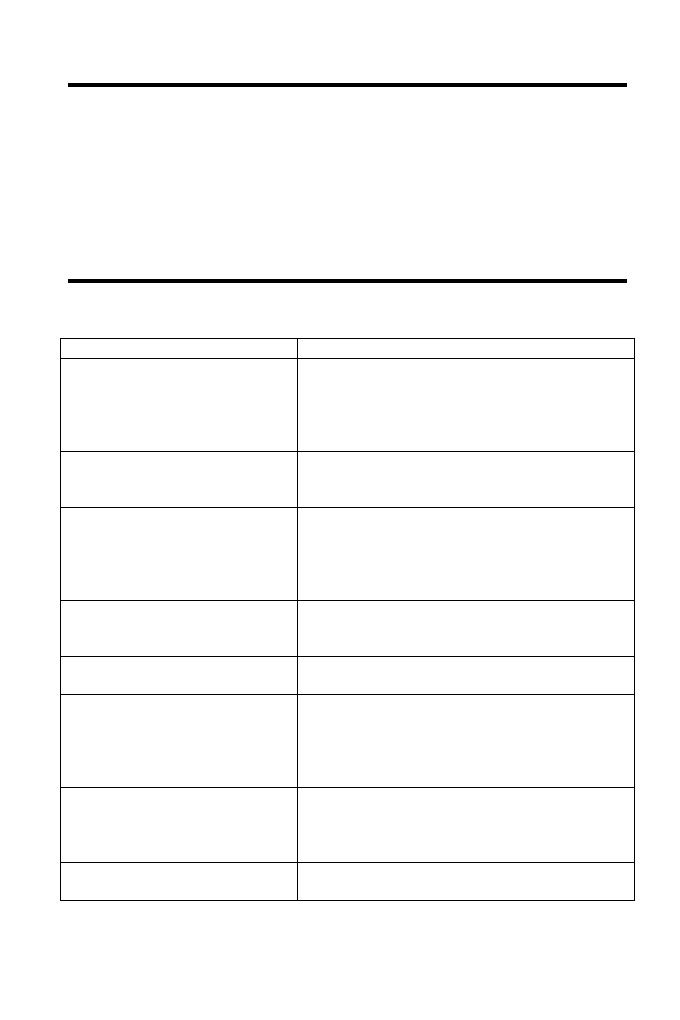
Before you request repair service
The following occurrences do not indicate that the television is faulty. Before you
request repair, follow the listed methods to check the device.
Occurrences Possible reasons
No picture and sound Battery pack is exhausted or not making contact,
AC adapter or automobile adapter is not properly
connected. Uncertified power is being used.
Power switch is off. Is it properly to choose
TV/AV?
No picture Check to see if the channels selected correctly.
Readjust automatic channel tuning. Channels
should be reset in a new region.
No sound Check to see if the audio volume is off or audio
system is improperly set and the earphone is
inserted. Poor signal or the sound elimination
function is on. Is it properly to choose audio
system (S.SYS)?
Poor reception Check if the audio system is correct? Antenna is
correctly adjusted and that the channel is tuned
correctly.
Dark picture Check that the brightness and contrast are set
correctly. Also that the environmental is too low
Vague picture or unstable picture Check that the antenna is correctly adjusted.
Possibly the grounding signal is too weak.
Snowflake interference is possibly affected
electric wave interference from vehicle motors,
trains, high-voltage power wired or neon lights.
No color Check that the color and the color system are
adjusted correctly. If you are receiving bad
signal. Check to see the color elimination
function is on.
Remote control doesnt work Check to see that whether batteries are exhausted
and strong sunshines on the receiver.

Specification
Product size: 7″ (16:9, 4:3 display modes)
Receivable channels: DI: 49.75MHz-863.25MHz
BG: 48.25MHz-855.25MHz
System: PAL/SECAM (BG/DK/I)
Display component: color TFT-LCD
Resolution: 1440 (H) x 234(V)
Audio output: 150 mW (max)
Speaker: round 40 mm
Connectors: external antenna input jack, stereo earphone jack,
audio/video input jack, external power input jack
Power supply: AC adapter
Car adapter
Power consumption: ~10 W
External dimensions: W 193 mm x H 121 mm x T 27 mm
Weight: 540g

!
.
,
.
………………………………………………………………………………………………………14
…………………………………………….……………………………………15
……………………………………………………………………………………………………….16
……………………………………….………………………………………………………………….16
………..………………….………………………………………………………………..17
……………………..…………………………………………………………19
……………………..…………………………………………………………………………19
……………………..…………………………24
…………………………………….……………………….25
…………………………………………….……………………………..26

1. .
,
.
.
.
2. , , ,
.
3. .
,
.
4.
. 0 40°.
20° 60°.
5. ,
.
6.
, .
7. .
8.
, .
9. .
10. .
,
. .
1. ,
.
2.
.
3. ,
.
4.
.
1.
2.
3.
4.
5.
6. AC
1.
2.
3.
4. 12
5. (AV)
6.
7. «»
8.
9.
10. TV/AV
11.
1.
2.
3.
1. Mute ()
2. Vol +/- ()
3. Menu ()
4. Picture mode ()
5.
6. Power (./.)
7. CH +/- ()
8. Call (Game exit) ( ())
9. Sys ()
10. Lang ()
11. Cale ()
12. Game ()
13. AV/TV ()
14. Return (Game start)
())
1. , ,
.
2. .
2 .
3. Power ,
CH+, CH-.
((0-9) (- / — — )):
256 . ,
.
, (- / — -),
.
CH +/- ()
CH +/- .
VOL +/- ()
VOL +/- .
Picture mode ()
: ,
, , , .
Power ()
.
Mute ():
.
VOL +/- .
Call ( ())
,
.

Lang ()
: , .
AV/TV ( AV/TV)
AV/TV.
Cale ()
.
Return (Game start) ( ())
,
.
Game (): GAME , ,
VOL +/-, .
: VOL -, VOL +,
360º +, —.
1. AC
AC 220 .
.
2. (12 )
(
)
.
1. .
.
, POWER
.
2. .
3. CH +/- .
4. .
5. MENU :
, , , , .
«»
MENU, «».
CH +/-, , VOL +/-,
.
) : CH +/-,
VOL +/- .
) : CH +/-,
VOL +/- .
) : CH +/-,
VOL +/- .
) : CH +/-,
VOL +/- .

«»
MENU, «».
CH +/-, , VOL +/-,
.
) : : , , ,
, , , , .
) : CH +/-, ,
VOL +/-, . CH +/-,
, VOL +/-, .
, .
) : CH +/-, VOL +/-,
. CH+,
.
«»
MENU, «».
CH +/-, , VOL +/-, .
a) : VOL +/-, «00:00»,
VOL +,
59 ). ,
, 0 .
VOL —,
23 ). 23
, ,
0 .
: ,
. , ,
.
) :
. CH +/-,
TFT LCD COLOR TV
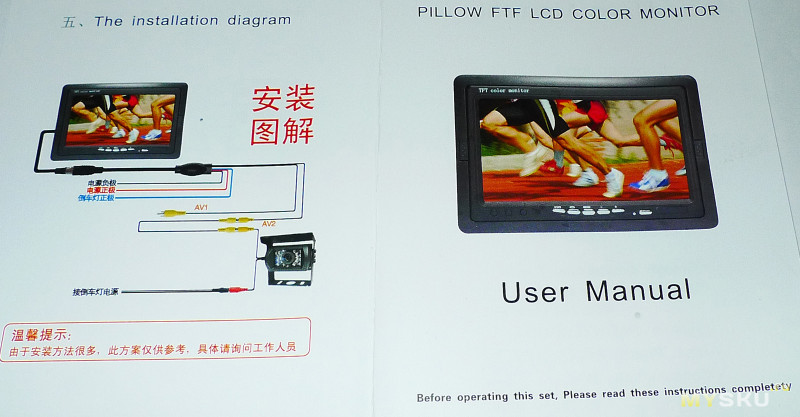
Installation and connection methods
Please refer to the Body Figure
Fuse 2A
Red wire —ACC switch
Green wire — backing-up
control wire
Yellow wire — accumulator of 12V
Black wire — grounding
Please connect backing-up camera head from
V2 white import, when green wire is connected
to backing-up signal lamp (12V); When
backing-up, automatically entered into V2, and
Warning
after backing-up, original state returned.
Figure of installing batteries into remote controller
— 3 —
White wire — video
frequency V2
Red wire — audio input
Yellow wire — video frequency V1
Antenna input port 1
Antenna input port 2
Descriptions
AC adapter or vehicle adapter are wrongly
connected.
No pictures
Uncertified power is under using.
or sounds
If TV/AV is correctly selected?
If channel is rightly selected?
No pictures
Auto reset receiving channel.
Reset channel in other new places.
If volume is rightly adjusted?
If earphone has been connected?
No sounds
Signal and mute are under functions.
If antenna is rightly adjusted?
Poor contact
If channel is rightly adjusted?
If brightness and contrast are rightly adjusted?
Dark picture
If ambient temperature is too low?
If antenna is rightly adjusted?
Blur picture
Maybe received local signal is too weak.
or non-stable
If antenna direction is right?
Double image
Maybe signals reflected by nearby buildings or
high walls are received.
Maybe interfered by electric wave of motors of
Blur pots
vehicles, trains, high-pressure wires and neon
lamps.
If color adjustment is under good state?
No colors
For poor signal achromatic in under function
If batteries have been used up?
No operation of
If receiver has exposed on violent light?
remote controller
— 20 —
TFT LCD COLOR TV
Reasons
Содержание
- 7 TFT LCD Car Rear View Color Screen Monitor #2
- Автомобильный 7-дюймовый TFT LCD цветной монитор с двумя видеовходами
- Автомобильный 7-дюймовый TFT LCD цветной монитор с двумя видеовходами
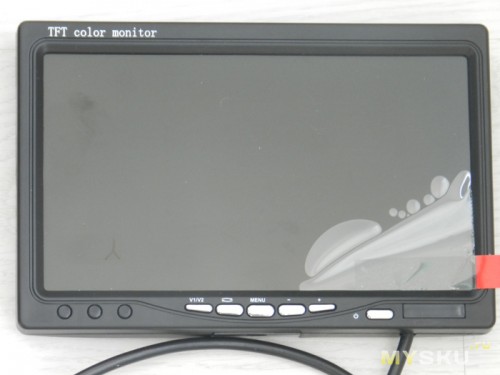
7 TFT LCD Car Rear View Color Screen Monitor #2
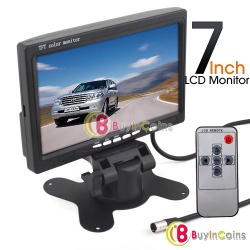
В сегодняшнем обзоре речь пойдет про 7 дюймовый tft экран для автомобиля.
Посылочка мне пришла достаточно быстро, за семь дней до Симферополя, но до моего почтового отделения она шла еще три дня, пожалуй у меня это рекорд по скорости доставки.
BIC как всегда радует скоростью отправки своих товаров.
Экран мне обошелся в 36$, благодаря 15% скидки которую можно получить по этой схеме.
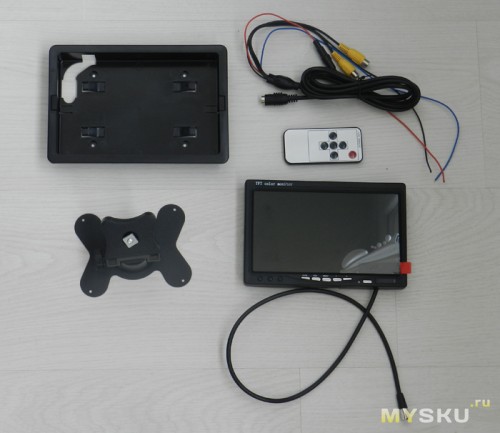
— Экран
— Подставка под экран
— Корзинка для экрана
— Провода подключения
— Пульт ДУ
— Инструкция
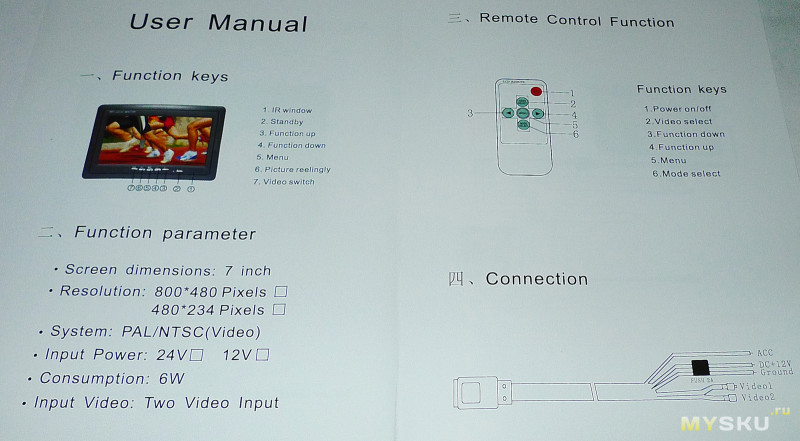
— Диагональ — 7″
— Разрешение экрана — 480х234 px
— Напряжение питания — 12V
— Два видео входа
— Поддержка PAL/NTSC, автоматичекое переключение.
Экрана (Ш/В/Г) — 170/110/20 мм
Корзины (Ш/В/Г) — 190/133/25 мм
Я покупал этот экран не для автомобиля, а для того что-бы сделать видео глазок, работает совместно с этой камерой.
Сам экран собран достаточно нормально, углы обзора по горизонтали нормальные, по вертикали хромают немного. Как по мне то у экрана не хватает яркости, т.к. при ярком свете картинка совсем блекнет.
На панели расположено шест кнопок управления:
— Переключение между видеовходами
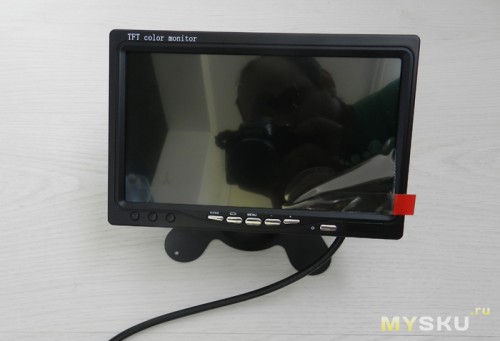
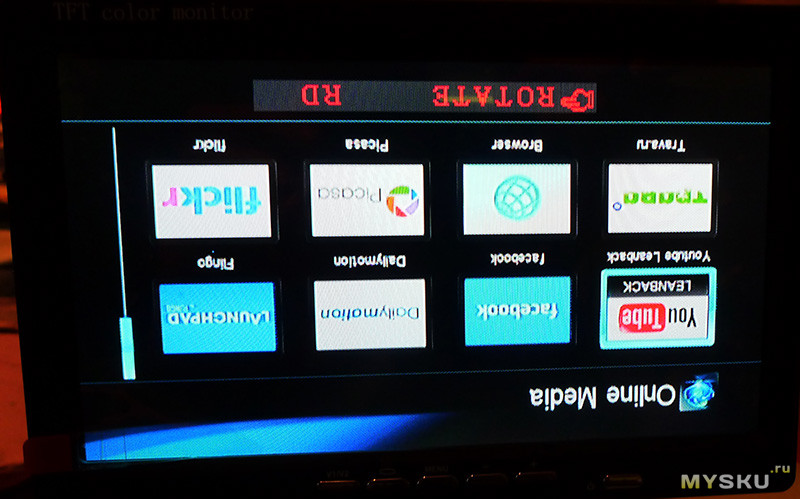
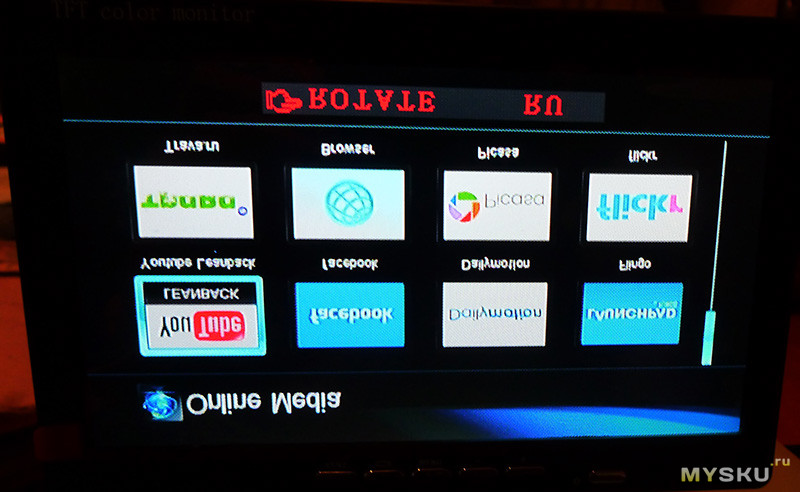
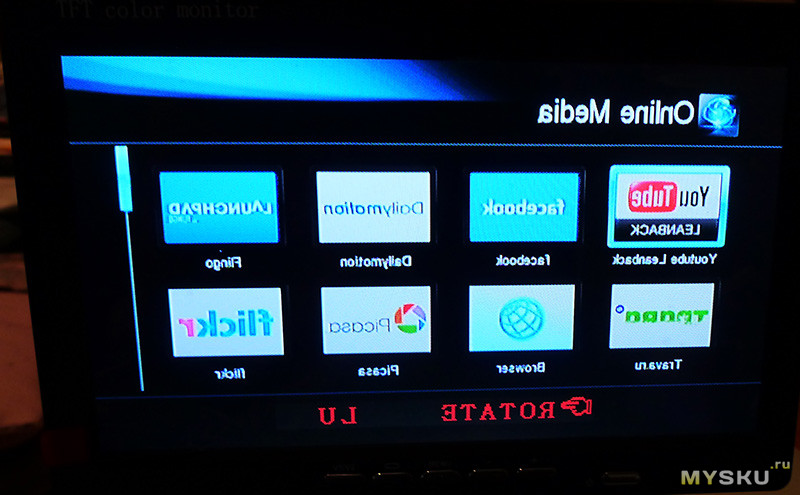
— Кнопка поворота картинки
— Кнопка доступа к меню
— Кнопки громкости (служат для навигации по меню)
— Включение экрана
Динамиков я так понял в данном экране нету, хотя сзади место под них есть.
При подключении столкнулся с небольшой трудностью т.к. там есть три провода (красный, черный, и синий), красный это + (на нем имеется предохранитель), черный как оказалось минус, а вот для чего синий не понятно, в инструкции никакой схемы подключения не имеется.
Меню устройства позволяет выбрать язык (русского нету), изменить яркость, контраст, насыщенность. Баловался этими настройками, честно говоря разницы не заметил, складывается впечатление что они только для вида.
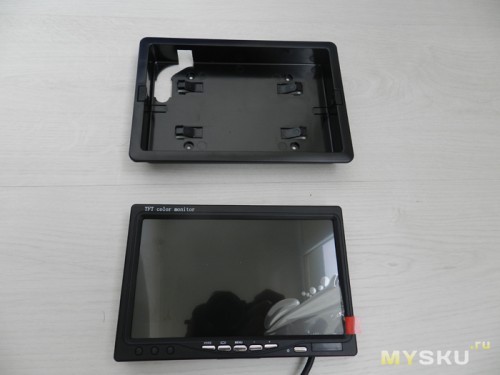
Монитор можно прикрепить двумя способами, или на подставке на двухсторонний скотч (идет в комплекте), или через корзину, она прикручивается и монитор уже вставляется в корзину.
Для моих целей данный монитор подходит отлично, но в автомобиль я такой себе не возьму т.к. слишком он блеклый, и при солнечной погоде там будет все плохо просматриваться, это мое субъективное мнение.
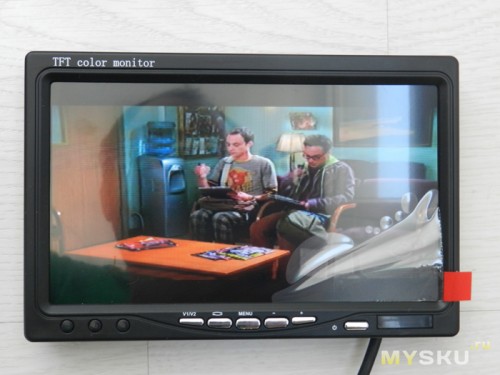
Подключил для сравнения к этому экрану через видеовыход Galaxy Tab 7
Источник
Автомобильный 7-дюймовый TFT LCD цветной монитор с двумя видеовходами

Предлагаю вашему вниманию обзор универсального (автомобильного) 7-дюймового TFT LCD цветного монитора с двумя видеовходами и универсальным крепежом…
7 Inch TFT Color LCD Dual-Input Car Monitor with Remote Controller
Description:
Color: Black
Resolution: 480 x 234(RGB)
System: PAL / NTSC
Voltage: 12V
Power:≦7 W
Operating Temperature:-20°C
+ 50°C
Scan Frequency:2
170 degree adjustable angle.
Touching key operating.
Language: Chinese / English
Video: Two-way Video Input
7″ TFT Color LCD 16:9 Screen
Car reversing backsight surveillance.
Remote control,strong shock resistance,adjustable stand,adjustable image brightness,color and contrast.
Backlight function,automatic image switching to left or right monitoring.
Package Included:
1 x 7″ LCD Car Monitor
1 x Remote Controller
1 x Connecting Cable
1 x English User Manual
Технические характеристики:
Диагональ — 7″ 16:9
Разрешение экрана — 480 x 234(RGB)
Напряжение питания — 12В
Два видео входа
Поддержка PAL/NTSC с автоматичеким переключением.
Размеры:
Экрана (Ш/В/Г) — 170/110/20 мм
Корзины (Ш/В/Г) — 190/133/25 мм
Сам монитор весит 250гр
Комплект поставки в красочной картонной коробке весом 670гр что приехал ко мне:
Монитор с несъемными проводами подключения
Подставка под монитор
Корзинка для крепления корпуса монитора
Импульсный блок питания на 12В
Инструкция 


Доступные режимы поворота изображения, кнопкой на панели или через меню монитора 


Итог.
Плюсы
Качество изображения вполне приличное для своей цены и предназначения, битых пикселей не обнаружил
Универсальный крепёж монитора в комплекте
Минусы.
Небольшие углы обзора по вертикали
Товар предоставлен для написания обзора магазином. Обзор опубликован в соответствии с п.18 Правил сайта.
Источник
Автомобильный 7-дюймовый TFT LCD цветной монитор с двумя видеовходами

Предлагаю вашему вниманию обзор универсального (автомобильного) 7-дюймового TFT LCD цветного монитора с двумя видеовходами и универсальным крепежом…
7 Inch TFT Color LCD Dual-Input Car Monitor with Remote Controller
Description:
Color: Black
Resolution: 480 x 234(RGB)
System: PAL / NTSC
Voltage: 12V
Power:≦7 W
Operating Temperature:-20°C
+ 50°C
Scan Frequency:2
170 degree adjustable angle.
Touching key operating.
Language: Chinese / English
Video: Two-way Video Input
7″ TFT Color LCD 16:9 Screen
Car reversing backsight surveillance.
Remote control,strong shock resistance,adjustable stand,adjustable image brightness,color and contrast.
Backlight function,automatic image switching to left or right monitoring.
Package Included:
1 x 7″ LCD Car Monitor
1 x Remote Controller
1 x Connecting Cable
1 x English User Manual
Технические характеристики:
Диагональ — 7″ 16:9
Разрешение экрана — 480 x 234(RGB)
Напряжение питания — 12В
Два видео входа
Поддержка PAL/NTSC с автоматичеким переключением.
Размеры:
Экрана (Ш/В/Г) — 170/110/20 мм
Корзины (Ш/В/Г) — 190/133/25 мм
Сам монитор весит 250гр
Комплект поставки в красочной картонной коробке весом 670гр что приехал ко мне:
Монитор с несъемными проводами подключения
Подставка под монитор
Корзинка для крепления корпуса монитора
Импульсный блок питания на 12В
Инструкция 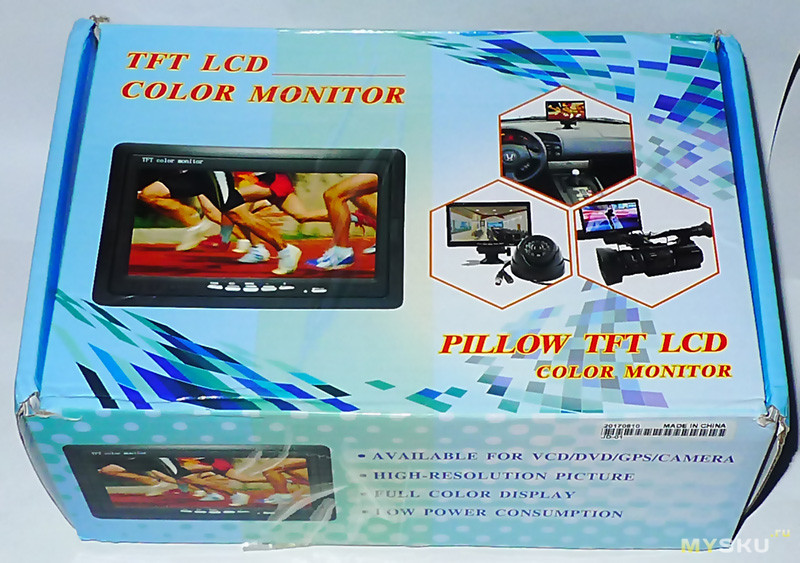
Доступные режимы поворота изображения, кнопкой на панели или через меню монитора 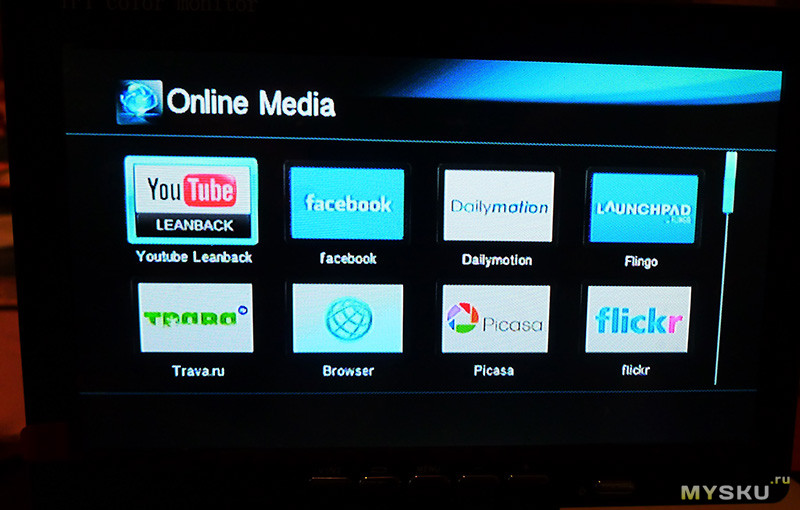
Итог.
Плюсы
Качество изображения вполне приличное для своей цены и предназначения, битых пикселей не обнаружил
Универсальный крепёж монитора в комплекте
Минусы.
Небольшие углы обзора по вертикали
Товар предоставлен для написания обзора магазином. Обзор опубликован в соответствии с п.18 Правил сайта.
Источник
(скачивание инструкции бесплатно)
Формат файла: PDF
Доступность: Бесплатно как и все руководства на сайте. Без регистрации и SMS.
Дополнительно: Чтение инструкции онлайн

SM-LCD711
Portable LCD Color TV
Instruction manual
Страница:
(1 из 26)
навигация

1

2

3

4

5

6

7

8

9

10

11

12

13

14

15

16

17

18

19

20

21

22

23

24

25

26
Оглавление инструкции
- Страница 1 из 27
SM-LCD711 Portable LCD Color TV Instruction manual - Страница 2 из 27
Dear consumer! Thank you for purchasing the TFT-LCD color television. To enjoy the features of this unit and to ensure safety and years of trouble-free operation, be sure to carefully read this manual and follow the instructions contained herein. Contents Contents - Страница 3 из 27
Caution 1. Never attempt your own maintenance. If something appears strange, please turn the TV off and consult your TV dealer. The TV is composed of many delicate electronic components that can be damaged or broken if you open the TV or attempt to modify it. 2. Do not expose the TV to high - Страница 4 из 27
Aspect Front panel 1. 2. 3. 4. 5. 6. 7. 8. 9. 10. 11. 12. 13. TFT-LCD screen Speakers Power indicator ON Power indicator OFF POWER button AV/TV button MENU button VOLUME -/+ button AUTO button CH -/+ button Remote receiving window Antenna IN jack Telescopic antenna Side panels Right 14. 15. 16. 17. - Страница 5 из 27
Remote control (RC) 1. 2. 3. 4. 5. 6. 7. 8. 9. 10. 11. 12. 13. 14. 15. 16. 17. 18. MENU button VOL-/VOL+ buttons MUTE button MODE button Number buttons Two-digit button HORIZONTAL button VERTICAL button CH-/CH+ buttons POWER button CALL button TIMER button LANG button CALE button VIDEO button - Страница 6 из 27
TIMER button: Time setup of sleep off, it is used to set the time off within 120 minutes. LANG button: Press this button to switch between OSD menu languages. CALE button: Press this button to show Year, Month, Day and Week. Press CH+/CH- buttons to adjust the year, press VOL+/VOL- buttons to - Страница 7 из 27
Power Selection 1. 220V AC adapter AC adapter (refer to product tag attached to the AC adapter) supplies power to the television from 220V alternating current. 2. Automobile storage battery with 12V DC Use automobile adapter (suitable for vehicles with negative grounding) to supply power to the - Страница 8 из 27
Connection of the telescopic antenna: Align the telescopic antenna plug with the external antenna jack on TV set and just plug in till its end. Earphone connection Align the earphone plug with the earphone jack on the right side panel, just plug in till its end. Note: If earphone is applied, the - Страница 9 из 27
Menu operation 1. 2. Press MENU button on the unit or RC to select among different Menu pages, i. e. Picture, Option, Clock, System and Preset. Press CH+/CH- buttons to select an item and press VOL+/VOLbuttons to change setting. Menu “Picture” In this menu you can choose following items to adjust: - Страница 10 из 27
c. Off-Time: When you have adjusted the time, you can set time for «Off-Time». Use CH+/CH- buttons to enter this item, then press VOL+/VOL- buttons to set it to «00:00». Press VOL+ button again to increase the time by one minute. Press VOL- button to increase the time by one. Note: The time that - Страница 11 из 27
c. d. e. f. g. Band: You may choose the band where to search the channel. You can choose V-L, V-H, UHF, and return to Program No.0 upon completion. Swap: Press CH+/CH- buttons to choose the program swap item. The function allows you to swap the current channel number to another one. Press CH+/CH- - Страница 12 из 27
Troubleshooting The following occurrences do not indicate that the television is faulty. Before you request repair, follow the listed methods to check the device. Occurrences No picture and sound No picture No sound Poor reception Dark picture Vague picture or unstable picture No color Remote - Страница 13 из 27
Specification Product name: Receivable channels: Resolution: Brightness: Contrast: Audio input: Response Speed (ms): View Angle: Connectors: Power supply: Power consumption: External dimensions: Weight: 7″ portable LCD color television 48.25 MHz — 863.25 MHz 1440(H) x 234(V) 300 cd/m² 300:1 0.3 W - Страница 14 из 27
! — . , « « « « « . ………………………………………………………… 14 …………………………………………. 15 ………………………………………. 15 …………………………………………………………. 16 - Страница 15 из 27
1. , . . . . 2. , , , . 3. . , . 4. . -20° +60° . 0° +40° . 5. , . 6. 7. 8. , . . , . 9. . 10. . , . . 1. , . 2. 3. , . . 4. . 15 - Страница 16 из 27
AC AV (75 Ohm) 16 - Страница 17 из 27
1. 2. 3. 4. 5. 6. 7. 8. 9. 10. 11. 12. 13. POWER AV/TV MENU VOLUME-/+ AUTO CH-/+ 14. 15. 16. 17. 18. AV1 IN AV2 IN ON/OFF 12V DC 17 - Страница 18 из 27
( 1. 2. 3. 4. 5. 6. MENU VOL-/VOL+ MUTE MODE 7. 8. 9. 10. 11. 12. 13. 14. 15. 16. 17. 18. ) HORIZONTAL VERTICAL CH-/CH+ POWER CALL TIMER LANG CALE VIDEO RETURN AUTO P.MODE 1. 2. . , , 3. –2 POWER 4. . . . , CH+/CH-. : 256 (0 – 255). . , , ( . CH-/+: CH+ CH- VOL-/+: «- -»), . . VOLVOL+ . . MODE: : - Страница 19 из 27
MUTE: . VOL+/VOL- . CALL: . . . TIMER: , LANG: CALE: VIDEO: TV/AV. AUTO: . VOL+/VOL- CH-/CH+ . 5 . RETURN: , 120 . HORIZONTAL: . . VERTICAL: . . P.MODE: : 16:9, 4:3. 2 19 - Страница 20 из 27
1. AC ( 2. 220 AC . . ) 12 ( ) . 3. ) 220 (12 ( ): . : , , , . : AC , DC12V. : , , . 20 - Страница 21 из 27
: , . . : , , . 1. AV1: AV ( ( , ) – ) , ) — . AV1 IN . 2. AV2: AV ( ( , ) – ) , ) — . AV2 IN . 21 - Страница 22 из 27
1. MENU , : . 2. , » , , ( ) : NTSC – « : . » : : , , CH+/CH-, , , . : , VOL+/VOL, . CH+/CH-, VOL+/VOL-, ) , . « ) , CH+/-, VOL+/-, ) , , . . VOL+/VOL-, : VOL+ . : . , CH+ POWER, 360. , VOL. . . « a) » : VOL+/VOL-, . CH+/CH-, . VOL– , VOL+ . ) . : . VOL+ , ) : , 22 VOL+/VOL-, CH+/CH-, VOL– . - Страница 23 из 27
«00:00», VOL+, ). ( : ) ( VOL-, 23 59 ). (00:00), . : , . VOL- VOL+ , . . ) : +, , VOL+/VOL-, VOL+, , 23 ), VOL-, CH+/CH-, ». . ) « » ), . , : « 59 . . ) , ( VOL+/VOL-, . : CH+/CH-, , VOL+/VOL, : SECAM. , PAL, : ) : ) : ) : ) ) . : : : CH+/CH-, VOL+/VOL-, (BG5.5 m, I6.0 m, DK/L6.5 m). « ». . - Страница 24 из 27
« » ) ) ) ) , . : VOL+/VOL. : , : : V-L, V-H, UHF. : CH+/CH-, . . ( ), ) ) CH+/CH-, , VOL+/VOL-, , CH+/VOL-, VOL+/VOL-, : , . CH+/CH-, VOL+/VOL-, : . ) . . CH+/CH-, VOL+/VOL-, . : – . , VOL+/VOLMENU, . . CH+/CH-, , 2. : . . 1. 2. 3. , VOL+/VOL-, . : 1. , NTSC. VOL+/VOL-. 10 . , . . : , , , , . . , - Страница 25 из 27
. . . . . . TV/AV , . . . , , , . . . . . . . . . « . » , . , . . , , . , , 25 . - Страница 26 из 27
: : : : : : ( ): 7″ 48.25 — 863.25 1440 ( ) x 234 ( ) 300 ² 300:1 0,3 R: 30 / F: 40 120 ( ), 120 ( ) : : , . : ,2 , – , (12 ) : : : ~ 10 240 ( ~ 0,583 ) x 149 : . 26 ( ) x 36 ( ) - Страница 27 из 27
Инструкции и руководства похожие на SOUNDMAX SM-LCD711
Другие инструкции и руководства из категории Портативный телевизор
© 2023 manuals-help.ru, Все права защищены