-
Contents
-
Table of Contents
-
Bookmarks
Quick Links
21887
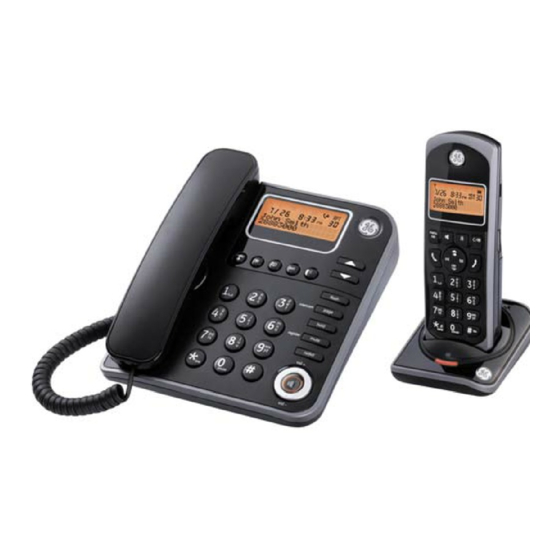
Digital Cordless
Telephone and Corded
Speakerphone with Dual
Mode Caller ID User’s Guide
– 0 –
Related Manuals for GE 21887
Summary of Contents for GE 21887
-
Page 1
21887 Digital Cordless Telephone and Corded Speakerphone with Dual Mode Caller ID User’s Guide – 0 –… -
Page 2: Precautions Of Use
Precautions of Use The quality of communication depends on the location and environment of the base and the handset. The 21887 must be kept away from sources of excessive heat (radiators, direct sunlight, etc.) and protected against vibrations and dust. Never allow your telephone to come into contact with water or other liquids or with aerosols.
-
Page 3
It is recommended that you avoid using this device during electrical storms. Thomson Telecom hereby declares that the 21887 conforms to the essential requirements and other applicable provisions of European directive 1999/5/CE. WARNING: TO PREVENT FIRE OR ELECTRICAL SHOCK HAZARD, DO NOT… -
Page 4: Battery Safety Precautions
Battery Safety Precautions Do not burn, disassemble, mutilate, or puncture. Like other batteries of this type, toxic materials could be released which can cause injury. To reduce the risk of fire or personal injury, use only the battery listed in User’s Guide. Keep batteries out of children.
-
Page 5: Installation
Installation Packaging Contents Packaging Single Twin Triple contents pack pack pack Handset Base Stations Cordless Handset Mains Adaptor Telephone Line Cord Batteries, type AAA, “1.2V 600mAh” Charging station Operating instructions Please check the contents of the package carefully. If anything is missing or shows signs of transport damage, do NOT put the telephone into service! In such a case, contact either your sales outlet with the purchase receipt.
-
Page 6
are designed prevent reverse poling). Plug the telephone line in the telephone connection socket. Insert the power plug at the other end in the power outlet. The base station in now ready to operate. Only use the connection cable supplied. AC power outlet Phone jack CAUTION:… -
Page 7: Connecting The Charging Station
Connecting the charging station Insert the power plug in the socket on the rear side of the charging station. Insert the power plug at the other end in the power outlet. The charging station is now ready to operate. AC power outlet Getting Started Install and Charge the Batteries –…
-
Page 8
Insert two pieces AAA batteries in the compartment, ensuring correct polarity and close the compartment. Place the handset in the remote charge unit to charge for 14 hours prior for first use. If you don’t properly charge the phone, battery performance will be compromised. -
Page 9
Features This cordless telephone is equipped with the following features: Handset Base Station Digital sound quality (DECT) Large mono display with backlight 50 Name and number phone book Handsfree Caller ID* and Caller ID* with Call Waiting Incoming 30 name/number call log Multi-language menu. -
Page 10
Caller ID * and Caller ID* with Call Waiting Incoming 30 name/number call log Multi-language menu. 8 Ring tone melodies Ringer on/off 5 level LCD contrast 5 level ring volume Real time clock display Handset naming Automatic call answering Key input tone on/off Battery status inc low battery warning Tone and pulse dialing Up to 100 hours standby… -
Page 11
Handset Layouts – 10 –… -
Page 12: Handset Lcd Display
Redial / up key /▲ CID/▼ Caller ID / down key menu / OK Menu / OK key Cancel / mute key Flash key Intercom key Phone book key Speakerphone key Off key Talk key Asterisk / ring off / temporary tone / tone dialing key Hash key/Keypad lock key…
-
Page 13
Battery icon Aerial icon Internal call Missed call icon Repeated call icon AM icon PM icon Corded Base Layouts – 12 –… -
Page 14
menu / OK Menu / OK key ▲ / ▼ Up / down key Cancel key exit Exit key Caller ID key redial Redial key Intercom/ page Intercom/ page key Phone book key hold Hold key flash Flash key Register/ mute Register handset/Mute key Speaker key Vol+/ vol-… -
Page 15: Menu Operation
Base LCD Phone icon Speakerphone icon Mute icon Internal call icon Missed call icon (Voice) Message Waiting icon Repeated call icon AM icon PM icon Menu Operation Base menu Selecting the Language Different languages display are available for selection. Press MENU/OK key. “Language”…
-
Page 16: Dial Mode
Press MENU/OK key. Press ▲ or ▼ key to select “CONTRAST” and press MENU/OK key. Press ▲ or ▼ key to select the desired contrast level. Press MENU/OK key to confirm the setting. Press the key to return to idle mode. exit Key Tone You can set the Base key tone to “On”…
-
Page 17: Message Waiting
Date / Time You can set the Date/Time displayed in idle mode. The default setting is “2007, 01/01 12:01 pm”. Press MENU/OK key. Press ▲ or ▼ key to select “DATE/TIME” and press MENU/OK key, the LCD will display “Year 2007”. Input the correct last two digits of year (range: 00-99) using number key, press MENU/OK key to confirm the setting and enter month and date setting.
-
Page 18: Handset Menu
Reset You can reset your Telephone Base to its original (default) settings. Note: After reset the base, all the caller ID records stored in base and cordless handset, and all the phonebook and redial records stored in base will be cleared. Please write down the useful information before reset.
-
Page 19
idle mode, and then icon will then shown on the display. Press and hold * key again can Enable ringer again. Press MENU/OK key. Press ▲ or ▼ key to select SETUP HS and press MENU/OK key. Press ▲ or ▼ key to select RING VOLUME and press MENU/OK key. -
Page 20
MENU/OK key. Press ▲ or ▼ key to select ON or OFF. Press MENU/OK key to confirm. Press the key to return to idle mode. Key Tone You can set the key tone to ON or OFF.. The default setting is ON. Press MENU/OK key. -
Page 21
Press ▲ or ▼ key to select ON or OFF. Enter HH:MM (if 12 hour format is set, set the “am” or “pm” by pressing ▲ or ▼ key). Press MENU/OK key to confirm. Note: 1. If Alarm is set to ON, “A” will be appeared on right side of display When Alarm time is reached, “ALARM ON”… -
Page 22: Base Setting
LCD Contrast There are 5 levels selection. The default setting is level 4 Press MENU/OK key. Press ▲ or ▼ key to select SETUP HS and press MENU/OK key. Press ▲ or ▼ key to select CONTRAST and press MENU/OK key.
-
Page 23
Note: WRONG PIN will be shown if the current PIN code you input is wrong, and then return to step 4. Input the desired new PIN code and press MENU/OK key, the LCD will show REPEAT PIN, prompt you to input the new PIN code again. -
Page 24
Press the key to return to idle mode. Message Waiting (VMWI) If you have subscribed to a voice message waiting service, MESSAGE WAITING will be displayed on handset and icon in Base will turn ON if you have a messages waiting call. You can reset Visual Message Waiting Indication (VMWI) to Off by the Cordless Handset Press the MENU/OK key. -
Page 25
Date / Time You can set the Date/Time displayed in idle mode. The default setting is “2007, 01/01 12:01 pm”. Press MENU/OK key. Press ▲ or ▼ key to select DATE/TIME and press MENU/OK key, the LCD will display “YEAR 2007”. Input the correct last two digits of year (range: 00-99) using number key, press MENU/OK key to confirm and then enter month and date setting. -
Page 26
After Registered, press the key to quit (during “SEARCHING” is displayed, handset can’t quit until time out) . Note: 1. SUCCESSFUL will be shown on cordless handset if it is registered to the base. Cordless handset number eg.2 will be shown after it returns to idle mode. -
Page 27: Basic Operation
Basic Operation Making External Calls Pre-dialing Post-dialling Using the Base Pick up the corded handset from the base or press key, wait for a dial tone, Dial the desired telephone number. Hang up the corded handset or press key to end the call. The call timer will be shown and last for about 2 seconds before return to idle mode.
-
Page 28: Taking Calls
Press the key, the number will be automatically dialled out. Press key or place the cordless handset into the charger to end the call. The call timer will be shown and last for about 2 seconds before return to idle mode. Adjust the Receiver or Speaker Volume You can adjust the receiver or speaker volume during a call (external or internal).
-
Page 29: Making Internal Calls
Hands-free Switch between Speakerphone & Receiver Using the Base To switch to speakerphone mode, press key and hang up the corded handset. To switch to receiver mode, pick up the corded handset from the base. Switch between Speakerphone & Receiver Using the Cordless Handset To switch to speakerphone mode, press key.
-
Page 30: Call Transfer
“INT-NUMBER?” will be shown, input the cordless handset number (1,2,3,4) you want to call.. The called cordless handset will ring and the LCD will show the calling cordless handset’s name and number. Press key of the called cordless handset to answer. Call Transfer The function allows you to transfer an external call from base to a cordless handset, or from a cordless handset to base or another…
-
Page 31: Redial Function
3 way conference is established. You can press the MENU/OK key again during the call, use the ▲ or ▼ key to select SINGLE CALL and press the MENU/OK key again to put the External Call on hold and speak to the Internal Caller. To return to the Conference, press the MENU/OK Key, select CONFERENCE and press the MENU/OK key to make 3 party conference again.
-
Page 32: Delete A Single Redial Memory
Press MENU/OK key on the base or handset to save. Delete a Single Redial Memory Press REDIAL key on base or key on cordless handset. Press ▲ or ▼ key to select the desired redial number. Press MENU/OK key on the base or handset to enter menu, press ▲…
-
Page 33
UNAVAILABLE. 5. Display “MISSED CALLS” – call is missed or some Caller-ID memories not yet reviewed. Base will also shows icon . 6. If the same call are received more than one time, the “RPT” icon will be shown when you review the record to prompt you this is a repeat call. -
Page 34: Delete All Call Records
Key Assignment Overview Capital letter 1 space € £ $ % & <> АBCБГ2 DEFÐДЕЖЗ3ΔΖ GHIИЙКЛ4Ğ ΘΙ JKLМНОП5ΚΛ MNOРСТУ6 ÑΞΟ PQRSФХЦЧ7ΠΣ TUVШЩЪЫ8ΥΦ WXYZЬЭЮЯ9ΨΩ . , ? ! 0 + — : ‘ «Δ ¿ # * @ / _ ()=§ Delete a Single Call Log Press CID key and use ▲…
-
Page 35: Advanced Operation
Press to remove entry or leftmost digit. Press ▲ or ▼key can recover the original CLI number. Example: CID number is 12345678 Press digit 1, display is 1 12345678 Press digit 2, display is 12 12345678 Press , display is 12345678 Press digit 3, display is 3 12345678 Press , display is 12345678…
-
Page 36
Store Name and Number into Phonebook Press key. Press MENU/OK key to enter menu, select ADD NEW. Press MENU/OK key ENTER NUMBER will be shown, enter number using the keypad. Press and hold 0 key if a PAUSE is needed, character “P”… -
Page 37: Special Feature
Delete Phonebook Memory Press key and use ▲ or ▼ key to select the desired record. Press MENU/OK key. Press ▲ or ▼ key to select DELETE. Press MENU/OK key, the LCD will show CONFIRM? , Press MENU/OK key again to confirm. Dial Record from Phonebook Press key and use ▲…
-
Page 38
The mute icon will be shown. Press MUTE key on handset base or on cordless handset again to turn it off. Pause You can insert a 3 seconds PAUSE into the dialing or storing of a number into phonebook. E.g. to dial number: 9 + PAUSE (press and hold 0 key) + telephone number. -
Page 39: Technical Specifications
Lift the corded handset or press key or press HOLD key again to release the Hold function. The hold can also be released when the branch phone answer the call.. Technical Specifications Handset Operating Time: Approx. 10 hours talk time (average values*) Approx.
-
Page 40: General Product Care
General Product Care Simply wipe the base station with a damp cloth or an antistatic wipe. Never use a dry cloth as this can cause static discharge. Troubleshooting Guide When you forgot the base PIN code, follow the following procedures can RESET the PIN code to “0000”.
-
Page 41
No reactions to The keypad is locked. Press # key longer keystroke. than 2 seconds. No radio connection The handset is outside Move closer to the to the base station: the base station range. base station. blinking! The handset is not Register the handset registered. -
Page 42
Environment Used equipment and used handset batteries must be disposed of in compliance with current environmental protection regulations. You should return them to your reseller or dispose of them at an approved recycling centre. “WEEE” weight:1.011Kg Do not attempt to open the batteries, as they contain chemical substance. -
Page 43
Thomson Telecom 46, Quai Alphonse le Gallo, 92648 Boulogne Cedex, France is a trademark of General Electric company and is under license by Thomson Telecom, France. Model: CE21887GEX-A 00019339 (Rev.1 E) 07-32 Printed in China – 42 –…
Электроника
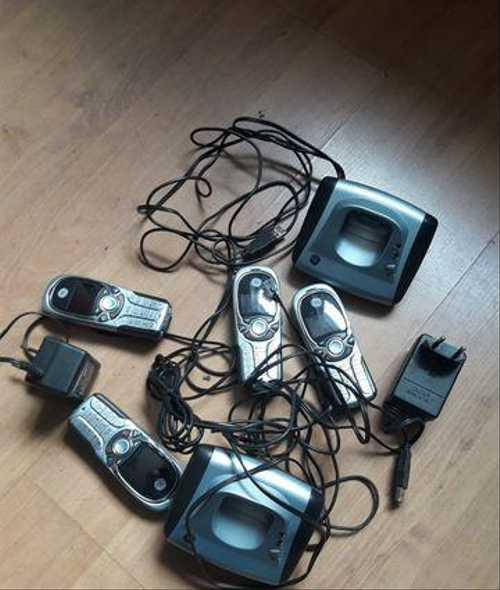
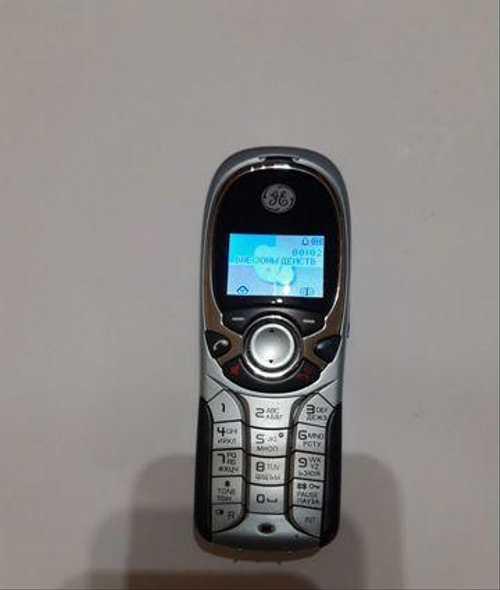
Skype-телефон Thomson Telecom RU21878GE5-A Thomson Telecom RU21878GE5-A (он же General Electric 1878),представляет собой некий гибрид — обычный проводной телефон плюс устройство для IP-телефонии. Можно использовать. Как обычный телефон.
Мы нашли это объявление 5 лет назад
Нажмите Следить и система автоматически будет уведомлять Вас о новых предложениях со всех досок объявлений
| Вид электроники | Оргтехника и расходники |
Адрес (Кликните по адресу для показа карты)
Москва, Люблинско-Дмитровская линия, метро Люблино
Еще объявления
Радиотелефон с функцией skype. В рабочем состоянии.
Оргтехника и расходники
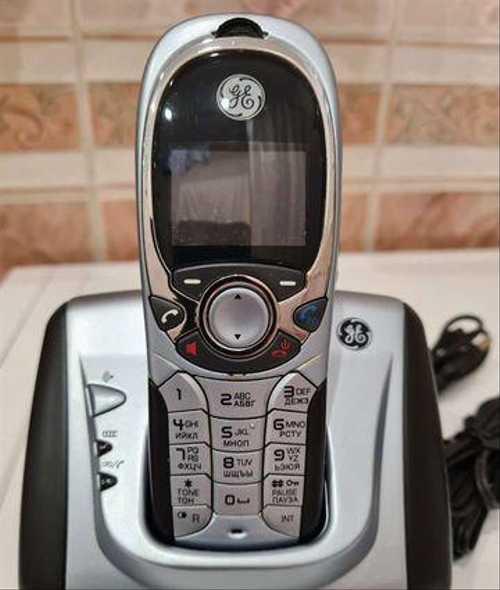
В отличном рабочем состоянии! Телефон Skype и Dect GE/Thompson Telecom RU21878GE5-A.Беспроводной телефон для дома(DECT) и для компьютера(Skype) Работает на Windows XP/Vista.
Мобильные телефоны
Внимание! Festima.Ru является поисковиком по объявлениям с популярных площадок.
Мы не производим реализацию товара, не храним изображения и персональные данные.
Все изображения принадлежат их авторам
Отказ от ответственности

-
Contents
-
Table of Contents
-
Troubleshooting
-
Bookmarks
Quick Links
21878
Digital Cordless Telephone
With PSTN and Skype Support
User’s Guide
Related Manuals for GE 21878
Summary of Contents for GE 21878
-
Page 1
21878 Digital Cordless Telephone With PSTN and Skype Support User’s Guide… -
Page 2: Table Of Contents
CONTENTS PRECAUTIONS OF USE…………………………..4 SAFETY ………………………………..4 BATTERY SAFETY PRECAUTIONS……………………….5 INSTALLATION…………………………….5 …………………………..5 ACKAGING ONTENTS ……………………5 ONNECTING THE TATION AND OWER …………………………….6 ETTING TARTED Minimum System Requirements: …………………………..6 Recommended System Requirements: …………………………6 FEATURES………………………………13 MENU STRUCTURE (HANDSET) ……………………….14 HANDSET AND BASE LAYOUTS ……………………….16 HANDSET AND BASE LAYOUTS ……………………….17 LCD D ……………………………..18…
-
Page 3
…………………………….29 EGISTRATION …………………………….30 EGISTRATION ………………………………30 ELECT …………………………30 EFAULT ANDSET ETTINGS BASE SETTINGS …………………………….30 ………………………………30 INGER …………………………..30 INGER …………………………….30 RIORITY ………………………………31 PIN………………………………31 YSTEM ………………………………31 LASH NET S ……………………………….31 TATUS …………………………..31 EFAULT ETTINGS FUNCTION ………………………………31 ………………………………..31 …………………………….32 ALKIE ALKIE TIMER ………………………………..32 …………………………….32 ………………………………..32 LARM TECHNICAL SPECIFICATIONS ……………………….33… -
Page 4: Precautions Of Use
Precautions of Use The quality of communication depends on the location and environment of the base and the handset. The 21878 must be kept away from sources of excessive heat (radiators, direct sunlight, etc.) and protected against vibrations and dust. Never allow your telephone to come into contact with water or other liquids or with aerosols.
-
Page 5: Battery Safety Precautions
Never dispose of batteries in a fire: the cell could explode. Check with local code for possible special disposal instruction. Installation Packaging Contents Model name: 21878 Packaging contents Solo pack Due pack Base stations Handsets…
-
Page 6: Getting Started
CAUTION: Plug the adapter to the socket outlet that near the equipment and shall be easily accessible. Use only the Thomson Telecom power supply that came with this unit. Using other power supplies may damage the unit. Getting Started Install and Charge the Battery Pack Insert two pieces AAA batteries in the compartment, ensuring correct polarity and close the compartment.
-
Page 7
Second, the following display will be shown, and click [Next] to continue or [Cancel] to terminate the procedure. -
Page 8
Third, there are two options. Choose “I accept the terms of the license agreement” and click [Next] to continue. Fourth, the folder where setup will install files can be changed, and the default directory is “C:Program FilesSKYLINKSKYLINK 2-in-1 Phone Utility”. Press [Change…] to change the directory. Then click [Next] to continue. -
Page 9
Fifth, the following display will appear. Click [Install] to continue. Sixth, click [Finish] to exit the wizard. If Skype program is not installed in the computer, it will prompt you to install it. click [Yes], it will link to Skype website automatically, you can download Skype software. Click [No] to abort. -
Page 10
Uninstall the Software If you choose to uninstall the software from the PC, the language should be chosen first. Then click [Next] to continue. There will be a message box to give prompt. Click [Yes] to continue, or [No] to cancel. After uninstalling the program, click [Finish] to exit the wizard. -
Page 11
Operation Guide If you see this, it indicates that all the things are ready. Software Information is here. You can see information about the SKYLINK(TM) 2-In-1 Phone Monitor. The most powerful part is this page. -
Page 12
If you want to register handset to base, just click “Start” Button in “Registration”, then you can do what you want to do. If you want de-register one handset, just select the handset number you want from the drop down list, and then click “Start” Button in “De-Registration”. -
Page 13: Features
Features We are very pleased that you have purchased this highly sophisticated, cordless telephone which is equipped with the following features: Digital cordless telephone complying to DECT standards Call free of charge worldwide via Skype 2-in-1 cordless telephone-Internet telephone and standard telephone in one. Operation instruction in 4 languages Teleconference Call transfer/forwarding…
-
Page 14: Menu Structure (Handset)
Menu Structure (Handset) 1-phone Book 1-Search 2-Add Name Number (1-3) Set Group 3-Group 1-VIP View Edit Name 2-Business View Edit Name 3-Family View Edit Name 4-Friends View Edit Name 5-School View Edit Name 6-Others View Edit Name 4-Speed Dial Key 1-9 5-Check Used x Total 100…
-
Page 15
Others Ringer 1-10 Page Ringer 1-10 3-Ringer Volume Line Level 1-5 Level 1-5 Intercom Level 1-5 Level 1-5 Business Level 1-5 Family Level 1-5 Friends Level 1-5 School Level 1-5 Others Level 1-5 Page Level 1-5 Ringer On/Off Line On/Off IP On/Off Intercom On/Off 4-Prefix… -
Page 16
6-Function 1-Games 1-Snake Play Set speed Highest Score Help 2-Guess Number Start Game Level Highest Score Help 2-Walkie Talkie Enable Input Group ID Disable… -
Page 17: Handset And Base Layouts
Handset and Base Layouts Usage symbol Name Left soft It is used to view the menu and confirm the settings. It is also used to mute or un-mute the microphone when talking or ring during incoming call. When playing games, it is used as (SKL) pause/play key Right soft…
-
Page 18: Lcd Display
Page key Charge LED In-use / CID LED: Steady Flash: OFF-hook / Unread miss call; LCD Display LCD Icon Description Icon Icon Name Description Small Icon Signal icon Indicate that the handset is used within the operational range. Key lock icon Indicate that the keypad is locked.
-
Page 19: Using The Handset Telephone
Message waiting Indicate that there is message waiting. icon Skype Icon Online icon Indicate that the user is online. Offline icon Indicate that the user is offline. Away icon Indicate that the user is away. disturb Indicate that the user is busy. icon Not Available icon Indicate that the user is in not available status.
-
Page 20: Post-Dialing
Making Internal Calls If more than one handset is registered on the base station, internal calls can be made free of charge. Press [INT] key. Press key to select the required handset (1..6). Press key , to carry out the conversation. Press key to end the call.
-
Page 21: Make An Ip Call During An Ongoing Call
Press key to carry out the conversation. press key to end the call. Make an IP call during an Ongoing Call During an ongoing call you can always start a new call. When you have an ongoing ordinary telephone call: Press to make the PSTN call on hold.
-
Page 22: Local 3-Way Conference Call
Press key to redial the desired record. If IP Dialed is selected, key is available too. Press key to end the call. Dialing from the Phone Book Press [SKR] button, the first entry in the phone book appears.(Or “No Records” if no entry) you can access Phone Book through user menu.
-
Page 23: Incoming Ordinary Telephone Call During A Pstn Call
After making a line call and a IP call with one handset, you can make conference call with the two lines . Press [INT] key to enter conference call. Press key to disconnect from the conference call. Call Waiting During an ongoing call you can always start a new call by pressing corresponding button. Incoming ordinary telephone call during a PSTN call Press R key to hold the ongoing call and connect to the incoming ordinary telephone call.
-
Page 24: Browse, Delete, Save
Key tone: Acoustic signal when a key pressed. Can be switched off (refer to Handset Settings). Low battery charge: If the low battery condition is detected, the handset will beep every 30 seconds and the empty battery icon will display on LCD. Out of range: When a handset is too far away from the base, “Out of Range”…
-
Page 25: Delete
2. CCITT: International Telephone and Telegraph Consultative Committee. Delete Press key to select [Delete] through the submenu [Call Log]. Press [SKL] button. Press key to select one type of calls or all calls. Press [SKL] button to delete the desired records or press [SKR] button to back up. Note: When viewing the records, press key the highlight record will be recalled immediately.
-
Page 26: Group In Phone Book
[SKL] button to save the number. The following procedure is as same as above. User can also save number into phone book through call log (refer to chapter “Call Log Operation”). Group in Phone book Press key to choose the selection [Group] through the submenu [Phone Book]. Press [SKL] button.
-
Page 27: Handset Settings
Handset Settings Ringer Type Press key to select [Handset Settings] through the main menu. Press [SKL] button to access the [Handset Settings]. Press key to choose the selection [Ringer Type]. Press [SKL] button. Press key to choose the desired selection Press [SKL] button.
-
Page 28: Call Barring
Call Barring Press key to choose the selection [Call Barring] through the submenu [Handset Settings]. Press [SKL] button. Enter the PIN (default setting = 0000). Press [SKL] button. Press key to choose the selection [Off], [Line Call], [Prefix Call] or [All]. Press [SKL] button to confirm the setting.
-
Page 29: Handset Name
Press [SKL] button. Press key to select [Off] or [On]. Press [SKL] button to confirm the selection. Handset Name Press key to choose the selection [Handset Name] through the submenu [Handset Settings]. Press [SKL] button. Enter the handset name. Press [SKL] button to confirm the input. Note: Key assignment Overview [1] [-?!,.&=:#»$] [7] [p q r s] [P Q R S]…
-
Page 30: De-Registration
Enter the System PIN (default setting = 0000). Press [SKL] button to register the handset. Press and hold the page key on the base station for 2 seconds. De-Registration Press key to choose the selection [De-Registration] through the submenu [Base Settings]. Press [SKL] button.
-
Page 31: Dial Mode
Dial Mode Press key to choose the selection [Dial Mode] through the submenu [Base Settings]. Press [SKL] button. Press key to select [Tone] or [Pulse]. Press [SKL] button to confirm the selection. System PIN Press key to choose the selection [System PIN] through the submenu [Base Settings]. Press [SKL] button.
-
Page 32: Walkie Talkie
Guess Number Press key to choose the selection [Game] through the submenu [Function] Press [SKL] button to confirm. Press key to choose the selection [Guess Number] Press [SKL] button to confirm. Enter [Start Game] to start the game; Enter [Level] to choose difficulty levels, use key to choose from [High], [Medium], [Low] levels and press [SKL] to confirm, [SKR] to cancel setting;…
-
Page 33: Technical Specifications
Press [SKL] button. Press key to select [Alarm]. Press [SKL] button. Press key to choose the selection [On/Off], [Ringer Type] or [Ringer Volume]. Press [SKL] button to confirm the relevant settings. If choose [On/Off] there are four options: Off, Once, Everyday, and Weekday. If set off, simply press [SKL] button to confirm.
-
Page 34
No radio connection to the base The handset is outside the base station Register the handset (see Registering station: blinking! range. Handset). The handset is not registered. Unplug and then plug the power adapter to the power outlet (220-230V AC / 50 Hz) The base station does not work. -
Page 35: Environment
Environment Used equipment and used handset batteries must be disposed of in compliance with current environmental protection regulations. You should return them to your reseller or dispose of them at an approved recycling centre. Do not attempt to open the batteries, as they contain chemical substance. In the event of leakage, avoid contact with the skin, eyes and mouth. In the event of contact, rinse the affected part for several minutes in running water.
-
Page 36
Thomson Telecom 46, Quai Alphonse Le Gallo, 92648 Boulogne Cedex France is a trademark of General Electric company used under license to Thomson Inc. Indianapolis, IN 46290. Model: CE21878GEX-A 00014098 (Rev. 0 E) 06-20 Printed in China…