- Manuals
- Brands
- Toyota Manuals
- Automobile
- Camry 1997
- Owner’s manual
-
Contents
-
Table of Contents
-
Bookmarks
Quick Links
Part 1
OPERATION OF
INSTRUMENTS
AND CONTROLS—
Chapter 1-1
Overview of instruments
and controls
D
Instrument panel overview
D
Instrument cluster overview
D
Indicator symbols on the
instrument panel
WWW.MANUALS.WS
WWW.MANUALS.WS
1
Related Manuals for Toyota Camry 1997
Summary of Contents for Toyota Camry 1997
-
Page 1: And Controls
WWW.MANUALS.WS Part 1 OPERATION OF INSTRUMENTS AND CONTROLS— Chapter 1-1 Overview of instruments and controls Instrument panel overview Instrument cluster overview Indicator symbols on the instrument panel WWW.MANUALS.WS…
-
Page 2: Instrument Panel Overview
WWW.MANUALS.WS Instrument panel overview 1. Rear view mirror remote control lever 2. Side defroster outlet 3. Side vent 4. Instrument cluster 5. Center vents 6. Glovebox 7. Electric moon roof switch and personal light 8. Garage door opener box or miscellany box 9.
-
Page 3
WWW.MANUALS.WS 1. Power rear view mirror control switch 2. Headlight and turn signal switch 3. Wiper and washer switches 4. Clock 5. Emergency flasher switch 6. Car audio 7. Rear window and outside rear view mirror defoggers switch 8. Air conditioning controls 9. -
Page 4: Instrument Cluster Overview
WWW.MANUALS.WS Instrument cluster overview 1. Engine coolant temperature gauge 4. Speedometer 7. Tachometer 2. Service reminder indicators or 5. Odometer and two trip meters 8. Trip meter reset knob indicator lights 6. Theft deterrent system indicator 9. Low fuel level warning light 3.
-
Page 5: Indicator Symbols On The Instrument Panel
WWW.MANUALS.WS Indicator symbols on the instrument panel Brake system warning light * Anti-lock brake system warning light * Seat belt reminder light* Open door warning light* Discharge warning light* Rear light failure warning light* Malfunction indicator lamp* SRS airbag warning light* Low oil pressure warning light* windshield washer…
-
Page 6
WWW.MANUALS.WS Traction control system Automatic transmission indicator light. indicator/warning light * Turn signal indicator lights. Slip indicator light. Headlight high beam indicator light : For details, see “Service reminder indicators and warning buzzers” in Chapter 1-5. : If this light flashes, see “Cruise control” in Chapter 1-6. Overdrive-of f indicator lighrt. -
Page 7: Operation Of Instruments And Controls
Theft deterrent system additional keys, duplicates can be made glovebox. Fuel tank cap by a Toyota dealer using the key number. To protect things locked in the glovebox You should also put a copy of the key Electric moon roof when you have your vehicle parked, leave number with your important papers.
-
Page 8: Side Doors
WWW.MANUALS.WS Side doors Driver’s side LOCKING AND UNLOCKING WITH LOCKING AND UNLOCKING WITH IN- SIDE LOCK BUTTON Insert the key into the keyhole and turn Move the lock button. To lock: Push the button downward. To lock: Turn the key forward. To unlock: Pull the button upward.
-
Page 9
WWW.MANUALS.WS LOCKING AND UNLOCKING WITH POWER DOOR LOCK SWITCH CAUTION Push the switch. Before driving, be sure that the To lock: Push the switch on the front side. doors are closed and locked, espe- To unlock: Push the switch on the rear cially when small children are in the side vehicle. -
Page 10: Wireless Remote Control
WWW.MANUALS.WS —Wireless remote control Your vehicle has a wireless remote You have 30 seconds to open a door after using the wireless remote unlock feature. control system that can lock or unlock If a door is not opened by then, all the all the doors, or sound an alarm of the doors will be automatically locked again.
-
Page 11
If the trans- tempting to brake into or damage your ve- Contact your Toyota dealer for detailed in- mitter still does not operate properly, con- hicle. formation. -
Page 12: Power Windows
WWW.MANUALS.WS Power windows If you lose your transmitter, contact your Toyota dealer as soon as possible to avoid the possibility of theft, or an accident. MODEL/FCC ID: GQ43VT7T ISC: 1470 K1361 MADE IN U.S.A. This complies with part 15 of the FCC rules.
-
Page 13
WWW.MANUALS.WS CAUTION To avoid serious personal injury, you must do the following. D Always make sure the head, hands and other parts of the body of all oc- cupants are kept completely inside the vehicle before you close the power windows. -
Page 14: Trunk Lid
WWW.MANUALS.WS Trunk lid— —Lock release lever CAUTION Keep the trunk lid closed while driv- ing. This not only keeps the luggage from being thrown out but also pre- vents exhaust gases from entering the vehicle. To open the trunk lid from the outside, To open the trunk lid from the driver’s insert the master key and turn it clock- seat, pull up on the lock release lever.
-
Page 15: Luggage Security System
WWW.MANUALS.WS —Luggage security system Hood This system deactivates the lock re- 2. After closing the trunk lid, insert To open the hood, do the following. lease lever so that things locked in the the master key and turn it counter- 1.
-
Page 16: Theft Deterrent System
WWW.MANUALS.WS Theft deterrent system— 2. In front of the vehicle, pull up on the 3. Hold the hood open by inserting To deter the vehicle theft, the system is designed to give an alarm and keep the auxiliary catch lever and lift the the support rod into the slot.
-
Page 17: Setting The System
WWW.MANUALS.WS As the doors are locked, the syste, will WHEN THE SYSTEM IS SET give you a preparation time of 30 seconds Activating the system before the setting, during which the doors, The system will give the alarm and cut the trunk and hood may be opened to prepare starter circuit under the following condi- for the setting.
-
Page 18: Cancelling The System
Unlock either front door with the key or wireless remote control transmitter. This If the system does not work properly, have cancels the system completely and the it checked by your Toyota dealer. starter circuit cut will be cancelled at once. WWW.MANUALS.WS…
-
Page 19: Fuel Tank Cap
WWW.MANUALS.WS Fuel tank cap The indicator lamp goes off after driving several times. If the indicator lamp does not go off, contact your Toyota dealer as soon as possible. CAUTION D Make sure the cap is tightened se- curely to prevent fuel spillage in case of an accident.
-
Page 20: Electric Moon Roof
WWW.MANUALS.WS Electric moon roof To operate the moon roof, use the Tilting operation— switches beside the personal light. To tilt up: Push the switch on the “TILT UP” side. The moon roof works when the ignition switch is in the “ON” position. However, To lower: Push the switch on the ”SLIDE if all the doors are closed, it works for 45 OPEN”…
-
Page 21
WWW.MANUALS.WS D Always make sure nobody places his/her head, hands and other parts of the body in the roof opening be- fore you close the roof . If some- one’s neck, head or hands gets caught in the closing roof, it could result in a serious injury. -
Page 22: Operation Of Instruments And Controls
WWW.MANUALS.WS Front seats— Part 1 Seats —Seat adjustment precautions OPERATION OF While the vehicle is being driven, all ve- Adjust the driver’s seat so that the foot hicle occupants should have the seatback pedals, steering wheel and instrument INSTRUMENTS AND upright, sit well back in the seat and prop- panel controls are within easy reach of the erly wear the seat belt provided.
-
Page 23
—Adjusting front seats WWW.MANUALS.WS (manual seat) 1. SEAT POSITION ADJUSTING LE- D While adjusting the seat, do not put your hands under the seat or near Pull the lever up. Then slide the seat to the moving parts. You may catch the desired position with slight body and injure your hands or fingers. -
Page 24
—Adjusting front seats WWW.MANUALS.WS (power seat) 3. SEAT CUSHION HEIGHT ADJUST- 1. SEAT POSITION AND SEAT CUSH- ING KNOB ION HEIGHT ADJUSTING SWITCH Turn the knob either way. More the control switch in the desired direction. 4. SEAT LUMBAR SUPPORT AD- Releasing the switch will stop the seat at JUSTING LEVER that position. -
Page 25: Fold-Down Rear Seat
WWW.MANUALS.WS Fold-down rear seat CAUTION To reduce the risk of sliding under the lap belt during a collision, avoid reclining the seatback any more than needed. The seat belts provide maxi- mum protection when the driver and the passenger are sitting up straight and well back in the seats.
-
Page 26: Head Restraints
WWW.MANUALS.WS Head restraints For your safety, adjust the head re- CAUTION straint before driving. To raise: Pull it up. When returning the seatback to the To lower: Push it down while pressing the upright position: lock release button. D Make sure the seat belts are not On some models, you can also move the twisted or caught in the seatback head restraint forward or backward.
-
Page 27
Seat belts— WWW.MANUALS.WS —Seat belt precautions Toyota strongly urges that the driver and Do not allow the child to stand up or kneel passengers in the vehicle be properly re- on either rear or front seats. An unre- CAUTION strained at all times with the seat belts… -
Page 28
The retractor will lock the belt during a normally, immediately contact sudden stop or on impact. It aslo may lock your Toyota dealer. WWW.MANUALS.WS if you lean forward too quickly. A slow, easy motion will allow the belt to extend, and you can move around freely. -
Page 29
WWW.MANUALS.WS CAUTION Always make sure the shoulder belt is positioned across the center of your shoulder. The belt should be kept away from your neck, but not falling off your shoulder. Failure to do so could reduce the amount of protection in an accident and cause severe injures in a collision. -
Page 30: Seat Belt Extender
CAUTION personalized seatbelt extender is avail- D High-positioned lap belts and able from your Toyota dealer free of loose-fitting belts both could in- charge. crease the chance of injury due to Please contact your local Toyota dealer…
-
Page 31
D If the seat belt does not function normally, immediately contact your Toyota dealer. To connect the extender to the seat belt, insert the tab into the seat belt buckle so that the “PRESS” signs on the buckle-release buttons of the ex- tender and the seat belt are both facing outward as shown. -
Page 32: Srs Airbags
WWW.MANUALS.WS SRS airbags The SRS (Supplemental Restraint Sys- This indicator comes on when the The SRS airbag system is designed to tem) airbags are designed to provide ignition key is turned to the “ACC” or activate in response to a severe frontal further protection to the driver and “ON”…
-
Page 33
WWW.MANUALS.WS However, this threshold velocity will be considerably higher if the vehicle strikes an object, such as a parked vehicle or sign pole, which can move or deform on im- pact, or if it is involved in an underride col- lision (e.g. -
Page 34
WWW.MANUALS.WS In a severe frontal impact, sensors detect deceleration and the system triggers the CAUTION airbag inflators. Then a chemical reaction in the inflators momentairly fills the air- D The SRS airbag system is designed bags with non-toxic nitrogen gas to help only as a supplement to the prima- restrain the forward motion of the occu- ry protection of the seat belt sys-… -
Page 35
WWW.MANUALS.WS D If you must use a forward-facing D Do not sit on the edge of the seat D Do not allow a child to stand up, or child restraint system in the front or lean over the dashboard when to kneel on the front passenger seat, the seat must be moved as far the vehicle is in use. -
Page 36
Do not perform any of the following as the steering wheel, column changes without consulting your cover, front passenger airbag Toyota dealer. Such changes can cover, front passenger airbag, center airbag sensor assembly. interfere with proper operation of Doing any of these may cause… -
Page 37
Child restraint— WWW.MANUALS.WS —Child restraint precautions Toyota strongly urges the use of child restraint systems for children small enough to use them. The laws of all fifty states in the U.S.A. and Canada now require the use of a child restraint system. -
Page 38
Child restraint— WWW.MANUALS.WS —Child restraint precautions Toyota strongly urges the use of child restraint systems for children small enough to use them. The laws of all fifty states in the U.S.A. and Canada now require the use of a child restraint system. -
Page 39: Child Restraint System
WWW.MANUALS.WS —Child restraint system A child restraint system for a small D Toyota strongly urges use of a child or baby must itself be properly proper child restraint system CAUTION which conforms to the size of the restrained on the seat with either the child and is put on the rear seat.
-
Page 40
Toyota dealer. Your vehicle has anchors for securing the CRS installation kit top strap of a child restraint system. The (Part No. -
Page 41: Built-In Child Restraint
WWW.MANUALS.WS —Built-in child restraint The built-in child restraint system mainly consists of a child seat integrated in the rear seat and 5-point seat belts. Refer to the illustration to become familiar with the parts of the system. This child restraint system conforms to U.S.
-
Page 42
WWW.MANUALS.WS This child restraint is designed for use D Keep the belts clean and dry. If CAUTION only by children who wiegh between they need cleaning, use a mild 10 and 30 kg (22.1 and 66.1 pounds), soap solution or lukewarm water. Make sure the child is securely re- and whose height is between 85 and Never use bleach, dye, or abrasive… -
Page 43
WWW.MANUALS.WS 1. Remove the head restraint and up- 2. Insert the head restraint and upper 3. While pulling the seat belt release per pad by pressing the head re- pad into the storage bag. Then strap (black), pull both shoulder straint lock release button and pull- place the storage bag into the trunk belts together. -
Page 44
WWW.MANUALS.WS 4. Compress the shoulder belt clip to 5. Pull down the seatback part of the 6. Press the removable pad against separate the right and left shoulder removable pad. Make sure the the fastener tapes and install the belts. child’s shoulders are at or below pad to the seatback. -
Page 45
WWW.MANUALS.WS D Do not insert coins, clips, etc. in the buckle as this may prevent you from properly latching the tabs and buckle. D If the seat belt does not function normally, it cannot protect your child from injury. Contact your To- yota dealer immediately. -
Page 46
WWW.MANUALS.WS 9. Pull the seat belt adjustment strap 10.To release the child from the seat 11. To store the built-in child restraint, (gray tab) firmly until the shoulder belts, separate the shoulder belts fasten the shoulder belt clip and re- belts are snugly adjusted around then press the buckle release but- turn the seat belt buckle using the… -
Page 47: Types Of Child Restraint System
WWW.MANUALS.WS —Types of child restraint system Child restraint systems are classified into CAUTION the following 3 types depending on the child’s age and size. Before using the vehicle’s seat belt, (A) Infant seat make sure the head restraint and up- (B) Convertible seat per pad is reinstalled.
-
Page 48
WWW.MANUALS.WS —Installation with 3-point type seat belt (A)INFANT SEAT INSTALLATION An Infant seat is used in rear-facing CAUTION only. D Never use rear-facing child re- straint system in the front seat be- cause the force of the rapid infla- tion of the passenger airbag can cause severe injury to the child. -
Page 49
WWW.MANUALS.WS CAUTION D After inserting the tab, make sure the tab and buckle are locked and that the lap and shoulder portions of the belt is not twisted. D Do not insert coins, clips, etc. in the buckle as this may prevent you from properly latching the tab and buckle. -
Page 50
WWW.MANUALS.WS 2. Fully extend the shoulder belt to put it 3. While pressing the infant seat firmly CAUTION in the lock mode. When the belt is then against the seat cushion and seat- retracted even slightly, it cannot be ex- back, let the shoulder belt retract as far Make sure the seat belt is securely tended. -
Page 51
WWW.MANUALS.WS 4. To remove the infant seat, press the (B) CONVERTIBLE SEAT INSTALLA- buckle-release button and allow the TION CAUTION belt to retract completely. The belt will A convertible seat is used in forward- move freely again and be ready to D Never use a rear-facing child re- facing and rear-facing depending on work for an adult or older child passen-… -
Page 52
WWW.MANUALS.WS 1. Run the lap and shoulder belt through D Only D Do not use a rear-facing child re- when it is unavoidable or around the convertible seat follow- should a forward-facing child re- straint system in the rear seat if it ing the instructions provided by its straint system be used on the front interferes with the lock mecha-… -
Page 53
WWW.MANUALS.WS CAUTION D After inserting the tab, make sure the tab and buckle are locked and that the lap and shoulder portions of the belt is not twisted. D Do not insert coins, clips, etc. in the buckle as this may prevent you from properly latching the tab and buckle. -
Page 54
WWW.MANUALS.WS 4. To remove the convertible seat, press (C)BOOSTER SEAT INSTALLATION CAUTION the buckle-release button and allow A booster seat is used in forward-fac- the belt to retract completely. The belt ing only. Make sure the seat belt is securely will move freely again and be ready to locked. -
Page 55
WWW.MANUALS.WS CAUTION D Always make sure the shoulder belt is positioned across the cen- ter of child’s shoulder. The belt should be kept away from child’s neck, but not falling off child’s shoulder. Failure to do so could re- duce the amount of protection in an accident and increase the chance of injury. -
Page 56
WWW.MANUALS.WS —Top strap anchors and locations D If the seat belt does not function normally, it cannot protect your child from injury. Contact your To- yota dealer immediately. Do not use the seat until the seat belt is fixed. 2. To remove the child restraint system, If your child restraint system requires press the buckle-release button and the use of a top strap, latch the hood… -
Page 57
3 anchor locations hsown in the illustra- tion. If your child restraint system does not pro- vide any of the necessary parts, ask you Toyota dealer. (See “—Child restraint sys- tem.”) On the filler panel behind the rear seat Outside anchors—… -
Page 58: Tilt Steering Wheel
WWW.MANUALS.WS Tilt steering wheel Outside rear view mirrors— CAUTION Do not adjust the mirror while the ve- hicle is moving. It may cause the driver to mishandle the vehicle and an accident may occur resulting in personal injuries. To change the steering wheel angle, Adjust the mirror so you can see the hold the steering wheel, pull up the side of your vehicle in the mirror.
-
Page 59: Power Rear View Mirror Control
WWW.MANUALS.WS —Rear view mirror remote —Power rear view mirror Anti-glare inside rear view control control mirror To adjust the rear view mirror, simply op- To adjust a mirror, use the switches. To reduce glare from the headlights of erate the control lever. the vehicle behind you during night 1.
-
Page 60: Sun Visors
WWW.MANUALS.WS Sun visors— —Vanity mirrors To block out glare, move the sun visor. To use the vanity mirrors, swing down the sun visor and open the cover. To block out glare from the fornt—Swing down the sun visor (position 1). On some models, the vanity light comes on when you open the cover.
-
Page 61: Operation Of Instruments And Controls
WWW.MANUALS.WS Part 1 Headlights and turn signals OPERATION OF NOTICE INSTRUMENTS AND To prevent the battery from being discharged, do not leave the lights CONTROLS— on for a long period when the engine is not running. Daytime running light system (Canada Chapter 1-4 only) The headlights turn on when the parking…
-
Page 62: Emergency Flashers
WWW.MANUALS.WS Emergency flashers High-Low beams—For high beams, TURN SIGNAL To turn on the emergency flashers, turn the headlights on and push the lever push the switch. To signal a turn, push the headlight/ away from you (position 1). Pull the lever All the turn signal lights will flash.
-
Page 63: Instrument Panel Light Control
WWW.MANUALS.WS Instrument panel light control Interior light NOTICE To prevent the battery from being discharged, do not leave the lights on for a long period when the engine is not running. To adjust the brightness of the instru- To turn on the interior light, slide the ment panel lights, turn the knob.
-
Page 64: Ignition Switch Light
WWW.MANUALS.WS Ignition switch light Personal light Windshield wipers and washer For easy access to the ignition switch, To turn on the person light, push the To turn on the windshield wipers, move the lever to the desired setting. the ignition switch light comes on switch.
-
Page 65: Rear Window And Outside Rear View Mirror Defoggers
WWW.MANUALS.WS Rear window and outside rear view mirror defoggers To squirt washer fluid, pull the lever Make sure you turn the defogger off when the window is clear. Leaving the defogger toward you and release it. on for a long time could cause the battery If the windshield wipers are off, they will to discharge, especially during stop-and- operate a couple of times after the washer…
-
Page 66: Gauges, Meters And Service Reminder Indicators
INSTRUMENTS AND the fuel tank immediately. The indicator lamp goes off after driving CONTROLS— several times. If the indicator lamp does not go off, contact your Toyota dealer as soon as possible. Chapter 1-5 Gauges, Meters and Service reminder indicators…
-
Page 67: Engine Coolant Temperature Gauge
WWW.MANUALS.WS Engine coolant temperature Tachometer gauge D Idling for a long period with the air con- ditioning on in stop-and-go traffic. D Towing a trailer NOTICE B Do not remove the thermostat in the engine cooling system as this may cause the engine to overheat. The thermostat is designed to control the flow of coolant to keep the temperature of the engine…
-
Page 68: Odometer And Two Trip Meters
WWW.MANUALS.WS Service reminder indicators Odometer and two trip meters and warning buzzers 3. Trip meter reset knob—It can reset the two trip meters to zero, and also change the meter display. To change the meter display, quickly push and release the knob. The meter display changes in the order from the odometer to trip meter A to trip meter B, then back to the odometer each…
-
Page 69
WWW.MANUALS.WS (a) Brake System Warning Light This light has the following functions: Parking brake reminder If this light is on, make sure the parking brake is fully released. The light should go off. Low brake fluid level warning If this light comes on and stays on while you are driving, slowdown and pull off the road. -
Page 70
If it comes on while you are driving in case NOTICE c, have your vehicle checked/repaired by This light warns that the battery is being your Toyota dealer as soon as possible. Do not drive the vehicle with the discharged. warning light on—even for one… -
Page 71
If the light comes on while you are driving, (j) SRS Airbag Warning Light (l) “TRAC OFF” Indicator/Warning have your vehicle checked by your Toyota light This light will come on when the igni- dealer as soon as possible. This light comes on when the ignition key tion key is turned to the “ACC”… -
Page 72
If any service reminder indicator or warn- ing buzzer does not function as described above, either the bulb is burned out or the circuit is in need of repair. Have it checked WWW.MANUALS.WS by your Toyota dealer as soon as pos- sible. -
Page 73: Ignition Switch With Steering Lock
WWW.MANUALS.WS Ignition switch with steering Part 1 lock OPERATION OF You must push in the key to turn the key from “ACC” to the “LOCK” position. On INSTRUMENTS vehicles with an automatic transmission, the selector lever must be put in the “P” AND CONTROLS—…
-
Page 74: Automatic Transmission
WWW.MANUALS.WS Automatic transmission WWW.MANUALS.WS Vehicles with cruise control — When the cruise control is being used, even if you downshift the transmission by turning off the overdrive switch, engine braking will not be applied because the cruise control is not cancelled. For ways to decrease the vehicle speed, see “Cruise control”…
-
Page 75
WWW.MANUALS.WS Your automatic transmission has a shift 3. Release the parking brake and brake Vehicles with cruise control—When the lock system to minimize the possibility of pedal. Depress the accelerator pedal cruise control is being used, even if you incorrect operation. This means you can slowly for smooth starting. -
Page 76
WWW.MANUALS.WS (e) Parking NOTICE CAUTION 1. Bring the vehicle to a complete stop. B Be careful not to overrev the en- 2. Pull the parking brake lever up fully to gine. Watch the tachometer to Always keep your foot on the brake securely apply the parking brake. -
Page 77: Manual Transmission
WWW.MANUALS.WS Manual transmission gear km/h (mph) NOTICE 1 to 2 or 2 to 1 24 (15) 2 to 3 or 3 to 2 40 (25) If you rock your vehicle, observe the 3 to 4 or 4 to 3 64 (40) following precautions to prevent 4 to 5 or 5 to 4 72 (45)
-
Page 78: Parking Brake
WWW.MANUALS.WS Parking brake Good driving practice When parking, firmly apply the park- D If it is difficult to shift into reverse, put ing brake to avoid inadvertent creep- ing. the transmission in neutral, release the clutch pedal momentarily, and then To set: Pull up the lever.
-
Page 79: Cruise Control
WWW.MANUALS.WS Cruise control The cruise control allows you to cruise the vehicle at a desired speed over 40 km/h (25 mph) even with your foot off the accelerator pedal. Your cruising speed can be maintained up or down grades within the limits of engine performance, although a slight speed change may occur when driving up or down the grades.
-
Page 80
If you use the brake pedal, pedal enough for the vehicle to exceed the your vehicle checked by your Toyota deal- cruise control is cancelled. set speed. When you release it, the ve- er at the earliest opportunity. -
Page 81
WWW.MANUALS.WS D The indicator light does not come on. D The indicator light flashes again. D The indicator light goes out after it comes on. If this is the case, contact your Toyota dealer and have your vehicle inspected. WWW.MANUALS.WS… -
Page 82
WWW.MANUALS.WS Air conditioning system— —Controls 1. “A/C” Button (on some models) 2. Air Intake Selector 3. Air Flow Selector 4. Temperature Selector 5. Fan Speed Selector WWW.MANUALS.WS… -
Page 83
WWW.MANUALS.WS Fan speed selector For details about air flow selector settings, Turn the knob to adjust the fan speed-to see the illustration after “A/C” button. the right to increase, to the left to de- Turning the air flow control knob to wind- crease. -
Page 84
If this happens, take your ve- hicle to a Toyota dealer for service. Air Intake selector Move the lever to select the air source. 1. Recirculate—Recirculates the air in- side the vehicle. -
Page 85: Air Flow Selector Settings
WWW.MANUALS.WS —Air flow selector settings —Operating tips D To cool off your Toyota after it has been parked in the hot sun, drive with the windows open for a few minutes. This vents the hot air, allowing the air condi- tioning to cool the interior more quickly.
-
Page 86
WWW.MANUALS.WS Heating Air conditioning Defogging For best results, set controls to: For best results, set controls to: The inside of the windshield For best results, set controls to: Fan speed -Any setting except “OFF” Fan speed -Any setting except “OFF” Temperature -Towards WARM Fan speed -Any setting except “OFF”… -
Page 87: Instrument Panel Vents
WWW.MANUALS.WS —Instrument panel vents Defrosting The outside of the windshield For best results, set controls to: Fan speed -Any setting except “OFF” Temperature -Towards WARM (blue zone) to heat; Air intake — FRESH (outside air) Air flow — WINDSHIELD Vehicles with “A/C” button— Turning the air flow control knob to wind- shield position turns on the defroster- linked air conditioning.
-
Page 88: Operation Of Instruments And Controls
Car audio system— WWW.MANUALS.WS Part 1 —Reference OPERATION OF INSTRUMENTS AND CONTROLS— Chapter 1-7 Car audio system and Air conditioning system Type 1: AM·FM ETR radio Type 2-2: AM·FM ETR radio/cassette Car audio system player Reference Using your audio system: some basics Using your audio system: controls and features…
-
Page 89
This section describes some of the basic TONE AND BALANCE YOUR RADIO ANTENNA features on Toyota audio systems. Some For details about your system’s tone and NOTICE information may not pertain to your sys- balance controls, see the description of tem. -
Page 90
WWW.MANUALS.WS YOUR COMPACT DISC PLAYER When you insert a disc, gently push it in with the label side up. (the player will auto- matically eject a disc if the label side is down.) The compact disc player will play from track 1 through the end of the disc. Then it will play from track 1 again. -
Page 91
—Using your audio system: WWW.MANUALS.WS controls and features D Type 1 Details of specific buttons, controls, and features are described in the alphabetical listing that follows. WWW.MANUALS.WS… -
Page 92
WWW.MANUALS.WS 1 2 3 4 5 6 (Preset buttons) BAL (Balance) SCAN These buttons are useed to preset and This knob lets you adjust the balance be- When you push “SCAN”, the radio finds tune in radio stations. tween the right and left speakers. the next station up the station band, plays To preset a station to a button: Tune in the it for 5 seconds, and then scans again. -
Page 93
WWW.MANUALS.WS TUNE Tuning Your Toyota has an electronic tuning radio (ETR). Push and release the “ ” (up) or “ ” (down) side of “TUNE” to step up or down the station band. If you hear a beep, you held the button too long and the radio will go into the seek mode. -
Page 94
WWW.MANUALS.WS D Type 2—1 Details of specific buttons, controls and features are described in the alphabetical listing that follows. WWW.MANUALS.WS… -
Page 95
WWW.MANUALS.WS D Type 2—2 Details of specific buttons, controls and features are described in the alphabetical listing that follows. WWW.MANUALS.WS… -
Page 96
WWW.MANUALS.WS 1 2 3 4 5 6 (Press buttons) Next, push “APS” until the number on the (Eject Button) These buttons are used to preset and display reaches the number of tracks you Push this button to eject a cassette. tune in radio stations. -
Page 97
WWW.MANUALS.WS *: Dolby noise reduction manufactured under license from Dolby Lab- There must be at least 3 seconds of blank MTL (Metal) display oratories Licensing Corporation. “DOLBY” and the double D symbol space between tracks in order for the APS Type 2-2 only are trademarks of Dolby Laboratories Licensing Corporation. -
Page 98
WWW.MANUALS.WS REW/FF (Rewind/Fast forward) Push “R M” again to turn off the R M fea- select a station, push “SCAN” a second ture. time. Push the “FF” side of the button to fast for- RPT (Repeat) To scan all the frequencies: Push “SCAN” ward a cassette tape. -
Page 99
Push the button a second time to turn off TUNE the skip feature. Tuning ST (Stereo reception) display Your Toyota has an electronic tuning radio Your radio automatically changes to ste- (ETR). reo reception when a stereo broadcast is received. “ST” appears on the display. If Push and release the “… -
Page 100
WWW.MANUALS.WS D Type 3 WWW.MANUALS.WS Button display for radio/cassette tape player/compact disc player… -
Page 101
WWW.MANUALS.WS Your audio system shows three different These systems can store one AM and two When counting thenumber of tracks you button displays that changes in accor- FM stations for each button. (The display want to rewind, remember to count the dance with the audio mode you have se- will show “AM”, “FM1”, or “FM2”… -
Page 102
WWW.MANUALS.WS Compact Disc Player Compact Disc Player CD (Compact Disc) Push either side of the track button until If you want to fast forward or reverse Push “CD” to switch from radio or cas- through a compact disc track, push and the number of the track you want to listen sette operation. -
Page 103
WWW.MANUALS.WS EQ (Equalizer) Dolby B C NR* Your audio system can store five different If you are listening to a tape that was re- EQ settings in its memory so that you will cored with Dolby B or C Noise Reduc- not need to readjust it every time you lis- tion, push the button marked with the ten to a different program. -
Page 104
WWW.MANUALS.WS To cancel all of the changed EQ setting: PROG (Program) RM (Radio Monitor) Push and hold in”EQ” until you hear a third Push “PROG” to select the other side of The radio monitor feature allows you to beep. a cassette tape. The display indicates listen to the radio while a cassette is being FADE which side is currently selected (“… -
Page 105
WWW.MANUALS.WS Scan Push “SCAN”. “SCAN” will appear on the Push “SKIP”. “SKIP” will appear on the display. The player will fast forward to the display. The cassette player will keep Radio next cassette track, play it for 12 seconds, track of how much blank space it plays. You can either scan all the frequencies on and then scan again. -
Page 106
Tuning while the ignition key is in the “LOCK” position. Your Toyota has an electronic tuning radio (ETR). Push and release the “ ” (up) or “v” You will need to know your security code (down) side of “TUNE” to step up or down to reactivate your radio after electrical ser- the station band. -
Page 107
WWW.MANUALS.WS Setting a security code for the first 2. While you are holding in the “ ” side of 3. Input the three digit code. “TUNE”, push “1”. time. You have 10 seconds to enter each digit. The display will read “—”. 1. -
Page 108
Choose a security code that is easy to re- member and keep a copy of it (not in your 4. The three-digit code should be on the Changing the security code Toyota). display. 1. Turn off the audio system. Push and hold in “SCAN” until the display Turn the ignition key to “ACC”. -
Page 109
WWW.MANUALS.WS 2. While you are holding in the “ ” side of 3. Input the existing three-digit code. 4. The three-digit code should be on the “TUNE” push “1”. display. You have 10 seconds to enter each digit. The display will read “—”. Push “SCAN”. -
Page 110
Simultaneously push and hold in “1”, “6”, system will be completely inoper- the display.) and “PWR/VOL” until “SEC” appears on able. At this time, the anti-theft light the display. also comes on. If this occurs, contact your Toyota dealer. WWW.MANUALS.WS… -
Page 111
WWW.MANUALS.WS 2. While you are holding in the “ ” side of 3. Input the existing three-digit code. 4. The three-digit code should be on the “TUNE”, push “1”. display. You have 10 seconds to enter eahc digit. The display will read “—“. For example, “209”: Push “SCAN”. -
Page 112
If this occurs, For example, “209”: 2. While you are holding in the “ ” side of contact your Toyota dealer. “TUNE”, push “1”. To set the first digit: Push “1” until the digit you want appears on the display. -
Page 113: Car Audio System Operating Hints
If this occurs, conditions outside the vehicle. contact your Toyota dealer. For example, nearby buildings and terrain can interfere with FM reception. Power lines or telephone wires can interfere with AM signals.
-
Page 114
WWW.MANUALS.WS Here are some common reception prob- Use high-quality cassettes. lems that probably do not indicate a prob- Low-quality cassette tapes can cause Fading—AM broadcasts are reflected by lem with your radio: upper atmosphere-especially many problems, including poor sound, night. These reflected signals can inter- inconsistent playing speed,… -
Page 115: Caring For Your Compact Disc Player And Discs
WWW.MANUALS.WS If moisture gets into your compact disc player, you may not hear any sound even though your compact disc player appears to be working. Remove the disc from the player and wait until it dries. Handle compact discs carefully, espe- cially when you are inserting them.
-
Page 116
WWW.MANUALS.WS CAUTION Compact disc players use invisible laser beam which could cause haz- ardous radiation exposure if di- rected outside the unit. Be sure to operate the player correctly as instructed. WWW.MANUALS.WS… -
Page 117: Other Equipment
WWW.MANUALS.WS Part 1 Clock OPERATION OF The digital clock indicates the time. The key must be in the ‘‘ACC”” or ‘‘ON’’ INSTRUMENTS position. To reset the hour: Push the ”H” button. AND CONTROLS— To reset the minutes: Push the “M” button. Once the electrical power source has been disconnected from the clock, the Chapter 1-8…
-
Page 118: Cigarette Lighter And Ashtrays
If the engine is not running, the key must be in the ”ACC” position. Do not hold the cigarette lighter pressed Use a Toyota genuine cigarette lighter or equivalent for replacement. ASHTRAY The power outlet is designed for pow- Cigarette lighter and front ashtray To use the ashtray, open the cover.
-
Page 119: Glove Box
WWW.MANUALS.WS Glovebox Garage door opener box B Close the power outlet lid when the power outlet is not in use. In- serting a foreign object other than plug that fits the outlet, or pouring juice or other liquid into the out- let, or pouring juice or other liquid into the outlet may cause troubles or short circuits.
-
Page 120
WWW.MANUALS.WS When a garage door opener is properly If the center panel does not contact with The miscellaneous box and garage stored, you can operate the opener by your garage door opener switch, attach door opener box (stored in the glove- pushing the center panel of the cover. -
Page 121
WWW.MANUALS.WS Miscellaneous box Miscellany box To use the box, open it as shown Installing the cover— To use the box, pull on the handle. above. Align the hinges to the pivots, and press CAUTION each hinge with a thumb until you hear a CAUTION click. -
Page 122: Cup Holder
WWW.MANUALS.WS Cup holder Traction control system The cup holder is designed for holding cups or drink-cans fit snugly in its holes. Front: To use the holder, open the lid. Rear: To use the holder, pull it out. CAUTION D Do not place anything else on the cup holder, as such items may be thrown about and possible injure people in the vehicle during sud-…
-
Page 123: Manual Operation
WWW.MANUALS.WS AUTOMATIC TRACTION CONTROL When getting the vehicle out of mud or new snow, etc. the traction control system SYSTEM will operate to prevent the wheels from The traction control system automati- spinning. Even though the accelerator cally controls spinning of the front pedal is fully depressed, the engine speed wheels which may occur when accel- will be restrained to a certain level.
-
Page 124: Floor Mat
WWW.MANUALS.WS Floor Mat CAUTION Under certain slippery road condi- tions, full stability of the vehicles and power to the front wheels can- not be maintained, even though the traction control system is in opera- tion. In situations where the road surface is covered with ice or snow, your vehicle should be fitted with snow tires or tire chains and driven…
-
Page 125: Information Before Driving Your Toyota
1600 km (1000 miles) can add To help prevent gas station mixups, your YOUR TOYOTA to the future economy and long life of your Toyota has a new smaller fuel tank opening. vehicle: The special nozzle on pumps with unleaded Break-in period D Do not drive over 88 km/h (55 mph).
-
Page 126: Gasolines Containing Alcohol
GASOLINES CONTAINING ALCOHOL paint damage. light knocking for a short time while accel- If the use of gasolines in your Toyota, erating or driving up hills. This is no cause be sure that it is unleaded, has an oc- FUEL TANK CAPACITY for concern.
-
Page 127: Operation In Foreign Countries
WWW.MANUALS.WS Operation in foreign countries Three-way catalytic converter If you plan to drive your Toyota in The three-way catalytic converter is an emission control device installed in another country… the exhaust system. First, comply with the vehicle registration The purpose is to reduce pollutants in the laws.
-
Page 128: Engine Exhaust Cautions
D Do not remain for a long time in a your vehicle. quired by the Toyota Maintenance B Do not turn off the ignition while parked vehicle with the engine Schedule. For scheduled mainte- running.
-
Page 129: Facts About Engine Oil Consumption
WWW.MANUALS.WS Facts about engine oil consumption D Oil is also used to lubricate the stems FUNCTIONS OF ENGINE OIL D Keep the back door closed while of the intake valves. Some of this oil Engine oil has the primary functions of lubri- driving.
-
Page 130
Therefore, it is essen- CAUTION tial that the oil level be checked regularly. Toyota recommends that the oil level be Do not drive your vehicle with only Your engine is fitted with twin ground elec- checked every time you refuel the vehicle. -
Page 131: Anti-Lock Brake System
WWW.MANUALS.WS D Even though the anti-lock brake sys- You may hear a sound in the engine CAUTION compartment for a few seconds when the tem is operating, a driver cannot main- engine is started or just after the vehicle tain full control on certain slippery road D Do not pump the brake pedal if the is started.
-
Page 132
Have your vehicle checked by your Toyota dealer as soon as possible DRUM-IN-DISC TYPE PARKING BRAKE SYSTEM (1MZ-FE engine) Your vehicle has a drum-in-disc type “ABS”… -
Page 133: Luggage Stowage Precautions
This is the primary identification number than the seatbacks. Keep luggage or turning, and impair the driver’s for your Toyota. It is used in registering the or packages low, as close to the control of the vehicle. In an acci- ownership of your vehicle.
-
Page 134: Engine Number
WWW.MANUALS.WS -Engine number The engine number is stamped on the engine block as shown. The vehicle identification number (VIN) is 5S-FE engine also on the Certification Label. WWW.MANUALS.WS 1MZ-FE engine…
-
Page 135: Theft Prevention Labels (Except For Canada)
WWW.MANUALS.WS Theft prevention labels (except for Canada) Suspension and chassis Types of tires Your new vehicle carries theft preven- Determine what kind of tires your ve- CAUTION tion labels which are approximately 56 hicle is originally equipped with mm (2.20 in.) by 16 mm (0.63 in.). Summer tires.
-
Page 136
WWW.MANUALS.WS CAUTION D Do not mix summer and all sea- son tires on your vehicle as this can cause dangerous handling characteristics, resulting in loss of control. D Do not use tires other than the manufacturer’s designated tires, and do not mix tires or wheels of the sizes different from the origi- nally equipped tires and wheels. -
Page 137: Starting And Driving
How to start the engine— WWW.MANUALS.WS Part 3 (a) Before cranking Before starting the engine STARTING AND 1. Check the area around the vehicle be- 1. Apply the parking brake firmly. fore entering it. 2. Turn off unnecessary lights and acces- DRIVING 2.
-
Page 138: Tips For Driving In Various Conditions
See “If your vehicle will not start” in Part 4. while lightly pressing the brake pedal with the parking brake pulled. If they WWW.MANUALS.WS still do not work safely, pull to the side of the road and call a Toyota dealer for assistance.
-
Page 139
Sudden ac- harder starting. If you are not sure about celeration or engine braking, which oil to use, call your Toyota dealer- could cause the vehicle to spin or he will be pleased to help. skid. -
Page 140: Trailer Towing
This product is available at your Toyota dling, performance, braking, durability dealer and most auto parts stores. Follow Some of the things you might put in the ve- and driving economy (fuel consumption, the manufacturer’s directions for how…
-
Page 141: Weight Limits
WWW.MANUALS.WS WEIGHT LIMITS B The gross vehicle weight must not Before towing, make sure the total trailer exceed the Gross Vehicle Weight weight, gross combination weight, gross Rating (GVWR) indicated on the Certification Label. The gross ve- vehicle weight, gross axle weight and trail- hicle weight is the sum of weights er tongue load are all within the limits.
-
Page 142
For correct B Toyota recommends removing the safety chain procedures, follow the trailer hitch whenever you are not tow- hitch or trailer manufacturer’s rec- ing a trailer to reduce the possibility of ommendations. -
Page 143: Maintenance
1MZ-FE engine BREAK-IN SCHEDULE provincial or local regulation. If not, Front 220 (2.2, 32) B Toyota recommends that you do not install the rear view mirrors required Rear 220 (2.2, 32). tow a trailer with a new vehicle or a ve- for towing purpose.
-
Page 144
WWW.MANUALS.WS B Backing with a trailer is difficult and re- B Avoid jerky steering and sharp turns. B In order to maintain engine braking ef- The trailer could hit your vehicle in a quires practice. Grip the bottom of the ficiency, do not use fifth gear (manual tight turn. -
Page 145: How To Save Fuel And Make Your Vehicle Last Longer, Too
WWW.MANUALS.WS How to save fuel and make your vehicle last longer, too 1. Apply the brakes and hold. Getting more kilometers/mileage from a li- ter/gallon of fuel is easy-just take it easy. CAUTION 2. Have someone place wheel blocks un- It will help make your vehicle last longer, der both the vehicle and trailer wheels.
-
Page 146
WWW.MANUALS.WS B Avoid continuous speeding up and B Keep the bottom of your vehicle slowing down. Stop-and-go driving free from mud, etc. This not only wastes fuel. lessens weight but also helps prevent B Avoid unnecessary stopping and corrosion. B Keep your vehicle tuned-up and in braking. -
Page 147: In Case Of An Emergency
If the light is O.K., but the engine still will If you lose your keys not start, it needs adjustment or repair. If you lose your wireless remote Call a Toyota dealer or qualified repair shop. control transmitter NOTICE Do not pull— or push-start the ve- hicle.
-
Page 148
CAUTION is correct. If the engine still will not start, it needs ad- justment or repair. Call a Toyota dealer or D Batteries contain sulfuric acid qualified repair shop for assistance. which is poisonous and corrosive. -
Page 149: Jump-Starting Procedure
WWW.MANUALS.WS JUMP STARTING PROCEDURE 1. If the booster battery is installed in another vehicle, make sure the ve- hicles are not touching. Turn off all un- necessary lights and accessories. 2. If required, remove all the vent plugs from the booster and discharged bat- teries.
-
Page 150: If Your Engine Stalls While Driving
WWW.MANUALS.WS If your engine stalls while driving Do not connect it to or near any part that If your engine stalls while driving moves when the engine is cranked. 1. Reduce your speed gradually, keeping a straight line. Move cautiously off the CAUTION road to a safe place.
-
Page 151: If Your Vehicle Overheats
You should have it checked as You should follow this procedure CAUTION soon as possible at your Toyota deal- 1. Pull safely off the road, stop the ve- hicle and turn on your emergency When the engine is running, keep flashers.
-
Page 152: If You Have A Flat Tire
WWW.MANUALS.WS —Required tools and spare If you have a flat tire— tire 1. Reduce your speed gradually, keeping D Stop the vehilce at a level place a straight line. Move cautiously off the and chock the wheel diagnonally road to a safe place well away from the opposite being traffic.
-
Page 153
WWW.MANUALS.WS —Blocking the wheel Turn the jack joint by hand. To remove the spare tire: 2. Block the wheel diagnoally oppo- site the flat tire to keep the vehicle To remove: turn the joint in direction 1 until 1. Loosen the nut and remove it. the jack is free. -
Page 154: Removing Wheel Ornament
WWW.MANUALS.WS —Removing wheel ornament —Loosening wheel nuts 3. Remove the wheel ornament. Pry off the wheel ornament, using the bev- eled end of the wheel nut wrench as shown. CAUTION Do not try to pull the ornament by hand. Take due care in handling the ornament avoid unexpected…
-
Page 155: Positioning The Jack
WWW.MANUALS.WS —Positioning the jack —Raising your vehicle CAUTION Never get under the vehicle when the vehicle is supported by the jack alone. 5. Position the jack at the correct jack 6. After making sure that no one is in points as shown. the vehicle, raise it high enough so that the spare tire can be installed.
-
Page 156: Changing Wheels
WWW.MANUALS.WS —Changing wheels —Reinstalling wheel nuts 7. Remove the wheel nuts and change Before putting on wheels, remove any 8. Reinstall all the wheel nuts finger corrosion on the mounting surfaces with a tires. tight. wire brush or such. Installation of wheels Lift the flat tire straight off and put it aside.
-
Page 157: Reinstalling Wheel Ornament
WWW.MANUALS.WS —Lowering your vehicle —Reinstalling wheel ornament CAUTION When lowering the vehicle, make sure all portions of your body and all other persons around will not be injured as the vehicle is lowered to the ground. 9. Lower the vehicle completely and Steel wheels tighten the wheel nuts.
-
Page 158: After Changing Wheels
WWW.MANUALS.WS If your vehicle needs to be —After changing wheels towed— 10. Reinstall the wheel ornament. 11. Check the air pressure of the re- placed tire. 1. Put the wheel ornament into position. Adjust the air pressure to the specification On some models, align the cutout of the designated in Part 8.
-
Page 159: Towing Precautions
If towing is necessary, we recommend TOWING PRECAUTIONS: NOTICE you to have it done by your Toyota Use a safety chain system for all towing, Do not tow with the key removed or dealer or a commercial tow truck ser- and abide by the state/provincial and local in the “LOCK”…
-
Page 160: Emergency Towing
WWW.MANUALS.WS —Emergency towing If towing is necessary, we recommend you to have it done by your Toyota dealer or a commercial tow truck ser- vice. If towing service is not available in an emergency, your vehicle may be tem- porarily towed by a cable or chain se- cured to either emergency towing eye- let under the vehicle.
-
Page 161: If You Cannot Shift Automatic Transmission Selector Lever
6. Start the engine. For your safety, 2. Pry up the cover with a flat-bladed keep the brake pedal depressed. screwdriver or equivalent. Be sure to have the system checked by your Toyota dealer as soon as possible. WWW.MANUALS.WS…
-
Page 162: If You Lose Your Keys
If you lose your wireless remote If you lose your keys control tansmitter Many Toyota dealers can make a new If you lose your transmitter, you can key if you can give them the key num- purchase a new one at your Toyota ber.
-
Page 163: Corrosion Prevention And Appearance Care
Now, it is up to you. Proper D High temperatures will cause corro- CARE care of your Toyota can help ensure long- sion to those components of the ve- term corrosion prevention. hicle which are prevented from quick-…
-
Page 164: Washing And Waxing Your Toyota
See “Washing and waxing your Toyota” mixed according to the manufacturer’s to resist corrosion. Your Toyota dealer will for more tips. instructions. Use a soft cotton mitt and be happy to assist in supplying and instal- keep it wet by dipping it frequently into Check the condition of your vehicle’s…
-
Page 165
High temperatures could driving your Toyota through an 3. Rinse thoroughly — dried soap can damage the bumpers. automatic car wash. cause streaking. In hot weather you… -
Page 166: Cleaning The Interior
WWW.MANUALS.WS Cleaning the interior NOTICE NOTICE CAUTION Do not use solvent, thinner, gasoline Do not use dye or bleach on the Do not wash the vehicle floor with or window cleaner on the interior. belts-it may weaken them. water, or allow water to get into the floor when cleaning the vehicle in- Carpets Windows…
-
Page 167
B If you use a liquid car freshener, cleaning of your Toyota, your local To- line, or alkaline or acid solutions for cleaning the leather as these yota dealer will be pleased to answer do not apply the liquid onto the ve- could cause discoloring. -
Page 168: Vehicle Maintenance And Care
These checks or inspections can be done WWW.MANUALS.WS er’s Guide, Owner’s Manual Supple- either by yourself or a qualified technician, ment or Warranty Booklet for complete or if you prefer, your Toyota dealer will be warranty information. pleased to do them at a nominal cost.
-
Page 169: General Maintenance
They learn to work on Booklet for the details. to your Toyota dealer or a qualified service Toyotas before they work on your vehicle, shop immediately. It is recommended rather than while they are working on it.
-
Page 170: Inside The Vehicle
WWW.MANUALS.WS Tire surface and wheel nuts Lights Accelerator pedal Check the tires carefully for cuts, damage Make sure the headlights, stop lights, tail Check the pedal for smooth operation and or excessive wear. See Chapter 7-2 for lights, turn signal lights, and other lights uneven pedal effort or catching.
-
Page 171: In The Engine Compartment
WWW.MANUALS.WS Does your vehicle need repairing? IN THE ENGINE COMPARTMENT Power steering fluid level Be on the alert for changes in perfor- mance, sounds, and visual tip-offs that in- Check the level through the reservoir. The Items listed below should be checked dicate service is needed.
-
Page 172
WWW.MANUALS.WS If you notice any of these clues, take your vehicle to your Toyota dealer as soon as possible. It probably needs adjustment or repair. CAUTION Do not continue driving with the vehicle unchecked. It could result in serious vehicle damage and possibly personal injury. -
Page 173: Do-It-Yourself Maintenance
WWW.MANUALS.WS Part 7 DO-IT-YOURSELF MAINTENANCE— Chapter 7-1 Introduction Engine compartment overview Fuse locations Do-it-yourself service precautions Parts and tools WWW.MANUALS.WS…
-
Page 174
WWW.MANUALS.WS Engine compartment overview D5S-FE engine 1. Power steering fluid reservoir 2. Engine coolant reservoir 3. Engine oil filler cap 4. Engine oil level dipstick 5. Brake fluid reservoir 6. Fuse blocks 7. Battery 8. Engine cooling fans 9. Windshield washer fluid tank WWW.MANUALS.WS… -
Page 175
WWW.MANUALS.WS D1MZ-FE engine 1. Power steering fluid reservoir 2. Engine coolant reservoir 3. Engine oil level dipstick 4. Engine oil filler cap 5. Brake fluid reservoir 6. Fuse blocks 7. Battery 8. Electric cooling fans 9. Windshield washer fluid tank WWW.MANUALS.WS… -
Page 176
WWW.MANUALS.WS Fuse locations WWW.MANUALS.WS Canada only… -
Page 177: Do-It-Yourself Service Precautions
B Right after driving, the engine B Use eye protection whenever you your warranty coverage. Read the sepa- compartment—the engine, radia- work on or under you vehicle rate Toyota Warranty statement for details tor, exhaust manifold, power where you may be exposed to fly- and suggestions.
-
Page 178: Parts And Tools
Do mission fluid, or the transmission tenance. Remember all Toyota parts are not dispose of used oil and filter in could be damaged. designed in metric sizes, so your tools…
-
Page 179
Checking power steering fluid Checking and replacing fuses Parts (if replacement is necessary): Parts (if level is low): B Automatic transmission fluid DEX- B Genuine Toyota fuse or equivalent with same amperage rating as original RON -II or III Adding washer fluid Tools:… -
Page 180: Engine And Chassis
WWW.MANUALS.WS Part 7 Checking the engine oil level DO-IT-YOURSELF CAUTION MAINTENANCE— Be careful not to touch the hot ex- haust manifold. Chapter 7-2 If the oil level is below or only slightly above the low level line, add engine oil Engine and Chassis of the same type as already in the en- gine.
-
Page 181
WWW.MANUALS.WS Engine oil selection Oil identification marks Use API SH, “Energy-Conserving II” mul- Either or both API registered marks are tigrade engine oil or ILSAC multigrade en- added to some oil containers to help gine oil. you select the oil you should use. Recommended viscosity (SAE): The API Service Symbol is located any- where on the outside of the container. -
Page 182: Checking The Engine Coolant Level
So Do not use alcohol type antifreeze If you can find no leak, have your Toyota be sure to keep the reservoir filled. or plain water alone. dealer test the cap pressure and check for If the reservoir needs frequent refilling, it leaks in the cooling system.
-
Page 183: Checking Power Steering Fluid
WWW.MANUALS.WS Checking power steering fluid Use only newly opened brake fluid. Once Clean all dirt from outside of the reservoir opened, brake fluid absorbs moisture tank and look at the fluid level. If the fluid from the air, and excess moisture can is cold, the level should be in the “COLD”…
-
Page 184: Checking Tire Pressure
D Never exceed the vehicle capacity If a tire frequently needs refilling, have it weight. The passenger and luggage checked by your Toyota dealer. weight should be located so that the Keep your tire pressures at the proper The following instructions for check- vehicle is balanced.
-
Page 185: Checking And Replacing Tires
Any tires which are over six years old must be checked by a qualified techni- Toyota recommends all four tires, or at cian even if damage is not obvious. least both of the front or rear tires be…
-
Page 186: Rotating Tires
If you need snow tires, select tires of the same size, construction and load capacity as the original tires on your Toyota. Do not use tires other than those mentioned above. To equalize tire wear and help extend Do not install studded tires without first…
-
Page 187: Chain Installation
Correct replacement wheels are available NOTICE fore installing chains. at your Toyota dealer. Do not attempt to use a tire chain on CHAIN INSTALLATION A wheel of a different size or type may ad-…
-
Page 188: Aluminum Wheel Precautions
D When using tire chains, be careful not signed for a tubeless tire. to damage the aluminum wheels. D Use only the Toyota wheel nuts and wrench designed for your aluminum wheels. D When balancing your wheels, use only Toyota balance weights or equivalent and a plastic or rubber hammer.
-
Page 189: Electrical Components
WWW.MANUALS.WS Checking battery condition— Part 7 —Precautions DO-IT-YOURSELF D If electrolyte gets on your skin, CAUTION thoroughly wash the contact area. MAINTENANCE— If you feel pain or burning, get BATTERY PRECAUTIONS medical attention immediately. D If electrolyte gets on your clothes, The battery produces flammable Chapter 7-3 there is a possibility of its soaking…
-
Page 190: Checking Battery Fluid
WWW.MANUALS.WS —Checking battery exterior —Checking battery fluid There are two types of batteries: Main- NOTICE tenance type and non-maintenance B Be sure the engine and all acces- type. sories are off before performing A non-maintenance battery has “MAIN- maintenance. TENANCE FREE BATTERY” on its top. A B When checking the battery, re- maintenance type battery does not have move the ground cable from the…
-
Page 191
Type A Type B GREEN BLUE Good Charging necessary. DARK WHITE Have battery checked by your Toyota dealer. CLEAR or LIGHT Have battery checked YELLOW by your Toyota dealer. NOTICE CHECKING BY THE FLUID LEVEL CHECKING BY THE HYDROMETER Do not refill the battery with water. -
Page 192: Battery Recharging Precautions
WWW.MANUALS.WS Battery recharging precautions During recharging, the battery is pro- NOTICE ducing hydrogen gas. Do not overfill the cells. Excess Therefore, before recharging: electrolyte could squirt out of the 1. Maintenance type batteries—Remove battery during heavy charging, the vent plugs. causing corrosion or damage.
-
Page 193: Checking And Replacing Fuses
WWW.MANUALS.WS Checking and replacing fuses NOTICE Never recharge the battery while the engine is running. Also, be sure all accessories are turned off. If the headlights or other electrical components do not work, check the fuses. If any of the fuses are blown, they must be replaced.
-
Page 194: Adding Washer Fluid
Have your Toyota dealer correct it as light comes on, the washer tank may soon as possible. If you are not sure whether the fuse has be empty.
-
Page 195: Replacing Light Bulbs
WWW.MANUALS.WS Replacing light bulbs— —Headlights The following illustrations show how to Light bulbs Bulb Type gain access to the bulbs. When replacing a bulb, make sure the ignition switch and Headlights 60/55 light switch are off. Use bulbs with the Parking and front side —…
-
Page 196: Parking, Front Side Marker And Front Turn Signal Lights
Make sure the rubber cover fits snugly on the connector and the headlight body. Aiming is not necessary after replacing the bulb. When aiming adjustment is nec- essary, contact your Toyota dealer. WWW.MANUALS.WS…
-
Page 197
WWW.MANUALS.WS —Rear side marker, rear turn signal, stop and tail lights Removing cover clips WWW.MANUALS.WS Installing cover clips… -
Page 198
WWW.MANUALS.WS —Back-up and tail lights (type A) a: Rear side marker light a: Back-up light b: Rear turn signal light b: Tail light c: Stop and tail light WWW.MANUALS.WS… -
Page 199
WWW.MANUALS.WS —Back-up and tail lights (type B) Use a flat-bladed screwdriver. Removing the cover clips WWW.MANUALS.WS a: Back-up light Installing the cover clips b: Tail light… -
Page 200: License Plate Lights
WWW.MANUALS.WS —License plate lights Use a phillips-head screw driver Removing the cover clips WWW.MANUALS.WS Installing the cover clips…
-
Page 201: High Mounted Stoplight
WWW.MANUALS.WS —High mounted stoplight WWW.MANUALS.WS…
-
Page 202: Specifications
WWW.MANUALS.WS Part 8 Dimensions and weight SPECIFICATIONS mm (in.) Dimensions and weight P195/70R 14 tire P205/65R 15 tire Engine Overall length 4783 (188.3) 4783 (188.3) Fuel Overall width 1780 (70.1) 1780 (70.1) Service specifications Overall height 1416 (55.7)* 1419 (55.9)* Tires Wheelbase 2670 (105.1)
-
Page 203
WWW.MANUALS.WS Engine Fuel Service specifications Model: Fuel type: ENGINE 5S-FE and 1MZ-FE 5S-FE engine Valve clearance (engine cold), mm (in.) Type: Unleaded gasoline, Research Oc- 5S-FE engine tane Number 91 (Octane Rating 87) 5S-FE engine Intake 0.19 0.29 (0.007 0.011) or higher 4 cylinder in line, 4 cycle, gasoline Exhaust 0.28 0.38 (0.011 0.015) -
Page 204
WWW.MANUALS.WS ENGINE LUBRICATION COOLING SYSTEM CLUTCH Oil capacity (drain and refill), L (qt., Imp. Total capacity, L (qt., Imp.): Pedal freeplay, mm (in.): qt.): 5S-FE engine 6.9 (7.3, 6.1) 5 15 (0.2 0.6) 5S-FE engine 1MZ-FE engine 9.1 (9.6, 8.4) Fluid type: With filter 3.6 (3.8, 3.2) -
Page 205
WWW.MANUALS.WS Differential STEERING Fluid capacity, L (qt., Imp. qt.): Wheel freeplay: 5S-FE engine 1.6 (1.7, 1.4) Less than 30 mm (1.2 in.) 1MZ-FE engine 0.85 (0.9, 0.7) Power steering fluid type: Fluid type: Automatic transmission fluid DEX- RON II or III Automatic transmission fluid D-II or DEXRON III (DEXRON II) BRAKES… -
Page 206
WWW.MANUALS.WS Tires Normal driving kPa (kgf/cm or bar, psi) For all loads including full rated loads For all loads including full rated loads For reduced loads (1 to 4 passengers) For reduced loads (1 to 4 passengers) Tire size Wheel size Front Rear Front… -
Page 207
WWW.MANUALS.WS Fuses Engine compartment (Canada) Engine compartment Fuses (type A) 9. HAZ 10 A: Emergency flasher 1. A/C 10 A: Air conditioning system 10.AM2 30 A: Gauge and meter, SRS air- bag system, Multiport fuel injection 2. 10 A: Spare fuse system/sequential multiport fuel injec- 3. -
Page 208
WWW.MANUALS.WS 18.HEAD (RH-LO) 10 A: Right-hand 25.IGN 5A: Gauges and meters, charging headlight system, SRS airbag system, multiport fuel injection system/sequential multi- 19.SEAT-HEA TER 20 A: No circuit port fuel injection system 20.HEATER 10 A: Air conditioning sys- 26.STOP 15 A: Stop lights, cruise control tem, rear window defogger, starting system, high-mounted stoplight, anti- system… -
Page 209
WWW.MANUALS.WS 33.PANEL 7.5 A: Gauge and meter, au- 42.PWR 30 A: Power window control sys- dio system, cigarette lighter, glove box tem, power seat, electric moon roof light, clock, instrument panel light con- 43.AM1 40 A: Head lamp cleaner trol, service reminder indicators, air Fuses (type C) conditioning control panel lights, ash- tray light, emergency flasher, seat… -
Page 210: Reporting Safety Defects For U.s. Owners And Uniform Tire Quality Grading
However, NHTSA can- not become involved in individual problems between you, your deal- er, or Toyota Motor Sales, U.S.A., Inc. WWW.MANUALS.WS…
-
Page 211: Uniform Tire Quality Grading
A tire marked C may have poor trac- failure. quality grading. tion performance. Your Toyota dealer will help answer any Warning: The traction grade assigned to questions you may have as you read this this tire is based on braking (straight information.
-
Page 212
A−9 WWW.MANUALS.WS Quick index D If a service reminder indicator or warning buzzer comes on ..D If your vehicle will not start ……..D If your engine stalls while driving .
This manual is also suitable for:
1997 camry
- Руководства по ремонту
- Руководство по ремонту Тойота Камри 1992-1997 г.в.
Руководство по ремонту Toyota Camry / Тойота Камри 1992-
Общая информация об автомобиле.
Престиж — это, пожалуй, одна из немногих нематериальных категорий, которую можно купить за деньги. Что вкладывается в понятие престижный автомобиль? В первую очередь большой, просторный внутри, обязательно с кожаным салоном и отделкой деревом и максимально укомплектованный.
История машины берет свое начало в 1983 году, когда появились первые экземпляры с совсем скромными моторами 1,8 и 2,0 литра. Кроме седана в производственной гамме присутствовал и кузов лифтбек, а позже, в < 1992 > году, выпускался и универсал.
У нас же Camry начала набирать популярность с середины 90 годов, когда эти машины появились у спецподразделения ГАИ «Кобра». Затем на этот автомобиль обратили внимание и чиновники, в связи с чем Camry чаще всего ассоциируется с «государственным автомобилем». Наибольшим тиражом разошлась у нас модель пятого поколения — японский дизайн, хороший уровень комплектации и комфорта и превосходная надежность.
↓ Комментарии ↓
1. Инструкция по эксплуатации
1.0 Инструкция по эксплуатации
1.2 Комбинация приборов
1.3. Ключи
1.4. Двери
1.5 Подголовники
1.6. Сиденья
1.7 Установка рулевого колеса по высоте
1.8. Переключатели света, стеклоочистителя и указателей поворотов
1.9. Контрольные приборы
1.10. Контрольные лампы
1.11 Эконометр
1.12 Замок зажигания
1.13. Автоматическая коробка передач
1.14 Механическая коробка передач
1.15. Круиз-контроль
1.16. Система отопления и вентиляции
1.17 Часы
2. Техническое обслуживание
2.0 Техническое обслуживание
2.2 Периодичность обслуживания
3. Четырехцилиндровый двигатель
3.0 Четырехцилиндровый двигатель
3.2 Операции по ремонту двигателя на автомобиле
3.3 Верхняя мертвая точка первого цилиндра
3.4. Крышка головки блока цилиндров
3.5. Впускной коллектор
3.6. Выпускной коллектор
3.7. Зубчатый ремень и шкивы
3.8 Замена переднего уплотнительного кольца коленчатого вала
3.9 Замена уплотнительного кольца распределительного вала
3.10. Распределительный вал и толкатели
3.11. Головка блока цилиндров
3.12. Масляный поддон
3.13. Масляный насос
3.14. Маховик / пластина привода
3.15 Замена заднего уплотнительного кольца коленчатого вала
3.16. Подвеска силового агрегата
4. Шестицилиндровые двигатели V6
4.0 Шестицилиндровые двигатели V6
4.2 Общая информация
4.3 Ремонт, не требующий снятия двигателя
4.4. Верхняя мертвая точка (ВМТ) поршня первого цилиндра
4.5. Двигатель 3VZ-FE
4.6. Впускной коллектор
4.7 Выпускной коллектор
4.8. Зубчатый ремень и шкивы
4.9 Замена переднего уплотнительного кольца коленчатого вала
4.10 Замена уплотнительных колец распределительных валов
4.11. Распределительные валы и толкатели
4.12. Головка блока цилиндров
4.13. Масляный поддон
4.14. Масляный насос
4.15 Маховик / пластина привода
4.16 Замена заднего уплотнительного кольца коленчатого вала
4.17 Подвеска силового агрегата
5. Капитальный ремонт двигателей
5.0 Капитальный ремонт двигателей
5.2 Общая информация
5.3 Проверка компрессии
5.4 Рекомендации по снятию двигателя
5.5. Снятие и установка двигателя
5.6 Последовательность разборки двигателя
5.7 Разборка головки блока цилиндров
5.8. Очистка и осмотр головки блока цилиндров
5.9 Сборка головки блока цилиндров
5.10 Снятие поршней с шатунами
5.11 Снятие коленчатого вала
5.12. Блок цилиндров двигателя
5.13 Поршни и шатуны
5.14 Коленчатый вал
5.15. Осмотр и выбор коренных и шатунных подшипников
5.16 Контроль люфта сборки балансира (двигатель 5S-FE)
5.17 Последовательность сборки двигателя при капитальном ремонте
5.18 Установка поршневых колец
5.19. Установка коленчатого вала и проверка рабочих зазоров подшипников
5.20 Установка заднего уплотнительного кольца коленчатого вала
5.21 Установка поршней и шатунов, проверка рабочих зазоров подшипников
5.22 Установка сборки балансира (двигатель 5S-FE)
5.23 Запуск двигателя после капитального ремонта
6. Система охлаждения, отопления и кондиционирования воздуха
6.0 Система охлаждения, отопления и кондиционирования воздуха
6.2 Общая информация
6.3 Антифриз
6.4 Шланги системы охлаждения
6.5. Проверка и замена термостата
6.6. Проверка и замена вентилятора радиатора и реле
6.7. Вентилятор радиатора (модели V6 с 1992 по 1994 г.)
6.8. Радиатор
6.9 Расширительный бачок
6.10. Водяной насос
6.11. Датчик температуры охлаждающей жидкости
6.12 Вентилятор отопителя
6.13 Резистор вентилятора отопителя
6.14 Радиатор отопителя
6.15. Панель управления отопителем
6.16 Система кондиционирования воздуха
7. Топливная система
7.0 Топливная система
7.2 Общая информация
7.3 Снятие давления в топливной системе
7.4. Проверка топливного насоса
7.5 Топливный насос
7.6. Датчик уровня топлива
7.7 Топливный бак
7.8 Воздушный фильтр
7.9. Трос акселератора
7.10 Электронная система впрыска топлива EFL
7.11. Топливная система
7.12 Проверка системы впрыска топлива
7.13. Проверка и замена элементов системы впрыска топлива EFI
7.14 Топливная магистраль и топливные форсунки
7.15. Клапан режима холостого хода системы кондиционирования воздуха
7.16 Камера воздухозаборника (только двигатели V6)
8. Система зажигания, запуска и зарядки
8.0 Система зажигания, запуска и зарядки
8.2 Аккумулятор
8.3. Система зажигания
8.4. Проверка системы зажигания
8.5. Катушка зажигания
8.6. Распределитель зажигания
8.7 Проверка и регулировка угла опережения зажигания
8.8 Блок зажигания (коммутатор)
8.9. Датчик импульсов
8.10 Система зарядки
8.11 Генератор
8.12 Проверка и замена компонентов генератора
8.13 Система запуска двигателя
8.14 Стартер
8.15 Тяговое реле
9. Система понижения токсичности выхлопных газов и управления двигателем
9.0 Система понижения токсичности выхлопных газов и управления двигателем
9.2 Общая информация
9.3 Система электронного управления (TCCS)
9.4 Система самодиагностики
9.5. Датчики
9.6. Индукционная система подачи воздуха в двигатель (ACIS)
9.7 Система улавливания паров топлива (EVAP)
9.8. Система повторного сжигания отработанных газов (EGR)
9.9 Система вентиляции картера (PCV)
9.10 Катализатор
9.11 Коды неисправностей
10. Механическая коробка передач
10.0 Механическая коробка передач
10.2 Общая информация
10.3 Тросы переключения передач
10.4 Рычаг переключения передач
10.5 Выключатель света заднего хода
10.6. Снятие и установка коробки передач
10.7 Ремонт коробки передач
11. Автоматическая коробка передач
11.0 Автоматическая коробка передач
11.2 Общая информация
11.3. Диагностика
11.4. Регулировка и замена троса выбора передач
11.5 Проверка и регулировка троса управления дроссельной заслонкой
11.6. Проверка, замена и регулировка выключателя блокировки стартера
11.7. Замок блокировки рычага выбора передач
11.8. Замена уплотнительных колец
11.9. Проверка и замена опор коробки передач
11.10 Электронная система управления
12. Сцепление и приводные валы
12.0 Сцепление и приводные валы
12.2 Общая информация
12.3. Проверка и замена диска сцепления
12.4. Выжимной подшипник
12.5. Главный цилиндр сцепления
12.6. Рабочий цилиндр сцепления
12.7 Удаление воздуха из гидравлической системы сцепления
12.8 Стартовый выключатель сцепления
12.9. Шарнир равных угловых скоростей (ШРУС)
12.10 Замена защитных чехлов и ремонт шарниров равных угловых скоростей
12.10. Модели с двигателем 5S-FE
13. Тормозная система
13.0 Тормозная система
13.2 Общая информация
13.3 (ABS)
13.4 Замена тормозных колодок дисковых тормозов
13.5. Суппорт дисковых тормозов
13.6. Тормозной диск
13.7 Замена тормозных колодок барабанных тормозов
13.8. Рабочий тормозной цилиндр
13.9. Главный тормозной цилиндр
13.10 Тормозные трубопроводы и шланги
13.11 Прокачка гидравлической тормозной системы
13.12. Вакуумный усилитель тормозов
13.13 Замена тормозных колодок ручного тормоза на задних дисковых тормозах
13.14. Регулировка стояночного тормоза
13.15. Замена троса ручного тормоза
13.16. Выключатель стоп-сигнала
14. Подвеска и рулевое управление
14.0 Подвеска и рулевое управление
14.2 Общая информация
14.3. Передний стабилизатор поперечной устойчивости
14.4. Передняя стойка
14.5 Ремонт передней стойки
14.6. Нижний рычаг передней подвески
14.7 Замена нижнего шарнира передней подвески
14.8. Поворотный кулак
14.9 Задний стабилизатор поперечной устойчивости
14.10. Стойка задней подвески
14.11 Продольная тяга задней подвески
14.12. Рычаги задней подвески
14.13. Ступица задней подвески
14.14. Крепежный элемент задней ступицы
14.15. Рулевое колесо
14.16. Наконечники рулевой тяги
14.17 Замена защитных чехлов рулевой передачи
14.18. Рулевая передача
14.19. Насос усилителя рулевого управления
14.20 Удаление воздуха из системы рулевого управления с усилителем
14.21. Колеса и шины
14.22 Углы установки колес
15. Кузов
15.0 Кузов
15.1 Меры безопасности при проведении сварочных работ
15.2. Уход за кузовом
15.3. Уход за обивкой и ковриками
15.4. Ремонт незначительных повреждений кузова
15.5 Ремонт сильных повреждений кузова
15.6. Капот
15.7 Крышка багажника
15.8 Задняя дверь
15.9. Замена стоек поддержки
15.10 Обивка двери
15.11. Двери
15.12. Замок, цилиндр замка и ручки открытия двери
15.13 Стекло двери
15.14 Стеклоподъемник
15.15 Передний бампер
15.16 Задний бампер
15.17 Наружные зеркала заднего вида
15.18. Сиденья
15.19 Декоративная накладка комбинации приборов
15.20 Кожухи рулевой колонки
15.21 Центральная консоль
15.22 Вещевой ящик
15.23 Проверка состояния ремней безопасности
15.24 Решетка радиатора
15.25 Брызговик двигателя
16. Электрическое оборудование
16.0 Электрическое оборудование
16.2 Общая информация
16.3 Электрические цепи
16.4. Обнаружение незамкнутой цепи
16.5 Предохранители
16.6 Реле
16.7. Многофункциональные переключатели рулевой колонки
16.8. Замок зажигания
16.9 Выключатель обогревателя заднего стекла
16.10 Проверка обогревателя заднего стекла
16.11 Радиоприемник
16.12 Громкоговорители
16.13 Антенна
16.14 Замена лампочек фар
16.15 Регулировка света фар
16.16 Фара
16.17. Замена лампочек накаливания
16.18. Двигатель стеклоочистителя
16.19 Комбинация приборов
16.20 Звуковой сигнал
16.21 Система круиз-контроля
16.22 Стеклоподъемники с электрическим приводом
16.23 Система центральной блокировки замков
16.24 Зеркала заднего вида с электроприводом
16.25 Воздушная подушка безопасности
16.26. Схемы электрооборудования
Руководство на английском языке по техническому обслуживанию и ремонту + схемы электрооборудования автомобиля Toyota Camry серии XV10 1994 года выпуска.
- Автор: —
- Издательство: Toyota Motor Corporation
- Год издания: —
- Страниц: —
- Формат: PDF
- Размер: 87,3 Mb
Сборник руководств на английском языке по техническому обслуживанию и ремонту + схемы электрооборудования автомобиля Toyota Camry серии XV20 1996-2001 годов выпуска.
- Автор: —
- Издательство: Toyota Motor Corporation
- Год издания: —
- Страниц: —
- Формат: PDF
- Размер: 215,6 Mb
Сборник руководств на английском языке по техническому обслуживанию и ремонту + схемы электрооборудования автомобиля Toyota Camry серии XV30 2002-2006 годов выпуска.
- Автор: —
- Издательство: Toyota Motor Corporation
- Год издания: —
- Страниц: —
- Формат: PDF
- Размер: 116,0 Mb
Сборник руководств на английском языке по техническому обслуживанию и ремонту + схемы электрооборудования автомобиля Toyota Camry серии XV40 2007 года выпуска.
- Автор: —
- Издательство: Toyota Motor Corporation
- Год издания: —
- Страниц: —
- Формат: PDF, ISO
- Размер: 980,2 Mb
Сборник руководств на английском языке по техническому обслуживанию и ремонту автомобиля Toyota Camry серии V20 1986-1991 годов выпуска.
- Автор: —
- Издательство: Toyota Motor Corporation
- Год издания: —
- Страниц: —
- Формат: PDF
- Размер: 87,9 Mb
Руководство по эксплуатации и техническому обслуживанию автомобиля Toyota Camry Gracia 1996-2001 годов выпуска.
- Автор: —
- Издательство: Монолит
- Год издания: —
- Страниц: 254
- Формат: —
- Размер: —
Руководство по эксплуатации, техническому обслуживанию и ремонту автомобилей Lexus ES300/330 и toyota Camry 2002-2005 годов выпуска.
- Автор: —
- Издательство: Алфамер Паблишинг
- Год издания: —
- Страниц: 312
- Формат: —
- Размер: —

Мультимедийное руководство по эксплуатации и ремонту автомобиля Toyota Camry 1992-1997 годов выпуска.
- Автор: —
- Издательство: —
- Год издания: —
- Страниц: —
- Формат: —
- Размер: 167,8 Mb
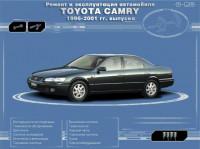
Мультимедийное руководство по эксплуатации и ремонту автомобиля Toyota Camry 1996-2001 годов выпуска.
- Автор: —
- Издательство: —
- Год издания: —
- Страниц: —
- Формат: —
- Размер: 179,8 Mb
Руководство по эксплуатации и техническому обслуживанию автомобиля Toyota Camry серии XV30 2006 года выпуска.
- Автор: —
- Издательство: Toyota Motor Corporation
- Год издания: 2005
- Страниц: 291
- Формат: PDF
- Размер: 40,9 Mb
Руководство по эксплуатации и техническому обслуживанию автомобиля Toyota Camry серии XV40 2009 года выпуска.
- Автор: —
- Издательство: Toyota Motor Corporation
- Год издания: 2008
- Страниц: 164
- Формат: PDF
- Размер: 11,2 Mb
Руководство по эксплуатации и техническому обслуживанию автомобиля Toyota Camry серии XV50 2012 года выпуска.
- Автор: —
- Издательство: Toyota Motor Corporation
- Год издания: 2011
- Страниц: 284
- Формат: PDF
- Размер: 158,9 Mb
Мультимедийное руководство по техническому обслуживанию и ремонту автомобиля Toyota Camry серии XV50 с 2011 года выпуска.
- Автор: —
- Издательство: Toyota Motor Corporation
- Год издания: —
- Страниц: —
- Формат: HTML
- Размер: 332,6 Mb
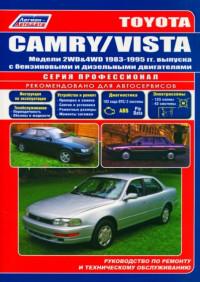
Руководство по эксплуатации, техническому обслуживанию и ремонту автомобилей Toyota Camry и Toyota Vista 1983-1995 годов выпуска с бензиновыми и дизельными двигателями.
- Автор: —
- Издательство: Легион-Автодата
- Год издания: —
- Страниц: 360
- Формат: —
- Размер: —
Руководство по эксплуатации, техническому обслуживанию и ремонту + каталог расходных запчастей автомобиля Toyota Camry 2001-2005 годов выпуска с бензиновыми двигателями объемом 2,4/3,0/3,3 л.
- Автор: —
- Издательство: Легион-Автодата
- Год издания: —
- Страниц: 464
- Формат: —
- Размер: —
Руководство по эксплуатации, техническому обслуживанию и ремонту + каталог расходных запчастей автомобиля Toyota Camry 2006-2011 годов выпуска с бензиновыми двигателями объемом 2,4/3,5 л.
- Автор: —
- Издательство: Легион-Автодата
- Год издания: —
- Страниц: 474
- Формат: —
- Размер: —
Руководство по эксплуатации, техническому обслуживанию и ремонту автомобилей Toyota Camry Gracia и Toyota Mark II Qualis 1996-2001 годов выпуска с бензиновыми двигателями объемом 2,2/2,5/3,0 л.
- Автор: —
- Издательство: Легион-Автодата
- Год издания: —
- Страниц: 352
- Формат: —
- Размер: —
Руководство по эксплуатации, техническому обслуживанию и ремонту + каталог расходных запчастей автомобиля Toyota Camry с 2011 года выпуска с бензиновыми двигателями объемом 2,0/2,5/3,5 л.
- Автор: —
- Издательство: Легион-Автодата
- Год издания: —
- Страниц: 608
- Формат: —
- Размер: —

Руководство по эксплуатации и ремонту автомобилей Toyota Avalon/Camry/Solara и Lexus ES300/330 2002-2005 годов выпуска с бензиновыми двигателями объемом 2,3/3,0/3,3 л.
- Автор: —
- Издательство: Монолит
- Год издания: —
- Страниц: 344
- Формат: —
- Размер: —
Руководство по эксплуатации, техническому обслуживанию и ремонту автомобилей Toyota Avalon/Camry/Solara с 2001 года выпуска.
- Автор: —
- Издательство: Монолит
- Год издания: —
- Страниц: 260
- Формат: —
- Размер: —

Руководство по эксплуатации и ремонту автомобиля Toyota Camry с 2006 года выпуска с бензиновыми двигателями объемом 2,4/3,5 л.
- Автор: —
- Издательство: Монолит
- Год издания: —
- Страниц: 356
- Формат: —
- Размер: —
Руководство по эксплуатации и ремонту автомобиля Toyota Camry с 2011 года выпуска с бензиновыми двигателями объемом 2,5/3,5 л.
- Автор: —
- Издательство: Монолит
- Год издания: —
- Страниц: 500
- Формат: —
- Размер: —

Руководство по эксплуатации и ремонту автомобиля Toyota Camry с 2017 года выпуска с бензиновыми двигателями объемом 2,0/2,5/3,5 л.
- Автор: —
- Издательство: Монолит
- Год издания: —
- Страниц: 572
- Формат: —
- Размер: —
Руководство по эксплуатации и техническому обслуживанию автомобиля Toyota Camry с 2006 года выпуска.
- Автор: —
- Издательство: MoToR
- Год издания: —
- Страниц: 312
- Формат: —
- Размер: —
Руководство по эксплуатации, техническому обслуживанию и ремонту автомобиля Toyota Camry с 2006 года выпуска с бензиновыми двигателями объемом 2,4/3,5 л.
- Автор: —
- Издательство: Арго-Авто
- Год издания: —
- Страниц: 784
- Формат: —
- Размер: —
Мультимедийное руководство по эксплуатации и ремонту автомобиля Toyota Camry 2001-2005 годов выпуска.
- Автор: —
- Издательство: —
- Год издания: —
- Страниц: —
- Формат: —
- Размер: 156,5 Mb
Руководство по техническому обслуживанию и ремонту автомобилей Toyota Camry и Toyota Vista 1994-1998 годов выпуска с правым расположением руля.
- Автор: —
- Издательство: Легион-Автодата
- Год издания: —
- Страниц: 336
- Формат: —
- Размер: —
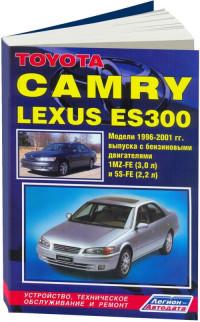
Руководство по техническому обслуживанию и ремонту автомобилей Lexus ES300 и Toyota Camry 1996-2001 годов выпуска с бензиновыми двигателями объемом 2,2/3,0 л.
- Автор: —
- Издательство: Легион-Автодата
- Год издания: —
- Страниц: 360
- Формат: —
- Размер: —
Руководство по техническому обслуживанию и ремонту автомобиля Toyota Camry 2001-2005 годов выпуска с бензиновыми двигателями объемом 2,0/2,4 л. В Книге представлены модели с правым расположением руля.
- Автор: —
- Издательство: Легион-Автодата
- Год издания: —
- Страниц: 376
- Формат: —
- Размер: —
Каталог руководств по обслуживанию и ремонту автомобилей самых популярных марок


© 2022 manuals4car.ru Все права защищены.
При упоминании использовании материалов активная ссылка на manuals4car.ru обязательна.

