Быстрый и бесшовный Wi-Fi
Дополнительный модуль Mesh Wi-Fi
AC1200 двухдиапазонный Wi-Fi
Deco M3W
Для чего нужен Deco M3W?

Нет Wi-Fi подключения
в спальне?-
Теряете подключение
при передвижении по дому? -
Постоянная
буферизация? -
Беспокоит безопасность
ваших детей


Wi-Fi по всему дому
Deco M3W – это дополнительный модуль для домашней Mesh Wi-Fi системы Deco. Расширяйте сеть Wi-Fi на дополнительных 140 кв. м, чтобы устранить зоны со слабым сигналом Wi-Fi.
Работает со всеми
модулями Deco
Примечание: Для расширения покрытия Mesh Wi-Fi модуль Deco M3W должен быть подключён к модулю Deco.
Удобное подключение Wi-Fi
Подключение к настенной розетке и компактный дизайн обеспечивают больше возможностей по расширению Wi-Fi. Просто добавьте дополнительные модули, подключив их к розеткам в холле, на кухне, в гараже или подвале – и используйте быстрый Wi-Fi.
Подключите усилитель сигнала на между модулем Deco и «мёртвой зоной». Умный индикатор сигнала позволит вам быстро и удобно найти подходящее место для установки.
-
Белый
Горит белым:
Подключено, сеть доступна -
Красн.
Горит красным:
Подключено, сеть недоступнаМигает красным:
Не подключено
Работает со всеми
роутерами Deco
Deco M3W совместим со всеми роутерами Deco для формирования Mesh-сети. Используйте все функции главного роутера Deco* повсюду.
Проверьте, как настроить смешанную сеть Deco
* Функции смешанной системы Deco согласуются с функциями главного роутера Deco.
- Deco M5 Plus
/ M5 / P7 - Deco M3W
- Deco M9 Plus
- Deco M4 / E4
- Deco M9 Plus
- Deco M3W
- Deco M3W
- Deco M3W
Бесшовный роуминг с одним именем сети
TP-Link Mesh означает, что модули Deco работают вместе и формируют единую сеть с одним именем. Смотрите потоковое видео без задержек, загружайте файлы, играйте в игры и передвигайтесь по дому без переключения между модулями, находясь внутри бесшовной сети.
Бесшовный роуминг
Потоковое видео без задержек
Одна сеть Wi-Fi
Без переключения между разными SSID
Всегда быстро
Функция адаптивного выбора пути для максимальной скорости работы сети
Восстановление подключения
Убедитесь, что вы онлайн, даже если один модуль выходит из работы
Без буферизации
Благодаря двухдиапазонному Wi-Fi, адаптивному выбору пути и функции QoS, система Deco устраняет буферизацию, чтобы вы могли просматривать плавное потоковое видео.
5 ГГц 867 Мбит/с
2,4 ГГц 300 Мбит/с
Удобный родительский контроль
Простой, интуитивно понятный родительский контроль обеспечит
безопасность вашим детям, пока они онлайн.
- Пользовательские профили
Легко создайте профиль для каждого члена семьи и установите ограничения времени.
- Уровни фильтрации
Одним нажатием обеспечьте безопасность в интернете с помощью настроек, которые блокируют веб-сайты в зависимости от возраста.
- Ограничения времени
Установите ограничения на количество времени, которое каждый член семьи может проводить в сети.
- Статистика
Узнайте, какие сайты посещают ваши дети и сколько времени они проводят на каждом.
- Wi-Fi на паузу
Отдохните от Wi-Fi – просто нажмите кнопку, чтобы приостановить доступ в интернет.
Wi-Fi, который понятен всем
-
Настройка — ещё проще
Установка Deco – быстрая и простая. Просто распакуйте её, установите приложение Deco и следуйте инструкциям на экране.
Как настроить систему Deco
-
Удобное управление
Управляйте Wi-Fi дома или удалённо из приложения Deco: получайте статистику по подключённым устройствам, приоритизируйте их работу, настраивайте гостевую сеть и многое другое.
-
Голосовое управление
Свяжите устройство с Amazon Alexa, чтобы управлять системой через простые голосовые команды.
-
Contents
-
Table of Contents
-
Bookmarks
Quick Links
Whole Home Mesh Wi-Fi System
Seamless Roaming | Parental Controls | Adaptive Path Selection
User Guide
AC1200 Whole Home Mesh Wi-Fi Extender
Deco M3W
1910012488 REV1.0.0
Related Manuals for TP-Link Deco M3W
Summary of Contents for TP-Link Deco M3W
-
Page 1
Whole Home Mesh Wi-Fi System Seamless Roaming | Parental Controls | Adaptive Path Selection User Guide AC1200 Whole Home Mesh Wi-Fi Extender Deco M3W 1910012488 REV1.0.0… -
Page 2: Table Of Contents
Contents About This Guide ···················································· 1 Appearance ······························································· 2 Set Up Your Deco Extender ······························ 3 Dashboard ·································································· 5 Update Deco Units ················································ 6 Authentication ·························································· 7…
-
Page 3
All images, parameters and descriptions documented in this guide are used for demonstration only. operational temperature:0-40度 Conventions • A Technical Support Forum is provided for you to discuss our products at https://forum.tp-link.com. In this guide, the following conventions are used: • Our Technical Support contact information can be found at the Help… -
Page 4
Appearance Deco Extender has four LED lights and a Reset button. See the explanation below: Reset Button: Press to reset Deco Extender to factory default settings. LEDs: STATUS INDICATION On/Off Deco is on or off. Deco is starting up, upgrading firmware, Pulse Power or resetting. -
Page 5: Set Up Your Deco Extender
Set Up Your Deco Extender Follow the steps below to add the Deco Extender to your existing Deco network. Before you start 2. Add your Deco Extender 3. Find a suitable spot Install the Deco app and set up a Deco On the dashboard, tap and select DECOS.
-
Page 6
4. Plug in your Deco Extender 5. Specify the location 6. Finish Plug the Deco Extender into a wall outlet and Select a location for this Deco Extender. If its The Deco app will automatically optimize your wait until its Power LED turns solid on. location is not listed, you can create a new one Deco network and finish adding the Deco by choosing Custom. -
Page 7: Dashboard
Dashboard After you successfully extend your Deco network, you will see the dashboard of the Deco app. Here you can view the connected devices and their internet speeds, and tap the (Internet) icon to check the working status of all Deco units. View connected devices Display all Deco units Check the working status…
-
Page 8: Update Deco Units
Update Deco Units TP-Link is dedicated to improving product features and providing a better customer experience. Update Deco units when prompted in the Deco app. Update Available Updating Deco Up-to-date…
-
Page 9: Authentication
No part of the specifications may be reproduced in any form or by any means or used to make any derivative such as translation, transformation, or adaptation without permission from TP-Link Technologies Co., Ltd. Copyright © 2018 TP-Link Technologies Co., Ltd. All rights reserved.
-
Page 10
Product Name: AC1200 Whole Home Mesh Wi-Fi Extender Model Number: Deco M3W Responsible Party: TP-Link USA Corporation, d/b/a TP-Link North America, Inc. Address: 145 South State College Blvd. Suite 400, Brea, CA 92821 Website: http://www.tp-link.com/us/ Tel: +1 626 333 0234 Fax: +1 909 527 6803 E-mail: sales.usa@tp-link.com… -
Page 11
This device is restricted in indoor environment only. We, TP-Link USA Corporation, has determined that the equipment shown as above has been shown to comply with the applicable technical standards, FCC part 15. There is no unauthorized change is made in the equipment and the equipment is properly maintained and operated. -
Page 12
5470 MHz -5725 MHz (30dBm) EU Declaration of Conformity TP-Link hereby declares that the device is in compliance with the essential requirements and other relevant provisions of directives 2014/53/EU, 2009/125/EC and 2011/65/EU. The original EU declaration of conformity may be found at http://www.tp-link.com/en/ce RF Exposure Information This device meets the EU requirements (2014/53/EU Article 3.1a) on the limitation of exposure of the general public to electromagnetic fields by way… -
Page 13
1. l’appareil ne doit pas produire de brouillage; 2. l’utilisateur de l’appareil doit accepter tout brouillage radioélectrique subi, meme si le brouillage est susceptible d’en compromettre le fonctionnement. Caution: 1. The device for operation in the band 5150–5250 MHz is only for indoor use to reduce the potential for harmful interference to co-channel mobile satellite systems;… -
Page 14
당해 무선설비는 운용중 전파혼신 가능성이 있음. NCC Notice & BSMI Notice 注意! 依據 低功率電波輻射性電機管理辦法 第十二條 經型式認證合格之低功率射頻電機,非經許可,公司、商號或使用者均不得擅自變更頻率、加大功率或變更原設計之特性或功能。 第十四條 低功率射頻電機之使用不得影響飛航安全及干擾合法通信;經發現有干擾現象時,應立即停用,並改善至無干擾時方得繼續使用。前項合法通 信,指依電信規定作業之無線電信。低功率射頻電機需忍受合法通信或工業、科學以及醫療用電波輻射性電機設備之干擾。 於5.25GHz至5.35GHz區域內操作之無線設備的警告聲明 工作頻率5.250~5.350GHz該頻段限於室內使用。 安全諮詢及注意事項 • 請使用原裝電源供應器或只能按照本產品注明的電源類型使用本產品。 • 清潔本產品之前請先拔掉電源線。請勿使用液體、噴霧清潔劑或濕布進行清潔。 • 注意防潮,請勿將水或其他液體潑灑到本產品上。 • 插槽與開口供通風使用,以確保本產品的操作可靠並防止過熱,請勿堵塞或覆蓋開口。 • 請勿將本產品置放於靠近熱源的地方。除非有正常的通風,否則不可放在密閉位置中。 • 請不要私自打開機殼,不要嘗試自行維修本產品,請由授權的專業人士進行此項工作。 限用物質含有情況標示聲明書 限用物質及其化學符號 鉛 鎘 汞 六價鉻 多溴聯苯… -
Page 15
備考1. «超出0.1 wt %» 及 «超出0.01 wt %» 系指限用物質之百分比含量超出百分比 含量基準值。 備考2. «○»系指該項限用物質之百分比含量未超出百分比含量基準值。 備考3. » − » 系指該項限用物質為排除項目。 Продукт сертифіковано згідно с правилами системи УкрСЕПРО на відповідність вимогам нормативних документів та вимогам, що передбачені чинними законодавчими актами України. Safety Information • Keep the device away from water, fire, humidity or hot environments. •… -
Page 16
Symbol Explanation AC voltage Indoor use only RECYCLING This product bears the selective sorting symbol for Waste electrical and electronic equipment (WEEE). This means that this product must be handled pursuant to European directive 2012/19/EU in order to be recycled or dismantled to minimize its impact on the environment. User has the choice to give his product to a competent recycling organization or to the retailer when he buys a new electrical or electronic equipment. -
Page 17
User Guide AC1200 Wi-Fi Range Extender RE300 REV1.0.0 1910012486… -
Page 18
4. 3. 1. Add TP-Link ID to Manage the Extender …… -
Page 19
6. 4. Upgrade the Firmware …………32 6. -
Page 20: About This Guide
The Quick Installation Guide can be found where you find this guide or inside the package of the extender. Specifications can be found on the product page at https://www.tp-link.com. A Technical Support Forum is provided for you to discuss our products at https://forum.tp-link.com.
-
Page 21: Appearance
Chapter Get to Know About Your Extender This chapter introduces what the extender can do and its appearance. It contains the following sections: • Product Overview • Appearance…
-
Page 22: Product Overview
Get to Know About Your Extender Product Overview Bring Dead Zones Back to Life Tired of Wi-Fi “dead zones”? The TP-Link extender is connected to your router wirelessly, strengthening its signal and expanding its coverage into areas that could not otherwise be reached.
-
Page 23: Button Description
Chapter 1 Get to Know About Your Extender Name Status Indication On/Off The extender is on or off. (Power) Blinking The system is starting up or firmware is being upgraded. The extender is connected to your router’s wireless Solid white network and is in a suitable location.
-
Page 24: Chapter 2 Set Up Internet Connection
Chapter Set Up Internet Connection This chapter introduces how to boost your host wireless coverage. Please follow the step-by-step instructions to set up the internet connection. It contains the following sections: • Power On the Extender • Set Up the Extender…
-
Page 25: Power On The Extender
For safety, we suggest that you plug the extender in upright directions as shown below. Solid On Set Up the Extender There are three ways to set up the extender: via the TP-Link Tether app, via a web browser, or via the WPS button. 2 2 1 Method 1: Via the TP-Link Tether App 1.
-
Page 26: Method 2: Via A Web Browser
Chapter 2 Set Up Internet Connection 4. Create a password to log 5. Follow app instructions to set up and relocate your extender. Tips: For more intuitive location assistant, access extender settings via Tether and go to Tools > Location Assistant.
-
Page 27
Chapter 2 Set Up Internet Connection Connections are available Wireless Network Connection TP-Link_Extender Connect automatically √ Connect • For Mac OS X Users 1 ) Unplug the Ethernet cable from your computer (if any). 2 ) Click the Wi-Fi icon in the top right corner of the screen, and connect to the extender’s network: TP-Link_Extender. -
Page 28
Next. Tips: If you connect the extender to a TP-Link OneMesh router, the extender will automatically join the router’s OneMesh network and copy the router’s wireless settings. For more information, refer to OneMesh with Seamless… -
Page 29
Chapter 2 Set Up Internet Connection 6 ) Follow web instructions to relocate your extender for optimal Wi-Fi coverage and performance, and then click Done. Enjoy! Connect to the extended network and enjoy the internet. -
Page 30: Method 3: Via The Wps Button
WPS connection is successful. Note: If the LED does not turn solid on, try again or refer to Method 1: Via the TP-Link Tether App Method 2: Via a Web Browser. 3. If the extender connects to a dual band router, repeat steps 1 and 2 above to connect to the other band.
-
Page 31
Chapter 2 Set Up Internet Connection Extended Network Names: Router’s network name with _EXT at the end Passwords: Same as your router Solid On Note: If you want to customize the extended network name, refer to Configure Wireless Network. If you cannot find the network names with _EXT in your Wi-Fi network list, this means that the extender has been connected to a OneMesh router and automatically copied its wireless settings. -
Page 32: Chapter 3 Onemesh With Seamless Roaming
Chapter OneMesh with Seamless Roaming This chapter introduces the TP-Link OneMesh feature. It contains the following sections: • What‘s a OneMesh Network • How to Set Up a OneMesh Network…
-
Page 33: What’s A Onemesh Network
Set up a OneMesh network with a push of WPS buttons. Manage all network devices on the Tether app or at your router’s web management page. To check full list of TP-Link OneMesh devices, scan the QR code, or visit https://www.tp-link.com/One-Mesh/compatibility.
-
Page 34: How To Set Up A Onemesh Network
OneMesh with Seamless Roaming How to Set Up a OneMesh Network Once the extender is connected to a TP-Link OneMesh router via any method, the extender will automatically join the router’s OneMesh network and copy the router’s wireless settings. You can manage all mesh devices in the OneMesh network all on your router’s web page.
-
Page 35: Chapter 4 Tp-Link Cloud Service
TP-Link Cloud service provides a better way to manage your cloud devices. Log in to your cloud device with a TP-Link ID, and you can easily monitor and manage your home network when you are out and about via the Tether app on your smartphone or tablet.
-
Page 36: Register A Tp-Link Id
Manage the User TP-Link IDs. • Once you have registered a TP-Link ID on the web management page, you can only register another TP-Link ID via the Tether APP. Please refer to Manage the Extender via the TP-Link Tether App to install the app and register a new one.
-
Page 37: Manage The User Tp-Link Ids
Password. 2. Enter the current password, then a new password twice. And click Save. Manage the User TP-Link IDs The TP-Link ID used to log in to the extender for the first time will be automatically bound as the Admin account.
-
Page 38: Add Tp-Link Id To Manage The Extender
3. Click , enter another TP-Link ID as needed and click Save. Note: If you need another TP-Link ID, please register a new one via the Tether app. Please refer to Manage the Extender via the TP-Link Tether App to install the app and register a new TP-Link ID.
-
Page 39: Manage The Extender Via The Tp-Link Tether App
QR code to download and install the app. 2. Connect your device to the extender’s or host router’s wireless network. 3. Launch the Tether app, select the model of your extender and log in with your TP-Link ID or the password your set for the extender.
-
Page 40: Chapter 5 Customize Your Network
Chapter Customize Your Network This chapter guides you on how to configure network settings that are available for this extender. It contains the following sections: • Check Internet Status • Configure Wireless Network • Change LAN Settings • Adjust Wi-Fi Coverage •…
-
Page 41: Check Internet Status
Chapter 5 Customize Your Network Check Internet Status You can view the internet status of your extender to check whether you have successfully set up the extended network(s). 1. Visit http://tplinkrepeater.net, and log in with the password you set for the extender. 2.
-
Page 42: Configure Wireless Network
Chapter 5 Customize Your Network Configure Wireless Network If you want to extend another host network after Quick Setup, you can refer to this section. Moreover, you can change the wireless settings for your extended networks. Tips: If the extender is in your router’s OneMesh network, it will automatically copy wireless settings from your router. No wireless settings is needed for the extender.
-
Page 43: Change Lan Settings
Chapter 5 Customize Your Network 5. Click Save. ¾ To enable or disable the extended network: 1. Go to Settings > Wireless > Extended Network. 2. Extended networks are enabled by default. If you want to disable the wireless function of a certain band, just clear the Enable checkbox.
-
Page 44: Adjust Wi-Fi Coverage
Chapter 5 Customize Your Network 7. Click Save. Adjust Wi-Fi Coverage You can set the extender’s Wi-Fi coverage depending on how large you want your Wi-Fi area to be. 1. Visit http://tplinkrepeater.net and log in with the password you set for the extender. 2.
-
Page 45: Set Access Control
Chapter 5 Customize Your Network 4. Click Save. Set Access Control Access Control allows you to permit or block specific devices from accessing the internet for a specific period. Tips: If the extender is in your router’s OneMesh network, it will automatically copy access control settings from your router. No access control settings is needed for the extender.
-
Page 46
Chapter 5 Customize Your Network 5. Click OK. ¾ To permit specific device(s): 1. Select Whitelist and click Save. 2. Click in the Devices in Whitelist table. Enter the Device Name Address. And you can set the Effective Time for a certain entry as needed. 3. -
Page 47: Set High Speed Mode
Chapter 5 Customize Your Network Set High Speed Mode The High Speed feature switches off one of the wireless bands to leave one high- performance, super-fast network, ideal for HD streaming and gaming applications. If most of your devices are connected to one wireless band, this feature can increase the overall performance of your wireless network.
-
Page 48: Chapter 6 Manage Your Extender
Chapter Manage Your Extender This chapter presents how to manage and maintain your extender. It includes the following sections: • Set System Time • Control LEDs • Set Power Schedule • Upgrade the Firmware • Backup and Restore Configuration Settings •…
-
Page 49: Set System Time
Chapter 6 Manage Your Extender Set System Time The System Time of the extender will be used for time-based function such as the Power Schedule function. If you have enabled the Daylight Saving Time feature, the system time will be sychronized with the daylight saving time you configure. 1.
-
Page 50: Set Power Schedule
Chapter 6 Manage Your Extender 2. Go to Settings > System Tools > Control. ¾ To turn off the LEDs: Disable Status. ¾ To specify a time period when LEDs are off: 1. Select Night Mode. 2. Specify the LED off time period. 3.
-
Page 51: Upgrade The Firmware
Chapter 6 Manage Your Extender 3. Click Save. Upgrade the Firmware TP-Link is committed to improving product features, giving you a better network experience. You can download the latest firmware file from the Support page at our website www.tp-link.com and upgrade the extender to the latest firmware version.
-
Page 52: Backup And Restore Configuration Settings
Chapter 6 Manage Your Extender 5. Wait a few minutes for the firmware upgrade to complete and the extender to reboot. Backup and Restore Configuration Settings The configuration settings are stored as a configuration file in the extender. You can backup the configuration file and restore the extender to the previous settings from the backup file when needed.
-
Page 53: Change Login Password
Chapter 6 Manage Your Extender 1. Click Factory Restore to reset the extender. 2. Wait a few minutes for the reset and reboot. Note: 1. During the reset process, do not power off or reset the extender. 2. We strongly recommend you backup the current configuration settings before resetting the extender. Change Login Password The account management feature allows you to change your login username and password of the web management webpage.
-
Page 54
Chapter 6 Manage Your Extender… -
Page 55: Faq
Q1 How to reset the extender to its factory default settings? • With the extender powered on, use a pin to press the Reset button for 1 second. The extender will reboot. • Log in to the extender’s web management page. Go to Settings >…
-
Page 56
1. Log in to your router and disable the MAC filter, wireless access control or ACL. Note: For more information about how to disable your router’s MAC filter, wireless access control or ACL, please refer to your router’s user guide. 2. -
Page 57
Specifications are subject to change without notice. is a registered trademark of TP-Link Technologies Co., Ltd. Other brands and product names are trademarks or registered trademarks of their respective holders. No part of the specifications may be reproduced in any form or by any means or used to make any derivative such as translation, transformation, or adaptation without permission from TP-Link Technologies Co., Ltd. -
Page 58
FCC compliance information statement Product Name: AC1200 Wi-Fi Range Extender Model Number: RE300 Responsible Party: TP-Link USA Corporation, d/b/a TP-Link North America, Inc. Address: 145 South State College Blvd. Suite 400, Brea, CA 92821 Website: http://www.tp-link.com/us/ Tel: +1 626 333 0234 Fax: +1 909 527 6803 E-mail: sales.usa@tp-link.com… -
Page 59
This device is restricted in indoor environment only. We, TP-Link USA Corporation, has determined that the equipment shown as above has been shown to comply with the applicable technical standards, FCC part 15. There is no unauthorized change is made in the equipment and the equipment is properly maintained and operated. -
Page 60
5470 MHz -5725 MHz (30dBm) EU Declaration of Conformity TP-Link hereby declares that the device is in compliance with the essential requirements and other relevant provisions of directives 2014/53/EU, 2009/125/EC and 2011/65/EU. The original EU declaration of conformity may be found at http://www.tp-link.com/en/ce RF Exposure Information This device meets the EU requirements (2014/53/EU Article 3.1a) on the limitation of… -
Page 61
DFS (Dynamic Frequency Selection) products that operate in the bands 5250- 5350 MHz, 5470-5600MHz, and 5650-5725MHz. Avertissement: 1. Le dispositif fonctionnant dans la bande 5150-5250 MHz est réservé uniquement pour une utilisation à l’intérieur afin de réduire les risques de brouillage préjudiciable aux systèmes de satellites mobiles utilisant les mêmes canaux;… -
Page 62
於5.25GHz至5.35GHz區域內操作之無線設備的警告聲明 工作頻率5.250~5.350GHz該頻段限於室內使用。 安全諮詢及注意事項 • 請使用原裝電源供應器或只能按照本產品注明的電源類型使用本產品。 • 清潔本產品之前請先拔掉電源線。請勿使用液體、噴霧清潔劑或濕布進行清潔。 • 注意防潮,請勿將水或其他液體潑灑到本產品上。 • 插槽與開口供通風使用,以確保本產品的操作可靠並防止過熱,請勿堵塞或覆蓋 開口。 • 請勿將本產品置放於靠近熱源的地方。除非有正常的通風,否則不可放在密閉位 置中。 • 請不要私自打開機殼,不要嘗試自行維修本產品,請由授權的專業人士進行此項 工作。 限用物質含有情況標示聲明書 限用物質及其化學符號 鉛 鎘 汞 六價鉻 多溴聯苯 多溴二苯醚 產品元件名 CrVI PBDE 稱 ○ ○ ○ ○ ○ ○ 外殼 ○ ○ ○ ○… -
Page 63
Please read and follow the above safety information when operating the device. We cannot guarantee that no accidents or damage will occur due to improper use of the device. Please use this product with care and operate at your own risk. This product can be used in the following countries: Explanations of the symbols on the product label Symbol…
Посмотреть инструкция для TP-Link Deco M3W бесплатно. Руководство относится к категории wi-fi ретрансляторы, 1 человек(а) дали ему среднюю оценку 7.5. Руководство доступно на следующих языках: английский. У вас есть вопрос о TP-Link Deco M3W или вам нужна помощь? Задайте свой вопрос здесь
Не можете найти ответ на свой вопрос в руководстве? Вы можете найти ответ на свой вопрос ниже, в разделе часто задаваемых вопросов о TP-Link Deco M3W.
В чем разница между роутером и модемом?
От чего зависит скорость загрузки в Интернете?
Вредно ли Wi-Fi-излучение?
Какие сертификаты TP-Link Deco M3W имеет?
Какая высота TP-Link Deco M3W?
Какая ширина TP-Link Deco M3W?
Какая толщина TP-Link Deco M3W?
Инструкция TP-Link Deco M3W доступно в русский?
Не нашли свой вопрос? Задайте свой вопрос здесь
На чтение 5 мин Просмотров 35.5к. Опубликовано 6 ноября 2019
Обновлено 19 мая 2023
В одной из прошлых статей мы познакомились с mesh системами TP-Link на примере модели E4 из серии Deco. Сегодня хочу дать вам подробную инструкцию по подключению ее к роутеру или интернету и настройке wifi сети с бесшовным роумингом. Сразу оговорюсь, что данное руководство универсальное и подойдет для всех моделей mesh систем TP-Link Deco — m4, m5, e3, m9, m9 plus и других.
Подключение к интернету mesh системы TP-Link Deco
Для настройки mesh системы TP-Link Deco не требуется подключать ее к компьютеру по кабелю. Для того, чтобы выполнить первоначальную конфигурацию, потребуется всего лишь мобильный телефон с установленным на него фирменным приложением. Его можно скачать по QR коду, указанному на упаковке. Сканируем и устанавливаем.

После этого подключаем оба модуля Deco к электророзетке. А также в любой из них в порт «1» вставляем кабель от интернет-провайдера или соединяем проводом из комплекта с основным wifi роутером, если вы хотите расширить уже существующую сеть.
Теперь полностью погрузимся в мобильное приложение «Deco». На стартовой странице нам предлагается зарегистрировать новую учетную запись в облачном сервисе TP-Link ID. У меня она уже есть, так как я настраивал ранее удаленный доступ к одному из роутеров данной фирмы, а значит достаточно просто авторизоваться.
После входа в личный кабинет жмем на кнопку «Приступим» и выбираем свою модель mesh системы из серии Deco. У меня E4 — последняя в списке.
Далее нас просят проверить подключение устройств и их готовность к работе
Если индикатор мигает синим цветом, то система готова к настройке и начала ретранслировать свой собственный сигнал wifi
![]()
Нам необходимо в настройках телефона подключиться к этой сети, которая имеет называние «Deco_XXXX». Пароль не требуется.
Далее назначаем месторасоположение данной точки доступа, чтобы впоследствии при подключении нескольких модулей было легче среди них ориентироваться.
На следующей странице выбираем тип соединения с интернетом. Если вы подключили к mesh системе кабель от провайдера, то необходимо узнать его, а также все данные для коннекта у поставщика услуг. Также при необходимости вручную прописываем MAC адрес, если он привязан к вашему аккаунту у провайдера.
Если же вы подключаете Deco к другому маршрутизатору, на котором уже настроен интернет, то оставляем «Динамический IP»
После этого задаем имя и пароль для новой беспроводной сети
На этом настройка первой точки завершена. Теперь нужно дождаться ее перезагрузки для применения всех данных и подключиться к новой WiFi сети от нее.
На этом этапе необходимо включить на телефоне Bluetooth, так как поиск последующих модулей будет происходить именно с помощью этого вида соединения. При этом отключаться от созданной wifi сети на первом устройстве нельзя.
После чего можно установить вторую Deco из комплекта. Для этого жмем на соответствующую кнопку в приложении и ждем, пока она обнаружится. И далее выбираем то место в доме, где она будет установлена
И далее — выбор комнаты, где она будет работать
На последнем шаге жмем на «Закончим на этом»
Что, если интернет на TP-Link Deco не работает?
Иногда в процессе настройки mesh системы Deco E4 может возникнуть ошибка подключения к интернету.
В том случае, если вы соединились через дополнительный роутер, к которому идет кабель от провайдера, то рекомендуется проверить доступность для работы LAN порта, через который вы подключили mesh систему. Он не должен быть зарезервирован для IPTV или VoIP. Проверить это можно в настройках маршрутизатора, либо просто переставить кабель в другой разъем.
Настройка бесшовного wifi роуминга на mesh системе TP-Link Deco E4
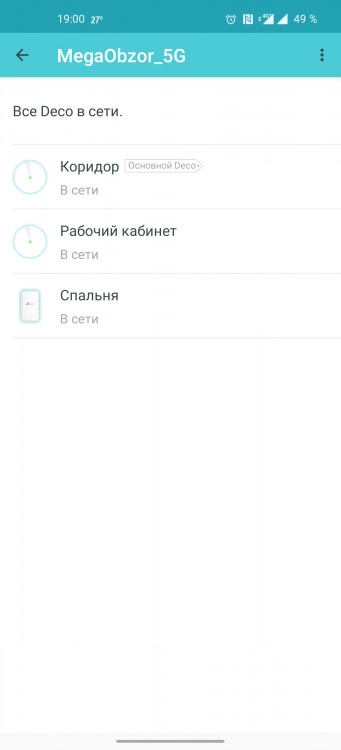
Переходим к настройке быстрого роуминга внутри wifi сети TP-Link Deco E4 (его еще называют бесшовным или fast roaming). На главном экране панели управления mesh системой отображаются подключенные в текущий момент к wifi устройства с информацией о входящем и исходящем на них трафике. Для входа в детальные настройки необходимо перейти на вкладку «Еще».
Попадаем в подробное меню. Давайте пройдемся по основным пунктам.
- WiFi — здесь можно поменять параметры для подключения, которые мы только что задали (SSID и пароль)

- Черный список — в данном разделе есть возможность добавить устройства, которым будет запрещено подключение к вашей сети. Доступно как выбрать из уже когда-либо подключавшихся девайсов, так и добавить новый по их MAC адресу

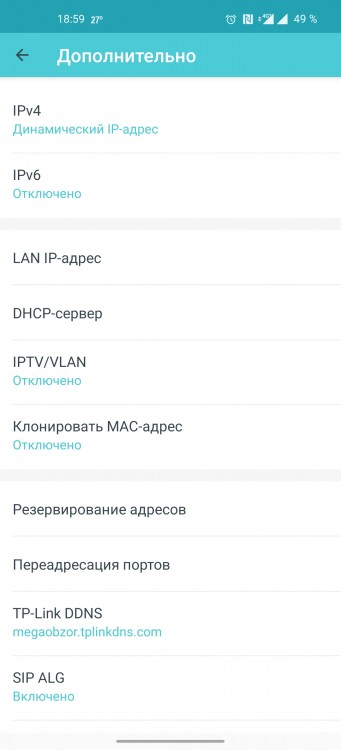
- Дополнительно — вспомогательные параметры, в которые редко кто вообще будет заглядывать, однако в некоторых случаях их наличие может быть весьма полезно. Это служба DDNS, резервирование адресов, переадресация портов VLAN, IPv4 и IPv6
- Уведомления — включение или деактивация всплывающих подсказок на смартфоне от приложения Deco. Таких как появления в сети новых устройств или обновление прошивки.
- Родительский контроль позволяет создать несколько профилей для разных групп пользователей с разным уровнем доступа к интернету.
Также для каждого предустановленного набора можно добавить или убрать стандартные компоненты
В дополнение ко всему, внести запрещенные для посещения веб-ресурсы можно вручную, указав их URL-адреса в интернете
Видео по настройке бесшовной mesh сети TP-Link Deco
Актуальные предложения:
Задать вопрос
- 10 лет занимается подключением и настройкой беспроводных систем
- Выпускник образовательного центра при МГТУ им. Баумана по специальностям «Сетевые операционные системы Wi-Fi», «Техническое обслуживание компьютеров», «IP-видеонаблюдение»
- Автор видеокурса «Все секреты Wi-Fi»
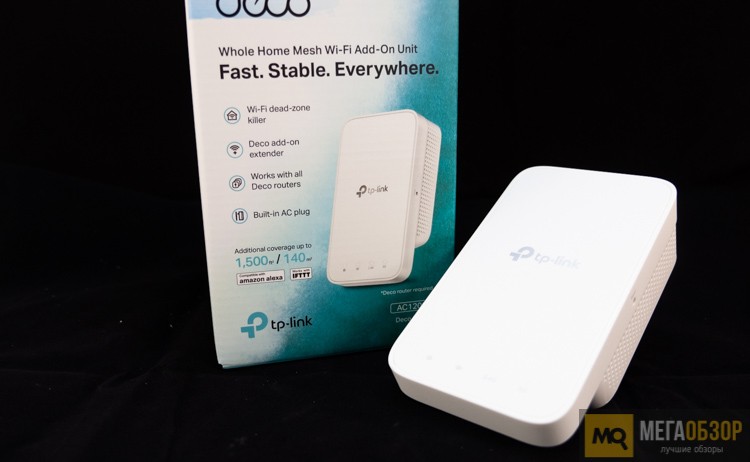
В рамках «Лаборатории» мы уже проводили тестирование MESH систем от TP-LINK. Это были решения разных ценовых сегментов, от базовых комплектов до интересных вариантов с интеграцией технологии Powerline. Все эти системы объединяла возможность расширения системы с помощью дополнительных модулей, причем они все совместимы между собой. Сегодня мы рассмотрим самый доступный вариант в семействе Deco, это TP-LINK Deco M3W.
Его средняя стоимость на момент публикации составляет 2 490 рублей. Мы собрали актуальные предложения в российских магазинах в таблице, составленной на основе данных сервиса Яндекс.Маркет.
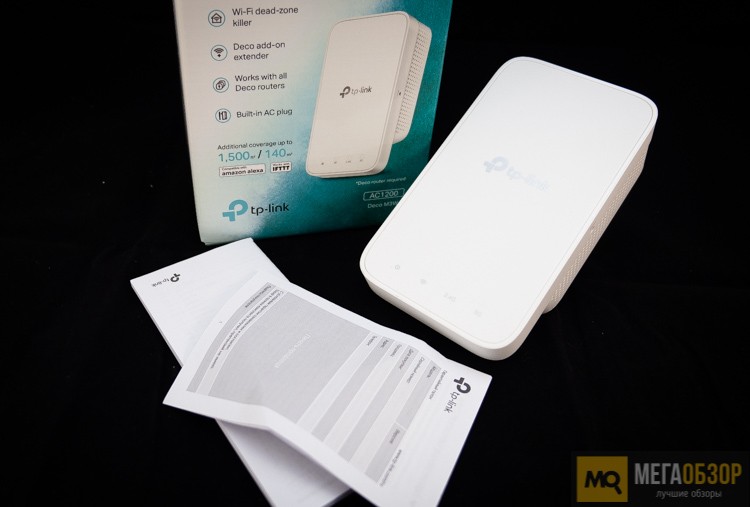
Комплектация
Упакован в коробку из плотного картона. На обратной стороне приведены подробные технические характеристики. Комплект включает только техническую документацию.
Внешний вид
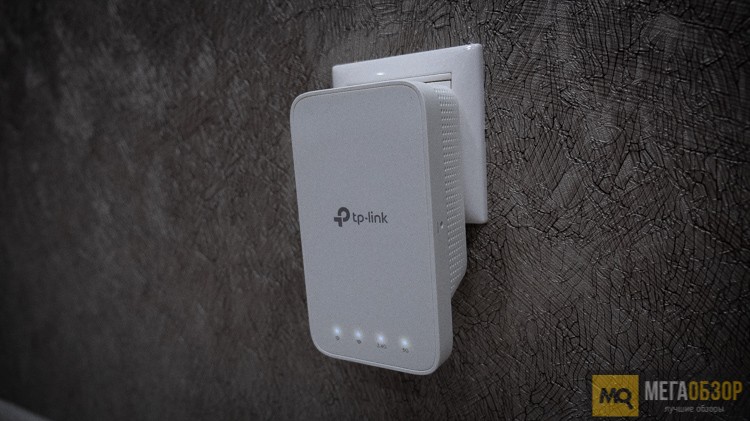
Модуль выполнен из белоснежного пластика. В отличие от основных вариантов исполнения в семействе Deco, он не может выступать самостоятельным роутером. Работает только в качестве дополнения.
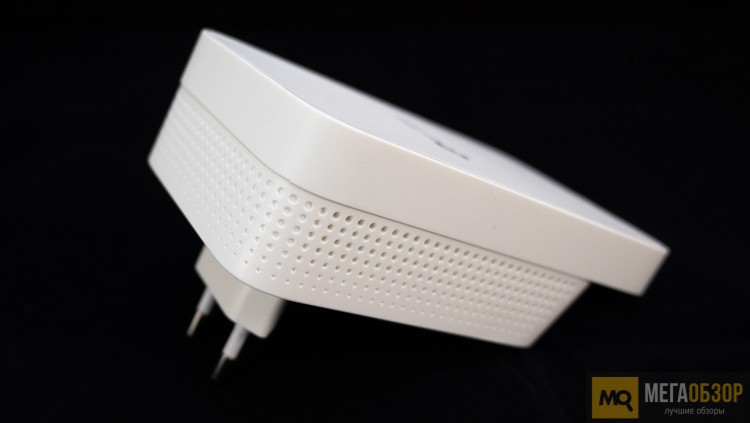
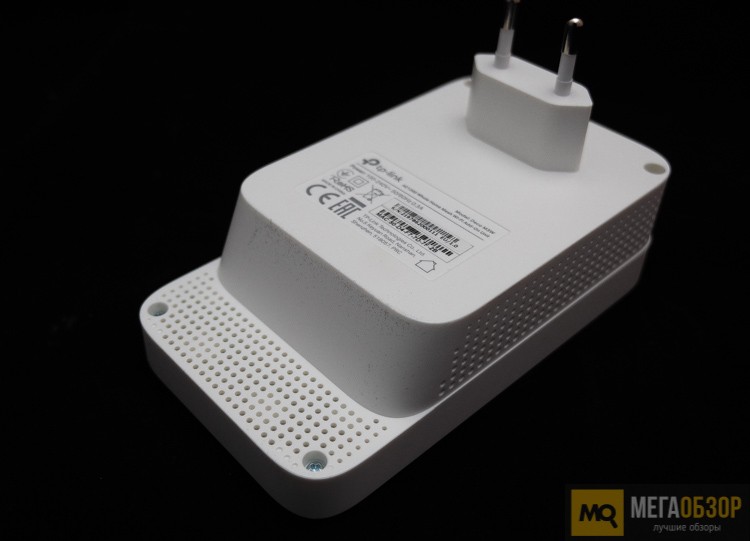
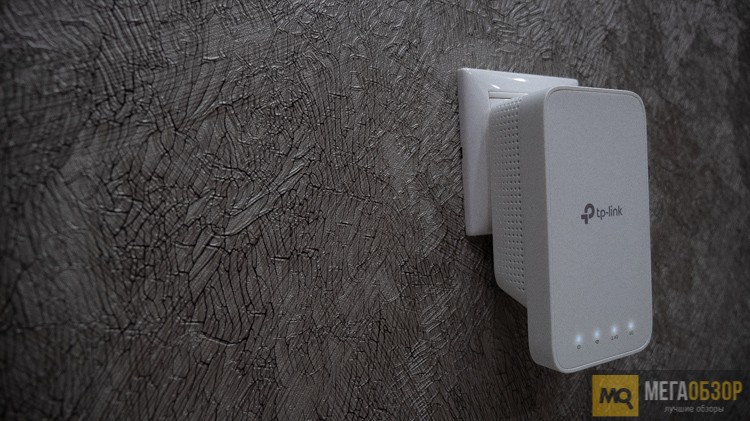
Блок устанавливается в евророзетку. Из-за особенностей будет перекрывать ниже расположенную розетку.
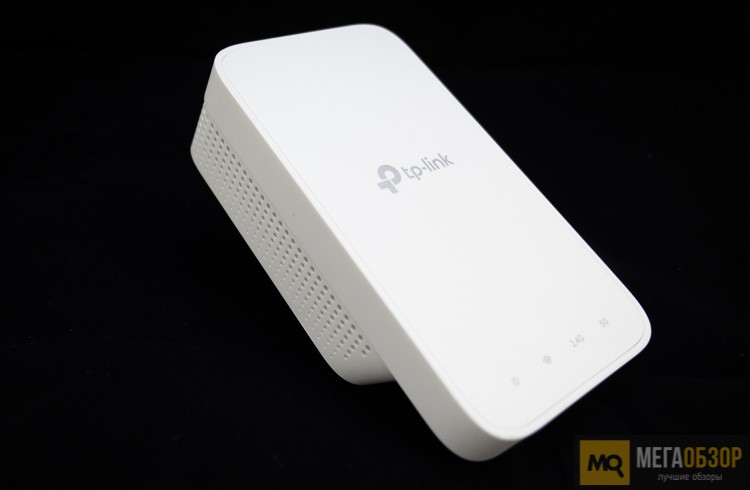
Сам внешний вид у нее простой и лаконичный. Внимание к себе не привлекает. Подойдет под любой интерьер. Выглядит, как элемент самой розетки.
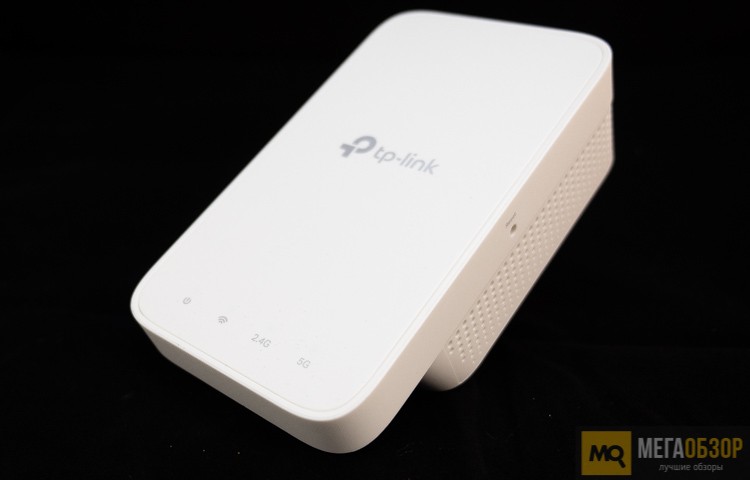
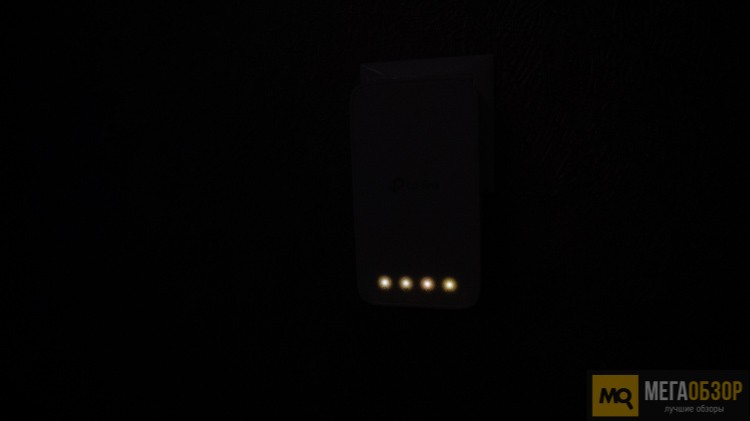
На нижней грани расположена группа из четырех светодиодов, отображающих рабочий статус. Рядом с каждым нанесена соответствующая маркировка.
Сбоку у TP-LINK Deco M3W вентиляционная решетка. На основании нанесена наклейка с техническими данными. Есть скрытая кнопка сброса настроек.
Софт
Для управления используется общее приложение Deco. От пользователя потребуется в пару кликов добавить устройство в уже созданную ранее связку из MESH устройств. Сам процесс простой, проходит без затруднений.
В дальнейшем выводится в общем списке используемых устройств. Есть возможность просмотреть IP и MAC-адрес.
Используются общие настройки сети. Каких-либо отдельных опций для него не предусмотрено.

Тесты
В нашем сценарии необходимость в модуле появилась в отдаленной комнате для улучшения качества покрытия и стабильности подключения для устройств умного дома. Добавлен к паре TP-LINK Deco P7.
С поставленной задачей справился. Связь стабильная и уверенная. Выделить в рамках квартиры только один из модулей проблематично.
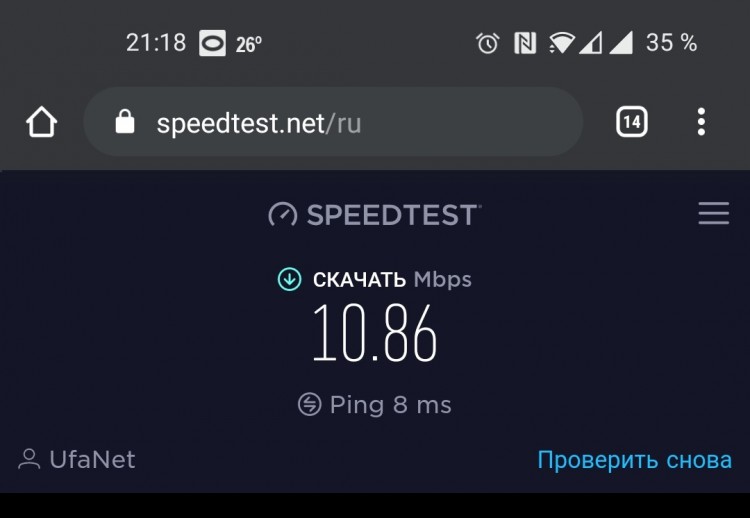
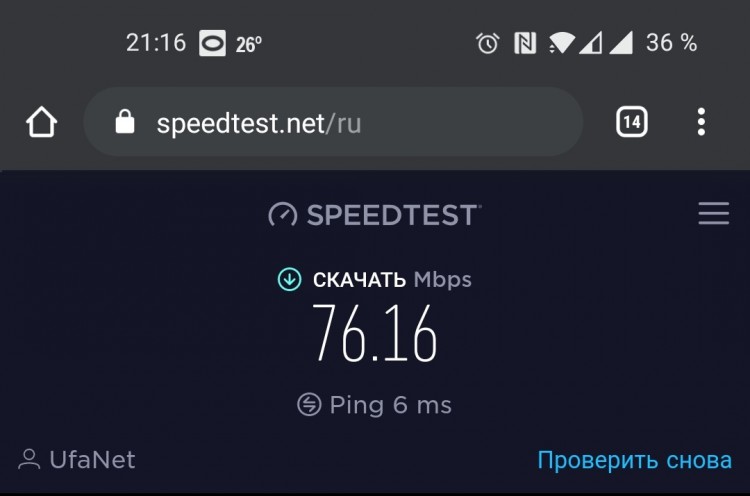
Провели замеры скорости в следующих точках:
Комната с основной точкой
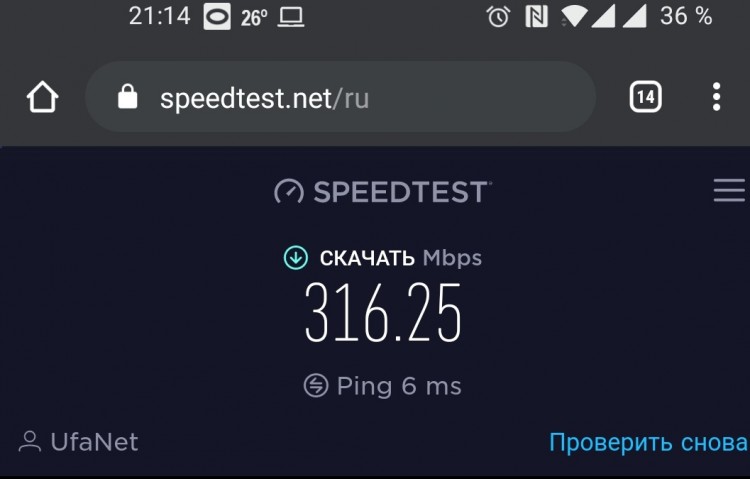
Дальная комната с несколькими железобетонными стенами
После установки TP-LINK Deco M3W
Итоги по TP-LINK Deco M3W
 TP-LINK Deco M3W – недорогой вариант для расширения покрытия созданной MESH-сети на основе одного из роутеров из семейства Deco. Простой запуск, аккуратный внешний вид, отсутствие необходимости разбираться с настройками в последующем. Работает в единой бесшовной сети. Из особенностей отметим отсутствие LAN-разъемов.
TP-LINK Deco M3W получает заслуженную награду «Золото. Выбор редакции MegaObzor.com».