Hide thumbs
Also See for TRAKTOR KONTROL S4:
- Manual (85 pages)
-
Contents
-
Table of Contents
-
Bookmarks
Quick Links
Related Manuals for Native Instruments TRAKTOR KONTROL S4
Summary of Contents for Native Instruments TRAKTOR KONTROL S4
-
Page 2: Table Of Contents
Table of Contents 1. Disclaimer ……………………1 2. Welcome to TRAKTOR KONTROL S4 …………….. 2 2.1. Document Conventions ………………2 2.2. Documentation Resources …………….3 2.3. In this Document ………………..3 3. Concepts ……………………4 3.1. S4 and TRAKTOR Control Concept …………..4 3.2.
-
Page 3
9. Integrating External Devices ………………79 9.1. Integrating Microphone ………………. 79 9.2. Integrating Turntable ………………80 9.3. Integrating CD Players ………………81 9.4. Enabling Scratch Function in TRAKTOR …………81 10. Setting the TRAKTOR KONTROL S4 as Your Default Audio Interface ……83… -
Page 4: Disclaimer
The information in this document is subject to change without notice and does not represent a commitment on the part of Native Instruments GmbH. The software described by this document is subject to a License Agreement and may not be copied to other media. No part of this publication may be copied, reproduced or otherwise transmitted or recorded, for any purpose, without prior written permission by Native Instruments GmbH, hereinafter referred to as Native Instruments.
-
Page 5: Welcome To Traktor Kontrol S4
Welcome to TRAKTOR KONTROL S4 2. WELCOME TO TRAKTOR KONTROL S4 Thank you for choosing TRAKTOR KONTROL S4, it is because of customers like you that we can continue developing groundbreaking music software and hardware. TRAKTOR KONTROL S4 is a fully integrated hardware and software DJ performance system.
-
Page 6: Documentation Resources
• TRAKTOR PRO 3 Manual: For in-depth information on all features provided by the TRAKTOR software, refer to the TRAKTOR PRO 3 Manual. 2.3. In this Document What you are reading now is the TRAKTOR KONTROL S4 Manual. This manual is structured as follows: •…
-
Page 7: Concepts
Concepts 3. CONCEPTS In this section you are briefly introduced to the main concepts of the TRAKTOR KONTROL S4 and some basic concepts of the TRAKTOR software. 3.1. S4 and TRAKTOR Control Concept This section quickly introduces the main areas and concepts of your TRAKTOR KONTROL S4 hardware controller with reference to the TRAKTOR PRO software.
-
Page 8: Haptic Drive Modes
Concepts 3.2. Haptic Drive Modes You can operate the Jog Wheels on the S4 in three different modes, called HAPTIC DRIVE MODEs. Each HAPTIC DRIVE MODE provides you with different control functions for the Jog Wheels. • JOG mode: The JOG mode lets you control the playback of your tracks by spinning the Jog Wheel.
-
Page 9: Automatic Track Synchronization
Concepts STEMS mode is available only for STEM Decks. On the S4 Decks A and B the STEMS button lights up blue whereas on the S4 Decks C and D the STEMS button lights up orange. For more Information, refer to Playing with STEM Decks.
-
Page 10: Snap Mode And Quantize Mode
Concepts 3.6. Snap Mode and Quantize Mode Snap mode and Quantize mode are important tools that can help you when working with Cue Points and Loops, and for jumping in the track: • The Snap mode ensures that any Loop or Cue Point you set in a track snaps to the closest beat.
-
Page 11: Setting Up Traktor Kontrol S4
Registering and Installing a Native Instruments Product using NATIVE ACCESS. This section describes how to set up the TRAKTOR KONTROL S4. When all devices are connec- ted your setup will look like the following illustration: TRAKTOR KONTROL S4 setup.
-
Page 12: Connecting An Amplification System
Setting up TRAKTOR KONTROL S4 4.2. Connecting an Amplification System To connect your power amplifier system to the TRAKTOR KONTROL S4: • Connect the MAIN OUT XLR or RCA outputs on the rear panel of the TRAKTOR KONTROL S4 to the inputs of your amplification system using the appropriate cables.
-
Page 13: Connecting Headphones
Setting up TRAKTOR KONTROL S4 • Connect the BOOTH OUT outputs on the rear panel of the TRAKTOR KONTROL S4 to the inputs of your monitoring system using appropriate cables. 4.4. Connecting Headphones To connect headphones to the TRAKTOR KONTROL S4: •…
-
Page 14: Final Preparation
Setting up TRAKTOR KONTROL S4 4.6. Final Preparation After successfully setting up the TRAKTOR KONTROL S4 system, you need to prepare final steps before you can start using you S4. At first you switch on your devices and then you configure TRAKTOR to be used with you S4.
-
Page 15
Setting up TRAKTOR KONTROL S4 Switching to TRAKTOR Default Settings When you start TRAKTOR with the S4 for the first time, TRAKTOR asks if you want to switch Mix- er FX selection and the Tempo fader range to default setting. This is necessary to get the intended user experience of your S4: TRAKTOR alert for switching Mixer FX and TEMPO fader range to default settings. -
Page 16: Importing Music To The Track Collection
Setting up TRAKTOR KONTROL S4 4.7. Importing Music to the Track Collection The most convenient way to get your tracks into TRAKTOR’s Track Collection is using drag and drop: • Drag the music files from the location on your computer and drop them in the Track Collec- tion folder in TRAKTOR’s Browser Tree.
-
Page 17: Traktor Kontrol S4 Overview
TRAKTOR KONTROL S4 Overview 5. TRAKTOR KONTROL S4 OVERVIEW This section introduces you to the TRAKTOR KONTROL S4 and all its control elements and con- nectors. TRAKTOR KONTROL S4 Overview. (1) Decks: You can use the Decks to control tracks and Samples, similar to DJ turntables or CD players but with additional features.
-
Page 18
TRAKTOR KONTROL S4 Overview (3) FX Units: You can further process the signals in the Mixer channels by using the two FX Units located at the top-left and top-right on your S4 and in the software interface. The FX Units give you access to a collection of high-quality effects included in TRAKTOR. -
Page 19: Decks
TRAKTOR KONTROL S4 Overview 5.1. Decks TRAKTOR KONTROL S4 provides you with two physical Decks to control the TRAKTOR Decks. Each Deck provides you with the following control elements: S4 Deck. (1) Browse controls: Allow you to scroll through the Track Collection to find and load tracks, as well as previewing tracks and preparing playlists.
-
Page 20
TRAKTOR KONTROL S4 Overview (4) SYNC (Lock): Syncs the Deck to the Tempo Master. Using SHIFT and SYNC (Lock) locks the TEMPO fader for the Deck. For more information, refer to Adjusting Tempo Locking the Key of Tracks. (5) TEMPO fader: Lets you manually adjust the track tempo on that Deck. The TEMPO fader can be operated in Absolute mode and in Relative mode. -
Page 21: Browse Controls
TRAKTOR KONTROL S4 Overview (19) FX Unit: The FX Units allow you to control the effect parameters in the FX Units in the TRAK- TOR software. Each Deck features one FX Unit which can be assigned to any Mixer channel. FX Unit 1 is located on the left Deck, and FX Unit 2 on the right Deck.
-
Page 22
TRAKTOR KONTROL S4 Overview Pad section. (1) HOTCUES button: Enables HOTCUES mode. In this mode, you can store and trigger Cue Points and Loops within tracks using the Pads. On Decks A and B the HOTCUES button lights up blue whereas on Decks C and D the HOTCUES button lights up orange. The HOTCUES mode is the default mode for Track Decks and STEM Decks. -
Page 23: Display Elements For Tracks And Stem Files
TRAKTOR KONTROL S4 Overview 5.1.3. Display Elements for Tracks and STEM Files When the HOTCUES mode or the STEMS mode is enabled, the display contains the following ele- ments: Display elements for tracks and STEM Files. (1) Track title: Displays the title of the loaded track or STEM File.
-
Page 24: Mixer
Decks. 5.2. Mixer Sitting in the middle of the TRAKTOR KONTROL S4 controller, the Mixer receives the audio sig- nals coming from Decks. There is one channel for each Deck. The Mixer’s purpose is to adjust the relative level of each channel, to control the mixer channels’ frequency content, possibly feeding them into the FX Units before sending the overall result to the Master output, and in the end, to generate the mix that is sent to your audience.
-
Page 25
TRAKTOR KONTROL S4 Overview (2) MASTER knob: Adjusts the MASTER signal level. For more information, refer to Adjusting Levels. (3) QUANT (Snap) button: Allows you to enable or disable Quantize mode and Snap mode. For more information, refer to Snap Mode and Quantize Mode. -
Page 26: Mixer Channel
TRAKTOR KONTROL S4 Overview 5.2.1. Mixer Channel The Mixer channels receive the individual audio signals from the Decks. Each Mixer channel con- tains controls to adjust the incoming and outgoing levels, and the audio signal’s frequency con- tent. Any of the four Mixer channels can integrate different external sources. Whereas Mixer chan- nels A and B are equipped with an additional PHONO pre-amplifier for connecting turntables, Mix- er channels C and D integrate microphones instead.
-
Page 27: Fx Unit
TRAKTOR KONTROL S4 Overview (6) MIXER FX Amount knob: The MIXER FX Amount knob controls the amount of the MIXER FX to be applied to the audio signal. In center position the MIXER FX is disabled for the individual Mixer channel. For more information, refer to Playing with MIXER Effects.
-
Page 28: Front Panel View
TRAKTOR KONTROL S4 Overview 5.4. Front Panel View The front panel hosts controls for assigning the Mixer channels to the crossfader, and sockets for connecting headphones and a microphone. Front panel. (1) Crossfader Curve selector: Selects the curve which lets the audio signals fade in and out when moving the crossfader from one side to the other.
-
Page 29
(11) USB HUB: Connects a USB device, for example, another TRAKTOR controller or a USB-Hub. (12) USB socket: Connects your S4 to the computer using the supplied USB cable. (13) PSU socket: Connects the supplied Native Instruments Power Supply to the S4. (14) Power switch: Switches the S4 on or off. -
Page 30: Mixing Your First Tracks
Mixing Your First Tracks 6. MIXING YOUR FIRST TRACKS In this section you will learn to mix your first two tracks, using Deck A and Deck B, with the SYNC function. For this method, you will not need to use the Jog Wheels or your headphones. At first you will prepare the Mixer by adjusting the control elements for mixing tracks between Deck A to Deck B.
-
Page 31: Loading The First Track Into Deck A
Press the VIEW button to maximize the Browser view in the software. Turn the Browse encoder to select one of your tracks in the Track List, or a demo track, for example, Berlin Hauptbahnhof by Native Instruments. Press the Browse encoder to load the selected track into that Deck.
-
Page 32: Starting Playback Of Deck A
Mixing Your First Tracks TRAKTOR now analyzes the track to determine its tempo, and to create the Beatgrid and the Waveform. Press the VIEW button again to minimize the Browser view in the software. 6.3. Starting Playback of Deck A To start playback on Deck A: Press the Play/Pause button on the left S4 Deck.
-
Page 33
Press the VIEW button to maximize the Browse view in the software. Turn the Browse encoder to select one of your tracks in the Track List, or a demo track, for example, Lisa by Native Instruments. Press the Browse encoder to load the track into the Deck. -
Page 34: Syncing The Track Tempos
Mixing Your First Tracks Press the VIEW button again to minimize the Browser view in the software. 6.5. Syncing the Track Tempos In order to sync the tempos of both tracks: • Press the SYNC (Lock) button on the right S4 Deck. The tempo of the track in Deck B is now synced to the running track, indicated by the equal tempo value in the software’s Deck Header.
-
Page 35
Mixing Your First Tracks The audio signal of the track in Mixer channel B fades into the Master signal. While the track in Deck A reaches its end, slowly move the crossfader towards the right-most position. The audio signal of Mixer channel A slowly fades out of the Master signal. Only Mixer chan- nel B is now audible. -
Page 36: Tutorials
Tutorials 7. TUTORIALS The tutorials in this section introduces you to the several functions and features of the S4. The fol- lowing list provides you with an overview of the tutorials including the link to it: • Browsing and Loading Tracks: By having your music imported in TRAKTOR, you can use the Browse controls on the S4 to find tracks for your mix.
-
Page 37: Browsing And Loading
Tutorials you to preview your tracks and your sound adjustments before you transition to the next track. For more information, refer Previewing Tracks in the Browser, and Using CUE Channel. • Working with the Preparation List: TRAKTOR’s Browser allows you to prepare for your next mix.
-
Page 38: Controlling Playback
Tutorials Press and hold the Star button + turn the Browse encoder to select another favorite folder. The Track List shows the content according to the selected folder. Loading the Track into the Deck To load the selected track into the Deck: •…
-
Page 39: Using Transport Controls
Tutorials 7.2.1. Using Transport Controls The Transport Controls let you start and pause playback as well as cue the track. Starting/Pausing Playback To start the playback of the loaded track: • Press the Play/Pause button. To pause the playback: • Press the Play/Pause button again.
-
Page 40
Tutorials Enabling JOG Mode To enable JOG mode: • Press the JOG button on the Deck. The JOG button brightly lights up in the color of the focused Deck. Tempo Bending and Nudging You can use the Jog Wheel to manually correct the sync of tracks by bending or nudging the Deck tempo. -
Page 41
Tutorials If you select the option Ticks when Nudging in the Preferences, you then feel ticks in the Jog Wheel when spinning it using its outer rim. This option applies only for JOG mode. For more information, refer to Preferences. Cueing and Scratching You can hold the track playback with the Jog Wheel to cue a beat or to scratch: Touch and hold the top plate of the Jog Wheel. -
Page 42
Tutorials While holding the top plate, spin the Jog Wheel back and forth to perform a scratch. If you select the option Enable Haptic Hotcues Preferences, you then feel haptic feedback in the Jog Wheel when cuing Cue Points and Loop markers while touching the top plate. -
Page 43: Using Jog Wheels In Turntable Mode
Tutorials Disabling the Top Plate’s Touch-Sensitivity You can disable the touch-sensitivity of the top plate for the JOG mode. This enables you to also use the top plate to bend or nudge the track tempo. To disable the touch-sensitivity: • Press the JOG button.
-
Page 44
Tutorials In the Preferences you can adjust the Base speed for the Jog wheels. For more information, refer to Preferences. Enabling Turntable Mode To enable Turntable mode: • Press the TT button on that Deck. The TT button brightly lights up in the color of the focused Deck. Tempo Bending and Nudging During Deck playback you can use the Jog Wheel to temporarily bend or to nudge the Deck tem- po. -
Page 45
Tutorials Cueing, Seeking and Scratching You can use the Jog Wheel to cue a beat or to scratch: Touch and hold the top plate of the Jog Wheel. The Jog Wheel stops to rotate and and the playback is held. While holding the top plate, spin the Jog Wheel clockwise or counterclockwise to cue a beat or to seek in the track. -
Page 46: Assigning Mixer Channels To The Crossfader
Tutorials While holding the top plate, quickly spin the Jog Wheel back and forth for scratching the track. When you release the top plate, the Jog Wheel continues to rotate and the Deck playback continues. By enabling the option Enable Haptic Hotcues in the Preferences, you then feel a haptic feedback in the Jog Wheel when cuing Cue Points and Loop markers using the top plate.
-
Page 47: Setting The Crossfader Curve
Tutorials To assign a Mixer channel to the right crossfader side: • Set the crossfader assign selector for the corresponding Mixer channel to the right. Unassigning Mixer Channels To unassign a Mixer channel from the crossfader: • Set the crossfader assign selector for the corresponding Mixer channel to the center position. 7.3.1.
-
Page 48: Adjusting Levels
Tutorials • Set the crossfader curve selector to the center position. If you want the crossfader to use the sharp curve: • Set the crossfader curve selector to the right. 7.4. Adjusting Levels When you mix tracks you need to make sure that the levels of both tracks are at the same level for flawless transitions.
-
Page 49
Tutorials To adjust the outgoing level of a Mixer channel: • Move the relevant channel fader up or down. The outgoing level changes accordingly. When the channel fader is set to its maximum posi- tion, the outgoing signal level equals the level of the incoming signal. You can also use the channel faders to transitions between audio signals without using the cross- fader. -
Page 50: Using The Equalizer
Tutorials To avoid damaging your ears, always watch the listening level of the connected speakers or power amplifier, and set it to a comfortable listening level. 7.5. Using the Equalizer You can use the equalizer to slightly adjust certain frequencies in the audio signal to highlight a specific part, like, attenuating vocals or a lead line.
-
Page 51: Using Cue Channel
Tutorials 7.6. Using CUE Channel You can use the CUE channel on the Mixer to preview tracks in the headphones. Any Mixer chan- nel is equipped with a CUE button to route the audio signal into the CUE channel. You can use the MIX and VOL knobs to determining the level for the CUE channel, as well as the ratio between the cued signal and the MASTER signal.
-
Page 52: Adjusting Tempo
Tutorials 7.7. Adjusting Tempo You can adjust the track tempo with the automatic Deck synchronization function SYNC and the TEMPO fader. When youusing the TEMPO fader the resulting effect depends on several factors: • When the SYNC function is used, changing the Tempo by moving the TEMPO fader only works on the Deck assigned to Tempo Master.
-
Page 53
Tutorials The track tempo decreases or increases, respectively. The key of the track changes accord- ingly. Locking TEMPO Fader To prevent accidental tempo changes you can lock the TEMPO fader: On the Deck, press and hold SHIFT to access the secondary Deck controls. While holding SHIFT, press the SYNC (Lock) button. -
Page 54
Tutorials Resetting Relative Tempo Fader Position When the TEMPO fader position in the software Deck does not match the TEMPO fader position on the S4 Deck, then you can reset the relative TEMPO fader position on the S4: On the S4 Deck, press and hold SHIFT to access the secondary Deck controls. While holding SHIFT, press the MASTER (Reset) button. -
Page 55: Locking The Key Of Tracks
Tutorials 7.8. Locking the Key of Tracks When you sync tracks, you change their tempos and, consequently, their pitches (or keys). Slow- ing down a track’s tempo will cause the track’s pitch to drop while speeding up a track’s tempo will cause the track’s pitch to rise.
-
Page 56
Tutorials The track tempo changes but the key value remains at the locked value. Adjusting the Key without Changing Tempo To change the pitch without changing the track tempo: Move the TEMPO fader up or down to set the desired track tempo. Press and hold SHIFT to access the secondary Deck functions. -
Page 57: Playing With Cue Points
Tutorials The enabled Keylock is indicated by the blue dot next to the key value. While holding SHIFT, turn the LOOP encoder clockwise to shift up the key value. Turn the LOOP encoder counterclockwise to shift down the key value. The pitch changes accordingly but the tempo remains unchanged.
-
Page 58
Tutorials Storing Cue Points as Hotcues Buttons To store a Cue Point as Hotcue: • At the desired position in the track, press a Pad. The Cue Point is set at the current playback position in the track and stored as Hotcue on the Pad. -
Page 59: Playing With Loops
Tutorials 7.10. Playing with Loops Loops are used as tools for remixing parts of tracks and can be used to extend track transitions. In this section you learn to play with Loops on the S4. Besides enabling Loops, you can store Loops as Hotcues in the track using the Deck’s Pads.
-
Page 60
Tutorials Changing the Loop Size You can instantly change the size of an enabled or disabled Loop: • Turn the LOOP encoder clockwise or counterYou can change the size of the enabled or disa- bled Loop:clockwise. The Loop size for the enabled Loop instantly changes by the value displayed in the Loop Control bar. -
Page 61: Playing With Flux Mode And Reverse Mode
Tutorials This instantly moves the Loop within the track by the selected Loop size. Removing a Stored Loop To remove a stored Loop from the Hotcue and from the track: • Press SHIFT and press a green lit Pad. The Loop is removed from the Hotcue and from the track. The Pad is now unlit. 7.11.
-
Page 62
Tutorials Flux mode is enabled. The second, virtual playhead continues forwards in the track. Press and hold a Pad with the Hotcue. The playback continues from the stored Cue Point or Loop. Release the Pad. The playback resumes at the playhead position created by Flux mode. You can also use Flux mode in conjunction with the Jog Wheel in JOG mode. -
Page 63: Playing With Mixer Effects
Tutorials 7.12. Playing with MIXER Effects A Mixer FX is a grouped effect that can be applied to the audio signal in the Mixer channel using the Mixer FX Amount knob. You can choose between the FILTER effect and one of four preselec- ted MIXER FX with the FX SELECT buttons 1 to 4.
-
Page 64: Playing With Fx Units
Tutorials Applying MIXER FX to the Audio Signal To apply the selected MIXER FX, in combination with a low-pass Filter, to the audio signal: • Turn the MIXER FX Amount knob counterclockwise. To apply the selected MIXER FX in combination with a high-pass Filter to the audio signal: •…
-
Page 65: Adding Tracks To The Preparation List
Tutorials The FX Unit Assign button lights up brightly. You can assign both FX Units to any Mixer channel at a time. Controlling FX Units On the S4 the FX Units reflect the current FX Unit configuration in TRAKTOR. To control the FX Units: Turn the FX Unit knobs 1 — 4 clockwise or counterclockwise to change the corresponding Ef- fect parameter.
-
Page 66: Previewing Tracks In The Browser
Tutorials Turn the Browse encoder to select a track in the Track List. Press the Preparation List button on that Deck. The track is added to the Preparation List. A diamond icon appears in the first column in the Track List in TRAKTOR indicating that the track is added to the Preparation List. Pressing the Preparation List button again removes the track from the Preparation List.
-
Page 67: Playing With Remix Decks
Tutorials To switch the Deck Focus on the right S4 Deck: • Press the DECK SELECT buttons B or D to switch the Deck focus to the corresponding Deck. When Decks A and Deck B are focused on the S4, the Deck LEDs light up blue. When Decks C and Deck D are focused on the S4, the Deck LEDs light up orange.
-
Page 68
Tutorials The TRAKTOR Layout switches to Browser view. Press and hold the Star button and turn the Browse encoder to select the All Remix Sets favorite folder. Turn the Browse encoder to select a Remix Set in the Track List. Press the Browse encoder to load the Remix Set into that Deck. -
Page 69
Tutorials To stop the playback of a Sample, press and hold SHIFT to access the Decks secondary functions. The colors of the first row of Pads change to white. While holding SHIFT, press the Pad for the corresponding Sample you want to stop play- back. -
Page 70
Tutorials The Volume parameter value in the display changes accordingly. Muting Sample Slots You can mute a Sample Slot immediately: Press and hold the Mute button. While holding the Mute button, press the Pad corresponding to the Sample Slot. The Sample Slot is muted. To unmute the Sample Slot, repeat the aforementioned steps. -
Page 71
Tutorials The Filter parameter value in the display changes accordingly. Selecting another Sample in Sample Slot You can instantly select another Sample in any Sample Slot, independent of the playback status of the Sample Slot. When the Sample Slot is playing Press and hold the Pad below the Pad for the corresponding Sample to access the sound controls for the Sample Slot. -
Page 72
Tutorials When the new Sample is highlighted, release the Pad. The playback of the Sample starts immediately in sync with the Quantize value. Enabling and Adjusting the Remix Deck’s Quantize Mode The Remix Deck provides an internal Quantize mode to let the Samples trigger at the right beat in the internal timeline. -
Page 73: Using Pattern Recorder
Tutorials The Quantize value changes accordingly. 7.17.1. Using Pattern Recorder The Pattern Recorder allows you to program sequences to be played by the Samples in the Remix Slots. When the Pattern Recorder is enabled, you can instantly play and record your sequences by tapping the Pads.
-
Page 74
Tutorials STEM Files allow you to interact with four different musical elements of a track independently. You can modify these four STEM Parts individually to create spontaneous instrumentals, remixes, or mashups. You can create transitions between musical elements STEM Part by STEM Part, or ap- ply effects and EQ to a specific STEM Part, rather than the entire track. -
Page 75
Tutorials • Press the Play/Pause button on the Deck. The STEM Deck plays back the STEM File. Adjusting STEM Part Volumes In order to adjust the volumes for the individual STEM Parts: Press the STEMS button to access STEM Deck controls. Press and hold the Pad below the Pad for the corresponding STEM Part to access the sound controls for that STEM Part. -
Page 76
Tutorials To reset the STEM Part volume, press and hold the Pad below the Pad of the corresponding STEM Part and press the MOVE encoder. The STEM Part volume is reset to full level. Muting STEM Parts You can mute a STEM Part immediately: Press and hold the Mute button and press the Pad corresponding to the STEM Part. -
Page 77
Tutorials Press and hold the Pad below the Pad corresponding to the STEM Part to access the sound controls for that STEM Part. The display shows the current Volume and Filter effect parameter values. While holding the Pad, press the LOOP encoder to enable the Filter effect for that STEM Part. -
Page 78: Correcting Beatgrids Of Tracks
Tutorials 7.19. Correcting Beatgrids of Tracks When a track contains a complex rhythm or an uneven timing, it can happen that the Beatgrid cal- culated by TRAKTOR does not precisely match the beat of the track. It is then not possible to match the beats of that track when mixing it using the SYNC function.
-
Page 79
Tutorials Besides the beat of the track, you now hear a second beat tick (like a metronome tick) repre- senting the Beatgrid. If the beat tick does not match the beat of the track, the Beatgrid is set incorrectly. Correcting Beatgrid To correct the Beatgrid setting, proceed as follows: While holding the GRID button, slightly turn the Jog Wheel clockwise or counterclockwise to move the Beatgrid forward or backward, respectively. -
Page 80: Preferences
Preferences 8. PREFERENCES When opening the Preferences dialog in TRAKTOR you will find an additional page for the S4 con- troller with configuration settings. Accessing TRAKTOR Preferences To open the Preferences in TRAKTOR: Click the Preferences button in TRAKTOR’s Header. Select the Traktor S4 MK3 page.
-
Page 81
Preferences Transport • Tempo Faders: Determines the TEMPO fader mode. • In Absolute mode, the track tempo automatically adjusts according to the TEMPO fader position when loading the track. • In Relative mode, the track tempo is always set to the original tempo independent of the current TEMPO fader position when loading the track. -
Page 82: Integrating External Devices
Integrating External Devices 9. INTEGRATING EXTERNAL DEVICES The S4 provides you with the possibility to integrate external audio devices. Besides integrating microphones, you can also connect devices like turntables and CD players. This enables you to mix in external audio from vinyl and CD. In conjunction with turntables and CD players you can enable TRAKTOR’s Scratch function to control the Decks with timecode vinyls or timecode CDs, which you can purchase separately.
-
Page 83: Integrating Turntable
Integrating External Devices Switching the Deck to Live Input To switch the S4 Deck to Live Input Press the EXT button on the Mixer channel you want to insert the microphone signal from. The Deck has switched to Live Input. You can now speak into the microphone. Set the incoming microphone signal to an adequate level by turning the GAIN knob on the Mixer channel.
-
Page 84: Integrating Cd Players
CD player(s). For this, you need the the timecode control vinyl or CD which you can pur- chase separately on the Native Instruments website. This section introduces you the workflow on how to enabling the Scratch function in TRAKTOR.
-
Page 85
Integrating External Devices Click the Deck letter of the Deck for which you want to enable the Scratch function. The context menu opens. Select Track Deck. The Deck switches to Track Deck. Click the Deck letter again to open the context menu. Select Scratch Control. -
Page 86: Setting The Traktor Kontrol S4 As Your Default Audio Interface
10. SETTING THE TRAKTOR KONTROL S4 AS YOUR DEFAULT AUDIO INTERFACE If you want to use the TRAKTOR KONTROL S4 for playback of all audio applications on your com- puter, you can set it as your default audio interface. Windows…
Посмотреть инструкция для Native Instruments Traktor Kontrol S4 MK2 бесплатно. Руководство относится к категории DJ-система, 2 человек(а) дали ему среднюю оценку 6.5. Руководство доступно на следующих языках: английский. У вас есть вопрос о Native Instruments Traktor Kontrol S4 MK2 или вам нужна помощь? Задайте свой вопрос здесь
- Title Page
- Disclaimer
- Contact
- Table of Contents
- 1 Welcome to the World of TRAKTOR KONTROL S4!
- 2 TRAKTOR KONTROL S4 Overview
- 3 Importing Your Music
- 4 Tutorials
- 5 Using the S4 with TRAKTOR DJ
- 6 Hardware Reference
- 7 Customizing TRAKTOR KONTROL S4
- 8 The S4 Audio Interface and Control Panel
- 9 Troubleshooting and Help
- 10 Appendix A – Common Setups
- 11 Appendix B – Technical Information
- 12 Appendix C – Quick References
- Index
Главная
| Native Instruments | |
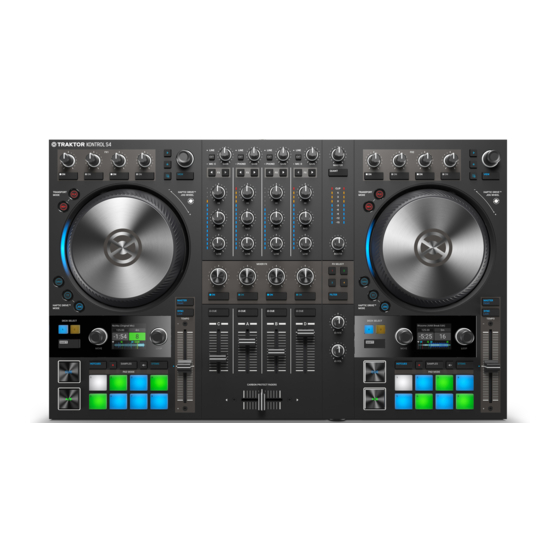
| Traktor Kontrol S4 MK2 | 22400 | |
| DJ-система | |
| 4042477224851 | |
| английский | |
| Руководство пользователя (PDF), Инструкция по установке (PDF) |
Технические характеристики
| Тип скретчера | Скретчер цифровой виниловой системы |
| Количество пластин скретчера | 2 |
| Микшер | Да |
| Количество каналов микшера | 4 канала |
| Кроссфейдер | Да |
| Эквалайзер | Да |
| Количество полос эквалайзера | 3 |
| Встроенный оптический привод | Нет |
| Воспроизведение с прямого порта USB | Да |
| Поддерживаемые форматы аудио | AAC, AIFF, FLAC, MP3, OGG, WAV, WMA |
| Диапазон частот | 20 — 20000 Hz |
| Интервал выборки | 96 kHz |
| Цвет товара | Черный |
| Битовая скорость передачи данных | 24 |
Экран
Порты и интерфейсы
| USB порт | Да |
| Версия USB | 2.0 |
| Тип USB коннектора | USB тип B |
| Количество портов USB | 1 |
| Совместимость подключения с устройствами Apple | iPad 4, iPad mini, iPhone 5, iPod Touch 5 |
| Линейный вход микрофона | Да |
| Количество микрофонных входов | 1 |
| Линейные выходы наушников | 1 |
| Аудио вход (Л/П) | 2 |
| Аудио (Л/П) выход | 2 |
Энергопитание
Системные требования
| Поддерживаемые операционные системы Windows | Windows 7 Enterprise, Windows 7 Enterprise x64, Windows 7 Home Basic, Windows 7 Home Basic x64, Windows 7 Home Premium, Windows 7 Home Premium x64, Windows 7 Professional, Windows 7 Professional x64, Windows 7 Starter, Windows 7 Starter x64, Windows 7 Ultimate, Windows 7 Ultimate x64, Windows 8 |
| Поддерживаемые операционные системы Mac | Mac OS X 10.10 Yosemite, Mac OS X 10.8 Mountain Lion, Mac OS X 10.9 Mavericks |
| Требуется USB | Да |
Вес и размеры
| Ширина | 500 mm |
| Глубина | 338 mm |
| Высота | 72 mm |
| Вес | 3400 g |
показать больше
Не можете найти ответ на свой вопрос в руководстве? Вы можете найти ответ на свой вопрос ниже, в разделе часто задаваемых вопросов о Native Instruments Traktor Kontrol S4 MK2.
Какой вес Native Instruments Traktor Kontrol S4 MK2?
Когда звук считается слишком громким?
Какая высота Native Instruments Traktor Kontrol S4 MK2?
Какая ширина Native Instruments Traktor Kontrol S4 MK2?
Какая толщина Native Instruments Traktor Kontrol S4 MK2?
Какой тип USB-подключения Native Instruments Traktor Kontrol S4 MK2 имеет?
Инструкция Native Instruments Traktor Kontrol S4 MK2 доступно в русский?
Не нашли свой вопрос? Задайте свой вопрос здесь

Хотите научиться скретчингу, но не знаете с чего начать? В TRAKTOR KONTROL S4 скретчинг на джогах очень похож на игру с винилом. Контроллер оборудован прочными и надежными элементами управления, с которыми диджею будет очень удобно исполнять комбо. Перед вами руководство по скретчингу на TRAKTOR KONTROL S4.
Содержание:
- Инструментарий
- Выбор семплов и битов для скретчинга
- Настройка
- Постановка рук
- Как установить cue в Traktor и S4
- Режимы и тактильный отклик
- Приемы скретчинга
Инструментарий
Для начала работы Вам понадобится TRAKTOR KONTROL S4, ноутбук, USB-кабель для подключения контроллера, библиотека битов и лупов для скретчинга, а также коллекция цифровых семплов скретчей. Помимо этих инструментов, рекомендуем найти человека, который может выступить учителем, и нескольких диджеев, у которых вы будете заимствовать приемы.
Выбор семплов и битов для скретчинга
Прежде всего нужно освоить работу со скретч-семплами. Скретч-семплы — это слова и фразы, которые можно использовать в качестве перкуссии. На классических скретч-семплах можно услышать что-нибудь наподобие «ahhh», «scratch» и «fresh». Если у вас есть коллекция винила, запишите и оцифруйте скретч-семплы из своей баттл-библиотеки. Если вы начинаете с нуля, то можете поискать семплы эффектов в библиотеке вроде Sounds.com (можно найти множество звуков и эффектов специально для скретчинга).
Далее, нам нужно поискать биты для скретчинга. Для скретча отлично подходит инструментальный хип-хоп, трэп, электро, хотя на самом деле скретчить можно с любым битом. Лучше начинать с медленных битов (скажем, 70-95 bpm) и постепенно увеличивать темп. На Sounds.com можно найти множество хороших битов, а если вам интересен продакшн, то вы можете создать собственные лупы на основе семпл-пака. Биты не должны быть длинными; для использования в TRAKTOR подойдут фразы от 8 до 16 тактов.
Настройка
Далее нам понадобится расставить точки cue с помощью TRAKTOR и контроллера S4. Определитесь, какой рукой вы будете скретчить, а какой управлять кроссфейдером. Как правило, на джоге стоит использовать ту руку, которой вы пишете, поскольку так можно добиться лучшего контроля над исполнением. Однако, если вам удобнее, можете играть и наоборот. Если вы собираетесь использовать левый джог для скретчинга, загрузите скретч-семплы в деку A в TRAKTOR, а бит в деку B. Если будете играть как правша, бит нужно будет загрузить в деку А, а семплы в деку В. Существует стиль скретчинга под названием hamster, где ход кроссфейдера идет слева направо, но пока что мы не будем затрагивать этот способ.

Постановка рук
Чтобы понимать, где находится семпл в соответствии с позицией джога, стоит представить джог как циферблат. Положите руку на джог между шестью и девятью часами. Поставьте на джог указательный и средний, либо средний и безымянный палец. Расположите ладонь ближе к джогу; чем она ближе, тем лучше будет контроль над звуками. Другой рукой мы будем управлять кроссфейдером. Ваше запястье должно быть расслаблено, а кроссфейдер должен свободно удерживаться между большим и указательным пальцами.
Как установить cue в Traktor и S4
Отметка cue позволяет ди-джеям мгновенно перемещаться в определенный момент трека. Отметки Cue нужны, чтобы быстро переходить к семплам. Лучше всего разместить cue-отметки в начале каждого семпла или каждых нескольких семплов. Чтобы разместить отметку, положите руку на джог и ориентируйтесь на слух и дисплей с TRAKTOR. На деке, в которую вы загрузили семпл, мотайте джог вперед и назад, пока не услышите первый семпл. Чтобы найти самое начало семпла, приблизьте отображаемую форму волны в TRAKTOR с помощью клавиши +. Перед семплом вы увидите пустое пространство и услышите тишину. Начало семпла будет иметь цветную форму волны, и вы услышите звук при перемещении джога к семплу. Нажмите Cue 1 на S4, чтобы сделать отметку cue. Чтобы удалить отметку cue, нажмите клавишу Shift, а затем нажмите на отметку, которую нужно удалить. Повторите действие на каждой отметке, которую нужно выделить.
На дорожке, загруженной в деку B, найдите первый такт записи, используя джог, чтобы перемотать дорожку, пока не услышите звук. Первую долю в музыке также называют даунбитом; это, как правило, первый звук, который вы услышите в треке, но лучше проверить лишний раз, что бит начинается с бочки. Если это не так, медленно вращайте джог, пока не найдете первую бочку. Отметьте cue на первой доле, нажав Cue 1 на S4. Так нам нужно закольцевать биты, нажмите Loop из выпадающего меню ниже Cue и выберите Loop. Выберите количество тактов, которое вы хотите закольцевать. Луп будет воспроизводиться при нажатии клавиши Cue Button 1.
Режимы и тактильный отклик
S4 имеет три разных режима; Turntable Mode, Jog Mode и Beatgrid Adjust Mode. Выберите Turntable Mode, чтобы включить имитацию винила. Этот режим позволяет ди-джеям вращать джог, а также использовать край контроллера для замедления треков во время сета, как на виниле. Также можно отрегулировать инерционный момент джогов, как на виниле. С помощью опции Enable Haptic Hotcues во вкладке Preferences вы можете включить тактильный отклик джога при установке Cue-отметок и Loop-маркеров. Джоги Haptic Drive щелкают, когда вы мотаете через cue-отметки и лупы; вы также можете быстро промотать джог до следующей cue-отметки. С помощью опции Enable Haptic Hotcues во вкладке Preferences вы можете включить тактильный отклик джога при установке Cue-отметок и Loop-маркеров. Джоги Haptic Drive щелкают, когда вы проматываете через cue-отметки и лупы; вы также можете быстро промотать джог до следующей cue-отметки.
Приемы скретчинга
Baby Scratch
Это самый простой прием из всех. Загрузите длинный семпл и начните с начала семпла. Держите кроссфейдер на середине, сдвиньте джог вперед, а затем назад. Играйте так вместе с музыкой, сдвигая джог вперед на первую долю, а назад — на вторую. Как только вы овладеете приемом, попробуйте делать его дабл-тайм (в два раза быстрее). Сначала попробуйте скретчить без музыки, но как только вы освоите движение, начните играть поверх бита и старайтесь скретчить в сетке.
Forwards (Cutting)
Форвард или кат, это когда кроссфейдер закрывается во время обратного движения пластинки. Лучше всего использовать семплы короткой и средней длины, типа «fresh» или «aww yeah». Чтобы исполнить прием, начните с Cue 1 в начале семпла и откройте кроссфейдер. Пусть семпл начнет проигрываться; поставьте руку на джог и остановите воспроизведение. Закройте кроссфейдер, сдвинув его на противоположную сторону (чтобы семпл не было слышно) и аккуратно перемотайте запись до начала семпла. Например, если у вас есть скретч-семпл, загруженный в деку A, сместите кроссфейдер до упора вправо, чтобы семпл не было слышно во время перемотки назад.
Drag
Дрег — это прием без использования кроссфейдера, то есть на всем протяжении скретча он остается открытым (в среднем положении). Этот прием выполняется медленно, плавным перемещением джога; таким образом семпл проигрывается с понижением тона. Чтобы выполнить дрег, оставьте кроссфейдер открытым и начните с семпла с отметкой cue. Семпл должен быть достаточно длинным, наподобие белого шума или звука «ahhh». Медленно перемотайте семпл под музыку, а затем потяните джог назад.
Tears
Еще один прием скретча без использования фейдера, когда два звука создаются из одного длинного звука с помощью паузы между движением вперед и движением назад на джоге. Чтобы выполнить прием, начните с отметки cue на семпле и перемотайте джог вперед. Сделайте паузу, затем снова потяните джог вперед. Завершите прием движением джога обратно, чтобы переместить проигрывание семпла в самое начало. Чем ниже над джогом находится рука, тем лучше вы будете контролировать звук. Чтобы сделать обратную версию приема, начните с конца семпла, потяните джог назад, сделайте паузу, а затем снова потяните колесо назад. Завершите прием перемоткой семпла вперед. Вы также можете делать различные комбинации приемов, например два прямых и два обратных.
Смотреть руководство для Native Instruments Traktor Kontrol S4 MK2 ниже. Все руководства на ManualsCat.com могут просматриваться абсолютно бесплатно. Нажав кнопку «Выбор языка» вы можете изменить язык руководства, которое хотите просмотреть.

MANUALSCAT | RU
Вопросы и ответы
У вас есть вопрос о Native Instruments Traktor Kontrol S4 MK2, но вы не можете найти ответ в пользовательском руководстве? Возможно, пользователи ManualsCat.com смогут помочь вам и ответят на ваш вопрос. Заполните форму ниже — и ваш вопрос будет отображаться под руководством для Native Instruments Traktor Kontrol S4 MK2. Пожалуйста, убедитесь, что вы опишите свои трудности с Native Instruments Traktor Kontrol S4 MK2 как можно более детально. Чем более детальным является ваш вопрос, тем более высоки шансы, что другой пользователь быстро ответит на него. Вам будет автоматически отправлено электронное письмо, чтобы проинформировать вас, когда кто-то из пользователей ответит на ваш вопрос.
Задать вопрос о Native Instruments Traktor Kontrol S4 MK2
- Бренд:
- Native Instruments
- Продукт:
- DJ-система
- Модель/название:
- Traktor Kontrol S4 MK2
- Тип файла:
- Доступные языки:
- английский
Сопутствующие товары Native Instruments Traktor Kontrol S4 MK2
- Инструкции и руководства
- Бренды
- Native Instruments
- Traktor Kontrol S4 MK2
- Техническая Спецификация
![]()