- Manuals
- Brands
- Trotec Manuals
- Printer
- Speedy 100
- Operation manual
-
Contents
-
Table of Contents
-
Troubleshooting
-
Bookmarks
Quick Links
OPERATION MANUAL
8010 Trotec Speedy 100 / R
BA 8010_3.0_EN (10/2016)
1 / 68
Related Manuals for Trotec Speedy 100
Summary of Contents for Trotec Speedy 100
-
Page 1
OPERATION MANUAL 8010 Trotec Speedy 100 / R BA 8010_3.0_EN (10/2016) 1 / 68… -
Page 2
Trotec cannot be held responsible for any direct or indirect damages, which result from using or working with the products electric circuits or software described herein. The apparatus must be used only by trained and skilled personnel. Before use the manual should be read and followed carefully. -
Page 3: Table Of Contents
1.2 Designated Use ……………………….6 1.3 Disposal remarks ……………………….6 1.4 Technical Data / Device Specification ………………… 7 1.4.1 Technical Data Speedy 100 ……………………7 1.4.2 Technical Data Speedy 100R ………………….. 9 1.5 Manufacturer’s Label ……………………..11 1.6 EU – Declaration of conformity ………………….12 2 SAFETY ……………………..
-
Page 4
4.9 Tips and Tricks for the Production of Rubber Dies …………….52 5 MAINTENANCE ………………….53 5.1 Cleaning the System ……………………..53 5.2 Cleaning the Optical Parts ……………………54 5.2.1 CLEANING THE LENS ……………………54 5.2.2 CLEANING THE MIRRORS #2 AND #3 ………………… 56 5.3 Maintenance Plan ………………………. -
Page 5: General
GENERAL 1.1 Operation Manual Use – General Information Caution: Please read and follow this Operation Manual carefully, before installation and operation. Damage to persons and/or material can result from not following individual points of the Operation Manual! Operation of the system is only permitted with equipment and spare parts supplied or listed in the spare parts and consumables lists.
-
Page 6: Designated Use
1.2 Designated Use The Trotec Speedy 100, is used for engraving and cutting of signs, stamps and suchlike. A wide variety of materials such as rubber, acrylic, coated metal, tin, special steel, anodized aluminum, cork, cardboard, glass, leather, marble, several plastics and wood can be processed on the laser.
-
Page 7: Technical Data / Device Specification
1.4 Technical Data / Device Specification 1.4.1 Technical Data Speedy 100 Mechanics 24“ x 12“/ 610 x 305 mm Working area Max. height of work piece 6,7 inch / 170 mm with 1,5 inch lens 6,2 inch / 157 mm with 2,0 inch lens 5,7 inch / 144 mm with 2,5 inch lens Max.
-
Page 8
Dimensions Width/depth/height (approx.) 38,3 inch / 30,1 inch / 18 inch; 974mm/765mm/457mm Weight (approx.) 194 lbs / 88 kg for 25W unit Ambient Conditions Ambient temperature +15°C to +25°C / 59°F to 77°F Humidity 40% to max. 70%, not condensing Laser Safety Laser class CDRH Laser Safety… -
Page 9: Technical Data Speedy 100R
1.4.2 Technical Data Speedy 100R Mechanics 24“ x 12“ / 610mm x 305mm Working area Max. height of work piece 6,7 inch / 170 mm with 1,5 inch lens 6,2 inch / 157 mm with 2,0 inch lens 5,7 inch / 144 mm with 2,5 inch lens Max.
-
Page 10
Dimensions Width/depth/height (approx.) 38,3 inch / 30,1 inch / 18 inch; 974mm/765mm/457mm Weight (approx.) 194 lbs / 88 kg for 25W unit Ambient Conditions Ambient temperature +15°C to +25°C / 59°F to 77°F Humidity 40% to max. 70%, not condensing Laser Safety Laser class CDRH Laser Safety… -
Page 11: Manufacturer’s Label
1.5 Manufacturer’s Label The manufacturer’s label is located on the back of the device (see Figure below). It is recommended to enter data such as serial number and year of manufacture into the manufacturer’s label below so that you always have this data handy if you have problems with your device or require spare parts.
-
Page 12: Eu — Declaration Of Conformity
Trotec Laser GmbH. Linzer Straße 156, A-4600 Wels Authorized person for the compilation of technical documentation Gerhard KREMPL, Trotec Laser GmbH., Linzer Straße 156, A-4600 Wels We hereby certify that SPEEDY 100 Modell N° 8010 Speedy 100 in its conception, construction and form put by us into circulation is in accordance with all the relevant essential health and safety requirements of the EC machinery directive 2006/42/EEC.
-
Page 13: Safety
SAFETY 2.1 General Safety Information All personnel involved in installation, set-up, operation maintenance and repair of the machine, must have read and understood the Operation Manual and in particular the «Safety» section. The user is recommended to generate company-internal instructions considering the professional qualifications of the personnel employed in each case, and the receipt of the instruction/Operation Manual or the participation at introduction/training should be acknowledged in writing in each case.
-
Page 14: Laser Safety Information
To assess the potential dangers laser systems pose, they are classified into 5 safety classes: 1, 2, 3a, 3b and 4. Speedy 100 is a device of class 2 (USA: Class II). This is guaranteed by the protective housing and the safety installations.
-
Page 15: Safety Precautions When Operating The Device
2.3 Safety Precautions when Operating the Device In your Speedy 100, a closed safety system is integrated which immediately switches off the power to the laser tube when the protection cover is opened. Consequently an incomplete engraving can occur if the cover is opened during operation. Therefore, first press the «PAUSE»…
-
Page 16: Warning And Information Labels
2.4 Warning and Information Labels The warning and information labels are attached in such positions of the device that could represent a source of danger during set-up and operation. Therefore, follow the information on the labels. If labels are lost or damaged, they must be replaced immediately.
-
Page 17
BA 8010_3.0_EN (10/2016) 17 / 68… -
Page 18
CAUTION INVISIBLE LASER RADIATION WHEN OPEN BEFORE OPEN UNPLUG THE AVOID EYE OR SKIN EXPOSURE TO CAUTION DIRECT OR SCATTERED RADIATION MACHINE FIRST VISIBLE LASER RADIATION WHEN OPEN DO NOT STARE INTO BEAM BA 8010_3.0_EN (10/2016) 18 / 68… -
Page 19: Before Operation
BEFORE OPERATION 3.1 Unpacking You receive your Trotec Speedy 100 packed in a cardboard box or wooden box, which contains the laser and additional accessories. The following steps give you an overview of the unpacking and assembly of the laser. Please follow these steps carefully.
-
Page 20: Contents Of Delivery
Transport and service packaging Laser including optics Stand (optional) Accessories box, which contains the following parts: 1. CD Trotec software / engraver driver incl. Operation Manual 2. Mains cable 3. Computer connection cable USB 4. Computer connection cable serial (optional) 5.
-
Page 21: Location
3.3 Location Before you install the laser system, you should select an appropriate location. Follow the guidelines shown below: Avoid locations where the system is exposed to high temperatures, dust and high humidity. (The humidity must not exceed 70% and the temperature must not be close to the dew point.) Avoid locations, where the system is exposed to mechanical shocks.
-
Page 22: Electrical — Requirements
3.4 Electrical – Requirements Make sure that your electrical outlet is capable of providing the proper voltage, frequency and amperage that the laser system requires. We recommend having individual circuits for Lasermachine and PC Extractor Recommended fuse: compare “Electricity, Power, Fuse” in section “1.4 Technical Data / Device Specification”.
-
Page 23: Exhaust System — Requirements
3.5 Exhaust System – Requirements To guarantee the right ventilation during the engraving of rubber, an exhaust system with a minimum suction power of 300 m³/h is required. The device must be equipped with a fine dust filter (generation of rubber dust) as well as an activated carbon filter (neutralization of smells).
-
Page 24: Connections
3.7 Connections Perform the connections exactly in the order described, otherwise electrostatic charging can damage your computer and/or the electronics of the laser system. 3.7.1 Connecting the Mains Connect one end of the mains cable with the connection socket (1) at the rear side of the laser device (see Figure below) and the other end with a protected power outlet.
-
Page 25: Connecting The Computer
3.7.2 Connecting the Computer The computer must be switched off and connected to the mains voltage. Connect the laser (see Figure below) to a free serial interface (1) or USB port (2) on your computer. BA 8010_3.0_EN (10/2016) 25 / 68…
-
Page 26: Connecting The Exhaust System
Plug the ends of the exhaust duct into the allocated connection (2). The position of the connector depends on the type of exhaust system. When using the Trotec exhaust system, also connect it with the cable included to the remote control connector of the laser (3).
-
Page 27: Operation
OPERATION 4.1 Machine view and connections 1 Top lid 11 Cooling fan 2 Autofocus sensor 12 Exhaust hose connector 3 Service access panel 13 Manufacturers label 4 Connection Socket for Rotary 14 Laser tube cover 5 Focusing head 15 Power supply 6 X-axis 16 Power socket and fuses 7 Ruler…
-
Page 28
10 Maintenance panel BA 8010_3.0_EN (10/2016) 28 / 68… -
Page 29
Top lid If the Top lid is opened, no data is processed. After closing the Top lid, the device is not ready to process commands for 5 seconds. If the protection cover is opened during operation, the motion system is stopped and laser source is turned off. -
Page 30
Used to align material and measure it. BA 8010_3.0_EN (10/2016) 30 / 68… -
Page 31
Working Table The work pieces to be processed are put onto the working table. To facilitate orientation, a horizontal and a vertical ruler are located on the engraving table. The table is ferromagnetic for easier fixation of work pieces. Keypad The Keypad contains multiple buttons and displays for controlling the device. -
Page 32
Power Socket To connect the main power according the information on the manufacturers label. In the Power Socket are the fuses. PC connection cable (Serial) Exhaust connection cable PC connection cable (USB) BA 8010_3.0_EN (10/2016) 32 / 68… -
Page 33: On/Off Switch
4.2 ON/OFF Switch Switches the mains supply ON/OFF. The following conditions must be fulfilled for correct start up: — unrestricted freedom of motion of the mechanics — no materials under the engraving table — protection covers closed If the top lid or any other interlock secured cover (mainenance panel) is open, an acoustic signal sounds and the status display flashes fast in green.
-
Page 34: Keypad
4.3 Keypad POSITIONING KEYS Z When pressing one of these two keys the engraving table moves in Z direction (upwards or downwards). Use these positioning keys to move the work piece manually. When both keys are pressed simultaneously, the material is focused automatically (only with light barriers = option).
-
Page 35
By pressing the “Shift” key and a Z- positioning key an automatic move to the corresponding end- positions is performed: Shift + Down: the table moves down to the lowest possible position Shift + Up: the table moves up to the autofocus- position. Note: Shift + Up will cause the head moving backwards to the light barriers (according simultaneous pressing of both z-keys). -
Page 36
Tests the laser source for proper function (acoustic signal sounds simultaneously) START (REPEAT) By pressing “Start (Repeat)”, the jobs which are currently positioned on the selected plate in the Trotec JobControl are started. If the jobs have been processed before, they will be reset automatically. STATUS INDICATOR LASER BEAM Indicates, that a laser beam is currently being emitted. -
Page 37
Indicates the current status of the device: green, flashing slowly (0.5 Hz) Machine is ready green, flashing fast (2 Hz) Cover has been opened green permanent light / Data available in the machine Pause mode red permanent light Laser beam is being emitted Cover open during switch-on process, green/red flashing alternately simultaneously acoustic signal -… -
Page 38: First Steps Before Engraving
4.4 First Steps before Engraving To prepare your laser for the first engraving tests, perform the following steps: Switch machine on with the ON / OFF switch. The working table automatically references in X/Y/Z direction. Open the protection cover and place work piece on the working table. Usually you position the work piece into the upper left-hand corner of the engraving table against the horizontal and vertical rulers.
-
Page 39
BA 8010_3.0_EN (10/2016) 39 / 68… -
Page 40
There are three methods to focus the laser beam: Manual focusing Focusing by software Automatic focusing by means of light barriers (optional) To A – Manual focusing: Move the processing head over the material to be engraved by means of the positioning keys X/Y Hang the focus tool on the external ring of the working head so that the focus tool can move unhindered. -
Page 41
To B – Focusing by software: Click the icon “focus laser” in the Trotec JobControl The working table moves in Z direction. The following values are used to determine the focus position and therefore always have to be checked before using this focus option:… -
Page 42: First Engraving Tests
4.5 First Engraving Tests The following steps describe, how to successfully engrave a first pattern. Please follow the individual steps: First switch on the computer, then the Laser. Put the object to be engraved into the laser and move into the desired position on the engraving table.
-
Page 43
BA 8010_3.0_EN (10/2016) 43 / 68… -
Page 44
After the engraving material, the engraving direction, die orientation of the work piece and the orientation of the plate have been specified in the Trotec JobControl under «Plate, Setup Plate», the job can be positioned on the plate with a double-click. If necessary, the job can be positioned at any position on the plate by dragging with the mouse. -
Page 45: Rotary Engraving Attachment
4.6 Rotary Engraving Attachment The rotary engraving option in the printer driver is used in combination of the rotary engraving attachment, to engrave cylindrical objects. To compensate for the different diameters of different objects, the image must be adjusted. This is performed automatically by the engraving driver, by selecting the rotary engraving option and entering the diameter of the object to be engraved.
-
Page 46
Connect the rotary engraving attachment via the control cable with the connector of the motion system. The connector is located inside the left front of the interior. Mounting the work piece: Before you mount the object into the rotary engraving attachment, measure the diameter of the object at the position to be engraved with a sliding caliper or a similar tool. -
Page 47
Now switch on the laser and wait until the referencing is finished. Position the working head over the object at the position, where you want to engrave. Now focus the object with the focus tool. BA 8010_3.0_EN (10/2016) 47 / 68… -
Page 48
Establish the connection to the laser. Switch on the exhaust system (only necessary if you do not use an original Trotec exhaust system). Activate the START button in the Engraver Control of the JobControl and start the engraving process. -
Page 49: Tips And Tricks For Laser Engraving
4.7 Tips and Tricks for Laser Engraving The engraving depth can easily be varied through the laser power or the speed. To increase the engraving depth, reduce the speed or increase the power setting. This way you increase the amount of energy per area unit. Engraving too deep, however, reduces the quality of the details.
-
Page 50
Acrylic: There are two different types of acrylic – cast and extruded. The cast acrylic becomes white or mat after engraving, the extruded acrylic remains clear. Use extruded acrylic for engravings that are filled with paint and cast acrylic for normal engravings. Cast acrylic can be best engraved without protection foil. -
Page 51: Tips And Tricks For Laser Cutting
4.8 Tips and Tricks for Laser Cutting Distance to the Surface of the Work piece If you want to achieve very good results, when laser-cutting acrylic or wood, we recommend, that the plate be attached at least some millimeters above the engraving table. By doing this the smoke and the melting residuals underneath the plate can escape unhindered.
-
Page 52: Tips And Tricks For The Production Of Rubber Dies
Due to their lower density, so-called micro porous rubber materials allow a significantly higher engraving speed. Test the rubber first, to find out the correct speed setting. The Trotec JobControl software simplifies the creation of a stamp significantly. Mirroring as well as converting is performed automatically and a cone-shaped shoulder is generated around each letter.
-
Page 53: Maintenance
MAINTENANCE 5.1 Cleaning the System Caution – use of controls or adjustments or performance of procedures other than those specified herein may result in hazardous laser radiation exposure. Before starting cleaning and maintenance work always switch off the device and unplug the mains plug. You should check at least once a day, whether dust has accumulated in the engraving system.
-
Page 54: Cleaning The Optical Parts
5.2 Cleaning the Optical Parts Trotec recommends to use following cleaning material: Lens tissues Part number 69249 Lens cleaner Part number 69248 The lens has a durable multi-coating and won’t be damaged by correct and careful cleaning. You should inspect the mirrors and the lens according the maintenance plan. If you discover a veil of haze or dirt, you must clean them.
-
Page 55
8. Hold the lens assembly by its edge with a lens cleaning tissue and use a drop of lens cleaning liquid from the little bottle which you received as an accessory delivered with the laser. While holding the lens on an angle, flush both surfaces of the lens, to wash away coarse soiling. -
Page 56: Cleaning The Mirrors #2 And #3
5.2.2 CLEANING THE MIRRORS #2 AND #3 There are two mirrors in the operating area of the laser, which may have to be cleaned if they are soiled. To clean the mirrors, follow the instructions below. MIRROR #2 1. The mirror #2 is located on the right-hand side of the machine. To be able to access mirror #2, you must remove the right maintenance panel.
-
Page 57
7. Replace the mirror and fix it again with the two Allen screws. BA 8010_3.0_EN (10/2016) 57 / 68… -
Page 58
MIRROR #3 1. While holding the mirror, loosen the big screw (1) and lift the mirror from the laser head Pay attention that the mirror doesn’t grind over the mirror holder, as it can be scratched very easily. 2. Use a drop of lens cleaning liquid from the accessories box and, while holding the mirror on an angle, flush the surface of the mirror, to wash away coarse soiling. -
Page 59: Maintenance Plan
5.3 Maintenance Plan daily weekly monthly yearly Laser Lens, mirror 3 Check Cleaning if required Mirror 2 Check Cleaning if required Engraving table and Cleaning rulers Cover of the laser tube Cleaning and housing Entire working area – Cleaning general cleaning Exhaust System Bag filter Filter mat…
-
Page 60: Additional Information
Check whether the sorting function «Kind» and «Resolution» are activated in the waiting list. Make sure that the directory ”Spool” has been created in the directory of JobControl (”Trotec”) and that the correct path to this directory has been set under «Options» in the «Settings» menu. …
-
Page 61: Options
6.2 Options 6.2.1 Lateral Air Assist During laser engraving and laser cutting, the supply of compressed air can significantly influence and improve results. Air assist is often used with vector cutting applications to derive heat and flammable gases from the cutting surface. Through a constant airflow over the whole cutting surface, fire sources will be removed and fume is reduced.
-
Page 62
Cutting table: Honeycomb table especially for cutting tasks, is placed onto the standard table, during cutting the residuals of the material fall through the honeycombs onto the table, reverse side of the material remains clean, cutting lines are cleaner. BA 8010_3.0_EN (10/2016) 62 / 68… -
Page 63
Deficiencies determined the manufacturer. The machine with the Thank you very much. machine designation: Speedy 100 has been checked according to the listed items and has been transferred properly. City, Date Company stamp / Signature BA 8010_3.0_EN (10/2016) -
Page 64: Training Schedule
6.3 TRAINING SCHEDULE Employee/Trainee: Trainer: Date of Training: The above mentioned Employee received instruction on the operation of the Speedy 100 Lasersystem. Especially the following topics are covered: Machine Function Danger Area Warnings Interlock System Taking into Service and Shutdown…
-
Page 65: Response Form
6.4 Response Form If you face any trouble with the machine, please provide the following information and add a Servicefile (procedure is described on the following pages). Date Machine Details Contact Details Serialnumber Name JobControl Version Country Driver Version Phone Number Layout Software Email address Firmware Version…
-
Page 66: How To Create A Service File
6.5 How to create a Service File 1. Start JobControl. 2. Position the job (which possibly caused a failure) on the plate. 3. Run the job and leave the job on the plate. 4. Go to “Settings” > “Create Service File”. 5.
-
Page 67
BA 8010_3.0_EN (10/2016) 67 / 68… -
Page 68
6. The window „Add Layout File“ shows up. Please select the layout file, which was sent most recently to JobControl and possibly caused a failure (example: Corel file, Photoshop file, AutoCAD file,…). Click on „Open“. 7. The following window confirms, that the Service File (ServiceLog.txt) was created successfully.
 Speedy 100: Компактный лазерный гравер
Speedy 100 — лазерный CO2 гравер начального уровня, который поможет Вашему бизнесу расти. Вы можете приобрести только то, что нужно сейчас, докупая опции постепенно.
•Высокоточная механика
•Отсутствие быстроизнашиваемых деталей
•Превосходное качество лазерной гравировки
•Доступная цена
•Имеет сертификат ПечатьСерт для производства гербовых печатей
•Расширенная гарантия 2 года
•Технология InPack — защита всех компонентов от пыли и дыма отсеки, в которых расположены двигатели, приводные ремни и электронные платы.
•Высочайшая надежность лазерного оборудования
Speedy -100R — компактный малогабаритный лазерный гравер серии «Speedy -100», предназначен для изготовления печатей и простых работ по лазерной гравировке, лазерной резке, изготовлению сувенирных, рекламных и наградных изделий, а также печатей и штампов.
— Максимальная скорость лазерной гравировки: 180-280 см/с
— Программное обеспечение JobControl: различные по сложности системы, от EASY до EXPERT
— Технология InPack: для максимальной защиты от пыли, дыма, масла и других загрязнений
— Высочайшее качество луча: для оптимальных результатов в области лазерной гравировки и резки
— Бесщеточные сервоприводы: для максимальной точности и стабильности позиционирования при лазерной гравировке и резке.
— Мощность: от 12 до 45 Вт, запаянная CO2 лазерная трубка.
— Максимальное поле лазерной гравировки: 610 x 305 x 170 мм
— Класс защиты: 2
— Электронная ось Z
Программное обеспечение для лазерного гравера
В комплекте с лазерным гравером поставляется программное обеспечение JobControl: различные по сложности системы, от EASY до EXPERT. Читать подробнее о программном обеспечении лазерного гравера Speedy100.
Лазерный гравер Speedy100R используется для:
лазерной гравировки пластиков, резины, бумаги, тканей, акрила, керамики, картона, фанеры, стекла камня, окрашенных металлических поверхностей, оргстекла, кожи.
лазерной резки таких материалов как дерево, оргстекло, пластик. резина, бумага, картон, кожа, бумага, фанера и прочие листовые неметаллические материалы.
Факты
■Максимальная скорость лазерной гравировки: 180-280 см/с
■Программное обеспечение: различные классы сложности, от EASY до EXPERT
■Высочайшее качество луча: для оптимальных результатов в области лазерной гравировки и резки
■Технология InPack: для максимальной защиты от пыли, дыма, масла и других загрязнений
■Бесщеточные сервоприводы: для максимальной точности и стабильности позиционирования при лазерной гравировке и резке.
■Мощность: от 12 до 45 Вт отпаянная CO2 лазерная трубка.
■Максимальное поле лазерной гравировки: 610 x 305 x 170 мм
■Класс защиты: 2
■Высота обрабатываемого материала: 170 мм.
■Габариты гравера: 974 x 765 x 457 мм.
Безопасная работа с лазером
Благодаря тому, что система Speedy 100 полностью закрыта, лазерная установка имеет сертификат Лазерной Безопасности 2-го класса. Это означает, что на нем можно безопасно работать в любых условиях.
Компоненты промышленного класса
Компоненты подвижной части, оптики, электроники, рабочей головки и лазерного источника – все выполнено из самых высококачественных деталей.
Программное обеспечение Job Control
Программное обеспечение Job Control обеспечивает максимальную функциональность и гибкость управления при лазерной гравировке и резке.
Линзы для лазерной гравировки и резки
Линзы 1.5”, 2.0″ и 2.5″ необходимы для самых различных применений и высококачественной обработки материала. Вытяжная система
Эффективная вытяжная система необходима для надежной работы лазерной установки. Вытяжная система защищает Вас, Ваших сотрудников и окружающую среду от пыли и запахов, возникающих во время лазерной гравировки или резки. Мы предлагаем широкий ассортимент вытяжных устройств для различных сфер применения.
Вытяжные системы фирмы Trotec оснащены специальной электроникой. Информация о результатах работы фильтра и о его состоянии отображается на дисплее.
В нашем ассортименте представлены как простые вентиляторы, так и высокотехнологичные системы фильтрации.
Опции и ПО
Автофокусировка
Лазерная установка Speedy 100 на базе
CO2 лазера имеет два режима автофокусировки – с помощью электрооптики или программного обеспечения JobControl. Преимущество: Вы выбираете ту опцию, которая Вам удобнее.
Система поддува
Система поддува предохраняет от возгорания воспламеняющиеся материалы во время лазерной гравировки или резки, а также защищает линзу от загрязнения. Используя управляющую программу JobControl поддув можно включать и выключать автоматически.
Стол для лазерной резки
Стол для лазерной резки имеет уменьшенную площадь соприкосновения с материалом. Таким образом, минимизируется отражение лазерного луча и предотвращается воспламенение. Воздух и пар вытягиваются через ячеистую структуру, оставляя стол чистым. Стол для лазерной резки оснащён линейками и крепежом для точного позиционирования на рабочем столе
Линзы
Для достижения оптимальных результатов при различных видах работ используются линзы с разными фокусными расстояниями.
Линза f`= 1.5“: для тонкой, высококачественной лазерной гравировки (для шрифта размером до 3pt)
Линза f`= 2.0“: стандартная линза для лазерной гравировки и лазерной резки
Линза f`= 2.5“: для лазерной гравировки и лазерной резки
Мы всегда готовы проконсультировать Вас по вопросу выбора линз исходя из Ваших задач.
Это приспособление предназначено для лазерной гравировки цилиндрических, конических или сферических объектов, таких как бутылки, стаканы или бокалы. Оно позволяет обрабатывать изделия диаметром от 1 до 160 мм и длиной до 400 мм. Для маркировки конических поверхностей приспособление может фиксироваться специальным бесступенчатым фиксатором наклонно под углом до 12 градусов к основанию.
Вытяжная система
Эффективная вытяжная система необходима для надежной работы лазерной установки. Вытяжная система защищает Вас, Ваших сотрудников и окружающую среду от пыли и запахов, возникающих во время лазерной гравировки или резки. Мы предлагаем широкий ассортимент вытяжных устройств для различных сфер применения. Вытяжные системы фирмы Trotec оснащены специальной электроникой. Информация о результатах работы фильтра и о его состоянии отображается на дисплее.В нашем ассортименте представлены как простые вентиляторы, так и высокотехнологичные системы фильтрации.
Увеличение мощности лазерной установки
Вы можете увеличить мощность Вашей лазерной установки до 100 Вт. Зачастую это позволяет избежать приобретения новой, более мощной системы.
В качестве дополнительной опции Speedy 100 может быть поставлена с передвижной подставкой.
Расширенная гарантия
Стандартную гарантию на оборудования для лазерной гравировки Speedy 100 можно, по желанию, расширить на пять лет.

Лазерный гравер Speedy100R


Лазерный гравер Speedy100R
.
-
gmsaby
- Новичок
- Сообщения: 3
- Зарегистрирован: 29 май 2017, 11:07
- Репутация: 0
- Настоящее имя: Мансур
-
Контактная информация:

Ремонт TROTEC Speedy 100R
Доброго времени суток! Проблема следующая, сгорел станок(TROTEC Speedy 100R )
, отправили на ремонт в Питер, сказали что ремонт обойдется в 300-350тыс. Но если продать на запчасти то 100тыс. Сам станок(новый) стоит под лям(где то 900 000-1.200000 рублей).
Мне кажется, нас на*бывают. По идеи там надо менять ось X и Y(ремни) + несколько выключателей.
Электроника работает исправно, рабочий стол отпускается и поднимается без проблем. Тем более этот ремонтник предлагал оплатить наличкой, это показалось очень странным. Походу он хочет на этом нормально заработать. Форумчане, что посоветуете? Может какой нибудь сервисный центр. Кто сталкивался с данной проблемой? Благодарю.
-

Nonstopich
- Мастер
- Сообщения: 1016
- Зарегистрирован: 02 авг 2015, 19:46
- Репутация: 284
- Настоящее имя: Александр Абдулаев
- Откуда: Москва, ФО Крым — Феодосия
- Контактная информация:

Re: Ремонт TROTEC Speedy 100R
Сообщение
Nonstopich » 13 окт 2017, 09:27
Я не специалист, но всё же оставлю свою заметку.
Рама подверглась некоторому воздействию температур => металл расширялся, а потом снова усаживался => геометрия поменялась.
В конечном итоге вам нужно проверить геометрию.
Отмойте бедалагу для начала. Вылезут косяки.
Покажите механику, что ли ![]() Хоть на Пули и Ремни посмотрим.
Хоть на Пули и Ремни посмотрим.
Ко всему прочему: вы просите оценить ущерб (ну если забыть, о том, что вам его уже оценили ![]() ) и не показываете целиком всех подробностей.
) и не показываете целиком всех подробностей.
-
tampotrafaret
- Опытный
- Сообщения: 105
- Зарегистрирован: 15 июн 2017, 07:53
- Репутация: 12
- Контактная информация:
Re: Ремонт TROTEC Speedy 100R
Сообщение
tampotrafaret » 13 окт 2017, 11:14
Думаю если приколхозить к нему китайскую голову и переделать все на шаговые моторы то можно почти даром сделать но это будет не trotec.
Там же в оригинале сервоприводы стоят, направляйки модные, плюс как верно заметили нужно перед заменой линеек геометрию проверить и выправить.
Русский Ваня конечно тысяч 100 прикрутил, но вряд-ли больше. Качество оно дорогое (я про зип а не про ваню)
-
boot78
- Новичок
- Сообщения: 3
- Зарегистрирован: 19 дек 2017, 10:33
- Репутация: 0
- Контактная информация:
Re: Ремонт TROTEC Speedy 100R
Сообщение
boot78 » 19 дек 2017, 10:37
Добрый день ребята. Кто может поделиться программой TROTEC Job Control , машинка стоит без дела. Директор меня убивает, диск просрали который шел с ним. Комп сгорел из за короткого замыкания,
Очень буду благодарен.
-
aftaev
- Зачётный участник

- Сообщения: 34042
- Зарегистрирован: 04 апр 2010, 19:22
- Репутация: 6186
- Откуда: Казахстан.
- Контактная информация:

Re: Ремонт TROTEC Speedy 100R
Сообщение
aftaev » 19 дек 2017, 10:56
boot78 писал(а):диск просрали который шел с ним
А на завод производителя написать — религия запрещает? https://www.troteclaser.com/ru/lazernye … obcontrol/
boot78 писал(а):Комп сгорел из за короткого замыкания,
Винчестер тоже?
Дилетанту сложные вещи кажутся очень простыми, и только профессионал понимает насколько сложна самая простая вещь
Кто хочет — ищет возможности, кто не хочет — ищет оправдание.
Найди работу по душе и тебе не придется работать.
-
boot78
- Новичок
- Сообщения: 3
- Зарегистрирован: 19 дек 2017, 10:33
- Репутация: 0
- Контактная информация:
Re: Ремонт TROTEC Speedy 100R
Сообщение
boot78 » 19 дек 2017, 15:48
Вопрос в другом если мой директор узнает что я просрал все то меня уволят ещё и накажут на деньги. Ладно комп хер с ним я с дома притащу свой, но вот где взять ПО это. Если напишу производителям то они что то попросят а это придётся дергать директора брать какие то документы на тот же лазер. и всё мне жопа
-

niksooon
- Мастер
- Сообщения: 2088
- Зарегистрирован: 23 июн 2014, 23:18
- Репутация: 1193
- Откуда: Кашира
- Контактная информация:

Re: Ремонт TROTEC Speedy 100R
Сообщение
niksooon » 19 дек 2017, 15:54
а у дяди Гугла спросить за trotec job control download?
Сделанное правильно — красиво. Если сделанное тебе не нравится — то и работать оно будет хреново. Перевари, пересверли, выпили заново — ну, или хотя бы покрась.
-
aftaev
- Зачётный участник
- Сообщения: 34042
- Зарегистрирован: 04 апр 2010, 19:22
- Репутация: 6186
- Откуда: Казахстан.
- Контактная информация:
Re: Ремонт TROTEC Speedy 100R
Сообщение
aftaev » 19 дек 2017, 16:04
boot78 писал(а):но вот где взять ПО это.
Возмешь ПО, выяснится ключик нужен ![]()
ПО стоит на винчесте на сгоревшем компе, нужно образ снять от греха и перекинуть винчестер на другой комп. Найди норм. компьютерщика.
Дилетанту сложные вещи кажутся очень простыми, и только профессионал понимает насколько сложна самая простая вещь
Кто хочет — ищет возможности, кто не хочет — ищет оправдание.
Найди работу по душе и тебе не придется работать.
-
boot78
- Новичок
- Сообщения: 3
- Зарегистрирован: 19 дек 2017, 10:33
- Репутация: 0
- Контактная информация:
Re: Ремонт TROTEC Speedy 100R
Сообщение
boot78 » 19 дек 2017, 16:34
arkhnchul писал(а):так сначала напишите и посмотрите, что спросят. Вероятно, им хватит модели и серийника.
Написал молчат
niksooon писал(а):а у дяди Гугла спросить за trotec job control download?
искал, нет такой
Я бы тут не просил поделиться если бы в нете было. Прост окогда будет программа то я смогу уже к директору подойти и потребовать документы и серийник на прогу . ПОяснив тем что переустановил винду. ![]()
-
30S.ru
- Новичок
- Сообщения: 1
- Зарегистрирован: 02 июн 2018, 21:26
- Репутация: 0
- Настоящее имя: Юрин Сергей
- Контактная информация:
Re: Ремонт TROTEC Speedy 100R
Сообщение
30S.ru » 02 июн 2018, 21:32
gmsaby писал(а):Доброго времени суток! Проблема следующая, сгорел станок(TROTEC Speedy 100R )
qJbhP9Bm1z4.jpg
, отправили на ремонт в Питер, сказали что ремонт обойдется в 300-350тыс. Но если продать на запчасти то 100тыс. Сам станок(новый) стоит под лям(где то 900 000-1.200000 рублей).
Мне кажется, нас на*бывают. По идеи там надо менять ось X и Y(ремни) + несколько выключателей.
ac2OTxBoK8Q.jpg
Электроника работает исправно, рабочий стол отпускается и поднимается без проблем. Тем более этот ремонтник предлагал оплатить наличкой, это показалось очень странным. Походу он хочет на этом нормально заработать. Форумчане, что посоветуете? Может какой нибудь сервисный центр. Кто сталкивался с данной проблемой? Благодарю.
Здравствуйте, интересуют запчасти на trotec 100/ тел 89162289922
-
Trotec
- Новичок
- Сообщения: 3
- Зарегистрирован: 04 июн 2018, 15:05
- Репутация: 1
- Настоящее имя: Юрий
- Контактная информация:
Re: Ремонт TROTEC Speedy 100R
Сообщение
Trotec » 04 июн 2018, 15:27
Можно ремонтировать поэтапно. Для начала нужно пойти в сервисный центр по ремонту оргтехники с куском зубчатого ремня. Возможно, что это стандартный ремень и применяется широко. Купить метражом по поставить вместо пострадавшего. Если не найдется — то в «Лазерном центре» или в европейском офисе «Trotес» запросить запчасти в виде ремней. На стр. 92 руководства есть артикул ремней 79758 по Х и 79830 по Y. Концевики — стандартные — в любом магазине электроники продаются. Пока ремня нет — нужно проверить — как движется «каретка» по оси Х. Промыть её нужно керосином. Если движение будет равномерным — линейный подшипник не пострадал. Крышку из оргстекла восстановить легко. Но там есть магнитные датчики «открытия крышки», если датчики не разместить правильно — станок не шелохнётся — сработает блокировка — типа крышка открыта. А тем, кто пользуется такими станками — посоветуйте — как не допустить такого возгорания? Что не нужно делать, что бы такого не случилось?
-
MasterRB
- Новичок
- Сообщения: 1
- Зарегистрирован: 03 май 2019, 17:46
- Репутация: 0
- Настоящее имя: Алексей
- Контактная информация:
Re: Ремонт TROTEC Speedy 100R
Сообщение
MasterRB » 03 май 2019, 17:49
Тема похоже слегка умерла, но по личному опыту:
1. Чистить почаще стол для резки, загорается в нем обычно.
2. Свисающая бахрома целлофановая на акриле горит только в путь. Потом уже и вместе с акрилом.
В Лазерном Центре ценники на всё очень даже очень.
Сервомотор покупал недавно — 25к.. Линза — 30к… и т.п.
Так что по количеству погоревшего и их ценникам на расходники так оно и выйдет.
- Manuals
- Brands
- Trotec Manuals
- Printer
- Speedy 100
- Operation manual
-
Bookmarks
Quick Links
OPERATION MANUAL
8010 Trotec Speedy 100 / R
Related Manuals for Trotec Speedy 100
Summary of Contents for Trotec Speedy 100
-
Page 1
OPERATION MANUAL 8010 Trotec Speedy 100 / R… -
Page 2
– GmbH. -
Page 3
– 1.5 Manufacturer’s Label – 2.2 Laser Safety Information – – –… -
Page 4
6.6 How to create a Service File… -
Page 5
–… -
Page 6
from Caution when processing conductive materials (carbon fibers,…)! Conductive… -
Page 7
24“ x 12“/ 610 x 305 mm 1,5”, 2,0” or 2,5” magnetic table, 2” lens, USB connection, Interchangeable – – – – – –… -
Page 9
24“ x 12“ / 610mm x 305mm 1,5”, 2,0” or 2,5” magnetic table, 2” lens, USB connection, Interchangeable – – – – – –… -
Page 12
– GmbH., Linzer Straße 156, A –… -
Page 13
operation) that affect the safety. -
Page 18
CAUTION INVISIBLE LASER RADIATION WHEN OPEN AVOID EYE OR SKIN EXPOSURE TO MACHINE FIRST DIRECT OR SCATTERED RADIATION… -
Page 21
–… -
Page 22
– “Electricity, Power, Fuse” in section “ ”. -
Page 23
– Computer –… -
Page 24
Connect Hz) –… -
Page 29
–… -
Page 34
. If the light barrier is broken, e.g. ≥… -
Page 35
By pressing the “ ” key and a Z… -
Page 36
– time). “SHIFT” (2): START (REPEAT) “Start (R )”… -
Page 40
–… -
Page 41
– Click the icon “focus laser” in the Trotec – (If you don’t have the autofocus… -
Page 44
–… -
Page 48
Orientation”. -
Page 50
–… -
Page 53
–… -
Page 54
won’t… -
Page 56
. To be able to access… -
Page 59
–… -
Page 60
”Could not build up connection to the .” ”Spool” (” ”) and that the correct path… -
Page 61
5“ 2“ 5“ ≥2.5″ lens… -
Page 62
≥… -
Page 63
– –… -
Page 65
Update,…) -
Page 66
How to create a Service File Go to “Settings” > “Create Service File”. The window „Save Service File to“ shows up. Please select a directory to save the file and click on „Save“. -
Page 68
The window „Add Layout File“ shows up. AutoCAD file,…). Click on „Open“.
Принимаем оплату российскими картами, выкупаем и доставляем ваши заказы из магазинов США и Германии. Наша доставка работает в стандартном режиме.
×
Сейчас вы находитесь в городе Москва
Выберите город, в который Вы хотите осуществить доставку


![]()
![]()
Вопрос по товару?
Мы перезвоним!
Основные характеристики
Оригинальное название:
Trotec Laser Speedy 100R 30 Watt Lasermaschine + Absaugung
Товар из США
Доставим в Ваш город
Артикул:185657224727
Продавец:
laser_cnc
(3006)
Местонахождение:Hannover, DE
Доставка до склада США
Бесплатно
Этот товар выгоднее доставить через склад Германии

Товары из магазинов
США и Европы
без наценок!
Отправили
67 000 посылок
с 2008 года!
Знаменитый
каталог eBay
на русском языке!
Доставка курьером
до двери
Почтой или в удобный пункт выдачи!
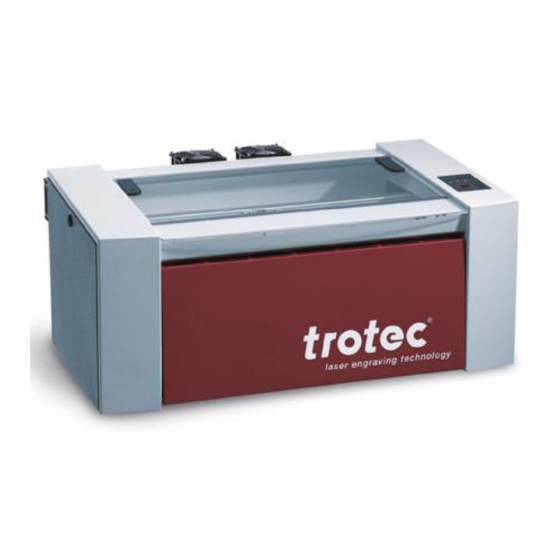
Trotec Laser Speedy 100R 30 Watt Lasermaschine + Absaugung
Trotec Laser Speedy 100R 30 Watt Lasermaschine + Absaugung – можно купить на shopozz.ru с доставкой
из Hannover, DE. Все товары из
данной категории быстро и вовремя доставляются в Россию и страны СНГ.
Полную информацию о доставке можно посмотреть в разделе «Доставка».
На товары данной категории действует доступная цена,
поэтому Trotec Laser Speedy 100R 30 Watt Lasermaschine + Absaugung можно
приобрести всего за
1309689 руб.
Не можете сделать выбор? Посмотрите другие товары продавца
laser_cnc
(3006)
–
«Смотреть все товары».
Возникли вопросы о товаре, условиях оплаты либо доставки?
Закажи обратный
звонок!
В чем наша ценность
Покупки без ограничений
- Доставка в любой город СНГ
- Простой процесс оплаты
- Каталог на русском языке
Доступ к 3 млн. товаров
- Доставка в любой город СНГ
- Простой процесс оплаты
- Каталог на русском языке
Консолидация и сервис
- Доставка в любой город СНГ
- Простой процесс оплаты
- Каталог на русском языке
Покупки в США и Европе — это просто
Вы делаете заказ — мы выкупаем товары и доставляем вам
Склад

$46
Косметика M.A.C.maccosmetics.com

$46
Часы Timexamazon.com

$15
Джинсы levi’sebay.com
К вам домойОтправляем в Россию и
во все страны СНГ
Начать выгодные покупки в зарубежных интернет-магазинах