- Manuals
- Brands
- Roche Manuals
- Measuring Instruments
- cobas Urisys 1100
- Operator’s manual
-
Contents
-
Table of Contents
-
Troubleshooting
-
Bookmarks
Quick Links
Urisys 1100
Gebrauchsanweisung
Operator’s Manual
Manual de instrucciones
Related Manuals for Roche cobas Urisys 1100
Summary of Contents for Roche cobas Urisys 1100
-
Page 1
Urisys 1100 Gebrauchsanweisung Operator’s Manual Manual de instrucciones… -
Page 2
Gebrauchsanweisung………… Seite 1–28 Operator’s Manual …………Page 29–54 Manual de instrucciones………. Página 55–82… -
Page 4
Directive 98/79/EC on in vitro diagnostic la Directiva 98/79/CE sobre los produc- 98/79/EG. medical devices. tos sanitarios para diagnóstico in vitro. Stand der Information: Last update: Fecha de la última 2008-06 2008-06 revisión: 2008-06 COBAS, Urisys, Urisys 1100, Combur-Test and Reflotron are trademarks of Roche. -
Page 5: Table Of Contents
Inhaltsverzeichnis Seite Einleitung Systembeschreibung Messprinzip Bedienungselemente und Funktion Software Übersicht Flussdiagramm des Benutzermenüs Funktionen des Benutzermenüs Ergebnistabelle Änderung der Bereichsgrenzen Inbetriebnahme Umrüstung auf Messung von Combur Test und Combur Test Teststreifen Benutzer-ID Authentifizierung Kalibration Teststreifenmessung Übersicht Normalmodus der Teststreifenmessung Ergebnisausdruck Schnellmodus (Serienmessung) Messfehler Eingeben einer Patienten-ID, Benutzer-ID und eines Authentifizierungspasswortes…
-
Page 6: Einleitung
Test und Combur Test* von Roche Diagnostics. Die Teststreifen werden unter standardisierten Bedingungen gemessen, die Ergebnisse werden gespeichert und über den eingebauten Drucker oder die serielle Schnittstelle ausgegeben. Das Urisys 1100 System ist für die In-vitro-Diagnose (IVD) bestimmt und darf nur von sachkundigem Laborpersonal und Ärzten verwendet werden.
-
Page 7: Systembeschreibung
2. Systembeschreibung Messprinzip Der Teststreifen wird auf einem beweglichen Schlitten fixiert, der durch einen Schrittmotor unter den fest eingebauten Messkopf gezogen wird. Dabei werden das Referenzfeld im Schlitten und die einzelnen Testfelder des Harnteststreifens nacheinander gemessen. Der Messkopf enthält LEDs unterschiedlicher Wellenlänge. Die optoelektronische Messwertermittlung läuft nach folgen- dem Schema ab: Von einer Leuchtdiode (1) wird die Testfeldoberfläche (2) in einem optimalen Winkel mit Licht einer definierten Wellenlänge angeblitzt.
-
Page 8: Bedienungselemente Und Funktion
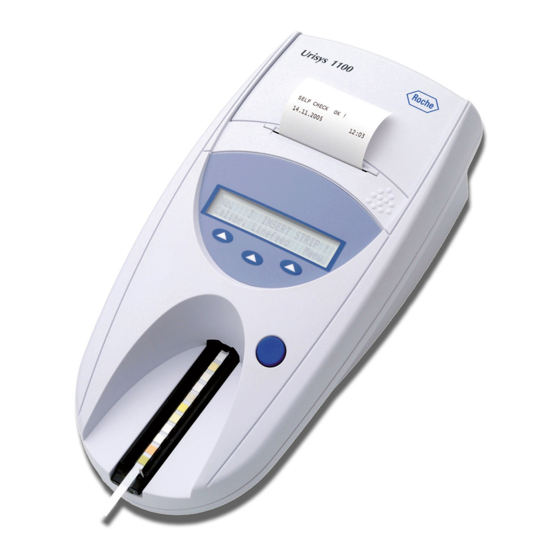
Bedienungselemente und Funktion Bedienungselement Funktion 1. Druckerklappe Kann zum Einlegen des Druckerpapiers aufgeklappt werden 2. Display/Tastatur Flüssigkristallanzeige (LCD) und 3 Funktionstasten zur Menüsteuerung und Bediener- führung 3. Teststreifenschlitten Zur Teststreifen-Auflage und -Fixierung 4. START-Taste a) Startet die Teststreifenmessung b) Rücksprung aus den Menüebenen in das Ausgangsmenü (Messbereitschaft) 5.
-
Page 9: Flussdiagramm Des Benutzermenüs
Flussdiagramm des Benutzermenüs Bestätigung der Einstellung und Rückkehr in die Messbereitschaft aus jeder Menüebene mit der START-Taste. SW 5.x (Internationale Version) SELBST-TEST Ben.-ID=AN BENUTZER: ……. Ben.-ID eingeben! PASSWORD: Ben.-ID=AUS Passwort eingeben ! AUTH=AUS PASSWORD=O.K. Nr: … EINLEGEN ! Messbereitschaft Kalibr. Papier Menü KALIBRATION STARTEN! PAPIERVORSCHUB MENÜ…
-
Page 10
Flussdiagramm des Benutzermenüs (Fortsetzung) Bestätigung der Einstellung und Rückkehr in die Messbereitschaft aus jeder Menüebene mit der START-Taste. SW 5.x (Internationale Version) SETUP 1 Modus Streifen Setup 2 STREIFENEINSTELLUNGEN SETUP 2 Einheit Grenzen Datum/Zeit Par. Setup3 STREIFEN:CHEMSTRIP10 UX TT.MM.JJJJ hh:mm C-10 Sequenz 12/24… -
Page 11: Funktionen Des Benutzermenüs
Funktionen des Benutzermenüs Selbsttest: Im Selbsttest prüft das Gerät nach dem Einschalten automatisch, ob der Program-Chip, der Antriebsmechanis- mus des Schlittens, der Druckeranschluss und die Optik einwandfrei funktionieren. Gleichzeitig wird geprüft, ob sich der eingelegte Schlitten in einwandfreiem Zustand befindet und dem im Menü ausgewählten Streifentyp entspricht (siehe Ka- pitel 4 und 7.1).
-
Page 12
Typ: Wahl des Teststreifentyps • Combur Test UX („C-10“) • Combur Test („C-7“) • Combur Test („C-5“) Das Urisys 1100 System ist werkseitig zur Messung von Combur Test UX Teststreifen eingestellt. Falls Sie Combur Test oder Combur Test Teststreifen verwenden wollen, benötigen Sie den passenden Teststreifenschlitten (siehe Kapitel 4.1 und 11). -
Page 13
Datum/Zeit: Einstellung von Datum und Uhrzeit. In der werkseitigen Einstellung wird das Datum in der Reihenfolge Tag-Monat-Jahr angezeigt, die Uhrzeit in Stunden (24- Stunden-Wechsel) und Minuten. Sofern erforderlich, kann die Uhrzeit auf einen 12-Stunden-Rhythmus (a.m./p.m.) umge- stellt werden. Über die Funktionstaste „Sequenz“ lässt sich das Datumsformat auf die Reihenfolge Monat-Tag-Jahr bzw. Jahr-Monat-Tag umstellen. -
Page 14: Ergebnistabelle
Ergebnistabelle Das Urisys 1100 System druckt die Teststreifenergebnisse in folgenden Konzentrationsstufen aus: ACHTUNG: Genauere Informationen zum Verständnis der Messergebnisse finden Sie in der Roche- Publikation Compendium Urinalysis with Test Strips. Parameter Konventionelle Einheiten SI Einheiten Arbiträre Einheiten (Konv.) (SI) (Arbiträr)
-
Page 15: Änderung Der Bereichsgrenzen
Geräte-ID. Geänderte Bereichsgrenzen gelten nur für den Teststreifentyp, für den die Änderungen durchgeführt wurden. WARNHINWEIS: Bei kundenseitig geänderten Remissionsbereichsgrenzen übernimmt Roche Diagnostics keine Gewährleistung für die Richtigkeit der Messergebnisse. Es obliegt dem Kunden zu prüfen, ob die nach einer Änderung gemessenen Ergebnisse korrekt und plausibel sind.
-
Page 16: Inbetriebnahme
ACHTUNG: Nach großen Temperatur- und Feuchtigkeitsunterschieden soll das Gerät erst nach einer aus- reichenden Akklimatisierung in Betrieb genommen werden. ACHTUNG: Bitte überprüfen Sie den Inhalt der Verpackung umgehend auf Vollständigkeit und Transport- schäden. Bei Transportschäden an Gerät oder Zubehör setzen Sie sich bitte mit Ihrem Roche Diagnostics Kundendienst in Verbindung. Inhalt: • Urisys 1100-Gerät…
-
Page 17
Sofern Papier eingelegt wurde, erfolgt der Ausdruck „SELBST-TEST O.K. “ (SELF CHECK O.K.) mit Datum und Uhrzeit. Ein solcher Ausdruck erfolgt regelmäßig nach dem Einschalten. Erscheint eine Fehlermeldung, hilft die Gebrauchsanweisung oder Ihr örtlicher Roche Diagnostics Kundendienst bei der Problemlösung. (6) Nach erfolgreichem Selbsttest erscheint bei der Erstinbetriebnahme im Display die Meldung „KALIBRATION WIEDER- HOLEN!“… -
Page 18: Umrüstung Auf Messung Von Combur
Ausschalten Es empfiehlt sich, am Ende des Arbeitstages das Gerät auszuschalten und das Netzteil aus der Steckdose zu ziehen (siehe auch Kapitel 7.1, Reinigung). Umrüstung auf Messung von Combur Test und Combur Test Teststreifen Für die Messung von Combur Test oder Combur Test Teststreifen benötigen Sie einen Teststreifenschlitten mit der Typen- bezeichnung „N“…
-
Page 19: Kalibration
Teststreifen entnehmen und ordnungsgemäß entsorgen (Hinweise in der Packungsbeilage des Teststreifens beachten!). ACHTUNG: Eine regelmäßige Kalibration ist Voraussetzung für korrekte Messergebnisse. Ohne regel- mäßige Kalibration übernimmt Roche Diagnostics keine Gewährleistung für die Richtigkeit der Messwerte. ACHTUNG: Sie können jederzeit, auch innerhalb der Wochenfrist, eine Neukalibrierung durchführen, z.B.
-
Page 20: Teststreifenmessung
Kalibrationsausdruck Liegen die neuen Kalibrationswerte im zulässigen Bereich, erfolgt automatisch der Ausdruck „KALIBRATION O.K. “ mit Datum und Uhrzeit und Angabe der Remissionswerte der Messpositionen 1-11 für die orangefarbene LED (mittlere Spalte) und die grüne LED (rechte Spalte) (Bild 8). Kalibrationsfehler Liegen die Messwerte des Referenzfeldes oder des Kalibrationsstreifens außerhalb der programmierten Toleranzen, kön- nen folgende Fehlermeldungen im Display angezeigt werden: „REFERENZFELDFEHLER!“, „KALIBRATION UNGÜLTIG!“…
-
Page 21: Ergebnisausdruck
Solange eine Probennummer und „EINLEGEN!“ im Display angezeigt wird, ist das Urisys 1100 System bereit zur Messung. ACHTUNG: Bitte beachten Sie für die ordnungsgemäße Durchführung von Harnanalysemessungen auch die Hinweise in der Packungsbeilage der Harnteststreifen. 1. Teststreifen in die Urinprobe eintauchen, überschüssigen Urin vorsichtig abstreifen. Teststreifen kurz (ca. 1 Sek.) mit der seitlichen Kante auf einer saugenden Unterlage (z.B.
-
Page 22: Messfehler
Danach beginnt sofort die Messung des Referenzfeldes und der Testfelder. Nach 30 Sek. ist die Messung beendet, und die nächste Probennummer erscheint im Display. Für die Serienmessung im Schnellmodus sollten Sie eine genaue Zuordnung der Proben zu den Sequenznummern sicherstellen. Hinweise: 1.
-
Page 23: Datenübertragung An Einen Pc Oder Host-Rechner
ACHTUNG: Wenn während der Messung eines Teststreifens eine Pat. ID mit dem Barcodeleser eingelesen wird, ordnet das Urisys 1100 System diese ID der nächsten sequentiellen Probennummer zu. Eine Löschung dieser Pat. ID ist dann nur durch Aus- und Einschalten des Urisys 1100 Systems vor dem Start der nächsten Messung möglich.
-
Page 24: Reinigung Und Wartung
Reinigung und Wartung Das Urisys 1100 System ist ein wartungsfrei arbeitendes Gerät. Schützen Sie das Gerät vor extremen Temperaturen und zu hoher Luftfeuchtig keit (siehe Kapitel 10) sowie vor starker Lichteinstrahlung (Sonnenlicht, Lichtstrahler). Die Geräteoberfläche und die äußeren Teile des Geräts sind aus hygienischen Gründen sauber zu halten. Bei Bedarf kön- nen sie mit einem feuchten Tuch und mit handelsüblichen Reinigungs- und Desinfektionsmitteln, vorzugsweise mit 70%igem Alkohol, gereinigt werden.
-
Page 25: Fehlermeldungen Und Fehlerbeseitigung
Gerät in den Standby-Zustand über. Nach Drücken der START-Taste erscheint wieder die Fehlermel- dung im Display. Bei Defekten setzen Sie sich bitte mit Ihrem Roche Diagnostics Kundendienst in Verbindung. E1 REFERENZFELDFEHLER MITTE ! Ursache: Die mittlere Stufe des Referenzfeldes im Schlitten verschmutzt oder beschädigt…
-
Page 26
E8 SCHLITTENPOS.-FEHLER ! Ursache: Positionierungskanal im Schlitten (Bild 17) verschmutzt oder nach Rei- nigung noch nass. Niederhaltebügel ist beim Herausfahren des Schlittens ge- öffnet, oder der Niederhaltemechanismus ist durch Urinverkrustungen blockiert (siehe Kapitel 7.1). Maßnahme: Positionierungskanal reinigen, durchblasen oder trocknen (fussel- freies Tuch verwenden) um eine einwandfreie Durchlässigkeit zu gewährleisten. -
Page 27: Schnittstellenbeschreibung
Host-Rechner ermöglicht. Bei dieser Schnittstelle handelt es sich nicht um eine RS-232- Schnittstelle. Ein passendes Verbindungskabel kann von Roche Diagnostics bei Bedarf bestellt werden (siehe auch Kapitel 11). Der an- geschlossene PC muss den Anforderungen an die elektrische Sicherheit gemäß EN 60950 gerecht werden.
-
Page 28: Barcodeleser, At/Pc-Tastatur
Interleaved 2/5.Wenn ein Barcodeleser und eine externe Tastatur angeschlossen werden müssen, wird ein Datenkabel vom Typ CAB 322 IBM AT/XT DIN benötigt. Bei Fragen zum Betrieb des Urisys 1100 Systems mit Barcodelesern wenden Sie sich bitte an Ihren Roche Diagnostics Kundendienst.
-
Page 29: Technische Informationen Und Hinweise
10. Technische Informationen und Hinweise 10.1 Technische Daten Maße: Breite: ca. 150 mm Tiefe: ca. 290 mm Höhe: ca. 95 mm Gewicht: < 0,8 kg Stromversorgung: Externes Netzteil, Modell SA 125A-0735U-S Primär: 100 – 240 V Wechselstrom, 50-60 Hz, 800 mA Ausgang: 7.5 V Gleichspannung, 3000 mA Polarität: –…
-
Page 30: Garantie
Beim Öffnen von Abdeckungen oder Entfernen von Teilen, außer wenn dies von Hand möglich ist, können span- nungsführende Teile freigelegt werden. Auch können Anschlussstellen spannungsführend sein. Eine Wartung oder Reparatur am geöffneten Gerät unter Spannung darf nicht durchgeführt werden. Wenn anzunehmen ist, dass ein gefahrloser Betrieb nicht mehr möglich ist, so ist das Gerät außer Betrieb zu set- zen und gegen unabsichtlichen Betrieb zu sichern.
-
Page 31: Bestell-Liste
11. Bestell-Liste Gerät und Zubehör sind wie folgt lieferbar: Bestellnummer (REF) 03 617 548 Inhalt: Urisys 1100 Gerät Externes Netzteil Modell SA 125A-0735U-S,100 V – 240 V, 50-60 Hz, Program-Chip, Test- streifenschlitten C und N, Druckerpapier, Gebrauchsanweisung, Kurzbedienungsanleitung, Netzkabel, Interaktive Schulungs-CD. 03 666 735 Teststreifenschlitten, Typ „C“, für Combur Test UX Teststreifen…
-
Page 32: Stichwortverzeichnis
12. Stichwortverzeichnis Kapitel Kapitel Akust. Signal Menüstruktur Software 3.2, 3.3 Anzeige-Texte 3.2, 8. Messprinzip Messung durchführen 6.2, 6.4 Messwertspeicher Messwerte speichern Barcodeleser Bedienungselemente Bereichsgrenzen 3.3, 3.4, 3.5 Bereichsgrenzen ändern Netzspannung 10.1 Control-Test M 3.3, 5., 11. Papiervorschub 3.3, 4. Parameter im Ergebnisausdruck festlegen Parameter im Ergebnisausdruck, Reihenfolge festlegen Daten löschen…
-
Page 33
Table of Contents Page Introduction System Description Measuring Principle Components and Functions Software Overview Menu Structure (Flowchart) Menu Functions Results Table Changing the Range Limits Installation Modification for Combur Test and Combur Test Test Strips Operator ID Authentication Calibration Reading Test Strips Overview Normal Mode (for Single Readings) Patient Report… -
Page 34: Introduction
Combur Test and Combur Test* from Roche Diagnostics. It reads the strips under standard ized conditions, saves the results to memory and outputs them via its own inbuilt printer and/or serial interface. The Urisys 1100 system is designed for In Vitro Diagnostic (IVD) use by qualified physicians and laboratory staff.
-
Page 35: System Description
2. System Description Measuring Principle The test strip is placed on a sliding tray, and a stepping motor moves it under the reading head, which remains stationary. The ana lyzer reads the reference pad, followed by each of the test pads on the strip. The reading head contains LEDs that emit light at various wavelengths.
-
Page 36: Components And Functions
Components and Functions Component Function 1. Printer cover Flips up for insertion of printer paper 2. Display/keypad LCD display and three function keys for menu-driven operation and interfacing with the user 3. Test strip tray Holds and anchors the strip 4.
-
Page 37: Menu Structure (Flowchart)
Menu Structure (Flowchart) Pressing the START button confirms the setting, closes the submenu, and resumes Ready-to-Measure status. SW 5.x (International Version) SELF CHECK Op.ID=ON OPERATOR: ……. Enter Op.ID! PASSWORD: Op.ID=OFF Enter password! AUTH.=OFF PASSWORD=O.K. No.: … INSERT STRIP ! Ready-to-Measure Status Calibr.
-
Page 38
Menu Structure (continued) Pressing the START button confirms the setting, closes the submenu, and resumes Ready-to-Measure status. SW 5.x (International Version) SETUP 1 Modes Strip Setup2 STRIP SETTINGS SETUP 2 Type Units Limits Date/Time Par. Setup3 STRIP TYPE:COMBUR10 UX DD.MM.YYYY hh:mm C-10 Sequence… -
Page 39: Menu Functions
Menu Functions Self Check: During Self Check at power-on, the analyzer automatically checks that the program chip, the tray transport mechanism, the printer connection and optical system are all OK. The tray type is checked (see Sections 4 and 7.1) to en- sure that it correctly matches the strip type selected in the menu.
-
Page 40
Units: Options are: • Conventional units (mg/dL) • SI units (mmol/L) • Arbitrary units (1+, 2+, 3+, 4+) Either single units or combined units (conventional/arbitrary or SI/arbitrary) can be selected. The operator selects a unit in which the results are to be stored, printed and/or transferred to a computer. After a new unit has been selected, the repeat printout (activated by “Print Results”) and all following printouts and/or data transfer (acti- vated by “Send Results”) will be in the newly chosen unit. -
Page 41: Results Table
Results Table The Urisys 1100 system prints the results in the following gradation of concentration: ATTENTION: For full details on how to interpret results, consult the following Roche Diagnostics publication, Compendium Urinalysis with Test Strips. Parameter Conventional Units SI Units Arbitrary Units (Conv.)
-
Page 42: Changing The Range Limits
Changed range limits apply only to the test strip type for which the changes are made. CAUTION: The correctness of results obtained after the user has altered the ranges or reflectance values is not warranted by Roche Diagnostics. The user is responsible for validating the consistency of results after changes have been made.
-
Page 43
“Self Check OK” is executed with date and time; this happens whenever the instrument is switched on. If an error occurs, consult the Operator’s Manual or contact your local Roche Diagnostics service representative. Gebrauchsanweisung V04 / Operator’s Manual V04 / Manual de instrucciones V04… -
Page 44: Modification For Combur 7 Test And Combur 5 Test Test Strips
(6) Upon first use of the analyzer, the message “REPEAT CALIBRATION” appears after a successful self check. Press the “No” key to attain Ready-to-Measure status. This also happens if the instrument is not used for more than seven days. To bring the instrument to Ready-to-Measure mode, insert the paper and execute the calibration.
-
Page 45: Authentication
ATTENTION: If the maximum length of identification is exceeded the input cursor will skip to the first character and the identification will be overwritten. Authentication It is possible to download up to 300 operator IDs with corresponding passwords (up to 12 alphanumeric characters) from the host PC via the ASTM protocol.
-
Page 46: Calibration
CAUTION: Regular calibration is necessary to ensure the quality of the results obtained. Roche Diagnostics cannot warrant the correctness of results if the system is not calibrated regularly. ATTENTION: You can recalibrate the system at any time, even if a week has not elapsed since the last calibration, for example if a Combur Test UX test strip has returned an implausible result.
-
Page 47: Reading Test Strips
Calibration printout If the new calibration results are within the permitted range, the message “CALIBRATION O.K. ” is automatically printed with a date and timestamp and also a list of reflectance values for measuring positions 1–11 for the orange LED (middle column) and green LED (right column) (see Figure 8).
-
Page 48: Patient Report
ATTENTION: To ensure that urinalysis is carried out correctly, read the package insert included with the test strips. 1. Dip the test strip in the urine sample and carefully wipe off any excess urine. Briefly (approximately 1 second) dab the side edge of the strip on a clean, absorbent surface (for example kitchen roll) (see Figure 9).
-
Page 49: Strip Measurement Error
2. When Fast Mode is selected, the analyzer continues to operate in Fast Mode for the rest of the calendar day, even if the analyzer is switched off and then on again. 3. Fast Mode is cancelled as soon as the date is automatically incremented. WARNING: When performing serial measurements in Fast Mode, allow the strips to react for approxi- mately 45 seconds before inserting them in the Urisys 1100 system and pressing START.
-
Page 50: Data Transmission To A Pc Or Host Computer
When data are entered from the keyboard, each character appears immediately in the display. It can be erased by back- spacing, and corrected as necessary. Press the keyboard ENTER key to terminate input, otherwise the Urisys 1100 system cannot start reading. Press the keyboard Escape key to delete the entire entry or turn the Urisys 1100 system off and then on again.
-
Page 51: Error Messages And Troubleshooting
Error messages are shown in the display but are not printed out. Following 5 minutes of inactivity, the analyzer switches to Standby mode. The error message is displayed again when the START button is pressed. In the event that the instrument is defective, contact your local Roche Diagnostics representative. E1 REFERENCE PAD ERROR Cause: The middle portion of the reference pad on the tray is soiled or damaged.
-
Page 52
E6 CHIP ERROR ! Cause: The program chip on the right of the analyzer underneath the printer cov- er (see Figure 18) is missing, is not making contact, is defective or contains an old soft ware version. Action: Switch off the Urisys 1100 system. Insert the program chip and switch the instrument on again. -
Page 53
E18 INVALID OP.ID! Cause: The entered operator ID is not valid. Action: Enter a valid operator ID. E19 LIST DOWNLOAD FAILED Cause: The new operator ID list download failed. Action: No action. After 2 seconds next state starts with old list if there was. E20 NO VALID LIST! Cause: There is no valid list at all in the device. -
Page 54: Connecting To Other Devices
This is not an RS 232 type interface. On request, Roche Diagnostics can supply a suitable standard data cable (see also Section 11). The connected PC must satisfy the requirements with regard to electrical safety laid down in EN 60950.
-
Page 55: Technical Information And Notices
If a barcode reader and an external keyboard have to be connected a data cable CAB 322 IBM AT/XT DIN is needed. For questions regarding the operation of the Urisys 1100 system with barcode readers, please contact your local Roche Diagnostics representative.
-
Page 56: Safety Notices
10.2 Safety Notices This analyzer was designed and manufactured to comply with the following international regulations “Safety requirements for electrical equipment for measurement, control and laboratory use” and left the factory in a safe condition. In order to keep the instrument in a perfect and safe condition, it is up to the user to observe all instructions and warnings included in this manual.
-
Page 57: Ordering Information
11. Ordering Information The analyzer, consumables and accessories are: Catalogue No. (REF) 03 617 548 Content: Urisys 1100 analyzer, Adapter Model SA 125A-0735U-S, 100 V — 240 V, 50/60 Hz, Program Chip, Test Strip Trays C and N, Printer Paper, Operator’s Manual, Quick Reference Guide, power cable, Interactive Training CD. 03 666 735 Test strip tray Type C for Combur Test UX test strips…
-
Page 58: Alphabetical Index
12. Alphabetical Index Section Section Acoustic signal (beep) Operating parts Barcode reader Parameters in patient report, setup Basic settings Pat. Id. entry Beep (acoustic signal) Patient identification Positioning hole Positioning of test strip Power supply 4.,10.1 Cable configuration Printer paper Calibration 4., 4.1, 5.
-
Page 59
Indice Página Introducción Descripción del sistema Principio de medición Componentes y funciones Software Resumen Estructura del menú (diagrama) Funciones del menú Tabla de resultados Modificación de los rangos Puesta en marcha Cambio a la medición de las tiras reactivas Combur Test o Combur Test Código de identificación del operador… -
Page 60
Test UX, Combur Test y Combur Test* de Roche Diagnostics. Las tiras reactivas son leídas y medidas bajo condiciones estándar, los resultados memorizados y enviados a la impresora incorporada al aparato y/o al interfaz serial. El sistema Urisys 1100 está destinado al uso como Diagnóstico In Vitro (IVD) por médicos y personal de laboratorio cualifi- cados. -
Page 61
2. Descripción del sistema Principio de medición La tira reactiva se deposita sobre una guía, y un motor de avance gradual la desplaza bajo el cabezal de lectura que per- manece estacionario. El aparato efectúa la medición tanto de la zona de referencia de la guía como de las distintas zonas de la tira reactiva. -
Page 62
Componentes y funciones Componente Función 1. Tapa de la impresora Puede levantarse para colocar el papel de impresora 2. Pantalla/teclado Pantalla de cristal líquido y tres teclas de función para la operación del menú y el interfaz con el usuario 3. -
Page 63
Estructura del menú (diagrama) Pulsando la tecla START, Vd. confirma el ajuste, cierra el submenú y retorna al estado “Listo para medición”. SW 5.x (Versión internacional) AUTOCONTROL Cod. Op.=ON OPERADOR: ……. Entrar nuevo COD. OP.! PASSWORD: Cod. Op.=OFF Entrar password ! AUTH=OFF PASSWORD=O.K. -
Page 64
Estructura del menú (Continuación) Pulsando la tecla START, Vd. confirma el ajuste, cierra el submenú y retorna al estado “Listo para medición”. SW 5x (Versión internacional) SETUP 1 Modo Tira Setup2 AJUSTES DE TIRA SETUP 2 Tipo Unidad Limites Fecha/Hora Par. -
Page 65
Funciones del menú Autocontrol: Tras el encendido, el aparato prueba mediante un autocontrol automático que el chip de programa, el meca- nismo de accionamiento de la guía, la conexión de impresora y el sistema óptico funcionan perfectamente. Al mismo tiem- po se comprueba el tipo de guía (ver apartados 4 y 7.1) para garantizar que se corresponde con el tipo de tiras selecciona- das en el menú. -
Page 66
Tipo de tira reactiva: Selección del tipo de tira reactiva: • Combur Test UX (“C-10”) • Combur Test (“C-7”) • Combur Test (“C-5”) El sistema Urisys 1100 ha sido ajustado en fábrica para la medición de las tiras reactivas Combur Test UX. -
Page 67
Fecha/hora: Ajuste de fecha y hora. El aparato ha sido ajustado en fábrica siguiendo el orden día-mes-año, y la hora en horas y minutos (conforme a periodos de 24 horas). No obstante, la hora también puede ser mostrada siguiendo el sistema “12 horas más a.m./p.m”. Pulse la te- cla de función “Secuencia”… -
Page 68
Tabla de resultados El sistema Urisys 1100 imprime los resultados en los niveles de concentración siguientes: ATENCIÓN: Para obtener más detalles sobre cómo interpretar los resultados, consulte el siguiente folleto de Roche Diagnostics: Compendium Urinalysis with Test Strips. Parámetro Unidades convencionales… -
Page 69
ATENCIÓN: Por favor, controle inmediatamente la integridad del contenido de la caja. En caso de comprobar daños de transporte en el contenido, diríjase al representante local de Roche Diagnostics. Contenido: •… -
Page 70
Si ocurre un error, consulte el Manual del Operador o diríjase al re- presentante local de Roche Diagnostics. Gebrauchsanweisung V04 / Operator’s Manual V04 / Manual de instrucciones V04… -
Page 71
(6) Al poner el aparato en marcha por primera vez y tras llevar a cabo el autocontrol sin detectar errores, en la pantalla aparece el mensaje “REPETIR CALIBRACIÓN” (REPEAT CALIBRATION). Pulse ahora la tecla “No” y el aparato pasará al modo “Listo para medición”. Esto también ocurre si el aparato no ha sido utilizado durante más de siete días. -
Page 72
ATENCIÓN: Si se supera la longitud máxima de identificación el cursor de entrada saltará al primer carác- ter y se sobreescribirá la identificación. Autenticación Es posible descargar hasta 300 códigos de identificación del operador con las respectivas contraseñas (hasta 12 caracte- res alfanuméricos) desde el servidor vía el protocolo ASTM. -
Page 73
8). Retire la tira reactiva y deséchela correctamente (siguiendo las instrucciones del prospecto de la tira reactiva). ADVERTENCIA: La calibración regular es necesaria para asegurar la calidad de los resultados obtenidos. Roche Diagnostics no puede garantizar la exactitud de los resultados si el sistema no es calibrado regularmente. -
Page 74
ATENCIÓN: Si contesta “No” a la invitación semanal “REPETIR CALIBRACIÓN”, por ejemplo porque ha consumido sus reservas de tiras de calibración Control-Test M, el mensaje “Repetir calibración” es impreso junto con cada informe de paciente de mediciones subsiguientes. Obtenga un nuevo paquete de Control-Test M y proceda inmediatamente a la recalibración. -
Page 75
6. Medición de las tiras reactivas Resumen El sistema Urisys 1100 es sumamente fácil de manejar. Simplemente introduzca la tira reactiva cuando la pantalla le mues- tre el número de la muestra (ver apartado 6.2), y pulse la tecla START para comenzar la medición. El aparato dispone de dos modos de operación distintos para llevar a cabo mediciones: 1. -
Page 76
ATENCIÓN: Asegúrese de que el estribo de sujeción encaja en su sitio y que la tira reactiva se encuentra en la posición correcta. Si la tira reactiva no está colocada correctamente en el centro de la guía, mué vala con cuidado hasta que se encuentre en su sitio (ver figura 14). Ponga atención a no tocar la guía. 4. -
Page 77
Errores de medición Si en la pantalla aparece el mensaje de error “ERROR DE MEDICIÓN”; probablemente ha cometido Ud. un error en la apli- cación de la tira reactiva o del aparato. Consulte el capítulo 8 para más detalles. Introducción del código de identificación del paciente, código de identificación del operador y contraseña de autenticación Código de identificación del paciente Cuando el aparato esté… -
Page 78
Si opera con un interfaz bidireccional, sólo podrá transferir los resultados mediante la opción “Enviar” del menú “MEMORIA”. De no conseguir establecer la comunicación bidireccional entre el ordenador personal y el central, el sistema Urisys 1100 interrumpe la transferencia tras algunos intentos y muestra en pantalla el mensaje “ERROR INTERFAZ” (ver apartado 8). -
Page 79
Los mensajes de error aparecen en pantalla pero no se imprimen. Transcurridos cinco minutos sin pulsar tecla alguna, el aparato pasa al modo standby. El mensaje de error aparece de nuevo en la pantalla al pulsar la tecla START. En caso de que el aparato esté defectuoso, diríjase al representante local de Roche Diagnostics. E1 ERROR ZONA DE Causa: El escalon medio de la zona de referencia gris de la guía está… -
Page 80
E4 ERROR DE CALIBRACIÓN ! Causa: Los valores de calibración difieren de los obtenidos en la última calibra- ción válida. Medida: Pulse la tecla START. Repita la calibración con una nueva tira de cali- bración del estuche de Control-Test M. Asegúrese de que la tira encaja correcta- mente en el estribo de sujeción (ver apartado 5). -
Page 81
E12 ERROR ÓPTICO ! Causa: O bien falta la zona de referencia de la guía, o un diodo fotoemisor o el detector han sido deteriorados. Medida: Coloque la zona de referencia o utilice la guía de reserva. Pulse la tecla START. -
Page 82
(ver el lector recomendado) o de un teclado AT/PC, por ej. el teclado Reflotron de Roche Diagnostics (en Informacio- nes para el pedido, apartado 11). -
Page 83
CAB 322 IBM AT/XT DIN. Para cualquier pregunta relacionada con el funcionamiento del sistema Urisys 1100 con lectores de código de barras, dirí- jase al representante local de Roche Diagnostics. 10. Datos técnicos y advertencias 10.1 Datos técnicos… -
Page 84
10.2 Indicaciones de seguridad Además, este aparato fue diseñado y manufacturado para cumplir con las disposiciones internacionales “Normas de segu- ridad para equipos eléctricos de medición, control y de laboratorio”, y ha salido de fábrica en perfecto estado respecto a la seguridad. -
Page 85
11. Informaciones para el pedido El aparato, los artículos de consumo y los accesorios son: de Cat. (REF) 03 617 548 Contenido: Aparato Urisys 1100, Adaptador SA 125A-0735U-S, 100 V — 240 V, 50 — 60 Hz, chip de programa, guía para tiras reactivas C y N, papel para impresora, manual de instrucciones, guía de referencia rápida, cable de alimentación, CD de formación interactiva. -
Page 86
12. Registro alfabético Apartado Apartado Ajuste de la impresora Medición de tiras reactivas Ajuste del dato Memoria Ajustes de base Mensaje de pantalla 3.2, 8. Artículos de consumo y accesorios, pedir Mensajes de error Autocontrol Modo Standby Avance del papel 3.3, 4. -
Page 87: Garantiekarte
13. Garantiekarte/Warranty Card/Certificado de garantia Urisys 1100 Garantiekarte / Warranty Card Serien-Nr. Serial No. Name, Anschrift, Tel.-Nr. des Käufers Buyer’s name, address and tel. no. Kaufdatum: Stempel und Unterschrift des Händlers Date of purchase: Stamp and signature of dealer Urisys 1100 Certificado de garantía N°…
-
Page 89: Adressenliste
14. Adressenliste/International addresses/Lista de direcciones Argentina Chile Productos Roche S.A.Q. e I. Productos Roche Ltda., División Diagnóstica Avda. Quilín 3750 Av. Belgrano 2350, Macul, Santiago Don Torcuato Buenos Aires Chile República Argentina Phone: +56 2 4413200 Phone: +54 11 5129-8000…
-
Page 90
Fax: +852 2418 0728 Roche Diagnostics Nederland BV Transistorstraat 41 India 1322 CK Almere Roche Diagnostics India (Pvt ) Ltd. Nederland 761, Solitaire Corporate Park, Phone: +31 36 53 94 911 167, Har Govindji Marg, Chakala, Fax: +31 36 53 94 202… -
Page 91
Philippines Fax: +421 7 54 78 85 12 Phone: +63 2 893 45 67 South Africa fax: +63 2 893 06 17 Roche Products (Pty) Ltd — South Africa Poland Diagnostics Division 9 Will Scarlet Road/Ferndale Roche Diagnostics Polska Sp.z.o.o. -
Page 92
South Korea United Kingdom Roche Diagnostics Korea Co., Ltd Roche Diagnostics Ltd 15th Floor, Sam-Wha Building, 144/17, Samsung-dong, Charles Avenue Kangnam-Ku Burgess Hill, RH15 9RY 135-092 Seoul United Kingdom Republic of Korea Phone: +44 1444 256000 Phone: +82 2 550 3300… -
Page 94
Roche Diagnostics GmbH D-68298 Mannheim Germany www.diavant.com www.roche-diagnostics.com…
- Manuals
- Brands
- Roche Manuals
- Measuring Instruments
- cobas Urisys 1100
- Owner’s manual
-
Bookmarks
Quick Links
Urisys 1100
®
Operator’s Manual
Related Manuals for Roche cobas Urisys 1100
Summary of Contents for Roche cobas Urisys 1100
-
Page 1
Urisys 1100 ® Operator’s Manual… -
Page 3
Symbols and Abbreviations The packaging material, the identification plate on the instrument and the manual may contain the following symbols or abbreviations: Please consult instructions for use Caution (refer to accompanying documents). Please refer to safety-related notes in the manual accompanying this instrument. -
Page 5
Table of Contents Introduction System Description Measuring Principle Components and Functions Software Overview Menu Structure (Flowchart) Menu Functions Results Table Changing the Range Limits Installation Operator ID Authentication Calibration Quality control (QC) Reading Test Strips Overview Normal Mode (for Single Readings) Patient Report Fast Mode (for Serial Readings) Strip Measurement Error… -
Page 7
Test ® from Roche Diagnostics. It reads the strips under standard ized conditions, saves the results to memory and outputs them via its own inbuilt printer and/or serial interface. COBAS, LIFE NEEDS ANSWERS, URISYS, URISYS 1100, COMBUR-TEST, CHEMSTRIP and REFLOTRON are trademarks of Roche. -
Page 8
2. System Description Measuring Principle The test strip is placed on a sliding test strip tray, and a stepping motor moves it under the reading head, which remains stationary. The ana lyzer reads the reference pad, followed by each of the test pads on the strip. The reading head contains LEDs that emit light at various wavelengths. -
Page 9
Components and Functions Component Function 1 Printer cover Flips up for insertion of printer paper 2 Display/keypad LCD display and three function keys for menu-driven operation and interfacing with the user 3 Test strip tray Holds and anchors the strip 4 START button •… -
Page 10
Menu Structure (Flowchart) Pressing the START button confirms the setting, closes the submenu, and resumes Ready-to-Measure status. SW > = 5 .7 (International Version) SELF CHECK Op.ID=ON OPERATOR: ……. Enter new Op.ID! PASSWORD: Op.ID=OFF Enter password! AUTH.=OFF PASSWORD=O.K. No.: … INSERT STRIP ! Ready-to-Measure Status Calibr. -
Page 11
Menu Structure (continued) Pressing the START button confirms the setting, closes the submenu, and resumes Ready-to-Measure status. SW > = 5 .7 (International Version) SETUP 1 Modes Setup2 Strip STRIP SETTINGS SETUP 2 Units Limits Date/Time Par. Setup3 UNITS: CONV Single Combined DD.MM.YYYY… -
Page 12
Menu Functions Self Check: During Self Check at power-on, the analyzer automatically checks that the program chip, the test strip tray transport mechanism, the printer connection and optical system are all OK. The test strip tray type is checked (see Section 4) to ensure that it correctly matches the strip type selected in the menu. -
Page 13
Units: Options are: • Conventional units (mg/dL) • SI units (mmol/L) • Arbitrary units (1+, 2+, 3+, 4+) Either single units or combined units (conventional/arbitrary or SI/arbitrary) can be selected. The operator selects a unit in which the results are to be stored, printed and/or transferred to a computer. After a new unit has been selected, the repeat printout (activated by “Print Results”) and all following printouts and/or data transfer (activated by “Send Results”) will be in the newly chosen unit. -
Page 14
Results Table The Urisys 1100 system prints the results in the following gradation of concentration: Parameter Conventional Units SI Units (SI) Arbitrary Units (Conv.) (Arbitrary) SG (Specific Gravity) 1.000 1.000 1.000 1.005 1.005 1.005 1.010 1.010 1.010 1.015 1.015 1.015 1.020 1.020 1.020… -
Page 15
Changed range limits apply only to the test strip type for which the changes are made. CAUTION: The correctness of results obtained after the user has altered the ranges or reflectance values is not warranted by Roche Diagnostics. The user is responsible for validating the consistency of results after changes have been made. -
Page 16
CAUTION: To ensure your readings are always accurate, do not set up the Urisys 1100 system in close proximity to devices that create high-frequency fields, as they may interfere and produce false results. Such devices include, for instance, walkie-talkies, mobile telephones, microwave ovens and diathermic equipment. -
Page 17
“Self Check OK” is executed with date and time; this happens whenever the instrument is switched on. If an error occurs, consult the Operator’ s Manual or contact your local Roche Diagnostics service representative. (6) Upon first use of the analyzer, the message “REPEAT CALIBRATION” appears after a successful self check. Press the “No”… -
Page 18
Operator ID The Urisys 1100 software allows the activation/deactivation of the operator identification code, containing up to 12 alphanumeric characters. The Operator ID and Authentication mode can be activated in Setup 3. ATTENTION: Please ensure that you have a barcode reader and/or an AT/PC keyboard prior to activation, as you will need one for this function. -
Page 19
5. Calibration The Urisys 1100 system is calibrated before leaving the factory. When installed, it must be recalibrated with Control-Test M calibration strips before the first samples are read, and thereafter every seven days. Control-Test M calibration strips consist of a grey plastic material that is standardized to give constant, defined reflectance readings. The purpose of calibrating the analyzer is to compensate for aging effects that influence the optical system and the grey reference pad in the test strip tray. -
Page 20
CAUTION: Regular calibration is necessary to ensure the quality of the results obtained. Roche Diagnostics cannot warrant the correctness of results if the system is not calibrated regularly. ATTENTION: You can recalibrate the system at any time, even if a week has not elapsed since the last… -
Page 21
6. Quality control (QC) Quality control (QC) measurements ensure the proper functioning of the analyzer. A QC material for which the results are known is measured and the results are then compared against the defined ranges for these known results. Use commercially available urine controls, or other suitable control material. -
Page 22
Normal Mode (for Single Readings) BIOHAZARD: Always wear protective gloves when handling and disposing of samples of human origin. The Urisys 1100 system is ready to read when the display shows a sample number and “INSERT STRIP !”. ATTENTION: To ensure that urinalysis is carried out correctly, read the package insert included with the test strips. -
Page 23
4. Press the START button (see Figure 13). An acknowledging beep sounds. After warming up time, the test strip tray advances slightly, the retaining bar closes, and the grey reference pad on the test strip tray is read (see Figure 14). Figure 13 Figure 14 ATTENTION: Ensure that the retaining bar is locked into place and… -
Page 24
Patient Report The patient report is printed out together with the sequence number, device ID, operator ID, date and time. The patient’ s name will also appear on the print out if entered prior to measurement (see Section 7.6). Test results which diverge from negative or normal values are flagged with an asterisk before the parameter concerned. -
Page 25
Entering Patient ID, Operator ID and Authentication Password Patient ID When the analyzer is ready to measure (“INSERT STRIP !” displayed), you may enter a Patient ID not exceeding 13 characters in length against the currently shown sequence number by means of a barcode reader or AT/PC keyboard (see Section 10.2). -
Page 26
Data Transmission to a PC or Host Computer In unidirectional mode, the results are transmitted immediately together with the sequence number, Patient ID (if entered), date and time. In bidirectional mode, transmission can only be accomplished by using the “Send” function when “MEMORY” is displayed. -
Page 27
8. Cleaning and Maintenance The Urisys 1100 system is designed for maintenance-free operation. Protect the instrument from extremes of temperature and high atmospheric humidity (see Section 11), and keep it out of bright light (direct sunlight, spot lamps, etc.). Maintain hygiene by keeping the exterior parts and surfaces of the instrument clean. For cleaning we recommend applying a commercial cleaning agent or disinfectant (preferably 70 % alcohol) with a moist cloth. -
Page 28
At the end of each working day 1. Switch off the instrument. 2. Pull the test strip tray out of the instrument. Figure 19 CAUTION: Be careful not to touch the grey reference pad (A). Contamination of the reference pad may impair the quality of the results obtained. -
Page 29
Error messages are shown in the display but are not printed out. Following 5 minutes of inactivity, the analyzer switches to Standby mode. The error message is displayed again when the START button is pressed. In the event that the instrument is defective, contact your local Roche Diagnostics representative. E1 REFERENCE PAD ERROR… -
Page 30
E8 TRAY POSITION ERROR ! Cause: The positioning hole in the test strip tray (see Figure 24) is soiled or still wet after cleaning; the retaining bar is open while the test strip tray is advancing or the retaining bar mechanism is fouled with urinary deposit and blocked. -
Page 31
Action: Replace the instrument. Cause: The analyzer is less than 5 years old and all troubleshooting steps failed. Action: Contact your local Roche Diagnostics representative for support. NO PRINTOUT Causes: “Printer: Off” has been selected, or the analyzer is operating in “Fast Mode”… -
Page 32
This is not an RS 232 type interface. On request, Roche Diagnostics can supply a suitable standard data cable (see also Section 13). The connected PC must satisfy the requirements with regard to electrical safety laid down in EN 60950. -
Page 33
If a barcode reader and an external keyboard have to be connected a data cable CAB 322 IBM AT/XT DIN is needed. For questions regarding the operation of the Urisys 1100 system with barcode readers, please contact your local Roche Diagnostics representative. -
Page 34
11.2 Safety Notices This analyzer was designed and manufactured to comply with the following international regulations “Safety requirements for electrical equipment for measurement, control and laboratory use” and left the factory in a safe condition. In order to keep the instrument in a perfect and safe condition, it is up to the user to observe all instructions and warnings included in this manual. -
Page 35
12. Contact Information For all questions about the Urisys 1100 analyzer that are not answered in this operator’ s manual, contact your Roche representative. To find your Roche contact details 1. Visit our website at www.roche.com. 2. Choose Roche Worldwide at the top of the page. -
Page 36
14. Alphabetical Index Section Section Acoustic signal (beep) Operating parts Barcode reader 10.2 Parameters in patient report, setup Basic settings Pat. Id. entry Beep (acoustic signal) Patient identification Positioning hole Positioning of test strip Power supply 4., 11.1 Cable configuration 10.1 Printer, setting Calibration… -
Page 37
Roche Diagnostics GmbH Sandhofer Strasse 116 68305 Mannheim Germany www.roche-diagnostics.com…
|
Detail Specifications: 1977/1977666-cobas_urisys_1100.pdf file (17 Jan 2023) |
Accompanying Data:
Roche cobas Urisys 1100 Measuring Instruments PDF Operator’s Manual (Updated: Tuesday 17th of January 2023 04:41:46 AM)
Rating: 4.3 (rated by 48 users)
Compatible devices: Cobas C 311, CoaguChek XS System, CoaguChek INRange, Cedex Bio, COBAS INTEGRA 400 plus, Cobas C111, CoaguChek XS Plus, Cedex HiRes.
Recommended Documentation:
Text Version of Operator’s Manual
(Ocr-Read Summary of Contents, UPD: 17 January 2023)
-
6, 2 Gebrauchsanweisung V04 / Operator’s Manual V04 / Manual de instrucciones V04 1. Einleitung Revision History Handbuchversion Softwareversion Revisionsdatum Änderungen/Ergänzungen 04 5.x Juni 2008 Benutzer-ID, begrenzte Sperrfunktion, Geräte-ID, Kompatibilität des Barcodelesers, ASTM-Protokoll Das Urisys 1100 System ist ein Reflexionsphotometer zur Auswertung der H…
-
89, Roche cobas Urisys 1100 Gebrauchsanweisung V04 / Operator’s Manual V04 / Manual de instrucciones V04 85 14. Adressenliste/International addresses/Lista de direcciones Argentina Productos Roche S.A.Q. e I. División Diagnóstica Av. Belgrano 2350, Don Torcuato Buenos Aires República Argentina Phone: +54 11 5129-8000 Fax: +54 11 5129-8105 Australia Roche Diagnostics Australia Pty. …
-
41, Gebrauchsanweisung V04 / Operator’s Manual V04 / Manual de instrucciones V04 37 3.4 Results Table The Urisys 1100 system prints the results in the following gradation of concentration: ! ATTENTION: For full details on how to interpret results, consult the following Roche Diagnostics publication, Compendium Urinalysis with Test Strips. Parameter Conventio…
-
7, Roche cobas Urisys 1100 Gebrauchsanweisung V04 / Operator’s Manual V04 / Manual de instrucciones V04 3 2. Systembeschreibung 2.1 Messprinzip Der Teststreifen wird auf einem beweglichen Schlitten fixiert, der durch einen Schrittmotor unter den fest eingebauten Messkopf gezogen wird. Dabei werden das Referenzfeld im Schlitten und die einzelnen Testfelder des Harnteststreifens nacheinander gemessen. Der Mess…
-
64, 60 Gebrauchsanweisung V04 / Operator’s Manual V04 / Manual de instrucciones V04 Estructura del menú (Continuación) Pulsando la tecla START, Vd. confirma el ajuste, cierra el submenú y retorna al estado “Listo para medición”. AJUSTES DE TIRA Tipo Unidad Limites SETUP3 Idioma Cod.Apar. Cod.Op UNIDAD: CONV Unica Combinada UNIDAD: CONV/A…
-
86, 82 Gebrauchsanweisung V04 / Operator’s Manual V04 / Manual de instrucciones V04 12. Registro alfabético Apartado A Ajuste de la impresora 3.3 Ajuste del dato 3.3 Ajustes de base 3.3 Artículos de consumo y accesorios, pedir 11. Autocontrol 3.3 Avance del papel 3.3, 4. B Borrar dados 3.3, 6.6 Borrar resultados 3.3 C Cable de conexión para interfaz 9.1, 11. Cable, configuració…
-
67, Gebrauchsanweisung V04 / Operator’s Manual V04 / Manual de instrucciones V04 63 Fecha/hora: Ajuste de fecha y hora. El aparato ha sido ajustado en fábrica siguiendo el orden día-mes-año, y la hora en horas y minutos (conforme a periodos de 24 horas). No obstante, la hora también puede ser mostrada siguiendo el sistema “12 horas más a.m./p.m”. Pulse la te- cla d…
-
26, Roche cobas Urisys 1100 22 Gebrauchsanweisung V04 / Operator’s Manual V04 / Manual de instrucciones V04 E8 SCHLITTENPOS.-FEHLER ! Ursache: Positionierungskanal im Schlitten (Bild 17) verschmutzt oder nach Rei- nigung noch nass. Niederhaltebügel ist beim Herausfahren des Schlittens ge- 17 öffnet, oder der Niederhaltemechanismus ist durch Urinverkrustungen blockiert (siehe Kapitel 7.1). M…
-
84, 80 Gebrauchsanweisung V04 / Operator’s Manual V04 / Manual de instrucciones V04 10.2 Indicaciones de seguridad Además, este aparato fue diseñado y manufacturado para cumplir con las disposiciones internacionales “Normas de segu- ridad para equipos eléctricos de medición, control y de laboratorio”, y ha salido de fábrica en perfecto estado r…
-
62, 58 Gebrauchsanweisung V04 / Operator’s Manual V04 / Manual de instrucciones V04 2.2 Componentes y funciones 1 2 3 4 87 6 5 Componente Función 1. Tapa de la impresora Puede levantarse para colocar el papel de impresora 2. Pantalla/teclado Pantalla de cristal líquido y tres teclas de función para la operación del menú y el interfaz con el us…
-
23, Gebrauchsanweisung V04 / Operator’s Manual V04 / Manual de instrucciones V04 19 ! ACHTUNG: Wenn während der Messung eines Teststreifens eine Pat. ID mit dem Barcodeleser eingelesen wird, ordnet das Urisys 1100 System diese ID der nächsten sequentiellen Probennummer zu. Eine Löschung dieser Pat. ID ist dann nur durch Aus- und Einschalten des Urisys 1100 Sys…
Recommended Instructions:
F8354001, CT-13R32, HGTL09111C, CSBL 100, SX-A6-J, XSD27ZS


-
Operating Instructions Lux MeterML-5052C / ML-5052BPCE Americas Inc.711 Commerce Way Suite 8 JupiterFL-33458USAFrom outside US: +1Tel: (561) 320-9162Fax: (561) [email protected]/englishwww.pce-instruments.comPCE Instruments UK Ltd.Units 12/13 Southpoint Business Park Ensign wayHampshire / SouthamptonUnited Kingdom, SO31 4RFFrom …
Gossen ML 5052C USB 23
-
USER GUIDE AND SPECIFICATIONSNI USB-6008/6009Bus-Powered Multifunction DAQ USB DeviceThis user guide describes how to use the National Instruments USB-6008 and National Instruments USB-6009 data acquisition (DAQ) devices and lists specifications.The NI USB-6008/6009 provides connection to eight single-ended analog input (AI) channels, two analog output (AO) channels, 12 digital input/output (DIO) …
NI USB-6008 30
-
Keysight X-Series Signal AnalyzersThis manual provides documentation for the following Analyzers: PXA Signal Analyzer N9030A MXA Signal Analyzer N9020A EXA Signal Analyzer N9010A CXA Signal Analyzer N9000A MXE EMI Receiver N9038A Notice: This document contains references to Agilent. Please note that Agilent’s Test and Measurement business has become K …
N9030A 36
Additional Information:
Popular Right Now:
Operating Impressions, Questions and Answers:
triage…
Urisys 1100
Urine Analyzer
Policies and Proceduresfor use with Urisys 1100 Urine
Analyzer
This is a CLIA-Waived System
Roche Diagnostics is not responsible for any changes made to
this diskette by the customer.
IntroductionRoche Diagnostics is pleased to assist you in
developing policies and procedures and implementing regulations of
the Clinical Laboratory Improvement Amendment of 1988 (CLIA 88) in
your facility. This guide contains sample policies and procedures
for use with the Urisys 1100 Urine Analyzer. These sample policies
and procedures are intended only as a guide, and it is important
that you make whatever adjustments may be required as a result of a
change in policy or a change in law or regulations or their
interpretation.
A total quality management program should include written
policies and testing procedures that are customized for your
particular facility. Any policies and procedures that involve using
Chemstrip urine test strips should be written prior to the start of
any urine testing. This guide provides sample policies and
procedures that meet the Section 493.1211 requirements. Blank
spaces let you customize the policies and procedures with
information specific to your facility. You are encouraged to
highlight impor-tant areas and procedures currently in use.We
suggest you store a Urisys 1100 Urine Analyzer Operators Manual,
Chemstrip urine test strip package insert and control package
insert in the Product Information section for quick reference. You
may also want to include the following clinical guidelines and
regulations in the Regulatory Requirements section.
1 JCAHO Guidelines 2 CAP Guidelines 3 CLIA 88 Guidelines 4 State
Guidelines 5 Bloodborne Pathogen Standard If you have any
questions, please call Roche Diagnostics Technical Service Center
at 1-800-4284674, available 7 days per week, 24 hours a day, and
365 days per year.
Approval ProcessThe following policies and procedures must be
approved, signed and dated by the laboratory director. If a new
director is placed in charge, the procedures must be re-approved,
signed, and dated by the new director. In addition, any changes to
the manual must be approved, signed, and dated by the laboratory
director.
You must maintain a copy of each procedure with the date of the
initial use and the date the test was discontinued. Keep these
records for at least two years after the procedure has been
discontinued.Approval date ____________________ Approved by:
_____________________________________________________
Reviewed/Revised Date ___________________ __ ___________________
__ ___________________ __ ___________________ __
___________________ __ ___________________ __ ___________________
__ ___________________ __ By Whom
___________________________________ __
___________________________________ __
___________________________________ __
___________________________________ __
___________________________________ __
___________________________________ __
___________________________________ __
___________________________________ __ Title
_________________________________ __
_________________________________ __
_________________________________ __
_________________________________ __
_________________________________ __
_________________________________ __
_________________________________ __
_________________________________ __
PurposeTo establish safe, accurate urine test results to be used
for screening and monitoring patient status.
General Policies and Procedures1 The policies and procedures
pertaining to urinalysis with the Urisys 1100 Urine Analyzer are
reviewed at least once a year. 2 Any changes to the text as they
apply to methodology or testing policy are signed by the
appropriate authority, dated, and inserted in the policies and
procedures manual. 3 Obsolete or superseded procedures are replaced
in the manual, but are retained for compliance purposes. 4 The most
recent package inserts and the Urisys 1100 Urine Analyzer Operators
Manualprovided by Roche Diagnostics should be referenced for the
most recent procedural information.
Table of ContentsI. Policies and Procedures
1 1
A.B. C. D.E.
Principle of OperationSpecimen Collection 3
Test Strip Storage and Stability
4
Calibration of the Urisys 1100 Urine Analyzer Testing with the
Urisys 1100 Urine Analyzer of Urinalysis Results 12 1315
5 7
F. Documentation
11
G. H. I.
Expected Values
Quality Control Procedure
Documentation of Quality Control Results
J. II.III. IV.
Limitations of the Procedure 1618 20 21
Preventive Maintenance
Infection Control Guidelines
Operator Certification/Recertification
V.VI.
Appendix
25 28 44 45
Log Sheets
VII. Regulatory Requirement VIII. Product Information
Urisys 1100 and CHEMSTRIP are trademarks of a Member of the
Roche Group. All other trademarks are the property of their
respective holders. 2003 Roche Diagnostics. All rights reserved.
REF 03755541001 (03)
1 Glucose Test: Glucose detection is based on the enzymatic
glucose oxidase/peroxidase (GOD/POD)method. The reaction utilizes
the enzyme glucose oxidase to catalyze the formation of gluconic
acid and hydrogen peroxide from the oxidation of glucose. In turn,
a second enzyme, peroxidase, catalyzes the reaction of hydrogen
peroxide with the chromogen tetramethylbenzidine to form a green
dye complex. A positive reaction is indicated by a color change
from yellow to green.9, 10
2 Ketone Test: Based on the principle of Legals Test, sodium
nitroprusside and glycine react with acetoacetate and acetone in an
alkaline medium to form a violet dye complex. A positive result is
indicated by a color change from beige to violet. 11, 12 3
Urobilinogen Test: Urobilinogen is coupled with
4-methoxybenzene-diazoniumtetrafluoroborate in an acid medium to
form a red azo dye.13 4 Bilirubin Test: The detection of bilirubin
is based on the coupling reaction of a diazonium salt with
bilirubin in an acid medium. The reaction yields a pink to
red-violet color proportional to the total bilirubin concentration.
14 (Some users may describe this as a cream to peach color.) 5
Blood Test: Hemoglobin and myoglobin, if present, catalyze the
oxidation of the indicator by the organic peroxidecontained in the
test pad. Intact erythrocytes hemolyze on the test pad and liberate
hemoglobin, which produces a green dot. Since the test pad absorbs
several microliters of urine, more erythrocytes become visible than
would cor-respond to 1L.15-19 Separate sets of color blocks are
representative of erythrocytes and hemoglobin. Scattered or
compacted green dots on the yellow test pad are indicative of
intact erythrocytes, or myoglobin.
6 Compensation Pad: The compensation area is not impregnated
with reagent. This pad allows the instrument to compensate for the
intrinsic color of urine, which may affect test results.
2
B.
Specimen Collection
Policy1 Use a freshly voided urine specimen, first-morning urine
specimen, or post-prandial urine specimen. 2 When testing urine
specimens, every precaution must be taken to avoid contamination of
the specimen and the operator. 3 Because of the potentially
hazardous nature of handling urine and the possibility of its
contamination with blood, it is recommended that disposable latex
gloves and laboratory coats be used when collecting specimens.
Consult your facilitys infection control policy. 4 Instructions for
collection of a clean-catch midstream urine specimen may be found
in Section V. Appendix.
Procedure1. Follow physicians order(s). 2. Assemble appropriate
supplies. 1 Cleansing towelette 2 Water-saturated sponge 3 Clean
urine container with lid 3. Instruct patient to wash genital area
(do not use towelettes with strong cleansing agents), rinse with
water, and thenobtain a clean-catch midstream urine sample in the
clean container. Refer to Section V. Appendix for instructions.
4. Test urine as soon as possible after collection to avoid
deterioration of specimen. If specimen cannot be tested within two
hours of collection, refrigerate immediately (at 2-8C) in a closed
container. Bring specimen to room temperature before testing. Mix
thoroughly before testing. 5. If urine is not tested immediately,
mix specimen thoroughly by capping container and swirling several
timesbefore testing to avoid incorrect results. Do not centrifuge
or add preservatives to the urine specimen.
3
C.
Test Strip Storage and Stability
Policy1 Store Chemstrip urine test strips at 2 C (36 F) 30 C (86
F). Do not freeze. 2 Opened Chemstrip urine test strips are stable
until the expiration date on the vial label when stored inthe
original capped vial. The vial must be closed immediately after
use, using the original cap.
4
D.
Calibration of the Urisys 1100 Urine Analyzer(with Chemstrip
10MD* Test Strips)
Policy1 Calibration is required if using the Chemstrip 10MD*
Test Strips. (When using Chemstrip 5 OB or Chemstrip 7 Test Strips,
the calibration procedure is not required. These test strips are
calibrated using the gray reference pad on the test strip tray.) 2
The Urisys 1100 Urine Analyzer must be calibrated every seven days
or when indicated by the analyzer. 3 The Chemstrip Urine Analyzer
Calibration Strips (Catalog Number 418007) should remain in the
vial until just before use. Do not touch the elevated gray areas on
the strips. 4 The calibration strips should be used only once. 5 If
you do not obtain a successful calibration, the analyzer will not
process samples. 6 Calibration should be documented on the
Preventive Maintenance Log.
Procedure1. Plug the power cord provided with the analyzer into
the power outlet at the rear of the analyzer and theninto a wall
outlet. Turn the analyzer on. The analyzer will then automatically
perform a self check. If the self check is completed successfully,
the message self check OK prints along with the time and date.
2. Make sure the test strip tray is clean and dry. Note: After a
successful self check, the operator may have to enter an operator
ID and password (if these options have been selected). 3. If the
message REPEAT CALIBRATION is in the display, press START. If the
analyzer is in Ready-to-Measuremode, press the left function key to
select Calibr. The message, START CALIBRATION appears on the
display.
4. Remove a calibration strip from its container, being careful
not to touch the pads. Do not allow the calibration strip to come
into contact with urine. 5. With the retaining bar open, place the
calibration strip, pads facing upward, onto the test strip tray and
insert the front edge of the strip under the plastic clip. 6. Press
the START button. You will hear a beep and then the tray advances
slightly, the retaining bar closes, and the calibration strip is
read. When calibration is complete, the tray moves to the start
position and the retaining bar opens. 7. Remove the calibration
strip and discard. Remember that each calibration strip is used
only once. 8. If the calibration is valid, results are stored in
memory, and a report with the reflectance values, time, and date
auto-matically prints. Reflectance values for positions 1 through
11 for the orange LED are printed in the middle column and for the
green LED in the right column.*Hospitals may use Chemstrip 10UA
Urine Test Strips.5
9. If the results for the reference pad or the calibration strip
are outside the programmed tolerances, one of the follow-ing
messages appears on the display: 1 REFERENCE PAD ERROR 2
CALIBRATION INVALID or 3 CALIBRATION ERROR If a calibration error
occurs, repeat the calibration procedure using a new calibration
strip. 1. Press the START button and the display will return to the
START CALIBRATION menu. 2. Place the new calibration strip on the
test strip tray and press the START button again. 3. If the
calibration is valid, the message CALIBRATION OK prints. 4.If the
calibration fails a second time and a calibration error appears on
the display, refer to the Operators Manual or call Roche
Diagnostics Technical Service at 1-800-428-4674, 7 days a week, 24
hours a day, and 365 days per year.
6
E.
Testing with the Urisys 1100 Urine Analyzer
Policy1 Only a certified operator may perform a urine test with
the Urisys 1100 Urine Analyzer. 2 Because of the potentially
hazardous nature of handling urine and the possibility of its
contamination with blood, it is recommended that disposable latex
gloves and laboratory coats be used when collecting specimens and
perform-ing test procedures. Consult your facilitys infection
control policy. 3 Urine should be handled at Biosafety Level 2 as
recommended for any potentially infectious material in the Centers
for Disease Control/National Institutes of Health manual, Biosafety
in Microbiological and Biomedical Laboratories , 1988.24 Universal
precautions may apply if the urine is contaminated with blood or if
required by the infection control policy of the facility. 4
Outdated Chemstrip urine test strips are discarded.
Procedure1. The following equipment is assembled prior to
testing: Urisys 1100 Urine Analyzer Chemstrip urine test strips
Patient specimen Disposable latex gloves (if required by facility)
Laboratory coat (if required by facility) Absorbent paper 2. Check
the expiration date on the Chemstrip urine test strip vial prior to
testing. 3. Plug the power cord provided with the analyzer into the
power outlet at the rear of the analyzer and theninto a wall
outlet. Turn the analyzer on. The analyzer will then automatically
perform a self check. If the self check is completed successfully,
the message self check OK prints along with the time and date.
Note: After successful self check, the operator may have to
enter their operator ID and password if these options have been
activated. 4. The Urisys 1100 Urine Analyzer is ready for
measurement as long as valid calibration values are stored inthe
ana-lyzer. Refer to Section I.D. Calibration of the Urisys 1100
Urine Analyzer of this manual.
5.
Verify the test strip tray is clean of any residue. If there is
residue on the tray, refer to Section II. Preventive Mainte-nance
of this manual for the cleaning procedure. Urine residue on the
test strip tray may result in inaccurate results.
6. If the sample has been refrigerated, allow it to come to room
temperature. Mix the specimen by capping the con-tainer and
swirling several times if not freshly voided.7
7. Remove the cap from the test strip vial and remove one
Chemstrip urine test strip. 8. Dip the test strip for one second in
the urine sample. Draw the edge of the test strip along the rim of
the specimen container. Gently touch (one second) the long edge of
the test strip to a piece of absorbent paper to remove any excess
urine. 9. If the analyzer is in Standby mode, press START to return
to Ready-to-Measure mode. The test strip trayand the retaining bar
must be in the open position. Place the test strip, with the pads
facing upward, onto the test strip tray and insert the front edge
of the strip under the plastic clip. It is important that the strip
is correctly positioned and the START button is pressed within 5-10
seconds of dipping the strip.
10.
Press the START button. You will hear a beep and then the tray
advances slightly, and the retaining bar closes.
First the gray reference pad located on the test strip tray is
read.
11.
If the test strip is not lined up straight on the test strip
tray, gently move it until it is properly lined up under the
retaining bar. Be careful not to move the tray.
12.
Approximately 60 seconds after the START key is pressed, all
test strip pads will be read. The results will print
and the next sample number appears on the display.
13.
The test strip tray will return to the start position and the
retaining bar will open. Remove the used test strip
and wipe the test strip tray as needed with a lint-free cloth to
remove any urine residue. Refer to Section II. Preventive
Maintenance of this manual for the cleaning procedure.
14.
Properly dispose of the urine, urine container and test
strip.
Guidelines1 Mechanical problems are evident when the analyzer
displays an error message. A chemistry problem may become evident
with an unexpected result. Abnormal results are flagged with an
asterisk. If you obtain an unexpected result on any chemistry,
refer to the Limitations and Performance Characteristics sections
of the Chemstrip urine test strip package insert. 2 If you are
comparing the analyzer values against the visual strip values and
the deviation is more than one concen-tration block, one of the
following may have occurred: 1 Test strip is not positioned
correctly in the test strip tray 2 Power supply failure or high
frequency interference by other devices 3 Visual strip is
deteriorated 4 Improper testing technique If one of the above
situations has occurred, repeat the measurement with a new test
strip, being very careful to properly position the test strip.
Remove any external source of interferences.8
The following is a list of error messages and suggestions on how
to eliminate the problem:Error Code E1 Error Description Reference
pad error Cause Gray reference pad on the test strip tray soiled or
damaged. Action Switch off the instrument. If not visibly damaged,
clean and dry the pad. Insert the tray and wait for the self-check
to finish. If the error message reoccurs, call Roche Diagnostics
Technical Service Center. Press the START button. Repeat the
measurement using the test strip that the instrument has been
programmed for.
E2
Wrong strip
E3
Strip measurement
The test strip used is different from the one for which the
analyzer has been programmed for (either Chem 10, Chem 5, or Chem
7). See Operators Manual. a) No test strip present on the tray. b)
Test strip is incorrectly positioned on the tray. c) Urine on the
test strip has dried. d) Test strip has not been dipped in urine.
Calibration values differ from those obtained in the last valid
calibration. Calibration values out of tolerance.
Press the START button. Repeat the measurement with a new test
strip. Make sure the strip is inserted correctly and that the
retaining bar properly closes after the START button is
pressed.
E4
Calibration Error
E5
Calibration Invalid
E6
Chip Error
The chip module underneath the printer cover is missing, not
making contact, or is defective. Test strip tray is missing or not
inserted far enough to engage the motor. The positioning hole in
the tray is dirty or still wet after cleaning; the retaining bar is
open while the tray is advancing; or the retaining bar mechanism is
contaminated with urine and blocked.
E7
Missing Tray Tray Position Error
Press the START button. Repeat the calibration using a new
calibration strip. Make sure the calibration strip is properly
positioned under the clip on the test strip tray. Check the
reference pad for soil or damage. Clean the reference pad or use
the spare tray. Repeat the calibration with a new calibration test
strip. If the error reappears, call Roche Diagnostics Technical
Service Center. Switch off the analyzer, insert the chip module and
switch the instrument on again. If the error message appears again,
call Roche Diagnostics Technical Service Center. Insert the test
strip tray correctly. (See Section 4 of Operators Manual.) Press
the START button. Clean, blow through, or dry the positioning hole
on the test strip tray using a lint-free cloth. Remove any urinary
deposits on both the top and bottom of the test strip tray. Insert
the tray again and press the START button. If the message error
persists, call Roche Diagnostics Technical Service
E8
E9
Wrong tray
E10
Light Barrier Error
E11
Motor Step Error
The test strip tray is not the one programmed for the analyzer
or the gray reference pad is missing from the tray. Gray reference
pad is scratched or dirty. The light barrier used to control the
position of the test strip is defective or the tray transport is
blocked. The stepping motor drive is out of tolerance or the
advance of the test strip tray is blocked.
E12
Optics Error
E13
Printer Error
The reference pad is missing from the test strip tray or an LED
or phototransistor is defective. Printer connection fault or paper
jam. This message will not appear if there is no paper.
Center. Press the START button. The strip type menu is
displayed. The strip type must match the tray type. (See Operators
Manual, Section 4.2.) Use the correct tray and make sure the gray
reference pad is clean. Press the START button. Pull out the tray
and return it to the start position. Press the START button. If the
error message persists, call Roche Diagnostics Technical Service
Center. Carefully clean the tray. Clean and dry the positioning
hole using a lint-free cloth. Remove any urinary deposits on both
the top and bottom of the test strip tray. Insert the tray again
and press the START button. If the message error persists, call
Roche Diagnostics Technical Service Center. Attach the reference
pad. Press the START button. If the error message appears again,
call Roche Diagnostics Technical Service Center. Switch off the
analyzer. If there is a paper jam, clear it. Switch the analyzer on
again. If the error message appears again, call Roche Diagnostics
Technical Service Center.
9
Error Code E14
Error Description Interface Error
Cause Unable to transfer data to PC or host in bi-directional
mode.
Action Check the data cable. Verify that the PC or host is ready
to receive data. Use the Send function to transfer data or press
Home to resume Ready-to-Measure status. see E1
E15 REFERENCE PAD ERROR BOTTO M! E16 REFERENCE PAD ERROR TOP!
E17 INVALID PASSWO RD! E18 INVALID
The bottom portion of the reference pad on the tray is soiled or
damaged.
The top portion of the reference pad on the tray is soiled or
damaged. The entered password doesnt match. The entered Operator ID
is not valid.
see E1
Enter an correct password.
Enter a valid Operator ID.
OP.ID! E19 LIST DOWNLO AD FAILED E20 NO VALID LIST! Check
Measuremen t
The new Operator ID list download failed. There is not a valid
list at all in device. Analyzer prints out software and chip
version number and 3-digit numbers without naming the parameters
Values obtained do not compare with those from visual
examination.
No action. After 2 seconds next state starts with old list if
there was. Try to download an Operator ID list from the host or
continue without authenticated operator. Press the Back function
key to return to the main menu.
Service function is activated.
a) Test strip incorrectly positioned on the test strip tray. b)
Uncharacteristic test pad colors. c) The wrong test strip, such as
the calibration strip, was used. d) Electromagnetic interference
from other devices. e) Improper storage or technique. Printer: Off
is selected or the printer/ software is defective.
Repeat the measurement with a new test strip. Follow the
procedure carefully and make sure the test strip is inserted
properly. Repeat calibration, if necessary. Move the analyzer to
another location if external interference is suspected.
No printout
Choose Printer: On to reactivate the printer. Request a patient
report through the Print function. If this fails, activate the
Linefeed function. If there is still no response, call ROCHE
DIAGNOSTICS Technical Service Center. Switch the analyzer off and
back on again.
The analyzer will not read, even though the sequence number is
displayed.
10
F.
Documentation of Urinalysis Results
Policy1 The date, time, initials of the operator, patient
name/patient ID number, and parameter values are recorded on the
patient chart or the appropriate log for your facility. 2 Test
requisitions, test authorizations, and test results are retained
for a minimum of two years. 3 Test requisition or authorization
includes: Patients name Name and address (or other identifier) of
the person requesting the test Test to be performedDate the sample
was obtained Date the test was performed
An audit trail exists, linking the patient test with the
Chemstrip test strip lot number and control lot number used.
Procedure1. Record the date, time, initials of the tester,
patient name/patient ID number, and test values on the Urinalysis
Report Form of this guide or the appropriate log for your facility.
2. Indicate the type of specimen (first morning, random,
clean-catch midstream, etc.) on the appropriate log.
(See Section VI. Log Sheets for sample log sheets.)
11
G.
Expected Values
GuidelinesPlease refer to the most recent Chemstrip urine test
strip package insert for any changes to the expected values
infor-mation. 1 Specific Gravity: Random urine specimens vary from
1.001 to 1.035. Twenty-four hour urine specimensfrom nor-mal adults
with normal diets and fluid intake will have a specific gravity of
1.016 to 1.022.22
2 pH: Urine pH values generally range from 5 to 9. The most
frequent pH values for firstmorning specimens in healthy subjects
are between 5 and 6. 3 Leukocytes: Normal urine should produce no
color reaction. Trace indicates a possible borderline situation,
and the test should be repeated on a fresh urine sample from the
patient. Positive and repeated trace findings indicate the need for
further testing of the patient and/or urine sample in accordance
with the medically accepted proce-dures for pyuria. 4 Nitrite: A
nitrite concentration as low as 0.05 mg/dL will produce a slightly
pink coloration of the test pad. This indi-cates a positive result.
5 Protein: A color change from yellow to light green/green will
occur if protein is present in urine. The concentrations given on
the vial label correspond with the albumin concentration in urine.
Pathological proteinuria usually will pro-duce persistent values
above 30 mg/dL. Clinical significance of the trace result should be
determined by additional testing. 6 Glucose: Due to the tests
sensitivity, glucose should not be detectable in normal urine.
Therefore, any positive reaction should be followed by further
diagnostic evaluation of the patient, such as a quantitative blood
glucose or a glucose tolerance test. 7 Ketones: Ketone bodies
should not detected in normal urine with this test. Fasting or
starvation diets may cause positive results. In known pathological
conditions such as diabetes, the presence of ketones may be useful
as an index of metabolic status. 8 Urobilinogen: Concentrations are
usually greater in the afternoon than during the remainder of the
day. Values up to 1 mg/dL are usually considered normal.13
9 Bilirubin: In normal urine, bilirubin should not be detectable
with this test. However, the test is very sensitive to bili-rubin
(0.5 mg/dL will produce positive results), and any positive
reaction indicates that further diagnostic evaluation of the
patient is needed. Blood: Erythrocyte excretion up to 5 Ery/L may
be expected in normal urine. 17, 18 Levels above this may require
further evaluation of the patient.
12
H.
Quality Control Procedure
Policy1 Quality control testing will be performed with a minimum
of two (2) quality control solutions according to your facili-tys
policy. 2 It is required to run a positive and negative control
daily and when a new vial of test strips is opened (including every
lot change). Values obtained for these controls should fall within
the limits established by the laboratory or the control
manufacturer. 3 Check the appropriate boxes for your facilitys
additional quality control frequency, being sure to meet all
standards of your regulatory agencies. 1q Each ________ (when? day,
shift, etc.). 2q When the test strips have been exposed to extreme
heat, humidity or cold. 3q When test results contradict clinical
symptoms. 4q As a way of checking operator competency. 5q Other
______________________________________________________________________________________.
4 If a quality control test result falls within the acceptable
control range, it is acceptable to proceed with patient testing. 5
If a quality control test result falls outside of the acceptable
control range, repeat the test with a fresh Chemstrip urine test
strip. Check the stability of the control being used. The problem
must be corrected before proceeding with patient testing. 6 Any
quality control result that falls outside of the acceptable control
range, along with any corrective action to restore that result to
acceptable range, must be recorded in the Urinalysis Quality
Control Log or other quality control log. 7 The controls should be
stored at the proper temperatures according to the manufacturers
recommendations. 2 Any outdated test strips or controls will be
discarded. 3 The urine test strip lot number and expiration date
are found on the label of each vial of Chemstrip urine test strips.
This information should be recorded in the Urinalysis Quality
Control Log or other quality control log. 4 Chemstrip urine test
strips must be stored at temperatures below 30C (86F). Do not
freeze. Teststrips are stable until the expiration date. Test
strips must be stored in the same capped vial in which they were
packaged, and the vial cap must be immediately replaced after
removal of a test strip.
5
Urine controls recommended for use with the Urisys 1100 Urine
Analyzer are KOVA-Trol and KOVA Liqua-Trol (HYCOR Biomedical Inc.),
the Dipper Urine Dipstick Control (Quantimetrix) and Liquichek
(BIORAD). Refer to
Section V. Appendix for more information about these controls. 6
Insert your facilitys quality control preparation information after
this page.13
Procedure1. The following equipment is needed for quality
control testing: Urisys 1100 Urine AnalyzerChemstrip urine test
strips Commercially prepared urinalysis control
Disposable latex gloves (if required by facility) Laboratory
coat (if required by facility) Absorbent paper 2. Prepare controls
according to the manufacturers instructions. 3. Check the
expiration date on the Chemstrip urine test strip vial prior to
testing. 4. The Urisys 1100 Urine Analyzer is ready for measurement
as long as valid calibration values are stored inthe ana-lyzer.
Refer to Section I.D. Calibration of the Urisys 1100 Urine Analyzer
of this manual.
5.
Verify the test strip tray is clean of any residue. If there is
residue on the tray, refer to Section II. Preventive Maintenance of
this manual for the cleaning procedure. Any residue on the test
strip tray may result in inaccurate results.
6. Remove the cap from the test strip vial and remove one
Chemstrip urine test strip. 7. Dip the test strip for one second in
the control. Draw the edge of the test strip along the rim of the
container. Gentlytouch (one second) the long edge of the test strip
to a piece of absorbent paper to remove any excess control.
8. If the analyzer is in Standby mode, press START to return to
Ready-to-Measure mode. The test strip tray and the retaining bar
must be in the open position. Place the test strip, with the pads
facing upward, onto the test strip tray and insert the front edge
of the strip under the plastic clip. 9. Press the START button. You
will hear a beep and then the tray advances slightly and the
retaining bar closes. First the gray reference pad located on the
test strip tray is read. 10.If the test strip is not lined up
straight on the test strip tray, gently move it until it is
properly lined up
under the retaining bar. Be careful not to move the tray.
11.
Approximately 60 seconds after the START key is pressed, all
test strip pads will be read. The results will
print and the next sample number appears on the display.
12.
The test strip tray will return to the start position and the
retaining bar will open. Remove the used test strip
and wipe the test strip tray as needed with a lint-free cloth to
remove any residue. Refer to Section II. Preventive Mainte-nance of
this manual for the cleaning procedure.
13.
Properly dispose of the control solution and test strip.14
I.
Documentation of Quality Control Results
Policy1 Quality control records are retained for a minimum of
two years. 2 The date, time, initials of the operator, and quality
control result are recorded in the Urinalysis Quality Control Log
or other quality control log. The log should also include the lot
number and expiration date of the control solutions and urine test
strips. 3 Any quality control result that falls outside the
acceptable control range, along with any corrective action to
restorethat result to acceptable range, is recorded in the
Urinalysis Quality Control Log or other quality control log.
4 An appropriate authority or an appointed individual reviews
the Urinalysis Quality Control Log for completenessand notes any
trends that could indicate potential problems. Such trends include
gradual drifting of values, sudden shifts in urine control values
while using the same lot of strips, and operator performance. The
log is reviewed
___________ (when? weekly, monthly, quarterly). 5 An audit trail
should exist to link the control test values to the patient test
values performed that day by listing theappropriate Urisys 1100
Urine Analyzer, Chemstrip urine test strip and control solution lot
number used.
6 Insert your facilitys policy for who is responsible for the
performance and documentation of quality
control._________________________________________________________________________________________________
_________________________________________________________________________________________________
_________________________________________________________________________________________________
_________________________________________________________________________________________________
_________________________________________________________________________________________________
_________________________________________________________________________________________________
15
J.
Limitations of the Procedure
Please reference the most recent Chemstrip urine test strip
package insert for modifications in the limitations of proce-dure.
1 Specific Gravity: The chemical principle of the test may cause
slightly different results compared with otherspe-cific gravity
methods when elevated amounts of certain constituents are present.
Glucose and urea concentrations greater than 1% may cause a low
specific gravity reading relative to other methods. In the presence
of moderate amounts of protein (100-500 mg/dL) or ketoacidosis,
readings may be elevated.
2 Leukocyte: This test is not affected by erythrocytes in
concentrations up to 10,000/L or by bacteriacommon in urine. Do not
collect specimens in containers that have been cleaned with strong
oxidizing agents. Do not use pre-servatives. The drugs cephalexin
and gentamicin have been found to interfere with this test.
Nitrofurantoin colors the urine and thus causes interference with
visual interpretation of the test strip. High levels of albumin
(>500 mg/ dL) in the urine may interfere with the test
results.
3 Nitrite: Large amounts of ascorbic acid (see under glucose)
decrease the sensitivity of the test. False positive read-ings may
be produced by medication that colors the urine red or that turns
red in an acid medium (e.g., phenazo-pyridine). 4 Protein: False
positive results may be found: In strongly alkaline urine (pH of 9
or higher). During therapy with phenazopyridine. When infusions of
polyvinylpyrrolidone (blood substitutes) are administered. When
residues of disinfectants containing quaternary ammonium groups or
chlorohexidine are present in the urine container. 1 Glucose: The
effect of ascorbic acid (vitamin C) retained in the urine due to
ingestion of vitamin tablets,antibiotics, or fruit juices has been
eliminated at glucose concentrations of 100 mg/dL and above so that
false negative read-ings rarely occur, even at high concentrations
of ascorbic acid. False positive readings may be produced by
strongly oxidizing cleaning agents in the urine container.
2 Ketone: Red-orange to red color shades, which are readily
distinguished from the colors obtained with ketone bodies, can be
produced by phenylketone or phthalein compounds administered for
liver and kidney function tests. 2-
Mercaptoethane sulphonate sodium (MESNA) or other
sulfhydryl-containing compounds may cause false positive results.
21 3 Urobilinogen: The total absence of urobilinogen cannot be
detected. Most urine specimens give a slight pink reaction. This
test gives the same color reaction with urobilinogen as with
stercobilinogen; however, the differentiation is not of diagnostic
importance. Urine from patients treated with phenazopyridine may
show a false positive reaction.
Nitrite concentrations above 5 mg/dL or formalin concentrations
above 200 mg/dL (used as a preservative) may cause a decrease in
color reaction.
16
1 Bilirubin: Large amounts of ascorbic acid present in the urine
following the ingestion of medication containingvita-min C or fruit
juices lower the sensitivity of the test. In case of doubt, repeat
test on urine voided at least 10 hours after the last
administration of vitamin C. Elevated concentrations of nitrite, as
in urinary tract infections, may result in lower bilirubin values.
Large amounts of urobilinogen in the urine affect the color change
of the bilirubin test, but not enough to give a positive result.
False positive results may be produced by medications that color
the urine red or turn red in an acid medium (e.g.,
phenazopyridine).
2 Blood: False negative readings are obtained when formalin is
used to preserve the urine. Nitrite in excess of 10 mg/ dL in the
urine (which is rare in urinary tract infections) delays the
reaction. False positive results can be produced by residues of
strongly oxidizing cleaning agents in the urine container. Urine
from menstruating females occasion-ally yields a positive result.
This test has not been found to be affected by the ingestion of
reasonable quantities of ascorbic acid.
17
II.
Preventive Maintenance
Policy Cleaning the Analyzer1 Clean and disinfect the exterior
of the Urisys 1100 Urine Analyzer by using a cloth dampened with a
suitabledisin-fectant such as 10% bleach or isopropyl alcohol. Be
sure that no liquid enters the analyzer.
2 Clean the test strip tray every day.
Procedure1. Turn off the power. 2. Remove the test strip tray.
3. Rinse the tray under running water. 4. Remove any crystalline
deposits, especially those contaminating the retaining bar
mechanism, with a soft brush. 5. Wipe down the test strip tray with
isopropyl alcohol or 10% bleach. 6. Dry with a soft, lint-free
cloth. 7. Install the test strip tray by holding the tray opposite
the side with the gray reference pad and inserting the tray into
the slot below the function keys. Do not touch the gray reference
pad. 8. Switch on the instrument. During the self-check process,
the system will verify that the reference pad is in suitable
condition for reading test strips. If not, an error message will be
displayed.
Policy Replacing Printer PaperReplace the printer paper the day
it runs out, following the instructions in Section 4.2 of the
Urisys 1100 Operators Manual. This will ensure a paper print-out of
calibration results will be available the next day if calibration
is performed upon instrument start up.
18
Policy Documentation and Replacement1 Any maintenance,
calibration or replacement is documented on the Preventive
Maintenance Log. 2 Replaceable parts are available. They can be
ordered from your local Roche Diagnostics distributor or are
available from __________________(location in your facility).
Replaceable parts for the Urisys 1100 Analyzer are:Replaceable Part
Test strip tray — Type C for Chemstrip 10MD Test strip tray Type N
for Chemstrip 5 OB/Chemstrip 7 AC Adapter Power cord Reference pads
Thermal paper Interface connection cable Keyboard Barcode reader
w/o trigger Barcode reader cable Catalog Number 3666735 3666913
4340647 4340612 1907131 3666751 1906186 1248693 ??? ???
#See your Operators Manual to determine which test strip tray is
in your analyzer.
1 If staff are unable to correct a problem with the Urisys 1100
Urine Analyzer, they are instructed to
contact_______________(location in your facility) or call Roche
Diagnostics Technical Service Center at 1-800-428-4674.
2 The appointed individual reviews the Preventive Maintenance
Log for completion __________________(when? weekly, monthly,
quarterly). 3 Insert your policy for who is responsible for
performing and documenting preventive maintenance.Name
Title_______________________________________________
_______________________________________________
_______________________________________________
_______________________________________________
_______________________________________________
_______________________________________________
_______________________________________________
_______________________________________________
_______________________________________________
_______________________________________________
19
III. Infection Control GuidelinesPolicy1 Because of the
potentially hazardous nature of handling urine and the possibility
of its contamination with blood, it is recommended that disposable
latex gloves and laboratory coats be used when collecting specimens
and perform-ing test procedures. Consult your facilitys infection
control policy. 2 Disposable latex gloves and laboratory coats are
to be removed and hands washed thoroughly with soapand water after
completing the test procedure and prior to handling equipment not
related to the procedure.
3 Urine specimens should be handled at Biosafety Level 2 as
recommended for any potentially infectious material in the Centers
for Disease Control/National Institutes of Health manual, Biosafety
in Microbiological and Biomedical Laboratories, 1988. Universal
precautions may apply if the urine is contaminated with blood or if
required by the infection control policy of your facility. 24 4 If
a spill should occur, disinfect the area with a 1:10 bleach
solution (1 part bleach plus 9 parts water) or follow the infection
control procedures of your facility.
20
IV. Operator Certification/RecertificationPolicy1 Operators
receive appropriate certification to perform tests with the Urisys
1100 Urine Analyzer according to your facilitys policy. 2
Certification is documented and maintained on the Operator
Certification Log and Skills Checklist. A Knowledge Test is also
provided. 3 Only certified operators may use the Urisys 1100 Urine
Analyzer. 4 Operator competency checks (recertification) will be
performed yearly and recorded on the Operator Certification Log and
Operator Competency Log.
Procedure Operator CompetencyThe following procedure may be used
to certify/recertify your operators and check their competency on
the use of the Urisys 1100 Urine Analyzer. Note: A valid
calibration is required before performing the following within-run
precision. Within-Run Precision 1. The following equipment is
assembled prior to testing: Urisys 1100 Urine Analyzer Chemstrip
urine test strips Quality control material1, 2, or 3 levels
(according to your facilitys policy) prepared according to the
manufac-turers instructions Disposable latex gloves (if required by
facility) Laboratory coat (if required by facility) Absorbent paper
Operator Competency Log 2. Run control 20 times consecutively on
the Urisys 1100 Urine Analyzer. Refer to Section I.H. Quality
Control Proce-dure for instructions. 3. Record results on the
Operator Competency Log. 4. Determine the result that occurs most
frequently (mode) for each parameter and record the result.21
5. Determine the color block variation (plus or minus the number
of color blocks from the mode) for each parameter in the run of 20.
Record the result for each parameter. 6. The color block variation
(number of color blocks away from the mode) for each chemistry of
the 20 analyses should be no greater than one color block. Refer to
Section 1.H. Quality Control Procedure if the color block variation
exceeds plus or minus one. Example 1: If 20 consecutive glucose
results produce 20 results of 100 mg/dL, the mode is 100 mg/dL and
the color block variation is 0. This is acceptable
performance.Example 2: If 20 consecutive glucose results produce 15
results of 100 mg/dL and 5 results of 250 mg/dL, the mode is 100
mg/dL and the color block variation is + one color block. This is
acceptable performance.
Example 3: If 20 consecutive glucose results produce two results
of 50 mg/dL, 16 results of 100 mg/dL and two results of 250 mg/dL,
the mode is 100 mg/dL and the color block variation is + one and —
one color block. This is acceptable performance.Example 4: If 20
consecutive glucose results produce two results of normal, 16
results of 100 mg/dL and two results of 250 mg/dL, the mode is 100
mg/dL and the color block variation would be + one and — two color
blocks. This is unacceptable performance.
Control Recovery1. Record the control package insert acceptable
ranges for the Urisys 1100 Urine Analyzer on the Operator
Compe-tency Log. The Urisys 1100 results should be compared to the
visual acceptable ranges if the Urisys 1100 Analyzer is not
referenced on your control package insert. 2. Compare the
acceptable ranges stated in the package insert to the results
obtained from the within-run precision step 4. 3. The mode results
should fall within the acceptable control ranges. Refer to Section
I.H. Quality Control Procedure for instructions if the results fall
outside the acceptable control ranges.
GuidelinesInsert your policy for who is responsible for training
and documenting operator certification / recertification with the
Urisys 1100 Urine
Analyzer.___________________________________________________________________________________________________
___________________________________________________________________________________________________
___________________________________________________________________________________________________
22
References1. Kolthoff, I. Acid-Base Indicators. McMillan Co.,
New York, 1937, p. 171. 2. Free, H., G. Collins and A. Free.
Triple-test Strip for Urinary Glucose, Protein and pH, Clin Chem,
1960, 6:352. 3. Griess, P., Notes on the Paper of Weselsky and
Benedikt. Some Azo Compounds. Ber. Dtsch. Chem. Ges., 1879, 12:426.
4. Weltmann, O., Method for the Simple Detection of Urinary Tract
Infections. Wien. Med. Wschr, 1922, 72:618. 5. Fuchs, T. and G.
Gutensohn. Value and Limitation of the Nitrite Test in Diagnosis of
Pyelonephritis. Dtsch. Med. J., 1967, 10:343. 6. Srensen, S. The
Measurement of the Hydrogen Ion Concentration and Its Importance
for Enzymatic Processes. Bio-chem. Z., 1909, 21:131. 7. US Patent
No. 4013416. 8. Gyure, W. L. Comparison of Several Methods for
Semiquantitative Determination of Urinary Protein. Clin. Chem,
1977, 23:876. 9. Keston, A. Abstracts of papers presented at the
129th meeting of the American Chemical Society, Dallas, April,
1956, p. 31c. 10. 11. 12. 13. 14. 15. 16. 17.Comer, J.
Semiquantitative Specific Test Paper for Glucose in Urine. Anal.
Chem., 1956, 28:1748. Legal, E. A New Acetone Reaction and its
Applicability for the Examination of Urine. Chem. Centr., 1883,
14:652. Chertack, M. and J. Sherrick. Evaluation of A Nitroprusside
Dip Test For Ketone Bodies. J. A. M. A., 1958, 167:1621.
Kutter, D. et al. Usefulness of a New Test Strip for Detecting
Urobilinogen in Urine. Dtsch. Med. Wschr., 1973, 98:112.
With, T. Bile Pigments, Chemical, Biological and Clinical
Aspects. Academic Press, New York, 1968, p. 492. Cook, M., et al.
The Detection of Blood in Urine. Am. J. Med. Tech., 1956, 22:218.
Leonards, J. Simple Test For Hematuria Compared With Established
Tests. J. A. M. A., 1962, 179:807. Braun, J. and W. Straube. A New
Rapid Test For Diagnosing Microhematuria, Compared With Results
Of
Microscopic Examination. Dtsch. Med. Wschr., 1975, 100:87.
18.
Kutter, D. et al. Usefulness of a New Test Strip for the
Detection of Erythrocytes and Hemoglobin in Urine.
Dtsch. Med. Wschr., 1974, 99:2332.
19.
Brhl, P. et al. Clinical Experience Gained with a Test Strip
Used to Screen for Erythrocytes and Hemoglobinuria.
Therapiewoche, 1976, 26:5193.
20.
NCCLS. Protection of Laboratory Workers from Infectious Disease
Transmitted by Blood and Tissue.23
NCCLS Doc. M29-P, 7, 9, May, 1985, 342-347.
21.
Csako, G. False Positive Results for Ketone with the Drug Mesna
and Other Free-Sulfhydryl Compounds. Clin.
Chem., 1987, 33/2:289.
22. Henry, J.B. et al. Clinical Diagnosis and Management by
Laboratory Methods, 17th ed. Saunders Philadelphia, 1984, 394;1441.
23. Czerwinski, A. W., et al. Further Evaluation of the Griess Test
to Detect Significant Bacteriuria.Amer. J. Obstet. Gynec., 1971,
110:677.
24. Centers for Disease Control/ National Institutes of Health.
Biosafety in Microbiological and BiomedicalLaboratories, 1988.
24
V. AppendixInstructions for Collections of a Midstream UrineWhen
examining urine specimens, every precaution must be taken to avoid
contamination. Therefore, make sure your patients follow the
instructions below carefully so that reasonable test results are
obtained.
It is important to note that some cleansing towelettes may use
soaps that contain oxidizing agents. Oxidizing agents may interfere
with some parameters on the urine test strips. Therefore, it is
extremely important that thorough rinsing take place after
cleansing the genitals.
Procedure1. Do not open the specimen container until immediately
prior to use. 2. Procedure Female 1 Kneel or squat over a bedpan or
stand astride a toilet bowl. 2 Separate labia minor. 3 Cleanse
meatus (opening of urethra) three times. 4 Rinse area with sterile,
water-saturated sponge. Do not dry. 5 Void forcibly, allowing
initial stream of urine to pass into the lavatory. 6 Collect
midstream in sterile container. Male 1 Cleanse glans three times. 2
Rinse area with sterile, water-saturated sponge. Do not dry. 3 Void
forcibly, allowing initial stream of urine to pass into the
lavatory. 4 Collect midstream in sterile container.
25
Infant 1 Cleanse genitalia three times. 2 Rinse area with
sterile, water-saturated sponge. Do not dry. 3 Supporting infant in
a face down position, stimulate urination by stroking paraspinal
muscles. 4 If infant fails to void, place sterile bag over
genitals. 5 If infant does not void within 45 minutes, re-prep the
area and apply a new bag. 6 Collect urine in a sterile container. 7
Do not allow the container to touch the body. 4. Close the
container and present it immediately for urinalysis.
26
Routine Urinalysis Controls Compatible with the Urisys 1100
Urine AnalyzerSeveral commercial controls are available. Controls
may vary in number of levels or components, necessity for
reconsti-tution or ready to use, type and volume of container, and
usefulness as a control for microscopic examination. When selecting
a control, consider the above-mentioned variables to identify the
control most suitable for your facilitys needs. Controls typically
can be ordered through medical/surgical supply distributors or
directly from the manufacturer.
Refer to the following table to determine which control best
meets the needs of your facilitys quality control
require-ments.Urine Controls Chart Brand Name KOVA-Trol Urinalysis
Control Manufactur er KOVA Liqua-Trol Urinalysis Control HYCOR
Biomedical Inc. www.hycorbiomedical.c om 7272 Chapman Ave. Garden
Grove, CA 92641 The Dipper Urine Dipstick Control Liquichek Routine
Urine Chemistry Control BIO RAD
Website Address
HYCOR Biomedical Inc. www.hycorbiomedical.c om 7272 Chapman Ave.
Garden Grove, CA 92641
Quantimetrix Corporation www.4qc.com 2005 Manhattan Beach Boulev
ard Redondo Beach, CA 90278 800-624-8380 310-536-0006 800.845.1834
[email protected]
www.bio-rad.com 4000 Alfred Nobel Dr Hercules, CA 94547
Toll-free No. Phone No. Fax No. Product Informatio n Requests
Distributio n
800-382-2527 714-895-9558 714-933-3222 http://www.hycorbiomedic
al. com/site/inforequest.ht ml
800-382-2527 714-895-9558 714-895-6920 http://www.hycorbiomedic
al. com/site/inforequest.ht ml
800-224-6723 510-724-7000 510-741-6373 [email protected]
Cardinal, Fisher, PSS, McKesson, Owens & Minor, Henry
Schein
Cardinal, Fisher, PSS, McKesson, Owens & Minor, Henry Schein
2: Normal Abnormal
Number of Levels
3: Negative Norm Low Abnormal High Abnormal/ High Abnormal
w/urob. Reconstitution 4 x 15 mL 4 x 60 mL 10 x 60 mL
Direct, online thru website , Cardinal Health, Fisher, Infol
Labsco, ab, McKesson, Owens & Minor, PSS 2: Nor mal
Abnormal
Direct, online catalog on website, Cardinal, PSS, Labsco 2:
Level 1Negative/Norm. Level 2Positive/Abnormal Ready to use 10 x 10
mL
Preparatio n Package Size
Ready to use 3 x 15 mL
Ready to use 6 x 15 mL
Stability / Unopened Stability / Opened Microscopi c Values
Until exp. date on vial (18mo.) 5-7 days after recon 4 mo.
frozen Yes
Until exp. date on vial Until exp. date on vial Yes
Until exp. date on vial 90 days 2-8C
Until exp. date on vial 7 days 2-8C
No
No
27
VI. Log SheetsThis section contains the following blank log
sheets that may be copied and used for documentation for the Urisys
1100 Urine Analyzer in your facility. Operator Certification Log
for recording the names of trained Urisys 1100 operators and
tracking yearly competency checks. Operator Competency Log for
recording yearly competency checks for each operator, withinrun
precision data, and control recovery data.Reagent Log for recording
the date received, lot numbers and expiration dates of Chemstrip
urine test strips,
Chemstrip Calibration Strips and controls. Urinalysis Report
Form for recording patient results. Quality Control Log for
recording quality control information. Preventive Maintenance Log
for recording the dates on which maintenance was performed.
Temperature Log (2) for recording Urisys 1100 Urine Analyzer
operating temperatures and Chemstrip urine test strip storage
temperatures. Knowledge Test for written documentation of operator
certification.Skills Checklist for documenting operator skills
while training on the Urisys 1100 Urine Analyzer
28
Operator Certification LogUrisys 1100 Urine AnalyzerDate of
Initial Certification Operator ID No. Competency Checks Date
Observer / Reviewer Initials / Date
2008 Roche Diagnostics. All rights reserved. COBAS, Urisys 1100
and CHEMSTRIP are trademarks of Roche.29
Operator Competency LogUrisys 1100 Urine AnalyzerOperator
Name:___________________________________________________________
Chemstrip Cat. No. Lot No.: ______________________________
__________________ Control Name and Lot No.:
Level:_________________________ __________________ Within-Run
PrecisionSG 1 2 3 4 5 6 7 8 9 10 11 12 13 14 15 16 17 18 19 20 Mode
Color block variation pH LEU NIT PRO GLU KET
Date:___________________ __ Exp. Date:_________________ Exp.
Date:_________________
UB G
BILI
BLD
Note: The color block variation should be no greater than +/-
one color block from the mode for acceptable perfor-mance.
2008 Roche Diagnostics. All rights reserved.
COBAS, Urisys 1100 and CHEMSTRIP are trademarks of Roche.30
Operator Competency LogUrisys 1100 Urine AnalyzerControl
RecoveryControl Package Insert Ranges Urisys 1100 Urine Analyzer
Mode Result from Within Run Precision
SG pH LEU NIT PRO GLU KET UBG BILI BLD
Note: Reference the visual acceptance range if the Urisys 1100
Urine Analyzer is not referenced on your control pack-age
insert.
2008 Roche Diagnostics. All rights reserved. COBAS, Urisys 1100
and CHEMSTRIP are trademarks of Roche.31
Reagent LogUrisys 1100 Urine AnalyzerChemstrip Urine Test Strips
No. Lot Vials No. Chemstrip Urine Analyzer Calibration Strips No.
Lot Exp. Vials No. Date Controls No. Vials Lot No. Exp. Date
Date Recd
Exp. Date
Da te Re cd
Date Recd
2008 Roche Diagnostics. All rights reserved. COBAS, Urisys 1100
and CHEMSTRIP are trademarks of Roche.32
Urinalysis Report FormUrisys 1100 Urine AnalyzerPatient Name:
________________________________________________________________________________________
Age: ______________________________
M
F
Physicians Name:
_____________________________________________________________________________________
Collection Date: __________________ Physical Examination Color:
Appearance: Chemical Examination Specific Gravity pH Leukocytes
Nitrite Protein Glucose Ketones Urobilinogen Bilirubin Blood
Comments: colorles s clear
Test Date: _______________________ yello w hazy
Operators Initials: __________________
amber cloudy
other turbid
1.000 5 neg neg neg norm neg norm neg neg
1.005 6 25 pos trace 50 15 1 1 trace
1.010 6.5
1.015 7
1.020 8
1.025 9
1.030
75 500 (any pink color is considered positive) 30 100 50 4 3 50
100 250 150 8 6 250 >12 500 >1000
____________________________________________________________________________________________________
____________________________________________________________________________________________________
Attach the Patient Report printout here if required by your
facility.2008 Roche Diagnostics. All rights reserved. COBAS, Urisys
1100 and CHEMSTRIP are trademarks of Roche.33
Quality Control LogUrisys 1100 Urine AnalyzerName of control
solution used by your facility:
______________________________________________________________
Control Lot No.: __________________________________ Exp. Date:
______________Chemstrip Cat. No.:
___________________________________________________________________________________
Chemstrip Lot No.: ________________________________ Operators
Initials: ________________________________Dat e Lev el 1 Lev el 2
Lev el 1 Lev el 2 Lev el 1 Lev el 2 Lev el 1 Lev el 2 Lev el 1 Lev
el 2 Lev el 1 Lev el 2 Lev el 1 Lev el 2 Lev el 1 Lev el 2 Lev el 1
Lev el 2 Lev el 1 Lev LE U PR O G L U
Exp. Date: _____________
SG
pH
NIT
KE T
UB G
BILI
BL D
Yes/ No
Initi als
Correcti ve Action
el 2 Lev el 1 Lev el 2 Lev el 1 Lev el 2
Note: Reference the visual acceptable range if the Urisys 1100
Urine Analyzer is not referenced on your control pack-age
insert.
2008 Roche Diagnostics. All rights reserved. COBAS, Urisys 1100
and CHEMSTRIP are trademarks of Roche.3 4
Preventive Maintenance LogUrisys 1100 Urine AnalyzerCheck the
box if you have performed the task. Date and initial the top of the
column.Date
Initials
1. Adequate urine test strip supply available.
2. Urine test strips within expiration date.
3. Adequate supply of calibration strips.
4. Adequate supply of controls available.
5. Controls within expiration date.
6.
Clean exterior of analyzer with 10% bleach solution.
7. Clean the tray of analyzer with 10% bleach solution.
8. Calibrate the analyzer. Perform weekly.9. Replace printer
paper on the day it runs out.
10.
Operators
manual and test strip package insert available.
Refer to the Urisys 1100 Urine Analyzer Operators Manual for
specific procedural instructions.
2008 Roche Diagnostics. All rights reserved. COBAS, Urisys 1100
and CHEMSTRIP are trademarks of Roche.35
Temperature LogUrisys 1100 Urine AnalyzerLocation:
______________________________________________________ Year:
_________________________________________________________
Acceptable Range (C): __________________________________________Fe
b Ma r Ma y Jun e Jul y Au g Se pt No v D e c
Jan 1 2 3 4 5 6 7 8 9 10 11 12 13 14 15 16 17 18 19 20 21 22 23
24 25 26 27 28 29 30 31
Apr
Oct
2008 Roche Diagnostics. All rights reserved. COBAS, Urisys 1100
and CHEMSTRIP are trademarks of Roche.
36
Temperature LogChemstrip Urine Test StripsCat. No.
_______________________________________________________ Location:
______________________________________________________ Year:
_________________________________________________________
Acceptable Range (C): __________________________________________Fe
b Ma r Ma y Jun e Jul y Au g Se pt No v D e c
Jan 1 2 3 4 5 6 7 8 9 10 11 12 13 14 15 16 17 18 19 20 21 22 23
24 25 26 27 28 29 30 31
Apr
Oct
2008 Roche Diagnostics. All rights reserved. COBAS, Urisys 1100
and CHEMSTRIP are trademarks of Roche.
37
Knowledge TestUrisys 1100 Urine AnalyzerName:
___________________________________________ Date:
____________________________________________ ID No.:
___________________________________________ Unit:
_____________________________________________
Mark T if the statement is true and F if the statement is false.
_____ 1. You must check the expiration dating on the vial each time
you perform a patient or quality control test. _____ 2. Dip the
Chemstrip urine test strip briefly (no longer than 1 second) in the
urine sample. _____ 3. Strong oxidizing cleaning agents interfere
with the blood patch results. _____ Correct placement of the
Chemstrip urine test strip in the tray of the analyzer is necessary
to obtain 4. accurate results. _____ 5. It is necessary to bring
refrigerated samples to room temperature before testing. _____ 6.
The sample should be in sufficient volume to allow all test pads to
be completely wetted. _____ Running the side of the Chemstrip urine
test strip along the rim of the container removes excess 7. sample.
_____ 8. If you do not obtain a successful calibration, the
analyzer will still process samples. _____ 9. A positive nitrite
test is not normal in fresh, clean-catch midstream urine specimens.
_____ 10.Urine residue on the tray of the analyzer may result in
inaccurate results. _____ 11.Green spots on the blood patch are
indicative of unlysed erythrocytes.
2008 Roche Diagnostics. All rights reserved. COBAS, Urisys 1100
and CHEMSTRIP are trademarks of Roche.38
Fill in the blanks. 12. 13. 14. The specimen should be tested
within ___________ hour(s) of collection, otherwise, refrigerate it
in a closed container. Replace the _____________________ to avoid
deterioration of the test strips.When using Chemstrip 10MD Test
Strips, the Urisys 1100 Urine Analyzer must be calibrated every
________
days. 15. 16. 17. Reasonable amounts of ascorbic acid do not
affect the ________ test. The specimen must be thoroughly
________________________, as red cells sink to the bottom and could
cause false positive results. Rinse the test strip tray with a
suitable disinfectant ________ (when?).
2008 Roche Diagnostics. All rights reserved. COBAS, Urisys 1100
and CHEMSTRIP are trademarks of Roche.39
Answer Key 1. 2. 3. 4. 5. 6. 7. 8. 9. 10. 11. 12. 13. 14. 15.
16. 17. T T T T T T T F T T T one vial cap seven blood or glucose
mixed daily
2008 Roche Diagnostics. All rights reserved.COBAS, Urisys 1100
and CHEMSTRIP are trademarks of Roche.
4 0
Skills ChecklistUrisys 1100 Urine AnalyzerThe trainer should
check each activity as it is demonstrated. All activities must be
completed before the trainee is certi-fied to use the Urisys 1100
Urine Analyzer. Specimen Collection 1. User assembles specimen
collection supplies 1q Specimen container 2q Cleansing towelette 3q
Water-saturated sponge 3. User reviews specimen collection 1q
States patient preparation steps 2q Explains specimen storage and
stability 3q Describes clean-catch, midstream urine technique
Testing Procedure 1. User assembles testing supplies 1q Urisys 1100
Urine Analyzer 2q Chemstrip Urine Test Strips 3q Chemstrip Urine
Analyzer Calibration Strips 4q Patient specimen 5q Disposable latex
gloves and laboratory coat 6q Absorbent paper 2. User preparation
1q Checks expiration date on test strip vial 2q Puts on disposable
latex gloves and laboratory coat
2008 Roche Diagnostics. All rights reserved. COBAS, Urisys 1100
and CHEMSTRIP are trademarks of Roche.41
3. Sample preparation 1q States if refrigerated, bring sample to
room temperature 2q Mixes sample by swirling capped container
several times 4. Calibration (when using Chemstrip 10MD or
Chemstrip 10UA Test Strips) 1q Removes one Chemstrip urine analyzer
calibration strip 2q Does not touch elevated gray areas on strip 3q
Places calibration strip(pad side up) onto the test strip tray 4q
Presses START button 5q Documents calibration on the Preventive
Maintenance Log 5. Testing 1q Removes one Chemstrip urine test
strip 2q Replaces vial cap immediately 3q Ensures analyzer test
strip tray is clean 4q Briefly dips test strip vertically into
specimen 5q Draws strip edge along rim of container to remove
excess urine 6q Touches strip to absorbent paper 7q Places the test
strip (pad side up) onto the test strip tray 8q The handle end of
the strip should be held by the clip at the insertion slot 9q
Obtains results from the printout 10q Removes test strip 11q Wipes
tray with dry lint-free cloth. If there is any residue on the tray,
follows proper maintenance as outlined in the Urisys 1100 Urine
Analyzer Operators Manual.
2008 Roche Diagnostics. All rights reserved. COBAS, Urisys 1100
and CHEMSTRIP are trademarks of Roche.42
6. Results 1q Documents results as appropriate for your facility
7. Quality control 1q States when to perform QC tests 2q Performs
test like routine urine. 3q Documents results 4q Reviews procedure
if the test results fall outside the acceptable range 5q If problem
persists, calls Roche Diagnostics Technical Service Center at
1-800-428-4674 8. Infection control 1q Properly disposes of
specimen, used test strips and container 2q Cleans and
decontaminates the work area according to infection control policy
3q Removes and disposes of disposable latex gloves
____________________________________________________________________________________________________
Operator Signature
Date
____________________________________________________________________________________________________
Trainer Signature
Date
Contact your Roche Diagnostics Account Manager for training
certificates.
2008 Roche Diagnostics. All rights reserved. COBAS, Urisys 1100
and CHEMSTRIP are trademarks of Roche.43
VII. Regulatory Requirements
2008 Roche Diagnostics. All rights reserved.COBAS, Urisys 1100
and CHEMSTRIP are trademarks of Roche.
4 4
VIII.Product Information
2008 Roche Diagnostics. All rights reserved.COBAS, Urisys 1100
and CHEMSTRIP are trademarks of Roche.4 5
Roche Diagnostics Corporation
9115 Hague Road Indianapolis, IN 46256www.poc.roche.com
www.diavant.com
Cat. No. 3755541 REF 0 3755541001
PDF to
W or
Table of Contents for Roche cobas Urisys 1100:
-
34 Gebrauchsanweisung V04 / Operator’s Manual V04 / Manual de instrucciones V04 Menu Structure (continued) Pressing the START button confirms the setting, closes the submenu, and resumes Ready-to-Measure status. STRIP SETTINGS Type Units Limits SETUP 3 Language DevicveID Op.ID UNITS: CONV Single Combined UNITS: CONV/ARB Conv/Arb. SI/Arb. STRIP TYPE:COMBUR10 UX C-10
-
Gebrauchsanweisung V04 / Operator’s Manual V04 / Manual de instrucciones V04 57 2. Descripción del sistema 2.1 Principio de medición La tira reactiva se deposita sobre una guía, y un motor de avance gradual la desplaza bajo el cabezal de lectura que per- manece estacionario. El aparato efectúa la medición tanto de la zona de referencia de la guía como de las distintas zonas de la tira reactiva. El cabezal de lectura con
-
88 Gebrauchsanweisung V04 / Operator’s Manual V04 / Manual de instrucciones V04 South Korea Roche Diagnostics Korea Co., Ltd 15th Floor, Sam-Wha Building, 144/17, Samsung-dong, Kangnam-Ku 135-092 Seoul Republic of Korea Phone: +82 2 550 3300 Fax: +82 2 566 1878 Spain Roche Diagnostics S.L. Avda. de la Generalitat, s/n 08174 Sant Cugat del Vallés (Barcelona) España Phone: +34 935 834 000 Fax: +34 935 834 340 Sweden Roche Diagnostics Scandinavia AB Karsbodavägen 30, Box 147 16126 Bromma Sverige Phone: +46 (0)8 404 88 00 Fax: +46 (0)8 98 44 4
-
Gebrauchsanweisung V04 / Operator’s Manual V04 / Manual de instrucciones V04 1 Inhaltsverzeichnis Seite 1. Einleitung 2 2. Systembeschreibung 3 2.1 Messprinzip 3 2.2 Bedienungselemente und Funktion 4 3. Software 4 3.1 Übersicht 4 3.2 Flussdiagramm des Benutzermenüs 5 3.3 Funktionen des Benutzermenüs 7 3.4 Ergebnistabelle 10 3.5 Änderung der Bereichsgrenzen 11 4. Inbetri
-
Gebrauchsanweisung V04 / Operator’s Manual V04 / Manual de instrucciones V04 81 11. Informaciones para el pedido El aparato, los artículos de consumo y los accesorios son: N o de Cat. (REF) 03 617 548 Contenido: Aparato Urisys 1100, Adaptador SA 125A-0735U-S, 100 V — 240 V, 50 — 60 Hz, chip de programa, guía para tiras reactivas C y N, papel para impresora, manual de instrucciones, guía de referencia rápida, cable de alimentación, CD
-
Gebrauchsanweisung V04 / Operator’s Manual V04 / Manual de instrucciones V04 87 New Zealand Roche Diagnostics N.Z. Ltd 15 Rakino Way, PO Box 62-089 Mt. Wellington, Auckland New Zealand Phone: +64-9-276 4157 Fax: +64-9-276 5147 Norway Roche Norge AS Divisjon Diagnostics Brynsengfaret 6B Pb 6610 Etterstad 0607 Oslo Norge Phone: +47 23373300 Fax: +47 23373399 Pakistan Roche Pakistan Ltd Divisio
-
64 Gebrauchsanweisung V04 / Operator’s Manual V04 / Manual de instrucciones V04 3.4 Tabla de resultados El sistema Urisys 1100 imprime los resultados en los niveles de concentración siguientes: ! ATENCIÓN: Para obtener más detalles sobre cómo interpretar los resultados, consulte el siguiente folleto de Roche Diagnostics: Compendium Urinalysis with Test Strips. Parámetro Unidades convencionales Unid
-
48 Gebrauchsanweisung V04 / Operator’s Manual V04 / Manual de instrucciones V04 E6 CHIP ERROR ! Cause: The program chip on the right of the analyzer underneath the printer cov- er (see Figure 18) is missing, is not making contact, is defective or contains an old 18 soft ware version. Action: Switch off the Urisys 1100 system. Insert the program chip and switch the instrument on again. If “CHIP ERROR” appears again, the instrument is defective. E7 MISSING TRAY ! Cause: No tra
-
38 Gebrauchsanweisung V04 / Operator’s Manual V04 / Manual de instrucciones V04 3.5 Changing the Range Limits The reflectance range limits for the lower concentration intervals can be altered to a limited extent for all test parameters except SG (specific gravity) and pH. To change the range limits, choose “RANGE LIMITS” and press the left function key (“New”). The lowest interval for the first parameter is displayed next to the current range limi
-
20 Gebrauchsanweisung V04 / Operator’s Manual V04 / Manual de instrucciones V04 7. Reinigung und Wartung Das Urisys 1100 System ist ein wartungsfrei arbeitendes Gerät. Schützen Sie das Gerät vor extremen Temperaturen und zu hoher Luftfeuchtig keit (siehe Kapitel 10) sowie vor starker Lichteinstrahlung (Sonnenlicht, Lichtstrahler). Die Geräteoberfläche und die äußeren Teile des Geräts sind aus hygienischen Grün
Questions, Opinions and Exploitation Impressions:
You can ask a question, express your opinion or share our experience of Roche cobas Urisys 1100 device using right now.