инструкцияPhilips Azur Precise GC4330

Azur
GC4340, GC4330, GC4325, GC4320, GC4310
Посмотреть инструкция для Philips Azur Precise GC4330 бесплатно. Руководство относится к категории утюги, 1 человек(а) дали ему среднюю оценку 8.3. Руководство доступно на следующих языках: русский, английский. У вас есть вопрос о Philips Azur Precise GC4330 или вам нужна помощь? Задайте свой вопрос здесь
- ENGLISH 4
- POLSKI 13
- ROMÂNĂ 23
- ČEŠTINA 43
- MAGYAR 52
- SLOVENSKY 62
- LIETUVIŠKAI 72
Главная
| Philips | |
| Azur Precise GC4330 | GC4330/02 | |
| утюг | |
| 8710103192589, 8710103192596, 8710103228509 | |
| русский, английский | |
| Руководство пользователя (PDF) |
Прочие свойства
| Размеры (ШхГхВ) | 120 x 303 x 152 mm |
| Непрерывный поток | 40 g/min |
| Эргономичная мягкая ручка для длительного комфорта при глажении | Да |
| Максимальная входная мощность | 2400 W |
| Мощность лампочки | 2400 W |
Свойства
| Тип | Паровой утюг |
| Автовыключение | Да |
| Съемный резервуар для воды | Нет |
| Функция «без капель» | Да |
| Переменный пар | Да |
| Система против накипи | Да |
| Функция вертикального пара | Да |
| Производительность парового напора | 100 г/мин |
| Функция распрыскивания | Да |
| Мягкая рукоятка | Да |
| Цвет товара | Blue, White |
| Длина шнура | 3 m |
| Угол поворота | 360 ° |
| Автоматическое удаление накипи | Да |
| Постоянная подача пара | 40 г/мин |
| Паровой носик Steam Tip для труднодоступных мест | Да |
| Подходит для жесткой воды | Да |
Эргономика
Индикация
Энергопитание
| Потребляемая мощность (в обычном режиме) | 2400 W |
| Частота входящего переменного тока | 50 — 60 Hz |
| Мощность | 2400 W |
| Входящее напряжение сети | 220 — 240 V |
Вес и размеры
показать больше
Не можете найти ответ на свой вопрос в руководстве? Вы можете найти ответ на свой вопрос ниже, в разделе часто задаваемых вопросов о Philips Azur Precise GC4330.
Что означает указанная на утюге мощность?
Как удалить пятна на подошве утюга?
Можно ли заливать в утюг водопроводную воду?
Какой вес Philips Azur Precise GC4330?
Инструкция Philips Azur Precise GC4330 доступно в русский?
Не нашли свой вопрос? Задайте свой вопрос здесь
Раздел: Бытовая, кухонная техника, электроника и оборудование
Тип: Утюг
Характеристики, спецификации
Потребляемая мощность:
2400 Вт
Мощность подачи пара:
до 40 г/мин
Вертикальное отпаривание:
Да
Противокапельная система:
Да
Авт.отключ. гориз./вертик.:
30 сек/8 мин
Насадка для деликатных тканей:
Нет
Шаровое крепление шнура:
Да
Инструкция к Утюгу Philips GC 4330

Azur
GC4340, GC4330, GC4325, GC4320, GC4310

2

ENGLISH 4
POLSKI 13
ROMÂNĂ 23
РУССКИЙ 33
ČEŠTINA 43
MAGYAR 52
SLOVENSKY 62
LIETUVIŠKAI 72
GC4340, GC4330, GC4325, GC4320, GC4310
ENGLISH4
Important
Read these instructions for use carefully before using the appliance and
save them for future reference.
◗ Check if the voltage indicated on the type plate corresponds to
the local mains voltage before you connect the appliance.
◗ Only connect the appliance to an earthed wall socket.
◗ Do not use the appliance if the plug, the cord or the appliance
itself shows visible damage, or if the appliance has been dropped
or is leaking.
◗ Check the cord regularly for possible damage.
◗ If the mains cord is damaged, it must be replaced by Philips, a
service centre authorised by Philips or similarly qualified persons
in order to avoid a hazard.
◗ Never leave the appliance unattended when it is connected to the
mains.
◗ Never immerse the iron and the stand, if provided, in water.
◗ Keep the appliance out of the reach of children.
◗ The soleplate of the iron can become extremely hot and may
cause burns if touched.
◗ Do not allow the cord to come into contact with the soleplate
when it is hot.
◗ When you have finished ironing, when you clean the appliance,
when you fill or empty the water tank and also when you leave
the iron even for a short while: set the steam control to position
0, put the iron on its heel and remove the mains plug from the
wall socket.
◗ Always place and use the iron and the stand, if provided, on a
stable, level and horizontal surface.
◗ Do not put perfume, vinegar, starch, descaling agents, ironing aids
or other chemicals in the water tank.
◗ This appliance is intended for household use only.
Before first use
1 Remove the heat-resistant protective cover from the soleplate
C
(GC4340 only). Remove any sticker or protective foil from the
soleplate.
B
The iron may give off some smoke when you use it for the first time.This
will cease after a short while.
ENGLISH 5
Preparing for use
Filling the water tank
Never immerse the iron in water.
1 Make sure the appliance is unplugged.
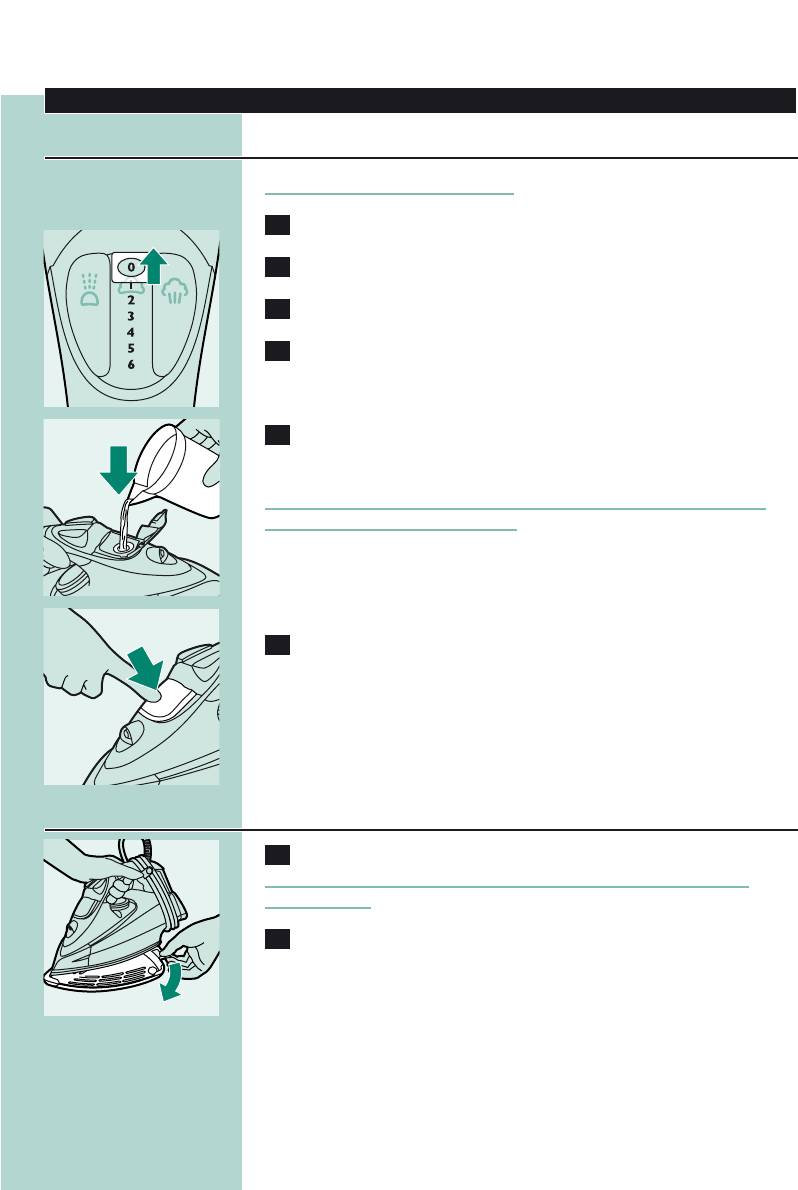
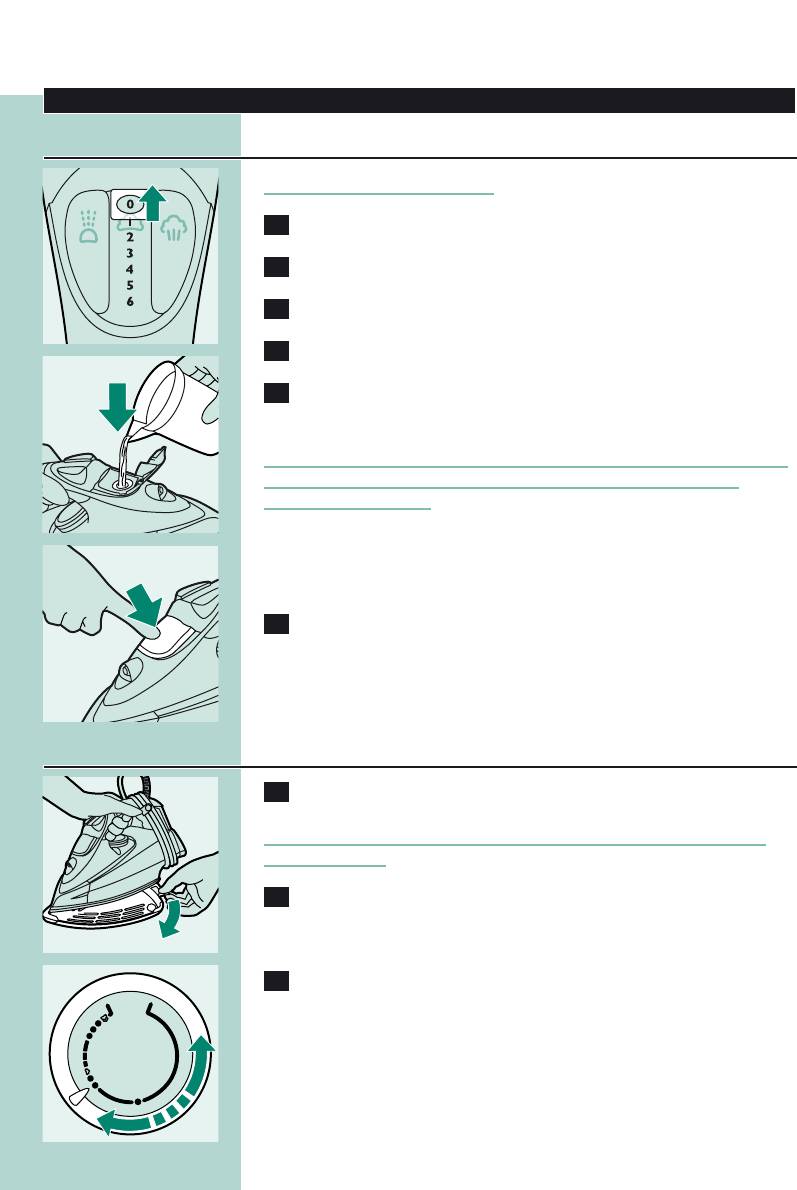
2 Set the steam control to position 0 (= no steam).
C
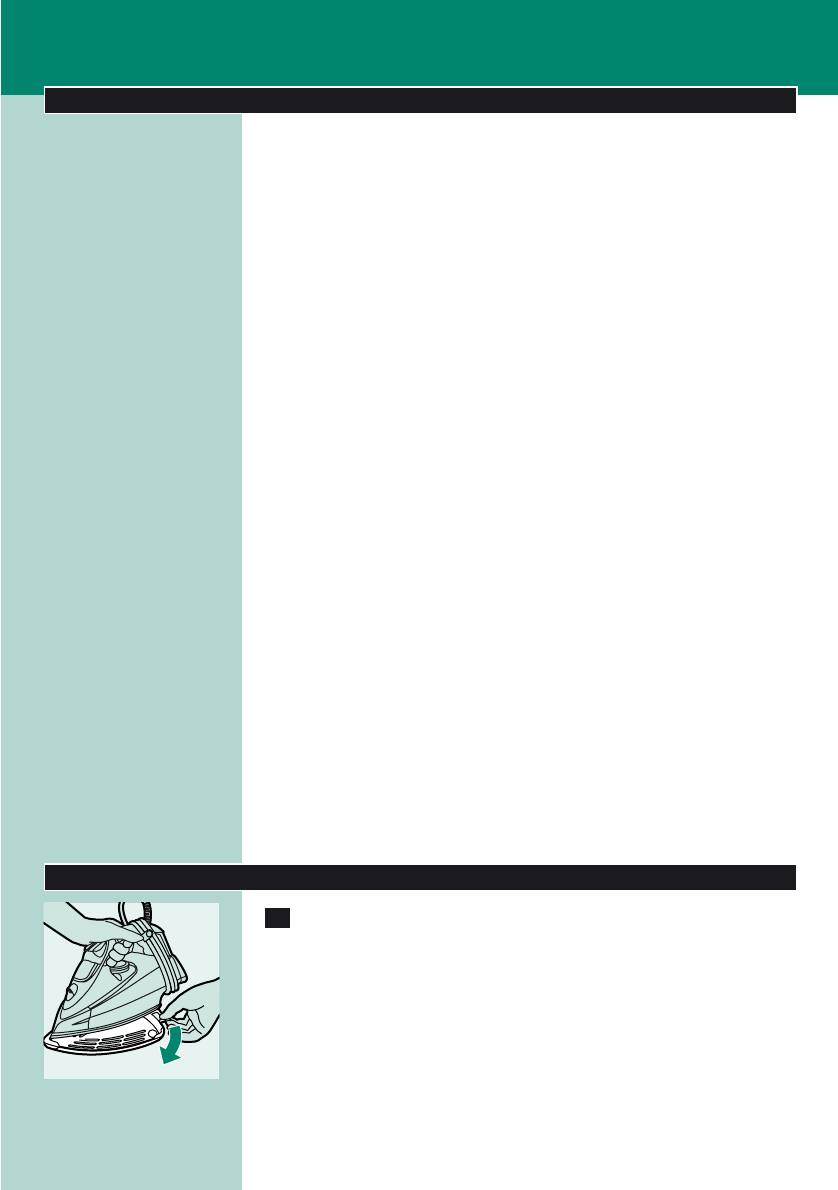
3 Open the cap of the filling opening.
4 Tilt the iron backwards.
5 Fill the water tank with tap water up to the maximum level by
C
means of the filling cup.
Do not fill the tank beyond the MAX indication.
Do not put perfume, vinegar, starch, descaling agents, ironing aids or
other chemicals in the water tank.
◗ If the tap water in your area is very hard, we advise you to mix it
with an equal portion of distilled water, or to use distilled water
only.
6 Close the cap of the filling opening (‘click’).
C
Setting the temperature
1 Type GC4340 only: remove the heat-resistant protective cover.
C
Do not leave the heat-resistant protective cover on the soleplate
during ironing.
2 Put the iron on its heel.
ENGLISH6
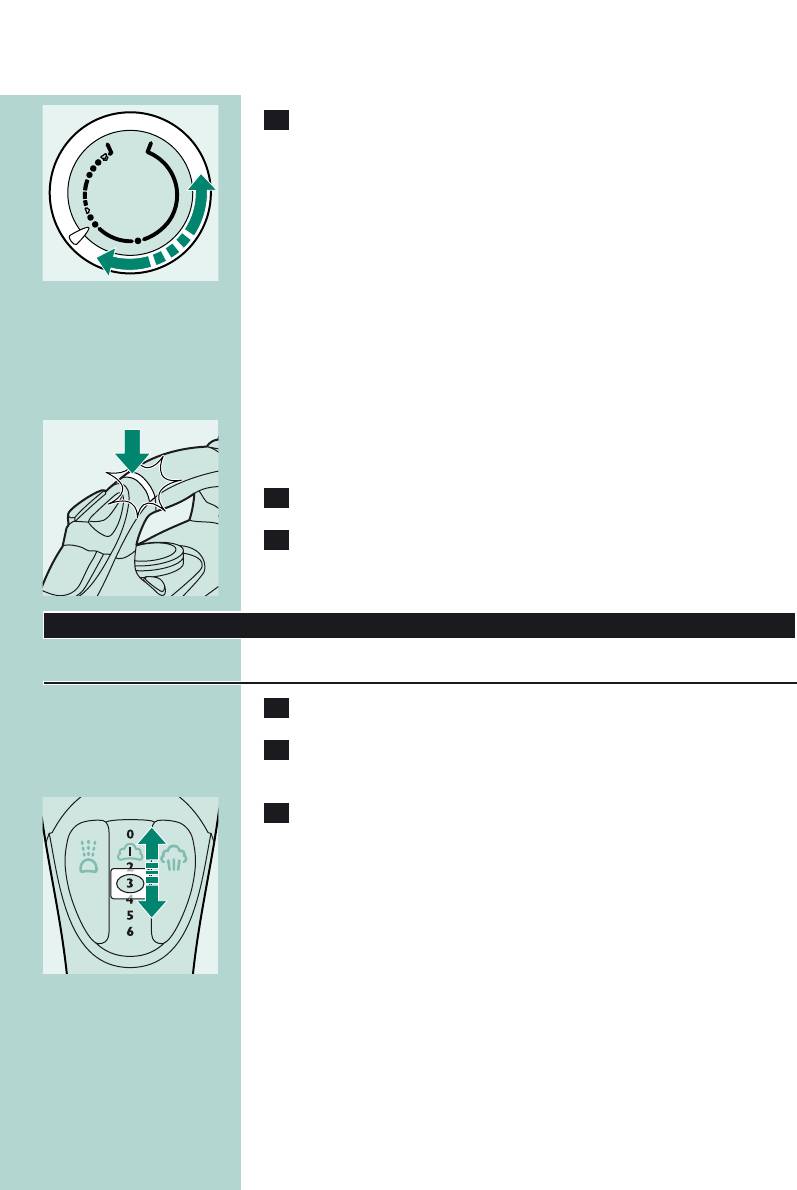
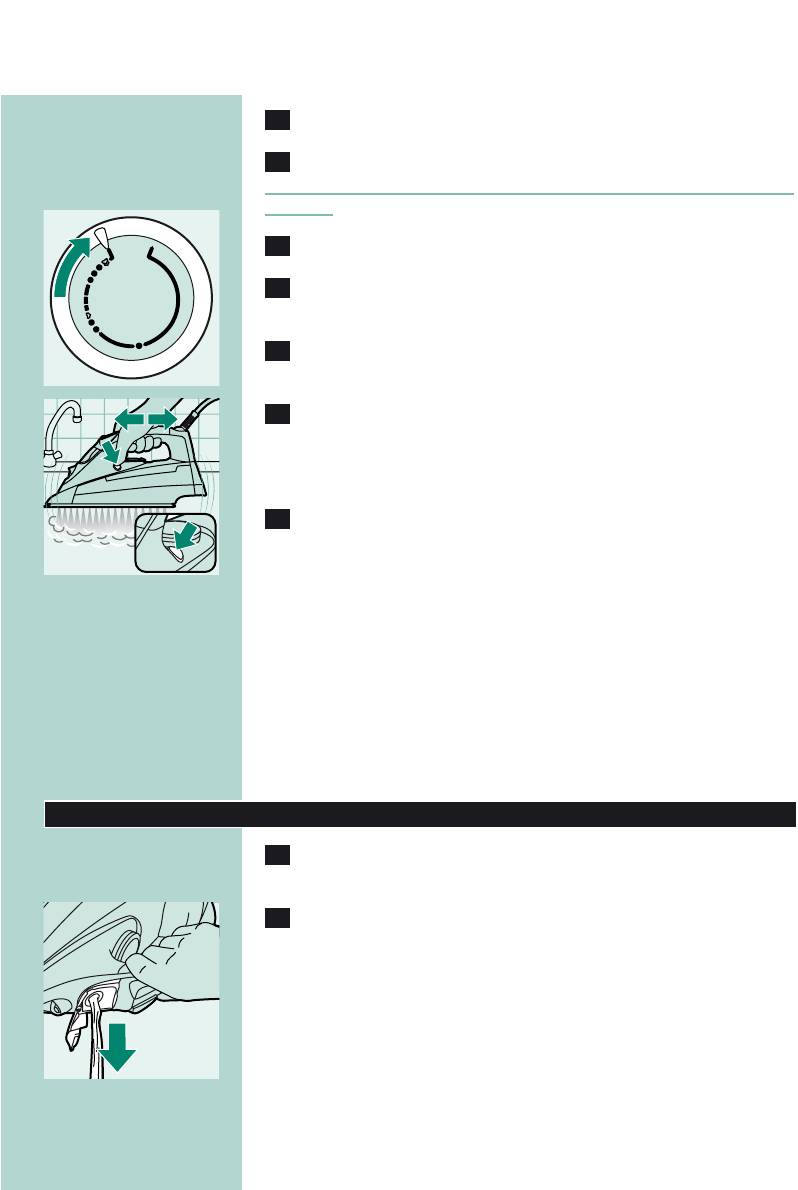
3 Set the required ironing temperature by turning the
C
temperature dial to the appropriate position.
Check the laundry care label for the required ironing temperature:
— 1 Synthetic fabrics (e.g. acrylic, nylon, polyamide, polyester)
— 1 Silk
— 2 Wool
— 3 Cotton, linen
If you do not know what kind or kinds of fabric an article is made of,
determine the right ironing temperature by ironing a part that will not
be visible when you wear or use the article.
Silk, woollen and synthetic materials: iron the reverse side of the fabric
to prevent shiny patches. Avoid using the spray function to prevent
stains.
Start ironing the articles that require the lowest ironing temperature,
such as those made of synthetic fibres.
4 Put the mains plug in an earthed wall socket.
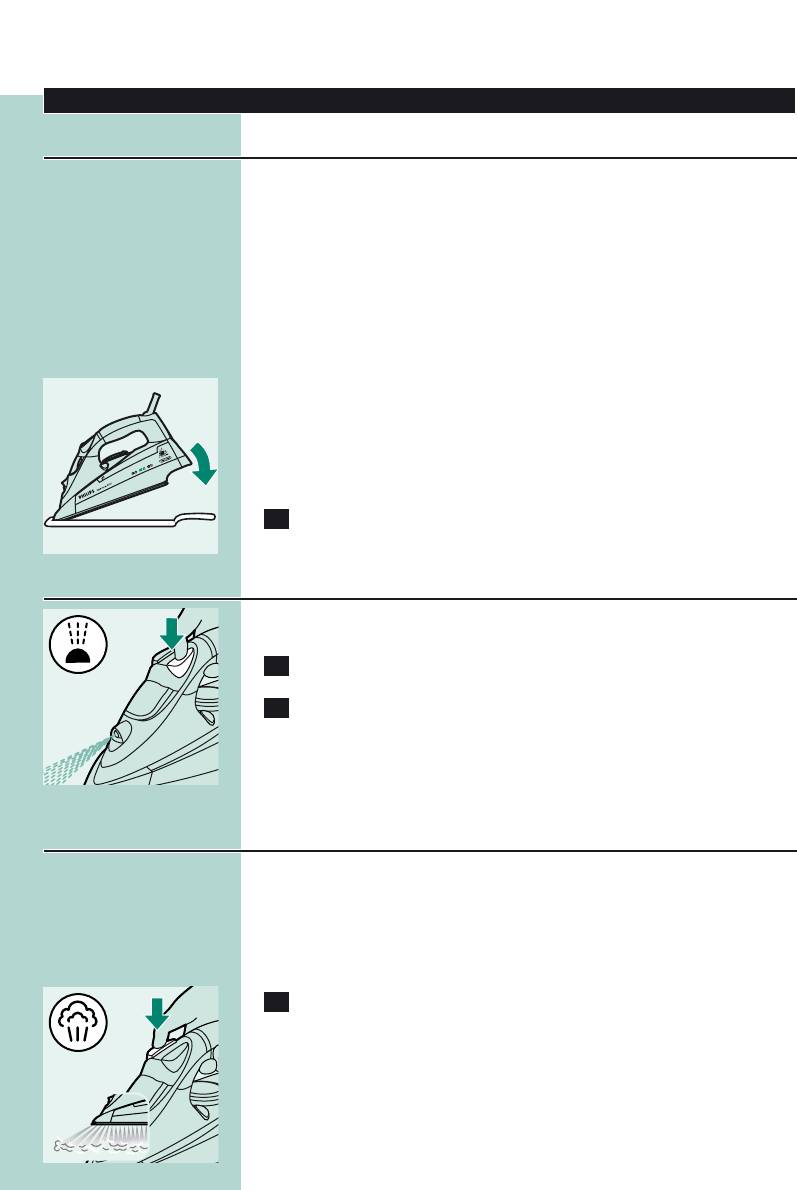
5 When the amber temperature light has gone out, wait a while
C
before you start ironing.
The temperature light will go on from time to time during ironing.
Using the appliance
Steam ironing
1 Make sure that there is enough water in the water tank.
2 Select the recommended ironing temperature (see chapter
‘Preparing for use’, section ‘Setting the temperature’).
3 Select the appropriate steam setting. Make sure that the steam
C
setting you select is suitable for the ironing temperature
selected:
— 1 — 3 for moderate steam (temperature settings 2 to 3)
— 4 — 6 for strong steam (temperature settings 3 to MAX)
B
The iron will start steaming as soon as the set temperature has been
reached.
MAX
MIN
LINEN
COTTON
WOOL
NYLON
SILK
ENGLISH 7
Ironing without steam
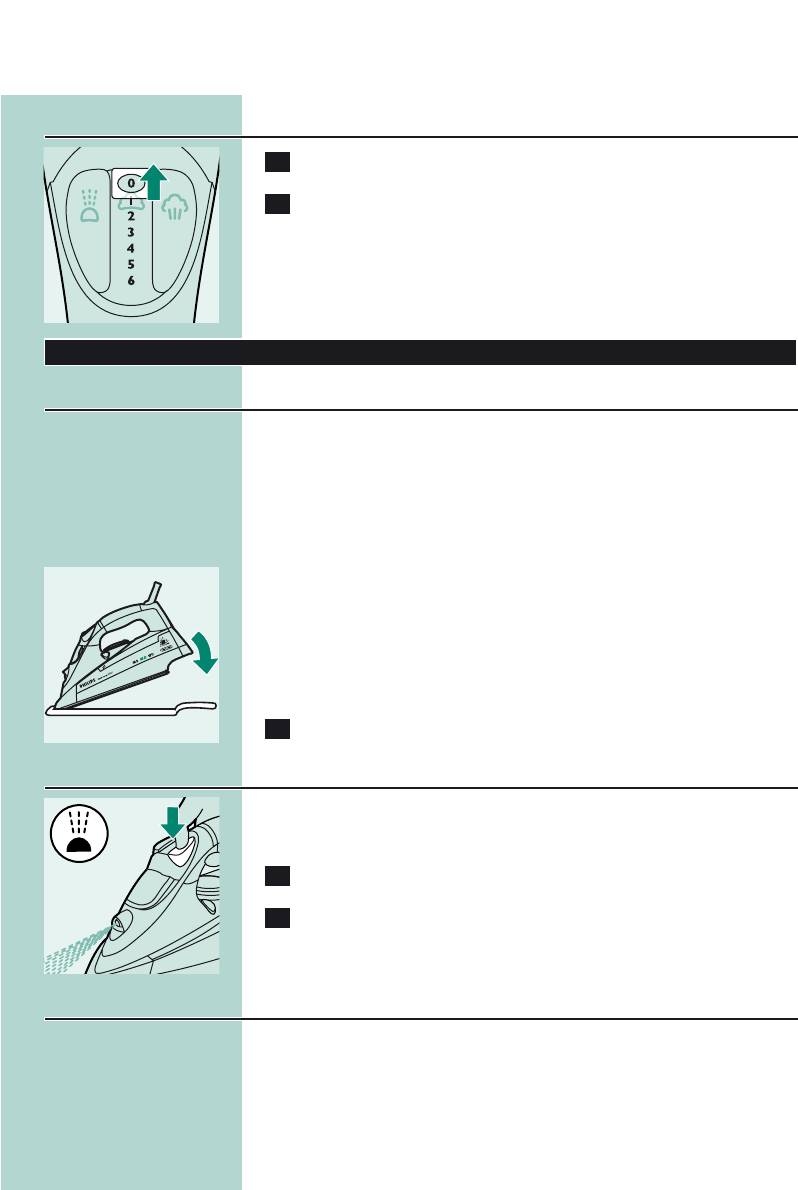
1 Set the steam control to position 0 (= no steam).
C
2 Select the recommended ironing temperature (see chapter
‘Preparing for use’, section ‘Setting the temperature’).
Features
Delicate fabric protector (GC4325 only)
The delicate fabric protector protects delicate fabrics from heat
damage and shiny patches.
With the delicate fabric protector you can iron delicate fabrics (silk,
wool and nylon) at temperature settings 3 to MAX in combination
with all steam functions available on the iron.
The delicate fabric protector reduces the soleplate temperature
instantly, thus allowing you to iron delicate fabrics safely.
If you do not know what kind or kinds of fabric an article is made of,
determine the right ironing temperature by ironing a part that will not
be visible when you wear or use the article.
1 Put the iron on the delicate fabric protector (‘click’).
C
Spray function
You can use the spray function to remove stubborn creases at any
temperature.
1 Make sure that there is enough water in the water tank.
2 Press the spray button several times to moisten the article to
C
be ironed.
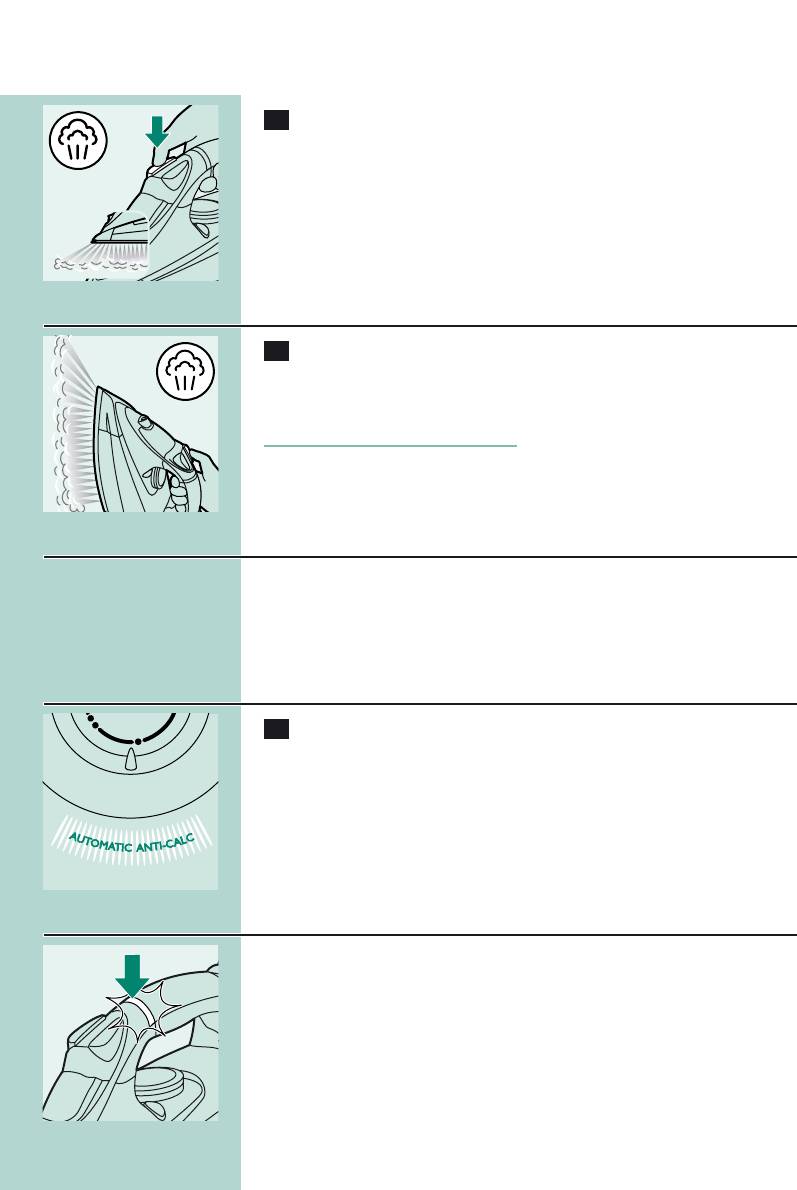
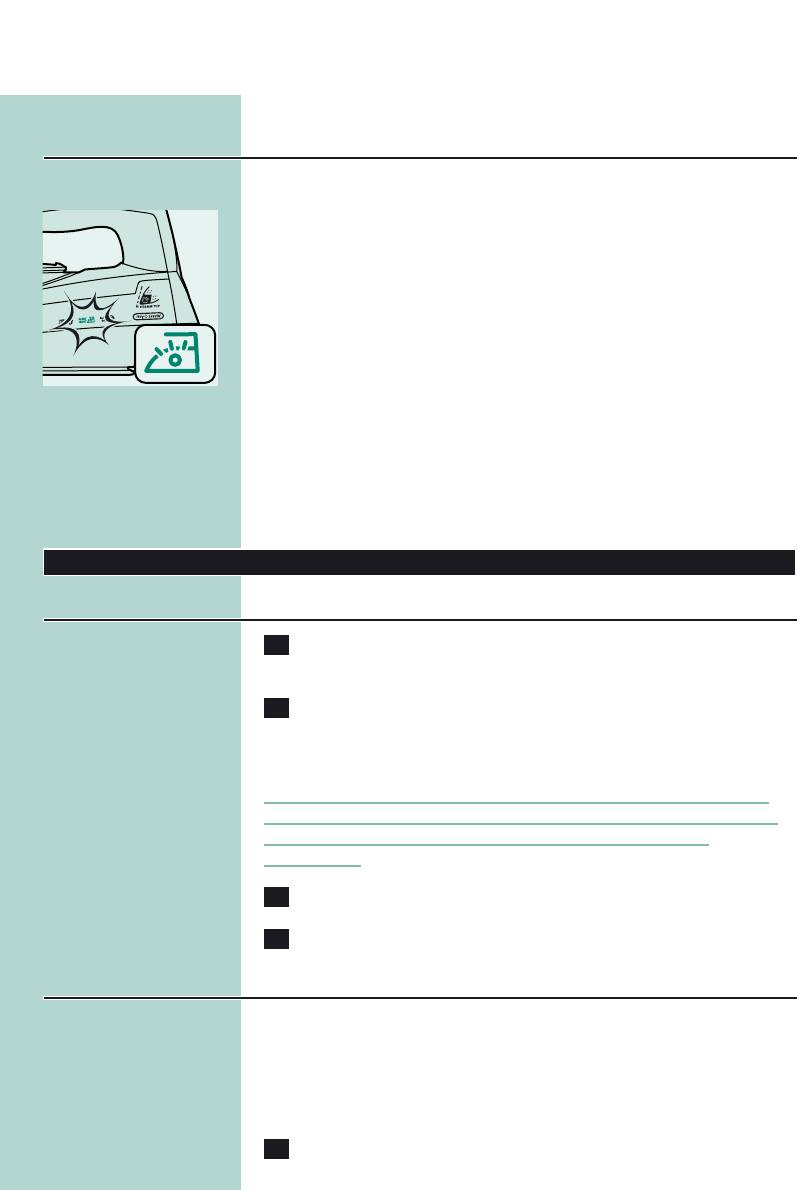
Concentrated shot of steam from the special Steam Tip
A powerful shot of concentrated steam helps remove stubborn
creases.The forward-directed concentrated shot of steam enhances
the distribution of steam into every part of your garment.
The shot-of-steam function can only be used at temperature settings
between 2 and MAX.
ENGLISH8
1 Press and release the shot-of-steam button.
C
Vertical shot of steam
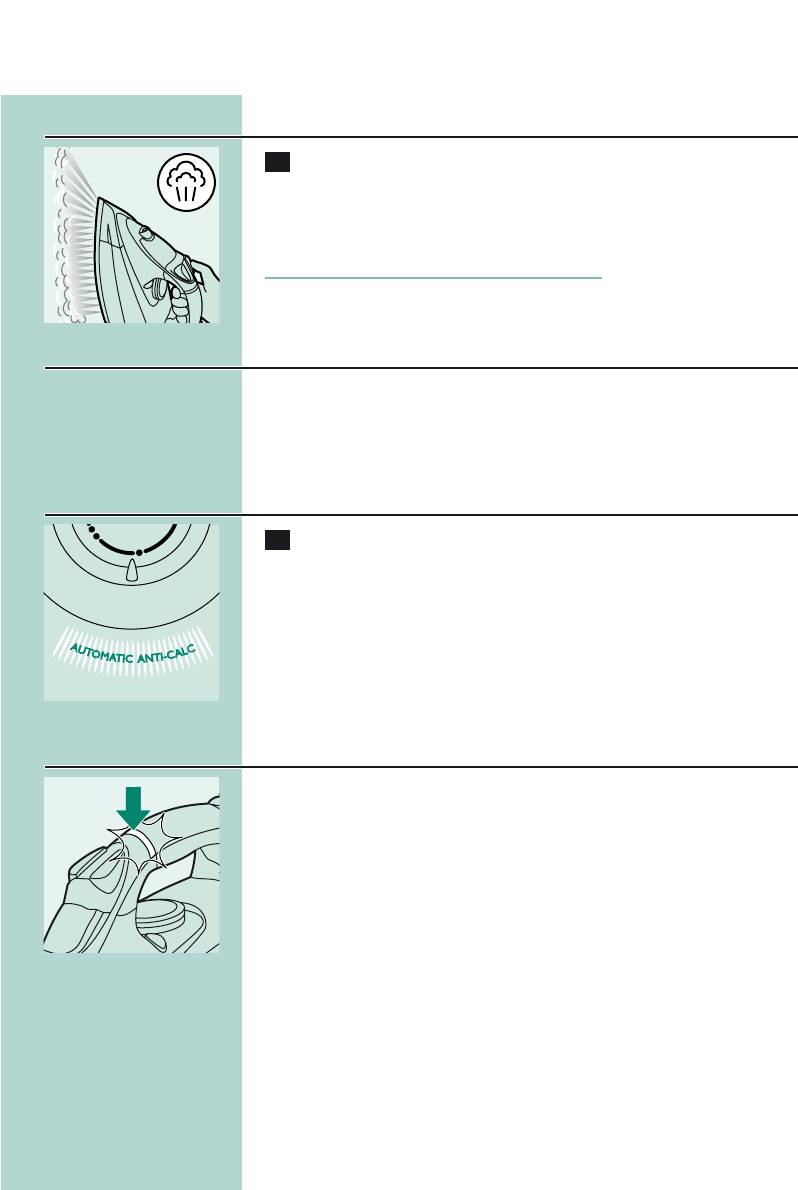
1 The shot-of-steam function can also be used when you hold
C
the iron in vertical position.
This is useful for removing creases from hanging clothes, curtains etc.
Never direct the steam at people.
Drip stop
This iron is equipped with a drip-stop function: the iron automatically
stops producing steam when the temperature is too low, to prevent
water from dripping out of the soleplate.When this happens you may
hear a sound.
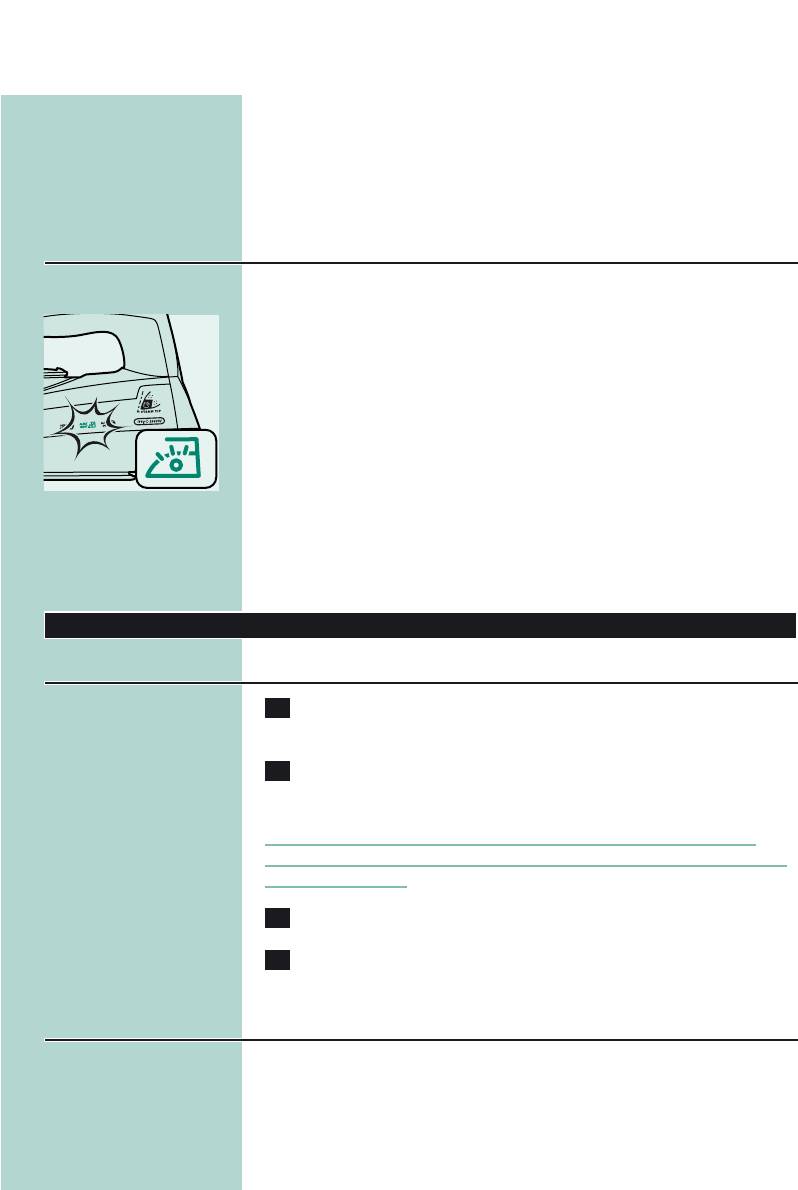
Automatic anti-calc system
1 The built-in anti-calc system reduces the build-up of scale and
C
guarantees a longer life for the iron.
Electronic safety shut-off function (GC4325/4320 only)
◗ The electronic safety shut-off function automatically switches off
C
the iron if it has not been moved for a while.
◗ The red auto-off light starts blinking to indicate that the iron has
been switched off by the safety shut-off function.
To let the iron heat up again:
— Pick up the iron or move it slightly.
— The red auto-off light goes out. If the temperature of the soleplate
has dropped below the set ironing temperature, the amber
temperature light goes on.
ENGLISH 9
— If the temperature light goes on after you have moved the iron, wait
for it to go out before you start ironing.
— If the temperature light does not go on after you move the iron, the
soleplate still has the right temperature and the iron is ready for use.
Alert light and electronic safety shut-off function (GC4340
and GC4330)
The iron is equipped with a blue alert light.
◗ The blue alert light burns as long as the iron is plugged in.
C
◗ The blue alert light starts blinking to indicate that the iron has
been switched off by the safety shut-off function.
To let the iron heat up again:
— Pick up the iron or move it slightly.
— The blue alert light stops blinking. If the temperature of the soleplate
has dropped below the set ironing temperature, the amber
temperature light goes on.
— If the temperature light goes on after you have moved the iron, wait
for it to go out before you start ironing.
— If the temperature light does not go on after you move the iron, the
soleplate still has the right temperature and the iron is ready for use.
Cleaning and maintenance
After ironing
1 Remove the mains plug from the wall socket and let the iron
cool down.
2 Wipe flakes and any other deposits off the soleplate with a
damp cloth and a non-abrasive (liquid) cleaning agent.
To keep the soleplate smooth, you should avoid hard contact with
metal objects. Never use a scouring pad, vinegar or other chemicals to
clean the soleplate.
3 Clean the upper part of the iron with a damp cloth.
4 Regularly rinse the water tank with water. Empty the water
tank after cleaning.
Calc-clean function
You can use the calc-clean function to remove scale and impurities.
◗ Use the calc-clean function once every two weeks. If the water in
your area is very hard (i.e. when flakes come out of the soleplate
ENGLISH10
during ironing), the calc-clean function should be used more
frequently.
1 Make sure the appliance is unplugged.
2 Set the steam control to position 0.
3 Fill the water tank to the maximum level.
Do not put vinegar or other descaling agents in the water tank.
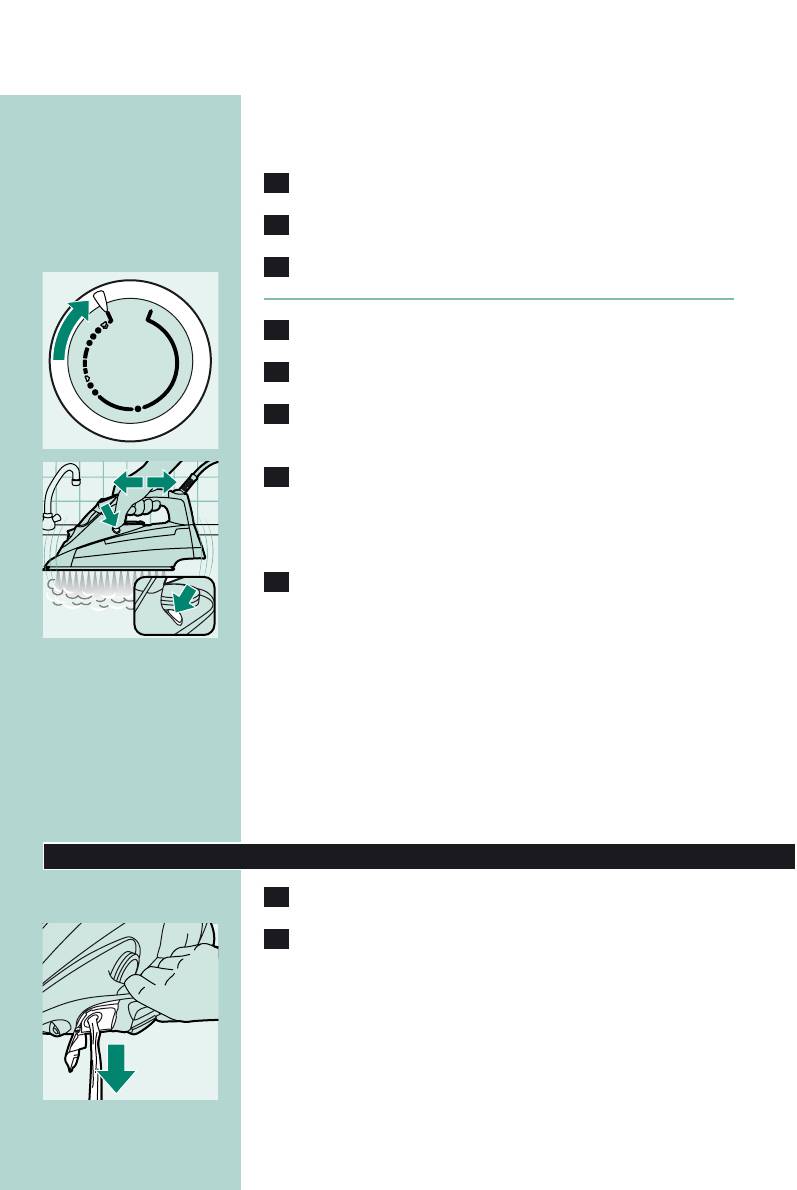
4 Select the maximum ironing temperature.
C
5 Put the plug in an earthed wall socket.
6 Unplug the iron when the amber temperature light has gone
out.
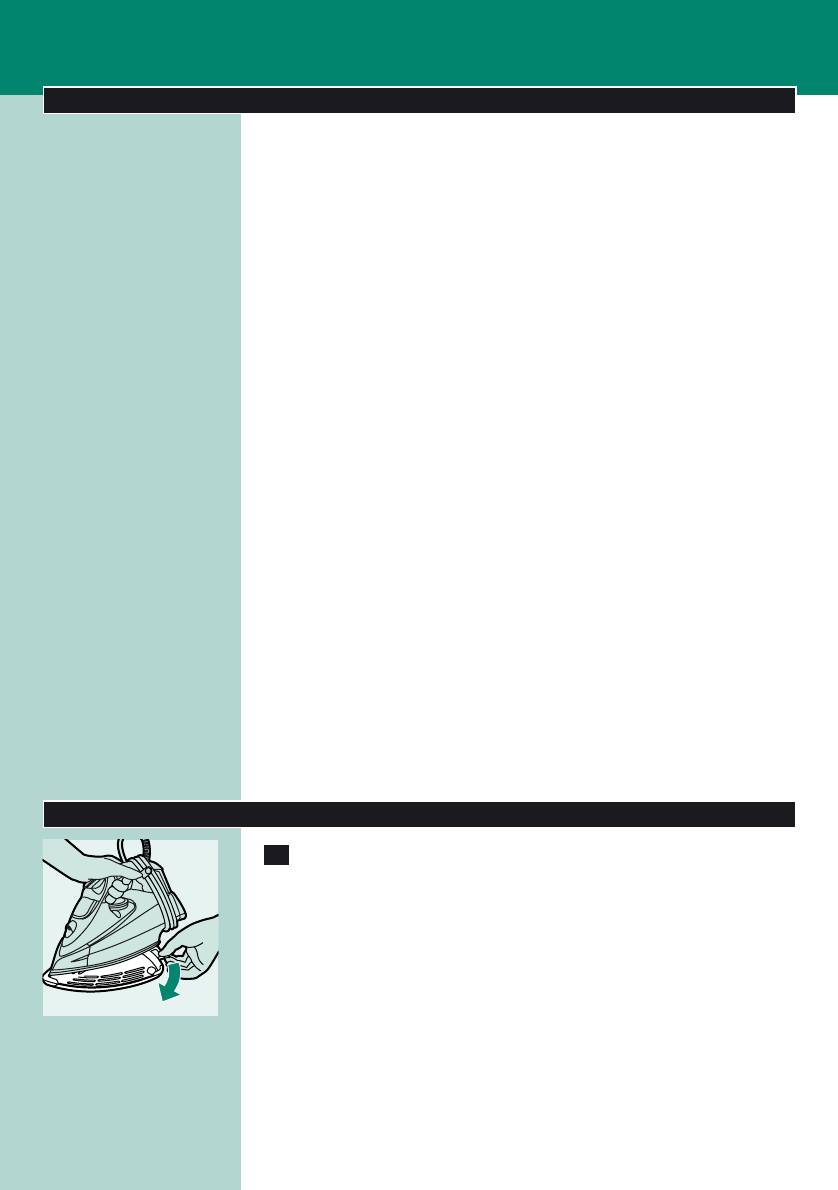
7 Hold the iron over the sink, press and hold the calc-clean
C
button and gently shake the iron to and fro.
Steam and boiling water will come out of the soleplate. Impurities and
flakes (if any) will be flushed out.
8 Release the calc-clean button as soon as all the water in the
tank has been used up.
Repeat the calc-clean process if the iron still contains a lot of impurities.
After the calc-clean process
— Put the plug in the wall socket and let the iron heat up to allow the
soleplate to dry.
— Unplug the iron when it has reached the set ironing temperature.
— Move the hot iron gently over a piece of used cloth to remove any
water stains that may have formed on the soleplate.
— Let the iron cool down before you store it.
Storage
1 Unplug the iron and set the steam control to position 0.
2 Empty the water tank.
C
MAX
MIN
LINEN
COTTON
WOOL
NYLON
SILK
ENGLISH 11
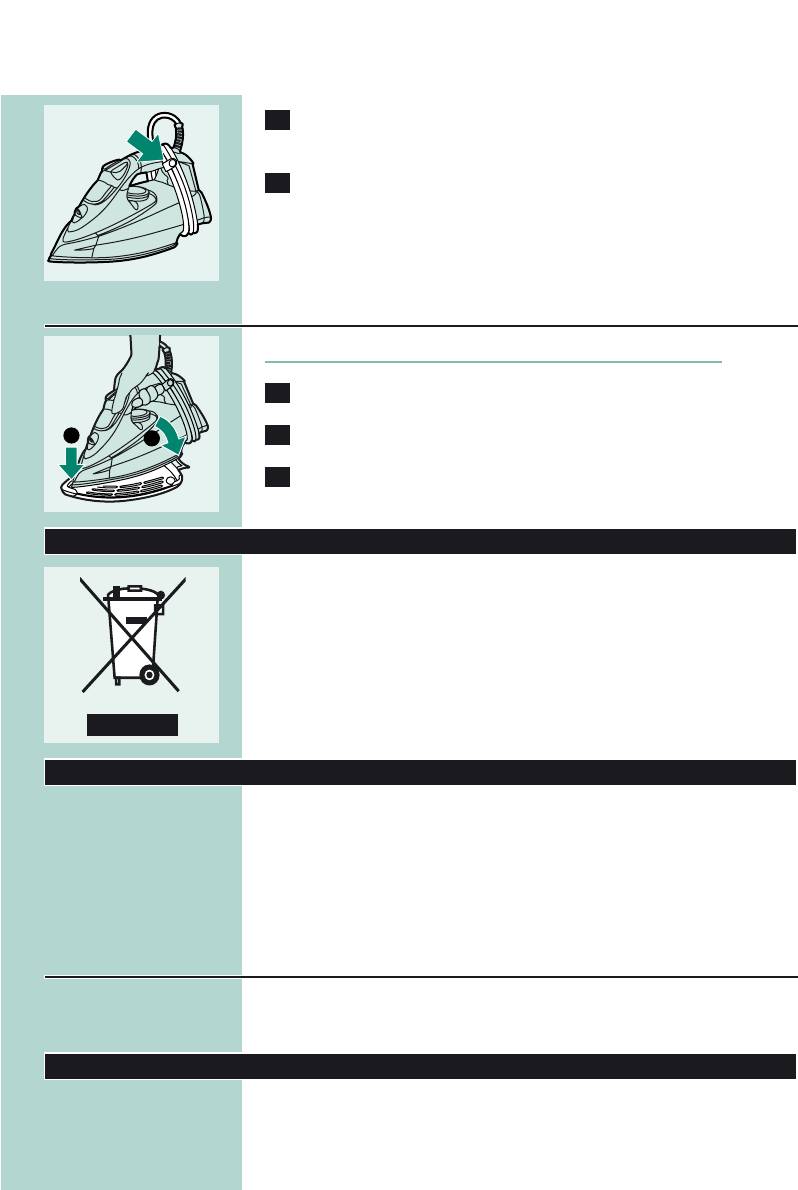
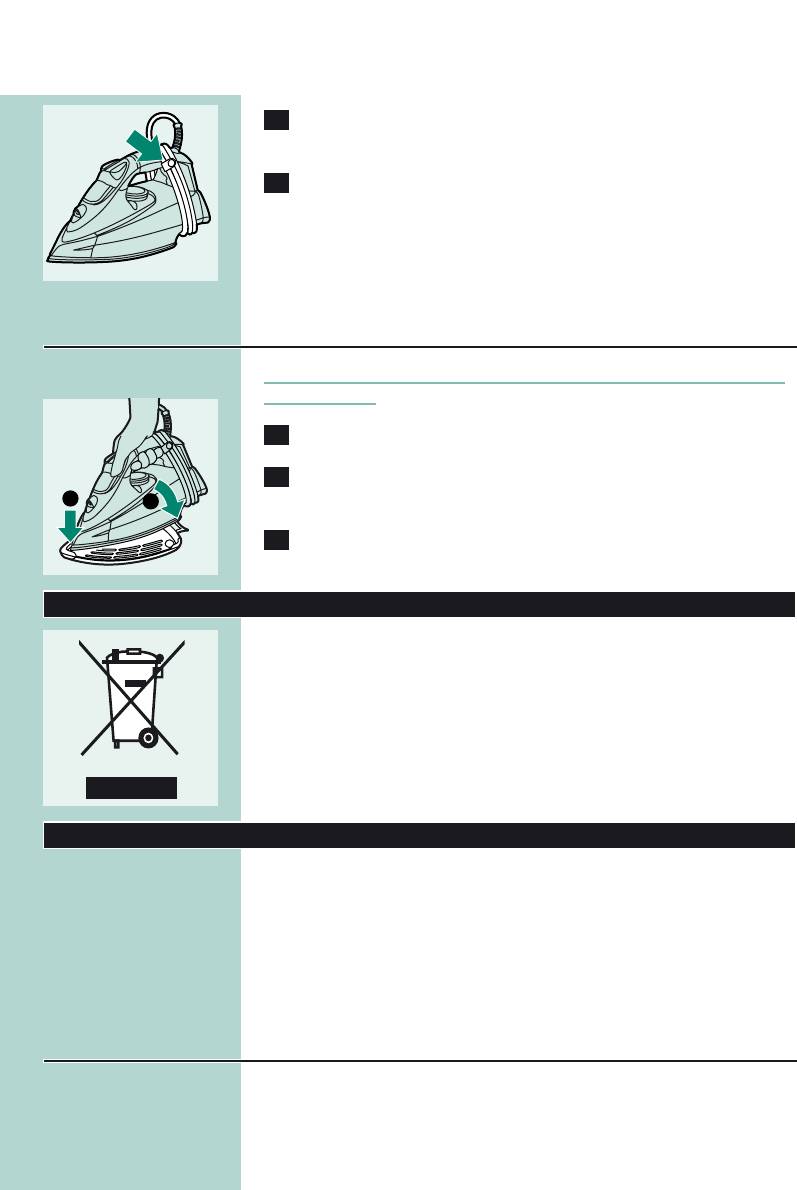
3 Let the iron cool down.Wind the mains cord round the cord
C
storage facility and fix it with the cord clip.
4 Always store the emptied iron horizontally on a stable surface
and use a cloth to protect the soleplate.
Heat-resistant protective cover (GC4340 only)
Do not use the heat-resistant protective cover during ironing.
1 Wind the mains cord round the cord storage facility.
2 Put the iron on the heat-resistant protective cover.
C
3 Store the iron with the heat-resistant protective cover
horizontally on a stable surface.
Environment
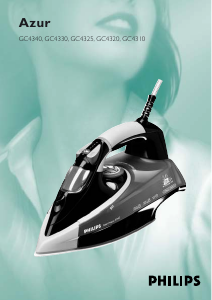
◗ Do not throw the appliance away with the normal household
C
waste at the end of its life, but hand it in at an official collection
point for recycling. By doing this you will help to preserve the
environment.
Guarantee & service
If you need information or if you have a problem, please visit the Philips
website at www.philips.com or contact the Philips Customer Care
Centre in your country (you will find its phone number in the
worldwide guarantee leaflet). If there is no Customer Care Centre in
your country, turn to your local Philips dealer or contact the Service
Department of Philips Domestic Appliances and Personal Care BV.
Guarantee restrictions
The delicate fabric protector is not covered by the terms of the
international guarantee.
Troubleshooting
This chapter summarises the most common problems you could
encounter with your iron. If you are unable to solve the problem,
contact the Customer Care Centre in your country.
1
2

ENGLISH12
Problem
Possible cause
Solution
The iron is plugged in but the soleplate
There is a connection problem.
Check the mains cord, the plug and
is cold.
the wall socket.
The temperature dial has been set to
Set the temperature dial to the
MIN.
required position.
No steam.
There is not enough water in the
Fill the water tank (see chapter
water tank.
‘Preparing for use’).
The steam control has been set to
Set the steam control to a position
position 0.
between 1 and 6 (see chapter ‘Using
the appliance’).
The iron is not hot enough and/or the
Select an ironing temperature that is
drip-stop function has been activated.
suitable for steam ironing (2 to
MAX). Put the iron on its heel and
wait until the amber temperature light
has gone out before you start ironing.
No shot of steam or no vertical shot of
The shot-of-steam function has been
Continue ironing in horizontal position
steam.
used too often within a very short
and wait a while before using the
period.
shot-of-steam function again.
The iron is not hot enough.
Select an ironing temperature that is
suitable for steam ironing (2 to
MAX). Put the iron on its heel and
wait until the amber temperature light
has gone out before you start ironing.
Water droplets drip onto the fabric.
The cap of the filling opening has not
Press the cap until you hear a click.
been closed properly.
An additive has been poured into the
Rinse the water tank and do not put
water tank.
any additive in the water tank.
Flakes and impurities come out of the
Hard water forms flakes inside the
Use the calc-clean function a few
soleplate during ironing.
soleplate.
times (see chapter ‘Cleaning and
maintenance’).
The red auto-off light blinks
The safety shut-off function has
Move the iron slightly to deactivate
(GC4325/4320 only).
switched the iron off (see chapter
the safety shut-off function.The auto-
‘Features’).
off light goes out.
The blue alert light blinks (GC4340 and
The safety shut-off function has
Move the iron slightly to deactivate
GC4330).
switched the iron off (see chapter
the safety shut-off function.The blue
‘Features’).
alert light stops blinking.
The iron is plugged in but the blue alert
There is a connection problem.
Check the mains cord, the plug and
light is out (GC4340 and GC4330).
the wall socket.
POLSKI 13
Ważne
Przed pierwszym użyciem urządzenia zapoznaj się dokładnie z jego
instrukcją obsługi i zachowaj ją na wypadek konieczności użycia w
przyszłości.
◗ Przed podłączeniem urządzenia upewnij się, czy napięcie podane
na tabliczce znamionowej jest zgodne z napięciem w sieci
elektrycznej.
◗ Podłączaj urządzenie wyłącznie do uziemionego gniazdka
elektrycznego.
◗ Nie korzystaj z urządzenia, jeśli uszkodzona jest wtyczka, przewód
sieciowy lub samo urządzenie, albo jeśli urządzenie zostało
upuszczone bądź przecieka.
◗ Regularnie sprawdzaj, czy przewód sieciowy nie jest uszkodzony.
◗ Ze względów bezpieczeństwa wymianę uszkodzonego przewodu
zleć autoryzowanemu centrum serwisowemu firmy Philips lub
odpowiednio wykwalifikowanej osobie.
◗ Nie zostawiaj urządzenia bez nadzoru, gdy jest ono podłączone do
sieci elektrycznej.
◗ Nie zanurzaj w wodzie żelazka ani podstawki (jeśli jest dołączona).
◗ Przechowuj urządzenie w miejscu niedostępnym dla dzieci.
◗ Stopa żelazka może być bardzo rozgrzana i dotknięcie jej może
spowodować poparzenia.
◗ Nie dopuszczaj do kontaktu przewodu z rozgrzaną stopą żelazka.
◗ Po zakończeniu prasowania ustaw regulator pary w położeniu „0”,
postaw żelazko na piętce i wyjmij wtyczkę przewodu sieciowego z
gniazdka w przypadku: czyszczenia urządzenia, napełniania lub
opróżniania zbiorniczka wody, odstawienia żelazka nawet na
krótką chwilę.
◗ Zawsze korzystaj z żelazka i podstawki (jeśli jest dołączona)
umieszczonej na stabilnej i równej powierzchni poziomej.
◗ Nie wlewaj do zbiorniczka wody perfum, octu, krochmalu,
środków do usuwania kamienia, ułatwiających prasowanie ani
żadnych innych środków chemicznych.
◗ Urządzenie to jest przeznaczone wyłącznie do użytku domowego.
Przed pierwszym użyciem
1 Usuń ze stopy żelazka osłonę zabezpieczającą, odporną na
C
wysokie temperatury (tylko w modelu GC4340). Zdejmij ze
stopy żelazka wszelkie nalepki i folię ochronną.
B
Podczas pierwszego użycia z żelazka może wydostawać się dym.
Zjawisko to ustanie po krótkiej chwili.
POLSKI14
Przygotowanie do użycia
Napełnianie zbiorniczka na wodę.
Nie zanurzaj żelazka w wodzie.
1 Upewnij się, że urządzenie jest odłączone od sieci elektrycznej.
2 Ustaw regulator pary w położeniu „0” (brak pary).
C
3 Zdejmij nasadkę z otworu wlewowego wody.
4 Przechyl żelazko do tyłu.
5 Nalej wody z kranu do zbiorniczka do górnego oznaczenia
C
poziomu, używając do tego celu specjalnego pojemniczka.
Nie napełniaj zbiorniczka powyżej wskaźnika „MAX”.
Nie wlewaj do zbiorniczka wody perfum, octu, krochmalu, środków do
usuwania kamienia, ułatwiających prasowanie ani żadnych innych
środków chemicznych.
◗ Jeśli woda kranowa w Twojej okolicy jest bardzo twarda, zaleca się
wymieszanie jej w równych proporcjach z wodą destylowaną lub
stosowanie samej wody destylowanej.
6 Załóż nasadkę na otwór wlewowy wody (usłyszysz
C
„kliknięcie”).
Ustawianie temperatury
1 Tylko model GC4340: Zdejmij osłonę zabezpieczającą, odporną
C
na wysokie temperatury.
Nie zostawiaj osłony zabezpieczającej założonej na stopę żelazka na
czas prasowania.
2 Postaw żelazko na piętce.
3 Ustaw żądaną temperaturę prasowania, obracając pokrętło
C
regulatora temperatury w odpowiednie położenie.
Sprawdź zaznaczoną na metce wymaganą temperaturę prasowania.
— 1 Tkaniny sztuczne (np. akryl, nylon, poliamid, poliester)
— 1 Jedwab
— 2 Wełna
— 3 Bawełna, len
Jeśli nie znasz rodzaju tkaniny, z którego wykonany jest prasowany
MAX
MIN
LINEN
COTTON
WOOL
NYLON
SILK

POLSKI 15
produkt, właściwą temperaturę prasowania należy ustalić przez
wyprasowanie takiej jego części, która będzie niewidoczna podczas
noszenia czy używania.
Jedwab, wełna i tkaniny sztuczne:Aby nie dopuścić do powstawania
lśniących plam, prasuj tkaniny na lewej stronie. Nie używaj funkcji
spryskiwacza, aby uniknąć powstawania plam przy prasowaniu.
Zacznij od prasowania produktów, wymagających najniższej
temperatury prasowania, np. wykonanych z tkanin sztucznych.
4 Podłącz wtyczkę przewodu sieciowego do uziemionego
gniazdka elektrycznego.
5 Gdy zgaśnie pomarańczowy wskaźnik temperatury, odczekaj
C
chwilę przed rozpoczęciem prasowania.
Podczas prasowania wskaźnik temperatury będzie zapalał się od czasu
do czasu.
Zasady używania
Prasowanie parowe
1 Sprawdź, czy w zbiorniczku jest wystarczająca ilość wody.
2 Wybierz zalecaną temperaturę prasowania (patrz rozdział
„Przygotowanie do użycia”, część „Ustawianie temperatury”).
3 Wybierz odpowiednie ustawienie pary. Sprawdź, czy wybrane
C
ustawienie pary jest odpowiednie dla wybranej temperatury
prasowania:
— 1–3 dla umiarkowanej ilości pary (ustawienia temperatury od 2 do
3)
— 4–6 dla maksymalnej ilości pary (ustawienia temperatury od 3
do „MAX”)
B
Z chwilą osiągnięcia zadanej temperatury żelazko zacznie wytwarzać
parę.
Prasowanie bez pary
1 Ustaw regulator pary w położeniu „0” (brak pary).
C
2 Wybierz zalecaną temperaturę prasowania (patrz rozdział
„Przygotowanie do użycia”, część „Ustawianie temperatury”).
POLSKI16
Funkcje
Osłona do delikatnych tkanin (tylko model GC4325)
Osłona chroni delikatne tkaniny przed zniszczeniem w wyniku działania
zbyt wysokich temperatur oraz przez powstawaniem lśniących plam.
Dzięki niej można prasować delikatne tkaniny (tj. jedwab, wełna i nylon)
przy ustawieniach temperatury od 3 do „MAX” i korzystać
jednocześnie ze wszystkich funkcji wytwarzania pary dostępnych w
żelazku.
Osłona do delikatnych tkanin błyskawicznie obniża temperaturę stopy,
umożliwiając bezpieczne prasowanie delikatnych tkanin.
Jeśli nie znasz rodzaju tkaniny, z którego wykonany jest prasowany
produkt, właściwą temperaturę prasowania należy ustalić przez
wyprasowanie takiej jego części, która będzie niewidoczna podczas
noszenia czy używania.
1 Umieść żelazko na osłonie do delikatnych tkanin (usłyszysz
C
„kliknięcie”).
Funkcja spryskiwacza
Funkcji spryskiwacza można użyć w celu usunięcia opornych zagnieceń.
1 Sprawdź, czy w zbiorniczku jest wystarczająca ilość wody.
2 Aby zwilżyć prasowaną tkaninę, kilkakrotnie wciśnij przycisk
C
spryskiwacza.
Skoncentrowane uderzenie pary ze specjalnej końcówki Steam
Tip
Uderzenie skoncentrowanej pary pozwala usunąć najbardziej oporne
zagniecenia. Skierowany do przodu strumień skoncentrowanej pary
zwiększa ilość pary trafiającej do każdej części prasowanej tkaniny.
Funkcję uderzenia pary można użyć wyłącznie dla ustawień
temperatury od 2 do „MAX”.
1 Wciśnij i zwolnij przycisk uderzenia pary.
C
POLSKI 17
Pionowe uderzenie pary
1 Funkcję uderzenia pary można także używać w pozycji
C
pionowej.
Jest ona użyteczna w przypadku usuwania zagnieceń na wiszących
ubraniach, zasłonach itd.
Nie wolno kierować strumienia pary na ludzi.
Blokada kapania
To żelazko wyposażone jest w funkcję blokady kapania: żelazko
automatycznie przestaje wytwarzać parę, gdy temperatura jest zbyt
niska, co zapobiega kapaniu wody ze stopy.Włączenie blokady jest
sygnalizowane dźwiękiem.
System antywapienny Anti-Calc
1 Wbudowany system Anti-Calc zmniejsza wytwarzanie się
C
kamienia i gwarantuje dłuższy czas eksploatacji żelazka.
Elektroniczny wyłącznik bezpieczeństwa (tylko model
GC4325/4320)
◗ Funkcja elektronicznego wyłącznika bezpieczeństwa powoduje
C
automatyczne wyłączenie żelazka, gdy nie jest ono używane przez
dłuższy czas.
◗ W przypadku wyłączenia żelazka przez wyłącznik bezpieczeństwa
wskaźnik automatycznego wyłączenia zaczyna migać na czerwono.
Aby żelazko rozgrzało się ponownie:
— Chwyć żelazko lub porusz nim delikatnie.
— Czerwony wskaźnik automatycznego wyłączenia zgaśnie. Jeśli
temperatura stopy żelazka spadnie poniżej ustawionej temperatury
prasowania, wówczas zapali się pomarańczowy wskaźnik
temperatury.
— Jeśli po poruszeniu żelazkiem zaświeci się wskaźnik temperatury,
zaczekaj aż zgaśnie i dopiero wtedy zacznij prasować.
— Jeśli po poruszeniu żelazkiem wskaźnik temperatury nie zaświeci się,
oznacza to, że temperatura stopy żelazka jest odpowiednia i żelazko
jest gotowe do prasowania.
POLSKI18
Wskaźnik ostrzegawczy i funkcja elektronicznego wyłącznik
bezpieczeństwa (model GC4340 i GC4330)
Żelazko wyposażone jest w niebieski wskaźnik ostrzegawczy.
◗ Niebieski wskaźnik ostrzegawczy świeci się, gdy żelazko
C
podłączone jest do zasilania.
◗ W przypadku wyłączenia żelazka przez wyłącznik bezpieczeństwa
wskaźnik ostrzegawczy zaczyna migać na czerwono.
Aby żelazko rozgrzało się ponownie:
— Chwyć żelazko lub porusz nim delikatnie.
— Niebieski wskaźnik ostrzegawczy przestanie migać. Jeśli temperatura
stopy żelazka spadnie poniżej ustawionej temperatury prasowania,
wówczas zapali się pomarańczowy wskaźnik temperatury.
— Jeśli po poruszeniu żelazkiem zaświeci się wskaźnik temperatury,
zaczekaj aż zgaśnie i dopiero wtedy zacznij prasować.
— Jeśli po poruszeniu żelazkiem wskaźnik temperatury nie zaświeci się,
oznacza to, że temperatura stopy żelazka jest odpowiednia i żelazko
jest gotowe do prasowania.
Czyszczenie i konserwacja
Po zakończeniu prasowania
1 Wyjmij wtyczkę przewodu sieciowego z gniazdka
elektrycznego i poczekaj, aż żelazko ostygnie.
2 Zetrzyj ze stopy żelazka płytki kamienia i inne osady za pomocą
wilgotnej szmatki i (płynnego) środka czyszczącego nie
zawierającego środków ściernych.
Aby powierzchnia stopy pozostała niezarysowana, żelazka nie należy
stawiać w pobliżu żadnych metalowych przedmiotów. Do czyszczenia
stopy nie wolno używać czyścików, octu ani innych środków
chemicznych.
3 Przetrzyj górną część żelazka wilgotną szmatką.
4 Wypłucz zbiorniczek wody. Po umyciu opróżnij go.
Funkcja Calc-Clean
Funkcja Calc-Clean służy do usuwania kamienia i innych zanieczyszczeń.
◗ Korzystaj z tej funkcji raz na dwa tygodnie. Jeśli woda kranowa w
Twojej okolicy jest bardzo twarda (tzn. gdy podczas prasowania ze
stopy spadają płytki kamienia), z funkcji należy korzystać częściej.
1 Upewnij się, że urządzenie jest odłączone od sieci elektrycznej.
POLSKI 19
2 Ustaw regulator pary w położeniu „0”.
3 Napełnij zbiorniczek wodą do wskaźnika „MAX”.
Nie wlewaj do zbiorniczka wody octu ani innych środków do usuwania
kamienia.
4 Wybierz maksymalną temperaturę prasowania.
C
5 Podłącz wtyczkę przewodu sieciowego do uziemionego
gniazdka elektrycznego.
6 Gdy zgaśnie pomarańczowy wskaźnik temperatury, wyjmij
wtyczkę przewodu z gniazdka elektrycznego.
7 Trzymając żelazko nad zlewem, wciśnij i przytrzymaj przycisk
C
Calc-Clean, po czym delikatnie potrząśnij żelazkiem.
Ze stopy żelazka zacznie wydostawać się para i gorąca woda.
Wypłukane zostaną zanieczyszczenia i płytki kamienia.
8 Po opróżnieniu zbiorniczka wody zwolnij przycisk Calc-Clean.
Czynność należy powtórzyć, jeśli w żelazku nadal znajduje się dużo
zanieczyszczeń.
Po czyszczeniu przy użyciu funkcji Calc-Clean
— Podłącz wtyczkę przewodu sieciowego do gniazdka elektrycznego i
poczekaj, aż żelazko rozgrzeje się, a jego stopa wyschnie.
— Odłącz żelazko od zasilania, gdy osiągnie ono ustawioną temperaturę
prasowania.
— Przeciągnij żelazko po kawałku niepotrzebnego materiału, aby usunąć
zacieki wodne, jakie mogły powstać na stopie żelazka.
— Przed odstawieniem żelazka odczekaj, aż zupełnie ostygnie.
Przechowywanie
1 Odłącz żelazko od zasilania i ustaw regulator pary w pozycji
„0”.
2 Opróżnij zbiorniczek wody.
C
MAX
MIN
LINEN
COTTON
WOOL
NYLON
SILK
POLSKI20
3 Odczekaj, aż żelazko ostygnie. Nawiń przewód zasilający na
C
żelazko i zapnij go za pomocą zacisku.
4 Puste żelazko przechowuj w pozycji poziomej, na stabilnej
powierzchni, a pod stopę podłóż szmatkę.
Osłona zabezpieczająca odporna na wysokie temperatury
(tylko model GC4340)
Nie używaj osłony zabezpieczającej odpornej na wysokie temperatury
do prasowania.
1 Nawiń przewód zasilający na żelazko.
2 Ustaw żelazko na osłonie zabezpieczającej odpornej na wysokie
C
temperatury.
3 Przechowuj żelazko z założoną osłoną zabezpieczającą w
pozycji poziomej, na stabilnej powierzchni.
Ochrona środowiska
◗ Zużytego urządzenia nie należy wyrzucać wraz z normalnymi
C
odpadami gospodarstwa domowego — należy oddać je do punktu
zbiórki surowców wtórnych w celu utylizacji. Stosowanie się do
tego zalecenia pomaga w ochronie środowiska.
Gwarancja i serwis
W razie jakichkolwiek pytań lub problemów prosimy odwiedzić naszą
stronę internetową www.philips.com lub skontaktować się z Centrum
Obsługi Klienta firmy Philips (numer telefonu znajduje się w ulotce
gwarancyjnej). Jeśli w kraju zamieszkania nie ma takiego Centrum, o
pomoc należy zwrócić się do sprzedawcy produktów firmy Philips lub
do Działu Obsługi Klienta firmy Philips Domestic Appliances and
Personal Care BV.
Ograniczenia gwarancji
Osłona do delikatnych tkanin nie jest objęta warunkami
międzynarodowej gwarancji.
1
2
Аннотация для Утюга Philips GC 4330 в формате PDF
Топ 10 инструкций
Другие инструкции
Требуется руководство для вашей Philips GC4330 Утюг? Ниже вы можете просмотреть и загрузить бесплатно руководство в формате PDF. Кроме того, приведены часто задаваемые вопросы, рейтинг изделия и отзывы пользователей, что позволит оптимально использовать ваше изделие. Если это не то руководство, которое вы искали, – свяжитесь с нами.
Ваше устройство неисправно, и в руководстве отсутствует решение? Перейдите в Repair Café для получения бесплатных ремонтных услуг.
Руководство

Рейтинг
Сообщите нам, что вы думаете о Philips GC4330 Утюг, оставив оценку продукта. Хотите поделиться вашими впечатлениями от данного изделия или задать вопрос? Вы можете оставить комментарий в нижней части страницы.
Довольны ли вы данным изделием Philips?
Да Нет
Будьте первым, кто оценит это изделие
0 голоса
Часто задаваемые вопросы
Наша служба поддержки выполняет поиск полезной информации по изделиям и отвечает на часто задаваемые вопросы. Если вы заметили неточность в наших часто задаваемых вопросах, сообщите нам об этом с помощью нашей контактной формы.
Можно ли чистить подошву утюга металлической губкой? Проверенный
Нет, это может испортить подошву. Для очистки используйте влажную ткань или мягкую губку.
Это было полезно (260)
Чем отличается паровой утюг от обычного утюга? Проверенный
Самым большим преимуществом парового утюга является то, что он легче разглаживает морщины за счет использования пара. Обычный утюг наоборот намного легче и зачастую дешевле.
Это было полезно (235)
Подошва утюга обесцвечена, можно ли гладить ею? Проверенный
Это возможно, но есть вероятность, что он будет стираться на светлой одежде.
Это было полезно (196)
Можно гладить пуговицы? Проверенный
Нет, это повредит подошву утюга и помешает правильной работе утюга. Никогда не гладьте пуговицы, молнии или другие твердые предметы.
Это было полезно (124)
На дне утюга Philips есть царапины, можно ли им пользоваться? Проверенный
Да, это не проблема. Дно сделано из нескольких слоев и выдерживает небольшие царапины. Утюг по-прежнему будет работать как надо.
Это было полезно (41)
- Manuals
- Brands
- Philips Manuals
- Iron
- Azur GC4330
Manuals and User Guides for Philips Azur GC4330. We have 6 Philips Azur GC4330 manuals available for free PDF download: Instructions Manual, Manual, User Manual, Directions For Use Manual
View a manual of the Philips Azur Precise GC4330 below. All manuals on ManualsCat.com can be viewed completely free of charge. By using the ‘Select a language’ button, you can choose the language of the manual you want to view.

MANUALSCAT | EN
Question & answers
Have a question about the Philips Azur Precise GC4330 but cannot find the answer in the user manual? Perhaps the users of ManualsCat.com can help you answer your question. By filling in the form below, your question will appear below the manual of the Philips Azur Precise GC4330. Please make sure that you describe your difficulty with the Philips Azur Precise GC4330 as precisely as you can. The more precies your question is, the higher the chances of quickly receiving an answer from another user. You will automatically be sent an e-mail to inform you when someone has reacted to your question.
Hi
Was chatting with Martin but lost the connection?
Stanley2017-12-29
Ask a question about the Philips Azur Precise GC4330
Page: 1
General description
A Spray nozzle
B Filling cap
C Shot-of-steam button 9
D Steam control
E Spray button T
F Automatic shut-off light (GC4325/GC4320 only)
GTemperature light
HTemperature dial
I Alert light and automatic shut-off light (GC4340/GC4330 only)
JType plate
K Water tank
L Calc-Clean button
M Soleplate
N Filling cup
Important
Read these instructions for use carefully before using the appliance and
save them for future reference.
◗ Check if the voltage indicated on the type plate corresponds to
the local mains voltage before you connect the appliance.
◗ If the appliance is provided with an earthed plug, it must be
plugged into an earthed wall socket.
◗ Do not use the appliance if the plug, the cord or the appliance
itself shows visible damage, or if the appliance has been dropped
or is leaking.
◗ Check the cord regularly for possible damage.
◗ If the mains cord is damaged, it must be replaced by Philips, a
service centre authorised by Philips or similarly qualified persons
in order to avoid a hazard.
◗ Never leave the appliance unattended when it is connected to the
mains.
◗ Never immerse the iron and the stand, if provided, in water.
◗ Keep the appliance out of the reach of children.
◗ Young children should be supervised to ensure that they do not
play with the appliance.
◗ This appliance is not intended for use by young children or infirm
persons without supervision.
◗ The soleplate of the iron can become extremely hot and may
cause burns if touched.
◗ Do not allow the cord to come into contact with the soleplate
when it is hot.
◗ When you have finished ironing, when you clean the appliance,
when you fill or empty the water tank and also when you leave
the iron even for a short while: set the steam control to position
0, put the iron on its heel and remove the mains plug from the
wall socket.
ENGLISH
6
Page: 2
◗ Always place and use the iron and the stand, if provided, on a
stable, level and horizontal surface.
◗ Do not put perfume, vinegar, starch, descaling agents, ironing aids
or other chemicals in the water tank.
◗ This appliance is intended for household use only.
Before first use
C 1 Remove the heat-resistant protective cover from the soleplate
(GC4340 only). Remove any sticker or protective foil from the
soleplate.
B The iron may give off some smoke when you use it for the first time.This
will cease after a short while.
Preparing for use
Filling the water tank
Never immerse the iron in water.
1 Make sure the appliance is unplugged.
C 2 Set the steam control to position 0 (= no steam).
3 Open the cap of the filling opening.
4 Tilt the iron backwards.
C 5 Fill the water tank with tap water up to the maximum level by
means of the filling cup.
Do not fill the tank beyond the MAX indication.
Do not put perfume, vinegar, starch, descaling agents, ironing aids or
other chemicals in the water tank.
◗ If the tap water in your area is very hard, we advise you to mix it
with an equal portion of distilled water, or to use distilled water
only.
C 6 Close the cap of the filling opening (‘click’).
ENGLISH 7
Page: 3
Setting the temperature
C 1 Type GC4340 only: remove the heat-resistant protective cover.
Do not leave the heat-resistant protective cover on the soleplate
during ironing.
2 Put the iron on its heel.
C 3 Set the required ironing temperature by turning the
temperature dial to the appropriate position.
Check the laundry care label for the required ironing temperature:
— 1 Synthetic fabrics (e.g. acrylic, nylon, polyamide, polyester)
— 1 Silk
— 2 Wool
— 3 Cotton, linen
If you do not know what kind or kinds of fabric an article is made of,
determine the right ironing temperature by ironing a part that will not
be visible when you wear or use the article.
Silk, woollen and synthetic materials: iron the reverse side of the fabric
to prevent shiny patches.Avoid using the spray function to prevent
stains.
Start ironing the articles that require the lowest ironing temperature,
such as those made of synthetic fibres.
4 Put the mains plug in an earthed wall socket.
C 5 When the amber temperature light has gone out, wait a while
before you start ironing.
The temperature light will go on from time to time during ironing.
Using the appliance
Steam ironing
1 Make sure that there is enough water in the water tank.
2 Select the recommended ironing temperature (see chapter
‘Preparing for use’, section ‘Setting the temperature’).
C 3 Select the appropriate steam setting. Make sure that the steam
setting you select is suitable for the ironing temperature
selected:
— 1 — 3 for moderate steam (temperature settings 2 to 3)
— 4 — 6 for strong steam (temperature settings 3 to MAX)
ENGLISH
8
LINEN
SILK
NYLON
WOOL
COTTON
M
IN
M
A
X
Page: 4
B The iron will start steaming as soon as the set temperature has been
reached.
Ironing without steam
C 1 Set the steam control to position 0 (= no steam).
2 Select the recommended ironing temperature (see chapter
‘Preparing for use’, section ‘Setting the temperature’).
Features
Delicate fabric protector (GC4325 only)
The delicate fabric protector protects delicate fabrics from heat
damage and shiny patches.
With the delicate fabric protector you can iron delicate fabrics (silk,
wool and nylon) at temperature settings 3 to MAX in combination
with all steam functions available on the iron.
The delicate fabric protector reduces the soleplate temperature
instantly, thus allowing you to iron delicate fabrics safely.
If you do not know what kind or kinds of fabric an article is made of,
determine the right ironing temperature by ironing a part that will not
be visible when you wear or use the article.
C 1 Put the iron on the delicate fabric protector (‘click’).
Spray function
You can use the spray function to remove stubborn creases at any
temperature.
1 Make sure that there is enough water in the water tank.
C 2 Press the spray button several times to moisten the article to
be ironed.
ENGLISH 9
Page: 5
Concentrated shot of steam from the special Steam Tip
A powerful shot of concentrated steam helps remove stubborn
creases.The forward-directed concentrated shot of steam enhances
the distribution of steam into every part of your garment.
The shot-of-steam function can only be used at temperature settings
between 2 and MAX.
C 1 Press and release the shot-of-steam button.
Vertical shot of steam
C 1 The shot-of-steam function can also be used when you hold
the iron in vertical position.
This is useful for removing creases from hanging clothes, curtains etc.
Never direct the steam at people.
Drip stop
This iron is equipped with a drip-stop function: the iron automatically
stops producing steam when the temperature is too low, to prevent
water from dripping out of the soleplate.When this happens you may
hear a sound.
Automatic anti-calc system
C 1 The built-in anti-calc system reduces the build-up of scale and
guarantees a longer life for the iron.
Electronic safety shut-off function (GC4325/GC4320 only)
C ◗ The electronic safety shut-off function automatically switches off
the iron if it has not been moved for a while.
◗ The red auto-off light starts blinking to indicate that the iron has
been switched off by the safety shut-off function.
ENGLISH
10
Page: 6
To let the iron heat up again:
— Pick up the iron or move it slightly.
— The red auto-off light goes out. If the temperature of the soleplate
has dropped below the set ironing temperature, the amber
temperature light goes on.
— If the temperature light goes on after you have moved the iron, wait
for it to go out before you start ironing.
— If the temperature light does not go on after you move the iron, the
soleplate still has the right temperature and the iron is ready for use.
Alert light and electronic safety shut-off function
(GC4340 and GC4330)
The iron is equipped with a blue alert light.
C ◗ The blue alert light burns as long as the iron is plugged in.
◗ The blue alert light starts blinking to indicate that the iron has
been switched off by the safety shut-off function.
To let the iron heat up again:
— Pick up the iron or move it slightly.
— The blue alert light stops blinking. If the temperature of the soleplate
has dropped below the set ironing temperature, the amber
temperature light goes on.
— If the temperature light goes on after you have moved the iron, wait
for it to go out before you start ironing.
— If the temperature light does not go on after you move the iron, the
soleplate still has the right temperature and the iron is ready for use.
Cleaning and maintenance
After ironing
1 Remove the mains plug from the wall socket and let the iron
cool down.
2 Wipe flakes and any other deposits off the soleplate with a
damp cloth and a non-abrasive (liquid) cleaning agent.
To keep the soleplate smooth, you should avoid hard contact with
metal objects. Never use a scouring pad, vinegar or other chemicals to
clean the soleplate.
3 Clean the upper part of the iron with a damp cloth.
4 Regularly rinse the water tank with water. Empty the water
tank after cleaning.
ENGLISH 11
Page: 7
Calc-clean function
You can use the calc-clean function to remove scale and impurities.
◗ Use the calc-clean function once every two weeks. If the water in
your area is very hard (i.e. when flakes come out of the soleplate
during ironing), the calc-clean function should be used more
frequently.
1 Make sure the appliance is unplugged.
2 Set the steam control to position 0.
3 Fill the water tank to the maximum level.
Do not put vinegar or other descaling agents in the water tank.
C 4 Select the maximum ironing temperature.
5 Put the plug in an earthed wall socket.
6 Unplug the iron when the amber temperature light has gone
out.
C 7 Hold the iron over the sink, press and hold the calc-clean
button and gently shake the iron to and fro.
Steam and boiling water will come out of the soleplate. Impurities and
flakes (if any) will be flushed out.
8 Release the calc-clean button as soon as all the water in the
tank has been used up.
Repeat the calc-clean process if the iron still contains a lot of impurities.
After the calc-clean process
— Put the plug in the wall socket and let the iron heat up to allow the
soleplate to dry.
— Unplug the iron when it has reached the set ironing temperature.
— Move the hot iron gently over a piece of used cloth to remove any
water stains that may have formed on the soleplate.
— Let the iron cool down before you store it.
ENGLISH
12
LINEN
SILK
NYLON
WOOL
COTTON
M
IN
M
A
X
Page: 8
Storage
1 Unplug the iron and set the steam control to position 0.
C 2 Empty the water tank.
C 3 Let the iron cool down.Wind the mains cord round the cord
storage facility and fix it with the cord clip.
4 Always store the emptied iron horizontally on a stable surface
and use a cloth to protect the soleplate.
Heat-resistant protective cover (GC4340 only)
Do not use the heat-resistant protective cover during ironing.
1 Wind the mains cord round the cord storage facility.
C 2 Put the iron on the heat-resistant protective cover.
3 Store the iron with the heat-resistant protective cover
horizontally on a stable surface.
Environment
C ◗ Do not throw the appliance away with the normal household
waste at the end of its life, but hand it in at an official collection
point for recycling. By doing this you will help to preserve the
environment.
Guarantee & service
If you need information or if you have a problem, please visit the Philips
website at www.philips.com or contact the Philips Customer Care
Centre in your country (you will find its phone number in the
worldwide guarantee leaflet). If there is no Customer Care Centre in
your country, turn to your local Philips dealer or contact the Service
Department of Philips Domestic Appliances and Personal Care BV.
ENGLISH 13
1 2
Page: 9
Solution
Check the mains cord, the plug and
the wall socket.
Set the temperature dial to the
required position.
Fill the water tank (see chapter
‘Preparing for use’).
Set the steam control to a position
between 1 and 6 (see chapter ‘Using
the appliance’).
Select an ironing temperature that is
suitable for steam ironing (2 to
MAX). Put the iron on its heel and
wait until the amber temperature light
has gone out before you start ironing.
Continue ironing in horizontal position
and wait a while before using the
shot-of-steam function again.
Select an ironing temperature that is
suitable for steam ironing (2 to
MAX). Put the iron on its heel and
wait until the amber temperature light
has gone out before you start ironing.
Press the cap until you hear a click.
Rinse the water tank and do not put
any additive in the water tank.
Use the calc-clean function a few
times (see chapter ‘Cleaning and
maintenance’).
Move the iron slightly to deactivate
the safety shut-off function.The auto-
off light goes out.
Move the iron slightly to deactivate
the safety shut-off function.The blue
alert light stops blinking.
Check the mains cord, the plug and
the wall socket.
Possible cause
There is a connection problem.
The temperature dial has been set to
MIN.
There is not enough water in the
water tank.
The steam control has been set to
position 0.
The iron is not hot enough and/or the
drip-stop function has been activated.
The shot-of-steam function has been
used too often within a very short
period.
The iron is not hot enough.
The cap of the filling opening has not
been closed properly.
An additive has been poured into the
water tank.
Hard water forms flakes inside the
soleplate.
The safety shut-off function has
switched the iron off (see chapter
‘Features’).
The safety shut-off function has
switched the iron off (see chapter
‘Features’).
There is a connection problem.
Problem
The iron is plugged in but the
soleplate is cold.
No steam.
No shot of steam or no vertical shot
of steam.
Water droplets drip onto the fabric.
Flakes and impurities come out of the
soleplate during ironing.
The red auto-off light blinks
(GC4325/GC4320 only).
The blue alert light blinks (GC4340
and GC4330).
The iron is plugged in but the blue
alert light is out (GC4340 and
GC4330).
Guarantee restrictions
The delicate fabric protector is not covered by the terms of the
international guarantee.
Troubleshooting
This chapter summarises the most common problems you could
encounter with your iron. If you are unable to solve the problem,
contact the Customer Care Centre in your country.
ENGLISH
14
Page: 10
A
B
C 9
D
E T
F
G
H
I
J
K
L
M
N
◗
◗
◗
◗
◗
◗
◗
◗
◗
◗
◗
◗
◗
◗
33
Page: 11
35
C 1
2
C 3
1
1
2
3
4
C 5
1
2
C 3
2 3
3
B
LINEN
SILK
NYLON
WOOL
COTTON
M
IN
M
A
X
Page: 12
38
C ◗
◗
1
2
3
4
◗
1
2
3
C 4
5
6
LINEN
SILK
NYLON
WOOL
COTTON
M
IN
M
A
X
Page: 13
A
B
C 9
D
E T
F
G
H
I
J
K
L
M
N
◗
◗
◗
◗
◗
◗
◗
◗
◗
◗
◗
◗
◗
◗
◗
◗
42
Page: 14
C 1
2
C 3
1
1
2
3
4
C 5
1
2
C 3
2 3
3
B
44
LINEN
SILK
NYLON
WOOL
COTTON
M
IN
M
A
X
Page: 15
C ◗
◗
1
2
3
4
◗
1
2
3
C 4
47
LINEN
SILK
NYLON
WOOL
COTTON
M
IN
M
A
X
Page: 16
51
A
B
C 9
D
E T
F
G
H
I
J
K
L
M
N
◗
◗
◗
◗
◗
◗
◗
◗
◗
◗
◗
◗
◗
Page: 17
53
C 1
2
C 3
1
1
2
2
4
C 5
1
2
C 3
2 3
3
LINEN
SILK
NYLON
WOOL
COTTON
M
IN
M
A
X
Page: 18
57
◗
1
2
3
C 4
5
6
C 7
8
1
LINEN
SILK
NYLON
WOOL
COTTON
M
IN
M
A
X
Page: 19
www.philips.com
u
4239 000 56964
- Brand:
- Philips
- Product:
- irons
- Model/name:
- Azur Precise GC4330
- Filetype:
- Available languages:
- English, Indonesian