- Manuals
- Brands
- Trail Tech Manuals
- Measuring Instruments
- Vapor
- User manual
-
Contents
-
Table of Contents
-
Troubleshooting
-
Bookmarks
Quick Links
Related Manuals for Trail Tech Vapor
Summary of Contents for Trail Tech Vapor
-
Page 3: Table Of Contents
Table of Contents Page # Table of Contents A Note To You Precautions SPECIFICATIONS Overview Installation Measure Wheel Size Data Setting Mode Normal Mode Screens VAPOR FEATURES Troubleshooting Glossary of Terms…
-
Page 4
Please read this manual carefully. Please Record Important Information: Whenever you call to request service for Vapor, you need to know the date of purchase, dealer’s name, address, and telephone number. PURCHASE DATE… -
Page 5: Precautions
Vapor or its voltage power from the vehicles accessories. ignition system. Damaged wires may also produce incorrect • Vapor can be used in the rain readings. but should not be used underwater. • Avoid contact with gasoline, degreasers or other chemical •…
-
Page 6: Specifications
Specifications FUNCTION DISPLAY RANGE CURRENT SPEED — 399.9 KM/H or M/H REVS PER MINUTE — 19999 RPM RPM BAR GRAPH Graphical — 12000 RPM MAXIMUM SPEED — 399.9 KM/H or M/H DISTANCE 0.0 — 19999 KM or M STOP WATCH — 9999 hour 59 min ODOMETER 0.0 — 999999…
-
Page 7
Specifications UNITS INCREMENTS ACCURACY KM/H or M/H 0.1 KM/H or M/H +/- 0.1% KM/H or M/H 10 RPM +/- 0.1% KM/H or M/H Variable +/- 0.1% KM/H or M/H 0.1 KM/H or M/H +/- 0.1% KM/H or M/H 0.1 KM/H or M/H +/- 0.1% Hours:Minutes 1 Second… -
Page 8: Overview
Overview Vapor Computer: Vapor holds a large amount of information in a small space. There are three buttons for easy navigation, two LED’s for alerts and warnings, and a brightly lit LCD panel for easy viewing. YELLOW RED LED SCREEN…
-
Page 9
Using External 12V Power: • Vapor will light up with all five LED’s. • Vapor will remain lit as long as it senses wheel movement. After 20 minutes of inactivity Vapor shuts off the backlight. Press any button, roll the wheels, or start the motor power and Vapor will light up again. -
Page 10: Reset Button
MOUNTING HOLES Internal Battery: Vapor has an internal 3.0V watch type battery (#CR2032). The computer can be run from this battery alone. To change the battery, unscrew the battery cap on the back of the computer with a coin. Make sure the positive side of the battery is facing up when replaced.
-
Page 11: Installation
Installation Bar Mounting: Place bolts as shown in picture. Remember to use provided nuts when placing bolts. RPM and Temperature Sensors: Please see model-specific instructions for mounting procedure. Motorcycle installation shown below. RADIATOR SENSOR HOSE COIL TEMP. SPARK PLUG SENSOR BOOT RPM Pulse Sensor Temperature Sensor…
-
Page 12
Installation Flat/Surface Mount: There are two screw holes on the back of Vapor. Use the included M4 bolts to mount to any flat surface (e.g. stock odometer mounting bracket or body panel). Make sure that the cables will not be chafed or damaged in their mounting location. -
Page 13
It is best to connect so power is not interrupted by key switch. Notes: • Vapor is polarity independent. Either lead can go to the positive or negative post on the battery. • Vapor will not drain your battery. -
Page 14
Installation ATV Sensor/Magnet Installation: Vapor needs two things to be able to collect distance data: 1. A magnet placed on the spinning part of the wheel. 2. The sensor, placed on the non-moving part of the wheel. The magnet spins around… -
Page 15
Magnet About to Pass Under Sensor attached to the brake caliper. Vapor can tell how far and fast it’s traveled by keeping track of how many times the magnet passes under the sensor switch. Many Motorcycles and ATV’s have special installation procedures. -
Page 16
Installation Overview: You will use the wheel size number when setting up the computer for your machine. Use Method 1, 2 or 3. Method 1) Easy Ruler Wheel Size= Method: Wheel Diameter(mm) x 3.14 Find the circumference of front wheel by measuring its diameter in millimeters. -
Page 17
Installation Method 3) Distance Measurements: For the most accurate measurement, use wheel size measurement from above or set the wheel size to 2110mm (motorcycle) or 1675 (ATV) and follow this procedure: 1. Find a length of road where the distance is known. 2. -
Page 18: Data Setting Mode
• Over Shift Indicator Warning Hold all three buttons down for three seconds to enter Data Setting Mode. After a setting is confirmed, Vapor will move on to the next setting in order. If no button is pressed for 15 seconds, Vapor will return…
-
Page 19
Enter Data Setting Mode: TO ENTER DATA SETTING MODE, HOLD ALL THREE BUTTONS FOR 3 SEC Release buttons to continue. Program Kilometers or Miles Per Hour: TO CYCLE BETWEEN M/H AND KM/H, PRESS TO CONFIRM, PRESS Vapor will go to the next setting. -
Page 20: Measure Wheel Size
Data Setting Mode Program Wheel Size: Vapor needs to know wheel size in order to measure Distance and Speed. Please take the time to accurately measure wheel size for smooth operation. See “Measuring Wheel Size” section for more information. This setting is critical and required.
-
Page 21
TO CYCLE BETWEEN 12H AND 24H, PRESS TO CONFIRM, PRESS Vapor will go to the next setting. Program Time of Day: MODIFY FLASHING DIGIT BY PRESSING CHANGE TO NEXT DIGIT BY PRESSING TO CONFIRM, PRESS Vapor will go on to the next setting. -
Page 22
Program Pulses per Revolution (PPR) Step 1: Every time the engine revolves it sends a pulse to Vapor, letting it know how fast the engine is turning. The number of ignition pulses per revolution will vary across different engine types. Select from 0.5, 1.0, or 2.0 PPR. -
Page 23
PPR over a certain RPM. For these vehicles, change the displayed RPM digits to the RPM at which the vehicle changes PPR. MODIFY FLASHING DIGIT BY PRESSING CHANGE TO NEXT DIGIT BY PRESSING TO CONFIRM, PRESS Vapor will go to the next setting. -
Page 24
This screen will appear if a number other than zero is entered in previous step. Vapor will flash the default number “1.0”. Typically, a vehicle that changes PPR ratio at higher RPM’s changes from 0.5 to 1.0. Consult your bike’s User Manual or the manufacturer for details. -
Page 25
Data Setting Mode Program Temperature Unit of Measure: Choose between °C or °F. MODIFY FLASHING DIGIT BY PRESSING CHANGE TO NEXT DIGIT BY PRESSING TO CONFIRM, PRESS Vapor will go to the next setting. -
Page 26
Data Setting Mode Program High Temp Warning Point: Vapor defaults to 90°C (190°F). When the engine temperature sensor reaches the value of this setting, the left LED will turn on as a warning. Note: This step is only neccessary if an optional engine temperature sensor is installed. -
Page 27
Data Setting Mode Program Over Temp Danger Point: Vapor defaults to 110°C (230°F). When the engine temperature sensor reaches the value of this setting, the right LED will turn on as a critical warning alarm. This step is only neccessary if an optional engine temperature sensor is installed. -
Page 28
Data Setting Mode Program RPM Shift Indicator: Vapor’s shift indicator defaults to 6000 RPM. The left LED will flash when it’s time to shift. Vapor defaults to 0. MODIFY FLASHING DIGIT BY PRESSING CHANGE TO NEXT DIGIT BY PRESSING TO CONFIRM, PRESS… -
Page 29
Data Setting Mode Program Over Shift Indicator Warning: Vapor’s over shift warning indicator defaults to 10,000 RPM. The right LED will flash when the engine is revving too high. Vapor defaults to 0. MODIFY FLASHING DIGIT BY PRESSING CHANGE TO NEXT DIGIT BY PRESSING TO CONFIRM, PRESS Vapor will return to Normal Mode. -
Page 30: Normal Mode Screens
Normal Mode Screens Switch between the 3 Normal Mode Screens: All of the information that Vapor provides is on one of these 3 screens. When riding, the user has the choice of staying on Screen 1 or Screen 2. Screen 3 will default back to Screen 1 after 5 seconds.
-
Page 31
Normal Mode Screen 2: Screen 2 Displays: • Speed (SPD) • Revolutions per Minute (RPM) • Stop Watch (TT) • Ride Time (RT) • Engine Temperature* • RPM Bar Graph TOGGLE BETWEEN STOP WATCH AND Ride TIME BY PRESSING Screen 3: Screen 3 Displays: •… -
Page 32: Vapor Features
• Ambient and Engine Temperature Sleep Mode: If Vapor receives no data for 20 minutes (either wheel data or a button pressed), it will enter sleep mode. It will only display the clock while in Sleep Mode. It will exit Sleep Mode when it receives sensor data…
-
Page 33
Vapor Features Tachometer: Description: The tachometer provides both a graphical and numeric display of engine RPM. The LCD display is designed to display a segmented bar graph for information at a glance as well as a numeric display for more accurate readings. -
Page 34
Vapor Features Speedometer: Description: The speedometer shows the current vehicle speed. Vapor also shows Maximum Speed, the highest speed achieved since the last reset. Speed: Speed is displayed from 0 to 399.9 M/H or KM/H in the center of Screens 1 and 2. The SPD icon and KM/H or M/H will also appear next to the speed reading. -
Page 35
Distance up with the <LEFT> button or down with the <RIGHT> button. ENTER DISTANCE EDIT MODE FROM ANY SCREEN BY HOLDING <MODE> FOR 2 SECONDS INCREMENT OR SCROLL DISTANCE VALUE BY PRESSING <LEFT> OR <RIGHT> Hold the button down and Vapor will scroll faster. -
Page 36
The odometer is not resettable. Display: The highest Odometer reading Vapor can display is 999,999 miles or kilometers. The Odometer is shown only on Screen 3 and alternates with Accumulated Ride Time (ART) -
Page 37
Display: The highest Accumulated Ride Time Vapor can display is 9999:59 hours (when the maximum value is reached, Vapor will not roll the number back to 0). Accumulated Ride Time (ART) is shown only on Screen 3 and alternates with the Odometer (ODO) by pressing <RIGHT>. -
Page 38
Vapor Features Clock, Stop Watch, and Ride Time: Time-of-Day Clock: The Time-of-Day clock is displayed in the upper- right corner of Screen 1 next to the clock icon and during Sleep Mode. The clock is displayed in either 12H or 24H format. -
Page 39
Temperature measurements use user defined values to advise when the engine is getting too hot. Tell Vapor what is too hot in Data Setting Mode (see Data Setting Mode:Temperature Settings for more detail). When Temperature reaches Vapor’s High Temp Setting, the left LED will light steady on, signaling the bike is starting to get too hot. -
Page 40
Shift Indicator Lights: The Shift Indicator Lights use user defined values to advise when it’s time to shift. Tell Vapor when to shift in Data Setting Mode (see Data Setting Mode:Shift Indicator Settings for more detail). When RPM reaches Vapor’s RPM Shift Indicator Warning Value, the left LED will flash, signaling it’s time to shift. -
Page 41
TO RESET SINGLE-RIDE DATA, PRESS If any wires become unplugged from Vapor, do a data reset after everything is properly re-connected. Alternatively, push the red reset button on the back of Vapor. -
Page 42: Troubleshooting
Frequently Asked Questions: Why does nothing work? The internal battery may be dead, or Vapor is not hooked up to vehicle power properly. Review installation procedure. Try the reset button on the back of Vapor. Don’t forget to write down your wheel size and other settings beforehand.
-
Page 43
0°C. Try the reset button and get Vapor back to a normal temperature. The Backlight won’t stay lit!!! Vapor needs to be connected to vehicle’s 12 volt system in order for the backlight to be continuous on. Review installation procedure. Vapor’s internal battery is dead! To replace the battery, use a coin to unscrew the round panel on the back of Vapor. -
Page 44: Glossary Of Terms
Normal Mode Glossary of Terms ACCUMULATED RIDE TIME (ART) The long-term total amount of time spent riding (all ride times added together). Cannot be reset. BACKLIGHT The light that brightens up Vapors display. When connected to vehicle’s 12 volt system the backlight can be activated by pressing any button, will be 5 times brighter, and will stay on continuously.
-
Page 45
SENSOR Vapors’ various sensors must be installed correctly or nothing will work! One works with the magnet to let Vapor collect its wheel data, another gets connected to the engine to measure PPR, and a third sensor will measure the temperature. -
Page 46
Notes Notes:… -
Page 47
NOTES OTHER PRODUCTS BY… -
Page 48
LIMITED WARRANTY Within 180 days from the date of original purchase, Trail Tech will repair or replace, at its option, any Trail Tech powersport computer which is deemed defective in workmanship or materials. Please return the unit, together with proof of date of purchase, to your local dealer or send unit (postage paid) to Trail Tech.
|
приборка Vapor Trail Tech |
||||||
|
||||||
|
||||||
|
||||||
|
||||||
|
||||||
|
||||||
|
||||||
|
||||||
|
||||||
|
||||||
|
||||||
|
||||||
|
||||||
|
||||||
|


|
|

Вот его характеристика:
Vapor ATV/motorcycle speedometer tachometer:
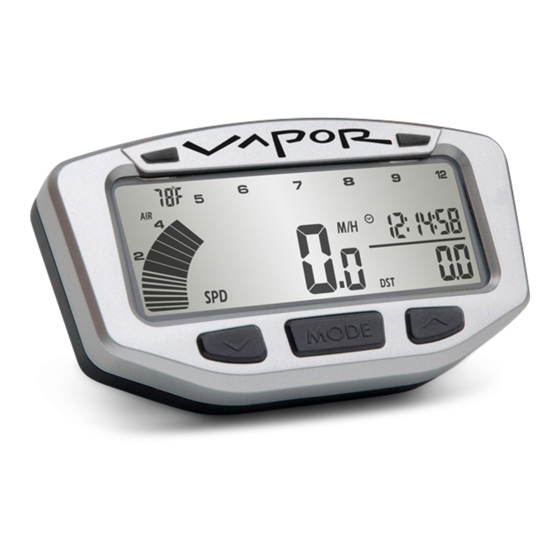
The Vapor motorcycle speedometer main feature is a large, well lit RPM tachometer graph. Vapor is useful as a motorcycle speedometer and side by side utility vehicle or ATV speedometer (or any machine with a wheel.) Vapor’s large digital tachometer bar graph is easy to read. The digital gauge has many other useful features like time keeping, engine temperature, resettable distance, and odometer. Vapor’s tachometer shift lights and temperature lights are great to warn about potential mechanical problems while there is still time to react. The built in stop watch and hour meter is perfect for race training. The adjustable distance setting can be used on those tough enduro courses.
Vapor is enough to replace an entire instrument cluster on your dashboard. Speed, time, distance and tach — Vapor has it covered. If indicator lights are required for dual-sport and supermoto road ready bikes, Vapor is available with a stylish indicator dashboard accessory. If rougher treatment is expected, the Vapor speedo has a full line of model-specific aluminum billet guards and protectors for motocross, enduro, rallies, and trials.
A combined effort from experts in software, electronics, and mechanical design – each feature of this 4th generation product is carefully crafted and constructed with the offroad enthusiast in mind.

Speedometer:
Current Speed
Maximum Speed
Selectable MPH/KMH Display
Tachometer:
Real-Time RPM Bar Graph
Numeric RPM Readout
Dual Programmable Shift Lights
Up to 20,000 RPM
Temperature:
Ambient Temperature
Engine Temperature
Dual Programmable Temp Lights
Exact Model Fit Temperature Sensors
Selectable °F/°C Display
Distance:
Adjustable Distance
Permanent Odometer
Selectable Mile/Kilometer Display
Clock:
Hour Meter
Stop Watch
Ride Time
Accumulated Ride Time
permanent Hour Meter
Selectable 12/24 Hour Display
Power Input :
Includes Power Connection Fits All Machines
Accepts Any Power Input — AC/DC
Auto Switch to Internal Power if External is Removed
Permanent Memory Guarantees Data is Never Lost
Value Added :
Custom Designed for Exact Model Fit
All Parts Included to Complete Installation
One Year Warranty
Unlimited Free Trail Tech Phone and Email Support
Waterproof Connections Included
Bright White Backlit LCD Display
Accessory Dashboards for Most Applications
Собственно ветку создал для того, что бы понятным языком любой желающий установить такую вещь мог спокойно зайти сюда и ему ответили на те вопросы, которые возникнут (а они не могут возникнуть у того, кто не знает английского и принципы работы компУтеров, такие как я). Внешний вид его описывать не буду, картинка его передаёт. Одно скажу, в темноте он светит голубовато-белёсым цветом, АБСОЛЮТНО не раздражает глаза, уставшийе от езды за весь день. Очень читателен и понятен, прост и герметичен.
Мы с Женей veyngold установили (в основном он) его без трудностей, а вот с тарировкой вышли заминки. Установить магнит для считывания скорости оборота переднего колеса на тормозной передний диск, установка самого прибора, проводка/подключение его, повторюсь, не вызвало мало-мальских трудносте. Обычное интереесное дело. А вот тарировка….
В общем есть вопросы на которые хотелось бы получить ответы, и которые могут проясниить многим удобство того прибора. Он работает в режиме трёх экранов (меняются они нажатем одной кнопки и переходят по круговой схеме, сначала показывает 1- затем2-3-1-2-… и т.д.):
1й экран показывает ВРЕМЯ, обороты двигателя ГРАФИЧЕСКИ, температуру окружающего воздуха, дистанцию, скорость;
2й экран показывает Время в пути, обороты двигателя ГРАФИЧЕСКИ, температуру масла (можно настроить и температуру ОЖидкости, в зависимости от модели мотоцикла), обороты двигателя ЦИФРАМИ;
3й экран показывает: максимальные показатели, записанные им во время пути, кроме текущего времени.
Лично мне неудобно постоянно переключать кнопкой режим за резимом. Хотелось бы иметь те показатели перед глазом, те, которые понятны и нужны. А вот как сделать это…. сухая инструкциЯ не объясняет. Да и вообще, можно ли это или это мои бздыки?
Кто пользовал такой «девайс«? Кто может прояснить некоторые вопросы? ephu, veyngold, Вы то знаете язык технический.
Правдой дорожить, лжи не потакать,
Дальних не судить, ближним помогать.
————————————
XR650L-2207 UA был…
ТТ350-1985 RU был….
DR350SЕ-1996 RU есть….
Сообщение отредактировал КРЫНЯ — Понедельник, 16.05.2011, 17:55
|
|


 TiReX
TiReX
©Kickstarter.org — мотоциклисты во Франции! :: Pоwered by SМF, © 2006 Simрle Мachines LLС
Suzuki DRZ400SM 2005
DReZina

Приборная панель Vapor Trail Tech
]
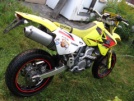
Вот собственно фото сего девайса на моём «макыкле»
Изначально выглядело так (вариант «на скорую руку»)

Потом запилил из алюминиевого уголка такую вот рамочку-хомут


Теперь с таким креплением приборка надежно закреплена на руле, кстати лампочки нейтрали и прочего от старой приборки, легко от неё открутились отдельно и теперь стоят уже с новой.
 «>
«>
Родная приборка моего DRZ умерла ещё в Германии у первого владельца мотоцикла, работала только оранжевая подсветка, цифр никаких не показывало, после разборки и проверки тестером нашел место обрыва на плате, запаял контакт но ожидаемого эффекта не достиг. цифры стало показывать но некоторые сливались, что взывало трудности при чтении информации, предположим вместо единицы была сплошная 8ка… начал поиски достойной замены вместо родной приборки. На сайте клуба владельцев дрз мне подсказали со множеством положительных отзывов именно эту приборку Vapor Trail Tech, В ней есть всё! Спидометр, одометр, часы, моточасы, секундомер, тахометр цифровой и схематичный, температура окружающей среды, охлаждающей жидкости, суточный пробег, отдельный режим экрана показывающий все максимальные показатели, приятная яркая в темноте белая подсветка, индикаторные оповещающие лампочки (желтая и красная) которые можно настроить на обороты двигателя для переключения (желтая) и критические (красная соответственно) то же с температурой охлаждения, себе выставил желтую на 95 градусов а красную на 99, вентилятор на радиаторе включается при 102 и понижает до 92 затем выключается.
З.Ы. купил через ебей около 100$ ибо наши местные барыги в Калининграде за такую приборку по 5 тысяч гнут и больше, всем доволен, работает второй сезон, водонепроницаемая, да и в целом очень практичная, если кто то захочет менять свой спидометр советую присмотреться к этому варианту, на мой взгляд дешево и очень сердито
 MaximusDRZ
- Максим
- 1 сентября 2013 в 0:01
-
17
-
оценка: +29
Только зарегистрированные пользователи могут оставлять комментарии.
Войдите, пожалуйста, или зарегистрируйтесь.
При перепечатке материалов, видео или картинок гиперссылка на «bikepost.ru» обязательна
мотоблоги, Suzuki DRZ400SM 2005, Приборная панель Vapor Trail Tech