![]()
Vue.js
-
Обучение
-
Документация
-
- Руководство
- API
- Рекомендации
- Примеры
- Книга рецептов
-
Видео курсы
-
-
Vue Mastery
-
Vue School
-
-
-
Экосистема
-
Помощь
-
- Форум
- Чат
- Митапы
-
Инструментарий
-
- Инструменты разработчика
- Vue CLI
- Vue Loader
-
Официальные плагины
-
- Vue Router
- Vuex
- Vue Server Renderer
-
Новости
-
- Еженедельные новости
- Roadmap
- События
- Блог
- Вакансии
- Сообщество разработчиков
-
- Команда
-
Ресурсы
- Партнёры
- Темы
- Awesome Vue
- Найти пакеты для Vue
-
Поддержать Vue
- Единоразовые пожертвования
- Повторяющиеся взносы
- Магазин футболок
-
Переводы
- English
- 中文
- 日本語
- 한국어
- Português
- Français
- Tiếng Việt
- Español
- Bahasa Indonesia
Эта документация для версий v2.x и ранее.
Для v3.x, документация на русском здесь.
Введение
Что такое Vue.js?
Vue (произносится /vjuː/, примерно как view) — это прогрессивный фреймворк для создания пользовательских интерфейсов. В отличие от фреймворков-монолитов, Vue создан пригодным для постепенного внедрения. Его ядро в первую очередь решает задачи уровня представления (view), что упрощает интеграцию с другими библиотеками и существующими проектами. С другой стороны, Vue полностью подходит и для создания сложных одностраничных приложений (SPA, Single-Page Applications), если использовать его совместно с современными инструментами и дополнительными библиотеками.
Если вы хотите узнать больше о Vue перед тем как начать, мы создали видео с рассказом об основных принципах работы на примере проекта.
Если вы — опытный фронтенд-разработчик, и хотите узнать, чем Vue отличается от остальных библиотек или фреймворков, обратите внимание на сравнение с другими фреймворками.
Начало работы
Установка
В этом руководстве мы предполагаем, что вы уже знакомы с HTML, CSS и JavaScript на базовом уровне. Если же вы во фронтенд-разработке совсем новичок, начинать сразу с изучения фреймворка может быть не лучшей идеей — возвращайтесь, разобравшись с основами! Наличие опыта работы с другими фреймворками может помочь, но не является обязательным.
Проще всего попробовать Vue.js, начав с примера Hello World. Откройте его в другой вкладке, и изменяйте по ходу чтения руководства. Можно и просто создать index.html файл на диске и подключить Vue:
<!-- версия для разработки, отображает полезные предупреждения в консоли -->
<script src="https://cdn.jsdelivr.net/npm/vue@2/dist/vue.js"></script>
или:
<!-- production-версия, оптимизированная для размера и скорости -->
<script src="https://cdn.jsdelivr.net/npm/vue@2"></script>
В разделе по установке описаны и другие варианты установки Vue. Обратите внимание, мы не рекомендуем новичкам начинать с vue-cli, особенно если нет опыта работы с инструментами сборки Node.js.
Если предпочитаете что-то более интерактивное, можете пройти эту серию уроков на Scrimba, которая представляет собой сочетание скринкастов и песочницы для проверки примеров кода, где вы можете остановиться и продолжить изучение в любое время.
Декларативная отрисовка
В ядре Vue.js находится система, которая позволяет декларативно отображать данные в DOM с помощью простых шаблонов:
<div id="app">
  {{ message }}
</div>
var app = new Vue({
  el: '#app',
  data: {
    message: 'Привет, Vue!'
  }
})
Вот мы и создали наше первое Vue-приложение! Выглядит как простая отрисовка шаблона, но «под капотом» Vue выполнил немало работы. Данные и DOM теперь реактивно связаны. Как это проверить? Просто откройте консоль JavaScript в браузере (прямо здесь, на этой странице) и задайте свойству app.message новое значение. Вы тут же увидите соответствующее изменение в браузере.
Обратите внимание, что теперь больше не нужно напрямую взаимодействовать с HTML. Приложение Vue присоединяется к одному элементу DOM (#app в данном случае), а затем полностью контролирует его. HTML является нашей точкой входа, но всё остальное происходит внутри вновь созданного экземпляра Vue.
Кроме интерполяции текста, можно также связывать атрибуты элементов:
<div id="app-2">
  <span v-bind:title="message">
    Наведи на меня курсор на пару секунд,
    чтобы увидеть динамически связанное значение title!
  </span>
</div>
var app2 = new Vue({
  el: '#app-2',
  data: {
    message: 'Вы загрузили эту страницу: ' + new Date().toLocaleString()
  }
})
Наведи на меня курсор на пару секунд, чтобы увидеть динамически связанное значение title!
Здесь мы встречаемся с чем-то новым. Атрибут v-bind, называется директивой. Директивы имеют префикс v-, указывающий на их особую природу. Как вы уже могли догадаться, они добавляют к отображаемому DOM особое реактивное поведение, управляемое Vue. В данном примере директива говорит «сохраняй значение title этого элемента актуальным при изменении свойства message в экземпляре Vue».
Откройте консоль JavaScript и введите app2.message = 'новое сообщение', вы увидите как связанный код HTML — в нашем случае, атрибут title — обновился.
Условия и циклы
Управлять присутствием элемента в DOM тоже довольно просто:
<div id="app-3">
  <span v-if="seen">Сейчас меня видно</span>
</div>
var app3 = new Vue({
  el: '#app-3',
  data: {
    seen: true
  }
})
Попробуйте ввести в консоли app3.seen = false. Сообщение пропадёт.
Этот пример демонстрирует возможность связывать данные не только с текстом и атрибутами, но и со структурой DOM. Более того, Vue также имеет мощную систему анимации, которая автоматически применяет эффекты переходов, когда элементы добавляются/обновляются/удаляются.
Есть и другие директивы, каждая из которых имеет своё предназначение. Например, директива v-for для отображения списков, используя данные из массива:
<div id="app-4">
  <ol>
    <li v-for="todo in todos">
      {{ todo.text }}
    </li>
  </ol>
</div>
var app4 = new Vue({
  el: '#app-4',
  data: {
    todos: [
      { text: 'Изучить JavaScript' },
      { text: 'Изучить Vue' },
      { text: 'Создать что-нибудь классное' }
    ]
  }
})
- {{ todo.text }}
Введите в консоли app4.todos.push({ text: 'Profit' }). Вы увидите, что к списку добавится новый элемент.
Работа с пользовательским вводом
Чтобы пользователи могли взаимодействовать с вашим приложением, используйте директиву v-on для отслеживания событий, указав метод-обработчик:
<div id="app-5">
  <p>{{ message }}</p>
  <button v-on:click="reverseMessage">Перевернуть сообщение</button>
</div>
var app5 = new Vue({
  el: '#app-5',
  data: {
    message: 'Привет, Vue.js!'
  },
  methods: {
    reverseMessage: function () {
      this.message = this.message.split('').reverse().join('')
    }
  }
})
Обратите внимание, в методе мы просто обновляем состояние приложения, не затрагивая DOM — всю работу с DOM выполняет Vue, а вы пишете код, который занимается только логикой приложения.
Vue также предоставляет директиву v-model, позволяющую легко связывать элементы форм и состояние приложения:
<div id="app-6">
  <p>{{ message }}</p>
  <input v-model="message">
</div>
var app6 = new Vue({
  el: '#app-6',
  data: {
    message: 'Привет, Vue!'
  }
})
Разбиение приложения на компоненты
Важной концепцией Vue являются компоненты. Эта абстракция позволяет собирать большие приложения из маленьких «кусочков». Они представляют собой пригодные к повторному использованию объекты. Если подумать, почти любой интерфейс можно представить как дерево компонентов:

Во Vue компонент — это, по сути, экземпляр Vue с предустановленными опциями. Создать новый компонент во Vue просто:
// Определяем новый компонент под именем todo-item
Vue.component('todo-item', {
  template: '<li>Это одна задача в списке</li>'
})var app = new Vue(...)
Теперь его можно использовать в шаблоне другого компонента:
<ol>
  <!-- Создаём экземпляр компонента todo-item -->
  <todo-item></todo-item>
</ol>
Пока что у нас получилось так, что во всех элементах списка будет один и тот же текст — это не очень-то интересно. Хотелось бы иметь возможность передавать данные от родительского в дочерние компоненты. Давайте изменим определение компонента, чтобы он мог принимать входной параметр:
Vue.component('todo-item', {
  // Компонент todo-item теперь принимает
  // "prop", то есть входной параметр.
  // Имя входного параметра todo.
  props: ['todo'],
  template: '<li>{{ todo.text }}</li>'
})
Теперь можно передать текст задачи в каждый компонент с помощью v-bind:
<div id="app-7">
  <ol>
    <!--
      Теперь мы можем передать каждому компоненту todo-item объект
      с информацией о задаче, который будет динамически меняться.
      Мы также определяем для каждого компонента "key",
      значение которого мы разберём далее в руководстве.
    -->
    <todo-item
      v-for="item in groceryList"
      v-bind:todo="item"
      v-bind:key="item.id"
    ></todo-item>
  </ol>
</div>
Vue.component('todo-item', {
props: ['todo'],
template: '<li>{{ todo.text }}</li>'
})var app7 = new Vue({
el: '#app-7',
data: {
groceryList: [
{ id: 0, text: 'Овощи' },
{ id: 1, text: 'Сыр' },
{ id: 2, text: 'Что там ещё люди едят?' }
]
}
})
Конечно, этот пример слегка надуман, но посмотрите сами — мы разделили наше приложение на два меньших объекта, и дочерний, в разумной мере, отделён от родительского с помощью интерфейса входных параметров. Теперь можно улучшать компонент <todo-item>, усложнять его шаблон и логику, но не влиять на родительское приложение.
В крупных приложениях разделение на компоненты становится обязательным условием для сохранения управляемости процесса разработки. Разговор о компонентах ещё далеко не окончен и мы вернёмся к ним позднее в этом руководстве, но уже сейчас можно взглянуть на (вымышленный) пример того, как может выглядеть шаблон приложения, использующего компоненты:
<div id="app">
  <app-nav></app-nav>
  <app-view>
    <app-sidebar></app-sidebar>
    <app-content></app-content>
  </app-view>
</div>
Отношение к пользовательским элементам Web Components
Вы могли заметить, что компоненты Vue довольно похожи на пользовательские элементы, являющиеся частью спецификации W3C Web Components. Дело в том, что синтаксис компонентов Vue и правда намеренно следует этой спецификации. В частности, компоненты Vue реализуют API слотов и специальный атрибут is. Но есть и несколько ключевых различий:
-
Спецификация Web Components была завершена, но она реализована ещё не во всех браузерах. Safari 10.1+, Chrome 54+ и Firefox 63+ уже поддерживают веб-компоненты. Компоненты Vue, напротив, не требуют никаких полифилов и работают во всех поддерживаемых браузерах (IE9 и выше). При необходимости компоненты Vue могут быть «обёрнуты» в нативные пользовательские элементы.
-
Компоненты Vue предоставляют возможности, недоступные в простых пользовательских элементах. Самые значимые из них: кросс-компонентная передача данных, коммуникация с использованием пользовательских событий и интеграция с инструментами сборок.
Готовы к большему?
Пока мы лишь кратко представили самые основные возможности ядра Vue.js — остаток этого руководства посвящён более детальному рассмотрению этих и других возможностей, поэтому советуем прочитать его целиком!
Видео Vue Mastery. Посмотрите бесплатный курс Vue Mastery Введение в курс Vue.
# Введение
Vue (произносится /vjuː/, примерно как view) — прогрессивный фреймворк для создания пользовательских интерфейсов. В отличие от фреймворков-монолитов, Vue создавался пригодным для постепенного внедрения. Его ядро в первую очередь решает задачи уровня представления (view), упрощая интеграцию с другими библиотеками и существующими проектами. С другой стороны, Vue полностью подходит и для разработки сложных одностраничных приложений (SPA, Single-Page Applications), если использовать его в комбинации с современными инструментами и дополнительными библиотеками (opens new window).
Если хотите узнать больше о Vue перед тем как начать — посмотрите видео с рассказом об основных принципах работы на небольшом примере проекта.
# Начало работы
Установка
Совет
Руководство предполагает знания HTML, CSS и JavaScript на среднем уровне. Для новичков во фронтенд-разработке начинать изучение сразу с фреймворка может быть не лучшей идеей — возвращайтесь, разобравшись с основами! Наличие опыта работы с другими фреймворками может помочь, но не является обязательным.
Самый простой способ попробовать Vue.js — начать с примера Hello World (opens new window). Открывайте его в соседней вкладке и практикуйтесь, изменяя по ходу изучения руководства.
На странице установки есть несколько вариантов как можно устанавливать Vue. Примечание: не рекомендуется начинающим программистам стартовать с vue-cli, особенно если ещё не знакомы с инструментами сборки на основе Node.js.
# Декларативная отрисовка
В ядре Vue.js находится система, которая позволяет декларативно отрисовывать данные в DOM с помощью простого синтаксиса шаблонов:
<div id="counter">
  Счётчик: {{ counter }}
</div>
1
2
3
const Counter = {
  data() {
    return {
      counter: 0
    }
  }
}

Vue.createApp(Counter).mount('#counter')
1
2
3
4
5
6
7
8
9
Вот и создано первое Vue-приложение! Хоть и выглядит как простая отрисовка строкового шаблона, но «под капотом» Vue выполнил немало работы. Данные и DOM теперь реактивно связаны. Как в этом убедиться? Посмотрите на пример ниже, где свойство counter увеличивается каждую секунду и увидите, как изменяется DOM:
const CounterApp = {
  data() {
    return {
      counter: 0
    }
  },
  mounted() {
    setInterval(() => {
      this.counter++
    }, 1000)
  }
}
1
2
3
4
5
6
7
8
9
10
11
12
Кроме интерполяции текста, можно также связывать данные с атрибутами элементов:
<div id="bind-attribute">
  <span v-bind:title="message">
    Наведи на меня курсор на пару секунд,
    чтобы увидеть динамически связанное значение title!
  </span>
</div>
1
2
3
4
5
6
const AttributeBinding = {
  data() {
    return {
      message: 'Страница загружена ' + new Date().toLocaleString()
    }
  }
}

Vue.createApp(AttributeBinding).mount('#bind-attribute')
1
2
3
4
5
6
7
8
9
See the Pen Attribute dynamic binding
by Vue (@Vue)
on CodePen.
Здесь встречаемся с чем-то новым. Атрибут v-bind называется директивой. Директивы имеют префикс v-, обозначающий что это специальные атрибуты Vue, и как уже могли догадаться, они добавляют особое реактивное поведение отрисованному DOM. В данном примере директива говорит «сохраняй значение title этого элемента актуальным при изменении свойства message в текущем активном экземпляре».
# Работа с пользовательским вводом
Чтобы позволить пользователям взаимодействовать с приложением, можно использовать директиву v-on для обработчиков событий, которые будут вызывать методы экземпляра:
<div id="event-handling">
  <p>{{ message }}</p>
  <button v-on:click="reverseMessage">Перевернуть сообщение</button>
</div>
1
2
3
4
const EventHandling = {
  data() {
    return {
      message: 'Привет, Vue.js!'
    }
  },
  methods: {
    reverseMessage() {
      this.message = this.message
        .split('')
        .reverse()
        .join('')
    }
  }
}

Vue.createApp(EventHandling).mount('#event-handling')
1
2
3
4
5
6
7
8
9
10
11
12
13
14
15
16
17
See the Pen Event handling
by Vue (@Vue)
on CodePen.
Обратите внимание, в методе обновляем только состояние приложения и не трогаем DOM — всеми манипуляциями с DOM занимается Vue, а код фокусируется на логике работы.
Vue также предоставляет директиву v-model, которая реализует двустороннюю привязку между элементом формы и состоянием приложения:
<div id="two-way-binding">
  <p>{{ message }}</p>
  <input v-model="message" />
</div>
1
2
3
4
const TwoWayBinding = {
  data() {
    return {
      message: 'Привет, Vue!'
    }
  }
}

Vue.createApp(TwoWayBinding).mount('#two-way-binding')
1
2
3
4
5
6
7
8
9
See the Pen Two-way binding
by Vue (@Vue)
on CodePen.
# Условия и циклы
Управлять присутствием элемента в DOM тоже просто:
<div id="conditional-rendering">
  <span v-if="seen">Сейчас меня видно</span>
</div>
1
2
3
const ConditionalRendering = {
  data() {
    return {
      seen: true
    }
  }
}

Vue.createApp(ConditionalRendering).mount('#conditional-rendering')
1
2
3
4
5
6
7
8
9
Этот пример демонстрирует возможность связывания данных не только с текстом и атрибутами, но и со структурой DOM. Более того, Vue имеет мощную систему анимаций, которая может автоматически применять эффекты переходов при добавлении, обновлении или удалении элементов.
Можно изменить в примере ниже значение seen с true на false чтобы увидеть эффект:
See the Pen Conditional rendering
by Vue (@Vue)
on CodePen.
Существует и некоторое количество других директив, каждая из которых обладает своей особой функциональностью. Например, директиву v-for можно использовать для отображения списка элементов, используя данные из массива:
<div id="list-rendering">
  <ol>
    <li v-for="todo in todos">
      {{ todo.text }}
    </li>
  </ol>
</div>
1
2
3
4
5
6
7
const ListRendering = {
  data() {
    return {
      todos: [
        { text: 'Learn JavaScript' },
        { text: 'Learn Vue' },
        { text: 'Build something awesome' }
      ]
    }
  }
}

Vue.createApp(ListRendering).mount('#list-rendering')
1
2
3
4
5
6
7
8
9
10
11
12
13
See the Pen List rendering
by Vue (@Vue)
on CodePen.
# Композиция приложения из компонентов
Компонентная система является ещё одной важной концепцией во Vue, потому что это абстракция, которая позволяет создавать большие приложения, состоящие из небольших, автономных и часто переиспользуемых компонентов. Если задуматься, то практически любой тип интерфейса приложения можно абстрактно представить деревом компонентов:
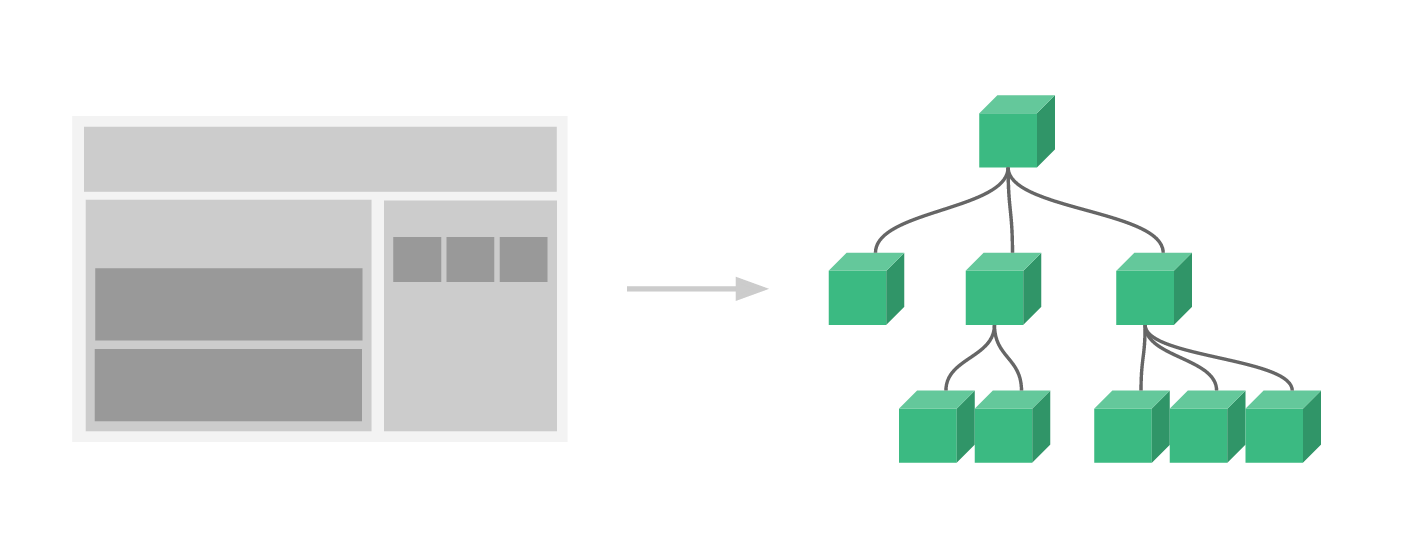
Компонент во Vue, по сути является экземпляром с предустановленными опциями. Его регистрация также проста: нужно создать объект компонента, как это делали с объектами App, и указать его в родительской опции components:
// Создаём приложение Vue
const app = Vue.createApp(...)

// Определяем новый компонент с именем todo-item
app.component('todo-item', {
  template: `<li>Это одна из задача</li>`
})

// Монтируем приложение Vue
app.mount(...)
1
2
3
4
5
6
7
8
9
10
Теперь можно использовать его в шаблоне другого компонента:
<ol>
  <!-- Создание экземпляра компонента todo-item -->
  <todo-item></todo-item>
</ol>
1
2
3
4
Пока выходит так, что во всех элементах списка будет один и тот же текст, что не очень-то интересно. Должна быть возможность передать данные в дочерние компоненты из родительской области видимости. Доработаем определение компонента, чтобы он принимал входной параметр:
app.component('todo-item', {
  props: ['todo'],
  template: `<li>{{ todo.text }}</li>`
})
1
2
3
4
Теперь можно передавать свой текст для каждого из компонентов с помощью v-bind:
<div id="todo-list-app">
  <ol>
    <!--
      Теперь мы можем передать каждому компоненту todo-item объект
      с информацией о задаче, который может динамически изменяться.
      Также для каждого компонента определяем "key",
      значение которого разберём далее в руководстве.
    -->
    <todo-item
      v-for="item in groceryList"
      v-bind:todo="item"
      v-bind:key="item.id"
    ></todo-item>
  </ol>
</div>
1
2
3
4
5
6
7
8
9
10
11
12
13
14
15
const TodoList = {
  data() {
    return {
      groceryList: [
        { id: 0, text: 'Vegetables' },
        { id: 1, text: 'Cheese' },
        { id: 2, text: 'Whatever else humans are supposed to eat' }
      ]
    }
  }
}

const app = Vue.createApp(TodoList)

app.component('todo-item', {
  props: ['todo'],
  template: `<li>{{ todo.text }}</li>`
})

app.mount('#todo-list-app')
1
2
3
4
5
6
7
8
9
10
11
12
13
14
15
16
17
18
19
20
See the Pen Intro-Components-1
by Vue (@Vue)
on CodePen.
Конечно, это слегка надуманный пример, но удалось разделить приложения на два блока поменьше. Дочерний компонент достаточно хорошо отделён от родительского с помощью интерфейса входных параметров. Теперь можно улучшать компонент <todo-item>, усложняя его шаблон и логику и не затрагивать работу родительского приложения.
В больших приложениях разделение на компоненты становится необходимостью для сохранения управляемости разработки. Гораздо подробнее с компонентами продолжим разбираться далее в руководстве, но и сейчас можно взглянуть на (вымышленный) пример того, как может выглядеть шаблон приложения, использующего компоненты:
<div id="app">
  <app-nav></app-nav>
  <app-view>
    <app-sidebar></app-sidebar>
    <app-content></app-content>
  </app-view>
</div>
1
2
3
4
5
6
7
# Связь с пользовательскими элементами Web Components
Можно заметить, что компоненты Vue очень похожи на пользовательские элементы, которые являются частью спецификации Web Components (opens new window). Синтаксис компонентов Vue и правда намеренно следует этой спецификации. Например, компоненты Vue реализуют API слотов (opens new window) и специальный атрибут is. Однако, есть несколько ключевых различий:
- Спецификация Web Components была завершена, но не реализована во всех браузерах. Safari 10.1+, Chrome 54+ и Firefox 63+ уже поддерживают веб-компоненты. В сравнении, компоненты Vue стабильно работают во всех поддерживаемых браузерах (IE11 со специальной совместимой сборкой и выше). При необходимости компоненты Vue могут быть «обёрнуты» в нативные пользовательские элементы.
- Компоненты Vue предоставляют возможности, недоступные в простых пользовательских элементах. Самые важные из них: межкомпонентная передача данных, коммуникация с использованием пользовательских событий и интеграция с инструментами сборок.
Хоть Vue и не использует пользовательские элементы внутри себя, но имеет отличную интероперабельность (opens new window) когда речь заходит об использовании или распространении в качестве пользовательских элементов. Vue CLI также поддерживает сборку компонентов Vue, которые будут регистрировать себя как нативные пользовательские элементы.
# Готовы к большему?
Пока лишь вкратце ознакомились с основными функциями ядра Vue.js — в следующих частях руководства разберём подробнее эти и другие возможности, поэтому не забудьте прочитать его целиком!
Скорее всего, вы, читая эти строки, уже слышали о JavaScript-фреймворке, который называется Vue. Если вы собирались его опробовать, но не очень хорошо представляли себе то, с чего вам стоит начать, значит — этот материал написан специально для вас. Его автор говорит, что хочет рассказать о том, почему ему очень нравится Vue. Кроме того, он собирается представить всем желающим 4 способа написания первого приложения на Vue.

В конце этого материала, вы найдете ссылки на целый курс по Vue.js.
Обзор материала
Обычно я стараюсь не рассказывать о слишком многих способах решения одних и тех же задач тем, кто только начинает осваивать некий фреймворк. Но в данном случае я полагаю, что показать несколько способов разработки первого приложения на Vue — это очень важно. Возможно, вам нравится работать с командной строкой, а возможно — с инструментами, оснащёнными графическим интерфейсом. Для Vue-разработки подходит и то и другое. Кроме того, Vue-приложения можно писать и не прибегая к командной строке. Для этого достаточно добавить на HTML-страницу тег для загрузки соответствующего скрипта. И, наконец, возможно, вам не хочется заботиться о настройке окружения разработки. Вместо этого вы стремитесь к тому, чтобы как можно скорее, без лишних движений, попробовать Vue. На самом деле, какой бы стратегии вы ни придерживались бы, здесь вы найдёте то, что поможет вам приступить к освоению Vue.
В процессе чтения этого материала вы будете встречать ссылки на полезные ресурсы. А когда вы прочтёте всю эту статью — я расскажу вам о том, на что вам стоит обратить внимание для дальнейшего изучения Vue. Надо отметить, что здесь мы не будем погружаться в тонкости Vue, не будем рассматривать все возможные механизмы этого фреймворка. Мы собираемся разобраться с основами и выйти на первое работающее приложение.
Для начала поговорим о некоторых интересных особенностях Vue.
Сильные стороны Vue
Сила Vue, на мой взгляд, заключается в том, насколько дружелюбно этот фреймворк относится к новичкам. Команда разработчиков Vue проделала замечательную работу, стремясь к тому, чтобы разработчики различной квалификации могли бы быстро приступить к продуктивной работе с фреймворком. Если вы знаете HTML, CSS и JavaScript — это означает, что вы буквально в шаге от того, чтобы разрабатывать довольно мощные приложения на Vue.
Я так же полагаю, что Vue, среди трёх ведущих инструментов для фронтенд-разработки (это — Angular, React и Vue), обладает самыми низкими входными барьерами. Это так по нескольким причинам, но для меня всё сводится к трём основным особенностям Vue:
- Отличная документация.
- Замечательное сообщество.
- Это — прогрессивный фреймворк.
▍Документация
Если поговорить с разработчиками, которым нравится Vue, то я думаю, что многие из них в первую очередь скажут о качестве документации этого фреймворка. Если посетить сайт Vue.js, то можно обнаружить, что документация разбита на несколько разделов:
- Руководство. Здесь можно найти всё то, что нужно для того, чтобы начать работу с Vue.js. Этот раздел разбит на удобные для восприятия подразделы, которые знакомят читателя с концепциями, нужными для того, чтобы приступить к разработке приложений, основанных на компонентах.
- API. В этом разделе приводится детальное описание API Vue. Например, если вам когда-нибудь попадётся какой-нибудь метод, в предназначении которого вы не вполне уверены, прояснить ситуацию поможет посещение этого раздела.
- Рекомендации. Тут можно найти замечательные рекомендации, следуя которым можно избежать появления ошибок. Эти рекомендации способны предостеречь разработчика от использования анти-паттернов. Важно то, что здесь приведены скорее не жёсткие правила, а нечто вроде руководства. После того, как вы немного освоитесь с Vue, напишете несколько приложений, я порекомендовал бы вам почитать материалы этого раздела. Я полагаю, что это — очень ценный источник знаний по Vue.
- Примеры. Здесь можно найти примеры приложений, разработанных средствами Vue. На вашем месте я пока не заглядывал бы сюда до тех пор, пока не освоился бы немного с разработкой компонентов. Но немного позже, когда вы будете готовы к тому, чтобы узнать о том, как устроены полноценные Vue-приложения, вам стоит изучить этот раздел.
- Книга рецептов. В данном разделе можно найти ответы на часто задаваемые вопросы о Vue. Например — на такие: «Как выполнить валидацию формы?», «Как провести модульное тестирование компонента?». Это, опять же, ценный ресурс, но освоение его материалов стоит отложить до того момента, когда у вас появятся вопросы, подобные тем, что приведены выше.
- Инструменты и основные библиотеки. На сайте Vue есть отличные материалы по инструментам и основным библиотекам. В особые подробности об этом мы тут вдаваться не будем, так как нам нужно поскорее приступить к написанию кода. Я приведу тут несколько ссылок на материалы, о существовании которых полезно знать. Итак, среди инструментов Vue я отметил бы следующие: инструменты разработчика, Vue CLI, Vue Loader. Вот ссылки на материалы по официальным библиотекам: Vue Router, Vuex, Vue Server Renderer.
▍Сообщество
Я, работая программистом, чувствую себя причастным к нескольким замечательным сообществам. Одно из них — это сообщество Vue. Его члены доброжелательны, дружелюбны, они более чем готовы оказать помощь тому, кто в ней нуждается. Рекомендую подписаться на Twitter-аккаунты следующих членов сообщества Vue. Так вам легче всего будет понять то, чем они занимаются, и узнать о том, чем они живут. Вот ссылки:
- Evan You
- Chris Fritz
- Sarah Drasner
- Damian Sulisz
- Divya Sasidharan
- Guillaume Chau
- Ben Hong
- Sebastien Chopin
- Natalia Tepluhina
- Edd Yerburgh
▍Vue — это прогрессивный фреймворк
Если посетить домашнюю страницу сайта Vue.js, то можно увидеть, что там его называют так: «Прогрессивный JavaScript-фреймворк». На первый взгляд это может показаться обычным маркетинговым ходом, но, немного вникнув в суть Vue, можно понять, что это не так. Для начала давайте определимся со значением слова «прогрессивное». Это — нечто, происходящее или развивающееся постепенно или поэтапно; это что-то такое, что выполняется пошагово.
Совсем скоро вы увидите, что при разработке Vue-приложений можно работать, поэтапно внедряя в них возможности этого фреймворка. Например, если у вас уже есть некий проект, то вы без проблем можете оснастить его поддержкой Vue. Начать можно с загрузки скрипта Vue и с написания нескольких строк кода.
Если вы хотите воспользоваться Vue CLI, средством командной строки Vue, для того, чтобы развернуть новый проект, обладающий необходимыми вам возможностями, то это — тоже не проблема. По мере того, как ваше приложение будет расти, и вам понадобятся достаточно продвинутые возможности вроде маршрутизации или управления состоянием, приложение несложно будет этими возможностями оснастить.
Как уже было сказано, Vue — это доступный фреймворк. Если вы уже знаете HTML, CSS и JavaScript, это значит, что вы готовы к тому, чтобы начать работу с Vue. Собственно говоря, если вы и правда стремитесь приступить к написанию Vue-приложений, тогда предлагаю этим и заняться.
Вариант №1: скрипт Vue, подключённый к странице
Первый способ использования Vue, который мы исследуем, заключается в подключении к странице скрипта Vue с помощью тега <script>. Если вы уже работали с JavaScript, то тут для вас не будет ничего нового. А именно, речь идёт о том, что имеется HTML-страница, которую надо оснастить неким функционалом, реализованным в какой-то JS-библиотеке. Для этого библиотеку подключают к странице с помощью тега <script>. При этом надо отметить, что рассматриваемый здесь метод использования Vue подходит не только для разработки учебного приложения. Он находит применение и в реальных проектах.
Обычно довольно сложно вводить новые инструменты, библиотеки или фреймворки в реальные проекты, скажем, в организации, где работает программист. Например, вам очень нравится работать с Vue. Вы идёте к начальству и спрашиваете — можно ли вам переписать весь проект на Vue. В ответ на такой вопрос вам, почти без вариантов, тут же ответят отказом. Если же вы предложите использовать Vue на некоей странице, разработкой которой вы в данный момент занимаетесь, то такое предложение уже вполне может быть принято.
В следующем примере мы разработаем весьма примитивное приложение, которое хорошо тем, что на нём будет очень удобно рассмотреть некоторые концепции Vue.
▍«Hello, Vue!»
В этом приложении мы собираемся вывести на экран текст «Hello, Vue!», а ниже текста — текущие время и дату. Затем мы напишем код, который поддерживает дату и время в актуальном состоянии. В результате пользователь приложения сможет пользоваться им как обычными часами, наблюдая течение времени. Создадим новую папку, в ней создадим файл index.html, а в этот файл добавим следующий код:
<!DOCTYPE html>
<html lang="en">
<head>
  <meta charset="UTF-8">
  <meta name="viewport" content="width=device-width, initial-scale=1.0">
  <meta http-equiv="X-UA-Compatible" content="ie=edge">
  <title>Hello, Vue.js</title>
</head>
<body>

</body>
</html>
Теперь у нас есть каркас страницы, основа будущего приложения. Поэтому нашим следующим шагом будет подключение к этой странице скрипта Vue.js. Добавим в код страницы, прямо над закрывающим тегом </body>, следующее:
<!-- Версия для разработки включает в себя возможность вывода в консоль полезных уведомлений -->
<script src="https://cdn.jsdelivr.net/npm/vue/dist/vue.js"></script>
<script>

</script>
Обратите внимание на комментарий. Он указывает на одну важную вещь. А именно, сейчас мы подключили к странице версию Vue, предназначенную для разработки. Если некая страница предназначена для реального использования, то к ней нужно подключать продакшн-версию скрипта. Подробности об этом можно почитать здесь.
Теперь, после подключения скрипта, нам, в первую очередь, нужно добавить на страницу корневой элемент, к которому будет подключён экземпляр Vue:
<div id="app">

</div>
После этого создадим новый экземпляр Vue и сообщим ему о том, к какому корневому элементу ему нужно подключиться:
<script>
  const app = new Vue({
    el: '#app'
  })
</script>
Теперь создадим пару переменных. Они будут хранить значения, которые мы используем для вывода информации на страницу. Делается это путём объявления свойств объекта data:
<script>
  const app = new Vue({
    el: '#app',
    data: {
      message: 'Hello, Vue!',
      now: new Date()

  })
</script>
Сейчас, когда данные готовы, мы готовы прибегнуть к возможностям Vue по выводу их на страницу. Делается это с использованием простых, удобных для восприятия конструкций:
<div id="app">
  <h1>{{ message }}</h1>
  <p>{{ now }}</p>
</div>
Сейчас вы можете поздравить себя с тем, что вы только что создали своё первое Vue.js-приложение. Если открыть index.html в браузере, то в нём должна вывестись страница, на которой крупными буквами написано «Hello, Vue!». Ниже этой надписи должна находиться строка, выводящая текущие дату и время. В ходе разработки и исследования моего варианта примера я пользовался Visual Studio Code и расширением Live Server.
То, что мы тут сделали, не выглядит как особенно продвинутый проект. Но в недрах Vue происходит много всего такого, что позволяет этому проекту работать так, как нам нужно. Фреймворк наладил связь между DOM и данными, после чего приложение стало реактивным. Как нам это проверить? Очень просто — достаточно открыть JS-консоль (прямо на странице приложения) и что-нибудь записать в app.message. Это должно привести к изменению надписи, выводимой на странице. Ниже показано то, как это может выглядеть.

Исследование приложения
Vue так же даёт разработчику возможность создавать обработчики для событий жизненного цикла компонентов. Это означает, что мы можем прослушивать события вроде created, mounted и destroyed. При возникновении события можно организовать выполнение некоего кода. Я не буду вдаваться в подробности, так как основная цель этого материала — продемонстрировать различные методы создания Vue-приложений, а не разбирать все тонкости фреймворка. Однако сейчас мы всё же посмотрим на то, как выглядит обработка событий жизненного цикла компонентов и завершим работу над нашим первым приложением.
Благодаря следующему коду значение переменной now будет обновляться каждую секунду. В ходе монтирования Vue мы, с помощью setInterval, настраиваем ежесекундный вызов функции, обновляющей дату и время. Создавать обработчики событий жизненного цикла можно, добавляя соответствующие методы в объект methods. Это очень похоже на то, как мы работали с объектом data. Вот этот код:
<script>
  const app = new Vue({
    el: '#app',
    data: {
      message: 'Hello Vue!',
      now: new Date()
    },
    methods: {
      updateDate() {
        this.now = new Date();
      }
    },
    mounted() {
      setInterval(() => {
        this.updateDate();
      }, 1000);
    }
  })
</script>
Если открыть эту страницу в браузере, то её внешний вид не изменится, но выводимое на ней время будет каждую секунду обновляться. При этом нам нет нужды в том, чтобы обновлять DOM вручную. Vue связал данные с DOM. При изменении данных меняется и то, что показано на странице.
Вариант №2: Vue CLI
Хотя мы и создали приложение, просто подключив скрипт Vue к странице, такой подход не отличается хорошей масштабируемостью. Если нужно разработать полноценное одностраничное приложение (Single Page Application, SPA) и при этом хочется воспользоваться вспомогательными инструментами Vue, тогда лучше всего будет прибегнуть к Vue CLI.
Если вы из тех, кто не очень любит работать в командной строке, тогда вы вполне можете воспользоваться инструментом с аналогичными возможностями, имеющим графический интерфейс (Vue UI).
▍Установка Vue CLI
Для начала нам нужно установить Vue CLI. Прежде чем это сделать — нужно обзавестись Node.js и npm. Если вы раньше не работали с Node.js и npm — уделите некоторое время на то, чтобы с ними познакомиться и немного в них разобраться. Вот команда, с помощью которой можно установить Vue CLI:
npm install -g @vue/cli
Для создания нового приложения можно воспользоваться командой vue create. Узнать список команд, которые поддерживает vue, можно с помощью команды vue -h.

Список команд, поддерживаемых утилитой vue
Команда create принимает имя приложения. Создадим новое Vue-приложение, выполнив следующую команду:
vue create hello-vue
В ходе выполнения этой команды в текущей директории будет создана новая папка hello-vue. Подробное описание процесса создания приложения с помощью vue create достойно отдельной статьи.
Сейчас же нам достаточно согласиться с предлагаемыми по умолчанию параметрами. Это приведёт к созданию нового приложения.

Создание нового приложения с помощью Vue CLI
Теперь перейдём в папку hello-vue, откроем файл, который находится по адресу src/components/HelloWorld.vue, и заменим всё его содержимое на следующий код:
<template>
  <div class="hello">
    <h1>{{ msg }}</h1>
    <p>{{ now }}</p>
  </div>
</template>

<script>
export default {
  name: "HelloWorld",
  props: {
    msg: String
  },
  data() {
    return {
      now: new Date()
    };
  },
  methods: {
    updateDate() {
      this.now = new Date();

  },
  mounted() {
    setInterval(() => {
      this.updateDate();
    }, 1000);

};
</script>
Обратите внимание на то, что значение текста, который оказывается в msg, задаётся в файле src/App.vue.
Теперь, в командной строке или во встроенном в ваш редактор терминале, выполните следующую команду:
npm run serveОна запустит сервер, после чего выдаст сведения о том, как открыть начальную страницу приложения. А именно, это http://localhost:8080/.

Vue-приложение в браузере
Тут мы рассмотрели использование Vue CLI лишь весьма поверхностно. Однако я надеюсь, что этот пример показал вам то, как легко с помощью Vue CLI создавать новые приложения, которые обеспечены надёжной инфраструктурой и могут масштабироваться сообразно росту нужд развивающегося проекта.
Вариант №3: Vue UI
Вместе с Vue CLI, с инструментом командной строки, устанавливается и инструмент Vue UI. Для того чтобы его запустить — воспользуйтесь следующей командой:
vue uiВ ходе её выполнения будет открыта страница нового приложения, находящаяся по адресу http://localhost:8000/dashboard.

Страница Vue UI
С помощью Vue UI можно создать новый проект, который будет обладать теми же возможностями, что и проект, созданный средствами командной строки.

Создание нового проекта в Vue UI
После того как настройка проекта будет завершена, запустить его можно прямо из Vue UI, перейдя в раздел Project tasks и нажав на соответствующую кнопку.

Запуск приложения в Vue UI
Вариант №4: CodeSandbox
Хотя вышерассмотренные варианты создания первого Vue-приложения и позволили нам достичь поставленной цели, они требуют некоторой настройки окружения разработки. Возможно, вам это не подходит и вы до сих пор не создали своё первое Vue-приложение. Если так — тогда сейчас мы рассмотрим ещё один способ работы с Vue. Он заключается в использовании онлайновых сред разработки, одной из которых является CodeSandbox.
Прежде чем создавать проекты на CodeSandbox, вам понадобится зарегистрироваться на сайте или войти в систему с использованием GitHub-аккаунта. После этого нужно создать новую «песочницу» (в рамках проекта это называется «sandbox») и найти Vue среди доступных шаблонов (на закладке Popular templates или Client templates).

Создание нового проекта, основанного на Vue, в CodeSandbox
После этого в вашем распоряжении окажется новое Vue-приложение. На следующем рисунке можно видеть, что в левой панели можно работать с файлами проекта, в центре находится окно редактора, а справа — область предварительного просмотра, в которой выводится работающее приложение.

Работа над приложением в CodeSandbox
Откройте в редакторе файл src/components/HelloWorld.vue и замените его содержимое на следующий код:
<template>
  <div class="hello">
    <h1>{{ msg }}</h1>
    <p>{{ now }}</p>
  </div>
</template>

<script>
export default {
  name: "HelloWorld",
  props: {
    msg: String
  },
  data() {
    return {
      now: new Date()
    };
  },
  methods: {
    updateDate() {
      this.now = new Date();

  },
  mounted() {
    setInterval(() => {
      this.updateDate();
    }, 1000);

};
</script>
После этого вы увидите то же приложение, которым мы уже занимались. В ходе работы над проектом может возникнуть необходимость в том, чтобы кому-то его показать. Например — для того, чтобы о чём-то посоветоваться. CodeSandbox позволяет сделать это с помощью специальной ссылки.

Работа над приложением в CodeSandbox
Полезные ресурсы
Вот ссылки на некоторые из моих любимых ресурсов по Vue. Они помогут вам продвигаться в деле освоения этого фреймворка. Например — вот страница Awesome Vue, посетив которую можно получить представление о масштабах экосистемы Vue. Здесь можно найти репозитории Vue. Вот официальный блог проекта. Вот сайт сообщества Vue-разработчиков. Вот и вот — подкасты по Vue. Вот — страницы нескольких проектов, основанных на Vue: VuePress, Nuxt, Gridsome.
Что дальше?
Независимо от того, каким фреймворком вы пользуетесь для разработки фронтенда — вам нужно поддерживать в хорошем состоянии свои знания по JavaScript. Чем больше времени вы сможете уделить совершенствованию своих знаний по JS — тем лучше. Если вы хорошо знаете JavaScript — это значит, что вы сможете справиться с любым фреймворком или с любой библиотекой, с которыми вам может понадобиться работать.
Я уже говорил о руководстве по Vue из официальной документации. Но о нём стоит упомянуть снова. Я бы, если был бы начинающим разработчиком, постарался бы как можно тщательнее разобраться с этим руководством, читал бы его и перечитывал. Но при этом я не забывал бы испытывать на практике те примеры кода, которые там встречаются. Не зря говорят, что повторенье — мать ученья. Повторение играет важную роль в процессе изучения новых технологий, и без него вам не обойтись.
В процессе работы с документацией стоит обратить особое внимание на следующие базовые концепции Vue:
- Компоненты.
- Связывание данных.
- Обработка событий.
- Директивы.
- Методы.
- Вычисляемые свойства.
- Жизненный цикл компонентов.
- Свойства, передаваемые компонентам.
Не стремитесь пока к созданию больших приложений. Сосредоточьтесь на освоении базовых вещей, а всё остальное придёт со временем.
Итоги
Если вы следите за моими публикациями в Twitter, то вы знаете, что я — большой фанат Vue. Мне нравится создавать приложения, основанные на компонентах. Я полагаю, что использование Vue не только упрощает работу, но и делает процесс написания кода приятным и увлекательным занятием.
Уважаемые читатели! Если вам приходилось недавно изучать свой первый клиентский фреймворк — просим рассказать о том, как это было.
Специально для вас мы перевели небольшой курс по Vue.js
→ Vue.js для начинающих, урок 1: экземпляр Vue
→ Vue.js для начинающих, урок 2: привязка атрибутов
→ Vue.js для начинающих, урок 3: условный рендеринг
→ Vue.js для начинающих, урок 4: рендеринг списков
→ Vue.js для начинающих, урок 5: обработка событий
→ Vue.js для начинающих, урок 6: привязка классов и стилей
→ Vue.js для начинающих, урок 7: вычисляемые свойства
→ Vue.js для начинающих, урок 8: компоненты

VueJS – Обзор
VueJS – это прогрессивный JavaScript-фреймворк с открытым исходным кодом, используемый для разработки интерактивных веб-интерфейсов. Это одна из известных платформ, используемая для упрощения веб-разработки. VueJS фокусируется на слое представления. Он может быть легко интегрирован в большие проекты для фронт-энда разработки без каких-либо проблем.
Начать установку VueJS очень легко. Любой разработчик может легко понять и создать интерактивные веб-интерфейсы в считанные сроки. VueJS создан Эван Ю, бывшим сотрудником Google. Первая версия VueJS была выпущена в феврале 2014 года. Недавно она достигла 64 828 звезд на GitHub, что сделало ее очень популярной.
Характеристики
Ниже приведены функции, доступные в VueJS.
Виртуальный ДОМ
VueJS использует виртуальный DOM, который также используется в других средах, таких как React, Ember и т. Д. Изменения не вносятся в DOM, вместо этого создается реплика DOM, которая представлена в виде структур данных JavaScript , Всякий раз, когда необходимо внести какие-либо изменения, они вносятся в структуры данных JavaScript, и последние сравниваются с исходной структурой данных. Окончательные изменения затем обновляются до реального DOM, который пользователь увидит изменяющимся. Это хорошо с точки зрения оптимизации, это дешевле и изменения могут быть внесены более быстрыми темпами.
Привязка данных
Функция привязки данных помогает манипулировать или присваивать значения атрибутам HTML, изменять стиль, назначать классы с помощью директивы привязки v-bind, доступной в VueJS.
Компоненты
Компоненты являются одной из важных функций VueJS, которая помогает создавать пользовательские элементы, которые можно повторно использовать в HTML.
Обработка событий
v-on – это атрибут, добавляемый к элементам DOM для прослушивания событий в VueJS.
Анимация / Transition
VueJS предоставляет различные способы применить переход к элементам HTML, когда они добавляются / обновляются или удаляются из DOM. VueJS имеет встроенный компонент перехода, который необходимо обернуть вокруг элемента для эффекта перехода. Мы можем легко добавить сторонние библиотеки анимации, а также добавить больше интерактивности в интерфейс.
Вычисленные свойства
Это одна из важных особенностей VueJS. Это помогает прослушивать изменения, внесенные в элементы пользовательского интерфейса, и выполняет необходимые вычисления. Для этого нет необходимости в дополнительном кодировании.
Шаблоны
VueJS предоставляет шаблоны на основе HTML, которые связывают DOM с данными экземпляра Vue. Vue компилирует шаблоны в виртуальные функции DOM Render. Мы можем использовать шаблон функций рендеринга, и для этого мы должны заменить шаблон функцией рендеринга.
Директивы
VueJS имеет встроенные директивы, такие как v-if, v-else, v-show, v-on, v-bind и v-model, которые используются для выполнения различных действий во внешнем интерфейсе.
Зрителей
Наблюдатели применяются к данным, которые изменяются. Например, формировать элементы ввода. Здесь нам не нужно добавлять какие-либо дополнительные события. Watcher заботится о любых изменениях данных, делая код простым и быстрым.
маршрутизация
Навигация между страницами осуществляется с помощью vue-router.
облегченный
Скрипт VueJS очень легкий и производительность также очень быстрая.
Вью-CLI
VueJS может быть установлен из командной строки с помощью интерфейса командной строки vue-cli. Это помогает легко создавать и компилировать проект, используя vue-cli.
Сравнение с другими структурами
Теперь давайте сравним VueJS с другими фреймворками, такими как React, Angular, Ember, Knockout и Polymer.
VueJS v / s React
Виртуальный ДОМ
Виртуальный DOM – это виртуальное представление дерева DOM. С виртуальным DOM создается объект JavaScript, который совпадает с реальным DOM. Каждый раз, когда необходимо внести изменения в DOM, создается новый объект JavaScript и вносятся изменения. Позже оба объекта JavaScript сравниваются, а окончательные изменения обновляются в реальном DOM.
VueJS и React используют виртуальный DOM, что делает его быстрее.
Шаблон v / s JSX
VueJS использует HTML, JS и CSS отдельно. Новичку очень легко понять и принять стиль VueJS. Подход на основе шаблонов для VueJS очень прост.
Реакт использует JSX подход. Все это JavaScript для ReactJS. HTML и CSS являются частью JavaScript.
Инструменты для установки
React использует приложение create response, а VueJS использует vue-cli / CDN / npm . Оба очень просты в использовании, и проект настроен со всеми основными требованиями. Для сборки React требуется веб-пакет, а для VueJS – нет. Мы можем начать с кодирования VueJS в любом месте jsfiddle или codepen, используя библиотеку cdn.
популярность
Реакт популярен чем VueJS. Возможность работы с React больше, чем у VueJS. За React стоит громкое имя, то есть Facebook, что делает его более популярным. Поскольку React использует основную концепцию JavaScript, он использует лучшие практики JavaScript. Тот, кто работает с React, безусловно, будет очень хорош со всеми концепциями JavaScript.
VueJS – это развивающийся фреймворк. В настоящее время возможности трудоустройства в VueJS меньше по сравнению с React. Согласно опросу, многие люди адаптируются к VueJS, что может сделать его более популярным по сравнению с React и Angular. Есть хорошее сообщество, работающее над различными функциями VueJS. Это сообщество поддерживает регулярные обновления vue-router.
VueJS позаимствовал у Angular и React хорошие детали и создал мощную библиотеку. VueJS намного быстрее по сравнению с React / Angular из-за своей легкой библиотеки.
VueJS v / s Angular
сходства
VueJS имеет много общего с Angular. Такие директивы, как v-if, v-for, почти аналогичны ngIf, ngFor of Angular. Они оба имеют интерфейс командной строки для установки проекта и его сборки. VueJS использует Vue-cli, а Angular использует angular-cli. Оба предлагают двустороннее связывание данных, рендеринг на стороне сервера и т. Д.
сложность
Vuejs очень легко учиться и начать с. Как уже говорилось ранее, новичок может взять библиотеку CDN VueJS и начать работать с codepen и jsfiddle.
Для Angular нам нужно пройти серию шагов по установке, и начинающим не сложно начать работу с Angular. Он использует TypeScript для кодирования, что сложно для людей, пришедших из основного фона JavaScript. Тем не менее, его легче освоить пользователям, принадлежащим Java и C # background.
Спектакль
Чтобы решить производительность, это зависит от пользователей. Размер файла VueJS намного меньше, чем у Angular. Сравнение производительности фреймворка приведено в следующей ссылке http://stefankrause.net/js-frameworks-benchmark4/webdriver-ts/table.html.
популярность
В настоящее время Angular более популярен, чем VueJS. Многие организации используют Angular, что делает его очень популярным. Возможности трудоустройства также больше для кандидатов, имеющих опыт работы в Angular. Тем не менее, VueJS занимает место на рынке и может считаться хорошим конкурентом для Angular и React.
зависимости
Angular предоставляет множество встроенных функций. Мы должны импортировать необходимые модули и начать работу с ними, например, @ angular / animations, @ angular / form.
VueJS не имеет всех встроенных функций, как Angular, и для его работы необходимо использовать сторонние библиотеки.
гибкость
VueJS может быть легко объединен с любым другим крупным проектом без каких-либо проблем. С Angular будет не так просто начать работать с любым другим существующим проектом.
Обратная совместимость
У нас были AngularJS, Angular2 и теперь Angular4. AngularJS и Angular2 имеют огромную разницу. Приложение проекта, разработанное в AngularJS, не может быть преобразовано в Angular2 из-за основных отличий.
Последняя версия VueJS – 2.0, и это хорошо с обратной совместимостью. Это обеспечивает хорошую документацию, которая очень проста для понимания.
Машинопись
Angular использует TypeScript для своего кодирования. Пользователи должны иметь знание Typescript, чтобы начать работу с Angular. Однако мы можем начать с кодирования VueJS в любом месте jsfiddle или codepen, используя библиотеку cdn. Мы можем работать со стандартным JavaScript, который очень легко начать.
VueJS v / s Ember
сходства
Ember предоставляет инструмент командной строки Ember, то есть ember-cli для простой установки и компиляции для проектов Ember.
VueJS также имеет инструмент командной строки vue-cli для запуска и сборки проектов.
Они оба имеют такие функции, как маршрутизатор, шаблон и компоненты, что делает их очень богатыми в качестве инфраструктуры пользовательского интерфейса.
Спектакль
VueJS имеет лучшую производительность по сравнению с Ember. Ember добавил механизм рендеринга мерцания с целью повышения производительности рендеринга, который похож на VueJS и React с использованием виртуального DOM. Тем не менее, VueJS имеет лучшую производительность по сравнению с Ember.
VueJS v / s Knockout
Knockout обеспечивает хорошую поддержку браузера. Он поддерживается в более низкой версии IE, тогда как VueJS не поддерживается в IE8 и ниже. Развитие нокаута со временем замедлилось. В последнее время популярность не такова.
С другой стороны, VueJS начал набирать популярность благодаря команде Vue, предоставляющей регулярные обновления.
VueJS v / s Полимер
Полимерная библиотека была разработана Google. Он используется во многих проектах Google, таких как Google I / O, Google Earth, Google Play Music и т. Д. Он предлагает привязку данных и вычисляемые свойства, аналогичные VueJS.
Определение пользовательского элемента Polymer включает простой JavaScript / CSS, свойства элемента, обратные вызовы жизненного цикла и методы JavaScript. Для сравнения, VueJS позволяет легко использовать JavaScript / html и CSS.
Polymer использует функции веб-компонентов и требует полифилов для браузеров, которые не поддерживают эти функции. VueJS не имеет таких зависимостей и прекрасно работает во всех браузерах IE9 +.
VueJS – Настройка среды
Есть много способов установить VueJS. Некоторые способы выполнения установки обсуждаются заранее.
Использование тега <script> непосредственно в файле HTML
<html>
   <head>
      <script type = "text/javascript" src = "vue.min.js"></script>
   </head>
   <body></body>
</html>
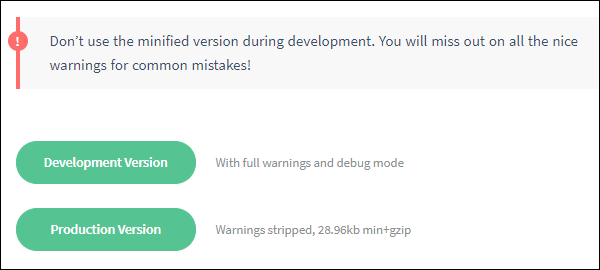
Перейдите на домашний сайт https://vuejs.org/v2/guide/installation.html VueJS и загрузите vue.js по мере необходимости. Есть две версии для использования – производственная версия и версия для разработки. Разрабатываемая версия не свернута, тогда как производственная версия свернута, как показано на следующем снимке экрана. Разработка версии поможет с предупреждениями и режимом отладки при разработке проекта.
Использование CDN
Мы также можем начать использовать файл VueJS из библиотеки CDN. Ссылка https://unpkg.com/vue предоставит последнюю версию VueJS. VueJS также доступен на jsDelivr ( https://cdn.jsdelivr.net/npm/vue/dist/vue.js ) и cdnjs ( https://cdnjs.cloudflare.com/ajax/libs/vue/2.4.0/ vue.js ).
Мы можем разместить файлы с нашей стороны, если потребуется, и приступить к разработке VueJS.
Использование NPM
Для крупномасштабных приложений с VueJS рекомендуется устанавливать с использованием пакета npm. Он поставляется с Browserify и Webpack вместе с другими необходимыми инструментами, которые помогают в разработке. Ниже приведена команда для установки с использованием npm.
npm install vue
Использование командной строки CLI
VueJS также предоставляет CLI для установки vue и начала работы с активацией сервера. Чтобы установить с помощью CLI, нам нужно установить CLI, что делается с помощью следующей команды.
npm install --global vue-cli

После этого он показывает версию CLI для VueJS. Это займет несколько минут для установки.
+ vue-cli@2.8.2
added 965 packages in 355.414s
Ниже приведена команда для создания проекта с использованием Webpack.
vue init webpack myproject

Чтобы начать, используйте следующую команду.
cd myproject
npm install
npm run dev


Как только мы выполним npm run dev, он запустит сервер и предоставит URL для отображения в браузере, как показано на следующем снимке экрана.

Структура проекта с использованием CLI выглядит следующим образом.

VueJS – Введение
Vue – это JavaScript-фреймворк для создания пользовательских интерфейсов. Его основная часть ориентирована в основном на слой представления, и это очень легко понять. Версия Vue, которую мы собираемся использовать в этом руководстве, – 2.0.
Поскольку Vue в основном создан для разработки веб-интерфейса, в следующих главах мы будем иметь дело с большим количеством файлов HTML, JavaScript и CSS. Чтобы понять детали, давайте начнем с простого примера.
В этом примере мы собираемся использовать версию разработки vuejs.
пример
<html>
   <head>
      <title>VueJs Introduction</title>
      <script type = "text/javascript" src = "js/vue.js"></script>
   </head>
   <body>
      <div id = "intro" style = "text-align:center;">
         <h1>{{ message }}</h1>
      </div>
      <script type = "text/javascript">
         var vue_det = new Vue({
            el: '#intro',
            data: {
               message: 'My first VueJS Task'
            }
         });
      </script>
   </body>
</html>
Выход

Это первое приложение, которое мы создали с помощью VueJS. Как видно из приведенного выше кода, мы включили vue.js в начало файла .html.
<script type = "text/javascript" src = "js/vue.js"></script>
В теле добавлен элемент div, который печатает «Моя первая задача VueJS» в браузере.
<div id = "intro" style = "text-align:center;">
   <h1>{{ message }}</h1>
</div>
Мы также добавили сообщение в интерполяции, то есть {{}} . Это взаимодействует с VueJS и печатает данные в браузере. Чтобы получить значение сообщения в DOM, мы создаем экземпляр vuejs следующим образом:
var vue_det = new Vue({
   el: '#intro',
   data: {
      message: 'My first VueJS Task'
   }
})
В приведенном выше фрагменте кода мы вызываем экземпляр Vue, который принимает идентификатор элемента DOM, т. Е. E1: ‘# intro’, это идентификатор элемента div. Есть данные с сообщением, которым присваивается значение «Моя первая задача VueJS» . VueJS взаимодействует с DOM и изменяет значение в DOM {{message}} с помощью «Моя первая задача VueJS» .
Если нам случится изменить значение сообщения в консоли, то же самое будет отражено в браузере. Например –

Детали консоли

В приведенной выше консоли мы напечатали объект vue_det, который является экземпляром Vue. Мы обновляем сообщение с «VueJs is интересно», и то же самое немедленно изменяется в браузере, как показано на скриншоте выше.
Это просто базовый пример, показывающий связь VueJS с DOM и то, как мы можем управлять этим. В следующих нескольких главах мы узнаем о директивах, компонентах, условных циклах и т. Д.
VueJS – Экземпляры
Чтобы начать с VueJS, нам нужно создать экземпляр Vue, который называется корневым экземпляром Vue .
Синтаксис
var app = new Vue({
   // options
})
Давайте посмотрим на пример, чтобы понять, что должно быть частью конструктора Vue.
<html>
<head>
<title>VueJs Instance</title>
<script type = "text/javascript" src = "js/vue.js"></script>
</head>
<body>
<div id = "vue_det">
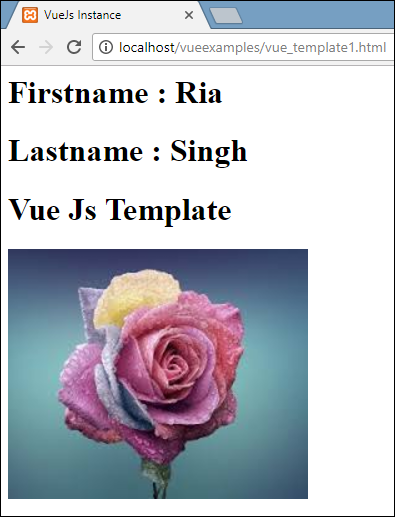
<h1>Firstname : {{firstname}}</h1>
<h1>Lastname : {{lastname}}</h1>
<h1>{{mydetails()}}</h1>
</div>
<script type = "text/javascript" src = "js/vue_instance.js"></script>
</body>
</html>
vue_instance.js
var  vm = new Vue({
   el: '#vue_det',
   data: {
      firstname : "Ria",
      lastname  : "Singh",
      address    : "Mumbai"
   },
   methods: {
      mydetails : function() {
         return "I am "+this.firstname +" "+ this.lastname;
      }
   }
})
Для Vue есть параметр el . Требуется идентификатор элемента DOM. В приведенном выше примере у нас есть идентификатор #vue_det . Это идентификатор элемента div, который присутствует в .html.
<div id = "vue_det"></div>
Теперь то, что мы собираемся сделать, повлияет на элемент div и ничего на него не повлияет.
Далее мы определили объект данных. Он имеет значение имя, фамилия и адрес.
То же самое назначается внутри div. Например,
<div id = "vue_det">
   <h1>Firstname : {{firstname}}</h1>
   <h1>Lastname : {{lastname}}</h1>
</div>
Значение Firstname: {{firstname}} будет заменено внутри интерполяции, т. Е. {{}} На значение, назначенное в объекте данных, т.е. Ria. То же самое касается фамилии.
Далее у нас есть методы, в которых мы определили функцию mydetails и возвращаемое значение. Он назначается внутри div как
<h1>{{mydetails()}}</h1>
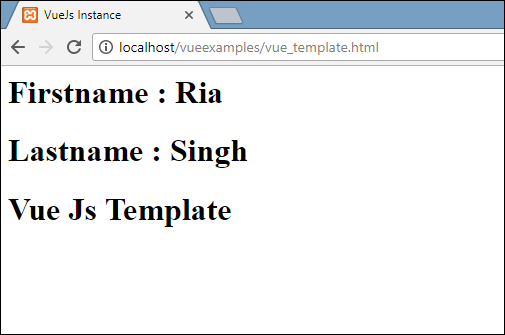
Следовательно, внутри {{}} вызывается функция mydetails. Значение, возвращаемое в экземпляре Vue, будет напечатано внутри {{}}. Проверьте вывод для справки.
Выход

Теперь нам нужно передать параметры конструктору Vue, который в основном содержит данные, шаблон, элемент для монтирования, методы, обратные вызовы и т. Д.
Давайте посмотрим на варианты, которые будут переданы в Vue.
#data – этот тип данных может быть объектом или функцией. Vue преобразует свои свойства в методы получения / установки, чтобы сделать его реактивным.
Давайте посмотрим, как данные передаются в опциях.
пример
<html>
   <head>
      <title>VueJs Introduction</title>
      <script type = "text/javascript" src = "js/vue.js"></script>
   </head>
   <body>
      <script type = "text/javascript">
         var _obj = { fname: "Raj", lname: "Singh"}

         // direct instance creation
         var vm = new Vue({
            data: _obj
         });
         console.log(vm.fname);
         console.log(vm.$data);
         console.log(vm.$data.fname);
      </script>
   </body>
</html>
Выход

console.log (vm.fname); // печатает Радж
console.log (ВМ $ данных.); печатает полный объект, как показано выше
console.log (VM $ data.fname.); // печатает Радж
Если есть компонент, объект данных должен быть передан из функции, как показано в следующем коде.
<html>
   <head>
      <title>VueJs Introduction</title>
      <script type = "text/javascript" src = "js/vue.js"></script>
   </head>
   <body>
      <script type = "text/javascript">
         var _obj = { fname: "Raj", lname: "Singh"};

         // direct instance creation
         var vm = new Vue({
            data: _obj
         });
         console.log(vm.fname);
         console.log(vm.$data);
         console.log(vm.$data.fname);

         // must use function when in Vue.extend()
         var Component = Vue.extend({
            data: function () {
               return _obj
            }
         });
         var myComponentInstance = new Component();
         console.log(myComponentInstance.lname);
         console.log(myComponentInstance.$data);
      </script>
   </body>
</html>
В случае компонента данные – это функция, которая используется с Vue.extend, как показано выше. Данные являются функцией. Например,
data: function () {
   return _obj
}
Чтобы обратиться к данным из компонента, нам нужно создать его экземпляр. Например,
var myComponentInstance = new Component();
Чтобы получить детали из данных, нам нужно сделать то же самое, что мы сделали с родительским компонентом выше. Например,
console.log(myComponentInstance.lname);
console.log(myComponentInstance.$data);
Ниже приведены данные, отображаемые в браузере.

Props – тип для реквизита представляет собой массив строки или объекта. Он принимает синтаксис на основе массива или объекта. Они называются атрибутами, используемыми для приема данных от родительского компонента.
Пример 1
Vue.component('props-demo-simple', {
   props: ['size', 'myMessage']
})
Пример 2
Vue.component('props-demo-advanced', {
   props: {
      // just type check
      height: Number,

      // type check plus other validations
      age: {
         type: Number,
         default: 0,
         required: true,
         validator: function (value) {
            return value >= 0
         }
      }
   }
})
propsData – используется для модульного тестирования.
Тип – массив строк. Например, {[key: string]: any}. Его нужно передать при создании экземпляра Vue.
пример
var Comp = Vue.extend({
   props: ['msg'],
   template: '<div>{{ msg }}</div>'
})
var vm = new Comp({
   propsData: {
      msg: 'hello'
   }
})
Вычисляется – Тип: {[ключ: строка]: Функция | {get: Function, set: Function}}
пример
<html>
   <head>
      <title>VueJs Introduction</title>
      <script type = "text/javascript" src = "js/vue.js"></script>
   </head>
   <body>
      <script type = "text/javascript">
         var vm = new Vue({
            data: { a: 2 },
            computed: {

               // get only, just need a function
               aSum: function () {
                  return this.a + 2;
               },

               // both get and set
               aSquare: {
                  get: function () {
                     return this.a*this.a;
                  },
                  set: function (v) {
                     this.a = v*2;
                  }
               }
            }
         })
         console.log(vm.aSquare);  // -> 4
         vm.aSquare = 3;
         console.log(vm.a);       // -> 6
         console.log(vm.aSum); // -> 8
      </script>
   </body>
</html>
Computed имеет две функции aSum и aSquare .
Функция aSum просто возвращает this.a + 2 . Функция aSquare снова две функции получить и установить .
Переменная vm является экземпляром Vue и вызывает aSquare и aSum. Также vm.aSquare = 3 вызывает функцию set из aSquare, а vm.aSquare вызывает функцию get. Мы можем проверить вывод в браузере, который выглядит как на следующем скриншоте.

Методы. Методы должны быть включены в экземпляр Vue, как показано в следующем коде. Мы можем получить доступ к функции, используя объект Vue.
<html>
   <head>
      <title>VueJs Introduction</title>
      <script type = "text/javascript" src = "js/vue.js"></script>
   </head>
   <body>
      <script type = "text/javascript">
         var vm = new Vue({
            data: { a: 5 },
            methods: {
               asquare: function () {
                  this.a *= this.a;
               }
            }
         })
         vm.asquare();
         console.log(vm.a); // 25
      </script>
   </body>
</html>
Методы являются частью конструктора Vue. Сделаем вызов метода с использованием объекта Vue vm.asquare () , значение свойства a обновляется в функции asquare . Значение a изменяется с 1 на 25, и то же самое отражается в следующей консоли браузера.

VueJS – Шаблон
В предыдущих главах мы узнали, как получить вывод в виде текстового содержимого на экране. В этой главе мы узнаем, как получить вывод в виде шаблона HTML на экране.
Чтобы понять это, давайте рассмотрим пример и увидим вывод в браузере.
<html>
   <head>
      <title>VueJs Instance</title>
      <script type = "text/javascript" src = "js/vue.js"></script>
   </head>
   <body>
      <div id = "vue_det">
         <h1>Firstname : {{firstname}}</h1>
         <h1>Lastname : {{lastname}}</h1>
         <div>{{htmlcontent}}</div>
      </div>
      <script type = "text/javascript" src = "js/vue_template.js"></script>
   </body>
</html>
vue_template.js
var vm = new Vue({
   el: '#vue_det',
   data: {
      firstname : "Ria",
      lastname  : "Singh",
      htmlcontent : "<div><h1>Vue Js Template</h1></div>"
   }
})
Теперь предположим, что мы хотим показать HTML-контент на странице. Если мы используем его с интерполяцией, то есть с двойными фигурными скобками, это то, что мы получим в браузере.

Если мы видим, что HTML-контент отображается так же, как мы указали в переменной htmlcontent, это не то, что нам нужно, мы хотим, чтобы оно отображалось в правильном HTML-контенте в браузере.
Для этого нам понадобится директива v-html . В тот момент, когда мы присваиваем директиву v-html элементу html, VueJS знает, что он должен выводить ее в виде HTML-содержимого. Давайте добавим директиву v-html в файл .html и увидим разницу.
<html>
   <head>
      <title>VueJs Instance</title>
      <script type = "text/javascript" src = "js/vue.js"></script>
   </head>
   <body>
      <div id = "vue_det">
         <h1>Firstname : {{firstname}}</h1>
         <h1>Lastname : {{lastname}}</h1>
         <div v-html = "htmlcontent"></div>
      </div>
      <script type = "text/javascript" src = "js/vue_template.js"></script>
   </body>
</html>
Теперь нам не нужны двойные фигурные скобки для отображения содержимого HTML, вместо этого мы использовали v-html = ”htmlcontent”, где htmlcontent определен в файле js следующим образом:
var vm = new Vue({
   el: '#vue_det',
   data: {
      firstname : "Ria",
      lastname  : "Singh",
      htmlcontent : "<div><h1>Vue Js Template</h1></div>"
   }
})
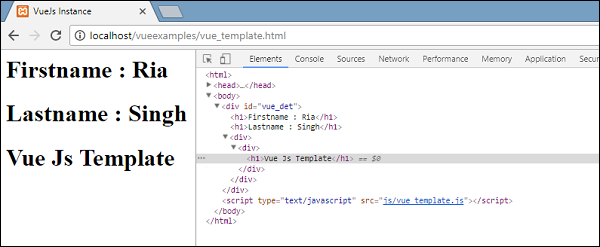
Вывод в браузере выглядит следующим образом –
Если мы проверим браузер, то увидим, что содержимое добавляется так же, как оно определено в файле .js, в переменную htmlcontent: “<div> <h1> Шаблон Vue Js </ h1> </ div>” ,
Давайте посмотрим на элемент проверки в браузере.
Мы видели, как добавить шаблон HTML в DOM. Теперь мы увидим, как добавить атрибуты к существующим элементам HTML.
Предположим, у нас есть тег image в файле HTML, и мы хотим назначить src, который является частью Vue.
пример
<html>
   <head>
      <title>VueJs Instance</title>
      <script type = "text/javascript" src = "js/vue.js"></script>
   </head>
   <body>
      <div id = "vue_det">
         <h1>Firstname : {{firstname}}</h1>
         <h1>Lastname : {{lastname}}</h1>
         <div v-html = "htmlcontent"></div>
         <img src = "" width = "300" height = "250" />
      </div>
      <script type = "text/javascript" src = "js/vue_template1.js"></script>
   </body>
</html>
Посмотрите на тег img выше, src пуст. Нам нужно добавить src к нему из vue js. Давайте посмотрим, как это сделать. Мы будем хранить img src в объекте данных в файле .js следующим образом:
var vm = new Vue({
   el: '#vue_det',
   data: {
      firstname : "Ria",
      lastname  : "Singh",
      htmlcontent : "<div><h1>Vue Js Template</h1></div>",
      imgsrc : "images/img.jpg"
   }
})
Если мы назначим src следующим образом, вывод в браузере будет таким, как показано на следующем снимке экрана.
<img src = "{{imgsrc}}" width = "300" height = "250" />

Мы получаем сломанное изображение. Чтобы назначить любой атрибут тегу HMTL, нам нужно использовать директиву v-bind . Давайте добавим src к изображению с помощью директивы v-bind.
Вот как это назначено в .html файле.
<html>
   <head>
      <title>VueJs Instance</title>
      <script type = "text/javascript" src = "js/vue.js"></script>
   </head>
   <body>
      <div id = "vue_det">
         <h1>Firstname : {{firstname}}</h1>
         <h1>Lastname : {{lastname}}</h1>
         <div v-html = "htmlcontent"></div>
         <img v-bind:src = "imgsrc" width = "300" height = "250" />
      </div>
      <script type = "text/javascript" src = "js/vue_template1.js"></script>
   </body>
</html>
Нам нужно добавить префикс src к v-bind: src = ”imgsrc”, а имя переменной к src.
Ниже приведен вывод в браузере.
Давайте проверим и посмотрим, как выглядит src с v-bind.

Как видно на скриншоте выше, src назначается без каких-либо свойств vuejs.
VueJS – Компоненты
Компоненты Vue являются одной из важных функций VueJS, которая создает пользовательские элементы, которые можно повторно использовать в HTML.
Давайте поработаем с примером и создадим компонент, который даст лучшее понимание того, как компоненты работают с VueJS.
пример
<html>
   <head>
      <title>VueJs Instance</title>
      <script type = "text/javascript" src = "js/vue.js"></script>
   </head>
   <body>
      <div id = "component_test">
         <testcomponent></testcomponent>
      </div>
      <div id = "component_test1">
         <testcomponent></testcomponent>
      </div>
      <script type = "text/javascript" src = "js/vue_component.js"></script>
   </body>
</html>
vue_component.js
Vue.component('testcomponent',{
   template : '<div><h1>This is coming from component</h1></div>'
});
var vm = new Vue({
   el: '#component_test'
});
var vm1 = new Vue({
   el: '#component_test1'
});
В файле .html мы создали два элемента div с идентификаторами component_test и component_test1 . В файлах .js, показанных выше, два экземпляра Vue создаются с помощью идентификаторов div. Мы создали общий компонент, который будет использоваться с обоими экземплярами представления.
Чтобы создать компонент, следующий синтаксис.
Vue.component('nameofthecomponent',{ // options});
Как только компонент создан, имя компонента становится пользовательским элементом, и его можно использовать в созданном элементе экземпляра Vue, то есть внутри элемента div с идентификаторами component_test и component_test1 .
В файле .js мы использовали тестовый компонент в качестве имени компонента, и то же имя используется в качестве пользовательского элемента внутри divs.
пример
<div id = "component_test">
   <testcomponent></testcomponent>
</div>
<div id = "component_test1">
   <testcomponent></testcomponent>
</div>
В компонент, созданный в файле .js , мы добавили шаблон, которому мы присвоили HTML-код. Это способ регистрации глобального компонента , который можно сделать частью любого экземпляра vue, как показано в следующем сценарии.
Vue.component('testcomponent',{
   template : '<div><h1>This is coming from component</h1></div>'
});
При исполнении то же самое будет отражено в браузере.

Компонентам присваивается пользовательский тег элемента, т.е. <testcomponent> </ testcomponent> . Однако, когда мы проверяем то же самое в браузере, мы не заметим пользовательский тег в простом HTML, присутствующий в шаблоне, как показано на следующем снимке экрана.

Мы также напрямую сделали компоненты частью экземпляра vue, как показано в следующем сценарии.
var vm = new Vue({
   el: '#component_test',
   components:{
      'testcomponent': {
         template : '<div><h1>This is coming from component</h1></div>'
      }
   }
});
Это называется локальной регистрацией, и компоненты будут частью только созданного экземпляра vue.
До сих пор мы видели базовый компонент с базовыми опциями. Теперь давайте добавим еще несколько параметров, таких как данные и методы. Так же, как экземпляр Vue имеет данные и методы, компонент также разделяет. Следовательно, мы расширим код, который мы уже видели, с данными и методами.
пример
<html>
   <head>
      <title>VueJs Instance</title>
      <script type = "text/javascript" src = "js/vue.js"></script>
   </head>
   <body>
      <div id = "component_test">
         <testcomponent></testcomponent>
      </div>
      <div id = "component_test1">
         <testcomponent></testcomponent>
      </div>
      <script type = "text/javascript" src = "js/vue_component.js"></script>
   </body>
</html>
vue_component.js
Vue.component('testcomponent',{
   template : '<div v-on:mouseover = "changename()" v-on:mouseout = "originalname();"><h1>Custom Component created by <span id = "name">{{name}}</span></h1></div>',
   data: function() {
      return {
         name : "Ria"
      }
   },
   methods:{
      changename : function() {
         this.name = "Ben";
      },
      originalname: function() {
         this.name = "Ria";
      }
   }
});
var vm = new Vue({
   el: '#component_test'
});
var vm1 = new Vue({
   el: '#component_test1'
});
В файле .js выше мы добавили данные, которые являются функцией, которая возвращает объект. Объект имеет свойство name, которому присваивается значение «Ria». Это используется в следующем шаблоне.
template : '<div v-on:mouseover = "changename()" v-on:mouseout = "originalname();"><h1>Custom Component created by <span id = "name">{{name}}</span></h1></div>',
Несмотря на то, что данные имеют функцию в компонентах, мы можем использовать их свойства так же, как и с прямым экземпляром Vue. Также добавлены два метода: changeename и originalname. В changename мы меняем свойство name, а в originalname мы возвращаем его к исходному имени.
Мы также добавили два события в div, mouseover и mouseout. Детали событий будут обсуждаться в главе «События». Итак, пока mouseover вызывает метод changename, а mouseout вызывает метод originalname .
Отображение того же самого показано в следующем браузере.

Как видно из приведенного выше браузера, он отображает имя, назначенное в свойстве data, которое является тем же именем. Мы также назначили событие mouseover для div, а также mouseout. Посмотрим, что будет, когда мы наведем курсор мыши и наведем курсор мыши.
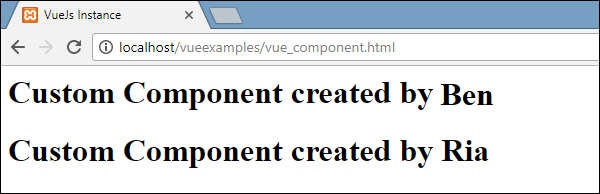
При наведении курсора мыши мы видим, что имя первого компонента изменено на Ben, однако второй остается без изменений. Это потому, что компонент данных является функцией, и он возвращает объект. Таким образом, когда оно изменяется в одном месте, то же самое не перезаписывается в других случаях.
Динамические Компоненты
Динамические компоненты создаются с использованием ключевого слова <component> </ component>, и оно связывается с использованием свойства, как показано в следующем примере.
пример
<html>
   <head>
      <title>VueJs Instance</title>
      <script type = "text/javascript" src = "js/vue.js"></script>
   </head>
   <body>
      <div id = "databinding">
         <component v-bind:is = "view"></component>
      </div>
      <script type = "text/javascript">
         var vm = new Vue({
            el: '#databinding',
            data: {
               view: 'component1'
            },
            components: {
               'component1': {
                  template: '<div><span style = "font-size:25;color:red;">Dynamic Component</span></div>'
               }
            }
         });
      </script>
   </body>
</html>
Выход

Динамический компонент создается с использованием следующего синтаксиса.
<component v-bind:is = "view"></component>
Он имеет v-bind: is = ”view”, и ему присваивается представление значений. Представление определяется в экземпляре Vue следующим образом.
var vm = new Vue({
   el: '#databinding',
   data: {
      view: 'component1'
   },
   components: {
      'component1': {
         template: '<div><span style = "font-size:25;color:red;">Dynamic Component</span></div>'
      }
   }
});
После выполнения шаблон динамического компонента отображается в браузере.
VueJS – Вычисленные свойства
Мы уже видели методы для экземпляра Vue и для компонентов. Вычисляемые свойства похожи на методы, но с некоторыми отличиями по сравнению с методами, которые мы обсудим в этой главе.
В конце этой главы мы сможем принять решение о том, когда использовать методы и когда использовать вычисляемые свойства.
Давайте разберемся с вычисленными свойствами на примере.
пример
<html>
   <head>
      <title>VueJs Instance</title>
      <script type = "text/javascript" src = "js/vue.js"></script>
   </head>
   <body>
      <div id = "computed_props">
         FirstName : <input type = "text" v-model = "firstname" /> <br/><br/>
         LastName : <input type = "text" v-model = "lastname"/> <br/><br/>
         <h1>My name is {{firstname}} {{lastname}}</h1>
         <h1>Using computed method : {{getfullname}}</h1>
      </div>
      <script type = "text/javascript" src = "js/vue_computedprops.js"></script>
   </body>
</html>
vue_computeprops.js
var vm = new Vue({
   el: '#computed_props',
   data: {
      firstname :"",
      lastname :"",
      birthyear : ""
   },
   computed :{
      getfullname : function(){
         return this.firstname +" "+ this.lastname;
      }
   }
})
Здесь мы создали .html файл с именем и фамилией. Имя и Фамилия – это текстовое поле, которое связано с использованием свойств имя и фамилия.
Мы вызываем вычисляемый метод getfullname, который возвращает имя и введенную фамилию.
computed :{
   getfullname : function(){
      return this.firstname +" "+ this.lastname;
   }
}
Когда мы вводим текстовое поле, функция возвращает то же самое, когда изменяются свойства имя или фамилия. Таким образом, с помощью computed нам не нужно делать ничего конкретного, например, помнить, чтобы вызвать функцию. В случае с computed он вызывается сам по себе, так как изменяются свойства, используемые внутри, то есть имя и фамилия.
То же самое отображается в следующем браузере. Напечатайте в текстовом поле, и то же самое будет обновлено, используя вычисляемую функцию.

Теперь давайте попробуем понять разницу между методом и вычисляемым свойством. Оба являются объектами. Внутри определены функции, которые возвращают значение.
В случае метода мы вызываем его как функцию, а для вычисляемого как свойство. Используя следующий пример, давайте поймем разницу между методом и вычисляемым свойством.
<html>
   <head>
      <title>VueJs Instance</title>
      <script type = "text/javascript" src = "js/vue.js"></script>
   </head>
   <body>
      <div id = "computed_props">
         <h1 style = "background-color:gray;">Random No from computed property: {{getrandomno}}</h1>
         <h1>Random No from method: {{getrandomno1()}}</h1>
         <h1>Random No from method : {{getrandomno1()}}</h1>
         <h1  style = "background-color:gray;">Random No from computed property: {{getrandomno}}</h1>
         <h1  style = "background-color:gray;">Random No from computed property: {{getrandomno}}</h1>
         <h1  style = "background-color:gray;">Random No from computed
            property: {{getrandomno}}</h1>
         <h1>Random No from method: {{getrandomno1()}}</h1>
         <h1>Random No from method: {{getrandomno1()}}</h1>
      </div>
      <script type = "text/javascript">
         var vm = new Vue({
            el: '#computed_props',
            data: {
               name : "helloworld"
            },
            methods: {
               getrandomno1 : function() {
                  return Math.random();
               }
            },
            computed :{
               getrandomno : function(){
                  return Math.random();
               }
            }
         });
      </script>
   </body>
</html>
В приведенном выше коде мы создали метод getrandomno1 и вычисляемое свойство с функцией getrandomno . Оба возвращают случайные числа, используя Math.random ().
Он отображается в браузере, как показано ниже. Метод и вычисляемое свойство вызываются много раз, чтобы показать разницу.

Если мы посмотрим на значения выше, то увидим, что случайные числа, возвращаемые из вычисляемого свойства, остаются неизменными независимо от того, сколько раз оно вызывается. Это означает, что при каждом вызове последнее значение обновляется для всех. Тогда как для метода это функция, следовательно, каждый раз, когда он вызывается, он возвращает другое значение.
Получить / установить в вычисляемых свойствах
В этом разделе мы узнаем о функциях get / set в вычисляемых свойствах на примере.
пример
<html>
   <head>
      <title>VueJs Instance</title>
      <script type = "text/javascript" src = "js/vue.js"></script>
   </head>
   <body>
      <div id = "computed_props">
         <input type = "text" v-model = "fullname" />
         <h1>{{firstName}}</h1>
         <h1>{{lastName}}</h1>
      </div>
      <script type = "text/javascript">
         var vm = new Vue({
            el: '#computed_props',
            data: {
               firstName : "Terry",
               lastName : "Ben"
            },
            methods: {
            },
            computed :{
               fullname : {
                  get : function() {
                     return this.firstName+" "+this.lastName;
                  }
               }
            }
         });
      </script>
   </body>
</html>
Мы определили одно поле ввода, которое связано с полным именем , которое является вычисляемым свойством. Он возвращает функцию с именем get , которая дает полное имя, то есть имя и фамилию. Также мы отобразили имя и фамилию как –
<h1>{{firstName}}</h1>
<h1>{{lastName}}</h1>
Давайте проверим то же самое в браузере.

Теперь, если мы изменим имя в текстовом поле, мы увидим, что то же самое не отражается в имени, отображаемом на следующем снимке экрана.

Давайте добавим функцию setter в вычисляемое свойство fullname.
<html>
   <head>
      <title>VueJs Instance</title>
      <script type = "text/javascript" src = "js/vue.js"></script>
   </head>
   <body>
      <div id = "computed_props">
         <input type = "text" v-model = "fullname" />
         <h1>{{firstName}}</h1>
         <h1>{{lastName}}</h1>
      </div>
      <script type = "text/javascript">
         var vm = new Vue({
            el: '#computed_props',
            data: {
               firstName : "Terry",
               lastName : "Ben"
            },
            methods: {
            },
            computed :{
               fullname : {
                  get : function() {
                     return this.firstName+" "+this.lastName;
                  },
                  set : function(name) {
                     var fname = name.split(" ");
                     this.firstName = fname[0];
                     this.lastName = fname[1]
                  }
               }
            }
         });
      </script>
   </body>
</html>
Мы добавили функцию set в вычисляемое свойство fullname.
computed :{
   fullname : {
      get : function() {
         return this.firstName+" "+this.lastName;
      },
      set : function(name) {
         var fname = name.split(" ");
         this.firstName = fname[0];
         this.lastName = fname[1]
      }
   }
}
Он имеет имя в качестве параметра, который является ничем иным, как полным именем в текстовом поле. Позже, это разделено на месте, и имя и фамилия обновлены. Теперь, когда мы запустим код и отредактируем текстовое поле, то же самое будет отображаться в браузере. Имя и фамилия будут обновлены благодаря функции set. Функция get возвращает имя и фамилию, а функция set обновляет их, если что-то редактирует.
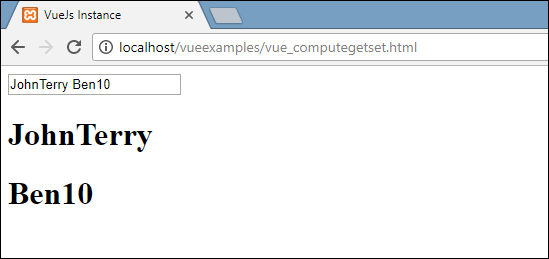
Теперь все, что напечатано в текстовом поле, совпадает с тем, что отображается, как показано на скриншоте выше.
VueJS – Смотреть недвижимость
В этой главе мы узнаем о свойстве Watch. Используя пример, мы увидим, что мы можем использовать свойство Watch в VueJS.
пример
<html>
   <head>
      <title>VueJs Instance</title>
      <script type = "text/javascript" src = "js/vue.js"></script>
   </head>
   <body>
      <div id = "computed_props">
         Kilometers : <input type = "text" v-model = "kilometers">
         Meters : <input type = "text" v-model = "meters">
      </div>
      <script type = "text/javascript">
         var vm = new Vue({
            el: '#computed_props',
            data: {
               kilometers : 0,
               meters:0
            },
            methods: {
            },
            computed :{
            },
            watch : {
               kilometers:function(val) {
                  this.kilometers = val;
                  this.meters = val * 1000;
               },
               meters : function (val) {
                  this.kilometers = val/ 1000;
                  this.meters = val;
               }
            }
         });
      </script>
   </body>
</html>
В приведенном выше коде мы создали два текстовых поля, одно с километрами, а другое с метрами . В свойстве data километры и метры инициализируются равными 0. Существует объект наблюдения, созданный с двумя функциями: километрами и метрами . В обеих функциях выполняется преобразование из километров в метры и из метров в километры.
Когда мы вводим значения в любом из текстовых полей, в зависимости от того, что изменилось, Watch заботится об обновлении обоих текстовых полей. Нам не нужно специально назначать какие-либо события и ждать, пока они изменятся, и выполнить дополнительную работу по проверке. Watch следит за обновлением текстовых полей с расчетом, выполненным в соответствующих функциях.
Давайте посмотрим на вывод в браузере.

Давайте введем некоторые значения в текстовое поле километров и увидим его изменение в текстовом поле метров и наоборот.
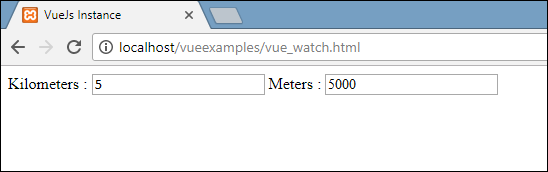
Теперь давайте войдем в текстовое поле метров и увидим его изменение в текстовом поле километров. Это дисплей, видимый в браузере.
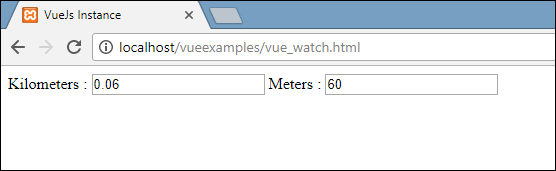
VueJS – Связывание
В этой главе вы узнаете, как манипулировать или присваивать значения атрибутам HTML, изменять стиль и назначать классы с помощью директивы связывания v-bind, доступной в VueJS.
Давайте рассмотрим пример, чтобы понять, зачем нам и когда использовать директиву v-bind для привязки данных.
пример
<html>
   <head>
      <title>VueJs Instance</title>
      <script type = "text/javascript" src = "js/vue.js"></script>
   </head>
   <body>
      <div id = "databinding">
         {{title}}<br/>
         <a href = "hreflink" target = "_blank"> Click Me </a> <br/>
         <a href = "{{hreflink}}" target = "_blank">Click Me </a>  <br/>
         <a v-bind:href = "hreflink" target = "_blank">Click Me </a>   <br/>
      </div>
      <script type = "text/javascript">
         var vm = new Vue({
            el: '#databinding',
            data: {
               title : "DATA BINDING",
               hreflink : "http://www.google.com"
            }
         });
      </script>
   </body>
</html>
В приведенном выше примере мы отобразили переменную заголовка и три ссылки привязки. Мы также присвоили значение href из объекта данных.
Теперь, если мы проверим вывод в браузере и проверим, мы увидим, что первые две якорные ссылки не имеют правильную ссылку, как показано на следующем снимке экрана.

Первый клик показывает href как hreflink, а второй – в {{hreflink}}, а последний отображает правильный URL-адрес, как нам нужно.
Следовательно, чтобы присвоить значения атрибутам HTML, нам нужно связать его с директивой v-bind следующим образом.
<a v-bind:href = "hreflink" target = "_blank">Click Me </a>
VueJS также предоставляет сокращение для v-bind следующим образом.
<a :href = "hreflink" target = "_blank">Click Me </a>
Если мы видим элемент проверки в браузере, тег привязки не показывает атрибут v-bind, однако он отображает простой HTML. Ни одно из свойств VueJS не видно, когда мы внедряем DOM.
Связывание классов HTML
Чтобы связать HTML-класс, нам нужно использовать v-bind: class . Давайте рассмотрим пример и свяжем в нем классы.
пример
<html>
   <head>
      <title>VueJs Instance</title>
      <script type = "text/javascript" src = "js/vue.js"></script>
   </head>
   <body>
      <style>
         .active {
            background: red;
         }
      </style>
      <div id = "classbinding">
         <div v-bind:class = "{active:isactive}"><b>{{title}}</b></div>
      </div>
      <script type = "text/javascript">
         var vm = new Vue({
            el: '#classbinding',
            data: {
               title : "CLASS BINDING",
               isactive : true
            }
         });
      </script>
   </body>
</html>
Существует div, созданный с помощью v-bind: class = ”{active: isactive}».
Здесь isactive – это переменная, которая основана на true или false. Он будет применять активный класс к div. В объекте данных мы присвоили переменной isactive значение true. Существует класс, определенный в стиле .active с цветом фона как красный.
Если переменная isactive имеет значение true, цвет будет применен, иначе – нет. Ниже будет вывод в браузере.
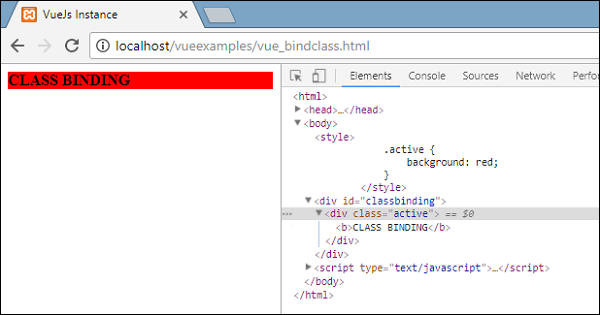
На приведенном выше дисплее мы видим красный цвет фона. Класс = «активный» применяется к div.
Теперь давайте изменим значение переменной на false и посмотрим результат. Переменная isactive изменяется на false, как показано в следующем коде.
<html>
   <head>
      <title>VueJs Instance</title>
      <script type = "text/javascript" src = "js/vue.js"></script>
   </head>
   <body>
      <style>
         .active {
            background: red;
         }
      </style>
      <div id = "classbinding">
         <div v-bind:class = "{active:isactive}"><b>{{title}}</b></div>
      </div>
      <script type = "text/javascript">
         var vm = new Vue({
            el: '#classbinding',
            data: {
               title : "CLASS BINDING",
               isactive : false
            }
         });
      </script>
   </body>
</html>

На приведенном выше экране мы видим, что активный класс не применяется к div.
Мы также можем назначить несколько классов тегам HTML, используя атрибут v-bind.
пример
<html>
   <head>
      <title>VueJs Instance</title>
      <script type = "text/javascript" src = "js/vue.js"></script>
   </head>
   <body>
      <style>
         .info {
            color: #00529B;
            background-color: #BDE5F8;
         }
         div {
            margin: 10px 0;
            padding: 12px;
         }
         .active {
            color: #4F8A10;
            background-color: #DFF2BF;
         }
         .displayError{
            color: #D8000C;
            background-color: #FFBABA;
         }
      </style>
      <div id = "classbinding">
         <div class = "info"  v-bind:class = "{ active: isActive, 'displayError': hasError }">
            {{title}}
         </div>
      </div>
      <script type = "text/javascript">
         var vm = new Vue({
            el: '#classbinding',
            data: {
               title : "This is class binding example",
               isActive : false,
               hasError : false
            }
         });
      </script>
   </body>
</html>
Для div в приведенном выше коде мы применили нормальный класс, например, class = ”info”. На основании переменных isActive и hasError другие классы будут применены к div.
Выход
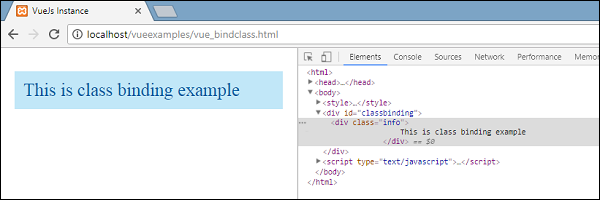
Это нормальный класс применяется. Обе переменные являются ложными прямо сейчас. Давайте сделаем переменную isActive равной true и посмотрим результат.

На приведенном выше дисплее в DOM мы видим два класса, назначенных div, info и active. Давайте сделаем переменную hasError true и isActive как false.
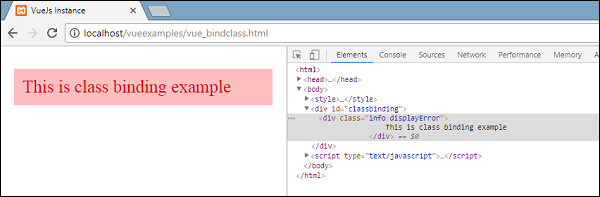
Теперь, когда мы видим на приведенном выше дисплее, класс div и displayError применяются к div. Вот как мы можем применять несколько классов в зависимости от условий.
Мы также можем передать класс в виде массива. Давайте возьмем пример, чтобы понять это.
пример
<html>
   <head>
      <title>VueJs Instance</title>
      <script type = "text/javascript" src = "js/vue.js"></script>
   </head>
   <body>
      <style>
         .info {
            color: #00529B;
            background-color: #BDE5F8;
         }
         div {
            margin: 10px 0;
            padding: 12px;
            font-size : 25px;
         }
         .active {
            color: #4F8A10;
            background-color: #DFF2BF;
         }
         .displayError{
            color: #D8000C;
            background-color: #FFBABA;
         }
      </style>
      <div id = "classbinding">
         <div v-bind:class = "[infoclass, errorclass]">{{title}}</div>
      </div>
      <script type = "text/javascript">
         var vm = new Vue({
            el: '#classbinding',
            data: {
               title : "This is class binding example",
               infoclass : 'info',
               errorclass : 'displayError'
            }
         });
      </script>
   </body>
</html>
Выход

Как мы видим выше, оба класса применяются к div. Давайте используем переменную и, основываясь на значении переменной, присваиваем класс.
<html>
   <head>
      <title>VueJs Instance</title>
      <script type = "text/javascript" src = "js/vue.js"></script>
   </head>
   <body>
      <style>
         .info {
            color: #00529B;
            background-color: #BDE5F8;
         }
         div {
            margin: 10px 0;
            padding: 12px;
            font-size : 25px;
         }
         .active {
            color: #4F8A10;
            background-color: #DFF2BF;
         }
         .displayError{
            color: #D8000C;
            background-color: #FFBABA;
         }
      </style>
      <div id = "classbinding">
         <div v-bind:class = "[isActive ? infoclass : '', haserror ? errorclass : '']">{{title}}</div>
      </div>
      <script type = "text/javascript">
         var vm = new Vue({
            el: '#classbinding',
            data: {
               title : "This is class binding example",
               infoclass : 'info',
               errorclass : 'displayError',
               isActive : true,
               haserror : false
            }
         });
      </script>
   </body>
</html>
Мы использовали две переменные isActive и haserror, и то же самое используется для div во время привязки класса, как показано в следующем теге div.
<div v-bind:class = "[isActive ? infoclass : '', haserror ? errorclass : '']">{{title}}</div>
Если isActive равно true, то ему будет присвоен инфокласс. То же самое относится и к haserror, если оно истинно, то к нему будет применен только errorClass.

Теперь давайте сделаем переменную haserror истинной, а переменную isActive – ложной.

Теперь мы добавим v-bind для классов в компонентах. В следующем примере мы добавили класс в шаблон компонента, а также в компонент.
пример
<html>
   <head>
      <title>VueJs Instance</title>
      <script type = "text/javascript" src = "js/vue.js"></script>
   </head>
   <body>
      <style>
         .info {
            color: #00529B;
            background-color: #BDE5F8;
         }
         div {
            margin: 10px 0;
            padding: 12px;
            font-size : 25px;
         }
         .active {
            color: #4F8A10;
            background-color: #DFF2BF;
         }
         .displayError{
            color: #D8000C;
            background-color: #FFBABA;
         }
      </style>
      <div id = "classbinding">
         <new_component class = "active"></new_component>
      </div>
      <script type = "text/javascript">
         var vm = new Vue({
            el: '#classbinding',
            data: {
               title : "This is class binding example",
               infoclass : 'info',
               errorclass : 'displayError',
               isActive : false,
               haserror : true
            },
            components:{
               'new_component' : {
                  template : '<div class = "info">Class Binding for component</div>'
               }
            }
         });
      </script>
   </body>
</html>
Ниже приведен вывод в браузере. Это применяет оба класса к окончательному div.
<div class = ”info active”></div>

Добавьте переменную в разделе компонента для отображения, основываясь на true / false.
<html>
   <head>
      <title>VueJs Instance</title>
      <script type = "text/javascript" src = "js/vue.js"></script>
   </head>
   <body>
      <style>
         .info {
            color: #00529B;
            background-color: #BDE5F8;
         }
         div {
            margin: 10px 0;
            padding: 12px;
            font-size : 25px;
         }
         .active {
            color: #4F8A10;
            background-color: #DFF2BF;
         }
         .displayError{
            color: #D8000C;
            background-color: #FFBABA;
         }
      </style>
      <div id = "classbinding">
         <new_component v-bind:class = "{active:isActive}"></new_component>
      </div>
      <script type = "text/javascript">
         var vm = new Vue({
            el: '#classbinding',
            data: {
               title : "This is class binding example",
               infoclass : 'info',
               errorclass : 'displayError',
               isActive : false,
               haserror : true
            },
            components:{
               'new_component' : {
                  template : '<div class = "info">Class Binding for component</div>'
               }
            }
         });
      </script>
   </body>
</html>
Поскольку переменная имеет значение false, активный класс не применяется, а информационный класс применяется, как показано на следующем снимке экрана.

Связывание встроенных стилей
Синтаксис объекта
пример
<html>
   <head>
      <title>VueJs Instance</title>
      <script type = "text/javascript" src = "js/vue.js"></script>
   </head>
   <body>
      <div id = "databinding">
         <div v-bind:style = "{ color: activeColor, fontSize: fontSize + 'px' }">{{title}}</div>
      </div>
      <script type = "text/javascript">
         var vm = new Vue({
            el: '#databinding',
            data: {
               title : "Inline style Binding",
               activeColor: 'red',
               fontSize :'30'
            }
         });
      </script>
   </body>
</html>
Выход
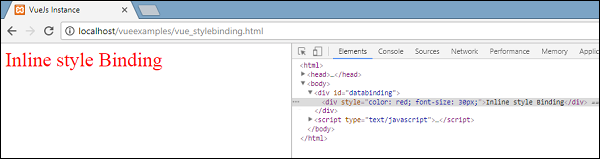
В приведенном выше примере для div применяется стиль, и данные извлекаются из объекта данных.
<div v-bind:style = "{ color: activeColor, fontSize: fontSize + 'px' }">{{title}}</div>
data: {
   title : "Inline style Binding",
   activeColor: 'red',
   fontSize :'30'
}
Мы также можем сделать то же самое, назначив все значения переменной, а затем присвоив переменную div.
пример
<html>
   <head>
      <title>VueJs Instance</title>
      <script type = "text/javascript" src = "js/vue.js"></script>
   </head>
   <body>
      <div id = "databinding">
         <div v-bind:style = "styleobj">{{title}}</div>
      </div>
      <script type = "text/javascript">
         var vm = new Vue({
            el: '#databinding',
            data: {
               title : "Inline style Binding",
               styleobj : {
                  color: 'red',
                  fontSize :'40px'
               }
            }
         });
      </script>
   </body>
</html>
Цвет и fontSize присваиваются объекту с именем styleobj, и то же самое присваивается div.
<div v-bind:style = "styleobj">{{title}}</div>
Выход
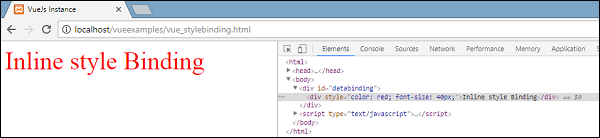
Привязки ввода формы
До сих пор в примере, который мы создали, мы видели, как v-модель связывает входной текстовый элемент и значение, связанное с присвоенной переменной. Давайте узнаем больше об этом в этом разделе.
пример
<html>
   <head>
      <title>VueJs Instance</title>
      <script type = "text/javascript" src = "js/vue.js"></script>
   </head>
   <body>
      <div id = "databinding">
         <h3>TEXTBOX</h3>
         <input  v-model = "name" placeholder = "Enter Name" />
         <h3>Name entered is : {{name}}</h3>
         <hr/>
         <h3>Textarea</h3>
         <textarea v-model = "textmessage" placeholder = "Add Details"></textarea>
         <h1><p>{{textmessage}}</p></h1>
         <hr/>
         <h3>Checkbox</h3>
         <input type = "checkbox" id = "checkbox" v-model = "checked"> {{checked}}
      </div>
      <script type = "text/javascript">
         var vm = new Vue({
            el: '#databinding',
            data: {
               name:'',
               textmessage:'',
               checked : false
            }
         });
      </script>
   </body>
</html>
Все, что мы вводим в текстовом поле, отображается ниже. v-модели присваивается имя значения, и имя отображается в {{name}}, которое отображает все, что напечатано в текстовом поле.
Выход

Давайте рассмотрим еще несколько примеров и как их использовать.
Радио и Выбор
пример
<html>
   <head>
      <title>VueJs Instance</title>
      <script type = "text/javascript" src = "js/vue.js"></script>
   </head>
   <body>
      <div id = "databinding">
         <h3>Radio</h3>
         <input type = "radio" id = "black" value = "Black" v-model = "picked">Black
         <input type = "radio" id = "white" value = "White" v-model = "picked">White
         <h3>Radio element clicked : {{picked}} </h3>
         <hr/>
         <h3>Select</h3>
         <select v-model = "languages">
            <option disabled value = "">Please select one</option>
            <option>Java</option>
            <option>Javascript</option>
            <option>Php</option>
            <option>C</option>
            <option>C++</option>
         </select>
         <h3>Languages Selected is : {{ languages }}</h3>
         <hr/>
      </div>
      <script type = "text/javascript">
         var vm = new Vue({
            el: '#databinding',
            data: {
               picked : 'White',
               languages : "Java"
            }
         });
      </script>
   </body>
</html>
Выход

Модификаторы
Мы использовали три модификатора в примере – отделка, число и ленивый.
пример
<html>
   <head>
      <title>VueJs Instance</title>
      <script type = "text/javascript" src = "js/vue.js"></script>
   </head>
   <body>
      <div id = "databinding">
         <span style = "font-size:25px;">Enter Age:</span> <input v-model.number = "age" type = "number">
         <br/>
         <span style = "font-size:25px;">Enter Message:</span> <input v-model.lazy = "msg">
         <h3>Display Message : {{msg}}</h3>
         <br/>
         <span style = "font-size:25px;">Enter Message : </span><input v-model.trim = "message">
         <h3>Display Message : {{message}}</h3>
      </div>
      <script type = "text/javascript">
         var vm = new Vue({
            el: '#databinding',
            data: {
               age : 0,
               msg: '',
               message : ''
            }
         });
      </script>
   </body>
</html>
Выход
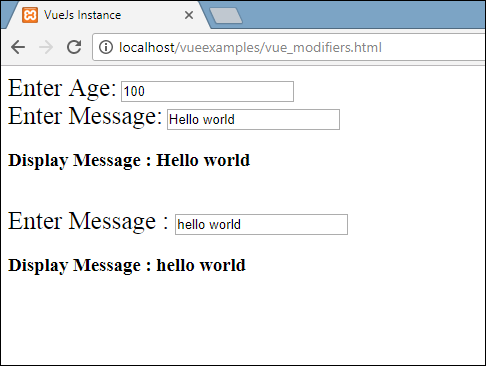
Модификатор числа позволяет только вводить числа. Это не займет никакого другого ввода, кроме чисел.
<span style = "font-size:25px;">Enter Age:</span> <input v-model.number = "age" type = "number">
Модификатор Lazy будет отображать содержимое, присутствующее в текстовом поле, как только оно будет полностью введено, и пользователь покинет текстовое поле.
<span style = "font-size:25px;">Enter Message:</span> <input v-model.lazy = "msg">
Модификатор Trim удалит все пробелы, введенные в начале и в конце.
<span style = "font-size:25px;">Enter Message : </span><input v-model.trim = "message">
VueJS – События
v-on – это атрибут, добавляемый к элементам DOM для прослушивания событий в VueJS.
Нажмите Событие
пример
<html>
   <head>
      <title>VueJs Instance</title>
      <script type = "text/javascript" src = "js/vue.js"></script>
   </head>
   <body>
      <div id = "databinding">
         <button v-on:click = "displaynumbers">Click ME</button>
         <h2> Add Number 100 + 200 = {{total}}</h2>
      </div>
      <script type = "text/javascript">
         var vm = new Vue({
            el: '#databinding',
            data: {
               num1: 100,
               num2 : 200,
               total : ''
            },
            methods : {
               displaynumbers : function(event) {
                  console.log(event);
                  return this.total =  this.num1+ this.num2;
               }
            },
         });
      </script>
   </body>
</html>
Выход

Следующий код используется для назначения события click для элемента DOM.
<button v-on:click = "displaynumbers">Click ME</button>
Для v-on существует сокращение, которое означает, что мы также можем вызвать событие следующим образом:
<button @click = "displaynumbers">Click ME</button>
При нажатии на кнопку, он вызовет метод «displaynumbers», который принимает событие, и мы утешаем то же самое в браузере, как показано выше.
Теперь мы проверим еще одно событие при наведении мыши.
пример
<html>
   <head>
      <title>VueJs Instance</title>
      <script type = "text/javascript" src = "js/vue.js"></script>
   </head>
   <body>
      <div id = "databinding">
         <div v-bind:style = "styleobj" v-on:mouseover = "changebgcolor" v-on:mouseout = "originalcolor"></div>
      </div>
      <script type = "text/javascript">
         var vm = new Vue({
            el: '#databinding',
            data: {
               num1: 100,
               num2 : 200,
               total : '',
               styleobj : {
                  width:"100px",
                  height:"100px",
                  backgroundColor:"red"
               }
            },
            methods : {
               changebgcolor : function() {
                  this.styleobj.backgroundColor = "green";
               },
               originalcolor : function() {
                  this.styleobj.backgroundColor = "red";
               }
            },
         });
      </script>
   </body>
</html>
В приведенном выше примере мы создали div с шириной и высотой 100px. Цвет фона красный. При наведении курсора мыши мы меняем цвет на зеленый, а при наведении мыши мы снова меняем цвет на красный.
Следовательно, во время наведения мыши, метод называется changebgcolor, и как только мы перемещаем мышь из div, метод называется originalcolor .
Это делается следующим образом –
<div v-bind:style = "styleobj" v-on:mouseover = "changebgcolor" v-on:mouseout = "originalcolor"></div>
Два события – mouseover и mouseout – назначаются элементу div, как показано выше. Мы создали переменную styleobj и дали требуемый стиль для присваивания div. Эта же переменная связана с div с помощью v-bind: style = ”styleobj”
В changebgcolor мы меняем цвет на зеленый, используя следующий код.
changebgcolor : function() {
   this.styleobj.backgroundColor = "green";
}
Используя переменную stylobj, мы меняем цвет на зеленый.
Точно так же следующий код используется, чтобы изменить его обратно к исходному цвету.
originalcolor : function() {
   this.styleobj.backgroundColor = "red";
}
Это то, что мы видим в браузере.

Когда мы наведем курсор мыши, цвет изменится на зеленый, как показано на следующем скриншоте.
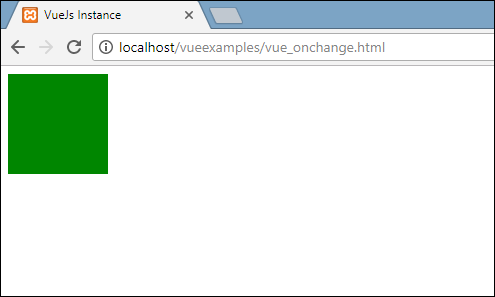
Модификаторы событий
Vue имеет модификаторы событий, доступные в атрибуте v-on. Ниже приведены доступные модификаторы –
.один раз
Позволяет событию выполняться только один раз.
Синтаксис
<button v-on:click.once = "buttonclicked">Click Once</button>
Нам нужно добавить оператор точки при вызове модификаторов, как показано в синтаксисе выше. Давайте использовать его в качестве примера и понять работу модификатора Once.
пример
<html>
   <head>
      <title>VueJs Instance</title>
      <script type = "text/javascript" src = "js/vue.js"></script>
   </head>
   <body>
      <div id = "databinding">
         <button v-on:click.once = "buttonclickedonce" v-bind:style = "styleobj">Click Once</button>
         Output:{{clicknum}}
         <br/><br/>
         <button v-on:click = "buttonclicked"  v-bind:style = "styleobj">Click Me</button>
         Output:{{clicknum1}}
      </div>
      <script type = "text/javascript">
         var vm = new Vue({
            el: '#databinding',
            data: {
               clicknum : 0,
               clicknum1 :0,
               styleobj: {
                  backgroundColor: '#2196F3!important',
                  cursor: 'pointer',
                  padding: '8px 16px',
                  verticalAlign: 'middle',
               }
            },
            methods : {
               buttonclickedonce : function() {
                  this.clicknum++;
               },
               buttonclicked : function() {
                  this.clicknum1++;
               }
            }
         });
      </script>
   </body>
</html>
Выход

В приведенном выше примере мы создали две кнопки. Кнопка с меткой Click Once добавила модификатор Once, а другая кнопка без модификатора. Это способ определения кнопок.
<button v-on:click.once = "buttonclickedonce" v-bind:style = "styleobj">Click Once</button>
<button v-on:click = "buttonclicked"  v-bind:style = "styleobj">Click Me</button>
Первая кнопка вызывает метод «buttonclickedonce», а вторая кнопка вызывает метод «buttonclicked».
buttonclickedonce : function() {
   this.clicknum++;
},
buttonclicked : function() {
   this.clicknum1++;
}
В clicknum и clicknum1 определены две переменные. Оба увеличиваются при нажатии кнопки. Обе переменные инициализируются в 0, и на дисплее видно, как показано выше.
При нажатии первой кнопки переменная clicknum увеличивается на 1. При втором щелчке число не увеличивается, поскольку модификатор не позволяет ему выполнять или выполнять какие-либо действия, назначенные при нажатии кнопки.
По нажатию второй кнопки выполняется то же действие, то есть переменная увеличивается. При каждом нажатии значение увеличивается и отображается.
Ниже приведен вывод, который мы получаем в браузере.

.предотвращать
Синтаксис
<a href = "http://www.google.com" v-on:click.prevent = "clickme">Click Me</a>
пример
<html>
   <head>
      <title>VueJs Instance</title>
      <script type = "text/javascript" src = "js/vue.js"></script>
   </head>
   <body>
      <div id = "databinding">
         <a href = "http://www.google.com" v-on:click = "clickme" target = "_blank" v-bind:style = "styleobj">Click Me</a>
      </div>
      <script type = "text/javascript">
         var vm = new Vue({
            el: '#databinding',
            data: {
               clicknum : 0,
               clicknum1 :0,
               styleobj: {
                  color: '#4CAF50',
                  marginLeft: '20px',
                  fontSize: '30px'
               }
            },
            methods : {
               clickme : function() {
                  alert("Anchor tag is clicked");
               }
            }
         });
      </script>
   </body>
</html>
Выход

Если щелкнуть ссылку clickme, она отправит предупреждение «Клик по метке привязки» и откроет ссылку https://www.google.com в новой вкладке, как показано на следующих снимках экрана.
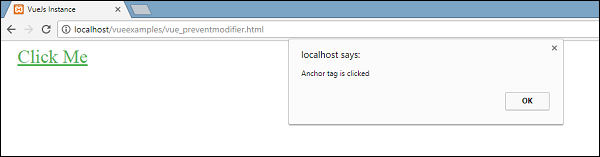
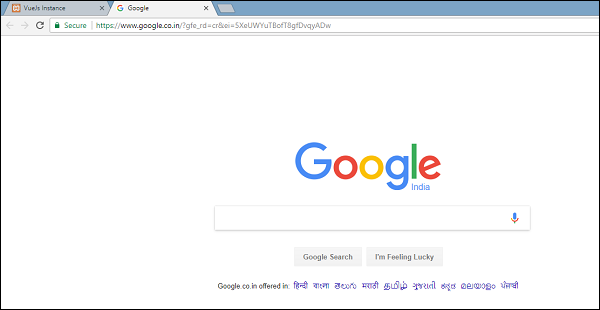
Теперь это работает как обычно, то есть ссылка открывается как мы хотим. В случае, если мы не хотим, чтобы ссылка открывалась, нам нужно добавить модификатор «предотвращение» к событию, как показано в следующем коде.
<a href = "http://www.google.com" v-on:click.prevent = "clickme" target = "_blank" v-bind:style = "styleobj">Click Me</a>
После добавления, если мы нажмем на кнопку, он отправит сообщение с предупреждением и больше не будет открывать ссылку. Модификатор предотвращает предотвращение открытия ссылки и выполняет только метод, назначенный тегу.
пример
<html>
   <head>
      <title>VueJs Instance</title>
      <script type = "text/javascript" src = "js/vue.js"></script>
   </head>
   <body>
      <div id = "databinding">
         <a href = "http://www.google.com" v-on:click.prevent = "clickme" target = "_blank" v-bind:style = "styleobj">Click Me</a>
      </div>
      <script type = "text/javascript">
         var vm = new Vue({
            el: '#databinding',
            data: {
               clicknum : 0,
               clicknum1 :0,
               styleobj: {
                  color: '#4CAF50',
                  marginLeft: '20px',
                  fontSize: '30px'
               }
            },
            methods : {
               clickme : function() {
                  alert("Anchor tag is clicked");
               }
            }
         });
      </script>
   </body>
</html>
Выход

При нажатии на ссылку, он будет отображать предупреждение и больше не будет открывать URL.
Событие – Ключевые модификаторы
VueJS предлагает ключевые модификаторы, на основе которых мы можем контролировать обработку событий. Предположим, у нас есть текстовое поле, и мы хотим, чтобы метод вызывался только тогда, когда мы нажимаем Enter. Мы можем сделать это, добавив ключевые модификаторы к событиям следующим образом.
Синтаксис
<input type = "text" v-on:keyup.enter = "showinputvalue"/>
Ключ, который мы хотим применить к нашему событию, это V-on.eventname.keyname (как показано выше)
Мы можем использовать несколько имен ключей. Например, V-on.keyup.ctrl.enter
пример
<html>
   <head>
      <title>VueJs Instance</title>
      <script type = "text/javascript" src = "js/vue.js"></script>
   </head>
   <body>
      <div id = "databinding">
         <input type = "text" v-on:keyup.enter = "showinputvalue" v-bind:style = "styleobj" placeholder = "Enter your name"/>
         <h3> {{name}}</h3>
      </div>
      <script type = "text/javascript">
         var vm = new Vue({
            el: '#databinding',
            data: {
               name:'',
               styleobj: {
                  width: "30%",
                  padding: "12px 20px",
                  margin: "8px 0",
                  boxSizing: "border-box"
               }
            },
            methods : {
               showinputvalue : function(event) {
                  this.name=event.target.value;
               }
            }
         });
      </script>
   </body>
</html>
Выход
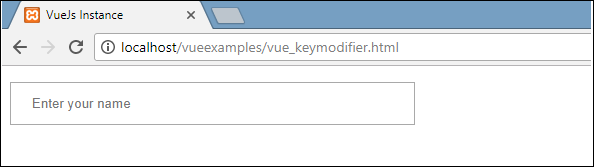
Напечатайте что-нибудь в текстовом поле, и мы увидим, что оно отображается только при нажатии Enter.

Пользовательские события
Родитель может передать данные в свой компонент с помощью атрибута prop, однако нам нужно сообщить родителю, когда произошли изменения в дочернем компоненте. Для этого мы можем использовать пользовательские события.
Родительский компонент может прослушивать событие дочернего компонента, используя атрибут v-on .
пример
<html>
   <head>
      <title>VueJs Instance</title>
      <script type = "text/javascript" src = "js/vue.js"></script>
   </head>
   <body>
      <div id = "databinding">
         <div id = "counter-event-example">
            <p style = "font-size:25px;">Language displayed : <b>{{ languageclicked }}</b></p>
            <button-counter
            v-for = "(item, index) in languages"
            v-bind:item = "item"
            v-bind:index = "index"
            v-on:showlanguage = "languagedisp"></button-counter>
         </div>
      </div>
      <script type = "text/javascript">
         Vue.component('button-counter', {
            template: '<button v-on:click = "displayLanguage(item)"><span style = "font-size:25px;">{{ item }}</span></button>',
            data: function () {
               return {
                  counter: 0
               }
            },
            props:['item'],
            methods: {
               displayLanguage: function (lng) {
                  console.log(lng);
                  this.$emit('showlanguage', lng);
               }
            },
         });
         var vm = new Vue({
            el: '#databinding',
            data: {
               languageclicked: "",
               languages : ["Java", "PHP", "C++", "C", "Javascript", "C#", "Python", "HTML"]
            },
            methods: {
               languagedisp: function (a) {
                  this.languageclicked = a;
               }
            }
         })
      </script>
   </body>
</html>
Выход

Приведенный выше код показывает передачу данных между родительским компонентом и дочерним компонентом.
Компонент создан с использованием следующего кода.
<button-counter
   v-for = "(item, index) in languages"
   v-bind:item = "item"
   v-bind:index = "index"
   v-on:showlanguage = "languagedisp">
</button-counter>
Существует атрибут v-for , который будет зацикливаться с массивом languages. Массив содержит список языков. Нам нужно отправить детали в дочерний компонент. Значения массива хранятся в элементе и индексе.
v-bind:item = "item"
v-bind:index = "index"
Чтобы обратиться к значениям массива, нам нужно сначала связать его с переменной, а переменную можно ссылаться с помощью свойства props следующим образом.
Vue.component('button-counter', {
   template: '<button v-on:click = "displayLanguage(item)"><span style = "font-size:25px;">{{ item }}</span></button>',
   data: function () {
      return {
         counter: 0
      }
   },
   props:['item'],
   methods: {
      displayLanguage: function (lng) {
         console.log(lng);
         this.$emit('showlanguage', lng);
      }
   },
});
Свойство props содержит элемент в виде массива. Мы также можем сослаться на индекс как –
props:[‘item’, ‘index’]
Также к компоненту добавлено событие следующим образом:
<button-counter
   v-for = "(item, index) in languages"
   v-bind:item = "item"
   v-bind:index = "index"
   v-on:showlanguage = "languagedisp">
</button-counter>
Имя события – showlanguage, и оно вызывает метод vulagedisp, который определен в экземпляре Vue.
В компоненте шаблон определяется следующим образом:
template: '<button v-on:click = "displayLanguage(item)"><span style = "font-size:25px;">{{ item }}</span></button>',
Кнопка создана. Кнопка будет создана с таким же количеством в языковом массиве. При нажатии кнопки появляется метод displayLanguage, и элемент, нажатый кнопкой, передается функции в качестве параметра. Теперь компонент должен отправить выбранный элемент родительскому компоненту для отображения, что делается следующим образом:
Vue.component('button-counter', {
   template: '<button v-on:click = "displayLanguage(item)"><span style = "font-size:25px;">{{ item }}</span></button>',
   data: function () {
      return {
         counter: 0
      }
   },
   props:['item'],
   methods: {
      displayLanguage: function (lng) {
         console.log(lng);
         this.$emit('showlanguage', lng);
      }
   },
});
Метод displayLanguage вызывает это. $ Emit (‘showlanguage’, lng);
$ emit используется для вызова метода родительского компонента. Метод showlanguage – это имя события, данное в компоненте с помощью v-on.
<button-counter
   v-for = "(item, index) in languages"
   v-bind:item = "item"
   v-bind:index = "index"
   v-on:showlanguage = "languagedisp">
</button-counter>
Мы передаем параметр, то есть имя языка, по которому щелкнул метод основного родительского экземпляра Vue, который определяется следующим образом.
var vm = new Vue({
   el: '#databinding',
   data: {
      languageclicked: "",
      languages : ["Java", "PHP", "C++", "C", "Javascript", "C#", "Python", "HTML"]
   },
   methods: {
      languagedisp: function (a) {
         this.languageclicked = a;
      }
   }
})
Здесь emit запускает showlanguage, который, в свою очередь, вызывает lagedagedisp из методов экземпляра Vue. Он присваивает значение clicked языку переменной languageclicked, и то же самое отображается в браузере, как показано на следующем снимке экрана.
<p style = "font-size:25px;">Language displayed : <b>{{ languageclicked }}</b></p>
Ниже приведен вывод, который мы получаем в браузере.

VueJS – Рендеринг
В этой главе мы узнаем об условном рендеринге и рендеринге списка. В условном рендеринге мы обсудим использование if, if-else, if-else-if, show и т. Д. В рендеринге списка мы обсудим, как использовать цикл for.
Условный рендеринг
Давайте начнем и сначала поработаем над примером, чтобы объяснить детали условного рендеринга. При условном рендеринге мы хотим выводить только тогда, когда условие выполнено, и условная проверка выполняется с помощью if, if-else, if-else-if, show и т. Д.
v-если
пример
<html>
   <head>
      <title>VueJs Instance</title>
      <script type = "text/javascript" src = "js/vue.js"></script>
   </head>
   <body>
      <div id = "databinding">
         <button v-on:click = "showdata" v-bind:style = "styleobj">Click Me</button>
         <span style = "font-size:25px;"><b>{{show}}</b></span>
         <h1 v-if = "show">This is h1 tag</h1>
         <h2>This is h2 tag</h2>
      </div>
      <script type = "text/javascript">
         var vm = new Vue({
            el: '#databinding',
            data: {
               show: true,
               styleobj: {
                  backgroundColor: '#2196F3!important',
                  cursor: 'pointer',
                  padding: '8px 16px',
                  verticalAlign: 'middle',
               }
            },
            methods : {
               showdata : function() {
                  this.show = !this.show;
               }
            },
         });
      </script>
   </body>
</html>
Выход
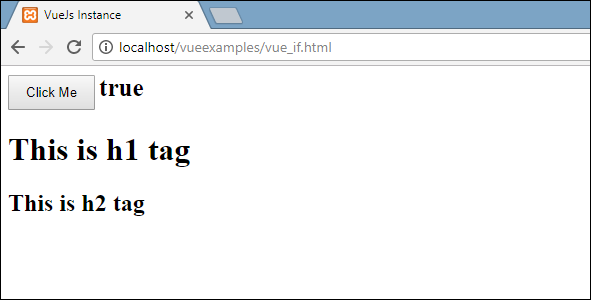
В приведенном выше примере мы создали кнопку и два тега h1 с сообщением.
Переменная с именем show объявляется и инициализируется значением true. Отображается рядом с кнопкой. При нажатии кнопки мы вызываем метод showdata , который переключает значение переменной show. Это означает, что при нажатии кнопки значение переменной show изменится с true на false и с false на true.
Мы присвоили if тегу h1, как показано в следующем фрагменте кода.
<button v-on:click = "showdata" v-bind:style = "styleobj">Click Me</button>
<h1 v-if = "show">This is h1 tag</h1>
Теперь он будет проверять значение переменной show и, если оно истинно, будет отображаться тег h1. Нажмите кнопку и просмотрите в браузере, поскольку значение переменной show меняется на false, тег h1 не отображается в браузере. Отображается только в том случае, если переменная show имеет значение true.
Ниже приводится отображение в браузере.

Если мы проверяем в браузере, это то, что мы получаем, когда шоу ложно.
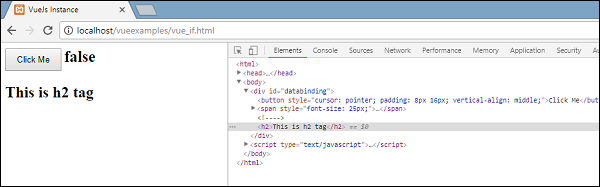
Тег h1 удаляется из DOM, когда для переменной show установлено значение false.

Это то, что мы видим, когда переменная истинна. Тег h1 добавляется обратно в DOM, когда для переменной show установлено значение true.
v-то еще
В следующем примере мы добавили v-else ко второму тегу h1.
пример
<html>
   <head>
      <title>VueJs Instance</title>
      <script type = "text/javascript" src = "js/vue.js"></script>
   </head>
   <body>
      <div id = "databinding">
         <button v-on:click = "showdata" v-bind:style = "styleobj">Click Me</button>
         <span style = "font-size:25px;"><b>{{show}}</b></span>
         <h1 v-if = "show">This is h1 tag</h1>
         <h2 v-else>This is h2 tag</h2>
      </div>
      <script type = "text/javascript">
         var vm = new Vue({
            el: '#databinding',
            data: {
               show: true,
               styleobj: {
                  backgroundColor: '#2196F3!important',
                  cursor: 'pointer',
                  padding: '8px 16px',
                  verticalAlign: 'middle',
               }
            },
            methods : {
               showdata : function() {
                  this.show = !this.show;
               }
            },
         });
      </script>
   </body>
</html>
v-else добавляется с использованием следующего фрагмента кода.
<h1 v-if = "show">This is h1 tag</h1>
<h2 v-else>This is h2 tag</h2>
Теперь, если show true, будет отображаться «Это тег h1» , а если false, будет отображаться тег «h2» . Это то, что мы получим в браузере.

Приведенный выше дисплей показывает, когда переменная show имеет значение true. Поскольку мы добавили v-else, второго утверждения нет. Теперь, когда мы нажмем кнопку, переменная show станет false, и будет отображен второй оператор, как показано на следующем снимке экрана.

v-шоу
V-шоу ведет себя так же, как V-если. Он также показывает и скрывает элементы на основе назначенного ему условия. Разница между v-if и v-show заключается в том, что v-if удаляет элемент HTML из DOM, если условие ложно, и добавляет его обратно, если условие истинно. Тогда как v-show скрывает элемент, если условие ложно с display: none. Он показывает элемент назад, если условие истинно. Таким образом, элемент присутствует в дом всегда.
пример
<html>
   <head>
      <title>VueJs Instance</title>
      <script type = "text/javascript" src = "js/vue.js"></script>
   </head>
   <body>
      <div id = "databinding">
         <button v-on:click = "showdata" v-bind:style = "styleobj">Click Me</button>
         <span style = "font-size:25px;"><b>{{show}}</b></span>
         <h1 v-if = "show">This is h1 tag</h1>
         <h2 v-else>This is h2 tag</h2>
         <div v-show = "show">
            <b>V-Show:</b>
            <img src = "images/img.jpg" width = "100" height = "100" />
         </div>
      </div>
      <script type = "text/javascript">
         var vm = new Vue({
            el: '#databinding',
            data: {
               show: true,
               styleobj: {
                  backgroundColor: '#2196F3!important',
                  cursor: 'pointer',
                  padding: '8px 16px',
                  verticalAlign: 'middle',
               }
            },
            methods : {
               showdata : function() {
                  this.show = !this.show;
               }
            },
         });
      </script>
   </body>
</html>
v-show присваивается элементу HTML с помощью следующего фрагмента кода.
<div v-show = "show"><b>V-Show:</b><img src = "images/img.jpg" width = "100" height = "100" /></div>
Мы использовали одну и ту же переменную show и, исходя из того, что это правда / ложь, изображение отображается в браузере.

Теперь, поскольку переменная show имеет значение true, изображение выглядит так, как показано на скриншоте выше. Давайте нажмем на кнопку и увидим дисплей.

Переменная show ложна, поэтому изображение скрыто. Если мы проверим и увидим элемент, div вместе с изображением все еще является частью DOM с отображением свойства style: ни одного, как показано на скриншоте выше.
Отображение списка
v-за
Давайте теперь обсудим рендеринг списка с помощью директивы v-for.
пример
<html>
   <head>
      <title>VueJs Instance</title>
      <script type = "text/javascript" src = "js/vue.js"></script>
   </head>
   <body>
      <div id = "databinding">
         <input type = "text" v-on:keyup.enter = "showinputvalue"
            v-bind:style = "styleobj" placeholder = "Enter Fruits Names"/>
         <h1 v-if = "items.length>0">Display Fruits Name</h1>
         <ul>
            <li v-for = "a in items">{{a}}</li>
         </ul>
      </div>
      <script type = "text/javascript">
         var vm = new Vue({
            el: '#databinding',
            data: {
               items:[],
               styleobj: {
                  width: "30%",
                  padding: "12px 20px",
                  margin: "8px 0",
                  boxSizing: "border-box"
               }
            },
            methods : {
               showinputvalue : function(event) {
                  this.items.push(event.target.value);
               }
            },
         });
      </script>
   </body>
</html>
Переменная с именем items объявлена как массив. В методах есть метод showinputvalue , который назначается блоку ввода , в котором содержатся имена фруктов. В этом методе фрукты, введенные в текстовое поле, добавляются в массив с помощью следующего фрагмента кода.
showinputvalue : function(event) {
   this.items.push(event.target.value);
}
Мы использовали v-for для отображения введенных фруктов, как показано в следующем фрагменте кода. V-for помогает перебирать значения, присутствующие в массиве.
<ul>
   <li v-for = "a in items">{{a}}</li>
</ul>
Чтобы перебрать массив с циклом for, мы должны использовать v-for = ”a in items”, где a содержит значения в массиве и будет отображаться до тех пор, пока все элементы не будут выполнены.
Выход
Ниже приведен вывод в браузере.

При проверке предметов, это то, что он показывает в браузере. В DOM мы не видим никакой директивы v-for для элемента li. Он отображает DOM без каких-либо директив VueJS.

Если мы хотим отобразить индекс массива, это делается с помощью следующего кода.
<html>
   <head>
      <title>VueJs Instance</title>
      <script type = "text/javascript" src = "js/vue.js"></script>
   </head>
   <body>
      <div id = "databinding">
         <input type = "text" v-on:keyup.enter = "showinputvalue"
            v-bind:style = "styleobj" placeholder = "Enter Fruits Names"/>
         <h1 v-if = "items.length>0">Display Fruits Name</h1>
         <ul>
            <li v-for = "(a, index) in items">{{index}}--{{a}}</li>
         </ul>
      </div>
      <script type = "text/javascript">
         var vm = new Vue({
            el: '#databinding',
            data: {
               items:[],
               styleobj: {
                  width: "30%",
                  padding: "12px 20px",
                  margin: "8px 0",
                  boxSizing: "border-box"
               }
            },
            methods : {
               showinputvalue : function(event) {
                  this.items.push(event.target.value);
               }
            },
         });
      </script>
   </body>
</html>
Чтобы получить индекс, мы добавили еще одну переменную в скобку, как показано в следующем фрагменте кода.
<li v-for = "(a, index) in items">{{index}}--{{a}}</li>
В (a, index), a является значением, а index является ключом. Теперь отображение браузера будет таким, как показано на следующем снимке экрана. Таким образом, с помощью индекса могут отображаться любые конкретные значения.
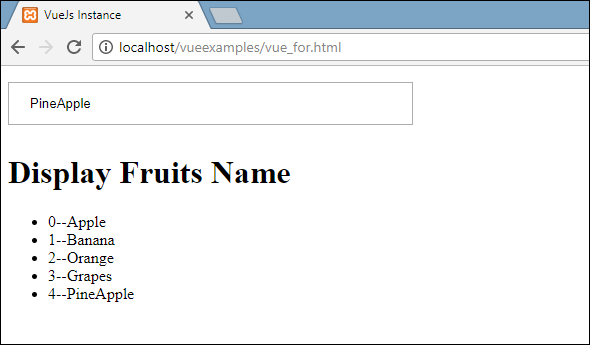
VueJS – переход и анимация
В этой главе мы обсудим функции перехода и анимации, доступные в VueJS.
переход
VueJS предоставляет различные способы применить переход к элементам HTML, когда они добавляются / обновляются в DOM. VueJS имеет встроенный компонент перехода, который необходимо обернуть вокруг элемента, который требует перехода.
Синтаксис
<transition name = "nameoftransition">
   <div></div>
</transition>
Давайте рассмотрим пример, чтобы понять работу перехода.
пример
<html>
   <head>
      <title>VueJs Instance</title>
      <script type = "text/javascript" src = "js/vue.js"></script>
   </head>
   <body>
      <style>
         .fade-enter-active, .fade-leave-active {
            transition: opacity 2s
         }
         .fade-enter, .fade-leave-to /* .fade-leave-active below version 2.1.8 */ {
            opacity: 0
         }
      </style>
      <div id = "databinding">
         <button v-on:click = "show = !show">Click Me</button>
         <transition name = "fade">
            <p v-show = "show" v-bind:style = "styleobj">Animation Example</p>
         </transition>
      </div>
      <script type = "text/javascript">
         var vm = new Vue({
            el: '#databinding',
            data: {
               show:true,
               styleobj :{
                  fontSize:'30px',
                  color:'red'
               }
            },
            methods : {
            }
         });
      </script>
   </body>
</html>
Существует кнопка с именем clickme, созданная с помощью которой мы можем изменить значение переменной show на true на false и наоборот. Существует тег p, который показывает текстовый элемент, только если переменная имеет значение true. Мы обернули тег p элементом перехода, как показано в следующем фрагменте кода.
<transition name = "fade">
   <p v-show = "show" v-bind:style = "styleobj">Animation Example</p>
</transition>
Название перехода исчезает . VueJS предоставляет некоторые стандартные классы для перехода, и классы имеют префикс с именем перехода.
Ниже приведены некоторые стандартные классы для перехода –
-
v-enter – Этот класс вызывается изначально до обновления / добавления элемента. Это начальное состояние.
-
v-enter-active – этот класс используется для определения кривой задержки, продолжительности и замедления для входа в переходную фазу. Это активное состояние для всего, и класс доступен в течение всей фазы входа.
-
v-отпуск – добавляется, когда выходной переход срабатывает, удаляется.
-
V-Leave-Active – применяется во время фазы ухода. Он удаляется после завершения перехода. Этот класс используется для применения кривой задержки, продолжительности и замедления во время фазы ухода.
v-enter – Этот класс вызывается изначально до обновления / добавления элемента. Это начальное состояние.
v-enter-active – этот класс используется для определения кривой задержки, продолжительности и замедления для входа в переходную фазу. Это активное состояние для всего, и класс доступен в течение всей фазы входа.
v-отпуск – добавляется, когда выходной переход срабатывает, удаляется.
V-Leave-Active – применяется во время фазы ухода. Он удаляется после завершения перехода. Этот класс используется для применения кривой задержки, продолжительности и замедления во время фазы ухода.
Каждый из вышеперечисленных классов будет иметь префикс с именем перехода. Мы дали имя перехода как fade, поэтому имя классов становится .fade_enter, .fade_enter_active, .fade_leave, .fade_leave_active .
Они определены в следующем коде.
<style>
   .fade-enter-active, .fade-leave-active {
      transition: opacity 2s
   }
   .fade-enter, .fade-leave-to /* .fade-leave-active below version 2.1.8 */ {
      opacity: 0
   }
</style>
.Fade_enter_active и .fade_leave_active определяются вместе, и он применяет переход в начале и на этапе выхода. Свойство непрозрачности изменяется на 0 через 2 секунды.
Продолжительность определяется в .fade_enter_active и .fade_leave_active. Последний этап определяется в .fade_enter, .fade_leave_to.
Отображение в браузере выглядит следующим образом.
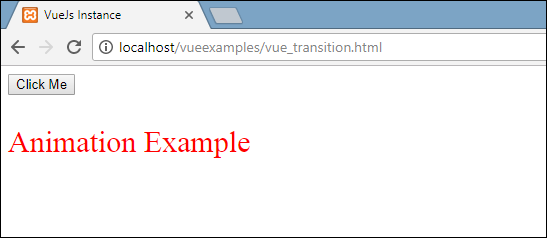
При нажатии кнопки текст исчезнет через две секунды.

Через две секунды текст полностью исчезнет.
Давайте рассмотрим еще один пример, когда изображение при нажатии кнопки перемещается по оси x.
пример
<html>
   <head>
      <title>VueJs Instance</title>
      <script type = "text/javascript" src = "js/vue.js"></script>
   </head>
   <body>
      <style>
         .shiftx-enter-active, .shiftx-leave-active {
            transition: all 2s ease-in-out;
         }
         .shiftx-enter, .shiftx-leave-to /* .fade-leave-active below version 2.1.8 */ {
            transform :  translateX(100px);
         }
      </style>
      <div id = "databinding">
         <button v-on:click = "show = !show">Click Me</button>
         <transition name = "shiftx">
            <p v-show = "show">
               <img src = "images/img.jpg" style = "width:100px;height:100px;" />
            </p>
         </transition>
      </div>
      <script type = "text/javascript">
         var vm = new Vue({
            el: '#databinding',
            data: {
               show:true
            },
            methods : {
            }
         });
      </script>
   </body>
</html>
Название перехода – shiftx . Свойство transform используется для смещения изображения на оси x на 100 пикселей с использованием следующего фрагмента кода.
<style>
   .shiftx-enter-active, .shiftx-leave-active {
      transition: all 2s ease-in-out;
   }
   .shiftx-enter, .shiftx-leave-to /* .fade-leave-active below version 2.1.8 */ {
      transform :  translateX(100px);
   }
</style>
Ниже приводится вывод.

При нажатии кнопки изображение сместится на 100 пикселей вправо, как показано на следующем снимке экрана.

Анимация
Анимации применяются так же, как и переход. Анимация также имеет классы, которые должны быть объявлены, чтобы эффект имел место.
Давайте рассмотрим пример, чтобы увидеть, как работает анимация.
пример
<html>
   <head>
      <title>VueJs Instance</title>
      <script type = "text/javascript" src = "js/vue.js"></script>
   </head>
   <body>
      <style>
         .shiftx-enter-active {
            animation: shift-in 2s;
         }
         .shiftx-leave-active {
            animation: shift-in 2s reverse;
         }
         @keyframes shift-in {
            0%   {transform:rotateX(0deg);}
            25%  {transform:rotateX(90deg);}
            50%  {transform:rotateX(120deg);}
            75%  {transform:rotateX(180deg);}
            100% {transform:rotateX(360deg);}
         }
      </style>
      <div id = "databinding">
         <button v-on:click = "show = !show">Click Me</button>
         <transition name = "shiftx">
            <p v-show = "show">
               <img src = "images/img.jpg" style = "width:100px;height:100px;" />
            </p>
         </transition>
      </div>
      <script type = "text/javascript">
         var vm = new Vue({
            el: '#databinding',
            data: {
               show:true
            },
            methods : {
            }
         });
      </script>
   </body>
</html>
Для применения анимации существуют классы, аналогичные переходным. В приведенном выше коде у нас есть изображение, заключенное в тег p, как показано в следующем фрагменте кода.
<transition name = "shiftx">
   <p v-show = "show"><img src = "images/img.jpg" style = "width:100px;height:100px;" /></p>
</transition>
Название перехода – shiftx . Применяемый класс выглядит следующим образом:
<style>
   .shiftx-enter-active {
      animation: shift-in 2s;
   }
   .shiftx-leave-active {
      animation: shift-in 2s reverse;
   }
   @keyframes shift-in {
      0%   {transform:rotateX(0deg);}
      25%  {transform:rotateX(90deg);}
      50%  {transform:rotateX(120deg);}
      75%  {transform:rotateX(180deg);}
      100% {transform:rotateX(360deg);}
   }
</style>
Классу предшествует имя перехода, то есть shiftx-enter-active и .shiftx-left-active. Анимация определяется с ключевыми кадрами от 0% до 100%. В каждом из ключевых кадров определено преобразование, как показано в следующем фрагменте кода.
@keyframes shift-in {
   0%   {transform:rotateX(0deg);}
   25%  {transform:rotateX(90deg);}
   50%  {transform:rotateX(120deg);}
   75%  {transform:rotateX(180deg);}
   100% {transform:rotateX(360deg);}
}
Ниже приводится вывод.
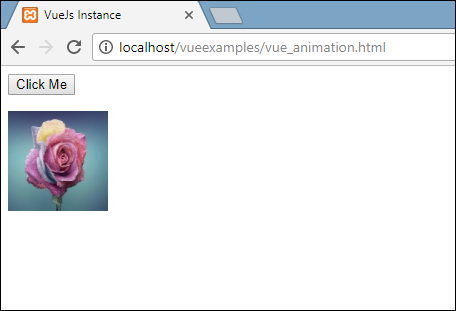
При нажатии на кнопку он поворачивается от 0 до 360 градусов и исчезает.

Пользовательские классы переходов
VueJS предоставляет список пользовательских классов, которые могут быть добавлены в качестве атрибутов к элементу перехода.
- введите класс
- введите активный класс
- несмываемый класс
- несмываемые активный класс
Пользовательские классы в основном вступают в игру, когда мы хотим использовать внешнюю библиотеку CSS, такую как animate.css.
пример
<html>
   <head>
      <link href = "https://cdn.jsdelivr.net/npm/animate.css@3.5.1" rel = "stylesheet" type = "text/css">
      <script type = "text/javascript" src = "js/vue.js"></script>
   </head>
   <body>
      <div id = "animate" style = "text-align:center">
         <button @click = "show = !show"><span style = "font-size:25px;">Animate</span></button>
         <transition
            name = "custom-classes-transition"
            enter-active-class = "animated swing"
            leave-active-class = "animated bounceIn">
            <p v-if = "show"><span style = "font-size:25px;">Example</span></p>
         </transition>
      </div>
      <script type = "text/javascript">
         var vm =  new Vue({
            el: '#animate',
            data: {
               show: true
            }
         });
      </script>
   </body>
</html>
Выход
![]()
Выход
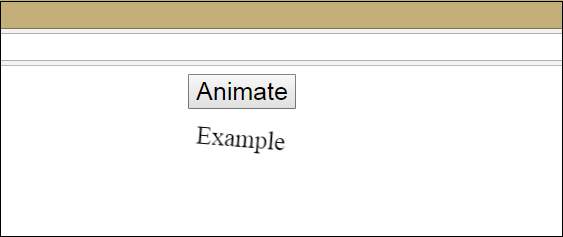
Выход

В приведенном выше коде применяются две анимации. Один enter-active-class = «анимированный свинг», а другой оставьте active-class = «animated bounceIn». Мы используем пользовательские классы анимации для анимации, которая будет применяться из сторонней библиотеки.
Явная продолжительность перехода
Мы можем применить переход и анимацию к элементу, используя VueJS. Vue ожидает события transionend и animationend, чтобы определить, выполнена ли анимация или переход.
Иногда переход может вызвать задержку. В таких случаях мы можем применить продолжительность явно следующим образом.
<transition :duration = "1000"></transition>
<transition :duration = "{ enter: 500, leave: 800 }">...</transition>
Мы можем использовать свойство duration с: на элементе перехода, как показано выше. В случае, если необходимо указать длительность отдельно для входа и выхода, это можно сделать, как показано в приведенном выше фрагменте кода.
JavaScript Крюки
Классы перехода можно вызывать как методы, использующие события JavaScript. Давайте рассмотрим пример для лучшего понимания.
пример
<html>
   <head>
      <title>VueJs Instance</title>
      <script type = "text/javascript" src = "js/vue.js"></script>
   </head>
   <body>
      <script src = "https://cdnjs.cloudflare.com/ajax/libs/velocity/1.2.3/velocity.min.js"></script>
      <div id = "example-4">
         <button @click = "show = !show">
            <span style = "font-size:25px;">Toggle</span>
         </button>
         <transition  v-on:before-enter = "beforeEnter"
            v-on:enter = "enter"
            v-on:leave = "leave"
            v-bind:css = "false">
            <p v-if = "show" style = "font-size:25px;">Animation Example with velocity</p>
         </transition>
      </div>
      <script type = "text/javascript">
         var vm = new Vue({
            el: '#example-4',
            data: {
               show: false
            },
            methods: {
               beforeEnter: function (el) {
                  el.style.opacity = 0
               },
               enter: function (el, done) {
                  Velocity(el, { opacity: 1, fontSize: '25px' }, { duration: 1000 })
                  Velocity(el, { fontSize: '10px' }, { complete: done })
               },
               leave: function (el, done) {
                  Velocity(el, { translateX: '15px', rotateZ: '50deg' }, { duration: 1500 })
                  Velocity(el, { rotateZ: '100deg' }, { loop: 2 })
                  Velocity(el, {
                     rotateZ: '45deg',
                     translateY: '30px',
                     translateX: '30px',
                     opacity: 0
                  }, { complete: done })
               }
            }
         });
      </script>
   </body>
</html>
Выход

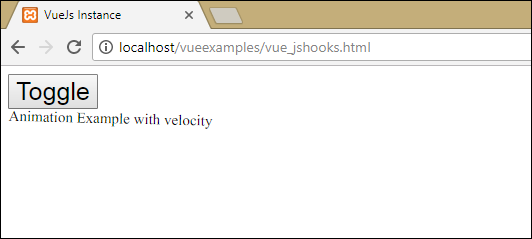
В приведенном выше примере мы выполняем анимацию, используя методы js для элемента перехода.
Методы перехода применяются следующим образом:
<transition  v-on:before-enter = "beforeEnter"
   v-on:enter = "enter"
   v-on:leave = "leave"
   v-bind:css = "false">
   <p v-if = "show" style = "font-size:25px;">Animation Example with velocity</p>
</transition>
Добавлен префикс v-on и имя события, к которому вызывается метод. Методы определены в экземпляре Vue следующим образом:
methods: {
   beforeEnter: function (el) {
      el.style.opacity = 0
   },
   enter: function (el, done) {
      Velocity(el, { opacity: 1, fontSize: '25px' }, { duration: 1000 })
      Velocity(el, { fontSize: '10px' }, { complete: done })
   },
   leave: function (el, done) {
      Velocity(el, { translateX: '15px', rotateZ: '50deg' }, { duration: 1500 })
      Velocity(el, { rotateZ: '100deg' }, { loop: 2 })
      Velocity(el, {
         rotateZ: '45deg',
         translateY: '30px',
         translateX: '30px',
         opacity: 0
      }, { complete: done })
   }
}
Требуемый переход применяется в каждом из этих методов. Существует анимация непрозрачности, применяемая по нажатию кнопки, а также по завершении анимации. Сторонняя библиотека используется для анимации.
При переходе v-bind добавлено свойство: css = “false”, что делается для того, чтобы Vue понимал, что это переход JavaScript.
Переход при начальном рендере
Чтобы добавить анимацию в начале, нам нужно добавить свойство «появиться» к элементу перехода.
Давайте посмотрим на пример, чтобы понять это лучше.
пример
<html>
   <head>
      <link href = "https://cdn.jsdelivr.net/npm/animate.css@3.5.1" rel = "stylesheet" type = "text/css">
      <script type = "text/javascript" src = "js/vue.js"></script>
   </head>
   <body>
      <div id = "animate" style = "text-align:center">
         <transition
            appear
            appear-class = "custom-appear-class"
            appear-active-class = "animated bounceIn">
            <h1>BounceIn - Animation Example</h1>
         </transition>
         <transition
            appear
            appear-class = "custom-appear-class"
            appear-active-class = "animated swing">
            <h1>Swing - Animation Example</h1>
         </transition>
         <transition
            appear
            appear-class = "custom-appear-class"
            appear-active-class = "animated rubberBand">
            <h1>RubberBand - Animation Example</h1>
         </transition>
      </div>
      <script type = "text/javascript">
         var vm =  new Vue({
            el: '#animate',
            data: {
               show: true
            }
         });
      </script>
   </body>
</html>
В приведенном выше примере мы использовали три разных анимации из библиотеки animate.css. Мы добавили появиться к элементу перехода.
При выполнении вышеприведенного кода последующим будет вывод в браузере.
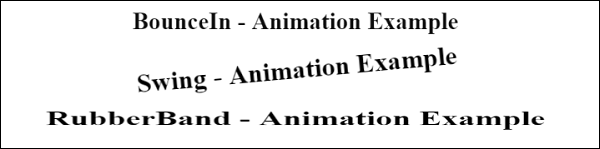
Анимация по компонентам
Мы можем обернуть переход для компонентов, используя следующий код. Мы использовали динамический компонент здесь.
пример
<html>
   <head>
      <title>VueJs Instance</title>
      <script type = "text/javascript" src = "js/vue.js"></script>
      <link href = "https://cdn.jsdelivr.net/npm/animate.css@3.5.1" rel = "stylesheet" type = "text/css">
   </head>
   <body>
      <div id = "databinding" style = "text-align:center;">
         <transition  appear
            appear-class = "custom-appear-class"
            appear-active-class = "animated wobble">
            <component v-bind:is = "view"></component>
         </transition>
      </div>
      <script type = "text/javascript">
         var vm = new Vue({
            el: '#databinding',
            data: {
               view: 'component1'
            },
            components: {
               'component1': {
                  template: '<div><span style = "font-
                  size:25;color:red;">Animation on Components</span></div>'
               }
            }
         });
      </script>
   </body>
</html>
Выход

VueJS – Директивы
Директивы – это инструкции для VueJS действовать определенным образом. Мы уже видели такие директивы, как v-if, v-show, v-else, v-for, v-bind, v-model, v-on и т. Д.
В этой главе мы рассмотрим пользовательские директивы. Мы создадим глобальные директивы, аналогичные тем, которые мы сделали для компонентов.
Синтаксис
Vue.directive('nameofthedirective', {
   bind(e1, binding, vnode) {
   }
})
Нам нужно создать директиву, используя Vue.directive. Он принимает имя директивы, как показано выше. Давайте рассмотрим пример, чтобы показать детали работы директив.
пример
<html>
   <head>
      <title>VueJs Instance</title>
      <script type = "text/javascript" src = "js/vue.js"></script>
   </head>
   <body>
      <div id = "databinding">
         <div v-changestyle>VueJS Directive</div>
      </div>
      <script type = "text/javascript">
         Vue.directive("changestyle",{
            bind(e1,binding, vnode) {
               console.log(e1);
               e1.style.color = "red";
               e1.style.fontSize = "30px";
            }
         });
         var vm = new Vue({
            el: '#databinding',
            data: {
            },
            methods : {
            },
         });
      </script>
   </body>
</html>
В этом примере мы создали пользовательскую директиву changetyletyle, как показано в следующем фрагменте кода.
Vue.directive("changestyle",{
   bind(e1,binding, vnode) {
      console.log(e1);
      e1.style.color = "red";
      e1.style.fontSize = "30px";
   }
});
Мы назначаем следующий тип изменений для div.
<div v-changestyle>VueJS Directive</div>
Если мы увидим в браузере, он отобразит текст директивы VueJs красным цветом, а размер шрифта увеличится до 30 пикселей.
Выход

Мы использовали метод bind, который является частью директивы. Он принимает три аргумента e1 , элемент, к которому должна применяться пользовательская директива. Привязка подобна аргументам, передаваемым в пользовательскую директиву, например, v-changestyle = ”{color: ‘green’}», где зеленый будет читаться в аргументе привязки, а vnode – элемент, то есть имя узла.
В следующем примере мы утешаем все аргументы, и он показывает, какие подробности дает каждый из них.
Ниже приведен пример со значением, переданным в пользовательскую директиву.
<html>
   <head>
      <title>VueJs Instance</title>
      <script type = "text/javascript" src = "js/vue.js"></script>
   </head>
   <body>
      <div id = "databinding">
         <div v-changestyle = "{color:'green'}">VueJS Directive</div>
      </div>
      <script type = "text/javascript">
         Vue.directive("changestyle",{
            bind(e1,binding, vnode) {
               console.log(e1);
               console.log(binding.value.color);
               console.log(vnode);
               e1.style.color=binding.value.color;
               e1.style.fontSize = "30px";
            }
         });
         var vm = new Vue({
            el: '#databinding',
            data: {
            },
            methods : {
            },
         });
      </script>
   </body>
</html>
Выход

Цвет текста меняется на зеленый. Значение передается с использованием следующего фрагмента кода.
<div v-changestyle = "{color:'green'}">VueJS Directive</div>
And it is accessed using the following piece of code.
Vue.directive("changestyle",{
   bind(e1,binding, vnode) {
      console.log(e1);
      console.log(binding.value.color);
      console.log(vnode);
      e1.style.color=binding.value.color;
      e1.style.fontSize = "30px";
   }
});
фильтры
VueJS поддерживает фильтры, которые помогают с форматированием текста. Он используется вместе с v-bind и интерполяциями ({{}}). Нам нужен символ канала в конце выражения JavaScript для фильтров.
пример
<html>
   <head>
      <title>VueJs Instance</title>
      <script type = "text/javascript" src = "js/vue.js"></script>
   </head>
   <body>
      <div id = "databinding">
         <input  v-model = "name" placeholder = "Enter Name" /><br/>
         <span style = "font-size:25px;"><b>Letter count is : {{name | countletters}}</b></span>
      </div>
      <script type = "text/javascript">
         var vm = new Vue({
            el: '#databinding',
            data: {
               name : ""
            },
            filters : {
               countletters : function(value) {
                  return value.length;
               }
            }
         });
      </script>
   </body>
</html>
В приведенном выше примере мы создали простой фильтр счетчиков. Фильтр Countletters подсчитывает количество символов, введенных в текстовое поле. Чтобы использовать фильтры, нам нужно использовать свойство фильтра и определить используемый фильтр следующим фрагментом кода.
filters : {
   countletters : function(value) {
      return value.length;
   }
}
Мы определяем счетчики методов и возвращаем длину введенной строки.
Чтобы использовать фильтр на дисплее, мы использовали оператор канала и имя фильтра, то есть счетчики .
<span style = "font-size:25px;"><b>Letter count is : {{name | countletters}}</b></span>
Ниже приводится отображение в браузере.
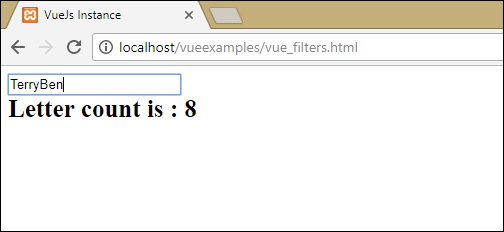
Мы также можем передать аргументы фильтру, используя следующий фрагмент кода.
<span style = "font-size:25px;"><b>Letter count is : {{name | countletters('a1', 'a2')}}</b></span>
Теперь счетчики будут иметь три параметра, то есть message, a1 и a2 .
Мы также можем передать несколько фильтров для интерполяции, используя следующий фрагмент кода.
<span style = "font-size:25px;"><b>Letter count is : {{name | countlettersA, countlettersB}}</b></span>
В свойствах фильтра countlettersA и countlettersB будут двумя методами, а countlettersA передаст детали в countlettersB .
VueJS – Маршрутизация
VueJS не имеет встроенного маршрутизатора Feauture. Нам нужно выполнить некоторые дополнительные шаги, чтобы установить его.
Прямая загрузка из CDN
Последняя версия vue-router доступна по адресу https://unpkg.com/vue-router/dist/vue-router.js.
Unpkg.com предоставляет основанные на npm cdn ссылки. Приведенная выше ссылка всегда обновляется до последней версии. Мы можем скачать и разместить его и использовать с тегом script вместе с vue.js следующим образом:
<script src = "/path/to/vue.js"></script>
<script src = "/path/to/vue-router.js"></script>
Использование NPM
Выполните следующую команду для установки vue-router.
npm install vue-router
Использование GitHub
Мы можем клонировать репозиторий из GitHub следующим образом:
git clone https://github.com/vuejs/vue-router.git node_modules/vue-router
cd node_modules/vue-router
npm install
npm run build
Давайте начнем с простого примера использования vue-router.js.
пример
<html>
   <head>
      <title>VueJs Instance</title>
      <script type = "text/javascript" src = "js/vue.js"></script>
      <script type = "text/javascript" src = "js/vue-router.js"></script>
   </head>
   <body>
      <div id = "app">
         <h1>Routing Example</h1>
         <p>
            <router-link to = "/route1">Router Link 1</router-link>
            <router-link to = "/route2">Router Link 2</router-link>
         </p>
         <!-- route outlet -->
         <!-- component matched by the route will render here -->
         <router-view></router-view>
      </div>
      <script type = "text/javascript">
         const Route1 = { template: '<div style = "border-radius:20px;background-color:cyan;width:200px;height:50px;margin:10px;font-size:25px;padding:10px;">This is router 1</div>' }
         const Route2 = { template: '<div style = "border-radius:20px;background-color:green;width:200px;height:50px;margin:10px;font-size:25px;padding:10px;">This is router 2</div>' }
         const routes = [
            { path: '/route1', component: Route1 },
            { path: '/route2', component: Route2 }
         ];
         const router = new VueRouter({
            routes // short for `routes: routes`
         });
         var vm = new Vue({
            el: '#app',
            router
         });
      </script>
   </body>
</html>
Выход

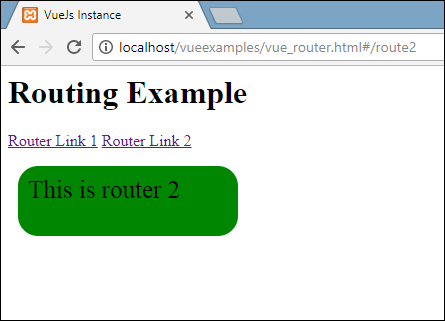
Чтобы начать с маршрутизации, нам нужно добавить файл vue-router.js. Возьмите код из https://unpkg.com/vue-router/dist/vue-router.js и сохраните его в файле vue-router.js.
Сценарий добавляется после vue.js следующим образом:
<script type = "text/javascript" src = "js/vue.js"></script>
<script type = "text/javascript" src = "js/vue-router.js"></script>
В разделе тела есть ссылка на маршрутизатор, определяемая следующим образом:
<p>
   <router-link   to = "/route1">Router Link 1</router-link>
   <router-link    to = "/route2">Router Link 2</router-link>
</p>
<router-link> – это компонент, используемый для перехода к содержимому HTML, которое будет отображаться пользователю. Свойство to является местом назначения, то есть исходным файлом, в котором будет выбрано содержимое для отображения.
В приведенном выше фрагменте кода мы создали две ссылки на маршрутизатор.
Взгляните на раздел скриптов, где инициализируется маршрутизатор. Есть две константы, созданные следующим образом:
const  Route1 = { template: '<div style = "border-radius:20px;background-color:cyan;width:200px;height:50px;margin:10px;font-size:25px;padding:10px;">This is router 1</div>' };
const Route2 = { template: '<div style = "border-radius:20px;background-color:green;width:200px;height:50px;margin:10px;font-size:25px;padding:10px;">This is router 2</div>' }
У них есть шаблоны, которые должны отображаться при нажатии на ссылку маршрутизатора.
Далее идет маршрут const, который определяет путь для отображения в URL.
const routes = [
   { path: '/route1', component: Route1 },
   { path: '/route2', component: Route2 }
];
Маршруты определяют путь и компонент. Путь ie / route1 будет отображаться в URL, когда пользователь нажимает на ссылку маршрутизатора.
Компонент принимает имена шаблонов для отображения. Путь от маршрутов должен совпадать с ссылкой маршрутизатора на свойство.
Например, <router-link to = «путь сюда» > </ router-link>
Затем экземпляр создается в VueRouter с использованием следующего фрагмента кода.
const router = new VueRouter({
   routes // short for `routes: routes`
});
Конструктор VueRouter принимает маршруты в качестве параметра. Объект router назначается основному экземпляру vue с помощью следующего фрагмента кода.
var vm = new Vue({
   el: '#app',
   router
});
Выполните пример и увидите отображение в браузере. При проверке и проверке ссылки на маршрутизатор мы обнаружим, что он добавляет класс к активному элементу, как показано на следующем снимке экрана.

Добавлен класс: «router-link-точно-active router-link-active» . Активная ссылка получает класс, как показано на скриншоте выше. Следует также отметить, что <router-link> отображается как тег.
Реквизит для роутера Link
Давайте посмотрим еще некоторые свойства, которые будут переданы <router-link>.
в
Это путь назначения, указанный для <router-link>. При нажатии значение to будет передано в router.push () внутри. Значение должно быть строкой или объектом местоположения. При использовании объекта нам нужно связать его, как показано, например, в 2.
e.g. 1:  <router-link to = "/route1">Router Link 1</router-link>
renders as
<a href = ”#/route”>Router Link </a>
e.g. 2:  <router-link v-bind:to = "{path:'/route1'}">Router Link 1</router-link>
e.g. 3: <router-link v-bind:to =
   "{path:'/route1', query: { name: 'Tery' }}">Router Link 1</router-link>//router link with query string.
Ниже приводится вывод, например, 3.
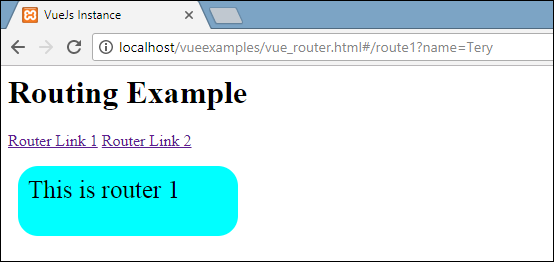
В пути URL имя = Tery является частью строки запроса. Например: http: //localhost/vueexamples/vue_router.html#/route1? Name = Tery
замещать
Добавление замены к ссылке на маршрутизатор вызовет router.replace () вместо router.push () . При замене история навигации не сохраняется.
пример
<router-link v-bind:to = "{path:'/route1', query: { name: 'Tery' }}" replace>Router Link 1</router-link>
присоединять
Добавление append к <router-link> <router-link> сделает путь относительным.
Если мы хотим перейти от ссылки маршрутизатора с путем / маршрута1 к пути / маршруту2 ссылки на маршрутизатор, он будет отображать путь в браузере как / route1 / route2.
пример
<router-link v-bind:to = "{ path: '/route1'}" append>Router Link 1</router-link>
тег
В настоящее время <router-link> отображается как тег. В случае, если мы хотим отобразить его как какой-то другой тег, нам нужно указать то же самое, используя tag = ”tagname”;
пример
<p>
   <router-link v-bind:to = "{ path: '/route1'}" tag = "span">Router Link 1</router-link>
   <router-link v-bind:to = "{ path: '/route2'}" tag = "span">Router Link 2</router-link>
</p>
Мы указали тег как span, и это то, что отображается в браузере.
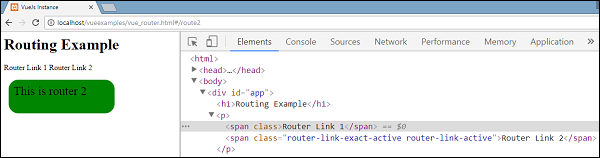
Тег, отображаемый сейчас, является тегом span. Мы по-прежнему увидим, как щелчок идет, когда мы нажимаем на ссылку маршрутизатора для навигации.
активный класс
По умолчанию активный класс, добавленный, когда активна ссылка на маршрутизатор, является активным для соединения с маршрутизатором. Мы можем перезаписать класс, установив его так, как показано в следующем коде.
<style>
   ._active{
      background-color : red;
   }
</style>
<p>
   <router-link v-bind:to = "{ path: '/route1'}" active-class = "_active">Router Link 1</router-link>
   <router-link v-bind:to = "{ path: '/route2'}" tag = "span">Router Link 2</router-link>
</p>
Используемый класс – active_class = ”_active”. Это вывод, отображаемый в браузере.

Точный-активный класс
Применяемый класс по умолчанию activeactive – router-link-точно-active. Мы можем перезаписать его с помощью точного активного класса.
пример
<p>
   <router-link v-bind:to = "{ path: '/route1'}" exact-active-class = "_active">Router Link 1</router-link>
   <router-link v-bind:to = "{ path: '/route2'}" tag = "span">Router Link 2</router-link>
</p>
Это то, что отображается в браузере.
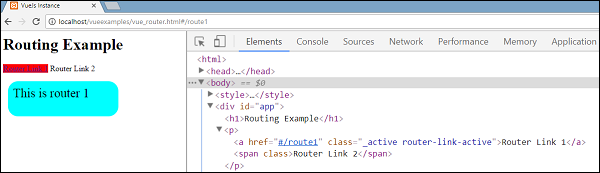
событие
В настоящее время событием по умолчанию для маршрутизатора-ссылки является событие щелчка. Мы можем изменить то же самое, используя свойство события.
пример
<router-link v-bind:to = "{ path: '/route1'}" event = "mouseover">Router Link 1</router-link>
Теперь, когда мы наведем указатель мыши на ссылку маршрутизатора, он будет перемещаться, как показано в следующем браузере. Наведите курсор мыши на ссылку 1 маршрутизатора, и мы увидим изменение навигации.
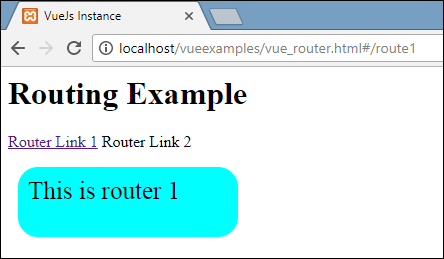
VueJS – Mixins
Mixins в основном должны использоваться с компонентами. Они разделяют повторно используемый код среди компонентов. Когда компонент использует mixin, все параметры mixin становятся частью параметров компонента.
пример
<html>
   <head>
      <title>VueJs Instance</title>
      <script type = "text/javascript" src = "js/vue.js"></script>
   </head>
   <body>
      <div id = "databinding"></div>
      <script type = "text/javascript">
         var vm = new Vue({
            el: '#databinding',
            data: {
            },
            methods : {
            },
         });
         var myMixin = {
            created: function () {
               this.startmixin()
            },
            methods: {
               startmixin: function () {
                  alert("Welcome  to mixin example");
               }
            }
         };
         var Component = Vue.extend({
            mixins: [myMixin]
         })
         var component = new Component();
      </script>
   </body>
</html>
Выход
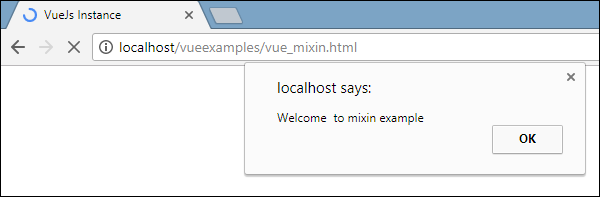
Когда миксин и компонент содержат перекрывающиеся параметры, они объединяются, как показано в следующем примере.
<html>
   <head>
      <title>VueJs Instance</title>
      <script type = "text/javascript" src = "js/vue.js"></script>
   </head>
   <body>
      <div id = "databinding"></div>
      <script type = "text/javascript">
         var mixin = {
            created: function () {
               console.log('mixin called')
            }
         }
         new Vue({
            mixins: [mixin],
            created: function () {
               console.log('component called')
            }
         });
      </script>
   </body>
</html>
Теперь в экземпляре mixin и vue создан один и тот же метод. Это вывод, который мы видим в консоли. Как видно, опция vue и mixin будут объединены.
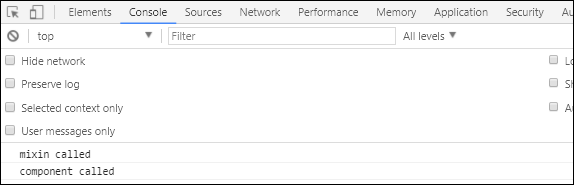
Если мы получим одно и то же имя функции в методах, то главный экземпляр vue получит приоритет.
пример
![]()
<html>
   <head>
      <title>VueJs Instance</title>
      <script type = "text/javascript" src = "js/vue.js"></script>
   </head>
   <body>
      <div id = "databinding"></div>
      <script type = "text/javascript">
         var mixin = {
            methods: {
               hellworld: function () {
                  console.log('In HelloWorld');
               },
               samemethod: function () {
                  console.log('Mixin:Same Method');
               }
            }
         };
         var vm = new Vue({
            mixins: [mixin],
            methods: {
               start: function () {
                  console.log('start method');
               },
               samemethod: function () {
                  console.log('Main: same method');
               }
            }
         });
         vm.hellworld();
         vm.start();
         vm.samemethod();
      </script>
   </body>
</html>
Мы увидим, что mixin имеет свойство метода, в котором определены функции helloworld и samemethod. Аналогично, экземпляр vue обладает свойством методов, в котором опять-таки определены два метода start и samemethod.
Каждый из следующих методов вызывается.
vm.hellworld(); // In HelloWorld
vm.start(); // start method
vm.samemethod(); // Main: same method
Как показано выше, мы вызвали helloworld, start и samemethod function. samemehod также присутствует в mixin, однако приоритет будет отдан основному экземпляру, как показано на следующей консоли.

VueJS – функция рендеринга
Мы видели компоненты и использование этого. Например, у нас есть контент, который необходимо повторно использовать в проекте. Мы можем конвертировать так же, как компонент и использовать его.
Давайте рассмотрим пример простого компонента и посмотрим, что должна делать функция рендеринга внутри него.
пример
<html>
   <head>
      <title>VueJs Instance</title>
      <script type = "text/javascript" src = "js/vue.js"></script>
   </head>
   <body>
      <div id = "component_test">
         <testcomponent></testcomponent>
      </div>
      <script type = "text/javascript">
         Vue.component('testcomponent',{
            template : '<h1>Hello World</h1>',
            data: function() {
            },
            methods:{
            }
         });
         var vm = new Vue({
            el: '#component_test'
         });
      </script>
   </body>
</html>
Рассмотрим приведенный выше пример простого компонента, который печатает Hello World, как показано на следующем снимке экрана.
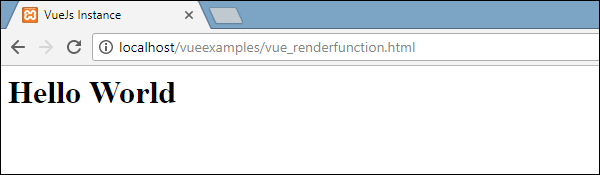
Теперь, если мы хотим повторно использовать компонент, мы можем сделать это, просто распечатав его снова. Например,
<div id = "component_test">
   <testcomponent></testcomponent>
   <testcomponent></testcomponent>
   <testcomponent></testcomponent>
   <testcomponent></testcomponent>
</div>
И вывод будет следующий.
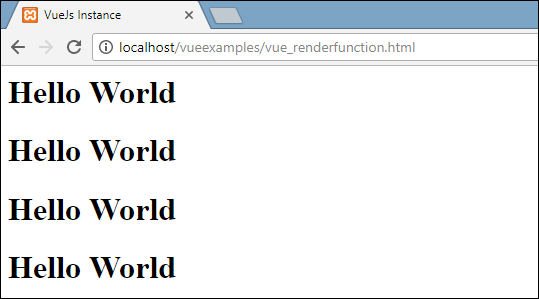
Однако теперь нам нужны некоторые изменения в компоненте. Мы не хотим, чтобы один и тот же текст печатался. Как мы можем изменить это? Если мы введем что-то внутри компонента, это будет учтено?
Давайте рассмотрим следующий пример и посмотрим, что произойдет.
<div id = "component_test">
   <testcomponent>Hello Jai</testcomponent>
   <testcomponent>Hello Roy</testcomponent>
   <testcomponent>Hello Ria</testcomponent>
   <testcomponent>Hello Ben</testcomponent>
</div>
Вывод остается таким же, как мы видели ранее. Это не меняет текст, как мы хотим.

Компонент обеспечивает то, что называется слотами . Давайте использовать его и посмотрим, получим ли мы желаемые результаты.
пример
<html>
   <head>
      <title>VueJs Instance</title>
      <script type = "text/javascript" src = "js/vue.js"></script>
   </head>
   <body>
      <div id = "component_test">
         <testcomponent>Hello Jai</testcomponent>
         <testcomponent>Hello Roy</testcomponent>
         <testcomponent>Hello Ria</testcomponent>
         <testcomponent>Hello Ben</testcomponent>
      </div>
      <script type = "text/javascript">
         Vue.component('testcomponent',{
            template : '<h1><slot></slot></h1>',
            data: function() {
            },
            methods:{
            }
         });
         var vm = new Vue({
            el: '#component_test'
         });
      </script>
   </body>
</html>
Как видно из приведенного выше кода, в шаблон мы добавили слот, следовательно, теперь требуется значение для отправки внутри компонента, как показано на следующем снимке экрана.

Теперь давайте рассмотрим, что мы хотим изменить цвет и размер. Например, в настоящее время мы используем тег h1 и хотим изменить тег HTML на тег p или тег div для того же компонента. Как мы можем иметь гибкость для проведения такого количества изменений?
Мы можем сделать это с помощью функции рендера. Функция рендеринга помогает сделать компонент динамичным и использовать его так, как требуется, поддерживая его общий характер и помогая передавать аргументы с использованием того же компонента.
пример
<html>
   <head>
      <title>VueJs Instance</title>
      <script type = "text/javascript" src = "js/vue.js"></script>
   </head>
   <body>
      <div id = "component_test">
         <testcomponent :elementtype = "'div,red,25,div1'">Hello Jai</testcomponent>
         <testcomponent :elementtype = "'h3,green,25,h3tag'">Hello Roy</testcomponent>
         <testcomponent :elementtype = "'p,blue,25,ptag'">Hello Ria</testcomponent>
         <testcomponent :elementtype = "'div,green,25,divtag'">Hello Ben</testcomponent>
      </div>
      <script type = "text/javascript">
         Vue.component('testcomponent',{
            render :function(createElement){
               var a = this.elementtype.split(",");
               return createElement(a[0],{
                  attrs:{
                     id:a[3],
                     style:"color:"+a[1]+";font-size:"+a[2]+";"
                  }
               },
               this.$slots.default
               )
            },
            props:{
               elementtype:{
                  attributes:String,
                  required:true
               }
            }
         });
         var vm = new Vue({
            el: '#component_test'
         });
      </script>
   </body>
</html>
В приведенном выше коде мы изменили компонент и добавили функцию рендеринга со свойством props, используя следующий фрагмент кода.
Vue.component('testcomponent',{
   render :function(createElement){
      var a = this.elementtype.split(",");
      return createElement(a[0],{
         attrs:{
            id:a[3],
            style:"color:"+a[1]+";font-size:"+a[2]+";"
         }
      },
      this.$slots.default
      )
   },
   props:{
      elementtype:{
         attributes:String,
         required:true
      }
   }
});
Реквизит выглядит следующим образом.
props:{
   elementtype:{
      attributes:String,
      required:true
   }
}
Мы определили свойство с именем elementtype, которое принимает поле атрибутов типа string. Другое обязательное поле, в котором упоминается, что это поле является обязательным.
В функции рендеринга мы использовали свойство elementtype, как показано в следующем фрагменте кода.
render :function(createElement){
   var a = this.elementtype.split(",");
   return createElement(a[0],{
      attrs:{
         id:a[3],
         style:"color:"+a[1]+";font-size:"+a[2]+";"
      }
   },
   this.$slots.default
   )
}
Функция рендеринга принимает createElement в качестве аргумента и возвращает то же самое. CreateElement создает элемент DOM так же, как в JavaScript. Мы также разбили тип элемента по запятой, используя значения в поле attrs.
CreateElement принимает первый параметр в качестве тега элемента, который будет создан. Он передается компоненту с использованием следующего фрагмента кода.
<testcomponent :elementtype = "'div,red,25,div1'">Hello Jai</testcomponent>
Компонент должен занять поле реквизита, как показано выше. Начинается с: и названия реквизита. Здесь мы передаем тег элемента, цвет, размер шрифта и идентификатор элемента.
В функции рендеринга, в createElement, мы разделяем запятую, поэтому первым элементом является тег тега, который присваивается createElemet, как показано в следующем фрагменте кода.
return createElement(
   a[0],{
      attrs:{
         id:a[3],
         style:"color:"+a[1]+";font-size:"+a[2]+";"
      }
   },
   this.$slots.default
)
[0] – это тег элемента html. Следующий параметр – это атрибуты тега элемента. Они определены в поле attr в следующем фрагменте кода.
attrs:{
   id:a[3],
   style:"color:"+a[1]+";font-size:"+a[2]+";"
}
Для тега элемента мы определили два атрибута – id и style . Идентификатору мы передаем [3], то есть значение, которое мы имеем после разделения на запятую. Используя стиль, мы определили цвет и размер шрифта.
Последний – это слот, то есть сообщение, которое мы дали в компоненте в следующем фрагменте кода.
<testcomponent :elementtype = "'div,red,25,div1'">Hello Jai</testcomponent>
Мы определили текст, который будет напечатан в createElement, используя следующий фрагмент кода.
this.$slots.default
Он принимает значение по умолчанию, назначенное в поле компонента.
Ниже приведен вывод, который мы получаем в браузере.

Элементы также показывают структуру. Это компоненты, которые мы определили –
<div id = "component_test">
   <testcomponent :elementtype = "'div,red,25,div1'">Hello Jai</testcomponent>
   <testcomponent :elementtype = "'h3,green,25,h3tag'">Hello Roy</testcomponent>
   <testcomponent :elementtype = "'p,blue,25,ptag'">Hello Ria</testcomponent>
   <testcomponent :elementtype = "'div,green,25,divtag'">Hello Ben</testcomponent>
</div>
VueJS – Реактивный интерфейс
VueJS предоставляет опции для добавления реактивности к свойствам, которые добавляются динамически. Учтите, что мы уже создали экземпляр vue, и нам нужно добавить свойство watch. Это можно сделать следующим образом –
пример
<html>
   <head>
      <title>VueJs Instance</title>
      <script type = "text/javascript" src = "js/vue.js"></script>
   </head>
   <body>
      <div id = "app">
         <p style = "font-size:25px;">Counter: {{ counter }}</p>
         <button @click = "counter++" style = "font-size:25px;">Click Me</button>
      </div>
      <script type = "text/javascript">
         var vm = new Vue({
            el: '#app',
            data: {
               counter: 1
            }
         });
         vm.$watch('counter', function(nval, oval) {
            alert('Counter is incremented :' + oval + ' to ' + nval + '!');
         });
         setTimeout(
            function(){
               vm.counter = 20;
            },2000
         );
      </script>
   </body>
</html>
В объекте данных есть счетчик свойств, определенный как 1. Счетчик увеличивается, когда мы нажимаем кнопку.
Экземпляр Vue уже создан. Чтобы добавить часы к этому, нам нужно сделать это следующим образом –
vm.$watch('counter', function(nval, oval) {
   alert('Counter is incremented :' + oval + ' to ' + nval + '!');
});
Нам нужно использовать $ watch, чтобы добавить watch вне экземпляра vue. Добавлено предупреждение, которое показывает изменение значения свойства counter. Также добавлена функция таймера, т.е. setTimeout, которая устанавливает значение счетчика в 20.
setTimeout(
   function(){
      vm.counter = 20;
   },2000
);
Всякий раз, когда счетчик изменяется, срабатывает предупреждение от метода watch, как показано на следующем снимке экрана.
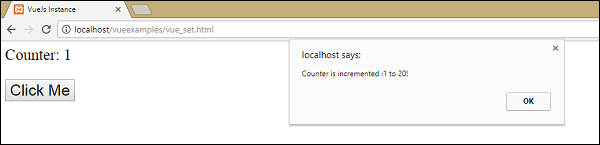
VueJS не может обнаружить добавление и удаление свойств. Лучший способ – всегда объявлять свойства, которые должны быть активными заранее в экземпляре Vue. Если нам нужно добавить свойства во время выполнения, мы можем использовать методы Vue global, Vue.set и Vue.delete.
Vue.set
Этот метод помогает установить свойство объекта. Он используется, чтобы обойти ограничение, заключающееся в том, что Vue не может обнаруживать добавления свойств.
Синтаксис
Vue.set( target, key, value )
Куда,
target: может быть объектом или массивом
ключ: может быть строкой или числом
значение: может быть любого типа
Давайте посмотрим на пример.
пример
<html>
   <head>
      <title>VueJs Instance</title>
      <script type = "text/javascript" src = "js/vue.js"></script>
   </head>
   <body>
      <div id = "app">
         <p style = "font-size:25px;">Counter: {{ products.id }}</p>
         <button @click = "products.id++" style = "font-size:25px;">Click Me</button>
      </div>
      <script type = "text/javascript">
         var myproduct = {"id":1, name:"book", "price":"20.00"};
         var vm = new Vue({
            el: '#app',
            data: {
               counter: 1,
               products: myproduct
            }
         });
         vm.products.qty = "1";
         console.log(vm);
         vm.$watch('counter', function(nval, oval) {
            alert('Counter is incremented :' + oval + ' to ' + nval + '!');
         });
      </script>
   </body>
</html>
В приведенном выше примере переменная myproduct создается в начале с использованием следующего фрагмента кода.
var myproduct = {"id":1, name:"book", "price":"20.00"};
Он присваивается объекту данных в экземпляре Vue следующим образом:
var vm = new Vue({
   el: '#app',
   data: {
      counter: 1,
      products: myproduct
   }
});
Предположим, мы хотим добавить еще одно свойство в массив myproduct после создания экземпляра Vue. Это можно сделать следующим образом –
vm.products.qty = "1";
Давайте посмотрим на вывод в консоли.
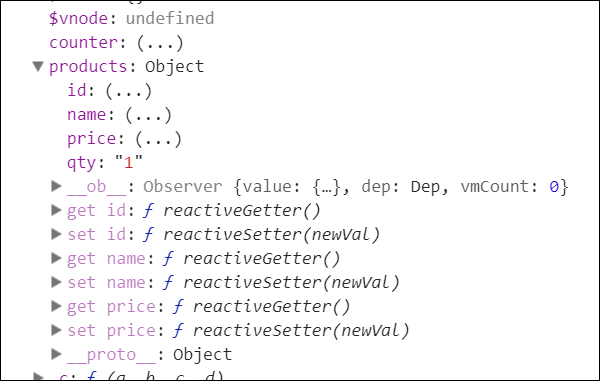
Как видно выше, в продуктах добавляется количество. Методы get / set, которые в основном добавляют реактивность, доступны для идентификатора, имени и цены, но не доступны для qty.
Мы не можем добиться реактивности, просто добавив объект vue. VueJS в основном хочет, чтобы все его свойства были созданы с самого начала. Однако, если нам нужно добавить его позже, мы можем использовать Vue.set. Для этого нам нужно установить его, используя vue global, т.е. Vue.set.
пример
<html>
   <head>
      <title>VueJs Instance</title>
      <script type = "text/javascript" src = "js/vue.js"></script>
   </head>
   <body>
      <div id = "app">
         <p style = "font-size:25px;">Counter: {{ products.id }}</p>
         <button @click = "products.id++" style = "font-size:25px;">Click Me</button>
      </div>
      <script type = "text/javascript">
         var myproduct = {"id":1, name:"book", "price":"20.00"};
         var vm = new Vue({
            el: '#app',
            data: {
               counter: 1,
               products: myproduct
            }
         });
         Vue.set(myproduct, 'qty', 1);
         console.log(vm);
         vm.$watch('counter', function(nval, oval) {
            alert('Counter is incremented :' + oval + ' to ' + nval + '!');
         });
      </script>
   </body>
</html>
Мы использовали Vue.set для добавления qty в массив, используя следующий фрагмент кода.
Vue.set(myproduct, 'qty', 1);
Мы утешаем объект vue, и следующий вывод.
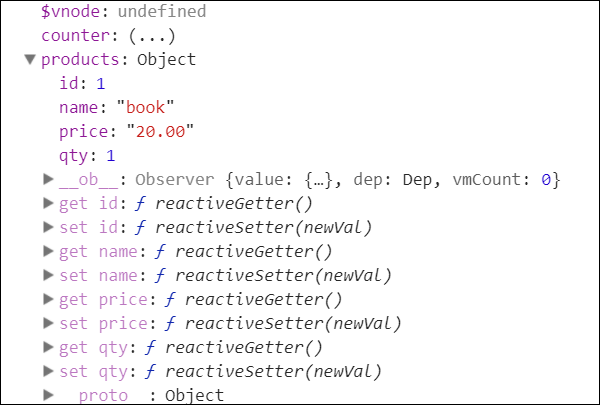
Теперь мы можем увидеть get / set для qty, добавленного с помощью Vue.set.
Vue.delete
Эта функция используется для динамического удаления свойства.
пример
Vue.delete( target, key )
Куда,
target: может быть объектом или массивом
ключ: может быть строкой или числом
Чтобы удалить любое свойство, мы можем использовать Vue.delete как в следующем коде.
пример
<html>
   <head>
      <title>VueJs Instance</title>
      <script type = "text/javascript" src = "js/vue.js"></script>
   </head>
   <body>
      <div id = "app">
         <p style = "font-size:25px;">Counter: {{ products.id }}</p>
         <button @click = "products.id++" style = "font-size:25px;">Click Me</button>
      </div>
      <script type = "text/javascript">
         var myproduct = {"id":1, name:"book", "price":"20.00"};
         var vm = new Vue({
            el: '#app',
            data: {
               counter: 1,
               products: myproduct
            }
         });
         Vue.delete(myproduct, 'price');
         console.log(vm);
         vm.$watch('counter', function(nval, oval) {
            alert('Counter is incremented :' + oval + ' to ' + nval + '!');
         });
      </script>
   </body>
</html>
В приведенном выше примере мы использовали Vue.delete для удаления цены из массива, используя следующий фрагмент кода.
Vue.delete(myproduct, 'price');
Ниже приведен вывод, который мы видим в консоли.
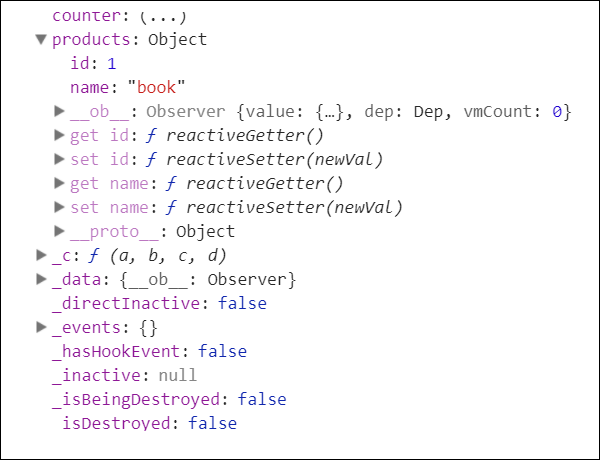
После удаления мы можем видеть только идентификатор и имя, так как цена удаляется. Мы также можем заметить, что методы get / set удалены.
VueJS – Примеры
Пример 1: конвертер валют
<html>
   <head>
      <title>VueJs Instance</title>
      <script type = "text/javascript" src = "js/vue.js"></script>
   </head>
   <body>
      <style>
         #databinding{
            padding: 20px 15px 15px 15px;
            margin: 0 0 25px 0;
            width: auto;
            background-color: #e7e7e7;
         }
         span, option, input {
            font-size:25px;
         }
      </style>

      <div id = "databinding" style = "">
         <h1>Currency Converter</h1>
         <span>Enter Amount:</span><input type = "number" v-model.number = "amount" placeholder = "Enter Amount" /><br/><br/>
         <span>Convert From:</span>
         <select v-model = "convertfrom" style = "width:300px;font-size:25px;">
            <option v-for = "(a, index) in currencyfrom"  v-bind:value = "a.name">{{a.desc}}</option>
         </select>
         <span>Convert To:</span>
         <select v-model = "convertto" style = "width:300px;font-size:25px;">
            <option v-for = "(a, index) in currencyfrom" v-bind:value = "a.name">{{a.desc}}</option>
         </select><br/><br/>
         <span> {{amount}} {{convertfrom}} equals {{finalamount}} {{convertto}}</span>
      </div>

      <script type = "text/javascript">
         var vm = new Vue({
            el: '#databinding',
            data: {
               name:'',
               currencyfrom : [
                  {name : "USD", desc:"US Dollar"},
                  {name:"EUR", desc:"Euro"},
                  {name:"INR", desc:"Indian Rupee"},
                  {name:"BHD", desc:"Bahraini Dinar"}
               ],
               convertfrom: "INR",
               convertto:"USD",
               amount :""
            },
            computed :{
               finalamount:function() {
                  var to = this.convertto;
                  var from = this.convertfrom;
                  var final;
                  switch(from) {
                     case "INR":
                     if (to == "USD") {
                        final = this.amount * 0.016;
                     }
                     if (to == "EUR") {
                        final = this.amount * 0.013;
                     }
                     if (to == "INR") {
                        final = this.amount;
                     }
                     if (to == "BHD") {
                        final = this.amount * 0.0059;
                     }
                     break;
                     case "USD":
                     if (to == "INR") {
                        final = this.amount * 63.88;
                     }
                     if (to == "EUR") {
                        final = this.amount * 0.84;
                     }
                     if (to == "USD") {
                        final = this.amount;
                     }
                     if (to == "BHD") {
                        final = this.amount * 0.38;
                     }
                     break;
                     case "EUR":
                     if (to == "INR") {
                        final = this.amount * 76.22;
                     }
                     if (to == "USD") {
                        final = this.amount * 1.19;
                     }
                     if (to == "EUR") {
                        final = this.amount;
                     }
                     if (to == "BHD") {
                        final = this.amount * 0.45;
                     }
                     break;
                     case "BHD":
                     if (to == "INR") {
                        final = this.amount *169.44;
                     }
                     if (to == "USD") {
                        final = this.amount * 2.65;
                     }
                     if (to == "EUR") {
                        final = this.amount * 2.22;
                     }
                     if (to == "BHD") {
                        final = this.amount;
                     }
                     break
                  }
                  return final;
               }
            }
         });
      </script>
   </body>
</html>
Выход (в долларах США)
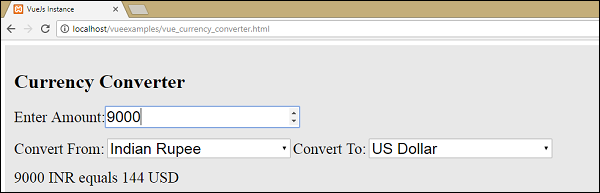
Выход: преобразование в BHD
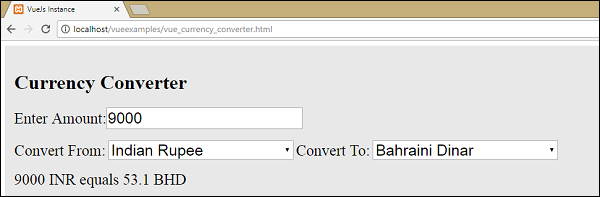
Пояснение. В приведенном выше примере мы создали конвертер валют, который преобразует одно значение валюты в выбранное значение другой валюты. Мы создали два выпадающих списка валют. Когда мы вводим сумму для конвертации в текстовое поле, то же самое отображается ниже после конвертации. Мы используем вычисленное свойство, чтобы сделать необходимые вычисления для конвертации валюты.
Пример 2: Данные клиента
<html>
   <head>
      <title>VueJs Instance</title>
      <script type = "text/javascript" src = "js/vue.js"></script>
   </head>
   <body>
      <style>
         #databinding{
            padding: 20px 15px 15px 15px;
            margin: 0 0 25px 0;
            width: auto;
         }
         span, option, input {
            font-size:20px;
         }
         .Table{
            display: table;
            width:80%;
         }
         .Title{
            display: table-caption;
            text-align: center;
            font-weight: bold;
            font-size: larger;
         }
         .Heading{
            display: table-row;
            font-weight: bold;
            text-align: center;
         }
         .Row{
            display: table-row;
         }
         .Cell{
            display: table-cell;
            border: solid;
            border-width: thin;
            padding-left: 5px;
            padding-right: 5px;
            width:30%;
         }
      </style>

      <div id = "databinding" style = "">
         <h1>Customer Details</h1>
         <span>First Name</span>
         <input type = "text" placeholder = "Enter First Name" v-model = "fname"/>
         <span>Last Name</span>
         <input type = "text" placeholder = "Enter Last Name" v-model = "lname"/>
         <span>Address</span>
         <input type = "text" placeholder = "Enter Address" v-model = "addr"/>
         <button v-on:click = "showdata" v-bind:style = "styleobj">Add</button>
         <br/>
         <br/>
         <customercomponent
            v-for = "(item, index) in custdet"
            v-bind:item = "item"
            v-bind:index = "index"
            v-bind:itr = "item"
            v-bind:key = "item.fname"
            v-on:removeelement = "custdet.splice(index, 1)">
         </customercomponent>
      </div>

      <script type = "text/javascript">
         Vue.component('customercomponent',{
            template : '<div class = "Table"><div class = "Row"  v-bind:style = "styleobj"><div class = "Cell"><p>{{itr.fname}}</p></div><div class = "Cell"><p>{{itr.lname}}</p></div><div class = "Cell"><p>{{itr.addr}}</p></div><div class = "Cell"><p><button v-on:click = "$emit('removeelement')">X</button></p></div></div></div>',
            props: ['itr', 'index'],
            data: function() {
               return {
                  styleobj : {
                     backgroundColor:this.getcolor(),
                     fontSize : 20
                  }
               }
            },
            methods:{
               getcolor : function() {
                  if (this.index % 2) {
                     return "#FFE633";
                  } else {
                     return "#D4CA87";
                  }
               }
            }
         });
         var vm = new Vue({
            el: '#databinding',
            data: {
               fname:'',
               lname:'',
               addr : '',
               custdet:[],
               styleobj: {
                  backgroundColor: '#2196F3!important',
                  cursor: 'pointer',
                  padding: '8px 16px',
                  verticalAlign: 'middle',
               }
            },
            methods :{
               showdata : function() {
                  this.custdet.push({
                     fname: this.fname,
                     lname: this.lname,
                     addr : this.addr
                  });
                  this.fname = "";
                  this.lname = "";
                  this.addr = "";
               }
            }
         });
      </script>
   </body>
</html>
Выход
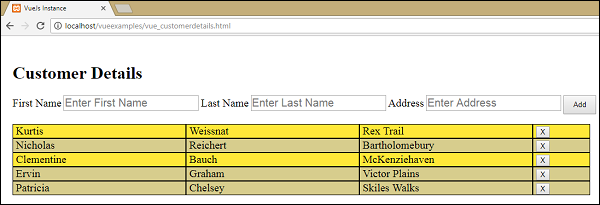
Вывод после удаления

Пояснение – в приведенном выше примере у нас есть три текстовых поля для ввода – имя, фамилия и адрес. Есть кнопка добавления, которая добавляет значения, введенные в текстовые поля в табличном формате, с помощью кнопки удаления.
Формат таблицы создается с использованием компонентов. Кнопка щелчка взаимодействует с родительским компонентом, используя событие emit для удаления элемента из массива. Введенные значения сохраняются в массиве и используются совместно с дочерним компонентом с помощью свойства prop .
VueJS — Overview
VueJS is an open source progressive JavaScript framework used to develop interactive web interfaces. It is one of the famous frameworks used to simplify web development. VueJS focusses on the view layer. It can be easily integrated into big projects for front-end development without any issues.
The installation for VueJS is very easy to start with. Any developer can easily understand and build interactive web interfaces in a matter of time. VueJS is created by Evan You, an ex-employee from Google. The first version of VueJS was released in Feb 2014. It recently has clocked to 64,828 stars on GitHub, making it very popular.
Features
Following are the features available with VueJS.
Virtual DOM
VueJS makes the use of virtual DOM, which is also used by other frameworks such as React, Ember, etc. The changes are not made to the DOM, instead a replica of the DOM is created which is present in the form of JavaScript data structures. Whenever any changes are to be made, they are made to the JavaScript data structures and the latter is compared with the original data structure. The final changes are then updated to the real DOM, which the user will see changing. This is good in terms of optimization, it is less expensive and the changes can be made at a faster rate.
Data Binding
The data binding feature helps manipulate or assign values to HTML attributes, change the style, assign classes with the help of binding directive called v-bind available with VueJS.
Components
Components are one of the important features of VueJS that helps create custom elements, which can be reused in HTML.
Event Handling
v-on is the attribute added to the DOM elements to listen to the events in VueJS.
Animation/Transition
VueJS provides various ways to apply transition to HTML elements when they are added/updated or removed from the DOM. VueJS has a built-in transition component that needs to be wrapped around the element for transition effect. We can easily add third party animation libraries and also add more interactivity to the interface.
Computed Properties
This is one of the important features of VueJS. It helps to listen to the changes made to the UI elements and performs the necessary calculations. There is no need of additional coding for this.
Templates
VueJS provides HTML-based templates that bind the DOM with the Vue instance data. Vue compiles the templates into virtual DOM Render functions. We can make use of the template of the render functions and to do so we have to replace the template with the render function.
Directives
VueJS has built-in directives such as v-if, v-else, v-show, v-on, v-bind, and v-model, which are used to perform various actions on the frontend.
Watchers
Watchers are applied to data that changes. For example, form input elements. Here, we don’t have to add any additional events. Watcher takes care of handling any data changes making the code simple and fast.
Routing
Navigation between pages is performed with the help of vue-router.
Lightweight
VueJS script is very lightweight and the performance is also very fast.
Vue-CLI
VueJS can be installed at the command line using the vue-cli command line interface. It helps to build and compile the project easily using vue-cli.
Comparison with Other Frameworks
Now let us compare VueJS with other frameworks such as React, Angular, Ember, Knockout, and Polymer.
VueJS v/s React
Virtual DOM
Virtual DOM is a virtual representation of the DOM tree. With virtual DOM, a JavaScript object is created which is the same as the real DOM. Any time a change needs to be made to the DOM, a new JavaScript object is created and the changes are made. Later, both the JavaScript objects are compared and the final changes are updated in the real DOM.
VueJS and React both use virtual DOM, which makes it faster.
Template v/s JSX
VueJS uses html, js and css separately. It is very easy for a beginner to understand and adopt the VueJS style. The template based approach for VueJS is very easy.
React uses jsx approach. Everything is JavaScript for ReactJS. HTML and CSS are all part of JavaScript.
Installation Tools
React uses create react app and VueJS uses vue-cli /CDN/npm. Both are very easy to use and the project is set up with all the basic requirements. React needs webpack for the build, whereas VueJS does not. We can start with VueJS coding anywhere in jsfiddle or codepen using the cdn library.
Popularity
React is popular than VueJS. The job opportunity with React is more than VueJS. There is a big name behind React i.e. Facebook which makes it more popular. Since, React uses the core concept of JavaScript, it uses the best practice of JavaScript. One who works with React will definitely be a very good with all the JavaScript concepts.
VueJS is a developing framework. Presently, the job opportunities with VueJS are less in comparison to React. According to a survey, many people are adapting to VueJS, which can make it more popular in comparison to React and Angular. There is a good community working on the different features of VueJS. The vue-router is maintained by this community with regular updates.
VueJS has taken the good parts from Angular and React and has built a powerful library. VueJS is much faster in comparison to React/Angular because of its lightweight library.
VueJS v/s Angular
Similarities
VueJS has a lot of similarities with Angular. Directives such as v-if, v-for are almost similar to ngIf, ngFor of Angular. They both have a command line interface for project installation and to build it. VueJS uses Vue-cli and Angular uses angular-cli. Both offer two-way data binding, server side rendering, etc.
Complexity
Vuejs is very easy to learn and start with. As discussed earlier, a beginner can take the CDN library of VueJS and get started in codepen and jsfiddle.
For Angular, we need to go through a series of steps for installation and it is little difficult for beginners to get started with Angular. It uses TypeScript for coding which is difficult for people coming from core JavaScript background. However, it is easier to learn for users belonging to Java and C# background.
Performance
To decide the performance, it is up to the users. VueJS file size is much lighter than Angular. A comparison of the framework performance is provided in the following link http://stefankrause.net/js-frameworks-benchmark4/webdriver-ts/table.html
Popularity
At present, Angular is more popular than VueJS. A lot of organizations use Angular, making it very popular. Job opportunities are also more for candidates experienced in Angular. However, VueJS is taking up the place in the market and can be considered as a good competitor for Angular and React.
Dependencies
Angular provides a lot of built-in features. We have to import the required modules and get started with it, for example, @angular/animations, @angular/form.
VueJS does not have all the built-in features as Angular and needs to depend on third party libraries to work on it.
Flexibility
VueJS can be easily merged with any other big project without any issues. Angular will not be that easy to start working with any other existing project.
Backward Compatibility
We had AngularJS, Angular2 and now Angular4. AngularJS and Angular2 have vast difference. Project application developed in AngularJS cannot be converted to Angular2 because of the core differences.
The recent version of VueJS is 2.0 and it is good with backward compatibility. It provides good documentation, which is very easy to understand.
Typescript
Angular uses TypeScript for its coding. Users need to have knowledge of Typescript to get started with Angular. However, we can start with VueJS coding anywhere in jsfiddle or codepen using the cdn library. We can work with standard JavaScript, which is very easy to start with.
VueJS v/s Ember
Similarities
Ember provides Ember command line tool, i.e. ember-cli for easy installation and compiling for Ember projects.
VueJS has also a command line tool vue-cli to start and build projects.
They both have features such as router, template, and components which makes them very rich as the UI framework.
Performance
VueJS has better performance in comparison to Ember. Ember has added a glimmer rendering engine with the aim of improving the re-render performance, which is a similar concept as VueJS and React using virtual DOM. However, VueJS has a better performance when compared to Ember.
VueJS v/s Knockout
Knockout provides a good browser support. It is supported on the lower version of the IE whereas VueJS is not supported on IE8 and below. Knockout development has slowed down over time. There is not much popularity for the same in recent times.
On the other hand, VueJS has started gaining popularity with the Vue team providing regular updates.
VueJS v/s Polymer
Polymer library has been developed by Google. It is used in many Google projects such as Google I/O, Google Earth, Google Play Music, etc. It offers data binding and computed properties similar to VueJS.
Polymer custom element definition comprises plain JavaScript/CSS, element properties, lifecycle callbacks, and JavaScript methods. In comparison, VueJS allows to easily use JavaScript/html and CSS.
Polymer uses web component features and requires polyfills for browsers, which does not support these features. VueJS does not have such dependencies and works fine in all browsers from IE9+.
VueJS — Environment Setup
There are many ways to install VueJS. Some of the ways on how to carry out the installation are discussed ahead.
Using the <script> tag directly in HTML file
<html>
   <head>
      <script type = "text/javascript" src = "vue.min.js"></script>
   </head>
   <body></body>
</html>
Go to the home site https://vuejs.org/v2/guide/installation.html of VueJS and download the vue.js as per need. There are two versions for use — production version and development version. The development version is not minimized, whereas the production version is minimized as shown in the following screenshot. Development version will help with the warnings and debug mode during the development of the project.

Using CDN
We can also start using VueJS file from the CDN library. The link https://unpkg.com/vue will give the latest version of VueJS. VueJS is also available on jsDelivr (https://cdn.jsdelivr.net/npm/vue/dist/vue.js) and cdnjs (https://cdnjs.cloudflare.com/ajax/libs/vue/2.4.0/vue.js).
We can host the files at our end, if required and get started with VueJS development.
Using NPM
For large scale applications with VueJS, it is recommended to install using the npm package. It comes with Browserify and Webpack along with other necessary tools, which help with the development. Following is the command to install using npm.
npm install vue
Using CLI Command Line
VueJS also provides CLI to install the vue and get started with the server activation. To install using CLI, we need to have CLI installed which is done using the following command.
npm install --global vue-cli
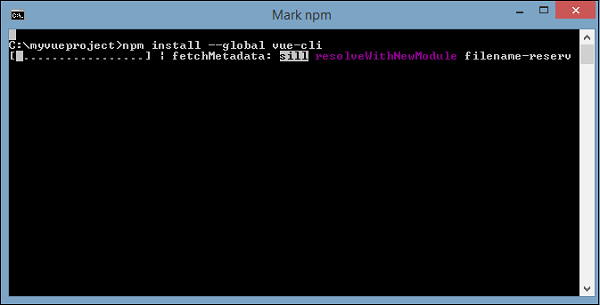
Once done, it shows the CLI version for VueJS. It takes a few minutes for the installation.
+ vue-cli@2.8.2
added 965 packages in 355.414s
Following is the command to create the project using Webpack.
vue init webpack myproject
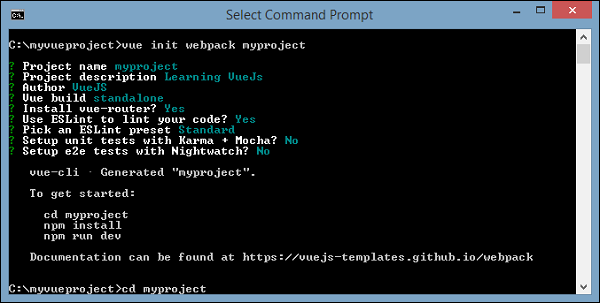
To get started, use the following command.
cd myproject
npm install
npm run dev

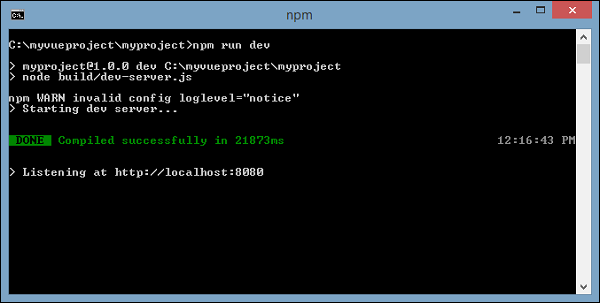
Once we execute npm run dev, it starts the server and provides the url for display to be seen in the browser which is as shown in the following screenshot.
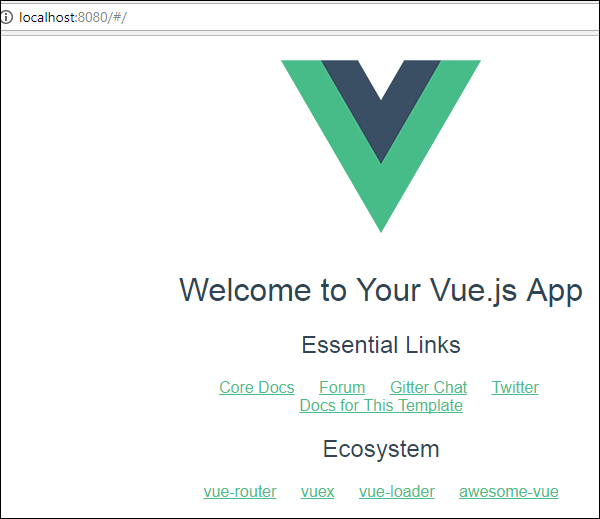
The project structure using CLI looks like the following.
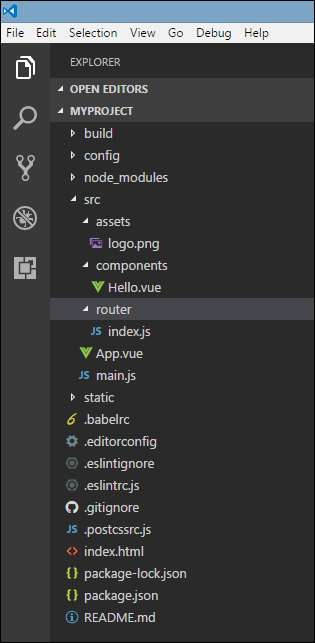
VueJS — Introduction
Vue is a JavaScript framework for building user interfaces. Its core part is focused mainly on the view layer and it is very easy to understand. The version of Vue that we are going to use in this tutorial is 2.0.
As Vue is basically built for frontend development, we are going to deal with lot of HTML, JavaScript and CSS files in the upcoming chapters. To understand the details, let us start with a simple example.
In this example, we are going to use the development verison of vuejs.
Example
<html>
   <head>
      <title>VueJs Introduction</title>
      <script type = "text/javascript" src = "js/vue.js"></script>
   </head>
   <body>
      <div id = "intro" style = "text-align:center;">
         <h1>{{ message }}</h1>
      </div>
      <script type = "text/javascript">
         var vue_det = new Vue({
            el: '#intro',
            data: {
               message: 'My first VueJS Task'
            }
         });
      </script>
   </body>
</html>
Output
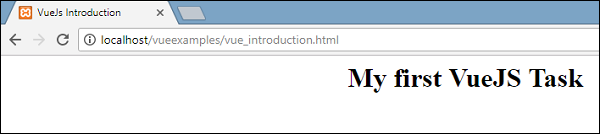
This is the first app we have created using VueJS. As seen in the above code, we have included vue.js at the start of the .html file.
<script type = "text/javascript" src = "js/vue.js"></script>
There is a div which is added in the body that prints “My first VueJS Task” in the browser.
<div id = "intro" style = "text-align:center;">
   <h1>{{ message }}</h1>
</div>
We have also added a message in a interpolation, i.e. {{}}. This interacts with VueJS and prints the data in the browser. To get the value of the message in the DOM, we are creating an instance of vuejs as follows −
var vue_det = new Vue({
   el: '#intro',
   data: {
      message: 'My first VueJS Task'
   }
})
In the above code snippet, we are calling Vue instance, which takes the id of the DOM element i.e. e1:’#intro’, it is the id of the div. There is data with the message which is assigned the value ‘My first VueJS Task’. VueJS interacts with DOM and changes the value in the DOM {{message}} with ’My first VueJS Task’.
If we happen to change the value of the message in the console, the same will be reflected in the browser. For example −

Console Details
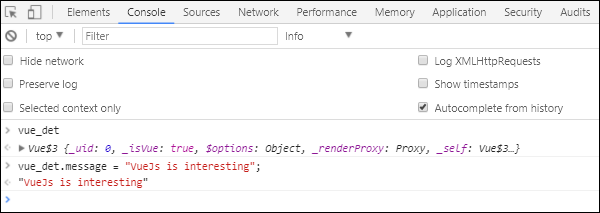
In the above console, we have printed the vue_det object, which is an instance of Vue. We are updating the message with “VueJs is interesting” and the same is changed in the browser immediately as seen in the above screenshot.
This is just a basic example showing the linking of VueJS with DOM, and how we can manipulate it. In the next few chapters, we will learn about directives, components, conditional loops, etc.
VueJS — Instances
To start with VueJS, we need to create the instance of Vue, which is called the root Vue Instance.
Syntax
var app = new Vue({
// options
})
Let us look at an example to understand what needs to be part of the Vue constructor.
<html>
<head>
<title>VueJs Instance</title>
<script type = "text/javascript" src = "js/vue.js"></script>
</head>
<body>
<div id = "vue_det">
<h1>Firstname : {{firstname}}</h1>
<h1>Lastname : {{lastname}}</h1>
<h1>{{mydetails()}}</h1>
</div>
<script type = "text/javascript" src = "js/vue_instance.js"></script>
</body>
</html>
vue_instance.js
var vm = new Vue({
el: '#vue_det',
data: {
firstname : "Ria",
lastname : "Singh",
address : "Mumbai"
},
methods: {
mydetails : function() {
return "I am "+this.firstname +" "+ this.lastname;
}
}
})
For Vue, there is a parameter called el. It takes the id of the DOM element. In the above example, we have the id #vue_det. It is the id of the div element, which is present in .html.
<div id = "vue_det"></div>
Now, whatever we are going to do will affect the div element and nothing outside it.
Next, we have defined the data object. It has value firstname, lastname, and address.
The same is assigned inside the div. For example,
<div id = "vue_det">
<h1>Firstname : {{firstname}}</h1>
<h1>Lastname : {{lastname}}</h1>
</div>
The Firstname : {{firstname}} value will be replaced inside the interpolation, i.e. {{}} with the value assigned in the data object, i.e. Ria. The same goes for last name.
Next, we have methods where we have defined a function mydetails and a returning value. It is assigned inside the div as
<h1>{{mydetails()}}</h1>
Hence, inside {{} } the function mydetails is called. The value returned in the Vue instance will be printed inside {{}}. Check the output for reference.
Output
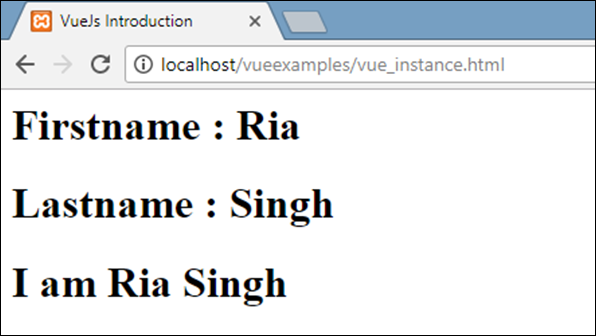
Now, we need to pass options to the Vue constructor which is mainly data, template, element to mount on, methods, callbacks, etc.
Let us take a look at the options to be passed to the Vue.
#data − This type of data can be an object or a function. Vue converts its properties to getters/setters to make it reactive.
Let’s take a look at how the data is passed in the options.
Example
<html>
<head>
<title>VueJs Introduction</title>
<script type = "text/javascript" src = "js/vue.js"></script>
</head>
<body>
<script type = "text/javascript">
var _obj = { fname: "Raj", lname: "Singh"}
// direct instance creation
var vm = new Vue({
data: _obj
});
console.log(vm.fname);
console.log(vm.$data);
console.log(vm.$data.fname);
</script>
</body>
</html>
Output
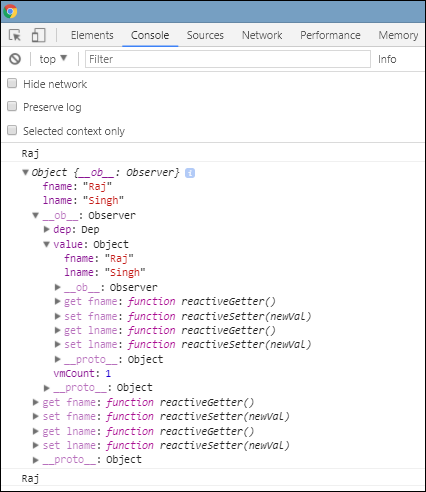
console.log(vm.fname); // prints Raj
console.log(vm.$data); prints the full object as shown above
console.log(vm.$data.fname); // prints Raj
If there is a component, the data object has to be referred from a function as shown in the following code.
<html>
<head>
<title>VueJs Introduction</title>
<script type = "text/javascript" src = "js/vue.js"></script>
</head>
<body>
<script type = "text/javascript">
var _obj = { fname: "Raj", lname: "Singh"};
// direct instance creation
var vm = new Vue({
data: _obj
});
console.log(vm.fname);
console.log(vm.$data);
console.log(vm.$data.fname);
// must use function when in Vue.extend()
var Component = Vue.extend({
data: function () {
return _obj
}
});
var myComponentInstance = new Component();
console.log(myComponentInstance.lname);
console.log(myComponentInstance.$data);
</script>
</body>
</html>
In case of a component, the data is a function, which is used with Vue.extend as shown above. The data is a function. For example,
data: function () {
return _obj
}
To refer to the data from the component, we need to create an instance of it. For example,
var myComponentInstance = new Component();
To fetch the details from the data, we need to do the same as we did with the parent component above. For example,
console.log(myComponentInstance.lname); console.log(myComponentInstance.$data);
Following are the details displayed in the browser.
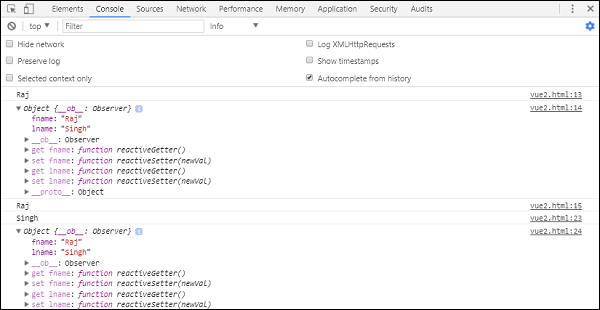
Props − Type for props is an array of string or object. It takes an array-based or object-based syntax. They are said to be attributes used to accept data from the parent component.
Example 1
Vue.component('props-demo-simple', {
props: ['size', 'myMessage']
})
Example 2
Vue.component('props-demo-advanced', {
props: {
// just type check
height: Number,
// type check plus other validations
age: {
type: Number,
default: 0,
required: true,
validator: function (value) {
return value >= 0
}
}
}
})
propsData − This is used for unit testing.
Type − array of string. For example, { [key: string]: any }. It needs to be passed during the creation of Vue instance.
Example
var Comp = Vue.extend({
props: ['msg'],
template: '<div>{{ msg }}</div>'
})
var vm = new Comp({
propsData: {
msg: 'hello'
}
})
Computed − Type: { [key: string]: Function | { get: Function, set: Function } }
Example
<html>
<head>
<title>VueJs Introduction</title>
<script type = "text/javascript" src = "js/vue.js"></script>
</head>
<body>
<script type = "text/javascript">
var vm = new Vue({
data: { a: 2 },
computed: {
// get only, just need a function
aSum: function () {
return this.a + 2;
},
// both get and set
aSquare: {
get: function () {
return this.a*this.a;
},
set: function (v) {
this.a = v*2;
}
}
}
})
console.log(vm.aSquare); // -> 4
vm.aSquare = 3;
console.log(vm.a); // -> 6
console.log(vm.aSum); // -> 8
</script>
</body>
</html>
Computed has two functions aSum and aSquare.
Function aSum just returns this.a+2. Function aSquare again two functions get and set.
Variable vm is an instance of Vue and it calls aSquare and aSum. Also vm.aSquare = 3 calls the set function from aSquare and vm.aSquare calls the get function. We can check the output in the browser which looks like the following screenshot.
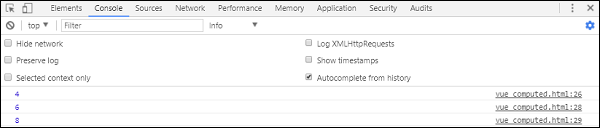
Methods − Methods are to be included with the Vue instance as shown in the following code. We can access the function using the Vue object.
<html>
<head>
<title>VueJs Introduction</title>
<script type = "text/javascript" src = "js/vue.js"></script>
</head>
<body>
<script type = "text/javascript">
var vm = new Vue({
data: { a: 5 },
methods: {
asquare: function () {
this.a *= this.a;
}
}
})
vm.asquare();
console.log(vm.a); // 25
</script>
</body>
</html>
Methods are part of the Vue constructor. Let us make a call to the method using the Vue object vm.asquare (), the value of the property a is updated in the asquare function. The value of a is changed from 1 to 25, and the same is seen reflected in the following browser console.

VueJS — Template
We have learnt in the earlier chapters, how to get an output in the form of text content on the screen. In this chapter, we will learn how to get an output in the form of HTML template on the screen.
To understand this, let us consider an example and see the output in the browser.
<html>
<head>
<title>VueJs Instance</title>
<script type = "text/javascript" src = "js/vue.js"></script>
</head>
<body>
<div id = "vue_det">
<h1>Firstname : {{firstname}}</h1>
<h1>Lastname : {{lastname}}</h1>
<div>{{htmlcontent}}</div>
</div>
<script type = "text/javascript" src = "js/vue_template.js"></script>
</body>
</html>
vue_template.js
var vm = new Vue({
el: '#vue_det',
data: {
firstname : "Ria",
lastname : "Singh",
htmlcontent : "<div><h1>Vue Js Template</h1></div>"
}
})
Now, suppose we want to show the html content on the page. If we happen to use it with interpolation, i.e. with double curly brackets, this is what we will get in the browser.
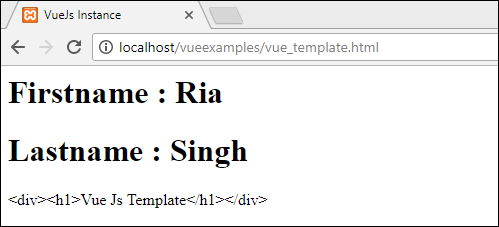
If we see the html content is displayed the same way we have given in the variable htmlcontent, this is not what we want, we want it to be displayed in a proper HTML content on the browser.
For this, we will have to use v-html directive. The moment we assign v-html directive to the html element, VueJS knows that it has to output it as HTML content. Let’s add v-html directive in the .html file and see the difference.
<html>
<head>
<title>VueJs Instance</title>
<script type = "text/javascript" src = "js/vue.js"></script>
</head>
<body>
<div id = "vue_det">
<h1>Firstname : {{firstname}}</h1>
<h1>Lastname : {{lastname}}</h1>
<div v-html = "htmlcontent"></div>
</div>
<script type = "text/javascript" src = "js/vue_template.js"></script>
</body>
</html>
Now, we don’t need the double curly brackets to show the HTML content, instead we have used v-html = ”htmlcontent” where htmlcontent is defined inside the js file as follows −
var vm = new Vue({
el: '#vue_det',
data: {
firstname : "Ria",
lastname : "Singh",
htmlcontent : "<div><h1>Vue Js Template</h1></div>"
}
})
The output in the browser is as follows −

If we inspect the browser, we will see the content is added in the same way as it is defined in the .js file to the variable htmlcontent : «<div><h1>Vue Js Template</h1></div>».
Let’s take a look at the inspect element in the browser.

We have seen how to add HTML template to the DOM. Now, we will see how to add attributes to the exiting HTML elements.
Consider, we have an image tag in the HTML file and we want to assign src, which is a part of Vue.
Example
<html>
<head>
<title>VueJs Instance</title>
<script type = "text/javascript" src = "js/vue.js"></script>
</head>
<body>
<div id = "vue_det">
<h1>Firstname : {{firstname}}</h1>
<h1>Lastname : {{lastname}}</h1>
<div v-html = "htmlcontent"></div>
<img src = "" width = "300" height = "250" />
</div>
<script type = "text/javascript" src = "js/vue_template1.js"></script>
</body>
</html>
Look at the img tag above, the src is blank. We need to add the src to it from vue js. Let us take a look at how to do it. We will store the img src in the data object in the .js file as follows −
var vm = new Vue({
el: '#vue_det',
data: {
firstname : "Ria",
lastname : "Singh",
htmlcontent : "<div><h1>Vue Js Template</h1></div>",
imgsrc : "images/img.jpg"
}
})
If we assign the src as follows, the output in the browser will be as shown in the following screenshot.
<img src = "{{imgsrc}}" width = "300" height = "250" />
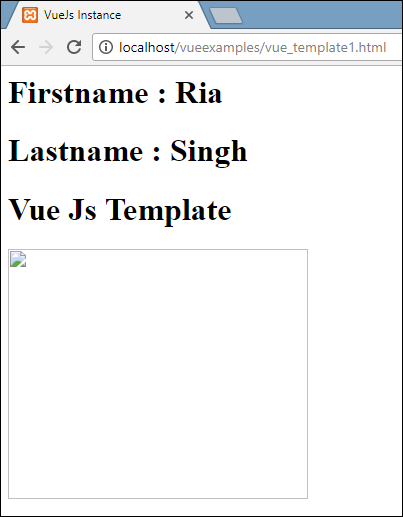
We get a broken image. To assign any attribute to HMTL tag, we need to use v-bind directive. Let’s add the src to the image with v-bind directive.
This is how it is assigned in .html file.
<html>
<head>
<title>VueJs Instance</title>
<script type = "text/javascript" src = "js/vue.js"></script>
</head>
<body>
<div id = "vue_det">
<h1>Firstname : {{firstname}}</h1>
<h1>Lastname : {{lastname}}</h1>
<div v-html = "htmlcontent"></div>
<img v-bind:src = "imgsrc" width = "300" height = "250" />
</div>
<script type = "text/javascript" src = "js/vue_template1.js"></script>
</body>
</html>
We need to prefix the src with v-bind:src = ”imgsrc” and the name of the variable with src.
Following is the output in the browser.

Let us inspect and check how the src looks like with v-bind.
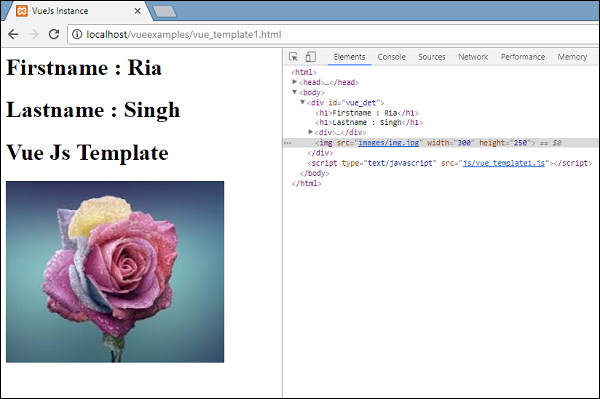
As seen in the above screenshot, the src is assigned without any vuejs properties to it.
VueJS — Components
Vue Components are one of the important features of VueJS that creates custom elements, which can be reused in HTML.
Let’s work with an example and create a component, that will give a better understanding on how components work with VueJS.
Example
<html>
<head>
<title>VueJs Instance</title>
<script type = "text/javascript" src = "js/vue.js"></script>
</head>
<body>
<div id = "component_test">
<testcomponent></testcomponent>
</div>
<div id = "component_test1">
<testcomponent></testcomponent>
</div>
<script type = "text/javascript" src = "js/vue_component.js"></script>
</body>
</html>
vue_component.js
Vue.component('testcomponent',{
template : '<div><h1>This is coming from component</h1></div>'
});
var vm = new Vue({
el: '#component_test'
});
var vm1 = new Vue({
el: '#component_test1'
});
In the .html file, we have created two div with id component_test and component_test1. In the .js files shown above, two Vue instances are created with the div ids. We have created a common component to be used with both the view instances.
To create a component, following is the syntax.
Vue.component('nameofthecomponent',{ // options});
Once a component is created, the name of the component becomes the custom element and the same can be used in the Vue instance element created, i.e. inside the div with ids component_test and component_test1.
In the .js file, we have used a test component as the name of the component and the same name is used as the custom element inside the divs.
Example
<div id = "component_test"> <testcomponent></testcomponent> </div> <div id = "component_test1"> <testcomponent></testcomponent> </div>
In the component created in the .js file, we have added a template to which we have assigned a HTML code. This is a way of registering a global component, which can be made a part of any vue instance as shown in the following script.
Vue.component('testcomponent',{
template : '<div><h1>This is coming from component</h1></div>'
});
On execution, the same will be reflected in the browser.
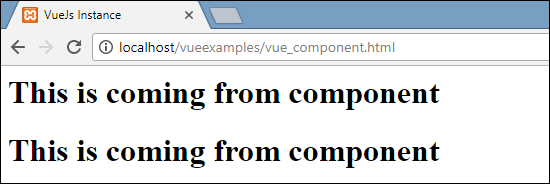
The components are given the custom element tag, i.e. <testcomponent></testcomponent>. However, when we inspect the same in the browser, we will not notice the custom tag in plain HTML present in the template as shown in the following screenshot.
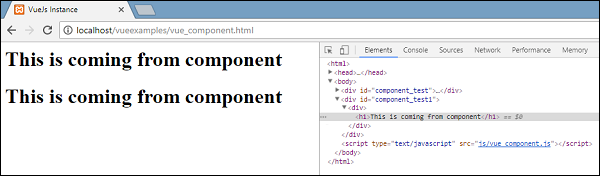
We have also directly made the components a part of vue instance as shown in the following script.
var vm = new Vue({
el: '#component_test',
components:{
'testcomponent': {
template : '<div><h1>This is coming from component</h1></div>'
}
}
});
This is called local registration and the components will be a part of only the vue instance created.
So far, we have seen the basic component with the basic options. Now, let’s add some more options such as data and methods to it. Just as Vue instance has data and methods, component also shares the same. Hence, we will extend the code, which we have already seen with data and methods.
Example
<html>
<head>
<title>VueJs Instance</title>
<script type = "text/javascript" src = "js/vue.js"></script>
</head>
<body>
<div id = "component_test">
<testcomponent></testcomponent>
</div>
<div id = "component_test1">
<testcomponent></testcomponent>
</div>
<script type = "text/javascript" src = "js/vue_component.js"></script>
</body>
</html>
vue_component.js
Vue.component('testcomponent',{
template : '<div v-on:mouseover = "changename()" v-on:mouseout = "originalname();"><h1>Custom Component created by <span id = "name">{{name}}</span></h1></div>',
data: function() {
return {
name : "Ria"
}
},
methods:{
changename : function() {
this.name = "Ben";
},
originalname: function() {
this.name = "Ria";
}
}
});
var vm = new Vue({
el: '#component_test'
});
var vm1 = new Vue({
el: '#component_test1'
});
In the .js file above, we have added data that is a function, which returns an object. The object has a name property, which is assigned the value ‘Ria’. This is used in the following template.
template : '<div v-on:mouseover = "changename()" v-on:mouseout = "originalname();"><h1>Custom Component created by <span id = "name">{{name}}</span></h1></div>',
In spite of having data as a function in components, we can use its properties the same way as we use with direct Vue instance. Also, there are two methods added, changename and originalname. In changename, we are changing the name property, and in originalname we are resetting it back to the original name.
We have also added two events on the div, mouseover and mouseout. The details of the events will be discussed in the Events chapter. So for now, mouseover calls changename method and mouseout calls originalname method.
The display of the same is shown in the following browser.
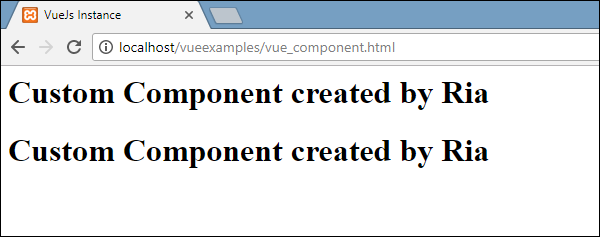
As seen in the above browser, it displays the name assigned in the data property, which is the same name. We have also assigned a mouseover event on the div and also a mouseout. Let’s see what happens when we mouseover and mouseout.

On mouseover, we see the name of the first component is changed to Ben, however, the second one remains as it is. This is because the data component is a function and it returns an object. Thus, when it is changed in one place, the same is not overwritten in other cases.
Dynamic Components
Dynamic components are created using the keyword <component></component> and it is bound using a property as shown in the following example.
Example
<html>
<head>
<title>VueJs Instance</title>
<script type = "text/javascript" src = "js/vue.js"></script>
</head>
<body>
<div id = "databinding">
<component v-bind:is = "view"></component>
</div>
<script type = "text/javascript">
var vm = new Vue({
el: '#databinding',
data: {
view: 'component1'
},
components: {
'component1': {
template: '<div><span style = "font-size:25;color:red;">Dynamic Component</span></div>'
}
}
});
</script>
</body>
</html>
Output
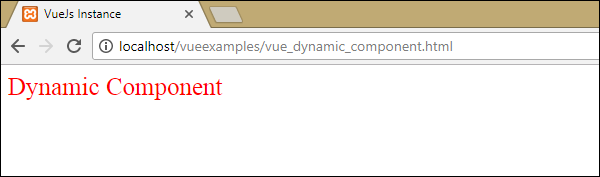
Dynamic component is created using the following syntax.
<component v-bind:is = "view"></component>
It has v-bind:is = ”view”, and a value view is assigned to it. View is defined in the Vue instance as follows.
var vm = new Vue({
el: '#databinding',
data: {
view: 'component1'
},
components: {
'component1': {
template: '<div><span style = "font-size:25;color:red;">Dynamic Component</span></div>'
}
}
});
When executed, the template Dynamic Component is displayed in the browser.
VueJS — Computed Properties
We have already seen methods for Vue instance and for components. Computed properties are like methods but with some difference in comparison to methods, which we will discuss in this chapter.
At the end of this chapter, we will be able to make a decision on when to use methods and when to use computed properties.
Let’s understand computed properties using an example.
Example
<html>
<head>
<title>VueJs Instance</title>
<script type = "text/javascript" src = "js/vue.js"></script>
</head>
<body>
<div id = "computed_props">
FirstName : <input type = "text" v-model = "firstname" /> <br/><br/>
LastName : <input type = "text" v-model = "lastname"/> <br/><br/>
<h1>My name is {{firstname}} {{lastname}}</h1>
<h1>Using computed method : {{getfullname}}</h1>
</div>
<script type = "text/javascript" src = "js/vue_computedprops.js"></script>
</body>
</html>
vue_computeprops.js
var vm = new Vue({
el: '#computed_props',
data: {
firstname :"",
lastname :"",
birthyear : ""
},
computed :{
getfullname : function(){
return this.firstname +" "+ this.lastname;
}
}
})
Here, we have created .html file with firstname and lastname. Firstname and Lastname is a textbox which are bound using properties firstname and lastname.
We are calling the computed method getfullname, which returns the firstname and the lastname entered.
computed :{
getfullname : function(){
return this.firstname +" "+ this.lastname;
}
}
When we type in the textbox the same is returned by the function, when the properties firstname or lastname is changed. Thus, with the help of computed we don’t have to do anything specific, such as remembering to call a function. With computed it gets called by itself, as the properties used inside changes, i.e. firstname and lastname.
The same is displayed in the following browser. Type in the textbox and the same will get updated using the computed function.

Now, let’s try to understand the difference between a method and a computed property. Both are objects. There are functions defined inside, which returns a value.
In case of method, we call it as a function, and for computed as a property. Using the following example, let us understand the difference between method and computed property.
<html>
<head>
<title>VueJs Instance</title>
<script type = "text/javascript" src = "js/vue.js"></script>
</head>
<body>
<div id = "computed_props">
<h1 style = "background-color:gray;">Random No from computed property: {{getrandomno}}</h1>
<h1>Random No from method: {{getrandomno1()}}</h1>
<h1>Random No from method : {{getrandomno1()}}</h1>
<h1 style = "background-color:gray;">Random No from computed property: {{getrandomno}}</h1>
<h1 style = "background-color:gray;">Random No from computed property: {{getrandomno}}</h1>
<h1 style = "background-color:gray;">Random No from computed
property: {{getrandomno}}</h1>
<h1>Random No from method: {{getrandomno1()}}</h1>
<h1>Random No from method: {{getrandomno1()}}</h1>
</div>
<script type = "text/javascript">
var vm = new Vue({
el: '#computed_props',
data: {
name : "helloworld"
},
methods: {
getrandomno1 : function() {
return Math.random();
}
},
computed :{
getrandomno : function(){
return Math.random();
}
}
});
</script>
</body>
</html>
In the above code, we have created a method called getrandomno1 and a computed property with a function getrandomno. Both are giving back random numbers using Math.random().
It is displayed in the browser as shown below. The method and computed property are called many times to show the difference.
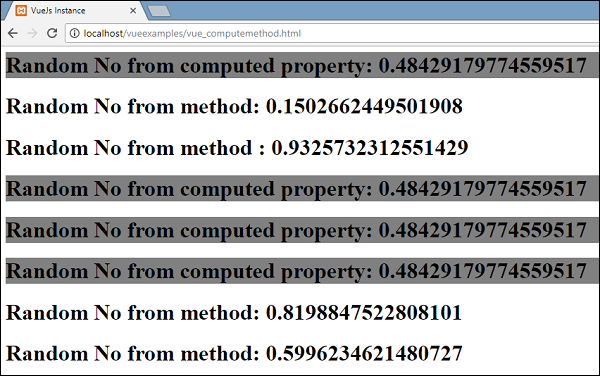
If we look at the values above, we will see that the random numbers returned from the computed property remains the same irrespective of the number of times it is called. This means everytime it is called, the last value is updated for all. Whereas for a method, it’s a function, hence, everytime it is called it returns a different value.
Get/Set in Computed Properties
In this section, we will learn about get/set functions in computed properties using an example.
Example
<html>
<head>
<title>VueJs Instance</title>
<script type = "text/javascript" src = "js/vue.js"></script>
</head>
<body>
<div id = "computed_props">
<input type = "text" v-model = "fullname" />
<h1>{{firstName}}</h1>
<h1>{{lastName}}</h1>
</div>
<script type = "text/javascript">
var vm = new Vue({
el: '#computed_props',
data: {
firstName : "Terry",
lastName : "Ben"
},
methods: {
},
computed :{
fullname : {
get : function() {
return this.firstName+" "+this.lastName;
}
}
}
});
</script>
</body>
</html>
We have defined one input box which is bound to fullname, which is a computed property. It returns a function called get, which gives the fullname, i.e. the first name and the lastname. Also, we have displayed the firstname and lastname as −
<h1>{{firstName}}</h1>
<h1>{{lastName}}</h1>
Let’s check the same in the browser.
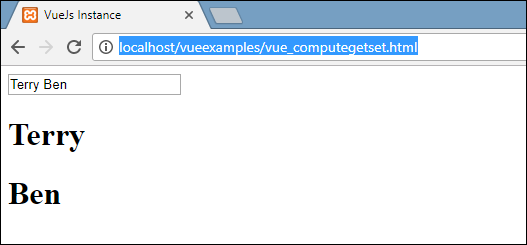
Now, if we change the name in the textbox, we will see the same is not reflected in the name displayed in the following screenshot.
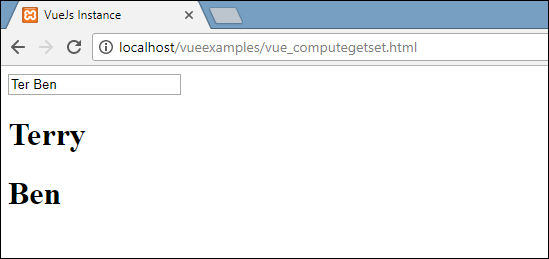
Let’s add the setter function in the fullname computed property.
<html>
<head>
<title>VueJs Instance</title>
<script type = "text/javascript" src = "js/vue.js"></script>
</head>
<body>
<div id = "computed_props">
<input type = "text" v-model = "fullname" />
<h1>{{firstName}}</h1>
<h1>{{lastName}}</h1>
</div>
<script type = "text/javascript">
var vm = new Vue({
el: '#computed_props',
data: {
firstName : "Terry",
lastName : "Ben"
},
methods: {
},
computed :{
fullname : {
get : function() {
return this.firstName+" "+this.lastName;
},
set : function(name) {
var fname = name.split(" ");
this.firstName = fname[0];
this.lastName = fname[1]
}
}
}
});
</script>
</body>
</html>
We have added the set function in the fullname computed property.
computed :{
fullname : {
get : function() {
return this.firstName+" "+this.lastName;
},
set : function(name) {
var fname = name.split(" ");
this.firstName = fname[0];
this.lastName = fname[1]
}
}
}
It has the name as the parameter, which is nothing but the fullname in the textbox. Later, it is split on space and the firstname and the lastname is updated. Now, when we run the code and edit the textbox, the same thing will be displayed in the browser. The firstname and the lastname will be updated because of the set function. The get function returns the firstname and lastname, while the set function updates it, if anything is edited.

Now, whatever is typed in the textbox matches with what is displayed as seen in the above screenshot.
VueJS — Watch Property
In this chapter, we will learn about the Watch property. Using an example, we will see we can use the Watch property in VueJS.
Example
<html>
<head>
<title>VueJs Instance</title>
<script type = "text/javascript" src = "js/vue.js"></script>
</head>
<body>
<div id = "computed_props">
Kilometers : <input type = "text" v-model = "kilometers">
Meters : <input type = "text" v-model = "meters">
</div>
<script type = "text/javascript">
var vm = new Vue({
el: '#computed_props',
data: {
kilometers : 0,
meters:0
},
methods: {
},
computed :{
},
watch : {
kilometers:function(val) {
this.kilometers = val;
this.meters = val * 1000;
},
meters : function (val) {
this.kilometers = val/ 1000;
this.meters = val;
}
}
});
</script>
</body>
</html>
In the above code, we have created two textboxes, one with kilometers and another with meters. In data property, the kilometers and meters are initialized to 0. There is a watch object created with two functions kilometers and meters. In both the functions, the conversion from kilometers to meters and from meters to kilometers is done.
As we enter values inside any of the texboxes, whichever is changed, Watch takes care of updating both the textboxes. We do not have to specially assign any events and wait for it to change and do the extra work of validating. Watch takes care of updating the textboxes with the calculation done in the respective functions.
Let’s take a look at the output in the browser.
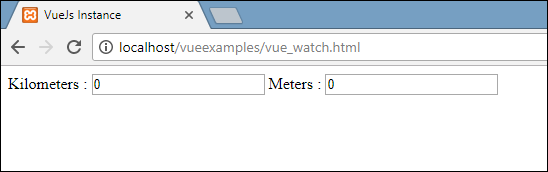
Let’s enter some values in the kilometers textbox and see it changing in the meters textbox and vice-versa.

Let’s now enter in meters textbox and see it changing in the kilometers textbox. This is the display seen in the browser.

VueJS — Binding
In this chapter will learn how to manipulate or assign values to HTML attributes, change the style, and assign classes with the help of binding directive called v-bind available with VueJS.
Let’s consider an example to understand why we need and when to use v-bind directive for data binding.
Example
<html>
<head>
<title>VueJs Instance</title>
<script type = "text/javascript" src = "js/vue.js"></script>
</head>
<body>
<div id = "databinding">
{{title}}<br/>
<a href = "hreflink" target = "_blank"> Click Me </a> <br/>
<a href = "{{hreflink}}" target = "_blank">Click Me </a> <br/>
<a v-bind:href = "hreflink" target = "_blank">Click Me </a> <br/>
</div>
<script type = "text/javascript">
var vm = new Vue({
el: '#databinding',
data: {
title : "DATA BINDING",
hreflink : "http://www.google.com"
}
});
</script>
</body>
</html>
In above example, we have displayed a title variable and three anchor links. We have also assigned a value to the href from the data object.
Now, if we check the output in the browser and inspect, we will see the first two anchor links do not have the href correctly as shown in the following screenshot.
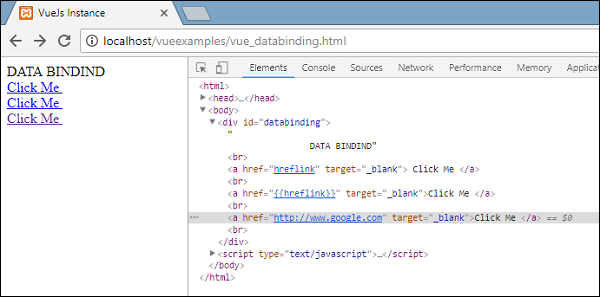
The first clickme shows the href as hreflink, and the second one shows it in {{hreflink}}, while the last one displays the correct url as we require.
Hence, to assign values to HTML attributes, we need to bind it with the directive v-bind as follows.
<a v-bind:href = "hreflink" target = "_blank">Click Me </a>
VueJS also provides a shorthand for v-bind as follows.
<a :href = "hreflink" target = "_blank">Click Me </a>
If we see the inspect element in the browser, the anchor tag does not show the v-bind attribute, however, it displays the plain HTML. None of the VueJS properties are seen when we inpsect the DOM.
Binding HTML Classes
To bind HTML class, we need to use v-bind: class. Let’s consider an example and bind classes in it.
Example
<html>
<head>
<title>VueJs Instance</title>
<script type = "text/javascript" src = "js/vue.js"></script>
</head>
<body>
<style>
.active {
background: red;
}
</style>
<div id = "classbinding">
<div v-bind:class = "{active:isactive}"><b>{{title}}</b></div>
</div>
<script type = "text/javascript">
var vm = new Vue({
el: '#classbinding',
data: {
title : "CLASS BINDING",
isactive : true
}
});
</script>
</body>
</html>
There is a div created with v-bind: class=” {active: isactive}”.
Here, isactive is a variable which is based on true or false. It will apply the class active to the div. In the data object, we have assigned the isactive variable as true. There is a class defined in the style .active with the background color as red.
If the variable isactive is true, the color will be applied otherwise not. Following will be the output in the browser.

In above display, we can see the background color is red. The class = ”active” is applied to the div.
Now, let’s change the value of the variable to false and see the output. The variable isactive is changed to false as shown in the following code.
<html>
<head>
<title>VueJs Instance</title>
<script type = "text/javascript" src = "js/vue.js"></script>
</head>
<body>
<style>
.active {
background: red;
}
</style>
<div id = "classbinding">
<div v-bind:class = "{active:isactive}"><b>{{title}}</b></div>
</div>
<script type = "text/javascript">
var vm = new Vue({
el: '#classbinding',
data: {
title : "CLASS BINDING",
isactive : false
}
});
</script>
</body>
</html>
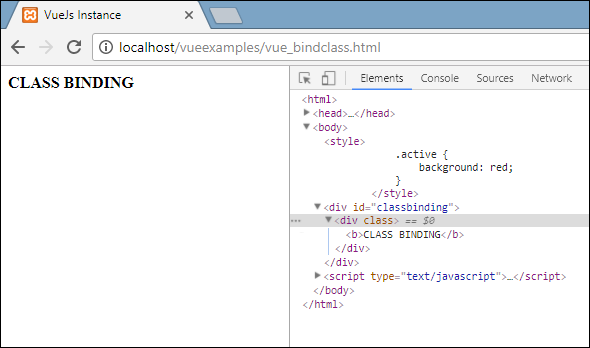
In the above display, we can see the active class is not applied to the div.
We can also assign multiple classes to the HTML tags using v-bind attribute.
Example
<html>
<head>
<title>VueJs Instance</title>
<script type = "text/javascript" src = "js/vue.js"></script>
</head>
<body>
<style>
.info {
color: #00529B;
background-color: #BDE5F8;
}
div {
margin: 10px 0;
padding: 12px;
}
.active {
color: #4F8A10;
background-color: #DFF2BF;
}
.displayError{
color: #D8000C;
background-color: #FFBABA;
}
</style>
<div id = "classbinding">
<div class = "info" v-bind:class = "{ active: isActive, 'displayError': hasError }">
{{title}}
</div>
</div>
<script type = "text/javascript">
var vm = new Vue({
el: '#classbinding',
data: {
title : "This is class binding example",
isActive : false,
hasError : false
}
});
</script>
</body>
</html>
For the div in the above code, we have applied a normal class, example class = ”info”. Based on isActive and hasError variable, the other classes will get applied to the div.
Output

This is a normal class applied. Both the variables are false right now. Let’s make isActive variable to true and see the output.
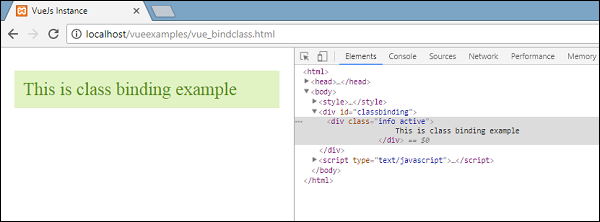
In the above display, in the DOM we can see two classes assigned to the div, info and active. Let’s make hasError variable true and isActive as false.

Now, when we see in the above display, info and displayError class is applied to the div. This is how we can apply multiple classes based on conditions.
We can also pass class as an array. Let us take an example to understand this.
Example
<html>
<head>
<title>VueJs Instance</title>
<script type = "text/javascript" src = "js/vue.js"></script>
</head>
<body>
<style>
.info {
color: #00529B;
background-color: #BDE5F8;
}
div {
margin: 10px 0;
padding: 12px;
font-size : 25px;
}
.active {
color: #4F8A10;
background-color: #DFF2BF;
}
.displayError{
color: #D8000C;
background-color: #FFBABA;
}
</style>
<div id = "classbinding">
<div v-bind:class = "[infoclass, errorclass]">{{title}}</div>
</div>
<script type = "text/javascript">
var vm = new Vue({
el: '#classbinding',
data: {
title : "This is class binding example",
infoclass : 'info',
errorclass : 'displayError'
}
});
</script>
</body>
</html>
Output
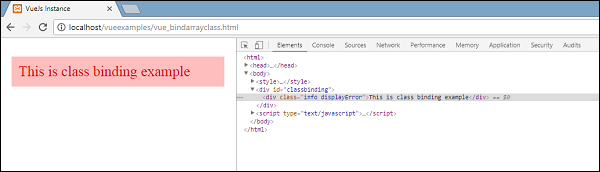
As we can see above, both classes get applied to the div. Let’s use a variable and based on the value of the variable, assign the class.
<html>
<head>
<title>VueJs Instance</title>
<script type = "text/javascript" src = "js/vue.js"></script>
</head>
<body>
<style>
.info {
color: #00529B;
background-color: #BDE5F8;
}
div {
margin: 10px 0;
padding: 12px;
font-size : 25px;
}
.active {
color: #4F8A10;
background-color: #DFF2BF;
}
.displayError{
color: #D8000C;
background-color: #FFBABA;
}
</style>
<div id = "classbinding">
<div v-bind:class = "[isActive ? infoclass : '', haserror ? errorclass : '']">{{title}}</div>
</div>
<script type = "text/javascript">
var vm = new Vue({
el: '#classbinding',
data: {
title : "This is class binding example",
infoclass : 'info',
errorclass : 'displayError',
isActive : true,
haserror : false
}
});
</script>
</body>
</html>
We have used two variables isActive and haserror and the same is used for the div while class binding as shown in the following div tag.
<div v-bind:class = "[isActive ? infoclass : '', haserror ? errorclass : '']">{{title}}</div>
If isActive is true, then infoclass will be assigned to it. The same goes for haserror, if it is true, then only errorClass will be applied to it.
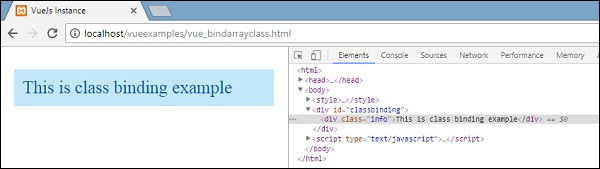
Now, let us make haserror variable as true and isActive variable as false.
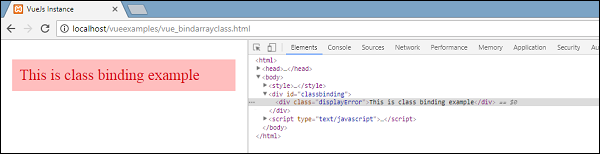
We will now add v-bind for classes in the components. In the following example, we have added a class to the component template and also to the component.
Example
<html>
<head>
<title>VueJs Instance</title>
<script type = "text/javascript" src = "js/vue.js"></script>
</head>
<body>
<style>
.info {
color: #00529B;
background-color: #BDE5F8;
}
div {
margin: 10px 0;
padding: 12px;
font-size : 25px;
}
.active {
color: #4F8A10;
background-color: #DFF2BF;
}
.displayError{
color: #D8000C;
background-color: #FFBABA;
}
</style>
<div id = "classbinding">
<new_component class = "active"></new_component>
</div>
<script type = "text/javascript">
var vm = new Vue({
el: '#classbinding',
data: {
title : "This is class binding example",
infoclass : 'info',
errorclass : 'displayError',
isActive : false,
haserror : true
},
components:{
'new_component' : {
template : '<div class = "info">Class Binding for component</div>'
}
}
});
</script>
</body>
</html>
Following is the output in the browser. It applies both the classes to final div.
<div class = ”info active”></div>

Add a variable in the component section to display, based on true/false.
<html>
<head>
<title>VueJs Instance</title>
<script type = "text/javascript" src = "js/vue.js"></script>
</head>
<body>
<style>
.info {
color: #00529B;
background-color: #BDE5F8;
}
div {
margin: 10px 0;
padding: 12px;
font-size : 25px;
}
.active {
color: #4F8A10;
background-color: #DFF2BF;
}
.displayError{
color: #D8000C;
background-color: #FFBABA;
}
</style>
<div id = "classbinding">
<new_component v-bind:class = "{active:isActive}"></new_component>
</div>
<script type = "text/javascript">
var vm = new Vue({
el: '#classbinding',
data: {
title : "This is class binding example",
infoclass : 'info',
errorclass : 'displayError',
isActive : false,
haserror : true
},
components:{
'new_component' : {
template : '<div class = "info">Class Binding for component</div>'
}
}
});
</script>
</body>
</html>
Since the variable is false, the active class is not applied and the info class is applied as shown in the following screenshot.
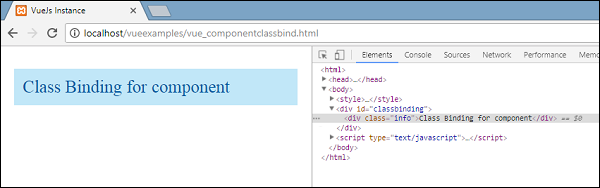
Binding Inline Styles
Object Syntax
Example
<html>
<head>
<title>VueJs Instance</title>
<script type = "text/javascript" src = "js/vue.js"></script>
</head>
<body>
<div id = "databinding">
<div v-bind:style = "{ color: activeColor, fontSize: fontSize + 'px' }">{{title}}</div>
</div>
<script type = "text/javascript">
var vm = new Vue({
el: '#databinding',
data: {
title : "Inline style Binding",
activeColor: 'red',
fontSize :'30'
}
});
</script>
</body>
</html>
Output

In the above example, for the div, the style is applied and the data is fetched from the data object.
<div v-bind:style = "{ color: activeColor, fontSize: fontSize + 'px' }">{{title}}</div>
data: {
title : "Inline style Binding",
activeColor: 'red',
fontSize :'30'
}
We can also do the same thing by assigning all the values to a variable and then assigning the variable to the div.
Example
<html>
<head>
<title>VueJs Instance</title>
<script type = "text/javascript" src = "js/vue.js"></script>
</head>
<body>
<div id = "databinding">
<div v-bind:style = "styleobj">{{title}}</div>
</div>
<script type = "text/javascript">
var vm = new Vue({
el: '#databinding',
data: {
title : "Inline style Binding",
styleobj : {
color: 'red',
fontSize :'40px'
}
}
});
</script>
</body>
</html>
The color and the fontSize is assigned to the object called styleobj and the same is assigned to the div.
<div v-bind:style = "styleobj">{{title}}</div>
Output

Form Input Bindings
So far in the example we have created, we have seen v-model binding the input text element and the value binded to a variable assigned. Let’s learn more about it in this section.
Example
<html>
<head>
<title>VueJs Instance</title>
<script type = "text/javascript" src = "js/vue.js"></script>
</head>
<body>
<div id = "databinding">
<h3>TEXTBOX</h3>
<input v-model = "name" placeholder = "Enter Name" />
<h3>Name entered is : {{name}}</h3>
<hr/>
<h3>Textarea</h3>
<textarea v-model = "textmessage" placeholder = "Add Details"></textarea>
<h1><p>{{textmessage}}</p></h1>
<hr/>
<h3>Checkbox</h3>
<input type = "checkbox" id = "checkbox" v-model = "checked"> {{checked}}
</div>
<script type = "text/javascript">
var vm = new Vue({
el: '#databinding',
data: {
name:'',
textmessage:'',
checked : false
}
});
</script>
</body>
</html>
Whatever we type in the texbox is displayed below. v-model is assigned the value name and the name is displayed in {{name}}, which displays whatever is typed in the textbox.
Output
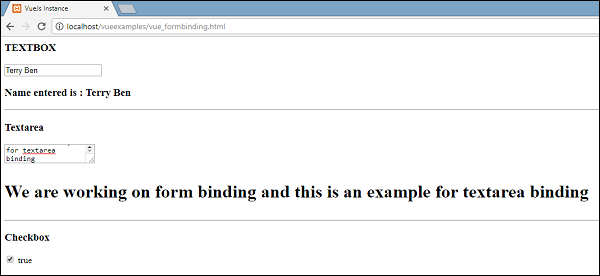
Let’s checkout out some more examples and how to use it.
Radio and Select
Example
<html>
<head>
<title>VueJs Instance</title>
<script type = "text/javascript" src = "js/vue.js"></script>
</head>
<body>
<div id = "databinding">
<h3>Radio</h3>
<input type = "radio" id = "black" value = "Black" v-model = "picked">Black
<input type = "radio" id = "white" value = "White" v-model = "picked">White
<h3>Radio element clicked : {{picked}} </h3>
<hr/>
<h3>Select</h3>
<select v-model = "languages">
<option disabled value = "">Please select one</option>
<option>Java</option>
<option>Javascript</option>
<option>Php</option>
<option>C</option>
<option>C++</option>
</select>
<h3>Languages Selected is : {{ languages }}</h3>
<hr/>
</div>
<script type = "text/javascript">
var vm = new Vue({
el: '#databinding',
data: {
picked : 'White',
languages : "Java"
}
});
</script>
</body>
</html>
Output
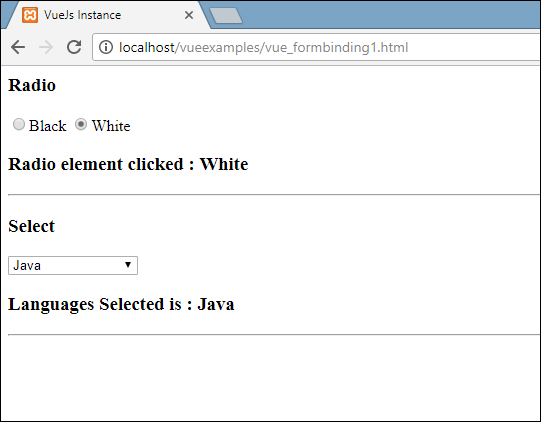
Modifiers
We have used three modifiers in the example — trim, number, and lazy.
Example
<html>
<head>
<title>VueJs Instance</title>
<script type = "text/javascript" src = "js/vue.js"></script>
</head>
<body>
<div id = "databinding">
<span style = "font-size:25px;">Enter Age:</span> <input v-model.number = "age" type = "number">
<br/>
<span style = "font-size:25px;">Enter Message:</span> <input v-model.lazy = "msg">
<h3>Display Message : {{msg}}</h3>
<br/>
<span style = "font-size:25px;">Enter Message : </span><input v-model.trim = "message">
<h3>Display Message : {{message}}</h3>
</div>
<script type = "text/javascript">
var vm = new Vue({
el: '#databinding',
data: {
age : 0,
msg: '',
message : ''
}
});
</script>
</body>
</html>
Output

Number modifier allows to only enter numbers. It will not take any other input besides numbers.
<span style = "font-size:25px;">Enter Age:</span> <input v-model.number = "age" type = "number">
Lazy modifier will display the content present in the textbox once it is fully entered and the user leaves the textbox.
<span style = "font-size:25px;">Enter Message:</span> <input v-model.lazy = "msg">
Trim modifier will remove any spaces entered at the start and at the end.
<span style = "font-size:25px;">Enter Message : </span><input v-model.trim = "message">
VueJS — Events
v-on is the attribute added to the DOM elements to listen to the events in VueJS.
Click Event
Example
<html>
<head>
<title>VueJs Instance</title>
<script type = "text/javascript" src = "js/vue.js"></script>
</head>
<body>
<div id = "databinding">
<button v-on:click = "displaynumbers">Click ME</button>
<h2> Add Number 100 + 200 = {{total}}</h2>
</div>
<script type = "text/javascript">
var vm = new Vue({
el: '#databinding',
data: {
num1: 100,
num2 : 200,
total : ''
},
methods : {
displaynumbers : function(event) {
console.log(event);
return this.total = this.num1+ this.num2;
}
},
});
</script>
</body>
</html>
Output
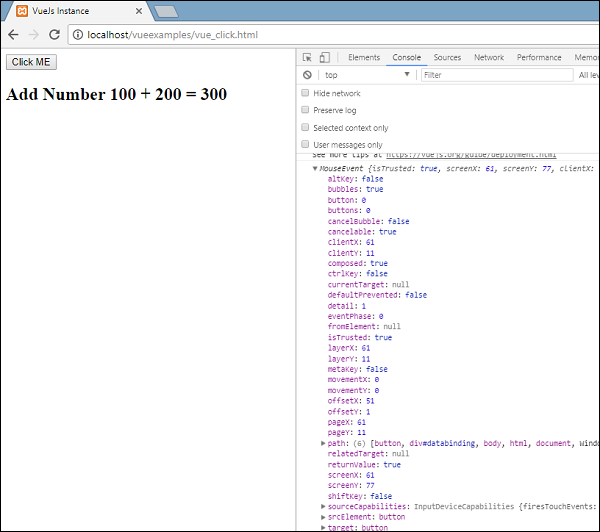
The following code is used to assign a click event for the DOM element.
<button v-on:click = "displaynumbers">Click ME</button>
There is a shorthand for v-on, which means we can also call the event as follows −
<button @click = "displaynumbers">Click ME</button>
On the click of the button, it will call the method ‘displaynumbers’, which takes in the event and we have consoled the same in the browser as shown above.
We will now check one more event mouseover mouseout.
Example
<html>
<head>
<title>VueJs Instance</title>
<script type = "text/javascript" src = "js/vue.js"></script>
</head>
<body>
<div id = "databinding">
<div v-bind:style = "styleobj" v-on:mouseover = "changebgcolor" v-on:mouseout = "originalcolor"></div>
</div>
<script type = "text/javascript">
var vm = new Vue({
el: '#databinding',
data: {
num1: 100,
num2 : 200,
total : '',
styleobj : {
width:"100px",
height:"100px",
backgroundColor:"red"
}
},
methods : {
changebgcolor : function() {
this.styleobj.backgroundColor = "green";
},
originalcolor : function() {
this.styleobj.backgroundColor = "red";
}
},
});
</script>
</body>
</html>
In the above example, we have created a div with width and height as 100px. It has been given a background color red. On mouseover, we are changing the color to green, and on mouseout we are changing the color back to red.
Hence, during mouseover, a method is called changebgcolor and once we move the mouse out of the div, a method is called originalcolor.
This is done as follows −
<div v-bind:style = "styleobj" v-on:mouseover = "changebgcolor" v-on:mouseout = "originalcolor"></div>
Two events — mouseover and mouseout — is assigned to the div as shown above. We have created a styleobj variable and given the required style to be assigned to the div. The same variable is binded to the div using v-bind:style = ”styleobj”
In changebgcolor, we are changing the color to green using the following code.
changebgcolor : function() {
this.styleobj.backgroundColor = "green";
}
Using the stylobj variable, we are changing the color to green.
Similarly, the following code is used to change it back to the original color.
originalcolor : function() {
this.styleobj.backgroundColor = "red";
}
This is what we see in the browser.
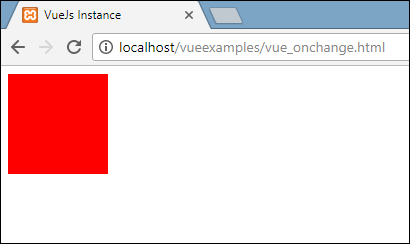
When we mouseover, the color will change to green as shown in the following screenshot.

Event Modifiers
Vue has event modifiers available on v-on attribute. Following are the modifiers available −
.once
Allows the event to execute only once.
Syntax
<button v-on:click.once = "buttonclicked">Click Once</button>
We need to add dot operator while calling the modifiers as shown in the syntax above. Let us use it in an example and understand the working of the once modifier.
Example
<html>
<head>
<title>VueJs Instance</title>
<script type = "text/javascript" src = "js/vue.js"></script>
</head>
<body>
<div id = "databinding">
<button v-on:click.once = "buttonclickedonce" v-bind:style = "styleobj">Click Once</button>
Output:{{clicknum}}
<br/><br/>
<button v-on:click = "buttonclicked" v-bind:style = "styleobj">Click Me</button>
Output:{{clicknum1}}
</div>
<script type = "text/javascript">
var vm = new Vue({
el: '#databinding',
data: {
clicknum : 0,
clicknum1 :0,
styleobj: {
backgroundColor: '#2196F3!important',
cursor: 'pointer',
padding: '8px 16px',
verticalAlign: 'middle',
}
},
methods : {
buttonclickedonce : function() {
this.clicknum++;
},
buttonclicked : function() {
this.clicknum1++;
}
}
});
</script>
</body>
</html>
Output
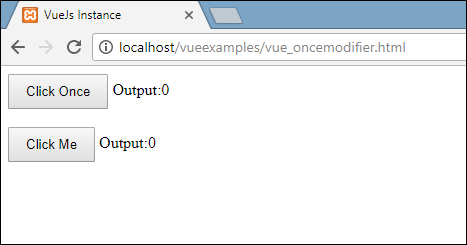
In the above example, we have created two butttons. The button with Click Once label has added the once modifier and the other button is without any modifier. This is the way the buttons are defined.
<button v-on:click.once = "buttonclickedonce" v-bind:style = "styleobj">Click Once</button> <button v-on:click = "buttonclicked" v-bind:style = "styleobj">Click Me</button>
The first button calls the method “buttonclickedonce” and the second button calls the method “buttonclicked”.
buttonclickedonce : function() {
this.clicknum++;
},
buttonclicked : function() {
this.clicknum1++;
}
There are two variables defined in the clicknum and clicknum1. Both are incremented when the button is clicked. Both the variables are initialized to 0 and the display is seen in the output above.
On the click of the first button, the variable clicknum increments by 1. On the second click, the number is not incremented as the modifier prevents it from executing or performing any action item assigned on the click of the button.
On the click of the second button, the same action is carried out, i.e. the variable is incremented. On every click, the value is incremented and displayed.
Following is the output we get in the browser.

.prevent
Syntax
<a href = "http://www.google.com" v-on:click.prevent = "clickme">Click Me</a>
Example
<html>
<head>
<title>VueJs Instance</title>
<script type = "text/javascript" src = "js/vue.js"></script>
</head>
<body>
<div id = "databinding">
<a href = "http://www.google.com" v-on:click = "clickme" target = "_blank" v-bind:style = "styleobj">Click Me</a>
</div>
<script type = "text/javascript">
var vm = new Vue({
el: '#databinding',
data: {
clicknum : 0,
clicknum1 :0,
styleobj: {
color: '#4CAF50',
marginLeft: '20px',
fontSize: '30px'
}
},
methods : {
clickme : function() {
alert("Anchor tag is clicked");
}
}
});
</script>
</body>
</html>
Output
If we click the clickme link, it will send an alert as “Anchor tag is clicked” and it will open the link https://www.google.com in a new tab as shown in the following screenshots.


Now this works as a normal way, i.e. the link opens up as we want. In case we don’t want the link to open up, we need to add a modifier ‘prevent’ to the event as shown in the following code.
<a href = "http://www.google.com" v-on:click.prevent = "clickme" target = "_blank" v-bind:style = "styleobj">Click Me</a>
Once added, if we click on the button, it will send an alert message and will not open the link anymore. The prevent modifier prevents the link from opening and only executes the method assigned to the tag.
Example
<html>
<head>
<title>VueJs Instance</title>
<script type = "text/javascript" src = "js/vue.js"></script>
</head>
<body>
<div id = "databinding">
<a href = "http://www.google.com" v-on:click.prevent = "clickme" target = "_blank" v-bind:style = "styleobj">Click Me</a>
</div>
<script type = "text/javascript">
var vm = new Vue({
el: '#databinding',
data: {
clicknum : 0,
clicknum1 :0,
styleobj: {
color: '#4CAF50',
marginLeft: '20px',
fontSize: '30px'
}
},
methods : {
clickme : function() {
alert("Anchor tag is clicked");
}
}
});
</script>
</body>
</html>
Output
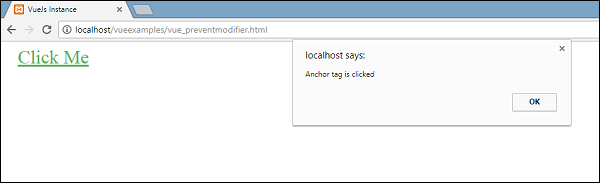
On the click of the link, it will display the alert message and does not open the url anymore.
Event — Key Modifiers
VueJS offers key modifiers based on which we can control the event handling. Consider we have a textbox and we want the method to be called only when we press Enter. We can do so by adding key modifiers to the events as follows.
Syntax
<input type = "text" v-on:keyup.enter = "showinputvalue"/>
The key that we want to apply to our event is V-on.eventname.keyname (as shown above)
We can make use of multiple keynames. For example, V-on.keyup.ctrl.enter
Example
<html>
<head>
<title>VueJs Instance</title>
<script type = "text/javascript" src = "js/vue.js"></script>
</head>
<body>
<div id = "databinding">
<input type = "text" v-on:keyup.enter = "showinputvalue" v-bind:style = "styleobj" placeholder = "Enter your name"/>
<h3> {{name}}</h3>
</div>
<script type = "text/javascript">
var vm = new Vue({
el: '#databinding',
data: {
name:'',
styleobj: {
width: "30%",
padding: "12px 20px",
margin: "8px 0",
boxSizing: "border-box"
}
},
methods : {
showinputvalue : function(event) {
this.name=event.target.value;
}
}
});
</script>
</body>
</html>
Output

Type something in the textbox and we will see it is displayed only when we press Enter.
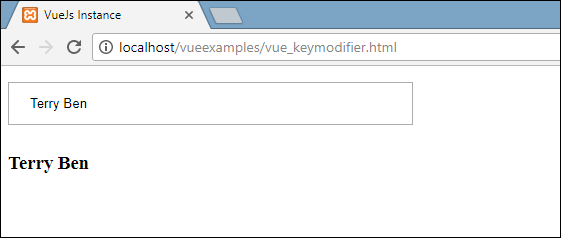
Custom Events
Parent can pass data to its component using the prop attribute, however, we need to tell the parent when there are changes in the child component. For this, we can use custom events.
The parent component can listen to the child component event using v-on attribute.
Example
<html>
<head>
<title>VueJs Instance</title>
<script type = "text/javascript" src = "js/vue.js"></script>
</head>
<body>
<div id = "databinding">
<div id = "counter-event-example">
<p style = "font-size:25px;">Language displayed : <b>{{ languageclicked }}</b></p>
<button-counter
v-for = "(item, index) in languages"
v-bind:item = "item"
v-bind:index = "index"
v-on:showlanguage = "languagedisp"></button-counter>
</div>
</div>
<script type = "text/javascript">
Vue.component('button-counter', {
template: '<button v-on:click = "displayLanguage(item)"><span style = "font-size:25px;">{{ item }}</span></button>',
data: function () {
return {
counter: 0
}
},
props:['item'],
methods: {
displayLanguage: function (lng) {
console.log(lng);
this.$emit('showlanguage', lng);
}
},
});
var vm = new Vue({
el: '#databinding',
data: {
languageclicked: "",
languages : ["Java", "PHP", "C++", "C", "Javascript", "C#", "Python", "HTML"]
},
methods: {
languagedisp: function (a) {
this.languageclicked = a;
}
}
})
</script>
</body>
</html>
Output
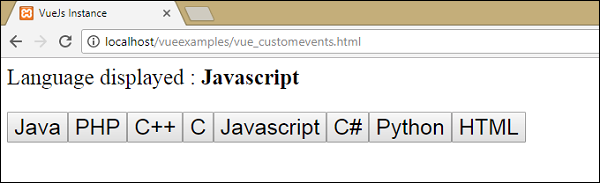
The above code shows the data transfer between the parent component and the child component.
The component is created using the following code.
<button-counter v-for = "(item, index) in languages" v-bind:item = "item" v-bind:index = "index" v-on:showlanguage = "languagedisp"> </button-counter>
There is a v-for attribute, which will loop with the languages array. The array has a list of languages in it. We need to send the details to the child component. The values of the array are stored in the item and the index.
v-bind:item = "item" v-bind:index = "index"
To refer to the values of the array, we need to bind it first to a variable and the varaiable is referred using props property as follows.
Vue.component('button-counter', {
template: '<button v-on:click = "displayLanguage(item)"><span style = "font-size:25px;">{{ item }}</span></button>',
data: function () {
return {
counter: 0
}
},
props:['item'],
methods: {
displayLanguage: function (lng) {
console.log(lng);
this.$emit('showlanguage', lng);
}
},
});
The props property contains the item in an array form. We can also refer to the index as −
props:[‘item’, ‘index’]
There is also an event added to the component as follows −
<button-counter v-for = "(item, index) in languages" v-bind:item = "item" v-bind:index = "index" v-on:showlanguage = "languagedisp"> </button-counter>
The name of the event is showlanguage and it calls a method called languagedisp which is defined in the Vue instance.
In the component, the template is defined as follows −
template: '<button v-on:click = "displayLanguage(item)"><span style = "font-size:25px;">{{ item }}</span></button>',
There is a button created. The button will get created with as many count in the language array. On the click of the button, there is a method called displayLanguage and the button clicked item is passed as a param to the function. Now the component needs to send the clicked element to the parent component for display which is done as follows −
Vue.component('button-counter', {
template: '<button v-on:click = "displayLanguage(item)"><span style = "font-size:25px;">{{ item }}</span></button>',
data: function () {
return {
counter: 0
}
},
props:['item'],
methods: {
displayLanguage: function (lng) {
console.log(lng);
this.$emit('showlanguage', lng);
}
},
});
The method displayLanguage calls this.$emit(‘showlanguage’, lng);
$emit is used to call the parent component method. The method showlanguage is the event name given on the component with v-on.
<button-counter v-for = "(item, index) in languages" v-bind:item = "item" v-bind:index = "index" v-on:showlanguage = "languagedisp"> </button-counter>
We are passing a parameter, i.e. the name of the language clicked to the method of the main parent Vue instance which is defined as follows.
var vm = new Vue({
el: '#databinding',
data: {
languageclicked: "",
languages : ["Java", "PHP", "C++", "C", "Javascript", "C#", "Python", "HTML"]
},
methods: {
languagedisp: function (a) {
this.languageclicked = a;
}
}
})
Here, the emit triggers showlanguage which in turn calls languagedisp from the Vue instance methods. It assigns the language clicked value to the variable languageclicked and the same is displayed in the browser as shown in the following screenshot.
<p style = "font-size:25px;">Language displayed : <b>{{ languageclicked }}</b></p>
Following is the output we get in the browser.

VueJS — Rendering
In this chapter, we will learn about conditional rendering and list rendering. In conditional rendering, we will discuss about using if, if-else, if-else-if, show, etc. In list rendering, we will discuss how to use for loop.
Conditional Rendering
Let’s get started and work on a example first to explain the details for conditional rendering. With conditional rendering, we want to output only when the condition is met and the conditional check is done with the help of if, if-else, if-else-if, show, etc.
v-if
Example
<html>
<head>
<title>VueJs Instance</title>
<script type = "text/javascript" src = "js/vue.js"></script>
</head>
<body>
<div id = "databinding">
<button v-on:click = "showdata" v-bind:style = "styleobj">Click Me</button>
<span style = "font-size:25px;"><b>{{show}}</b></span>
<h1 v-if = "show">This is h1 tag</h1>
<h2>This is h2 tag</h2>
</div>
<script type = "text/javascript">
var vm = new Vue({
el: '#databinding',
data: {
show: true,
styleobj: {
backgroundColor: '#2196F3!important',
cursor: 'pointer',
padding: '8px 16px',
verticalAlign: 'middle',
}
},
methods : {
showdata : function() {
this.show = !this.show;
}
},
});
</script>
</body>
</html>
Output

In the above example, we have created a button and two h1 tags with the message.
A variable called show is declared and initialized to a value true. It is displayed close to the button. On the click of the button, we are calling a method showdata, which toggles the value of the variable show. This means on the click of the button, the value of the variable show will change from true to false and false to true.
We have assigned if to the h1 tag as shown in the following code snippet.
<button v-on:click = "showdata" v-bind:style = "styleobj">Click Me</button> <h1 v-if = "show">This is h1 tag</h1>
Now what it will do is, it will check the value of the variable show and if its true the h1 tag will be displayed. Click the button and view in the browser, as the value of the show variable changes to false, the h1 tag is not displayed in the browser. It is displayed only when the show variable is true.
Following is the display in the browser.
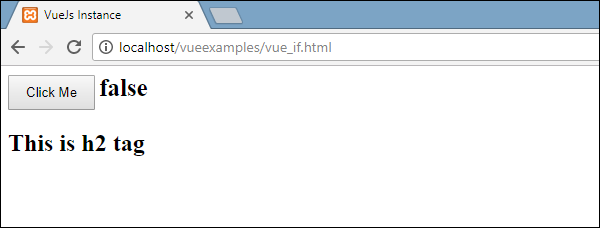
If we check in the browser, this is what we get when show is false.

The h1 tag is removed from the DOM when the variable show is set to false.
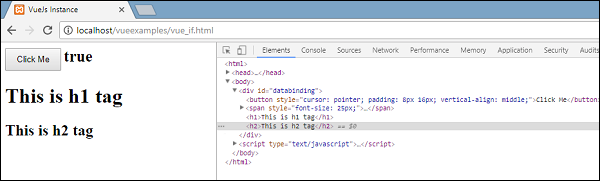
This is what we see when the variable is true.
The h1 tag is added back to the DOM when the variable show is set to true.
v-else
In the following example, we have added v-else to the second h1 tag.
Example
<html>
<head>
<title>VueJs Instance</title>
<script type = "text/javascript" src = "js/vue.js"></script>
</head>
<body>
<div id = "databinding">
<button v-on:click = "showdata" v-bind:style = "styleobj">Click Me</button>
<span style = "font-size:25px;"><b>{{show}}</b></span>
<h1 v-if = "show">This is h1 tag</h1>
<h2 v-else>This is h2 tag</h2>
</div>
<script type = "text/javascript">
var vm = new Vue({
el: '#databinding',
data: {
show: true,
styleobj: {
backgroundColor: '#2196F3!important',
cursor: 'pointer',
padding: '8px 16px',
verticalAlign: 'middle',
}
},
methods : {
showdata : function() {
this.show = !this.show;
}
},
});
</script>
</body>
</html>
v-else is added using the following code snippet.
<h1 v-if = "show">This is h1 tag</h1> <h2 v-else>This is h2 tag</h2>
Now, if show is true “This is h1 tag” will be displayed, and if false “This is h2 tag” will be displayed. This is what we will get in the browser.
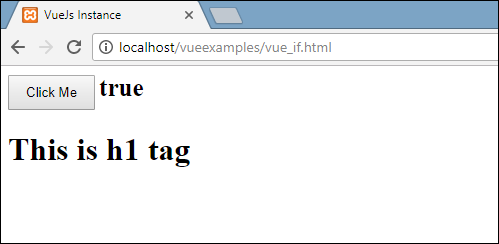
The above display is when the show variable is true. Since, we have added v-else, the second statement is not present. Now, when we click the button the show variable will become false and the second statement will be displayed as shown in the following screenshot.
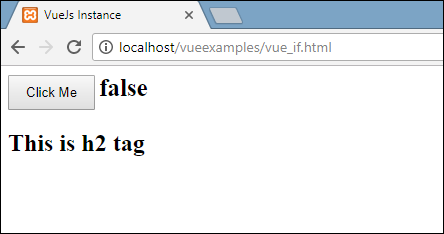
v-show
v-show behaves same as v-if. It also shows and hides the elements based on the condition assigned to it. The difference between v-if and v-show is that v-if removes the HTML element from the DOM if the condition is false, and adds it back if the condition is true. Whereas v-show hides the element, if the condition is false with display:none. It shows the element back, if the condition is true. Thus, the element is present in the dom always.
Example
<html>
<head>
<title>VueJs Instance</title>
<script type = "text/javascript" src = "js/vue.js"></script>
</head>
<body>
<div id = "databinding">
<button v-on:click = "showdata" v-bind:style = "styleobj">Click Me</button>
<span style = "font-size:25px;"><b>{{show}}</b></span>
<h1 v-if = "show">This is h1 tag</h1>
<h2 v-else>This is h2 tag</h2>
<div v-show = "show">
<b>V-Show:</b>
<img src = "images/img.jpg" width = "100" height = "100" />
</div>
</div>
<script type = "text/javascript">
var vm = new Vue({
el: '#databinding',
data: {
show: true,
styleobj: {
backgroundColor: '#2196F3!important',
cursor: 'pointer',
padding: '8px 16px',
verticalAlign: 'middle',
}
},
methods : {
showdata : function() {
this.show = !this.show;
}
},
});
</script>
</body>
</html>
v-show is assigned to the HTML element using the following code snippet.
<div v-show = "show"><b>V-Show:</b><img src = "images/img.jpg" width = "100" height = "100" /></div>
We have used the same variable show and based on it being true/false, the image is displayed in the browser.
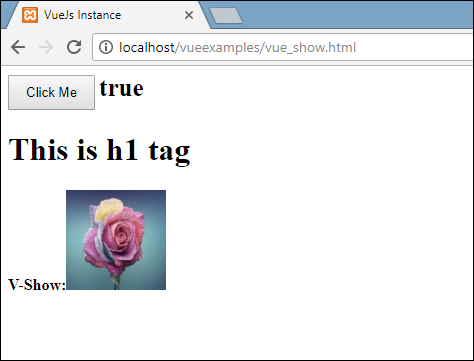
Now, since the variable show is true, the image is as displayed in the above screenshot. Let us click the button and see the display.
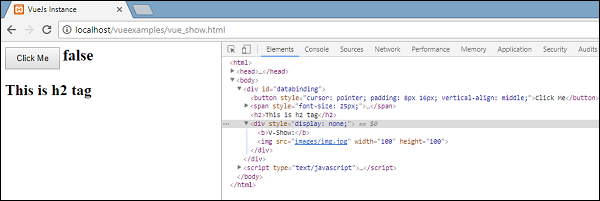
The variable show is false, hence the image is hidden. If we inspect and see the element, the div along with the image is still a part of the DOM with the style property display: none as seen in the above screenshot.
List Rendering
v-for
Let us now discuss list rendering with v-for directive.
Example
<html>
<head>
<title>VueJs Instance</title>
<script type = "text/javascript" src = "js/vue.js"></script>
</head>
<body>
<div id = "databinding">
<input type = "text" v-on:keyup.enter = "showinputvalue"
v-bind:style = "styleobj" placeholder = "Enter Fruits Names"/>
<h1 v-if = "items.length>0">Display Fruits Name</h1>
<ul>
<li v-for = "a in items">{{a}}</li>
</ul>
</div>
<script type = "text/javascript">
var vm = new Vue({
el: '#databinding',
data: {
items:[],
styleobj: {
width: "30%",
padding: "12px 20px",
margin: "8px 0",
boxSizing: "border-box"
}
},
methods : {
showinputvalue : function(event) {
this.items.push(event.target.value);
}
},
});
</script>
</body>
</html>
A variable called items is declared as an array. In methods, there is a method called showinputvalue, which is assigned to the input box that takes the names of the fruits. In the method, the fruits entered inside the textbox are added to the array using the following piece of code.
showinputvalue : function(event) {
this.items.push(event.target.value);
}
We have used v-for to display the fruits entered as in the following piece of code. V-for helps to iterate over the values present in the array.
<ul>
<li v-for = "a in items">{{a}}</li>
</ul>
To iterate over the array with for loop, we have to use v-for = ”a in items” where a holds the values in the array and will display till all the items are done.
Output
Following is the output in the browser.
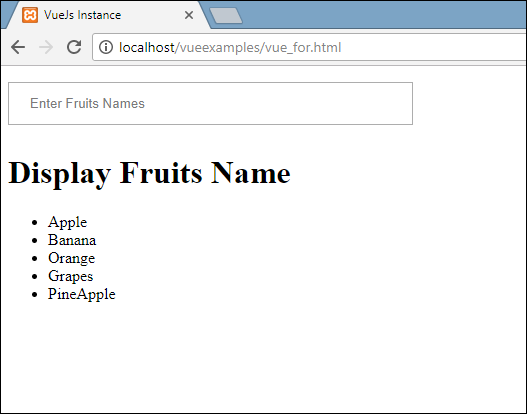
On inspecting the items, this is what it shows in the browser. In the DOM, we don’t see any v-for directive to the li element. It displays the DOM without any VueJS directives.
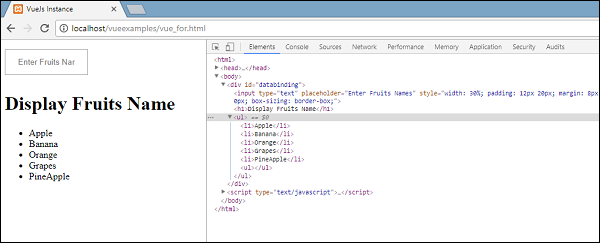
If we wish to display the index of the array, it is done using the following code.
<html>
<head>
<title>VueJs Instance</title>
<script type = "text/javascript" src = "js/vue.js"></script>
</head>
<body>
<div id = "databinding">
<input type = "text" v-on:keyup.enter = "showinputvalue"
v-bind:style = "styleobj" placeholder = "Enter Fruits Names"/>
<h1 v-if = "items.length>0">Display Fruits Name</h1>
<ul>
<li v-for = "(a, index) in items">{{index}}--{{a}}</li>
</ul>
</div>
<script type = "text/javascript">
var vm = new Vue({
el: '#databinding',
data: {
items:[],
styleobj: {
width: "30%",
padding: "12px 20px",
margin: "8px 0",
boxSizing: "border-box"
}
},
methods : {
showinputvalue : function(event) {
this.items.push(event.target.value);
}
},
});
</script>
</body>
</html>
To get the index, we have added one more variable in the bracket as shown in the following piece of code.
<li v-for = "(a, index) in items">{{index}}--{{a}}</li>
In (a, index), a is the value and index is the key. The browser display will now be as shown in the following screenshot. Thus, with the help of index any specific values can be displayed.

VueJS — Transition and Animation
In this chapter, we will discuss the transition and animation features available in VueJS.
Transition
VueJS provides various ways to apply transition to the HTML elements when they are added/updated in the DOM. VueJS has a built-in transition component that needs to be wrapped around the element, which needs transition.
Syntax
<transition name = "nameoftransition"> <div></div> </transition>
Let us consider an example to understand the working of transition.
Example
<html>
<head>
<title>VueJs Instance</title>
<script type = "text/javascript" src = "js/vue.js"></script>
</head>
<body>
<style>
.fade-enter-active, .fade-leave-active {
transition: opacity 2s
}
.fade-enter, .fade-leave-to /* .fade-leave-active below version 2.1.8 */ {
opacity: 0
}
</style>
<div id = "databinding">
<button v-on:click = "show = !show">Click Me</button>
<transition name = "fade">
<p v-show = "show" v-bind:style = "styleobj">Animation Example</p>
</transition>
</div>
<script type = "text/javascript">
var vm = new Vue({
el: '#databinding',
data: {
show:true,
styleobj :{
fontSize:'30px',
color:'red'
}
},
methods : {
}
});
</script>
</body>
</html>
There is button called clickme created using which we can change the value of the variable show to true to false and vice versa. There is a p tag which shows the text element only if the variable is true. We have wrapped the p tag with the transition element as shown in the following piece of code.
<transition name = "fade"> <p v-show = "show" v-bind:style = "styleobj">Animation Example</p> </transition>
The name of the transition is fade. VueJS provides some standard classes for transition and the classes are prefixed with the name of the transition.
Following are some standard classes for transition −
-
v-enter − This class is called initially before the element is updated/added. Its the starting state.
-
v-enter-active − This class is used to define the delay, duration, and easing curve for entering in the transition phase. This is the active state for entire and the class is available during the entire entering phase.
-
v-leave − Added when the leaving transition is triggered, removed.
-
v-leave-active − Applied during the leaving phase. It is removed when the transition is done. This class is used to apply the delay, duration, and easing curve during the leaving phase.
Each of the above classes will be prefixed with the name of the transition. We have given the name of the transition as fade, hence the name of the classes becomes .fade_enter, .fade_enter_active, .fade_leave, .fade_leave_active.
They are defined in the following code.
<style>
.fade-enter-active, .fade-leave-active {
transition: opacity 2s
}
.fade-enter, .fade-leave-to /* .fade-leave-active below version 2.1.8 */ {
opacity: 0
}
</style>
The .fade_enter_active and .fade_leave_active are defined together and it applies a transition at the start and at the leaving stage. The opacity property is changed to 0 in 2 seconds.
The duration is defined in the .fade_enter_active and .fade_leave_active. The final stage is defined in the .fade_enter, .fade_leave_to.
The display in the browser is as follows.

On the click of the button, the text will fade away in two seconds.

After two seconds, the text will disappear completely.
Let us consider another example, where there is an image and it is shifted on the x-axis when the button is clicked.
Example
<html>
<head>
<title>VueJs Instance</title>
<script type = "text/javascript" src = "js/vue.js"></script>
</head>
<body>
<style>
.shiftx-enter-active, .shiftx-leave-active {
transition: all 2s ease-in-out;
}
.shiftx-enter, .shiftx-leave-to /* .fade-leave-active below version 2.1.8 */ {
transform : translateX(100px);
}
</style>
<div id = "databinding">
<button v-on:click = "show = !show">Click Me</button>
<transition name = "shiftx">
<p v-show = "show">
<img src = "images/img.jpg" style = "width:100px;height:100px;" />
</p>
</transition>
</div>
<script type = "text/javascript">
var vm = new Vue({
el: '#databinding',
data: {
show:true
},
methods : {
}
});
</script>
</body>
</html>
The name of the transition is shiftx. A transform property is used to shift the image on the x-axis by 100px using the following piece of code.
<style>
.shiftx-enter-active, .shiftx-leave-active {
transition: all 2s ease-in-out;
}
.shiftx-enter, .shiftx-leave-to /* .fade-leave-active below version 2.1.8 */ {
transform : translateX(100px);
}
</style>
Following is the output.

On the click of the button, the image will shift 100px towards the right as shown in the following screenshot.
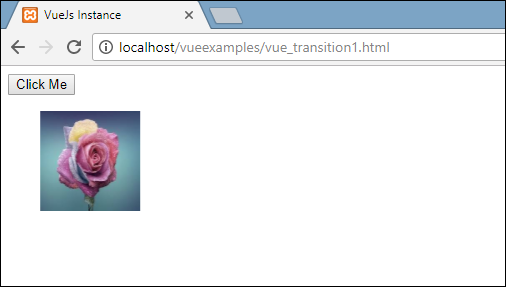
Animation
Animations are applied the same way as transition is done. Animation also has classes that needs to be declared for the effect to take place.
Let us consider an example to see how animation works.
Example
<html>
<head>
<title>VueJs Instance</title>
<script type = "text/javascript" src = "js/vue.js"></script>
</head>
<body>
<style>
.shiftx-enter-active {
animation: shift-in 2s;
}
.shiftx-leave-active {
animation: shift-in 2s reverse;
}
@keyframes shift-in {
0% {transform:rotateX(0deg);}
25% {transform:rotateX(90deg);}
50% {transform:rotateX(120deg);}
75% {transform:rotateX(180deg);}
100% {transform:rotateX(360deg);}
}
</style>
<div id = "databinding">
<button v-on:click = "show = !show">Click Me</button>
<transition name = "shiftx">
<p v-show = "show">
<img src = "images/img.jpg" style = "width:100px;height:100px;" />
</p>
</transition>
</div>
<script type = "text/javascript">
var vm = new Vue({
el: '#databinding',
data: {
show:true
},
methods : {
}
});
</script>
</body>
</html>
To apply animation, there are classes same as transition. In the above code, we have an image enclosed in p tag as shown in the following piece of code.
<transition name = "shiftx"> <p v-show = "show"><img src = "images/img.jpg" style = "width:100px;height:100px;" /></p> </transition>
The name of the transition is shiftx. The class applied is as follows −
<style>
.shiftx-enter-active {
animation: shift-in 2s;
}
.shiftx-leave-active {
animation: shift-in 2s reverse;
}
@keyframes shift-in {
0% {transform:rotateX(0deg);}
25% {transform:rotateX(90deg);}
50% {transform:rotateX(120deg);}
75% {transform:rotateX(180deg);}
100% {transform:rotateX(360deg);}
}
</style>
The class is prefixed with the transition name, i.e. shiftx-enter-active and .shiftx-leave-active. The animation is defined with the keyframes from 0% to 100%. There is a transform defined at each of the keyframes is as shown in the following piece of code.
@keyframes shift-in {
0% {transform:rotateX(0deg);}
25% {transform:rotateX(90deg);}
50% {transform:rotateX(120deg);}
75% {transform:rotateX(180deg);}
100% {transform:rotateX(360deg);}
}
Following is the output.

On clicking the button, it rotates from 0 to 360 degree and disappears.
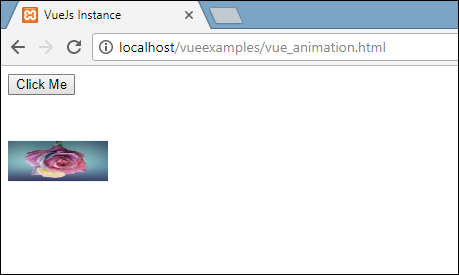
Custom Transition Classes
VueJS provides a list of custom classes, which can be added as attributes to the transition element.
- enter-class
- enter-active-class
- leave-class
- leave-active-class
Custom classes basically come into play when we want to use an external CSS library such as animate.css.
Example
<html>
<head>
<link href = "https://cdn.jsdelivr.net/npm/animate.css@3.5.1" rel = "stylesheet" type = "text/css">
<script type = "text/javascript" src = "js/vue.js"></script>
</head>
<body>
<div id = "animate" style = "text-align:center">
<button @click = "show = !show"><span style = "font-size:25px;">Animate</span></button>
<transition
name = "custom-classes-transition"
enter-active-class = "animated swing"
leave-active-class = "animated bounceIn">
<p v-if = "show"><span style = "font-size:25px;">Example</span></p>
</transition>
</div>
<script type = "text/javascript">
var vm = new Vue({
el: '#animate',
data: {
show: true
}
});
</script>
</body>
</html>
Output
![]()
Output

Output
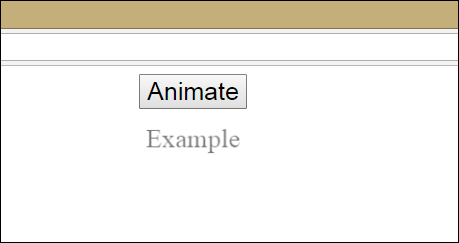
There are two animations applied in the above code. One enter-active-class = “animated swing” and another leave-active-class = ”animated bounceIn”. We are making the use of custom animation classes for the animation to be applied from the third party library.
Explicit Transition Duration
We can apply transition and animation on the element using VueJS. Vue waits for the transionend and animationend event to detect if the animation or transition is done.
Sometimes the transition can cause delay. In such cases, we can apply the duration explicitly as follows.
<transition :duration = "1000"></transition>
<transition :duration = "{ enter: 500, leave: 800 }">...</transition>
We can use the duration property with a : on the transition element as shown above. In case there is a need to specify the duration separately for entering and leaving, it can be done as shown in the above piece of code.
JavaScript Hooks
The transition classes can be called as methods using JavaScript events. Let us consider an example for better understanding.
Example
<html>
<head>
<title>VueJs Instance</title>
<script type = "text/javascript" src = "js/vue.js"></script>
</head>
<body>
<script src = "https://cdnjs.cloudflare.com/ajax/libs/velocity/1.2.3/velocity.min.js"></script>
<div id = "example-4">
<button @click = "show = !show">
<span style = "font-size:25px;">Toggle</span>
</button>
<transition v-on:before-enter = "beforeEnter"
v-on:enter = "enter"
v-on:leave = "leave"
v-bind:css = "false">
<p v-if = "show" style = "font-size:25px;">Animation Example with velocity</p>
</transition>
</div>
<script type = "text/javascript">
var vm = new Vue({
el: '#example-4',
data: {
show: false
},
methods: {
beforeEnter: function (el) {
el.style.opacity = 0
},
enter: function (el, done) {
Velocity(el, { opacity: 1, fontSize: '25px' }, { duration: 1000 })
Velocity(el, { fontSize: '10px' }, { complete: done })
},
leave: function (el, done) {
Velocity(el, { translateX: '15px', rotateZ: '50deg' }, { duration: 1500 })
Velocity(el, { rotateZ: '100deg' }, { loop: 2 })
Velocity(el, {
rotateZ: '45deg',
translateY: '30px',
translateX: '30px',
opacity: 0
}, { complete: done })
}
}
});
</script>
</body>
</html>
Output
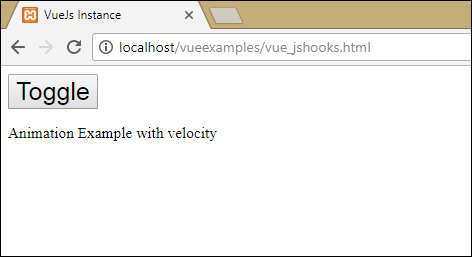

In the above example, we are performing animation using js methods on the transition element.
The methods on transition are applied as follows −
<transition v-on:before-enter = "beforeEnter" v-on:enter = "enter" v-on:leave = "leave" v-bind:css = "false"> <p v-if = "show" style = "font-size:25px;">Animation Example with velocity</p> </transition>
There is a prefix added v-on and the name of the event to which the method is called. The methods are defined in the Vue instance as follows −
methods: {
beforeEnter: function (el) {
el.style.opacity = 0
},
enter: function (el, done) {
Velocity(el, { opacity: 1, fontSize: '25px' }, { duration: 1000 })
Velocity(el, { fontSize: '10px' }, { complete: done })
},
leave: function (el, done) {
Velocity(el, { translateX: '15px', rotateZ: '50deg' }, { duration: 1500 })
Velocity(el, { rotateZ: '100deg' }, { loop: 2 })
Velocity(el, {
rotateZ: '45deg',
translateY: '30px',
translateX: '30px',
opacity: 0
}, { complete: done })
}
}
The required transition is applied in each of these methods. There is an opacity animation applied on the click of the button and also when the animation is done. Third party library is used for animation.
There is a property added on transition v-bind:css = «false», which is done so that Vue understands it is a JavaScript transition.
Transition at the Initial Render
In order to add animation at the start, we need to add ‘appear’ property to the transition element.
Let’s look at an example to understand it better.
Example
<html>
<head>
<link href = "https://cdn.jsdelivr.net/npm/animate.css@3.5.1" rel = "stylesheet" type = "text/css">
<script type = "text/javascript" src = "js/vue.js"></script>
</head>
<body>
<div id = "animate" style = "text-align:center">
<transition
appear
appear-class = "custom-appear-class"
appear-active-class = "animated bounceIn">
<h1>BounceIn - Animation Example</h1>
</transition>
<transition
appear
appear-class = "custom-appear-class"
appear-active-class = "animated swing">
<h1>Swing - Animation Example</h1>
</transition>
<transition
appear
appear-class = "custom-appear-class"
appear-active-class = "animated rubberBand">
<h1>RubberBand - Animation Example</h1>
</transition>
</div>
<script type = "text/javascript">
var vm = new Vue({
el: '#animate',
data: {
show: true
}
});
</script>
</body>
</html>
In the above example, we have used three different animations from animate.css library. We have added appear to the transition element.
On execution of the above code, following will be the output in the browser.

Animation on Components
We can wrap the transition for the components using the following code. We have used dynamic component here.
Example
<html>
<head>
<title>VueJs Instance</title>
<script type = "text/javascript" src = "js/vue.js"></script>
<link href = "https://cdn.jsdelivr.net/npm/animate.css@3.5.1" rel = "stylesheet" type = "text/css">
</head>
<body>
<div id = "databinding" style = "text-align:center;">
<transition appear
appear-class = "custom-appear-class"
appear-active-class = "animated wobble">
<component v-bind:is = "view"></component>
</transition>
</div>
<script type = "text/javascript">
var vm = new Vue({
el: '#databinding',
data: {
view: 'component1'
},
components: {
'component1': {
template: '<div><span style = "font-
size:25;color:red;">Animation on Components</span></div>'
}
}
});
</script>
</body>
</html>
Output

VueJS — Directives
Directives are instruction for VueJS to do things in a certain way. We have already seen directives such as v-if, v-show, v-else, v-for, v-bind , v-model, v-on, etc.
In this chapter, we will take a look at custom directives. We will create global directives similar to how we did for components.
Syntax
Vue.directive('nameofthedirective', {
bind(e1, binding, vnode) {
}
})
We need to create a directive using Vue.directive. It takes the name of the directive as shown above. Let us consider an example to show the details of the working of directives.
Example
<html>
<head>
<title>VueJs Instance</title>
<script type = "text/javascript" src = "js/vue.js"></script>
</head>
<body>
<div id = "databinding">
<div v-changestyle>VueJS Directive</div>
</div>
<script type = "text/javascript">
Vue.directive("changestyle",{
bind(e1,binding, vnode) {
console.log(e1);
e1.style.color = "red";
e1.style.fontSize = "30px";
}
});
var vm = new Vue({
el: '#databinding',
data: {
},
methods : {
},
});
</script>
</body>
</html>
In this example, we have created a custom directive changestyle as shown in the following piece of code.
Vue.directive("changestyle",{
bind(e1,binding, vnode) {
console.log(e1);
e1.style.color = "red";
e1.style.fontSize = "30px";
}
});
We are assigning the following changestyle to a div.
<div v-changestyle>VueJS Directive</div>
If we see in the browser, it will display the text VueJs Directive in red color and the fontsize is increased to 30px.
Output
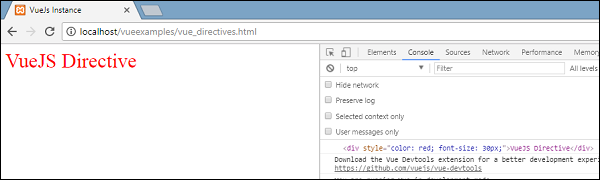
We have used the bind method, which is a part of the directive. It takes three arguments e1, the element to which the custom directive needs to be applied. Binding is like arguments passed to the custom directive, e.g. v-changestyle = ”{color:’green’}”, where green will be read in the binding argument and vnode is the element, i.e. nodename.
In the next example, we have consoled all the arguments and its shows what details each of them give.
Following is an example with a value passed to the custom directive.
<html>
<head>
<title>VueJs Instance</title>
<script type = "text/javascript" src = "js/vue.js"></script>
</head>
<body>
<div id = "databinding">
<div v-changestyle = "{color:'green'}">VueJS Directive</div>
</div>
<script type = "text/javascript">
Vue.directive("changestyle",{
bind(e1,binding, vnode) {
console.log(e1);
console.log(binding.value.color);
console.log(vnode);
e1.style.color=binding.value.color;
e1.style.fontSize = "30px";
}
});
var vm = new Vue({
el: '#databinding',
data: {
},
methods : {
},
});
</script>
</body>
</html>
Output

The color of the text is changed to green. The value is passed using the following piece of code.
<div v-changestyle = "{color:'green'}">VueJS Directive</div>
And it is accessed using the following piece of code.
Vue.directive("changestyle",{
bind(e1,binding, vnode) {
console.log(e1);
console.log(binding.value.color);
console.log(vnode);
e1.style.color=binding.value.color;
e1.style.fontSize = "30px";
}
});
Filters
VueJS supports filters that help with text formatting. It is used along with v-bind and interpolations ({{}}). We need a pipe symbol at the end of JavaScript expression for filters.
Example
<html>
<head>
<title>VueJs Instance</title>
<script type = "text/javascript" src = "js/vue.js"></script>
</head>
<body>
<div id = "databinding">
<input v-model = "name" placeholder = "Enter Name" /><br/>
<span style = "font-size:25px;"><b>Letter count is : {{name | countletters}}</b></span>
</div>
<script type = "text/javascript">
var vm = new Vue({
el: '#databinding',
data: {
name : ""
},
filters : {
countletters : function(value) {
return value.length;
}
}
});
</script>
</body>
</html>
In the above example, we have created a simple filter countletters. Countletters filter counts the numbers of characters entered in the textbox. To make use of filters, we need to use the filter property and define the filter used, by the following piece of code.
filters : {
countletters : function(value) {
return value.length;
}
}
We are defining the method countletters and returning the length of the string entered.
To use filter in the display, we have used the pipe operator and the name of the filter, i.e. countletters.
<span style = "font-size:25px;"><b>Letter count is : {{name | countletters}}</b></span>
Following is the display in the browser.

We can also pass arguments to the filter using the following piece of code.
<span style = "font-size:25px;"><b>Letter count is : {{name | countletters('a1', 'a2')}}</b></span>
Now, the countletters will have three params, i.e. message, a1, and a2.
We can also pass multiple filters to the interpolation using the following piece of code.
<span style = "font-size:25px;"><b>Letter count is : {{name | countlettersA, countlettersB}}</b></span>
In the filter property countlettersA and countlettersB will be the two methods and the countlettersA will pass the details to countlettersB.
VueJS — Routing
VueJS does not have a built-in router feauture. We need to follow some additional steps to install it.
Direct Download from CDN
The latest version of vue-router is available at https://unpkg.com/vue-router/dist/vue-router.js
Unpkg.com provides npm-based cdn links. The above link is always updated to the recent version. We can download and host it, and use it with a script tag along with vue.js as follows −
<script src = "/path/to/vue.js"></script> <script src = "/path/to/vue-router.js"></script>
Using NPM
Run the following command to install the vue-router.
npm install vue-router
Using GitHub
We can clone the repository from GitHub as follows −
git clone https://github.com/vuejs/vue-router.git node_modules/vue-router cd node_modules/vue-router npm install npm run build
Let us start with a simple example using vue-router.js.
Example
<html>
<head>
<title>VueJs Instance</title>
<script type = "text/javascript" src = "js/vue.js"></script>
<script type = "text/javascript" src = "js/vue-router.js"></script>
</head>
<body>
<div id = "app">
<h1>Routing Example</h1>
<p>
<router-link to = "/route1">Router Link 1</router-link>
<router-link to = "/route2">Router Link 2</router-link>
</p>
<!-- route outlet -->
<!-- component matched by the route will render here -->
<router-view></router-view>
</div>
<script type = "text/javascript">
const Route1 = { template: '<div style = "border-radius:20px;background-color:cyan;width:200px;height:50px;margin:10px;font-size:25px;padding:10px;">This is router 1</div>' }
const Route2 = { template: '<div style = "border-radius:20px;background-color:green;width:200px;height:50px;margin:10px;font-size:25px;padding:10px;">This is router 2</div>' }
const routes = [
{ path: '/route1', component: Route1 },
{ path: '/route2', component: Route2 }
];
const router = new VueRouter({
routes // short for `routes: routes`
});
var vm = new Vue({
el: '#app',
router
});
</script>
</body>
</html>
Output
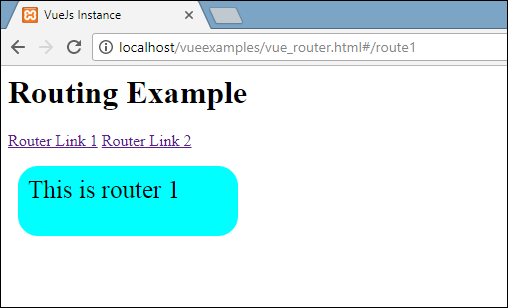

To start with routing, we need to add the vue-router.js file. Take the code from https://unpkg.com/vue-router/dist/vue-router.js and save it in the file vue-router.js.
The script is added after vue.js as follows −
<script type = "text/javascript" src = "js/vue.js"></script> <script type = "text/javascript" src = "js/vue-router.js"></script>
In the body section, there is a router link defined as follows −
<p> <router-link to = "/route1">Router Link 1</router-link> <router-link to = "/route2">Router Link 2</router-link> </p>
<router-link> is a component used to navigate to the HTML content to be displayed to the user. The to property is the destination, i.e the source file where the contents to be displayed will be picked.
In the above piece of code, we have created two router links.
Take a look at the script section where the router is initialized. There are two constants created as follows −
const Route1 = { template: '<div style = "border-radius:20px;background-color:cyan;width:200px;height:50px;margin:10px;font-size:25px;padding:10px;">This is router 1</div>' };
const Route2 = { template: '<div style = "border-radius:20px;background-color:green;width:200px;height:50px;margin:10px;font-size:25px;padding:10px;">This is router 2</div>' }
They have templates, which needs to be shown when the router link is clicked.
Next, is the routes const, which defines the path to be displayed in the URL.
const routes = [
{ path: '/route1', component: Route1 },
{ path: '/route2', component: Route2 }
];
Routes define the path and the component. The path i.e. /route1 will be displayed in the URL when the user clicks on the router link.
Component takes the templates names to be displayed. The path from the routes need to match with the router link to the property.
For example, <router-link to = ”path here”></router-link>
Next, the instance is created to VueRouter using the following piece of code.
const router = new VueRouter({
routes // short for `routes: routes`
});
The VueRouter constructor takes the routes as the param. The router object is assigned to the main vue instance using the following piece of code.
var vm = new Vue({
el: '#app',
router
});
Execute the example and see the display in the browser. On inspecting and checking the router link, we will find that it adds class to the active element as shown in the following screenshot.
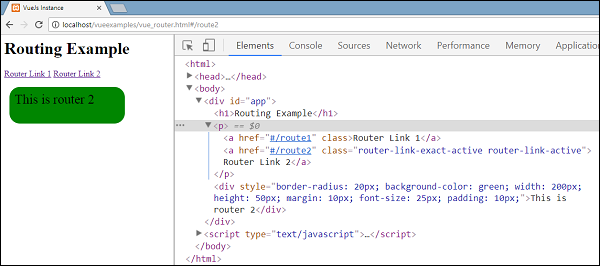
The class added is class = “router-link-exact-active router-link-active”. The active link gets the class as shown in the above screenshot. Another thing to notice is, the <router-link> gets rendered as a tag.
Props for Router Link
Let us see some more properties to be passed to <router-link>.
to
This is the destination path given to the <router-link>. When clicked, the value of to will be passed to router.push() internally. The value needs to be a string or a location object. When using an object, we need to bind it as shown in e.g. 2.
e.g. 1: <router-link to = "/route1">Router Link 1</router-link>
renders as
<a href = ”#/route”>Router Link </a>
e.g. 2: <router-link v-bind:to = "{path:'/route1'}">Router Link 1</router-link>
e.g. 3: <router-link v-bind:to =
"{path:'/route1', query: { name: 'Tery' }}">Router Link 1</router-link>//router link with query string.
Following is the output of e.g. 3.

In the URL path, name = Tery is a part of the query string. E.g.: http://localhost/vueexamples/vue_router.html#/route1?name = Tery
replace
Adding replace to the router link will call the router.replace() instead of router.push(). With replace, the navigation history is not stored.
Example
<router-link v-bind:to = "{path:'/route1', query: { name: 'Tery' }}" replace>Router Link 1</router-link>
append
Adding append to the <router-link><router-link> will make the path relative.
If we want to go from the router link with path /route1 to router link path /route2, it will show the path in the browser as /route1/route2.
Example
<router-link v-bind:to = "{ path: '/route1'}" append>Router Link 1</router-link>
tag
At present <router-link> renders as a tag. In case, we want to render it as some other tag, we need to specifty the same using tag = ”tagname”;
Example
<p>
<router-link v-bind:to = "{ path: '/route1'}" tag = "span">Router Link 1</router-link>
<router-link v-bind:to = "{ path: '/route2'}" tag = "span">Router Link 2</router-link>
</p>
We have specified the tag as span and this is what is displayed in the browser.

The tag displayed now is a span tag. We will still see the click going as we click on the router link for navigation.
active-class
By default, the active class added when the router link is active is router-link-active. We can overwrite the class by setting the same as shown in the following code.
<style>
._active{
background-color : red;
}
</style>
<p>
<router-link v-bind:to = "{ path: '/route1'}" active-class = "_active">Router Link 1</router-link>
<router-link v-bind:to = "{ path: '/route2'}" tag = "span">Router Link 2</router-link>
</p>
The class used is active_class = ”_active”. This is the output displayed in the browser.
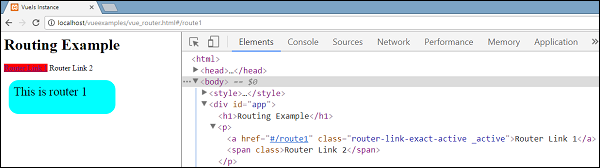
exact-active-class
The default exactactive class applied is router-link-exact-active. We can overwrite it using exact-active-class.
Example
<p>
<router-link v-bind:to = "{ path: '/route1'}" exact-active-class = "_active">Router Link 1</router-link>
<router-link v-bind:to = "{ path: '/route2'}" tag = "span">Router Link 2</router-link>
</p>
This is what is displayed in the browser.

event
At present, the default event for router-link is click event. We can change the same using the event property.
Example
<router-link v-bind:to = "{ path: '/route1'}" event = "mouseover">Router Link 1</router-link>
Now, when we mouseover the router link, it will navigate as shown in the following browser. Mouseover on the Router link 1 and we will see the navigation changing.

VueJS — Mixins
Mixins are basically to be used with components. They share reusable code among components. When a component uses mixin, all options of mixin become a part of the component options.
Example
<html>
<head>
<title>VueJs Instance</title>
<script type = "text/javascript" src = "js/vue.js"></script>
</head>
<body>
<div id = "databinding"></div>
<script type = "text/javascript">
var vm = new Vue({
el: '#databinding',
data: {
},
methods : {
},
});
var myMixin = {
created: function () {
this.startmixin()
},
methods: {
startmixin: function () {
alert("Welcome to mixin example");
}
}
};
var Component = Vue.extend({
mixins: [myMixin]
})
var component = new Component();
</script>
</body>
</html>
Output

When a mixin and a component contain overlapping options, they are merged as shown in the following example.
<html>
<head>
<title>VueJs Instance</title>
<script type = "text/javascript" src = "js/vue.js"></script>
</head>
<body>
<div id = "databinding"></div>
<script type = "text/javascript">
var mixin = {
created: function () {
console.log('mixin called')
}
}
new Vue({
mixins: [mixin],
created: function () {
console.log('component called')
}
});
</script>
</body>
</html>
Now the mixin and the vue instance has the same method created. This is the output we see in the console. As seen, the option of the vue and the mixin will be merged.

If we happen to have the same function name in methods, then the main vue instance will take priority.
Example

<html>
<head>
<title>VueJs Instance</title>
<script type = "text/javascript" src = "js/vue.js"></script>
</head>
<body>
<div id = "databinding"></div>
<script type = "text/javascript">
var mixin = {
methods: {
hellworld: function () {
console.log('In HelloWorld');
},
samemethod: function () {
console.log('Mixin:Same Method');
}
}
};
var vm = new Vue({
mixins: [mixin],
methods: {
start: function () {
console.log('start method');
},
samemethod: function () {
console.log('Main: same method');
}
}
});
vm.hellworld();
vm.start();
vm.samemethod();
</script>
</body>
</html>
We will see mixin has a method property in which helloworld and samemethod functions are defined. Similarly, vue instance has a methods property in which again two methods are defined start and samemethod.
Each of the following methods are called.
vm.hellworld(); // In HelloWorld vm.start(); // start method vm.samemethod(); // Main: same method
As seen above, we have called helloworld, start, and samemethod function. samemethod is also present in mixin, however, priority will be given to the main instance, as seen in the following console.
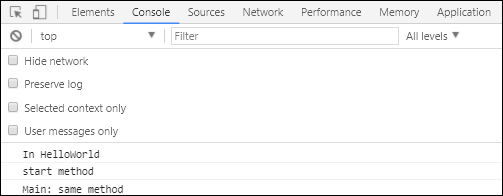
VueJS — Render Function
We have seen components and the usage of it. For example, we have a content that needs to be reused across the project. We can convert the same as a component and use it.
Let’s take a look at an example of a simple component and see what the render function has to do within it.
Example
<html>
<head>
<title>VueJs Instance</title>
<script type = "text/javascript" src = "js/vue.js"></script>
</head>
<body>
<div id = "component_test">
<testcomponent></testcomponent>
</div>
<script type = "text/javascript">
Vue.component('testcomponent',{
template : '<h1>Hello World</h1>',
data: function() {
},
methods:{
}
});
var vm = new Vue({
el: '#component_test'
});
</script>
</body>
</html>
Consider the above example of a simple component that prints Hello World as shown in the following screenshot.

Now, if we want to reuse the component, we can do so by just printing it again. For example,
<div id = "component_test"> <testcomponent></testcomponent> <testcomponent></testcomponent> <testcomponent></testcomponent> <testcomponent></testcomponent> </div>
And the output will be the following.

However, now we need some changes to the component. We don’t want the same text to be printed. How can we change it? In case, we type something inside the component, will it be take into consideration?
Let us consider the following example and see what happens.
<div id = "component_test"> <testcomponent>Hello Jai</testcomponent> <testcomponent>Hello Roy</testcomponent> <testcomponent>Hello Ria</testcomponent> <testcomponent>Hello Ben</testcomponent> </div>
The output remains the same as we had seen earlier. It does not change the text as we want.
Component does provide something called as slots. Let’s make use of it and see if we get the desired results.
Example
<html>
<head>
<title>VueJs Instance</title>
<script type = "text/javascript" src = "js/vue.js"></script>
</head>
<body>
<div id = "component_test">
<testcomponent>Hello Jai</testcomponent>
<testcomponent>Hello Roy</testcomponent>
<testcomponent>Hello Ria</testcomponent>
<testcomponent>Hello Ben</testcomponent>
</div>
<script type = "text/javascript">
Vue.component('testcomponent',{
template : '<h1><slot></slot></h1>',
data: function() {
},
methods:{
}
});
var vm = new Vue({
el: '#component_test'
});
</script>
</body>
</html>
As seen in the above code, in the template we have added slot, hence now it takes the value to send inside the component as shown in the following screenshot.
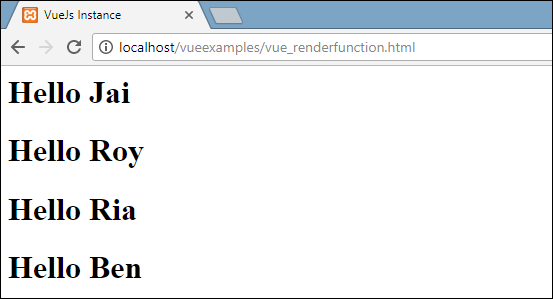
Now, let us consider we want to change the color and size. For example, currently we are using h1 tag and we want to change the HTML tag to p tag or div tag for the same component. How can we have the flexibility to carry out so many changes?
We can do so with the help of the render function. Render function helps make the component dynamic and use the way it is required by keeping it common and helping pass arguments using the same component.
Example
<html>
<head>
<title>VueJs Instance</title>
<script type = "text/javascript" src = "js/vue.js"></script>
</head>
<body>
<div id = "component_test">
<testcomponent :elementtype = "'div,red,25,div1'">Hello Jai</testcomponent>
<testcomponent :elementtype = "'h3,green,25,h3tag'">Hello Roy</testcomponent>
<testcomponent :elementtype = "'p,blue,25,ptag'">Hello Ria</testcomponent>
<testcomponent :elementtype = "'div,green,25,divtag'">Hello Ben</testcomponent>
</div>
<script type = "text/javascript">
Vue.component('testcomponent',{
render :function(createElement){
var a = this.elementtype.split(",");
return createElement(a[0],{
attrs:{
id:a[3],
style:"color:"+a[1]+";font-size:"+a[2]+";"
}
},
this.$slots.default
)
},
props:{
elementtype:{
attributes:String,
required:true
}
}
});
var vm = new Vue({
el: '#component_test'
});
</script>
</body>
</html>
In the above code, we have changed the component and added the render function with props property using the following piece of code.
Vue.component('testcomponent',{
render :function(createElement){
var a = this.elementtype.split(",");
return createElement(a[0],{
attrs:{
id:a[3],
style:"color:"+a[1]+";font-size:"+a[2]+";"
}
},
this.$slots.default
)
},
props:{
elementtype:{
attributes:String,
required:true
}
}
});
The props look like the following.
props:{
elementtype:{
attributes:String,
required:true
}
}
We have defined a property called elementtype, which takes attributes field of type string. Another required field, which mentions that the field is mandatory.
In the render function, we have used the elementtype property as seen in the following piece of code.
render :function(createElement){
var a = this.elementtype.split(",");
return createElement(a[0],{
attrs:{
id:a[3],
style:"color:"+a[1]+";font-size:"+a[2]+";"
}
},
this.$slots.default
)
}
Render function takes createElement as the argument and returns the same. CreateElement creates the DOM element the same way as in JavaScript. We have also split the elementtype on comma, using the values in the attrs field.
CreateElement is taking the first param as the elementtag to be created. It is passed to the component using the following piece of code.
<testcomponent :elementtype = "'div,red,25,div1'">Hello Jai</testcomponent>
The component needs to take the props field as shown above. It starts with : and the name of the props. Here, we are passing the element tag, color, fontsize, and the id of the element.
In render function, in createElement, we are splitting on comma, so the first element is the elementtag, which is given to the createElemet as shown in the following piece of code.
return createElement(
a[0],{
attrs:{
id:a[3],
style:"color:"+a[1]+";font-size:"+a[2]+";"
}
},
this.$slots.default
)
a[0] is the html element tag. The next parameter is the attributes for the element tag. They are defined in the attr field in the following piece of code.
attrs:{
id:a[3],
style:"color:"+a[1]+";font-size:"+a[2]+";"
}
We have defined two attributes for the element tag — id and style. To id, we are passing a[3], which is the value we have after splitting on comma. Using style, we have defined color and fontsize.
Last is the slot, that is the message we have given in the componentin the following piece of code.
<testcomponent :elementtype = "'div,red,25,div1'">Hello Jai</testcomponent>
We have defined the text to be printed in the createElement using the following piece of code.
this.$slots.default
It takes the default assigned in the component field.
Following is the output we get in the browser.
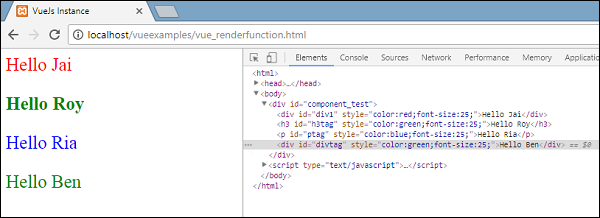
The elements also show the structure. These are the components we have defined −
<div id = "component_test"> <testcomponent :elementtype = "'div,red,25,div1'">Hello Jai</testcomponent> <testcomponent :elementtype = "'h3,green,25,h3tag'">Hello Roy</testcomponent> <testcomponent :elementtype = "'p,blue,25,ptag'">Hello Ria</testcomponent> <testcomponent :elementtype = "'div,green,25,divtag'">Hello Ben</testcomponent> </div>
VueJS — Reactive Interface
VueJS provides options to add reactivity to properties, which are added dynamically. Consider that we have already created vue instance and need to add the watch property. It can be done as follows −
Example
<html>
<head>
<title>VueJs Instance</title>
<script type = "text/javascript" src = "js/vue.js"></script>
</head>
<body>
<div id = "app">
<p style = "font-size:25px;">Counter: {{ counter }}</p>
<button @click = "counter++" style = "font-size:25px;">Click Me</button>
</div>
<script type = "text/javascript">
var vm = new Vue({
el: '#app',
data: {
counter: 1
}
});
vm.$watch('counter', function(nval, oval) {
alert('Counter is incremented :' + oval + ' to ' + nval + '!');
});
setTimeout(
function(){
vm.counter = 20;
},2000
);
</script>
</body>
</html>
There is a property counter defined as 1 in data object. The counter is incremented when we click the button.
Vue instance is already created. To add watch to it, we need to do it as follows −
vm.$watch('counter', function(nval, oval) {
alert('Counter is incremented :' + oval + ' to ' + nval + '!');
});
We need to use $watch to add watch outside the vue instance. There is an alert added, which shows the value change for the counter property. There is also a timer function added, i.e. setTimeout, which sets the counter value to 20.
setTimeout(
function(){
vm.counter = 20;
},2000
);
Whenever the counter is changed, the alert from the watch method will get fired as shown in the following screenshot.

VueJS cannot detect property addition and deletion. The best way is to always declare the properties, which needs to be reactive upfront in the Vue instance. In case we need to add properties at run time, we can make use of Vue global, Vue.set, and Vue.delete methods.
Vue.set
This method helps to set a property on an object. It is used to get around the limitation that Vue cannot detect property additions.
Syntax
Vue.set( target, key, value )
Where,
target: Can be an object or an array
key : Can be a string or number
value: Can be any type
Let’s take a look at an example.
Example
<html>
<head>
<title>VueJs Instance</title>
<script type = "text/javascript" src = "js/vue.js"></script>
</head>
<body>
<div id = "app">
<p style = "font-size:25px;">Counter: {{ products.id }}</p>
<button @click = "products.id++" style = "font-size:25px;">Click Me</button>
</div>
<script type = "text/javascript">
var myproduct = {"id":1, name:"book", "price":"20.00"};
var vm = new Vue({
el: '#app',
data: {
counter: 1,
products: myproduct
}
});
vm.products.qty = "1";
console.log(vm);
vm.$watch('counter', function(nval, oval) {
alert('Counter is incremented :' + oval + ' to ' + nval + '!');
});
</script>
</body>
</html>
In the above example, there is a variable myproduct created at the start using the following piece of code.
var myproduct = {"id":1, name:"book", "price":"20.00"};
It is given to the data object in Vue instance as follows −
var vm = new Vue({
el: '#app',
data: {
counter: 1,
products: myproduct
}
});
Consider, we want to add one more property to the myproduct array, after the Vue instance is created. It can be done as follows −
vm.products.qty = "1";
Let’s see the output in the console.

As seen above, in products the quantity is added. The get/set methods, which basically adds reactivity is available for the id, name, and price, and not available for qty.
We cannot achieve the reactivity by just adding vue object. VueJS mostly wants all its properties to be created at the start. However, in case we need to add it later, we can use Vue.set. For this, we need to set it using vue global, i.e. Vue.set.
Example
<html>
<head>
<title>VueJs Instance</title>
<script type = "text/javascript" src = "js/vue.js"></script>
</head>
<body>
<div id = "app">
<p style = "font-size:25px;">Counter: {{ products.id }}</p>
<button @click = "products.id++" style = "font-size:25px;">Click Me</button>
</div>
<script type = "text/javascript">
var myproduct = {"id":1, name:"book", "price":"20.00"};
var vm = new Vue({
el: '#app',
data: {
counter: 1,
products: myproduct
}
});
Vue.set(myproduct, 'qty', 1);
console.log(vm);
vm.$watch('counter', function(nval, oval) {
alert('Counter is incremented :' + oval + ' to ' + nval + '!');
});
</script>
</body>
</html>
We have used Vue.set to add the qty to the array using the following piece of code.
Vue.set(myproduct, 'qty', 1);
We have consoled the vue object and following is the output.

Now, we can see the get/set for qty added using Vue.set.
Vue.delete
This function is used to delete the property dynamically.
Example
Vue.delete( target, key )
Where,
target: Can be an object or an array
key: Can be a string or a number
To delete any property, we can use Vue.delete as in the following code.
Example
<html>
<head>
<title>VueJs Instance</title>
<script type = "text/javascript" src = "js/vue.js"></script>
</head>
<body>
<div id = "app">
<p style = "font-size:25px;">Counter: {{ products.id }}</p>
<button @click = "products.id++" style = "font-size:25px;">Click Me</button>
</div>
<script type = "text/javascript">
var myproduct = {"id":1, name:"book", "price":"20.00"};
var vm = new Vue({
el: '#app',
data: {
counter: 1,
products: myproduct
}
});
Vue.delete(myproduct, 'price');
console.log(vm);
vm.$watch('counter', function(nval, oval) {
alert('Counter is incremented :' + oval + ' to ' + nval + '!');
});
</script>
</body>
</html>
In the above example, we have used Vue.delete to delete the price from the array using the following piece of code.
Vue.delete(myproduct, 'price');
Following is the output, we see in the console.

After deletion, we can see only the id and name as the price is deleted. We can also notice that the get/set methods are deleted.
VueJS — Examples
Example 1: Currency Converter
<html>
<head>
<title>VueJs Instance</title>
<script type = "text/javascript" src = "js/vue.js"></script>
</head>
<body>
<style>
#databinding{
padding: 20px 15px 15px 15px;
margin: 0 0 25px 0;
width: auto;
background-color: #e7e7e7;
}
span, option, input {
font-size:25px;
}
</style>
<div id = "databinding" style = "">
<h1>Currency Converter</h1>
<span>Enter Amount:</span><input type = "number" v-model.number = "amount" placeholder = "Enter Amount" /><br/><br/>
<span>Convert From:</span>
<select v-model = "convertfrom" style = "width:300px;font-size:25px;">
<option v-for = "(a, index) in currencyfrom" v-bind:value = "a.name">{{a.desc}}</option>
</select>
<span>Convert To:</span>
<select v-model = "convertto" style = "width:300px;font-size:25px;">
<option v-for = "(a, index) in currencyfrom" v-bind:value = "a.name">{{a.desc}}</option>
</select><br/><br/>
<span> {{amount}} {{convertfrom}} equals {{finalamount}} {{convertto}}</span>
</div>
<script type = "text/javascript">
var vm = new Vue({
el: '#databinding',
data: {
name:'',
currencyfrom : [
{name : "USD", desc:"US Dollar"},
{name:"EUR", desc:"Euro"},
{name:"INR", desc:"Indian Rupee"},
{name:"BHD", desc:"Bahraini Dinar"}
],
convertfrom: "INR",
convertto:"USD",
amount :""
},
computed :{
finalamount:function() {
var to = this.convertto;
var from = this.convertfrom;
var final;
switch(from) {
case "INR":
if (to == "USD") {
final = this.amount * 0.016;
}
if (to == "EUR") {
final = this.amount * 0.013;
}
if (to == "INR") {
final = this.amount;
}
if (to == "BHD") {
final = this.amount * 0.0059;
}
break;
case "USD":
if (to == "INR") {
final = this.amount * 63.88;
}
if (to == "EUR") {
final = this.amount * 0.84;
}
if (to == "USD") {
final = this.amount;
}
if (to == "BHD") {
final = this.amount * 0.38;
}
break;
case "EUR":
if (to == "INR") {
final = this.amount * 76.22;
}
if (to == "USD") {
final = this.amount * 1.19;
}
if (to == "EUR") {
final = this.amount;
}
if (to == "BHD") {
final = this.amount * 0.45;
}
break;
case "BHD":
if (to == "INR") {
final = this.amount *169.44;
}
if (to == "USD") {
final = this.amount * 2.65;
}
if (to == "EUR") {
final = this.amount * 2.22;
}
if (to == "BHD") {
final = this.amount;
}
break
}
return final;
}
}
});
</script>
</body>
</html>
Output (Conversion to USD)

Output: Conversion to BHD

Explanation − In the above example, we have created a currency converter that converts one value of currency to the selected value of other currency. We have created two dropdowns of currency. When we enter the amount to convert in the textbox, the same is displayed below after conversion. We are using the computed property to do the necessary calculation for currency conversion.
Example 2: Customer Details
<html>
<head>
<title>VueJs Instance</title>
<script type = "text/javascript" src = "js/vue.js"></script>
</head>
<body>
<style>
#databinding{
padding: 20px 15px 15px 15px;
margin: 0 0 25px 0;
width: auto;
}
span, option, input {
font-size:20px;
}
.Table{
display: table;
width:80%;
}
.Title{
display: table-caption;
text-align: center;
font-weight: bold;
font-size: larger;
}
.Heading{
display: table-row;
font-weight: bold;
text-align: center;
}
.Row{
display: table-row;
}
.Cell{
display: table-cell;
border: solid;
border-width: thin;
padding-left: 5px;
padding-right: 5px;
width:30%;
}
</style>
<div id = "databinding" style = "">
<h1>Customer Details</h1>
<span>First Name</span>
<input type = "text" placeholder = "Enter First Name" v-model = "fname"/>
<span>Last Name</span>
<input type = "text" placeholder = "Enter Last Name" v-model = "lname"/>
<span>Address</span>
<input type = "text" placeholder = "Enter Address" v-model = "addr"/>
<button v-on:click = "showdata" v-bind:style = "styleobj">Add</button>
<br/>
<br/>
<customercomponent
v-for = "(item, index) in custdet"
v-bind:item = "item"
v-bind:index = "index"
v-bind:itr = "item"
v-bind:key = "item.fname"
v-on:removeelement = "custdet.splice(index, 1)">
</customercomponent>
</div>
<script type = "text/javascript">
Vue.component('customercomponent',{
template : '<div class = "Table"><div class = "Row" v-bind:style = "styleobj"><div class = "Cell"><p>{{itr.fname}}</p></div><div class = "Cell"><p>{{itr.lname}}</p></div><div class = "Cell"><p>{{itr.addr}}</p></div><div class = "Cell"><p><button v-on:click = "$emit('removeelement')">X</button></p></div></div></div>',
props: ['itr', 'index'],
data: function() {
return {
styleobj : {
backgroundColor:this.getcolor(),
fontSize : 20
}
}
},
methods:{
getcolor : function() {
if (this.index % 2) {
return "#FFE633";
} else {
return "#D4CA87";
}
}
}
});
var vm = new Vue({
el: '#databinding',
data: {
fname:'',
lname:'',
addr : '',
custdet:[],
styleobj: {
backgroundColor: '#2196F3!important',
cursor: 'pointer',
padding: '8px 16px',
verticalAlign: 'middle',
}
},
methods :{
showdata : function() {
this.custdet.push({
fname: this.fname,
lname: this.lname,
addr : this.addr
});
this.fname = "";
this.lname = "";
this.addr = "";
}
}
});
</script>
</body>
</html>
Output

Output after deletion
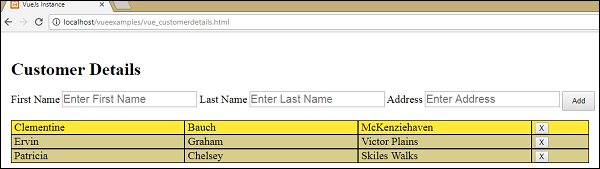
Explanation − In the above example, we have three texboxes to enter — the First Name, Last Name and Address. There is an add button, which adds the values entered in the textboxes in a table format with a delete button.
The table format is created using components. The click button interacts with the parent component using the emit event to delete the elemet from the array. The values entered are stored in the array and the same are shared with the child component using the prop property.