Overview[]
- This page contains clickable links (blue texts) to find more detailed information, you can also use the above contents menu for easy navigation.
- Starting a game should be self explanatory
- If you have any problems or questions you can find help by searching and/or posting on the steam forums as a lot of the community (including developers) will assist you.
Controls[]
- This section is a basic control list, the controls given on this page are default keys.
- The in-game main menu has an options menu allowing you to see the following controls, with the possibility to rebind keys.
Character Controls[]
- W, A, S, D — moves your character side to side, up and down (including ladders). «S» can revive other players.
- E — interacts with various things inside the Submarines and Caves.
- Q — provides an exterior view using a Periscope.
- Left click — swing/shoot your personal items, weapons, and tools. Can be held down when holding melee weapons or the Tesla Gun to charge an attack.
- Right click — cycles through your Items. Can only be used if your character has a Backpack.
- H — Displays a help icon (!). Activated by default upon death. Hold «S» on a dead player to revive.
Other Controls[]
- Enter — Open Chat
- Tab — Close Chat & View players
- Escape — Options
- Space-bar — Dodge Roll (Enables Tactical View if pressed while using the Periscope)
- V -Turns on voice chat
Controller Controls[]
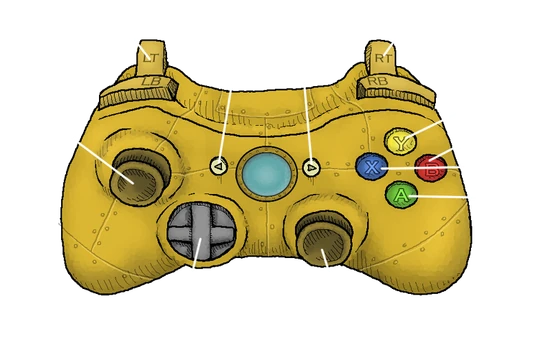
- This section is a basic tutorial, displaying important information and concepts for the gameplay.
Submarine — («Roles»)[]
The submarine layouts can be seen after clicking one of the current submarines, each highlighted area will be referred to in the following sub-categories.
Engine Room — («Engineer»)[]
- The center switch has 3 positions.
- Down — Shuts everything off including the interior lights, nothing else can be powered.
- Middle — Provides power to the interior lights and allows the other consoles to be powered.
- Up — EMP weapon that kills most enemies instantly, but locks into the «down» position temporarily.
Each console has a unique symbol and should be easily recognizable.
| Consoles
(Powered) |
Effect | Max
Power |
Submarine |
|---|---|---|---|
| Exterior
Lights |
Light surrounds the submarine (not controllable).
Light is attached to the submarine weapon (controllable). |
1 | Perle, Crevette,
Requine, Poubelle, Espadon |
| Shields | Blocks damage, each power level allows for higher charge. | 3 | Crevette, Perle |
| Weapons | 1 Power to activate the turret
2 Power to increase fire rate (Minigun) or increase ammo capacity (Cannon) |
2 | Requin — 2
Others — 1 |
| Engines | Propels the submarine (more power increases speed). | 3 | All |
- E — to occupy and exit a console.
- W, S — to add or remove power to the occupied console.
- Q — to use the periscope
- Spacebar — to activate Tactical view while using the periscope
Navigation Room — («Driver»)[]
- E — occupy and exit the console.
- W, S — angle the submarine up or down
- A, D — turns the submarine in the desired direction, left or right.
- Spacebar — Use fuel for temporary speed boost
Weapons Room — («Gunner»)[]
- E — occupy and exit the console, also used to grab and load torpedoes.
- W, S — Rotates the Turret, allowing the gunner to aim at the enemies.
- A, D — Switches between the Minigun and Cannon
- 1 power for a minigun (unlimited ammo) and 1 torpedo slot (needs to be loaded), 2 power for an improved minigun, turret rotation and 3 torpedo slots.
- Space bar — is used to shoot both ammo types, provided the above requirements are met.
The Hatch[]
Exit and enter the submarine once a cave is entered.
- E — Exits when hatch is highlighted.
- E — Enters when the submarine is highlighted.
The Bed[]
Slowly heals your character.
- E — Enters and exits the bed.
Caves[]
- A Cave contains various things to aid you in your current and future journeys.
- These are fairly easy to explore, just be careful of Enemies. Don’t let your health drop too low if the path back isn’t clear.
Strategies[]
Loadout / Found Items[]
- Loadout
- Best weapons: Sword, Any gun, or Tesla. If safe dynamite is ON, I recommend dynamite.
- Single player: You have a repair tool. Alternative: You have a weapon, and at least two repair bots.
- Note: You should never go on a shieldless ship alone. You will almost certainly die. I speak from experience.
- Two players on a shielded ship: One should have a repair tool, and one should have a strong weapon.
- Two players on a shieldless ship: Two have repair tools.
- Three players on a shielded ship: One has a repair tool. Two have weapons. Alternative: One has a repair tool. One has a weapon. One has potions.
- Three players on a shieldless ship: Two have repair tools. One has a weapon.
- Four players on a shielded ship: One has a repair tool. Three have weapons. Alternative: One has a repair tool. Two have weapons. One has a healing tool.
- Four players on a shieldless ship: Two have repair tools. Two have weapons. Alternative: Two have repair tools. One has a weapon. One has a healing tool.
- Found
- Take what you can get. Prioritize.
- My priorities are: Repair tool, weapon, healing/special item. Try to have variety. I prefer repair tool + weapon, but again, take what you can get. With multiple people, decide who needs it the most.
- Take what you can get. Prioritize.
Biomes[]
At the moment always using 3 speed and one shield is the most effective strategy no matter the player count or sub. This strategy is practically forced after the first cycle. Therefore the below strategies will be more traditional. The lights also may be optional for some players which have very bright screens, yet it’s still heavily recommended to turn them on when needed.
Atlantic Waters[]
- Strategy — A good combination of speed and other equipment, no lights needed.
- Crevette — 2 power into engines, 1 power into gun, 1 power into shield.
- Requin — 2 power into engines, and 1 power for each gun.
- Perle — 2 power into engines, 1 power into gun, 1 power into shield.
- Espadon — 3 power into engines, 1 power into guns.
- Poubelle — 2 power into engines, 1 power into gun, 1 power into shield.
- Dangers — This biome is fairly easy.
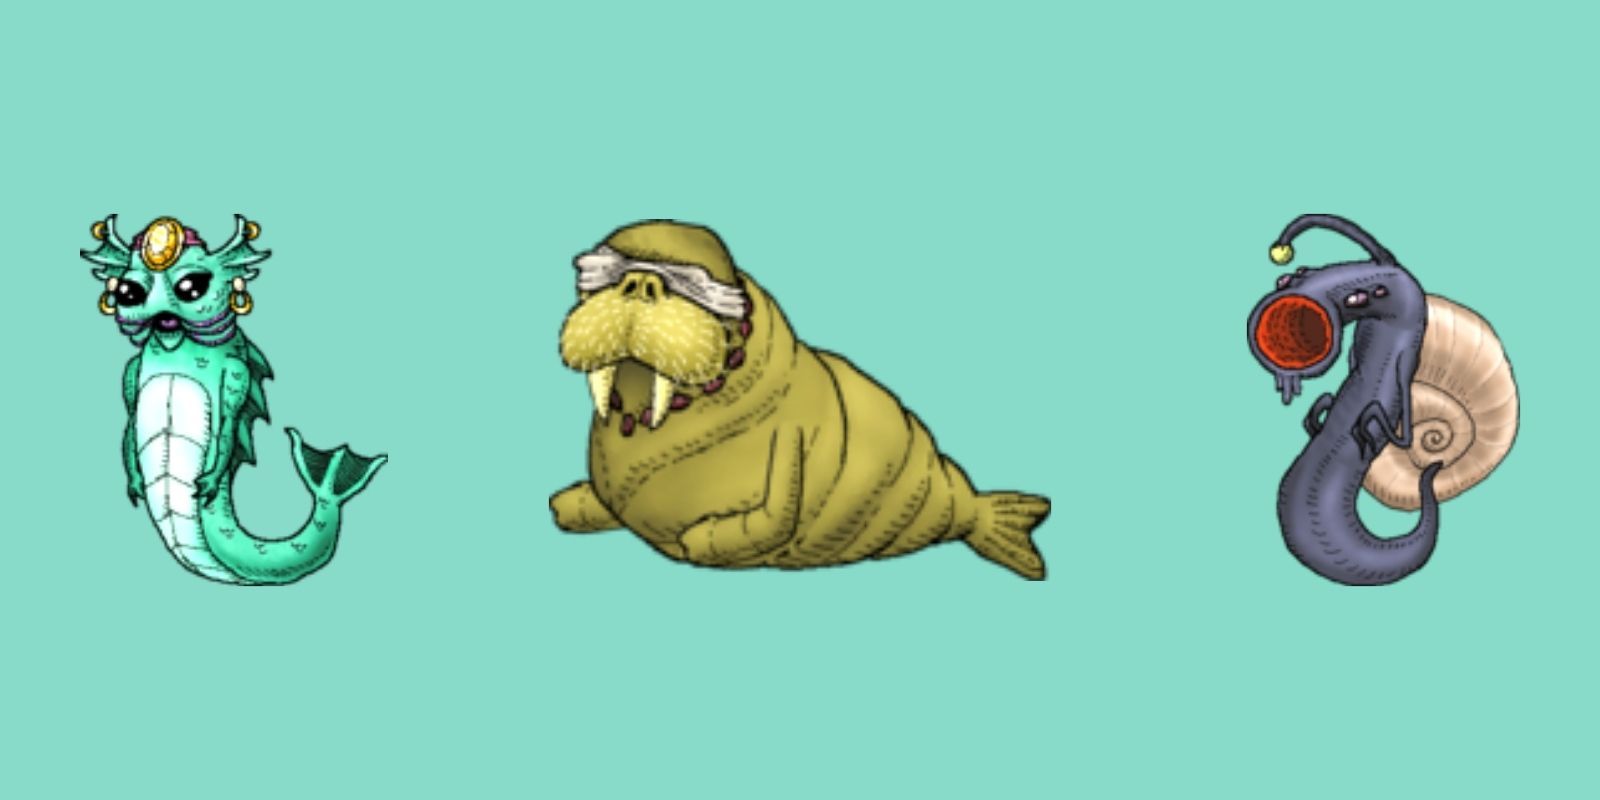
- Open Water — Swordfish are among the deadliest enemies, potentially killing players inside.
- Caves — No particular enemy stands out as dangerous, be aware of mini bosses.
- Boss — The Quadken — Avoid getting too close to it to avoid its melee attacks, and take care not to hit the Duopus Eggs scattered around her lair, as they will often release more Baby Duopuses, making the fight much more difficult. If you don’t have homing torpedoes, outrun baby doupuses to keep the boss from spawning more. If you have homing torpedoes, they will lock on to the baby doupuses. Kill them quickly, then damage the boss before it spawns more.
Frozen Waters[]
- Strategy — Due to the icebergs that can block movement, it’s generally advisable to always have 1 power to gun so that it’s possible to quickly destroy them.
- Crevette — 2 power into engines, 1 power into gun, 1 power into shield.
- Requin — 2 power into engines, and 1 power for each gun.
- Perle — 2 power into engines, 1 power into gun, 1 power into shield.
- Espadon — 2 power into engines, 2 power into guns.
- Poubelle — 2 power into engines, 1 power into gun, 1 power into shield.
- Dangers — This biome poses a big threat on small crews or speedrunners, due to it encouraging slower playstyles.
- Open Water -The Icebergs Can block progress and force the crew to attack any enemies that were previously pursuing them. The cold water can also freeze doors and cause hypothermia, making repairing less effective.
- Caves — Crab eggs can pose a large threat if the crew has no ranged weapons.
- Boss — The Pale Whale — Use torpedoes or boosting to keep the Pale Whale out of range, where it is unable to reach and attack the Submarine. You can ignore the Icebergs, as they generally don’t pose much of a threat and will simply be an occasional nuisance if you are trying to dodge the Pale Whale. Additionally, good communication will help on this bossfight, so remember to alert the repairmen if a Starfish is attacking you.
Cursed Waters[]
- Strategy — Always have at least 1 power allocated to shields to avoid being invaded by pirates. Avoid shooting with the cannon as it’s recoil may cause the submarine to hit an effigy
- Crevette — 1 power into engines, 1 power into gun, 2 power into shield.
- Requin — 3 power into engines, and 1 power for one gun.
- Perle — 1 power into engines, 1 power into gun, 2 power into shield.
- Espadon — 2 power into engines, 2 power into guns.
- Poubelle — 1 power into engines, 1 power into gun, 2 power into shield.
- Dangers — This is the hardest initial biome and arguably one of the most dangerous of the game.
- Open Water — The effigies will spawn an Abomination if damaged or touched. Avoid them at all costs. Another big threat are pirate ships, as they will deal heavy damage and spawn multiple Cursed Pirates inside the submarine.
- Boss — The Leviathan — Stay away from the creature’s mouth to avoid being bitten, and avoid being below it to prevent the Submarine from being slashed with its claws. When it dashes across the screen, pay attention to the background — it is preparing its unique attack.
Dark Depths[]
- Strategy — Allocate power to lights, pay constant attention to your surroundings and consider using the cannon
- Crevette — 2 power into engines, 1 power into gun, 1 power into lights.
- Requin — 2 or 1 power into engines, 1 or 2 power for guns, 1 power to lights.
- Perle — 1 power into engines, 1 power into gun, 1 power into shield, 1 power into lights.
- Espadon — 2 power into engines, 1 power into guns, 1 power into lights.
- Poubelle — 2 or 1 power into engines, 1 or 2 power into for guns, 1 power to lights.
- All — In place of lights use radar navigation to allow greater power to another console.
- Dangers — This biome is the darkest one in the game, meaning it is particularly important to put power to lights. This biome is also capable of overwhelming you with enemies that are hard to kill.
- Open Water — This biome is full of slow, tanky enemies and fast, small enemies. It is generally a good idea to put more energy into engines, so you can outrun many enemies. It is also important to have good aim to fend off waves of small creatures.
- Caves — Progress slowly and in a group, and always watch out for Stargazers hiding in the ground. Remember to destroy all Snail Mounds and that the Snail shots can be avoided if you stand on top of them.
- Boss — The Sightless — High speed submarines may be able to dodge them, but if you are using a slower one, it may be better to turn out all engines and focus on shooting the twins as they charge at the Submarine. Focusing on one when possible is a viable strategy to reduce their damage output by quickly killing one of them.
Infected Depths[]
- Strategy — Slow and careful progression, lights needed.
- Crevette — 1 power on everything
- Requin — 1 power to Light, 1 or 2 power to Engines, the rest of it to Weapon systems.
- Perle — 1 power on everything
- Espadon — 2 power to engines, 1 power to lights, 1 power to gun
- Poubelle — 1 power on everything
- All — In place of lights use radar navigation to allow greater power to another console. This may be somewhat unadvisable because of the barnacle mines that are in this biome.
- Dangers — This biome in particular can be very hard to recover once the submarine begins to get flooded.
- Open Water — Remember to avoid Barnacle Mines. Pay attention to the outside of the submarine, as enemies such as the Barnacle Maw and the Barnacle Grabber Can easily cause havoc.
- Caves — Try to clear the caves quickly, as Barnacles will spawn from the walls. Never feel too secure, as Barnacle Spiders Can drop from the ceiling and surprise you.
- Boss — The Hive — The trick to this boss is to stay at the top left of the boss room and shoot torpedoes or if available harpoons at it until it dies, this only works with the harpoon gun or torpedoes because when fired they spawn an entity that will travel in a set direction and when it hits a wall or an object it will deal damage rather than dealing damage to something that is in a particular direction onscreen, because from this distance barnacle mines won’t spawn, but if this isn’t available go to it’s blind spot — Underneath it. When there, stick to it’s root and attack it until it dies. Otherwise, keep a decent distance from the boss and dodge the mines as they are fired towards you. If one of them hits you and a Biter or Grabber is released, focus on killing it to avoid the submarine taking hull damage and flooding, as if water builds up in the vessel, you will have to fight constantly hatching interior enemies as you fight the Hive.
Volcanic Depths[]
- Strategy — Fast yet careful progression, ignoring enemies along the way.
- Crevette — 3 power on engines, 1 power to lights.
- Requin — 1 power to Light, 3 power to Engines.
- Perle — 2 power to engines, 1 power to lights, 1 power to shields.
- Espadon — 3 power to engines, 1 power to lights.
- Poubelle — 2 power to engines, 1 power to lights, 1 power to shields.
- All — In place of using lights use radar navigation to allow greater power to another console.
- Dangers — Slow progress can easily lead to death, due to the vents and the slow, yet tanky enemies found in this biome.
- Open Water — Since most enemies are difficult to kill do to them being invulnerable in many spots, it is unnecessary to use guns. Instead, ignore them and progress, paying close attention as to not accidentally hit any
Obstacles. Vent Boosting Is also a useful skill for experienced players.
-
- Caves — Volcanic boars are the greatest danger, as they can easily overrun players and are hard to dodge, making ranged weapons more suitable for fights in caves.
- Boss — The Erupting Shell — Stay below the boss at all times, unless you are near the radius of the vents found on the bottom of the arena. If your crew has good weapons, it may be worth ignoring the Volcanic Boars it spawns and focusing on shooting the creature’s weak spots — the tail and head.
Aurelian Depths[]
- Strategy — Slow and careful progression, focusing on killing faster enemies and ignoring slow enemies along the way.
- Crevette — 2 power on engines, 2 power to gun.
- Requin — 2 power to Engines, 1 power to each gun.
- Perle — 1 power to engines, 2 power to gun, 1 power to shields.
- Espadon — 2 power to engines, 2 power to gun.
- Poubelle — 2 power to engines, 1 power to gun, 1 power to shields.
- Dangers — Fast progress can easily lead to death, due to the few fast, nearly unavoidable enemies and slow enemies that can quickly damage or deactivate the submarine.
- Open Water — If a burrowing worm appears and there’s no other dangers in view, focus on killing it, as it’s impossible to outrun it. Carefully and slowly progress through the biome, as to not hit the dangerous EMP jellyfish. You can’t drown in the Aurelian Depths, but the water can mess with control panels and driving panels deactivating them for 1-2 seconds at a time, this can be dangerous if you dont realize since you dont take damage from drowning, also you dont need a light so this may be preffered rather than the volcanic depths.
- Caves — Always stick together, Manowars are common and if they attach to your head, you can’t remove them without the help from your team and will inevitably die. Angel Fish should be killed or enemy bodies destroyed to prevent them from being resurrected.
- Boss — The Ephyra — The boss is invulnerable in most spots, excpet for the big red areas. Due to the high damage output and nearly unavoidable attacks from this boss, fighting it is a race to who can kill the other first. Reallocate most of the energy to shields and guns, but keep 1 power to engines if the driver is skilled enough to dodge the waves of energy shots. If the submarine is shieldless, it’s advised to use torpedoes to quickly defeat the boss.
Ancient Abyss[]
- Strategy — Always keep an active gunner, because all enemies in this biome are heavy damage dealers. Avoid staying still for too long, as it will allow multiple Prehistoric Flowers to spawn, which will make progress difficult.
- Crevette — 2 power on Gun, 1 power to Engines, 1 power to Shields.
- Requin — 1-2 power to Engines, 1-2 to the Weapon systems.
- Perle — 2 power on Gun, 1 power to Engines, 1 power to Shields.
- Espadon — 2 power to Engines, 2 power to gun.
- Poubelle — 2 power to Gun, 1-2 power to Engines, 0-1 power to Shields.
- Dangers — Enemies have incredibly high DPS, and can easily overwhelm you.
- Open Water — Always be on the move and avoid leaving the guns. Do not let any enemies get near the submarine, as they can quickly kill you. Cannons should be considered due to their knockback on enemies. Remember to never leave open holes, as Plant Invaders can pose a big danger.
- Caves — Prehistoric Caves are notorious for their high amount of enemies. Don’t rush and remember you can avoid damage from Trilobites by standing on top of them.
- Boss — The Sleepy Giant — The Sleepy Giant’s fight takes place entirely in its interior, thus trying to escape its powerful suction is pointless. Once inside its belly, you will have to fight through hordes of Nematodes, and watch your step as Spiky Flesh may be found scattered around the Belly of the Giant, so bringing healing items is generally a good idea. After destroying its heart, the beast will start to collapse, and chunks of flesh will begin to fall in the inside as you rush back to your Submarine. Since all you have to do at that point is escape, a Monkey Wrench may help you avoid getting hit by the meat chunks. Alternatively, if the hosting player remains on the ship with the engine already charged up, they can brig all players outside of the ship when the boss is killed, and then drive to safety.
Mechanical Abyss[]
- Strategy — Slow and careful progression, lights needed. Always keep guns powered and manned.
- Crevette — 1 power into engines, 1 power to lights, 1 power into gun, 1 power into shield.
- Requin — 1 power into engines, 1 power to lights, and 1 power for each gun.
- Perle — 1 power into engines, 1 power to lights, 1 power into gun, 1 power into shield.
- Espadon — 1 power into engines, 1 power to lights, 2 power into guns.
- Poubelle — 1 power into engines, 1 power to lights, 1 power into gun, 1 power into shield.
- All — In place of lights using radar navigation to allow greater power to another console.
- Dangers — This biome is highly dangerous and filled with traps.
- Open Water — Progress slowly and carefully, with constant use of the Tactical View to inform the driver of the location of traps and for him to follow the optimal route when possible. The gunner should always be active, as destroying traps can be essential for getting past some sections of the map.
- Caves — Trash Compactors can deal heavy damage very quickly, but are easy to kill when handled with care.
- Boss — The Ambassador — If possible, destroy the Mechanical Turrets from a range before focusing on the Ambassador. Afterwards, park the submarine near the boss and assign the most well-armed crewmembers to a defensive position inside the submarine, to take care of The Emissaries as they arrive. The gunner must not be interrupted, as he will have to continuously chip away at The Ambassador’s health, and possibly shoot down Emissaries before they arrive. One last crewmember should constantly repair to avoid overflooding as the fight progresses.
The Meteor[]
- Strategy — Careful progression with constant use of the Tactical View, and lights are needed. Always keep guns powered and manned, as well as with torpedoes loaded.
- Crevette — 1 power into engines, 1 power to lights, 1 power into gun, 1 power into shield.
- Requin — 1 power into engines, 1 power to lights, and 1 power for each gun.
- Perle — 1 power into engines, 1 power to lights, 1 power into gun, 1 power into shield.
- Espadon — 2 power into engines, 1 power to lights, 1 power into guns.
- Poubelle — 1 power into engines, 1 power to lights, 1 power into gun, 1 power into shield.
- All — In place of using lights use radar navigation to allow greater power to another console.
- Dangers — This biome is extremely dangerous, with unique enemies at every corner, often requiring different strategies.
- Open Water — Progress slowly and carefully, with constant use of the Tactical View to inform the driver of the location of enemies, in particular the Whisperer. Good communication is key, as many enemies will try to trick you in some way. The gunner should always be active and, if possible, count with the help of someone to load torpedoes, as they are almost necessary if one wishes to survive in this biome. Although many dangers ignore shields, some do not and are unable to effectively bypass it. If a Battery is available, two shields are highly recommended. Avoid Interdimensional Tears at all costs.
- Caves — There are no caves in this biome. There is no way to stop, only to continue onwards.
- Boss — The Ancient One — Just don’t.
Caves[]
The Cave Generator at work
- Caves can be generated in multiple shapes and sizes — See Cave Generator gif on the right.
- Big caves have a low chance of appearing at first, but the odds of finding a big cave increases based on the current depth.
- Ladders can be used to attack enemies with ranged weapons safely, as many of them are unable to swim or climb ladders.
- Dodge rolling can be used to kite most enemies.
- Don’t destroy corpses unless you have the Butcher Knife. They can be used to give an indication to where you have been.
- Always focus on spawner enemies, as they will continuously spawn enemies as they are killed unless the spawner is destroyed.
Civilizations[]
- Similarly to caves, some civilization dwellers are vulnerable if you use ladders. This may, however, change in some update.
- Hiding inside the submarine is not an option, as they are able to enter and even break doors to reach you! If you don’t want to lose your doors, it may be a good idea to fight outside the vessel.
- Since all civilization dwellers deal heavy damage, ranged Weapons or skilled use of dodge rolls is important to do a successful raid.
Undersea Lairs[]
- Every Undersea Lair layout is designed with the boss in mind — find ways to reliably hit their weak spots, find locations where you’re safer while attacking or where you can stop to heal your crewmates with healing Items.
- Specific Boss Strategies
- (As of now, the Lair Guardian is the only Undersea Lair boss) The Lair Guardian — Take note of the gadgets he has and adjust your strategies accordingly. While Short ranged weapons may be good for the Laser and Drone spawner, that does not hold true for dealing with his Sword. The Lair Guardian takes highly increased damage if hit in the head and can also be staggered if enough damage is dealt in a short space of time. Ranged weapons are great for targetting its weak spots and melee weapon users will have to climb the multiple chains hanging from the Lair’s ceiling to deliver devastating blows to the Guardian’s head. Additionally, sustained damage to its limbs or head may cause them to fall off, which can leave the Lair Guardian mostly defenseless.
Advanced[]
- Vent Boosting — The act of using the knockback from Vents to boost ahead and avoid enemies.
- Espadon Blocking — The act of using the Espadon drill to block enemies from hitting the submarine. Generally used on bosses or when there’s no power allocated to the engines.
- Banana Hoarding — The act of using the Banana Peel to move extra Items to the interior of the submarine.
- Radar Switching — The act of switching between piloting and radar to see your quickest course, as well as caves.
- Radar Navigating — The act of using the radar to check where enemies and walls are in place of using lights.

This is a general guide on how to get deep.
Keep in mind that most of this information is based on my expirence and how i play.
This guide will have spoilers to areas and the games endings.
This guide also assumes you know the very basics of the game, as explaining the controls and basic mechanics would be extremly boring.
Contents
- Picking Items and Bots
- Picking a Vessel
- Atlantic Waters
- Frozen Waters
- Cursed Waters
- Dark Depths
- Infected Depths
- Volcanic Depths
- Aurelian Depths
- Ancient Abyss
- Mechanical Abbys
- The Meteor
- Endings
Picking Items and Bots
Starting a game alone
When you begin a game alone with 3 bots, i recomend picking a weapon becuse bots are terrible at fighting. Weapons i recomend the most are:
- Flintlock – best gun.
- Sword – best melee.
- Pickaxe – if you still have items to buy in the catalog.
- Butcher knife – if you have trouble staying alive.
For picking bots i recommend either
- 3 Repair bots.
- 2 Repair bots and music bot (If you going for the good ending.
Joining mid game
Before you pick your items, ask. The crew will be happier if you pick the item they want. If they say pick whatever you want, they dont respond or you are too lazy to ask:
- Press TAB to check what items other players have.
- If you see more then one person without any repair guy pick a wrench.
- If you dont, pick any of your favorite items other then dynamite (Why would you pick dynamite?).
Picking a Vessel
I recomend using The Perle or The Crevette if you are looking for a peacefull and simple game. I recomend using The Requin or The Poubelle if you have a large team ready or are willing to wait half an hour in the lobby waiting for enough people. I recomend using The Espadon if you are looking for a fast and intense dive. The choice is up to you.
Atlantic Waters
Dificulity: 1/5
Light level: Bright
Civilisation: Hard to defeat
Dangerous enemies:
- Swordfish – Try to quickly focus and destroy them.
- Starfish – Ask a friend to get them off you, very dangerous when traveling alone.
Strategy for boss:
- Set power to 1 Shield 2 Engine 1 Gun.
- Quickly go to right above the quadken.
- Change power to 2 Shield 2 Gun.
- Strike him down.
Frozen Waters
Dificulity: 1/5
Light level: Bright
Civilisation: Easy to defeat (as long as you stay on ladders)
Dangerous enemies:
- Narwhal – Try to quickly focus and destroy them
Strategy for boss:
- Set power to 1 Shield 2 Engine 1 Gun.
- When the boss charges at you, quickly boost to the place he was before the charge.
- Strike him down.
- Repeat steps 2 and 3 until dead.
Cursed Waters
Dificulity: 2/5
Light level: Bright
Civilisation: Pretty easy to defeat
Dangerous enemies:
- Hammerhead shark (both dead and alive) – Try to quickly focus and destroy them, as you dont want getting pushed around.
- Cursed ship – Kill as quickly as possible, very dangerous when some pirates get into your submarine.
Strategy for boss:
- Same strategy as for the boss of the frozen waters, but a bit easier.
Dark Depths
Dificulity: 2/5
Light level: Dark
Civilisation: Very hard to defeat
Dangerous enemies:
- Angler fish (both healthy and sick) – Atack extremly quickly, might make you explode in seconds.
- Baby lamprey – Kill as quickly as possible, they will infect you with blood sickness when they atack.
- Stargazer – These enemies will devour you whole, so stay with a friend or atack them from a distance.
Strategy for boss:
- Set power to 1 Light 1 Shield 1 Engine 1 Gun.
- Travel to the middle of the arena.
- Change power to 2 Shield 2 Gun. You dont need light because the boss glows.
- Strike him down.
Infected Depths
Dificulity: 3/5
Light level: Dark
Civilisation: Easy to defeat
Dangerous enemies:
- Barnacle mine – Dont touch.
- barnacle maw – Kill as quickly as possible, strikes very fast.
Strategy for boss:
- Set power to 1 Light 1 Shield 1 Engine 1 Gun.
- Travel to the bottom left side of the boss.
- Attack the base to avoid breaking open any mines.
- Strike him down.
Volcanic Depths
Dificulity: 3/5
Light level: Dark
Civilisation: Extremly easy to defeat (By defeat i mean steal all the stuff and run away, otherwise it is pretty hard)
Dangerous enemies:
- Volcanic shark, turtle and squid – Atack in areas not covered by armor, unless you have a harpoon gun.
- Vent – Just dont atack and boost by.
Strategy for boss:
- Set power to 1 Light 1 Shield 1 Engine 1 Gun.
- Just strike him down, he will be gone in a matter of seconds.
- Keep in mind the armor on the top.
Aurelian Depths
Dificulity: 1/5
Light level: Light
Civilisation: Hard to defeat
Dangerous enemies:
- Jellyfritz – Dont let them get close, you are very vournable when the power is turned off.
- Regenerator – After you get rid of him, quickly boost away as he will come back to life, ready to grab you again.
- Manowhar – Same with the starfish, they will grab your head and wont let go until your friend helps.
Strategy for boss:
- Set power to 1 Shield 1 Engine 2 Gun.
- Just strike him down, he will be gone in a matter of seconds.
- Shoot the pink… erhmmm… ‘whatevers’ becuse he has armor anywhere else.
Ancient Abyss
Dificulity: 2/5
Light level: Light
Civilisation: Pretty easy to defeat
Dangerous enemies:
- Megalodon – Pretty hard to kill, just try to boost past it, it will eventually get stuck.
- Flowers (Yellow and Purple) – Just dont attack and boost by.
Strategy for boss:
- Set power to 3 Engine.
- Get in.
- Quickly locate the heart and kill it.
- Roll out of the inside.
Mechanical Abbys
Dificulity: 5/5
Light level: Dark
Civilisation: Easy to defeat
Dangerous enemies:
- Mechanical eye and turret – Dont get in the way, destroy them before you go further.
Strategy for boss:
- Set power to 1 Light 1 Shield 1 Engine 1 Gun.
- Boost to the bottom left ASAP, ignoring everything along the way.
- Change power to 1 Light 2 Shield 1 Gun.
- Quickly strike him down.
- If any mechanical emissary makes its way to the inside of your ship quickly strike it down by standing directly in the middle, it cant reach you there.
The Meteor
Dificulity: 5/5
Light level: Dim (Survivable without light, but putting power on light is recomended)
Dangerous enemies:
- Whisperer – They are invisible, so keep looking on the radar (by pressing Q then SPACE) every now and then.
- Eldrich pyramid – Do not interupt, if there is one in the way destroy it and quickly boost past.
Strategy for boss:
- Explained in next chapter.
Endings
There are three ending to the game:
- You crash (self explanatory).
- Good ending.
- Bad ending.
When you reach the boss you can do one of two things:
- Ignore the boss, reach the time traveler and loop.
- Atack the boss.
When you atack the boss your crew will be sent to the space of scholars. They will tell you in which order to trigger the obelisk (its random every time). If you do not have the translation book you can still hardly decipher which color is which:
- The word with 2 the same letters near the end is green.
- The word which is 3 letters long is red.
- The last one left will be purple.
After that you will be teleported back to the boss arena, in which you must quickly trigger the obelisks in the right order before your crew is anihlated by the neverending barage of randomised enemies. After you trigger the obelisk in the right order the ancient one will open itself, giving acces to a small area. Inside there is a sole altar, on which you can place a single item:
- Place the gramophone, and you will get the good ending.
- Place any other item, and you will get the bad ending.
 Симулятор подводной лодки We Need to Go Deeper подразумевает сугубо кооперативное прохождение, как минимум на двух человек. В оптимальном режиме, играть лучше вчетвером, а как это делать GAMESCASUAL.RU сейчас расскажет.
Прохождение We Need to Go Deeper. Как играть?
Роли всех четверых игроков
Первый игрок – Стрелок. Его задачи:
- Стрельба
- Зарядка орудий
Второй игрок – Капитан. Его задача – управление кораблем.
Третий игрок – Энергетик. Его задача распределять энергию между:
- Щит корабля
- Двигатель корабля
- Вооружение корабля
Четвертый игрок – Ремонтник. Его задачи – ремонтировать корабль, а также отбиваться от забирающихся в корабль мобов.
Советы по прохождению We Need to Go Deeper
Не играйте со случайными людьми – вряд ли Вам повезет с помощниками, потому удовольствия от игры будет немного.
Как решить ошибки подключения к лобби?
Обычно при одновременном подключении двух и более игроков к одному лобби, подключается только один, остальные получают ошибку соединения. Поэтому лучше договориться с друзьями по голосовому чату, в каком порядке Вы будете подключаться. Как только один подключается – он сообщает, что можно заходить следующему игроку.
Как правильно распределять энергию?
Экономьте прожектором в пользу дополнительной пушки. Стандартный набор – 1 щит, 1 двигатель, 2 – пушки.
Если ситуация близка к фатальной – отключаем двигатели и всю мощность на щиты и 1 пушку. Стрелок продолжает отстреливаться, а Капитан бежит помогать Ремонтнику и Энергетику отбиваться от мобов.
В начале игры советуем всех снабдить мечами – стоит 500 денег в магазине – серьезно помогает отбиваться от всех залезающих внутрь мобов.
Также найдите в пещерах второй гаечный ключ, чтобы отдать его Энергетику – он будет помогать Ремонтнику, когда будет самый ад в игре. Огнестрел можно отдать Ремонтнику, чтобы не только гаечным ключом махал.
Все болезни в игре лечатся аптечками и кроватью.
Overview
Вот и Обновление, я обновил руководство, спасибо всем помогавшим в комментариях, если понравилось руководство оцени и напиши в комментариях что можно добавить, Всем вам очень благодарен )
Боевое Оружие
Сабля:  Ломает кости ваших врагов с этим простым
но мощным старомодным оружием!
Урон: 24, Стоимость: 1,500 Золота
Тесак:  Наносит урон противнику и измельчает его на куски мяса.
Урон: 15, Лечение: 1 жизнь на кусок мяса. Стоимость: 2,000 Золота
Кирка:  Мои сладкие, сладкие богатства добытые из тел твоих врагов!
Урон: 15, Стоимость: 9,500 Золота
Динамит:  Можно кидать и он взрывается. Только аккуратно, он может нанести урон союзнику и подводной лодке.
Урон: 150, Стоимость: 9,500 Золота
Жуткий Посох:  Использует древнюю магию, чтобы бросить мощные самонаводящиеся снаряды.
Предупреждение: Может заспавнить противника.
Урон: 60, Стоимость: Открытие секрета
Тесла-пистолет:  Изобретенный известным изобретателем Николой, пистолет Tesla обладает электрическим зарядом, который действительно может нанести некоторый урон. Зарядите и освободите мощные кластеры электрической энергии!
Урон: 20-40, Стоимость: 9,500 Золота
Кремневый Пистолет:  Сбивайте надоедливых существ с этим кремневым пистолетом!
Урон: 40, Стоимость: 2,000 Золота
Шестизарядный Пистолет:  Самый быстрый пистолет на Западе. Он может
не будет сильным, но это быстрая стрельба”
Урон: 10 Стоимость: 2,000 Золота
Предметы Поддержки
Аптечка:  Держите вашу команду в форме с этим чудесным набором медицинских поставок! Также падает экипаж на ноги гораздо быстрее.
Урон: 1, Лечение: 1. Стоимость: 3,500 Золота
Химический Набор:  Создавайте различные научные сочетания
различных уровней полезности с этим,
все-в-одном химический набор!
Урон: 40 Врагам, 4 Своим. Стоимость: 3,500 Золота
Красный-лечит вас и Ваших товарищей по команде
Синий-полностью замедляет Игрока, Противника
Желтый-увеличивает скорость
Оранжевый – наносит урон
Фиолетовый-может вылечить болезни при попадании!
Шприц:  Выполняйте целебные переливания крови с помощью этого медицинского чуда!
Внимание: иглы острые и иногда больно!
10% шанс нанести 2 урона товарищам по команде. Стоимость: 2,500 Золота
Плоскогубцы:  Ремонт и исцеление с помощью этого удобного стоматологического инструмента! Предупреждение: это может быть немного больно.
10% шанс нанести 2 урона товарищам по команде. Стоимость: 2,500 Золота
Водяной Насос:  Перекачивайте и преобразуйте воду из вашего корабля в безвредный пар, используя эту современную насосную технологию!
Стоимость: 5,500 Золота
Заводная ручка Теслы:  Станьте мобильным источником питания!
Стоимость: 10,000 Золота
Ремонтные Инструменты
Гаечный Ключ:  Ни одна команда не должна быть без него! Держит
подводную лодку в форме. Хорош для починки, не тонет и не взрывается.
Разблокировано со старта. Починка: 10. Урон: 7
Разводной Ключ:  Повысьте свои акробатические способности с помощью этого подлинного разводного ключа!
Стоимость: 1,000 Золота. Починка: 7. Урон: 7.
Трубный Ключ:  Гаечный ключ для бойца-медленного ремонта!
Стоимость: 1,000 Золота. Починка: 7. Урон: 15.
Пистолет Для Заклепок:  Устраняйте протечки и вмятины издалека с помощью удивительного пистолета-заклепки! Предупреждение: Не указывайте на лицо.
Стоимость: 5,500 Золота. Починка: 30. Урон: 5.
Прочее
Фонограф:  Этот громоздкий парень позволит вам познакомить ваших товарищей по команде с радостями и чудесами классической музыки! Вся ваша команда будет ценить ваши поддерживающие мелодии!
“Позволяет воспроизводить музыку во время погружения с вашей командой. Повышается вероятность того, что путешественник во времени будет полезен.”
Стоимость: 5,000 Золота.
Роза:  Покажите близким, что вы заботитесь о них с этой прекрасной розой!
“Нет больше наказания за здоровье после смерти.”
Стоимость: 10,000 Золота.
Книга-Переводчик:  Не можете понять язык неизведанных цивилизаций? Прочитайте про них в этой книге!
“Переводит язык цивилизации жителя диалога, снижает цены в магазинах на 50%.”
Стоимость: 1,000 Золота.
Обручальное Кольцо:  Делитесь своим здоровьем, пока смерть не разлучит вас!
“Женитесь на других игроках, чтобы объединить свое здоровье, позволяя себе несколько различных тактик за счет использования других предметов.”
Стоимость: 6,000 Золота.
Оборудование
Световая консоль:  При включении включаются внутренние и внешние огни(тоесть свет).
Защитная консоль:  При питании генерирует щит, который поглощает урон.
Консоль двигателя:  При питании позволяет подводной лодке двигаться.
Консоль оружия:  При питании позволяет контролировать подводные башенки и открывает торпедный люк.
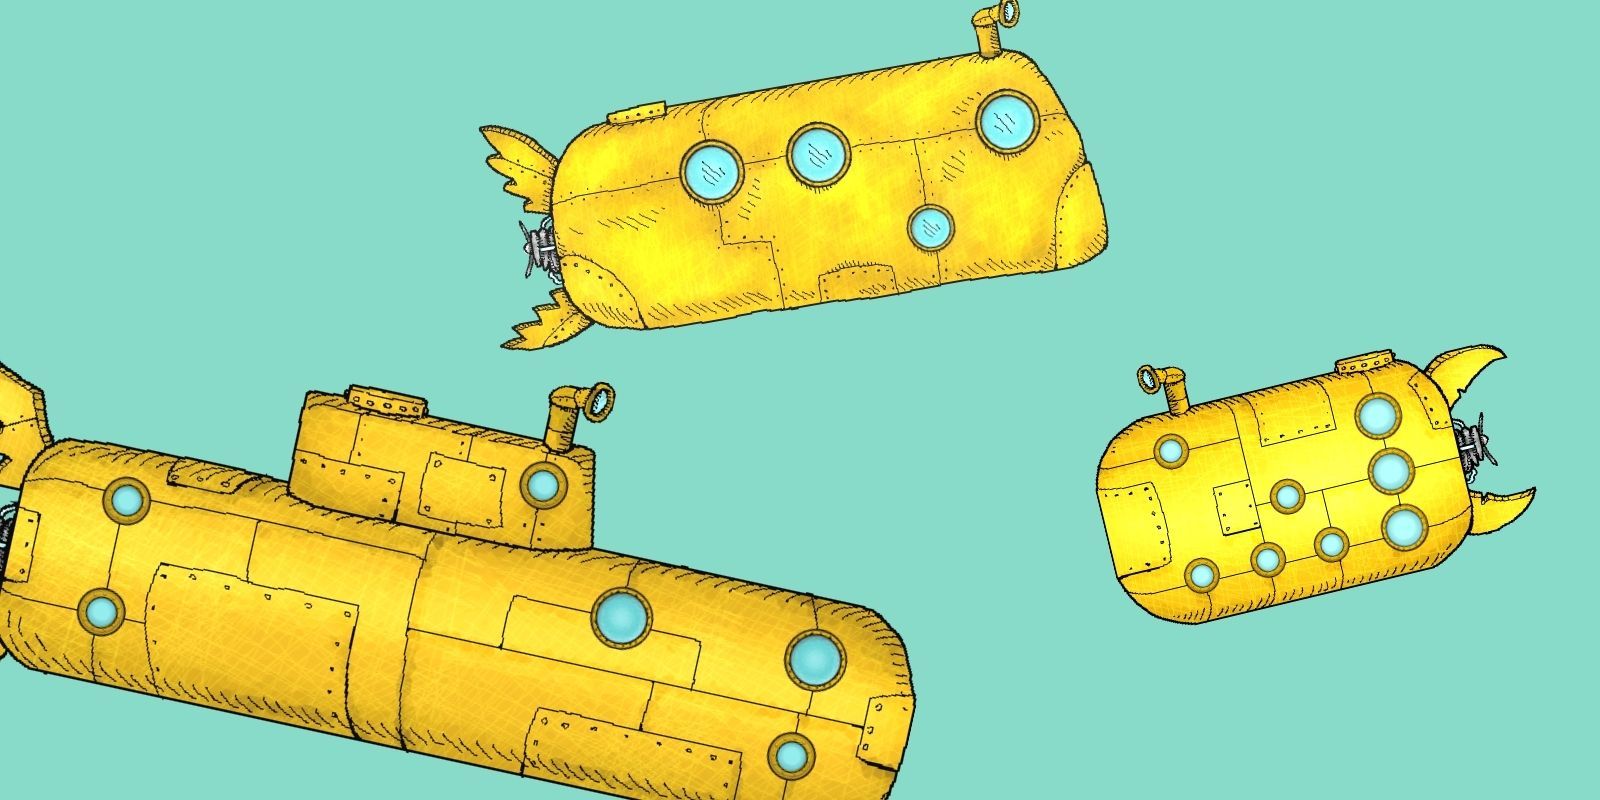
Субмарины
The_Requin:  Рекомендованное количество людей 3-4. Имеет две пушки но не имеет щитов.
The Crevette:  Рекомендованное количество людей 2-3. Базовая подлодка. Ничем не выделяется.
The Perle:  Рекомендованное количество людей 2. Имеет улучшенный шок и защиту.
The Espadon:  Рекомендованное количество людей 2-3. Самая интересная подлодка так-как она очень быстрая и единственная, которая наносит урон при таране. Не имеет щитов.
Зелья
Зелье Жизни:  Увеличивает максимальное здоровье на 2 очка. Рандомно уменьшает урон, починку или дыхание.
Зелье Урона:  Увеличивает максимальный урон. Рандомно уменьшает время дыхания или починку.
Яд:  Мгновенная смерть.
Зелье дыхания:  Увеличивает максимальное время дыхания под водой. Уменьшает урон или починку.
Зелье Ремонта:  Увеличивает скорость ремонта. Рандомно уменьшает урон или время дыхания.
Колдовской Эликсир:  Увеличивает повреждение или ремонт
(+10 очков за удар),
но снижает максимальное здоровье
(-5 Максимальных Очков Здоровья)
Апгрейды
 Увеличивает скорость перезарядки щита на 7%
 Увеличивает частоту вращения двигателя на 5%
 Увеличивает урон, наносимый ЭМП
 Увеличивает корпус на 5 баллов
 Увеличивает скорость вращения пушки на 7%
 Увеличивает скорострельность пули на неопределенное количество.
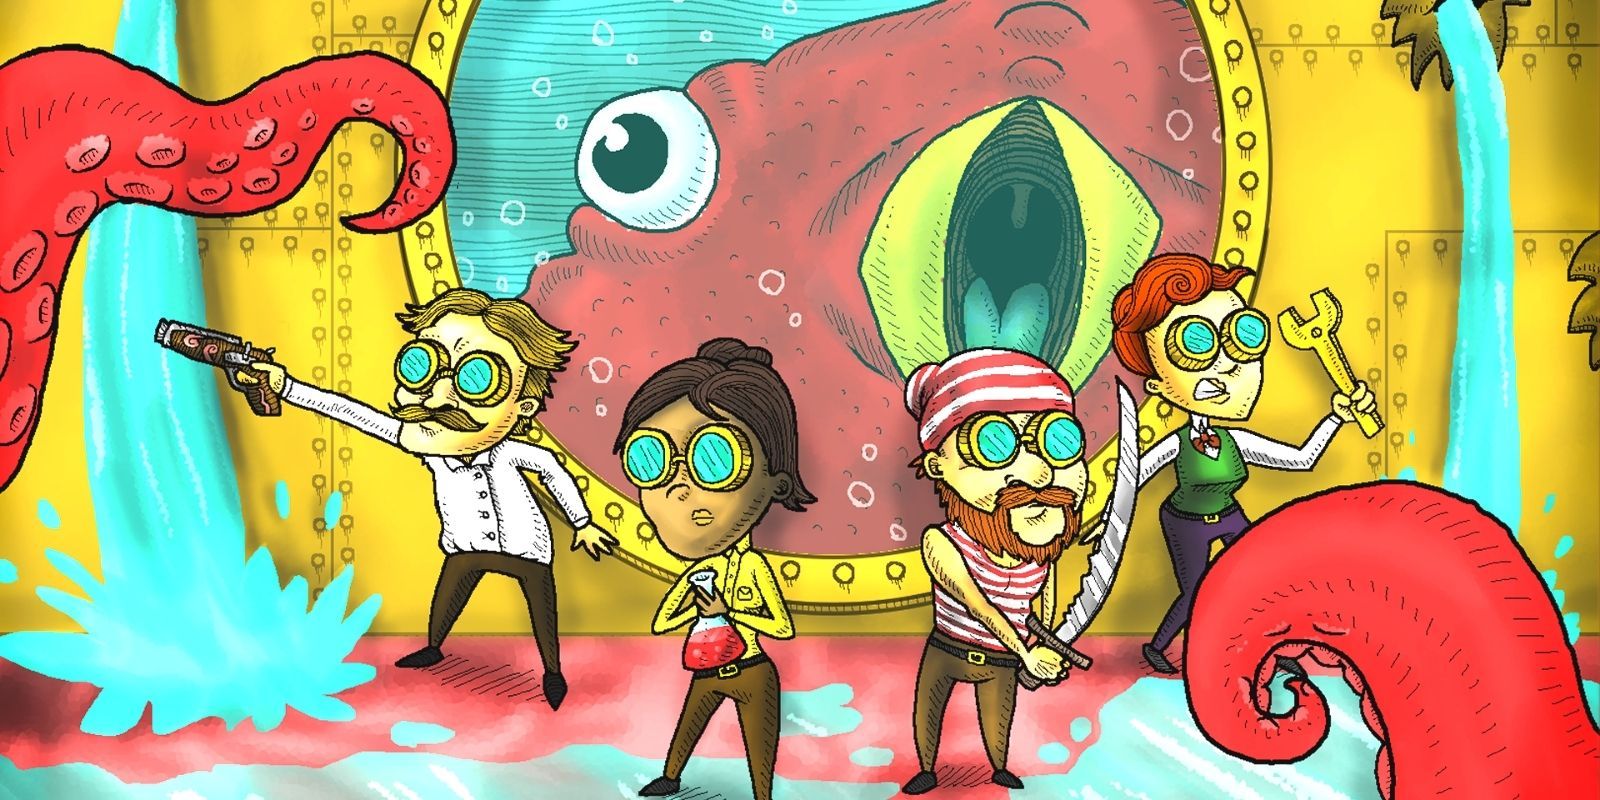
We Need To Go Deeper is a fun cooperative roguelike set beneath the ocean. Players work together to explore its vast depths in their very own submarine. This exploration game is a true gem, created by a small independent studio called Deli Interactive.
It would appear that Jules Verne’s works inspired the creators. The game seems to be giving off much more of a Twenty Thousand Leagues Under the Sea vibe than an Around the World in 80 Days one, though (due to the distinct lack of underwater travel in the latter novel). The game certainly fits into the 19th-century style, regardless, with its heavy emphasis on ostentatious hats and mustaches (fans of Deep Rock Galactic’s hilarious cosmetics will appreciate this). Now it is time to plunge deep into the mysterious depths of the undersea trench known as the Living Infinite. The game involves countless perilous voyages, so it is best to be prepared from your very first adventure.
10 There Is More Than One Submarine Available
The standard submarine in the game is called the Crevette. It is a reliable vessel for a first voyage, but not the only option. Players can also pick the Requin, a far larger submarine with additional weapons. The Requin does have a distinct lack of shields to protect itself from foes, however. A third option is the Perle, which is suited for smaller crews. The Perle has less health than the others, but makes up for this with a stronger shield.
Additional submarines can also be unlocked throughout the game and purchased with the crew’s hard-earned gold. These new submarines include the speedy Espadon and the run-down Poubelle. Players can test each vessel out to discover its quirks and features, and will have a much better time with a craft that suits their playstyle. The variety of submarines allows players to mix things up and they are also worth upgrading during the adventure.
9 Every Room Has A Purpose
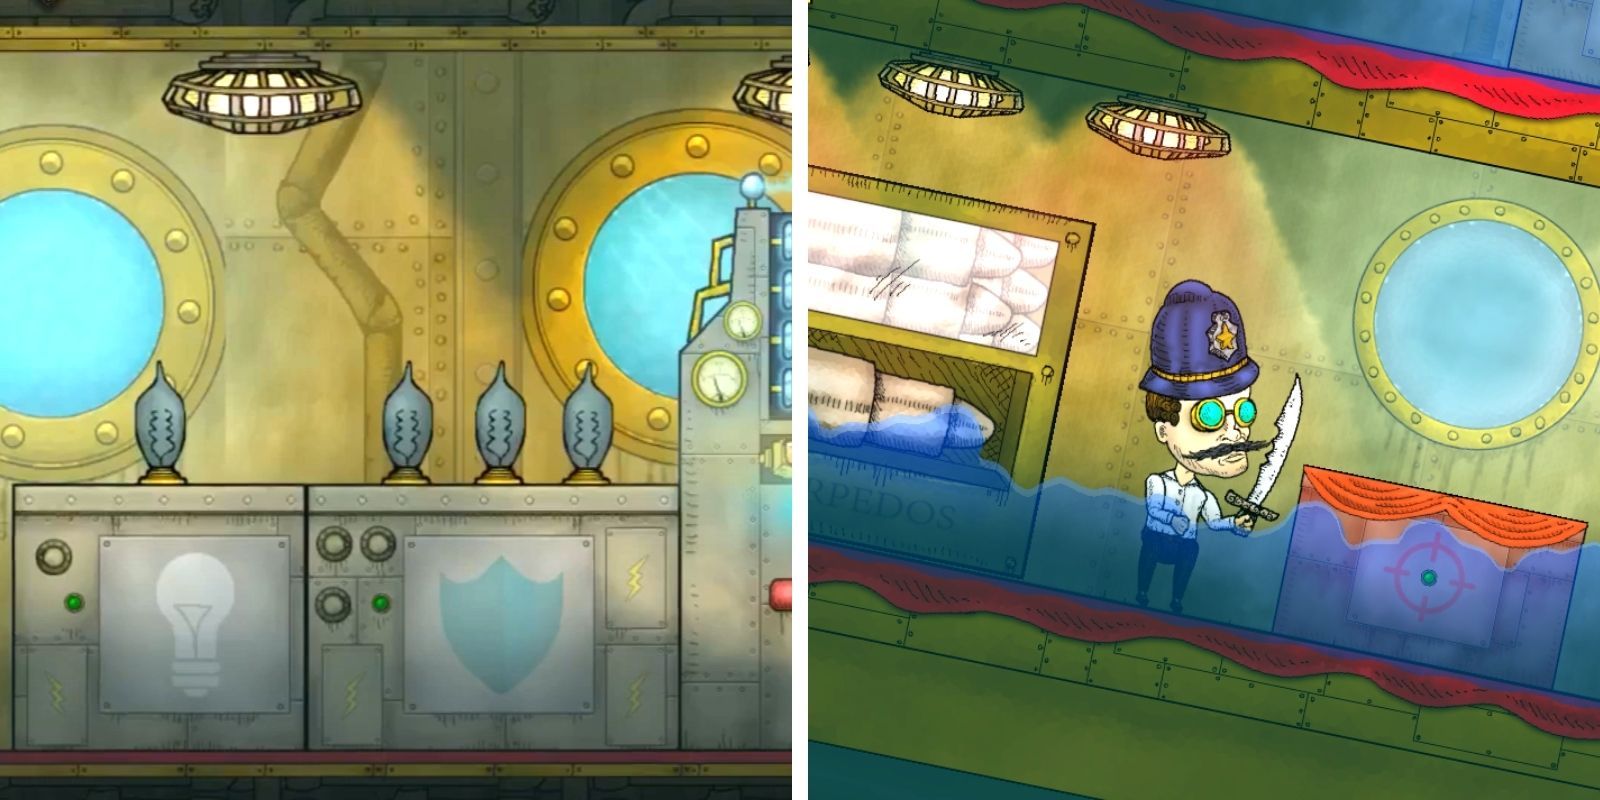
Before setting off, it’s important to know where everything is. Although the rooms might shift depending on the chosen submarine, there are consistent areas to get to grips with.
To begin, players should visit the engine room immediately. There are four power cores to divide up between the different consoles. The consoles control the lights, shields, engines, and cannons. Next, adventurers should find their way to the navigation room to plot a course. Meanwhile, the weapons room is where players can fire torpedoes. Finally, the bedroom isn’t just for sleeping: magical healing beds allow players to regain their health slowly, whilst also avoiding any actual work.
8 The Importance Of Assigning Roles
A team of up to four crewmates can be assembled for this perilous voyage, although those that prefer to venture out alone can instead enlist the help of robotic companions. Either way, assigning roles is vital.
There are three main tasks to keep an eye on during the journey. There is the pilot, tasked with navigating the murky depths and hopefully avoiding crashes. The engineer is key to the submarine’s integrity, fixing holes and keeping an eye on the engine’s power supply. The gunner helps to blast away the many enemies the crew might encounter, such as sharks. Communication and organization are key to this adventure. Players can switch their roles at any point, so be prepared for sudden mutinies.
7 Exploration Is The Goal
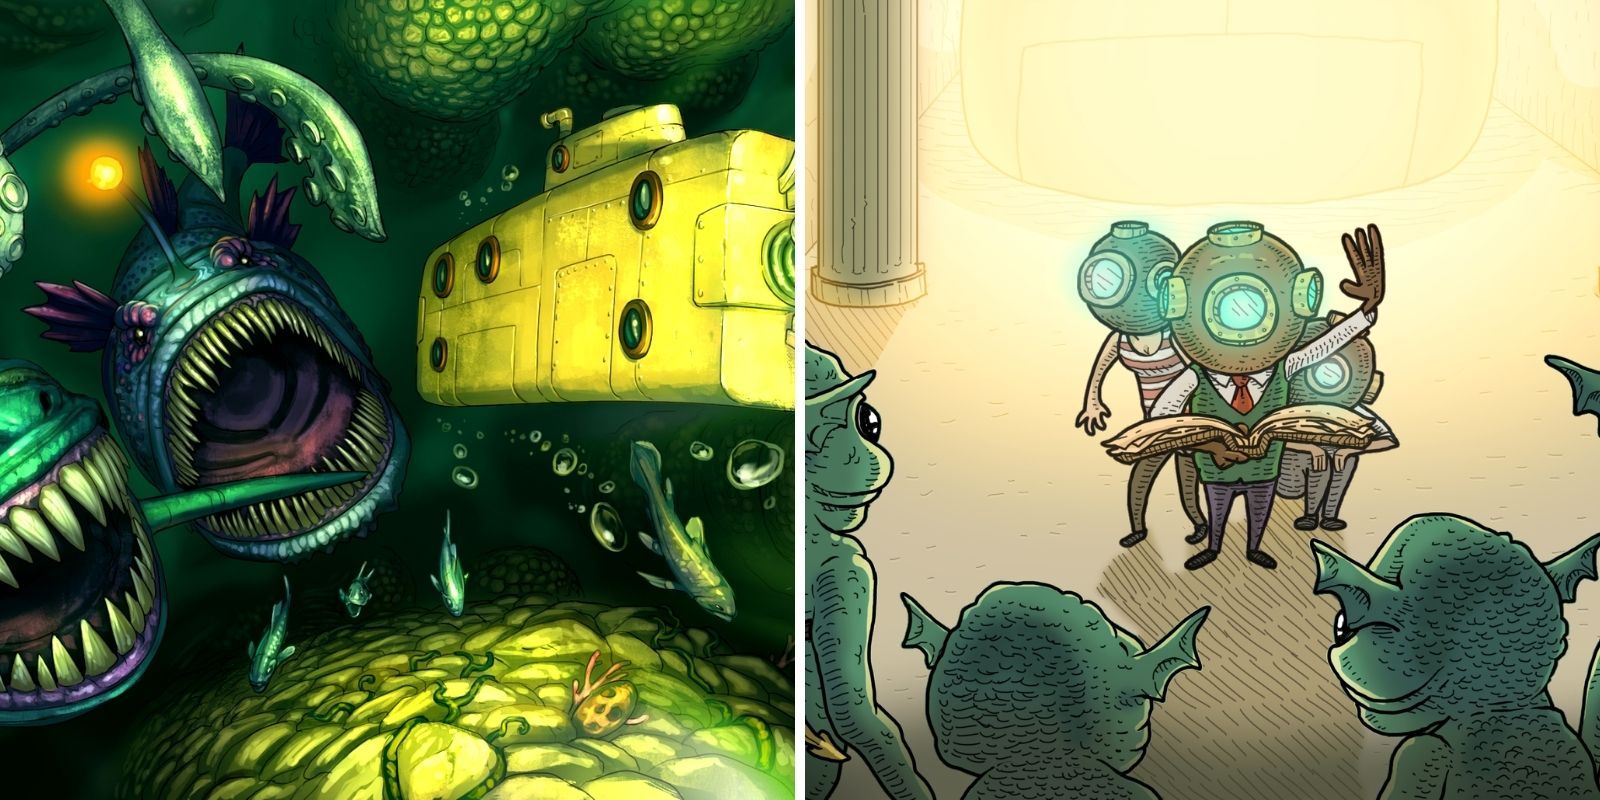
This roguelike experience is more welcoming to genre newcomers than some, but there’s still an element of RNG. The game is procedurally generated, ensuring that each adventure is randomized. There are a variety of locations the players might end up exploring. This includes gloomy caves and even underwater civilizations. Players can explore these locations on foot, if they dare face the wrath of creatures, monsters, and disgruntled shop keepers.
Despite these threats, such trips can be incredibly rewarding, as players can find new items, relics, and plenty of gold. All of this loot allows them to plunge deeper and deeper, in hopes of finding the very bottom of the Living Infinite.
6 Ranks Unlock New Vital Features
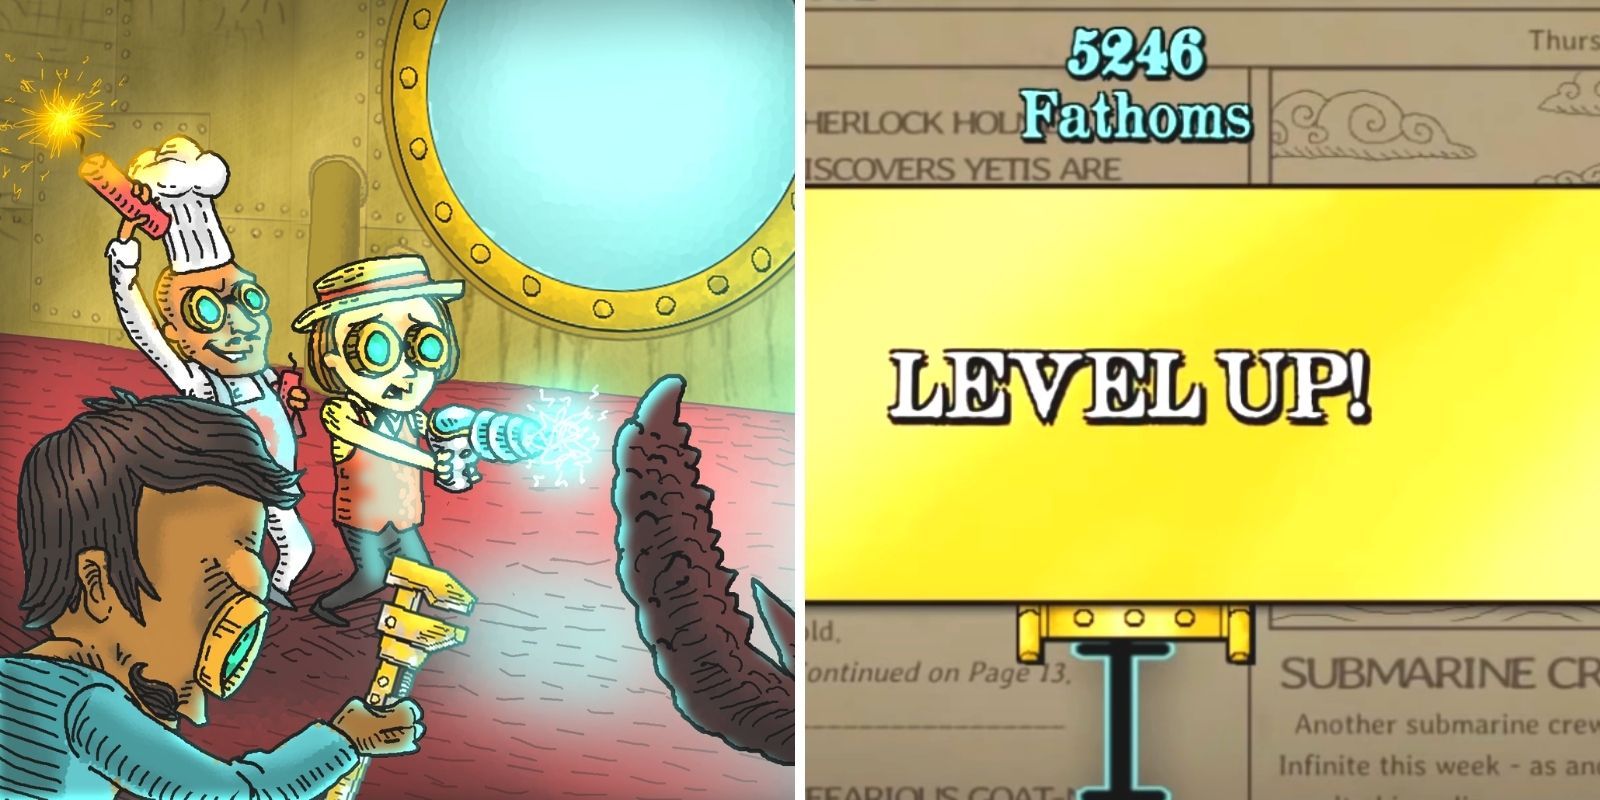
A player will begin their adventure as a lowly Landlubber. They have barely traveled, they might not even have seen the ocean before, but their quest is about to begin. The further players explore and survive, the more experience points they can earn.
These experience points allow them to rise through the ranks from Landlubber to Captain and even beyond. Currently, there are 13 ranks, all with sub-ranks. Along the way, players will unlock increasingly useful items and upgrades for their submarines. More importantly, they will unlock additional fancy hats and costumes that are just as quirky as the costumes in Among Us. All of these rewards are key to surviving the harder-to-reach areas.
5 Medkits Save Lives
It is always convenient to have a medkit available when venturing out of the submarine (and away from those magical healing beds). These medkits heal teammates and even revive ones who have been killed.
There is even a ten percent chance of curing any illnesses a character might be suffering from. Is a crewmate in pain? Simply strike them over the head with a medical briefcase. This tool is available once a player reaches the third rank of Landlubber, and is a must-buy.
4 Doctors Cure Afflictions
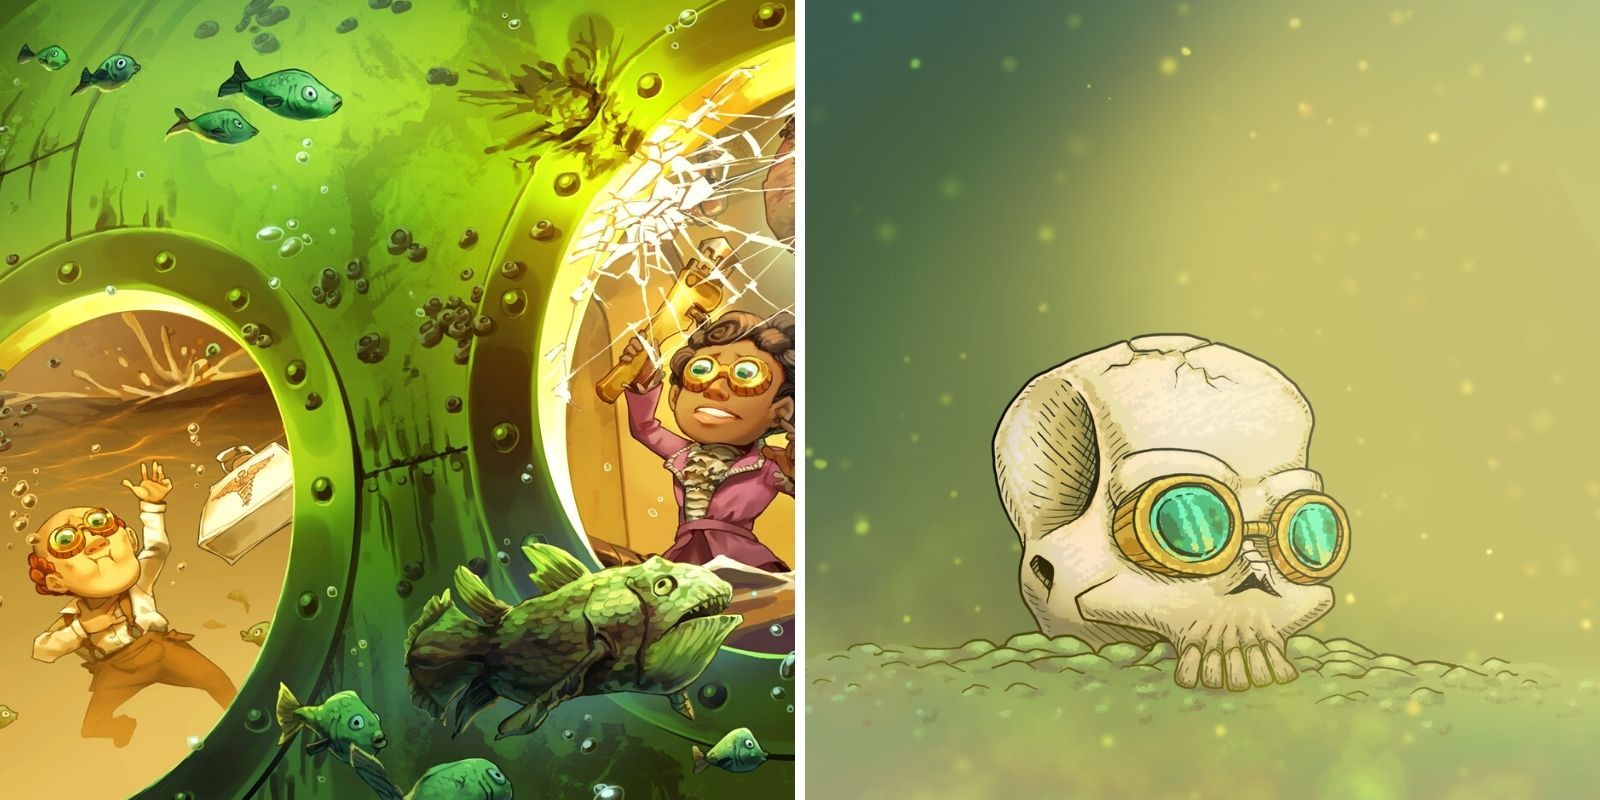
Throughout the daring adventures underneath the ocean, players will suffer from various afflictions. These will range from seasickness and hypothermia to more outlandish diseases, such as curses and a time plague.
All hope is not lost, though, as dotted around the various underwater civilizations are special characters: doctors capable of curing anything. They offer a far more reliable way to cure those disruptive afflictions, but be wary: it is best not to anger the locals if wanting to use the doctor’s services. Looting and fighting are frowned upon under the sea.
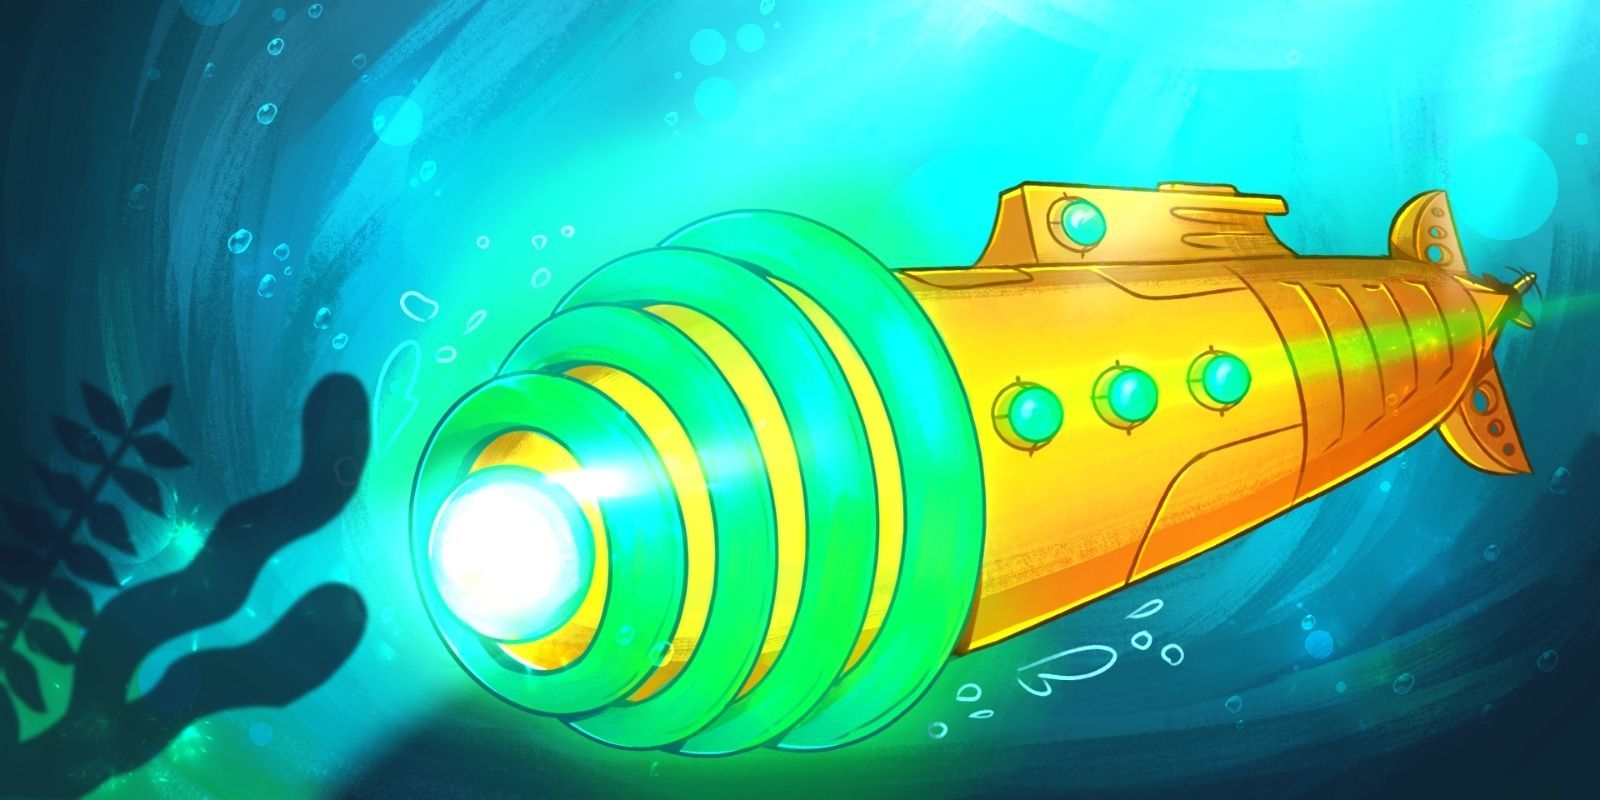
3 The Periscope Offers A Tactical View
While using the periscope, players can access a sonar function. This allows crewmates to keep track of various pieces of important information, such as the amount of fuel the submarine has left. It can also count the number of torpedoes that are stored and ready to fire. Keeping track of supplies is necessary to avoid being stranded or suffering a grisly fate. To that end, exploring the various caves and civilizations can help find additional fuel or weaponry for the submarine’s supplies.
Alongside this, players can see a wider view of the map in this mode, which updates in the form of short bursts. This feature helps fans navigate the darker biomes without needing to have the lights on, thus saving a power core to use elsewhere. The tactical view is also useful for locating caves to explore.
2 Custom Games Alter The Difficulty
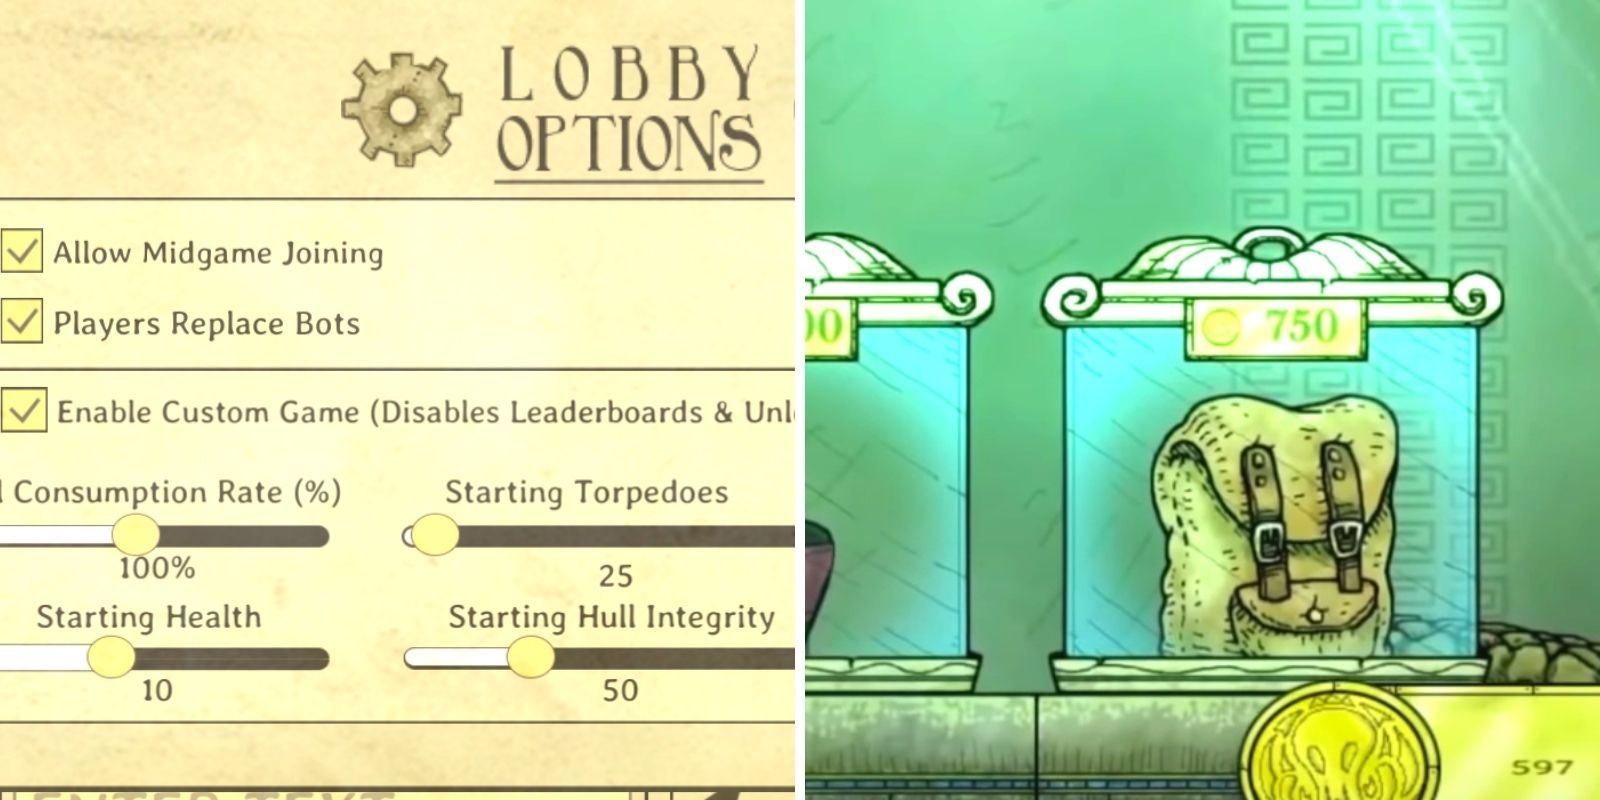
Before the start of a voyage, the host player can make adjustments to the experience. The challenge of the game can be increased or decreased, depending on what the crew would prefer. The host could create a more relaxing journey or plunge the crew into a grueling struggle for survival. The host can alter how much health everyone has, the rate of fuel depletion, and much more. One of the most useful alterations is the ability to start with a backpack.
Usually, backpacks are only found through exploration. They allow a crewmate to hold more than one item at a time, which is a real advantage. Although fun, these custom perks or hindrances will disable the ability to progress in the game. Tools and experience gained during this game mode also do not count, so take note of that.
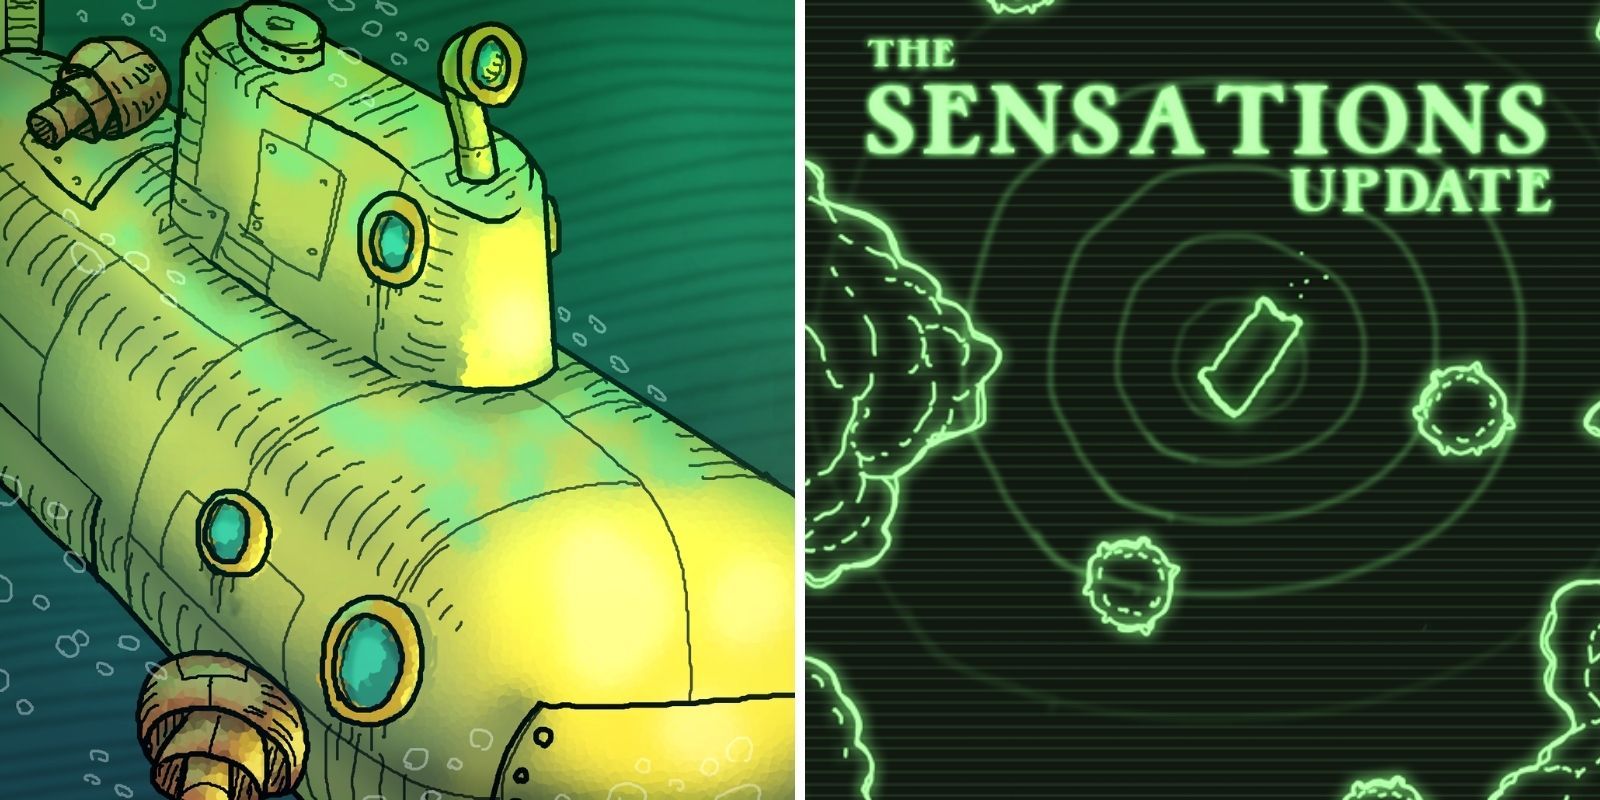
1 The Game Is Updated Regularly
Deli Interactive recently announced a roadmap for 2021, which has included some exciting updates to the game. The first update was released this week, introducing a new submarine called the Atomique, which has been described as a «nuclear powerhouse.»
The roadmap also revealed that another content update is in the works. Although no concrete details have been provided yet, it is a great sign that the studio is investing more time into adding new encounters and features. Players will be looking forward to diving into those soon.
NEXT: 10 Awesome-Looking Indie Games You Didn’t Know Were Coming To The Nintendo Switch In 2021