-
Contents
-
Table of Contents
-
Troubleshooting
-
Bookmarks
Related Manuals for Lenovo ThinkPad X220 4298
Summary of Contents for Lenovo ThinkPad X220 4298
-
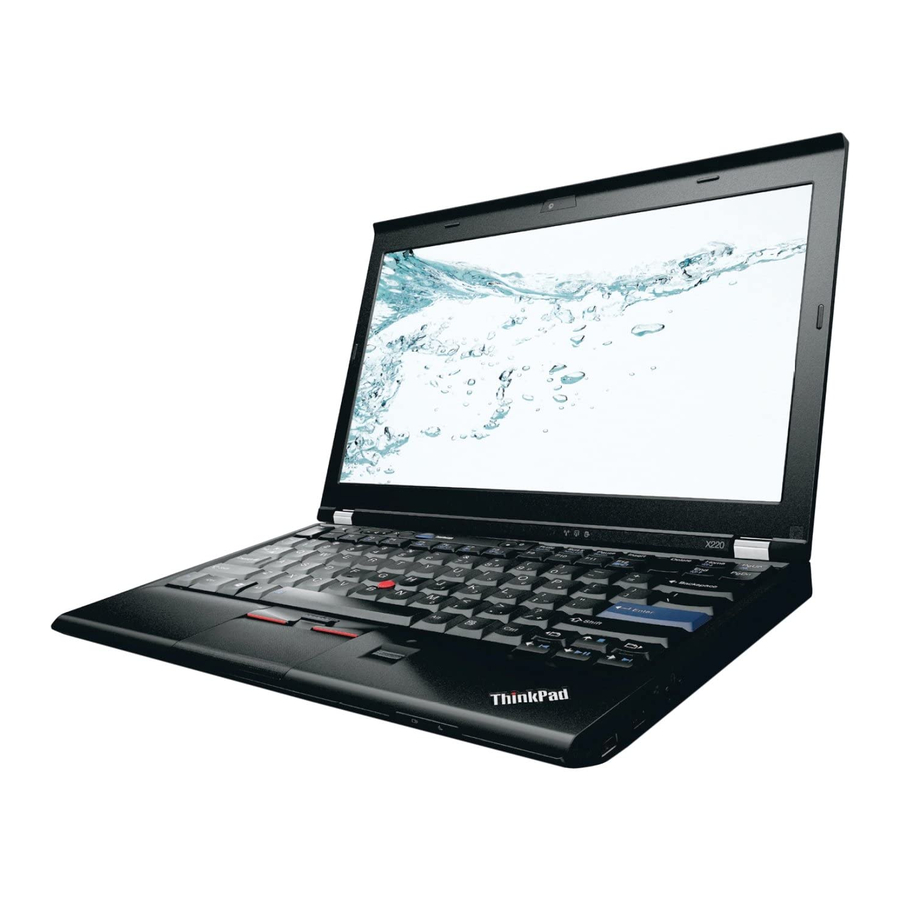
Page 1: User Guide
User Guide ThinkPad X220, X220i, X220 Tablet, and X220i Tablet…
-
Page 2
First Edition (April 2011) © Copyright Lenovo 2011. LENOVO products, data, computer software, and services have been developed exclusively at private expense and are sold to governmental entities as commercial items as defined by 48 C.F.R. 2.101 with limited and restricted rights to use, reproduction and disclosure. -
Page 3: Table Of Contents
… . ThinkVantage GPS … Lenovo SimpleTap … Lenovo ThinkVantage Tablet Shortcut Menu .
-
Page 4
Ergonomic information..Adjusting your computer to fit you ..Accessibility information ..FullScreen Magnifier function ..Traveling with your computer . -
Page 5
Using diagnostic programs ..Lenovo support Web site ..Calling Lenovo … . . Purchasing additional services .. -
Page 6
User Guide… -
Page 7: Read This First
Prevent your computer from getting wet. Protect the cables from being damaged. © Copyright Lenovo 2011 When your computer is turned on or the battery is charging, the base, the palm rest, and some other parts may become hot. The temperature they reach depends on the amount of system activity and the level of charge in the battery.
-
Page 8: Important Safety Information
The information in this document does not alter the terms of your purchase ® agreement or the Lenovo Limited Warranty. For more information, see “Warranty Information” in the Safety and Warranty Guide that comes with your computer.
-
Page 9: Conditions That Require Immediate Action
Note: If you notice these conditions with a product (such as an extension cord) that is not manufactured for or by Lenovo, stop using that product until you can contact the product manufacturer for further instructions, or until you get a suitable replacement.
-
Page 10
Replaceable Units, or CRUs. Lenovo provides documentation with instructions when it is appropriate for customers to install options or replace CRUs. You must closely follow all instructions when installing or replacing parts. The Off state of a power indicator does not necessarily mean that voltage levels inside a product are zero. -
Page 11: Power Cords And Power Adapters
Never overload these devices. If power strips are used, the load should not exceed the power strip input rating. Consult an electrician for more information if you have questions about power loads, power requirements, and input ratings. © Copyright Lenovo 2011 , or…
-
Page 12: Plugs And Outlets
Plugs and outlets DANGER If a receptacle (power outlet) that you intend to use with your computer equipment appears to be damaged or corroded, do not use the outlet until it is replaced by a qualified electrician. Do not bend or modify the plug. If the plug is damaged, contact the manufacturer to obtain a replacement.
-
Page 13: Rechargeable Battery Notice
In addition, many mobile products, such as notebook computers, utilize a rechargeable battery pack to provide system power when in portable mode. Batteries supplied by Lenovo for use with your product have been tested for compatibility and should only be replaced with approved parts.
-
Page 14: Lithium Coin Cell Battery Notice
Lithium coin cell battery notice DANGER Danger of explosion if battery is incorrectly replaced. When replacing the lithium coin cell battery, use only the same or an equivalent type that is recommended by the manufacturer. The battery contains lithium and can explode if not properly used, handled, or disposed of.
-
Page 15: Heat And Product Ventilation
• Do not restrict or block any ventilation openings. • Do not operate your computer inside furniture, as this might increase the risk of overheating. • Airflow temperatures into the computer should not exceed 35°C (95°F). © Copyright Lenovo 2011 xiii…
-
Page 16: Electrical Current Safety Information
Electrical current safety information DANGER Electric current from power, telephone, and communication cables is hazardous. To avoid a shock hazard: • Do not use your computer during a lightning storm. • Do not connect or disconnect any cables or perform installation, maintenance, or reconfiguration of this product during an electrical storm.
-
Page 17: Additional Safety Information
50332-2 can be dangerous due to excessive sound pressure levels. If your Lenovo computer came with headphones or earphones in the package, as a set, the combination of the headphones or earphones and the computer already complies with the specifications of EN 50332-1.
-
Page 18
User Guide… -
Page 19: Chapter 1. Product Overview
This section introduces you to the hardware features of your computer, and then gives you the basic information you’ll need to start taking advantage of its functions. • Front • Right-side • Left-side • Rear • Bottom • Status indicators Front view This section introduces front view of your notebook computer. © Copyright Lenovo 2011…
-
Page 20
ThinkPad X220 and X220i front view Figure 1. ThinkPad X220 and X220i front view Wireless WAN (auxiliary) and Wireless LAN/WiMAX (auxiliary) ThinkLight Computer display Power switch PCI Express Mini Card slot for wireless WAN or mSATA solid state drive (SSD) TrackPoint buttons TrackPoint pointing stick CapsLock indicator… -
Page 21
Your computer might include a PCI Express Mini Card in the PCI Express Mini Card slot which enables wireless WAN communications. With Lenovo technologies advancing to provide you with the best engineered systems, some models are equipped with an mSATA solid state drive for data storage. This cutting-edge technology enables notebook computers to be lighter, smaller and faster. -
Page 22
Windows and is hidden from it. Note: If your computer is a Windows 7 model, Lenovo ThinkVantage Toolbox will be displayed. Volume control buttons The built-in volume buttons enable you to quickly adjust the volume or mute the sound from your computer. -
Page 23
ThinkPad X220 Tablet and X220i Tablet front view Figure 2. Front view Wireless WAN (auxiliary) and Wireless LAN/WiMAX (auxiliary) Built-in microphones Computer display Power switch PCI Express Mini Card slot for wireless LAN/WiMAX TrackPoint pointing stick Touch pad Fn key System and power-status indicators Built-in stereo speakers Integrated camera… -
Page 24
You can use the ThinkVantage button to interrupt the startup sequence of your computer and start the Rescue and Recovery workspace, which runs independently of the Windows operating system and is hidden from it. Note: If your computer is a Windows 7 model, you can press ThinkVantage button to open Lenovo ThinkVantage Toolbox. -
Page 25
Your computer might include a PCI Express Mini Card in the PCI Express Mini Card slot which enables wireless WAN communications. With Lenovo technologies advancing to provide you with the best engineered systems, some models are equipped with an mSATA solid state drive for data storage. This cutting-edge technology enables notebook computers to be lighter, smaller and faster. -
Page 26: Right-Side View
If you wish, you can purchase another hard disk drive and install it in the Serial Ultrabay™ Slim in the ThinkPad Ultrabase™ Series 3. With Lenovo technologies advancing to provide you with the best engineered systems, some models are equipped with a solid state drive (SSD) for data storage. This cutting-edge technology enables notebook computers to be lighter, smaller and faster.
-
Page 27
Notes: • If you are using a headset with a function switch, for example, a headset for an iPhone device, do not press this switch while using the headset. If you press it, the headset microphone will be disabled, and the internal microphone will be enabled instead. •… -
Page 28
If you wish, you can purchase another hard disk drive and install it in the Serial Ultrabay Slim in the ThinkPad Ultrabase Series 3. With Lenovo technologies advancing to provide you with the best engineered systems, some models are equipped with a solid state drive (SSD) for data storage. This cutting-edge technology enables notebook computers to be lighter, smaller and faster. -
Page 29
Combo audio jack To listen to the sound from your computer, connect a headphone or a headset, that has a 3.5mm 4-pole plug, to the combo audio jack. Notes: • If you are using a headset with a function switch, for example, a headset for an iPhone mobile digital device, do not press this switch while using the headset. -
Page 30: Left-Side View
Note: Your computer does not support the CPRM feature for SD card. For details, refer to the instructions in “Using an ExpressCard, a smart card, or a flash media card” on page 79. Left-side view This section provides left-side view for your computer. ThinkPad X220 and X220i left-side view Figure 5.
-
Page 31
Note: Your computer is compatible with USB 1.1 and 2.0. When you attach a USB cable to the connector, make sure that the mark is to the upper side. Otherwise the connector might be damaged. DisplayPort connector Your computer supports the DisplayPort, a next-generation digital display interface that connects a compatible projector, external monitor, or HDTV to your computer. -
Page 32
ThinkPad X220 Tablet and X220i Tablet left-side view Figure 6. Left-side view ExpressCard slot USB connectors (left) Monitor connector Fan louvers (left) ExpressCard slot Your computer has an ExpressCard slot for a 54 mm-wide card. For details, refer to the instructions in “Using an ExpressCard, a smart card, or a flash media Card” on page 79. -
Page 33: Bottom View
Monitor connector You can attach an external monitor or a projector to your computer to display computer information. Note: If you attach your computer to the ThinkPad Ultrabase Series 3 and use a monitor connector, use the monitor connector on the ThinkPad Ultrabase Series 3, not the one on the computer. For details, refer to the instructions in “Attaching an external monitor”…
-
Page 34
Battery Use your computer with battery power whenever ac power is unavailable. For details, refer to the instructions in “Power Manager” on page 36. SIM card slot If your computer has a wireless WAN feature, it may require a SIM (Subscriber Identification Module) card to establish a wireless WAN (Wide Area Network) connections. -
Page 35: Rear View
For details, refer to the instructions in “Power Manager” on page 36. SIM card slot If your computer has a wireless WAN feature, it may require a SIM (Subscriber Identification Module) card to establish a wireless WAN (Wide Area Network) connections. Depending on the country of delivery, the SIM card may be already installed in the SIM card slot.
-
Page 36: Status Indicators
ThinkPad X220 Tablet and X220i Tablet rear view Figure 10. ThinkPad X220 Tablet and X220i Tablet rear view Power jack Power jack The ac power adapter cable connects to the computer power jack to provide power to the computer and charge the battery.
-
Page 37
Status indicators Device Access A hard disk drive or an optional drive, such as a drive in the Ultrabay, is being used to read or write data. When this indicator is blinking, do not put the computer into sleep (standby) mode, remove the device from the bay, or turn off the computer. -
Page 38
Numeric lock By default, when the numeric lock is on, the numeric lock indicator is displayed on the screen. To change the settings of the numeric lock indicator, see “Changing display settings” on page 70. Note: Another mode available for your computer, though there is no indicator for it, is Scroll Lock mode. When this mode is enabled, the arrow keys can be used as function keys for screen-scrolling, but not for moving the cursor. -
Page 39
• The battery status indicator is off: The battery is fully charged or the battery is detached. ThinkPad X220 Tablet and X220i Tablet status indicators Your computer has system-status indicators and power-status indicators. The status indicators show the current status of your computer. Status indicators Power On The power switch stays lit whenever the computer is on, blinks when the computer is in sleep (standby) -
Page 40
Device Access A hard disk drive or an optional drive, such as a drive in the Ultrabay, is being used to read or write data. When this indicator is blinking, do not put the computer into sleep (standby) mode, remove the device from the bay, or turn off the computer. -
Page 41: Locating Important Product Information
Certification label, and Windows Certificate of Authenticity. Machine type and model label The machine type and model label identifies your computer. If you contact Lenovo for help, the machine type and model number will help support technicians to identify your computer and provide the highest level of service.
-
Page 42: Fcc Id And Ic Certification Number Label
ThinkPad X220 Tablet and X220i Tablet FCC ID and IC Certification number label This section provides FCC ID and IC Certification number label location for your computer. User Guide…
-
Page 43
ThinkPad X220 and X220i FCC ID and IC Certification number label There is no FCC ID or IC Certification number for the PCI Express Mini Card shown on the enclosure of your computer. The FCC ID and IC Certification number label is affixed on the card installed in the PCI Express Mini Card slot of your computer. -
Page 44: Certificate Of Authenticity Label
ThinkPad X220 Tablet and X220i Tablet FCC ID and IC Certification number label There is no FCC ID or IC Certification number for the PCI Express Mini Card shown on the enclosure of your computer. The FCC ID and IC Certification number label is affixed on the card installed in the PCI Express Mini Card slot of your computer.
-
Page 45: Features
ThinkPad X220 and X220i ThinkPad X220 Tablet and X220i Tablet Features This section provides features for your notebook computer. ThinkPad X220 and X220i features Processor • See the system properties of your computer. You can do this as follows: Click Start, right-click Computer (in Windows XP, My Computer);…
-
Page 46
Display The color display uses TFT technology: • Size: 12.5 inch (317.5 mm) • Resolution: – LCD: 1366-by-768 – External monitor: Up to 2560-by-1600 • LED backlight • Brightness control • ThinkLight Keyboard • 89-key, 90-key, or 94-key • UltraNav (TrackPoint and multi-touch touch pad) •… -
Page 47: Thinkpad X220 Tablet And X220I Tablet Features
ThinkPad X220 Tablet and X220i Tablet features Processor • See the system properties of your computer. You can do this as follows: Click Start, right-click Computer (in Windows XP, My Computer); then from the pull down menu select Properties. Memory •…
-
Page 48: Specifications
Wireless features • Integrated wireless LAN (on some models) • Integrated Bluetooth (on some models) • Integrated wireless WAN (on some models) • Integrated WiMAX (on some models) Security features • Fingerprint reader (on some models) Tablet features • Tablet Digitizer Pen •…
-
Page 49: Thinkpad X220 Tabet And X220I Tablet Specifications
Battery pack • Lithium-ion (Li-Ion) battery pack Battery life • For percentage of remaining battery power, see the Power Manager Battery Gauge in the task bar. • The Power Manager also displays a green, yellow and red indication. A battery under warranty with a red indication is eligible for a warranty replacement.
-
Page 50: Operating Environment
Do not eat or smoke over your keyboard. Particles that fall into your keyboard can cause damage. ThinkVantage technologies and software Lenovo preinstalls on your PC useful and helpful software applications to help you get started, to stay productive while on the move and to keep you and your computer working. Lenovo offers enhanced security, wireless computing, data-migration and other solutions for your computer.
-
Page 51: Accessing Applications In Windows 7
Note: If you do not find the application you need in Control Panel, open the Lenovo ThinkVantage Tools application navigation window and double-click the dimmed icon to install the application you need.
-
Page 52: Access Connections
Lenovo — Airbag Protection Lenovo — Web Conferencing Lenovo — Fingerprint Reader Lenovo — notebook Fingerprint Reader Lenovo — System Health and Diagnostics Lenovo — 3G Mobile Broadband Lenovo — Password Vault Lenovo — Power Controls Lenovo — Factory Recovery Disks…
-
Page 53: Active Protection System
• For Windows Vista and Windows XP: Click Start ➙ All Programs ➙ ThinkVantage ➙ ThinkVantage Fingerprint Software. Lenovo ThinkVantage Tools The Lenovo ThinkVantage Tools program helps you work more easily and securely by providing easy access to various technologies, such as: • Lenovo ThinkVantage Toolbox •…
-
Page 54: Lenovo Thinkvantage Toolbox
To open Lenovo ThinkVantage Toolbox, do the following: • For Windows 7: See “Accessing applications in Windows 7” on page 33. • For Windows Vista and Windows XP: Click Start ➙ All Programs ➙ ThinkVantage ➙ Lenovo ThinkVantage Toolbox. For additional information about running the Lenovo ThinkVantage Toolbox program, refer to the Lenovo ThinkVantage Toolbox help system.
-
Page 55: Product Recovery
(ThinkVantage applications, device drivers, UEFI BIOS updates, and other third party applications). Some examples of software that you should keep updated are programs provided by Lenovo, such as the Rescue and Recovery program. To open the System Update, do the following: •…
-
Page 56: Lenovo Simpletap
• For Windows Vista: Click Start ➙ All Programs ➙ ThinkVantage ➙ Lenovo SimpleTap. Lenovo ThinkVantage Tablet Shortcut Menu If your notebook is a tablet model, Lenovo ThinkVantage Tablet Shortcut Menu is available in your system. The Tablet Shortcut Menu is a utility for your ThinkPad utility programs such as Access Connections, Presentation Director and EasyEject Utility, for launching custom defined applications, for changing system settings and for changing the focus from one window to another window.
-
Page 57: Chapter 2. Using Your Computer
“Using the media card reader” on page 79 Register your computer When you register your computer, information is entered into a database, which enables Lenovo to contact you in case of a recall or other severe problem. In addition, some locations offer extended privileges and services to registered users.
-
Page 58
Getting connected in different locations is a challenge? • To troubleshoot a wireless networking issue, go to: http://www.lenovo.com/support/faq • Take advantage of the networking features by use of Access Connections. • To learn more about using the wireless features of your computer, refer to “Wireless connections” on page 62. -
Page 59: Tablet Mode
• Also Recovery tool is provided on your computer hard disk or solid state drive. For more information, see Chapter 5 “Recovery overview” on page 107. Print the following sections and keep them with your computer in case you are unable to access this online help when necessary.
-
Page 60
3. Close the computer display slowly, holding the upper left and right sides with both hands. Note: Make sure that the display is rotated at 180 degrees, so that the back of the display faces the keyboard. 4. Your computer is now in the tablet mode. To return your computer to the notebook mode, do as follows: 1. -
Page 61: Using The Tablet Digitizer Pen
2. Follow the direction shown by the display swivel indicator and rotate the display slowly (figure below shows counter-clockwise rotation as an example) until the front of the display is facing the keyboard. Your computer is now in the notebook mode. Tips on using your computer in the tablet mode •…
-
Page 62: Using The Touch Panel
Note: The pen contains pressure sensors. Do not push the tip of the pen for an extended period of time. Do not subject the pen to shock or vibration. The Tablet Digitizer Pen consists of a tip , a click button , and an eraser tip .
-
Page 63: Using The Tablet Buttons
For a single click, tap the display once with your finger. For a double click, tap the display twice without pausing. For a right click, tap the display once and then hold your finger on the display until a circular symbol appears.
-
Page 64: Using The Tablet Shortcut Menu
There is another way to open the main panel. For Windows 7: Click Start ➙ All Programs ➙ Lenovo ThinkVantage Tools ➙ Tablet Utility. For Windows Vista and Windows XP: Click Start ➙ All Programs ➙ ThinkVantage ➙ Tablet Shortcut Menu.
-
Page 65: Thinkvantage Button
ThinkVantage button The blue ThinkVantage button can help you in many situations when your computer is working normally, and even when it is not. You can also use the ThinkVantage button to interrupt the startup sequence of your computer and start the Rescue and Recovery workspace, which runs independently of the Windows operating system and is hidden from it.
-
Page 66
To enable or disable the numeric keypad, press and hold Shift or Fn and then press NmLk (ScrLk). Note: The next drawing shows the locations of the keys that serve as the 10-key numeric keypad. The locations of these keys are the same on every keyboard, though for computers using different languages, different characters are printed on the keytops. -
Page 67: Function Key Combinations
Function key combinations By setting the function keys, you can change operational features instantly. To use this function, press and hold the Fn key ; then press one of the function keys Power conservation • Fn+F3 Select a power plan (in Windows XP, power scheme) that has been created by Power Manager, or adjust the power level by using the slider control.
-
Page 68
– To use Fn+F3, Fn+F4, and Fn+F12 key combinations, you must have the ThinkPad PM device driver installed on your computer. For information on the power management function, refer to “Power management” on page 58. Applying a presentation scheme • Fn+F7 Apply a presentation scheme directly, with no need to start Presentation Director. -
Page 69
Notes: If you want to use Fn+F5 to enable or disable the wireless features, the following device drivers must be installed on your computer beforehand: – Power Management driver – OnScreen Display Utility – Wireless device drivers For information on the wireless features, refer to “Wireless connections” on page 62. Launching the camera and audio settings •… -
Page 70: Volume And Mute Buttons
Volume and mute buttons You can adjust the sound level of the built-in speakers by using the following three buttons: If you mute the sound and then turn off your computer, the sound will remain muted when you turn on your computer again.
-
Page 71: Windows Key And Application Key
• For details about controlling volume, refer to your Windows online help. Setting the microphone mute button in Windows 7 and Windows Vista By default, you can toggle all of your recording devices between the mute state and the un-mute state by pressing the microphone mute button.
-
Page 72: Using The Ultranav Pointing Device
To display the shortcut menu for an object, select the object on the desktop or within an application and then press this key. Using the UltraNav pointing device Your computer may come with the UltraNav pointing device. The UltraNav consists of the TrackPoint and the touch pad, each of which is itself a pointing device with both basic and extended functions.
-
Page 73
If you are not familiar with the TrackPoint, these instructions will help you get started: 1. Place your hands in the typing position, and press gently with either index finger on the pointing stick in the direction in which you want the pointer to move. To move the pointer, press the pointing stick away from you to move it up, toward you to move it down, to one side or the other to move it sideways. -
Page 74: Using The Touch Pad
Note: If you replace the keyboard, a new keyboard is shipped with the default cap. If you wish, you can keep the cap from your old keyboard and use it on the new one. Using the touch pad The touch pad is below the TrackPoint buttons at the bottom of the keyboard. To move the pointer screen, slide your fingertip over the pad in the direction in which you want the pointer to move.
-
Page 75: Behavior Of The Ultranav And An External Mouse
3. Click the UltraNav tab and proceed to customizing the touch pad. For details, refer to the Help in the Utility. Behavior of the UltraNav and an external mouse By default, the TrackPoint and the touch pad are set to Enabled. Note: If you want to attach an external mouse to a USB connector, select “Disabled.”…
-
Page 76: Power Management
You can now change the properties of UltraNav by clicking the UltraNav icon on the system tray. Power management When you need to use your computer away from electrical outlets, you depend on battery power to keep your computer running. Different computer components consume power at different rates. The more you use the power-intensive components, the faster you consume battery power.
-
Page 77: Charging The Battery
– If the battery has not been used for a long time. Before you charge the battery, make sure that its temperature is at least 10°C (50°F). Charging the battery When you check battery status and find that the percentage of power remaining is low or when the power alarm alerts you that remaining power is low, you need to charge your battery or replace it with a charged battery.
-
Page 78
2. Select Power off display (keep current power plan) (in Windows XP, keep current power scheme). Notes: You can also turn off the computer display as follows: 1. Press Fn+F3. A panel for selecting a power plan (in Windows XP, power scheme) appears. 2. -
Page 79: Handling The Battery
Do not attempt to disassemble or modify the battery pack. Attempting to do so can cause an explosion, or liquid leakage from the battery pack. A battery pack other than the one specified by Lenovo, or a disassembled or modified battery pack is not covered by the warranty.
-
Page 80: Connecting To The Network
DANGER Only recharge the battery pack strictly according to instructions included in the product documentation. DANGER Do not put the battery pack in trash that is disposed of in landfills. When disposing of the battery, comply with local ordinances or regulations and your company’s safety standards. DANGER There is a danger of an explosion if the backup battery is incorrectly placed.
-
Page 81
Wireless LAN A wireless local area network covers a relatively small geographic area, such as an office building or a house. Devices based on the 802.11 standards can connect to this network. Wireless WAN A wireless wide area network covers a broader geographic area. Cellular networks are used for data transmission, and access is provided by a wireless service carrier. -
Page 82: Using Bluetooth
Your computer can be wireless upgradeable. This means that your computer has an antenna that can support wireless LAN access when wireless LAN access points are available. Wireless devices are available from Lenovo. For more information, see “Finding ThinkPad options” on page 149. Using wireless WAN connections Wireless Wide Area Network (wireless WAN) enables you to establish wireless connections over remote public or private networks.
-
Page 83
Note: If you use the wireless feature (the 802.11 standard) of your computer simultaneously with a Bluetooth option, data transmission speed can be delayed and the performance of the wireless feature can be degraded. For Windows XP If your computer is equipped with the Integrated Bluetooth features, you can enable or disable the features by pressing Fn+F5. -
Page 84
To use the Bluetooth features, do the following: 1. Double-click the My Bluetooth Places icon on the desktop. 2. For Windows XP, go to Bluetooth Tasks and double-click View devices in range. A list of the devices on which Bluetooth has been enabled appears. 3. -
Page 85
2. Click Start ➙ Run. 3. Type C:SWTOOLSDriversTPBToothSetup.exe (or specify the full path to the setup.exe file you have downloaded from http://www.lenovo.com/support); then click OK. 4. Click Next. 5. Select I accept the terms in the license agreement; then click Next. -
Page 86
2. Click Performance and Maintenance; then click System. 3. Click the Hardware tab; then click Device Manager. 4. Double-click Bluetooth Radios to extract the Bluetooth Radios device tree. 5. Double-click the ThinkPad Bluetooth with Enhanced Data Rate icon to open the Properties window. 6. -
Page 87
– Power to the wireless radio is on. The signal strength of the wireless connection is excellent. • Access Connections Gauge states: wireless WAN – No signal – Signal level 1 – Signal level 2 – Signal level 3 Note: For more information about Access Connections Gauge, see the Help in Access Connections. Access Connections icon and wireless status icon The Access Connections icon displays general connection status. -
Page 88: Using A Projector Or External Display
Enabling or disabling the wireless feature To enable or disable the wireless feature, press Fn+F5. A list of wireless features is displayed. You can turn the feature on and off with a single click. You can also enable or disable the feature by the following procedures. To enable the wireless feature, do as follows: 1.
-
Page 89: Connecting A Projector Or External Display
3. Under Font Size, click Large Fonts or Extra Large Fonts. 4. Click Apply to apply the settings. 5. Click OK. If you are prompted to restart the computer after you click OK or Apply, the change will take effect after the computer restarts. Numeric lock To change the numeric lock setting, do as follows: For Windows 7:…
-
Page 90
Connecting an external monitor To attach an external monitor, do as follows: For Windows 7: 1. Connect the external monitor to the monitor connector; then connect the monitor to an electrical outlet 2. Turn on the external monitor. 3. Change the display output location by pressing Fn+F7. This allows you to switch between viewing output on the external display, the computer display, and both displays. -
Page 91
3. Right-click on the desktop, and click Screen resolution. Note: If your computer cannot detect the external monitor, click the Detect button. 4. Set Resolution. 5. Click Advanced Settings. 6. Click the Monitor tab. Check the monitor information window to make sure that the monitor type is correct. -
Page 92
16. Set Resolution and Colors in the Display Settings window. 17. Click OK. For Windows XP: 1. Connect the external monitor to the monitor connector, and then connect the monitor to an electrical outlet. 2. Turn on the external monitor and the computer. 3. -
Page 93: Setting Up A Presentation
2. Connect the DVI monitor to the DVI connector of the expansion unit, and then connect the monitor to an electrical outlet. 3. Turn on the DVI monitor and the computer. The system starts. If the computer output does not appear on the DVI monitor, do as follows: For a computer that has the Intel display adapter: 1.
-
Page 94: Using Dual Displays
Playing sound Your projector might have one or more audio-input connectors. To project sound, you will need to attach the combo audio jack on your computer to these connectors, using an audio cable (commercially available). Using dual displays Using the Extend desktop function Your computer supports a function named the Extend desktop.
-
Page 95: Using Audio Features
For Windows Vista: 1. Connect the external monitor to the monitor connector; then connect the monitor to an electrical outlet. 2. Turn on the external monitor. 3. If this is the first time the external monitor has been connected, the New Display Detected dialog box opens.
-
Page 96: Using An Integrated Camera
• Recording and playback of PCM and WAV files in 16-bit or 24-bit format. • Playback of a WAV file at a sample rate of 44.1KHz to 192 KHz. • Playback of MIDI files through a Wave table synthesizer under Microsoft Windows operating systems. •…
-
Page 97: Using The Thinklight Feature
You can also use the integrated camera with other programs that provide features such as photographing, video capturing, and video conferencing. To use the integrated camera with other programs, open one of the programs and start the photographing, video capturing, or videoconferencing function. Then, the camera will start automatically and the green camera-in-use indicator will turn on.
-
Page 98: Inserting An Expresscard, A Flash Media Card, Or A Smart Card
For more information on ExpressCards, smart cards, and flash media cards, refer to any of the following topics: • “Inserting an ExpressCard, a flash media card, or a smart card” on page 80. • “Removing an ExpressCard, a flash media card, or a smart card” on page 81. Inserting an ExpressCard, a flash media card, or a smart card Attention: Do not insert an ExpressCard while the computer is in sleep (standby) mode or hibernation mode.
-
Page 99: Removing An Expresscard, A Flash Media Card, Or A Smart Card
Removing an ExpressCard, a flash media card, or a smart card Attention: Before removing a storage ExpressCard, such as a flash memory ExpressCard, a solid state ExpressCard, or a memory card reader ExpressCard, from an ExpressCard slot, you must stop the ExpressCard.
-
Page 100
User Guide… -
Page 101: Chapter 3. You And Your Computer
By keeping these considerations in mind, you can improve performance and achieve greater comfort. Lenovo is committed to providing the latest information and technology to our customers with disabilities. Refer to our accessibility information which outlines our efforts in this area.
-
Page 102: Adjusting Your Computer To Fit You
Note that there are many ThinkPad product solutions available to help you modify and expand your computer to best suit your needs. Access the following Web site to view some of these options: http://www.lenovo.com/accessories/services/index.html. Explore your options for docking solutions and external products that can provide the adjustability and features that you want.
-
Page 103: Accessibility Information
Accessibility information Lenovo is committed to providing people with disabilities greater access to information and technology. As a result, the following information provides ways to help users that have hearing, vision, and mobility limitations get the most out of their computer experience.
-
Page 104: Traveling With Your Computer
To disable the FullScreen Magnifier function, click the FullScreen Magnifier icon and select Exit or press Fn+Spacebar. Traveling with your computer When you travel abroad, your computer can help you feel more at home and at ease. With your own computer and its files, you can be confident about gathering and offering information to clients and coworkers.
-
Page 105
• A quality carrying case that provides adequate cushion and protection If you are traveling to another country you might want to consider these items: • An ac power adapter for the country that you are traveling to • An adapter to connect to a phone line in that country Other items you may wish to consider: •… -
Page 106
User Guide… -
Page 107: Chapter 4. Security
Refer to the instructions shipped with the mechanical lock. Note: You are responsible for evaluating, selecting, and implementing the locking devices and security features. Lenovo makes no comments, judgments, or warranties about the function, quality, or performance of locking devices and security features.
-
Page 108: Passwords And Sleep (Standby) Mode
• “Supervisor password” on page 93 Passwords and sleep (standby) mode If you have set passwords and you put your computer into sleep (standby) mode by pressing Fn+F4, the procedure for resuming operation is as follows: • You are not prompted to type the password when resuming operation. •…
-
Page 109: Hard Disk Passwords
Note: You might want to note your power-on password in a safe place. Otherwise, if you forget it, you have to take your computer to a Lenovo reseller or a marketing representative to have the password canceled. 11. Press F10 to exit.
-
Page 110
Lenovo cannot reset your passwords or recover data from the hard disk. You must take your computer to a Lenovo reseller or a marketing representative to have the hard disk drive replaced. Proof of purchase is required, and a fee will be charged for parts and service. -
Page 111: Supervisor Password
Setup Notice window is displayed. Press F10 to exit from the Setup Notice window. The user hard disk password will be removed. To change or remove the User + Master hard disk password, select User HDP or Master HDP. If you choose User HDP, do one of the following: •…
-
Page 112
Attention: You might want to note your password and keep it in a safe place. If you forget your supervisor password, Lenovo can not reset your password. You must take your computer to a Lenovo reseller or a Lenovo marketing representative to have the system board replaced. Proof of purchase is required, and a fee will be charged for parts and service. -
Page 113: Hard Disk Security
3. Follow step 11 and step 12 above in “Setting a supervisor password” on page 94 to change your supervisor password. To remove the password, do the following: 1. In the Enter Current Password field, type the current supervisor password. 2.
-
Page 114: Setting The Security Chip
For details about Windows BitLocker Drive Encryption, go to the Help and Support for Windows 7 or Windows Vista, or search for “Microsoft Windows BitLocker Drive Encryption Step-by-Step Guide” on Microsoft web site. Disk Encryption hard disk drive and Encryption solid state drive Some models contain the Disk Encryption hard disk drive or Encryption solid state drive.
-
Page 115: Using A Fingerprint Reader
Enrolling your fingerprint 1. Turn on your computer. 2. To start Lenovo Fingerprint software, refer to “Fingerprint Software” on page 35. 3. Follow the instructions on the screen to enroll your fingerprint. For details, refer to the Help for the program.
-
Page 116
LED behavior of the fingerprint reader Table 4. LED behavior list_fingerprint reader Indicator LED blinks green. LED is solid green. LED blinks amber. Swiping your finger over the reader To swipe your finger over the reader, do as follows: 1. Place the ball of your finger, that is, the central part of the fingerprint, on the small circle above the reader. -
Page 117
Lenovo cannot reset your password or recover data from the hard disk. You must take your computer to a Lenovo authorized servicer or a marketing representative to have the hard disk drive replaced. Proof of purchase is required, and a fee will be charged for parts and service. -
Page 118: Using A Fingerprint Reader In Thinkpad X220 Tablet And X220I Tablet
To set an item in the fingerprint submenu: 1. Print these instructions. To configure the fingerprint reader, you must turn your computer off and then on again. 2. Save all open files, and exit all applications. 3. Turn your computer off and then on again. 4.
-
Page 119
Enrolling your fingerprint 1. Turn on your computer. 2. To start Lenovo Fingerprint software, refer to “Fingerprint Software” on page 35. 3. Follow the instructions on the screen to enroll your fingerprint. For details, refer to the Help for the program. -
Page 120
1. Place the ball of your finger, that is, the central part of the fingerprint, on the small circle above the reader. Make sure that the entire top joint of the finger is on the reader. 2. Apply light pressure and swipe your finger across the reader in one smooth motion. To swipe your finger over the reader in tablet mode, do as follows: User Guide… -
Page 121
Lenovo authorized servicer or a marketing representative to have the password canceled. -
Page 122
If you forget your hard disk password, Lenovo cannot reset your password or recover data from the hard disk. You must take your computer to a Lenovo authorized servicer or a marketing representative to have the hard disk drive replaced. Proof of purchase is required, and a fee will be charged for parts and service. -
Page 123: Notice On Deleting Data From Your Hard Disk Drive Or Solid State Drive
(payware) or service (pay service) specifically developed for the purpose. For disposing of data on the hard disk drive, Lenovo provides such software as PC Doctor for DOS and the Secure Data Disposal tool. Software provides the interface for full erasure of the contents of a hard disk. To download either application, go to the Lenovo Web site at: http://www.lenovo.com/support…
-
Page 124: Using And Understanding Firewalls
Lenovo provides a full version of antivirus software on your computer with a free 30-day subscription. After 30 days, you must renew the license to continue receiving the antivirus software updates.
-
Page 125: Chapter 5. Recovery Overview
Chapter 5. Recovery overview This chapter provides information about the recovery solutions provided by Lenovo. This chapter contains the following topics: • “Creating and using recovery media” on page 107 • “Performing backup and recovery operations” on page 109 •…
-
Page 126: Creating Recovery Media
“creating Product Recovery discs.” • To create recovery media on the Windows 7 operating system, click Start ➙ All Programs ➙ Lenovo ThinkVantage Tools ➙ Factory Recovery Disks. Then, follow the instructions on the screen.
-
Page 127: Performing Backup And Recovery Operations
• To perform a backup operation using the Rescue and Recovery program on the Windows 7 operating system, do the following: 1. From the Windows desktop, click Start ➙ All Programs ➙ Lenovo ThinkVantage Tools ➙ Enhanced Backup and Restore. The Rescue and Recovery program opens.
-
Page 128: Using The Rescue And Recovery Workspace
1. From the Windows desktop, click Start ➙ All Programs ➙ Lenovo ThinkVantage Tools ➙ Enhanced Backup and Restore. The Rescue and Recovery program opens. 2. In the Rescue and Recovery main window, click the Launch advanced Rescue and Recovery arrow.
-
Page 129: Creating And Using A Rescue Medium
• To create a rescue medium on the Windows 7 operating system, do the following: 1. From the Windows desktop, click Start ➙ All Programs ➙ Lenovo ThinkVantage Tools ➙ Enhanced Backup and Restore. The Rescue and Recovery program opens.
-
Page 130: Reinstalling Preinstalled Applications And Device Drivers
• If you have created a rescue medium using a disc, use the following instructions to use the rescue medium: 1. Turn off your computer. 2. Repeatedly press and release the F12 key when turning on the computer. When the Startup Device Menu opens, release the F12 key.
-
Page 131: Solving Recovery Problems
Double-click the file, and follow the instructions on the screen. Attention: If you need updated device drivers, do not download them from the Windows Update Web site. Obtain them from Lenovo. For more information, see “Making sure device drivers are current” on page 202. Solving recovery problems…
-
Page 132
User Guide… -
Page 133: Chapter 6. Replacing Devices
When this is not possible, place the static-protective packaging on a smooth, level surface and place the part on it. • Do not place the part on the computer cover or other metal surface. © Copyright Lenovo 2011…
-
Page 134: Replacing The Battery
Replacing the battery Before you start, print these instructions. This system may not support batteries that are not genuine Lenovo-made or authorized. These systems will continue to boot, but may not charge unauthorized batteries. Attention: Lenovo has no responsibility for the performance or safety of unauthorized batteries, and provides no warranties for failures or damage arising out of their use.
-
Page 135
3. Unlock the battery latch by sliding it to the unlock position. 4. Remove the battery. 5. Slide the battery into the computer. Chapter 6 Replacing devices… -
Page 136: Replacing The Keyboard
6. Slide the battery latch to the locked position. 7. Turn the computer over again. Connect the ac power adapter and the cables to the computer. Replacing the keyboard Before you start, print these instructions. You can use the following procedures to replace the keyboard with a new one, available as an option. Prerequisites for the procedure DANGER During electrical storms, do not connect the cable to or disconnect it from the telephone outlet…
-
Page 137
4. Loosen the two screws on the memory slot cover , then remove the cover. 5. Turn the computer over and open the display. 6. Push hard in the direction shown by the arrows in the drawing to unlatch the front side of the keyboard. -
Page 138
7. Carefully lift the keyboard until you can see how it’s connected. Hold the keyboard above the computer , and then detach the connector Installing the keyboard 1. Attach the connector. User Guide . Now the keyboard has been removed. -
Page 139
2. Insert the keyboard. Make sure that the rear edges of the keyboard are under the frame as shown by the arrows. 3. Press gently on the areas marked in the drawing, and slide the keyboard toward you. Make sure that the edges of the keyboard marked in the drawing, are under the frame. -
Page 140: Replacing The Palm Rest
4. Put the memory slot cover back in place , close the cover , and then tighten the screws. 5. Reinstall the battery. For details, refer to the instructions in “Reinstall the battery” on page 116. 6. Turn the computer over again. Connect the ac power adapter and cables to the computer; then turn it on. Replacing the palm rest Before you start, print these instructions.
-
Page 141
6. Turn the computer over and open the display. Lift up the left and right top edges of the palm rest to remove it. 7. Detach the flip-lock ZIF connector , then remove the palm rest cable 8. Lift up and remove the palm rest. Chapter 6 Replacing devices… -
Page 142
9. Release the palm rest from the computer. Now the palm rest has been removed. Installing the palm rest 1. Attach the palm rest, making sure the latches near the top left and right edges of the palm rest are secure. 2. -
Page 143: Replacing The Hard Disk Drive
Replacing the hard disk drive Before you start, print these instructions. You can replace the hard disk drive with a new one which can be purchased from your Lenovo reseller or a marketing representative. To replace the hard disk drive, read the following prerequisites.
-
Page 144
• Do not drop the drive or subject it to physical shocks. Put the drive on a material, such as soft cloth, that absorbs any physical shocks. • Do not apply pressure to the cover of the drive. • Do not touch the connector. The drive is very sensitive. -
Page 145
6. Detach the side rubber rails from the hard disk drive. 7. Attach the side rubber rails to a new hard disk drive. 8. Insert the hard disk drive into the hard disk drive bay, then press it firmly into place. Chapter 6 Replacing devices… -
Page 146: Replacing The Solid State Drive
Replacing the solid state drive You can replace the solid state drive with a new one which can be purchased from your Lenovo reseller or a marketing representative. To replace the solid state drive, read the following prerequisites and select your model from the list below for instructions.
-
Page 147
4. Remove the screw that secures the solid state drive . Then flip out the cover and pull up to remove it 5. Remove the solid state drive by pulling out the tab. 6. Detach the side spacer rails from the hard disk drive. Chapter 6 Replacing devices… -
Page 148
7. Attach the side spacer rails to a new hard disk drive. 8. Insert the solid state drive into the hard disk drive bay, then press it firmly into place. 9. Reinstall the cover of the bay 10. Reinstall the battery. For more information about how to reinstall the battery, refer to “Replacing the battery”… -
Page 149: Installing And Replacing The Pci Express Mini Card For Wireless Lan/Wimax Connection
Installing and replacing the PCI Express Mini Card for wireless LAN/WiMAX connection Before you start, print these instructions. Your computer has a PCI Express Mini Card slot for connection to a wireless LAN/WiMAX. To replace the PCI Express Mini Card with a new one, read the following prerequisites. Prerequisites for the procedure DANGER During electrical storms, do not connect the cable to or disconnect it from the telephone outlet…
-
Page 150
6. If a tool for removing connectors is included in the package with the new card, use it to disconnect the cables from the card. If no such tool is included, disconnect the cables by picking up the connectors with your fingers and gently unplugging them. 7. -
Page 151
8. Remove the card. 9. Align the contact edge of the new PCI Express Mini Card with the corresponding socket contact of the computer. Chapter 6 Replacing devices… -
Page 152
10. Pivot the card until you can snap it into place by pressing the upper side of the connectors secure the card with the screw 11. Connect the cables to the new PCI Express Mini Card. Be sure to attach the gray cable to the connector marked “MAIN”… -
Page 153
4. Remove the keyboard. For details, refer to the instructions in “Remove the keyboard” on page 118. 5. Remove the palm rest. For details, refer to the instructions in “Remove the palm rest” on page 122. 6. If a tool for removing connectors is included in the package with the new card, use it to disconnect the cables from the card. -
Page 154
8. Remove the card. 9. Align the contact edge of the new PCI Express Mini Card with the corresponding socket contact of the computer. User Guide… -
Page 155: Installing And Replacing The Pci Express Mini Card For Wireless Wan Connection
10. Pivot the card until you can snap it into place by pressing the upper side of the connectors secure the card with the screw 11. Connect the cables to the new PCI Express Mini Card. Be sure to attach the gray cable to the connector marked “MAIN”…
-
Page 156
Some ThinkPad models have a PCI Express Mini Card slot for connection to a wireless WAN. To replace the PCI Express Mini Card with a new one, read the following prerequisites. Prerequisites for the procedure DANGER During electrical storms, do not connect the cable to or disconnect it from the telephone outlet on the wall. -
Page 157
7. Remove the screw. The card pops up. 8. Remove the card. Chapter 6 Replacing devices… -
Page 158
9. Align the contact edge of the new PCI Express Mini Card with the corresponding socket. Note: You can also replace the PCI Express Mini Card for Wireless WAN with an mSATA solid state drive. 10. Pivot the card until you can snap it into place by pressing the upper side of each connector. Secure the card with the screw. -
Page 159: Installing And Replacing The Msata Solid State Drive
Some ThinkPad models have an mSATA solid state drive. You can replace the mSATA solid state drive with a new one which can be purchased from your Lenovo reseller or a marketing representative. To replace the mSATA solid state drive, read the following prerequisites.
-
Page 160
If an mSATA solid state drive is available in your computer, to replace the mSATA solid state drive, do as follows. 1. Turn off the computer; then disconnect the ac power adapter and all cables from the computer. Wait for a few minutes, till the inside of the computer cools, before you start the following procedures. -
Page 161: Replacing Memory
8. Align the contact edge of a new mSATA solid state drive with the corresponding socket. Note: You can also replace the mSATA solid state drive with a Wireless PCI Express Mini Card for Wireless WAN. 9. Pivot the card downward 10.
-
Page 162
Note: The operating speed of the memory module depends on the system configuration of your computer and its combination with the memory module installed on your computer. In some conditions, the memory in your computer may not be able to operate at the maximum speed. Attention: Before you start installing a module, touch a metal table or a grounded metal object. -
Page 163
6. With the notched end of the SO-DIMM toward the contact edge side of the socket, insert the SO-DIMM into the socket at an angle of about 20 degrees Note: If you install a memory module in only one of the two memory slots, install it in the lower slot. 7. -
Page 164: Replacing The Sim Card
2. When the logo screen is displayed, press the F1 key. The ThinkPad Setup opens. The “Installed memory” item shows the total amount of memory installed in your computer. Replacing the SIM card Before you start, print these instructions. Your computer may require a SIM (Subscriber Identification Module) card to establish a wireless WAN (Wide Area Network) connections.
-
Page 165
5. Insert the SIM card firmly into the slot. Note: Make sure that you insert the SIM card all the way into the slot. 6. Put the battery back in place. For more details, refer to “Replacing the battery” on page 116. 7. -
Page 166
User Guide… -
Page 167: Chapter 7. Enhancing Your Computer
You can shop at Lenovo 24 hours a day, 7 days a week directly over the World Wide Web. All you need is an Internet connection and a credit card.
-
Page 168: Thinkpad Ultrabase Series 3 Top View
ThinkPad Ultrabase Series 3 top view The docking connector is used for attaching the ThinkPad computer to the ThinkPad Ultrabase Series 3. The power jack is where you connect the AC adapter. The Ethernet connector is for connecting the ThinkPad Ultrabase Series 3 to a LAN. The DisplayPort connector is for connecting a DisplayPort-compatible display device.
-
Page 169: Thinkpad Ultrabase Series 3 Bottom View
ThinkPad Ultrabase Series 3 bottom view By pressing the eject request button, you can tell the operating system to get ready for undocking. The docking indicator is red when your computer is docked. It blinks when the eject request button is pressed.
-
Page 170
2. Align the front of the computer with the front of the ThinkPad Ultrabase Series 3. 3. Make sure that the guides of the ThinkPad Ultrabase Series 3 align with the holes of the computer Then put the computer in place . -
Page 171: Detaching A Thinkpad Ultrabase Series 3
4. When the computer is already docked to the ThinkPad Ultrabase Series 3, you can start the computer. Note: You can turn the key clockwise to lock it. Then, keep the security key in a safe place. Do not lose this key;…
-
Page 172: Detaching A Thinkpad Ultrabase Series 3
• the battery is fully charged. To detach your computer from the ThinkPad Ultrabase Series 3, do the following: 1. Make sure that the system lock key of the ThinkPad Ultrabase Series 3 is in the unlocked (vertical) position. 2. Close the computer display. 3.
-
Page 173: Thinkpad Battery 19
Unlock position: If the UltraBase lock is in this position, your computer is not secured. Base lock position: If the UltraBase lock is in this position, the ThinkPad Ultrabase Series 3 is locked, and the computer cannot be removed from the ThinkPad Ultrabase Series 3. The Serial Ultrabay Slim device is also locked and cannot be removed from the UltraBase.
-
Page 174: Top View
Top view The docking connector is used for attaching the ThinkPad computer to the ThinkPad Battery 19+. Bottom view The power jack is where you connect the AC adapter. By pressing the indicator button, the status indicator shows the ThinkPad Battery 19+ charge status. The status indicator is to show the ThinkPad Battery 19+ charge status.
-
Page 175: Detaching A Thinkpad Battery 19
2. Make sure that the guides of the ThinkPad Battery 19+ align with the holes of the computer put the computer in place Detaching a ThinkPad Battery 19+ To detach a ThinkPad Battery 19+, do the following: 1. Unlock the battery latch by sliding it to the unlock position. .
-
Page 176: Charging A Thinkpad Battery 19
2. Release the eject lever and pull up the ThinkPad Battery 19+. Charging a ThinkPad Battery 19+ The ThinkPad Battery 19+ can be charged separately. User Guide…
-
Page 177: Thinkpad Port Replicator Series 3, Thinkpad Mini Dock Series 3, And Thinkpad Mini Dock Plus Series 3
The ThinkPad Battery 19+ can also be charged with a computer. When the ThinkPad Battery 19+ is charged with a computer, both the main battery and ThinkPad Battery 19+ can be charged simultaneously. ThinkPad Port Replicator Series 3, ThinkPad Mini Dock Series 3, and ThinkPad Mini Dock Plus Series 3 Note: Only ThinkPad X220 and X220i support ThinkPad Port Replicator Series 3, ThinkPad Mini Dock Series 3, and ThinkPad Mini Dock Plus Series 3.
-
Page 178: Front View
• “Front view” on page 160 • “Rear view” on page 163 • “Attaching a ThinkPad Port Replicator Series 3, ThinkPad Mini Dock Series 3, or ThinkPad Mini Dock Plus Series 3” on page 166 • “Detaching a ThinkPad Port Replicator Series 3, ThinkPad Mini Dock Series 3, and ThinkPad Mini Dock Plus Series 3”…
-
Page 179
ThinkPad Mini Dock Series 3 The power switch turns the computer on and off. The key lock indicator lights when the system lock key is in the locked position. When the system lock key is in the locked position, the eject button of the ThinkPad Mini Dock Series 3 is locked; you cannot attach or remove your computer. -
Page 180
ThinkPad Mini Dock Plus Series 3 The power switch turns the computer on and off. The key lock indicator lights when the system lock key is in the locked position. When the system lock key is in the locked position, the eject button of the ThinkPad Mini Dock Plus Series 3 is locked; you cannot attach or remove your computer. -
Page 181: Rear View
Rear view ThinkPad Port Replicator Series 3 The power jack is for connecting the ac power adapter. The Ethernet connector is for connecting the ThinkPad Port Replicator Series 3 to an Ethernet LAN. The indicator on the connector is the same as that on the computer. Notes: •…
-
Page 182
ThinkPad Mini Dock Series 3 The power jack is for connecting the ac power adapter. The DisplayPort is for connecting a display device. The digital visual interface connector is for connecting a monitor that supports Single-Link DVI. Note: The DVI connector provides a digital interface only. This connector can be used with a computer that supports DVI via docking only. -
Page 183
ThinkPad Mini Dock Plus Series 3 The DisplayPort is for connecting a display device. The digital visual interface connector is for connecting a monitor that supports Single-Link DVI. Note: The DVI connector provides a digital interface only. This connector can be used with a computer that supports DVI via docking only. -
Page 184: Attaching A Thinkpad Port Replicator Series 3, Thinkpad Mini Dock Series 3, Or Thinkpad Mini Dock Plus Series 3
When you attach a mechanical lock to the security keyhole, the eject button is locked so that the computer cannot be removed from the ThinkPad Mini Dock Plus Series 3. Attaching a ThinkPad Port Replicator Series 3, ThinkPad Mini Dock Series 3, or ThinkPad Mini Dock Plus Series 3 To attach your computer to a ThinkPad Port Replicator Series 3, a ThinkPad Mini Dock Series 3, or a ThinkPad Mini Dock Plus Series 3, do the following:…
-
Page 185
2. Press the button of the ThinkPad Mini Dock Series 3, or the ThinkPad Mini Dock Plus Series 3 the sliding adjuster in the direction shown by the arrow 3. Put your computer on the platform of the ThinkPad Mini Dock Series 3, or the ThinkPad Mini Dock Plus Series 3, making sure that the top-left corner of the computer is aligned to the guide plate on the ThinkPad Mini Dock Series 3, or the ThinkPad Mini Dock Plus Series 3. -
Page 186: Detaching A Thinkpad Port Replicator Series 3, Thinkpad Mini Dock Series 3, And Thinkpad Mini Dock Plus Series 3
• If your computer and the ThinkPad Port Replicator Series 3, the ThinkPad Mini Dock Series 3, or the ThinkPad Mini Dock Plus Series 3 are connected to separate ac power adapters, your computer goes into battery mode first, and then shifts into ac mode. •…
-
Page 187
3. Press the eject button until the computer moves up; then, grasp both sides, and remove the computer To detach your computer from the ThinkPad Port Replicator Series 3, do the following: Notes: • If your computer is operating, make sure that it has finished operations involving devices that are connected to the USB connector. -
Page 188: Security Feature
To lock the eject button, use the system lock key. Lenovo does not offer a mechanical lock. You will need to purchase one elsewhere. You are responsible for evaluating, selecting, and implementing any locking device and security feature. Lenovo makes no comments, judgments, or warranties about the function, quality, or performance of any locking device or security features.
-
Page 189
Attach a mechanical lock to the ThinkPad Mini Dock Series 3 as follows: Attach a mechanical lock to the ThinkPad Port Replicator Series 3 as follows: Chapter 7 Enhancing your computer… -
Page 190: Using The System Lock Key
Using the system lock key The system lock key has two positions, unlocked and locked. When the key is in the locked position, the eject button of the ThinkPad Mini Dock Series 3 or the ThinkPad Mini Dock Plus Series 3 is locked, and you cannot remove your computer. The key lock indicator lights when the eject button is locked.
-
Page 191: Chapter 8. Advanced Configuration
UEFI/Legacy Boot setting must be the same as it was when the Windows OS image was installed. Or, you will see an error. For the country or region code required in the installation, use one of the following: © Copyright Lenovo 2011…
-
Page 192: Installing Windows 7
• Registry patch enabling Wake Up on LAN from Standby for Energy Star • Fix for Issue of HDD with HD Detection To install these Registry Patches, go to: http://www.lenovo.com/support Installing the Windows 7 Update Module Package The Windows 7 Update Modules are in the following directory: C:SWTOOLSOSFIXES.
-
Page 193: Installing Windows Vista
• Registry patch enabling Wake Up on LAN from Standby for Energy Star • Registry patch to improve USB device detection on resume from sleep • Fix for Issue of HDD with HD Detection To install these Registry Patches, go to : http://www.lenovo.com/support Chapter 8 Advanced configuration…
-
Page 194: Installing Windows Xp
Installing the Windows Vista Update Module Package The Windows Vista Update Modules are in the following directory: C:SWTOOLSOSFIXES. The name of each subfolder is the number of a fix module. For information about each fix module, go to the Microsoft Knowledge Base homepage at http://support.microsoft.com/, type the number of the fix module you need in the search field, and click Search.
-
Page 195
16. To continue the installation, press Enter again. Leave the diskette in the drive until the next reboot; the software may need to be copied from the diskette again when the files are copied during setup. 17. Complete the installation of Windows XP Service Pack 2 by following OS installing instructions. 18. -
Page 196: Installing Device Drivers
Windows XP/Vista x86/x64. To download it, go to Lenovo Web site at: http://www.lenovo.com/support/site.wss/document.do?sitestyle=lenovo&lndocid=tpad-matrix Note: If you are installing Windows XP anew, be sure to install RICOH SD/MMC Bus Host Adapter driver for Windows 2000/XP 77sp05ww first. To download it, visit Lenovo Web site athttp://www.lenovo.com/support/site.wss/document.do?sitestyle=lenovo&lndocid=tpad-matrix, and then install the driver.
-
Page 197: Installing Thinkpad Monitor File For Windows 2000/Xp/Vista/7
Note: If you cannot find this directory on your hard disk drive or solid state drive, download the ThinkPad Monitor File for Windows 2000/XP/Vista/7 from the ThinkPad Web site at: http://www.lenovo.com/support/site.wss/document.do?sitestyle=lenovo&lndocid=tpad-matrix Note: Before you install this file, make sure that the correct video driver has been installed.
-
Page 198: Installing Intel Chipset Support For Windows 2000/Xp/Vista/7
11. Click OK. 12. Confirm the correct display type, then click Next. 13. Windows has finished installing. Click Close. 14. Click Close for Display Properties. 15. Click OK in the Monitor tab. 16. Click OK and close the Display Settings window. For Windows XP 1.
-
Page 199: Installing Drivers And Software
ThinkPad Web site at: http://www.lenovo.com/support/site.wss/document.do?sitestyle=lenovo&lndocid=tpad-matrix ThinkPad Setup Your computer provides a program, called ThinkPad Setup, that enables you to select various setup parameters.
-
Page 200: Config Menu
4. Using the cursor keys, move to an item you want to change. When the item you want is highlighted, press Enter. A submenu is displayed. 5. Change the items you wish to change. To change the value of an item, press +/-. If the item has a submenu, you can display it by pressing Enter.
-
Page 201: Security Menu
Security menu If you need to set the security features of your computer, select Security from the ThinkPad Setup menu. Notes: • The default settings are already optimized for you. If you consider changing the computer configuration, proceed with extreme caution. Setting the configuration incorrectly might cause unexpected results. •…
-
Page 202: Changing The Startup Sequence
If you select and enable Password at unattended boot, a password prompt is displayed when the computer is turned on, from either a power-off state or hibernation, by an unattended event such as Wake on LAN you select Disabled, no password prompt is displayed; the computer goes ahead and loads the operating system.
-
Page 203: Restart Menu
2. USB FDD: 3. ATAPI CD0: 4. ATA HDD0: 5. ATA HDD1: 6. ATA HDD2: 7. USB HDD: 8. PCI LAN: 9. ATAPI CD1: 10. ATAPI CD2: 11. ATA HDD3: 12. ATA HDD4: 13. Other CD: 14. Other HDD: Network Boot Use the Network Boot to select the boot device when the system wakes from LAN.
-
Page 204
• Enabled means that the function is configured. • Disabled means that the function is not configured. • Default values are in boldface. Config menu items Table 6. Config menu items Menu item Submenu item Network Wake On LAN Ethernet LAN Option ROM USB UEFI BIOS Support Always On USB User Guide… -
Page 205
Table 6. Config menu items (continued) Menu item Submenu item Always On USB Charge in off mode Keyboard/Mouse TrackPoint Touch Pad Fn and Ctrl Key swap Selection Comments • Disabled If you select “Enabled”, the Always On USB connector • Enabled enables you to charge some devices, such as iPod and iPhone and BlackBerry… -
Page 206
Table 6. Config menu items (continued) Menu item Submenu item Fn Key Lock ThinkPad NumLock Power-On NumLock User Guide Selection Comments • Disabled If you select “Enabled”, you can press the Fn key • Enabled to keep it in a pressed condition, and then press the desired function key. -
Page 207
Table 6. Config menu items (continued) Menu item Submenu item Display Boot Display Device Graphics Device OS Detection for NVIDIA Optimus Power Intel SpeedStep technology (Intel SpeedStep mounted models only) Selection • ThinkPad LCD • Analog (VGA) • Digital on ThinkPad •… -
Page 208
Table 6. Config menu items (continued) Menu item Submenu item Adaptive Thermal Management Optical Drive Speed CPU Power Management PCI Express Power Management Power On with AC Attach User Guide Selection Comments Scheme for AC This selects a thermal management scheme to •… -
Page 209
Table 6. Config menu items (continued) Menu item Submenu item Beep and Alarm Power Control Beep Low Battery Alarm Password Beep Keyboard Beep Serial ATA (SATA) SATA Controller Mode Option Core Multi-Processing Intel Hyper-Threading Technology Selection Comments • Disabled If this function is enabled, a beep sounds when the •… -
Page 210
Table 6. Config menu items (continued) Menu item Submenu item Intel AMT Intel AMT Control CIRA Timeout Console Type Security menu items Table 7. Security menu items Menu item Submenu item Password Fingerprint Predesktop Authentication Reader Priority User Guide Selection Comments •… -
Page 211
Table 7. Security menu items (continued) Menu item Submenu item Security Mode Password Authentication Reset Fingerprint Data Security Chip Security Chip Security Reporting Options Selection Comments • Normal If fingerprint authentication fails, you can still start • High the computer by entering a password. -
Page 212
Table 7. Security menu items (continued) Menu item Submenu item Clear Security Chip Intel TXT Feature UEFI BIOS Update Option Flash BIOS Updating by End-Users Flash Over LAN Memory Protection Execution Prevention Virtualization Intel Virtualization Technology Intel VT-d Feature User Guide Selection Comments •… -
Page 213
Table 7. Security menu items (continued) Menu item Submenu item I/O Port Access Ethernet LAN Wireless LAN WiMAX Wireless WAN Bluetooth Modem USB Port IEEE 1394 ExpressCard Slot Ultrabay (HDD/Optical) eSATA Port Memory Card Slot Integrated Camera Microphone Fingerprint Reader Selection Comments •… -
Page 214
Table 7. Security menu items (continued) Menu item Submenu item Anti-Theft Intel AT Module Activation Computrace Module Activation Startup menu items Table 8. Startup menu items Menu item Boot Network Boot UEFI/Legacy Boot UEFI/Legacy Boot Priority User Guide Selection • Disabled •… -
Page 215: Updating Your System Uefi Bios
In some instances when you add software, hardware, or a device driver, you may be informed that you need to update your UEFI BIOS in order for the new addition to work properly. To update your UEFI BIOS, visit this Web site at http://www.lenovo.com/support/site.wss/document.do?sitestyle=lenovo&lndocid=tpad-matrix Then follow the instructions on the screen. Using system management This section is intended primarily for network administrators.
-
Page 216: System Management
Once the computer is configured and operational, you can manage it by use of software and manageability features already integrated into the client system and the network. System management Check the following topics to learn more about features of System Management: •…
-
Page 217: Setting Management Features
6. Select the Allow this device to wake the computer check box. For Windows XP: 1. Click Start, and then click Control Panel. 2. Click Performance and Maintenance. 3. Click System. 4. Click the Hardware tab. 5. Click the Device Manager button. The Device Manager window opens. 6.
-
Page 218
Network Boot sequence When your computer is turned on remotely, system will try to boot from the device that is selected by Network Boot setting, and then follow the boot order list in the Boot menu. To define a sequence: 1. -
Page 219: Chapter 9. Preventing Problems
9. Profile your machine at http://www.lenovo.com/think/support to keep up to date with current drivers and revisions. 10. Keep up to date for device drivers on other non-Lenovo hardware. You might want to read the device driver information release notes prior to updating for compatibility or known issues.
-
Page 220: Making Sure Device Drivers Are Current
This may eliminate the driver as the potential cause of the problem. Getting the latest drivers from the Web site You can download and install updated device drivers from the Lenovo Web site by doing the following: 1. Connect to the Internet.
-
Page 221: Taking Care Of Your Computer
Taking care of your computer Although your computer is designed to function reliably in normal work environments, you need to use common sense in handling it. By following these important tips, you will get the most use and enjoyment out of your computer. Be careful about where and how you work •…
-
Page 222
Take care in setting passwords • Remember your passwords. If you forget a supervisor or hard disk password, Lenovo will not reset it, and you might have to replace your system board, or hard disk drive or solid state drive. -
Page 223: Cleaning The Cover Of Your Computer
Tips on using the built-in modem • Your computer modem may use only an analog telephone network, or public-switched telephone network (PSTN). Do not connect the modem to a PBX (private branch exchange) or any other digital telephone extension line because this could damage your modem. Analog phone lines are often used in homes, while digital phone lines are often used in hotels or office buildings.
-
Page 224
5. Wipe the display again; do not let any liquid drip into the computer. 6. Be sure to dry the display before closing it. User Guide… -
Page 225: Chapter 10. Troubleshooting Computer Problems
Using Lenovo ThinkVantage Toolbox Note: If your system is running and User Guide is accessible, see User Guide. If your computer is not operating properly, you may be able to diagnose the problem by having Lenovo ThinkVantage Toolbox test components of your computer.
-
Page 226: Computer Stops Responding
Computer stops responding Print these instructions now and keep it with your computer for reference later. If your computer is completely unresponsive (you cannot use the UltraNav pointing device or the keyboard), do the following steps: 1. Push and hold the power switch until the machine turns off. After the computer is turned off, restart by pressing the power switch.
-
Page 227: Error Messages
Error messages • Message: 0176: System Security — The System has been tampered with. Solution: This message is displayed if you remove the Security Chip and reinstall it, or install a new one. To clear the error, enter the ThinkPad Setup. If this does not solve the problem, have the computer serviced.
-
Page 228
Solution: The system CMOS might have been corrupted by an application program. The computer uses the default settings. Run the ThinkPad Setup to reconfigure the settings. If you still see the same error code, have the computer serviced. • Message: 0253: EFI Variable Block Data was destroyed. Solution: The system EFI Variable Block Data might have been corrupted. -
Page 229: Errors Without Messages
Solution: A power-on password or a supervisor password is set. Type the password and press Enter to use the computer (refer to “Using passwords” on page 89). If the power-on password is not accepted, a supervisor password might have been set. Type the supervisor password and press Enter. If you still see the same error message, have the computer serviced.
-
Page 230: Beep Errors
4. Verify the proper memory configuration and compatibility including the maximum memory size and the memory speed. For details, refer to the instructions in “Replacing memory” on page 143. 5. Run “Lenovo ThinkVantage Toolbox” on page 207. Modem and networking The following are the most common modem and networking problems: Ethernet problems •…
-
Page 231
Solution: Make sure that: – The cable is installed properly. The network cable must be securely connected both to the Ethernet connector of your computer and to the RJ45 connector of the hub. The maximum allowable distance from the computer to hub is 100 meters. -
Page 232: A Wireless Lan Problem
– If it is, check with your LAN administrator for the necessary settings. • Problem: If your computer is a Gigabit Ethernet model, it cannot connect to the network at 1000 Mbps. Instead, it connects at 100 Mbps. Solution: – Try another cable. –…
-
Page 233
For Windows XP Notes: If you are using the Microsoft standard Bluetooth features and you want to access information about how to use the Bluetooth function, do the following: 1. Press Fn+F5 to turn on Bluetooth. 2. Click Start ➙ Control Panel. 3. -
Page 234
Make sure that the security settings on the connected computer allow you to upload your business card. • Problem: Your computer is connected to a Bluetooth-enabled computer that works as an FTP server, but you cannot see any files in the FTP server. Solution: Check the newly shared files as follows: 1. -
Page 235: Keyboard And Other Pointing Devices
If the words “Bluetooth Radio” appear in the device listing, the Microsoft Bluetooth software is installed on your computer. If you want to use ThinkPad Bluetooth with Enhanced Data Rate Software, you have to install it and then replace the Bluetooth driver. For more information, see “Using Bluetooth” on page 64. •…
-
Page 236: Display And Multimedia Devices
If the keyboard problem is resolved, carefully reconnect the external numeric keypad, external keyboard, making sure that you have seated the connectors properly. If the problem remains, make sure that the correct device driver is installed. For Windows 7: 1. Click Start ➙ Control Panel. Change the view of the Control Panel from Category to Large icons or Small icons.
-
Page 237
Solution: Make sure that: – The display device driver is installed correctly. – The screen resolution and color quality are correctly set. – The monitor type is correct. To check these settings, do as follows: For Windows 7: 1. Right-click on the desktop, and click Personalize. 2. -
Page 238: External Monitor Problems
6. Make sure that the correct device driver name is shown in the adapter information window. Note: The device driver name depends on the video chip that has been installed on your computer. 7. Click the Properties button. Check the “Device status” box and make sure the device is working properly.
-
Page 239
5. Make sure that the correct device driver name is shown in the adapter information window. Note: The device driver name depends on the video chip that has been installed on your computer. 6. Click OK. If the information is incorrect, reinstall the device driver. See below for more information. For Windows Vista: 1. -
Page 240
12. Clear the Show compatible hardware check box. 13. Select Manufacturer and Model for your monitor. 14. After updating the driver, click Close. 15. Set Resolution. Note: To change the color settings, select the Monitor tab, then set Colors. 16. Click OK. For Windows Vista: 1. -
Page 241
8. If more than one monitor type is displayed, select Default Monitor. 9. Click Properties. 10. Click the Driver tab. 11. Click Update Driver. The Hardware Update Wizard appears. 12. Click No, not this time, and then click Next. 13. Select Install from a list or specific location (Advanced), and then click Next. 14. -
Page 242
1. Connect the external monitor to the monitor connector, and then connect the monitor to an electrical outlet. 2. Turn on the external monitor and the computer. 3. Press Fn+F7 to change the display output location to the external monitor. Note: After pressing Fn+F7, you will need to wait for a moment before the image appears. -
Page 243: Audio Problems
9. Select the Resolution and Colors of the secondary display. 10. Set the relative position of the each monitor by dragging its icon. You can set the monitors in any relative position, but the icons must touch each other. 11. Click OK to apply the changes. For Windows XP: 1.
-
Page 244
Solution: Make sure the built-in audio device is configured correctly. For Windows 7 and Windows Vista: 1. Click Start ➙ Control Panel. 2. Click Hardware and Sound. 3. Click Device Manager. If you are prompted for an administrator password or confirmation, type the password or provide confirmation. -
Page 245
Solution: The slider might be grayed out. This means that its position is fixed by the hardware and cannot be changed. • Problem: The volume sliders do not stay in place when some audio applications are used. Solution: It is normal for the sliders to change position when certain sound applications are used. The applications are aware of the Volume Mixer window (in Windows XP, Volume Control window) and are allowed to change the settings themselves. -
Page 246: Fingerprint Reader Problems
• Problem: When you connect a headphone to your computer while playing sound, a speaker does not produce sound in the MULTI-STREAM mode at SmartAudio (Windows 7). Solution: Once the headphone is attached, the streaming is automatically redirected to it. If you want to listen to sound from the speakers again, be sure to set those speakers as the default device.
-
Page 247: Power Problems
1. Turn off the computer. 2. Make sure that the over-discharged battery pack is in the computer. 3. Connect the ac power adapter to the computer and let it charge. If the optional Quick Charger is available, use it to charge the over-discharged battery pack. If the battery pack cannot be fully charged in 24 hours, use a new battery pack.
-
Page 248: A Power Button Problem
If you receive an error message while the operating system is loading the desktop configuration after the POST is completed, check the following items: 1. Visit the Lenovo Support Web site at http://www.lenovo.com/support and search for the error message. 2. Visit the Microsoft Knowledge Base homepage at http://support.microsoft.com/ and search for the error message.
-
Page 249
Solution: If the processor overheats, the computer automatically enter sleep (standby) mode to allow the computer to cool and to protect the processor and other internal components. Check the settings for sleep (standby) mode, using Power Manager. • Problem: The computer enters sleep (standby) mode (the sleep/standby indicator turns on) immediately after Power-on self-test. -
Page 250: Drives And Other Storage Devices
For Windows XP: 1. Click Start ➙ Control panel. 2. Click Performance and Maintenance. 3. Click Power Options. 4. Click the Hibernate tab. 5. Click the Enable hibernation check box. 6. Click OK. If you want to be able to enter hibernation mode by pressing Fn+F12, you need to install ThinkPad PM driver.
-
Page 251: Ports And Connectors
2. Click Performance and Maintenance, and click System. 3. Click the Hardware tab, and click the Device Manager button. Refer to “Diagnosing problems” on page 207 and run Lenovo ThinkVantage Toolbox for a diagnostic test of the USB connector. A docking station or port replicator problem •…
-
Page 252
User Guide… -
Page 253: Copyright Lenovo
Register your computer Register your ThinkPad products with Lenovo. Go to: http://www.lenovo.com/register. This can help authorities return your computer to you if it is lost or stolen. Registering your computer also enables Lenovo to notify you about possible technical information and upgrades.
-
Page 254: Getting Help And Service
Lenovo to assist you. This section contains information about where to go for additional information about Lenovo and our products, what to do if you experience a problem with your computer, and whom to call for service should it be necessary.
-
Page 255
• Lenovo hardware repair — If the problem is determined to be caused by Lenovo hardware under warranty, trained service personnel are available to provide the applicable level of service. • Engineering change management — Occasionally, there might be changes that are required after a product has been sold. -
Page 256
Table 10. World-wide telephone list (continued) Country or Region Brunei Canada Caribbean (Bermuda, Jamaica, and Tortola) Chile China China (Hong Kong S.A.R.) China (Macau S.A.R.) Colombia Costa Rica Croatia Cyprus Czech Republic Denmark Dominican Republic Ecuador Egypt El Salvador Estonia Finland France Germany… -
Page 257
Table 10. World-wide telephone list (continued) Country or Region Honduras Hungary India Indonesia Ireland Israel Italy Japan Korea Latvia Lithuania Luxembourg Malaysia Malta Mexico Middle East Netherlands New Zealand Nicaragua Norway Telephone Number Tegucigalpa: 232-4222 San Pedro Sula: 552-2234 (Spanish) + 36 1 3825716 + 36 1 3825720 (English and Hungarian) -
Page 258
United Kingdom United States Uruguay User Guide Telephone Number 206-6047 001-866-434-2080 (Lenovo Customer Support Center- toll free) (Spanish) 0-800-50-866 (Spanish) 1800-1601-0033 (Local number only) +603 8315 6858 (DID) (English and Filipino) +48 22 760-73-00 (Polski) +351 21 892 7046 (Portuguese) -
Page 259: Purchasing Additional Services
Table 10. World-wide telephone list (continued) Country or Region Venezuela Vietnam In all other countries and regions, contact your Lenovo reseller or marketing representative, or go to the Lenovo support Web site at: http://www.lenovo.com/support Purchasing additional services During and after the warranty period, you can purchase additional services, such as support for Lenovo and non-Lenovo hardware, operating systems, and application programs;…
-
Page 260
User Guide… -
Page 261: Appendix A. Regulatory Information
Usage environment and your health Integrated wireless cards emit radio frequency electromagnetic energy like other radio devices. However, the level of energy emitted is far much less than the electromagnetic energy emitted by wireless devices like for example mobile phones. © Copyright Lenovo 2011…
-
Page 262: Location Of The Ultraconnect™ Wireless Antennas
Due to the fact that integrated wireless cards operate within the guidelines found in radio frequency safety standards and recommendations, Lenovo believes they are safe for use by consumers. These standards and recommendations reflect the consensus of the scientific community and result from deliberations of panels and committees of scientists who continually review and interpret the extensive research literature.
-
Page 263: Locating Wireless Regulatory Notices
For more information about the wireless regulatory notices, refer to the Regulatory Notice shipped with your computer. If your computer is shipped without the Regulatory Notice, you can find it on the Web site at: http://www.lenovo.com/support To view the Regulatory Notice on the Web site, do the following: 1. Go to: http://www.lenovo.com/support…
-
Page 264: Export Classification Notice
• Consult an authorized dealer or service representative for help. Lenovo is not responsible for any radio or television interference caused by using other than specified or recommended cables and connectors or by unauthorized changes or modifications to this equipment.
-
Page 265: European Union — Compliance To The Electromagnetic Compatibility Directive
Geräte der Klasse B. Dieses Gerät ist berechtigt, in Übereinstimmung mit dem Deutschen EMVG das EG-Konformitätszeichen — CE — zu führen. Verantwortlich für die Konformitätserklärung nach Paragraf 5 des EMVG ist die Lenovo (Deutschland) GmbH, Gropiusplatz 10, D-70563 Stuttgart. Informationen in Hinsicht EMVG Paragraf 4 Abs. (1) 4: Das Gerät erfüllt die Schutzanforderungen nach EN 55024 und EN 55022 Klasse B.
-
Page 266: Korea Class B Compliance Statement
For additional regulatory information, refer to the Regulatory Notice shipped with your computer. If your computer is shipped without the Regulatory Notice, you can find it at the Web site http://www.lenovo.com/support. For details, refer to the instructions on “Locating wireless regulatory notices” on page 245.
-
Page 267: Appendix B. Weee And Recycling Statements
Collecting and recycling a disused Lenovo computer or monitor If you are a company employee and need to dispose of a Lenovo computer or monitor that is the property of the company, you must do so in accordance with the Law for Promotion of Effective Utilization of Resources.
-
Page 268
If you want to replace it with a new one, contact your place of purchase or ask for a repair service provided by Lenovo. If you have replaced it by yourself and want to dispose of the disused lithium battery, insulate it with vinyl tape, contact your place of purchase, and follow their instructions. -
Page 269: Appendix C. Notices
Lenovo representative for information on the products and services currently available in your area. Any reference to a Lenovo product, program, or service is not intended to state or imply that only that Lenovo product, program, or service may be used. Any functionally equivalent product, program, or service that does not infringe any Lenovo intellectual property right may be used instead.
-
Page 270: Trademarks
Trademarks The following terms are trademarks of Lenovo in the United States, other countries, or both: Lenovo Access Connections Active Protection System Rescue and Recovery ThinkLight ThinkPad ThinkVantage TrackPoint Ultrabay Ultrabase UltraConnect UltraNav Intel and Intel SpeedStep are trademarks or registered trademarks of Intel Corporation or its subsidiaries in the United States and other countries.
-
Contents
-
Table of Contents
-
Bookmarks
Quick Links
Hardware Maintenance Manual
ThinkPad X220 and X220i
Related Manuals for Lenovo ThinkPad X220
Summary of Contents for Lenovo ThinkPad X220
-
Page 1
Hardware Maintenance Manual ThinkPad X220 and X220i… -
Page 2
Appendix A “Notices” on page 137. Third Edition (August 2011) © Copyright Lenovo 2011. LIMITED AND RESTRICTED RIGHTS NOTICE: If data or software is delivered pursuant a General Services Administration “GSA” contract, use, reproduction, or disclosure is subject to restrictions set forth in Contract No. GS-35F-05925. -
Page 3: Table Of Contents
Diagnostics using PC-Doctor for DOS..FRU ….59 Lenovo ThinkVantage Toolbox ..Before servicing ThinkPad X220 and X220i PC-Doctor for Windows .
-
Page 4
….Windows 7 Ultimate (32 bit) DVDs ..Top view (ThinkPad X220 UltraBase) ..Windows 7 Professional (64 bit) DVDs.. -
Page 5: About This Manual
® This manual contains service and reference information for the following ThinkPad products. ThinkPad X220 and X220i Machine Type 4286, 4287, 4289, 4290, 4291, 4292, and 4293 Use this manual along with the advanced diagnostic tests to troubleshoot problems. Important: This manual is intended only for trained service technicians who are familiar with ThinkPad products.
-
Page 6
Hardware Maintenance Manual… -
Page 7: Chapter 1. Safety Information
• Reinstall all covers correctly before returning the machine to the customer. • Fan louvers on the machine help to prevent overheating of internal components. Do not obstruct fan louvers or cover them with labels or stickers. © Copyright Lenovo 2011…
-
Page 8: Electrical Safety
Electrical safety Observe the following rules when working on electrical equipment. Important: Use only approved tools and test equipment. Some hand tools have handles covered with a soft material that does not insulate you when working with live electrical currents. Many customers have, near their equipment, rubber floor mats that contain small conductive fibers to decrease electrostatic discharges.
-
Page 9: Safety Inspection Guide
– Use caution; do not become a victim yourself. – Switch off power. – Send another person to get medical aid. Safety inspection guide The purpose of this inspection guide is to assist you in identifying potentially unsafe conditions. As each machine was designed and built, required safety items were installed to protect users and service technicians from injury.
-
Page 10: Grounding Requirements
2. Make sure that the ESD protective devices you use have been certified (ISO 9000) as fully effective. When handling ESD-sensitive parts: • Keep the parts in protective packages until they are inserted into the product. • Avoid contact with other people. •…
-
Page 11
DANGER DANGER DANGER DANGER DANGER Chapter 1 Safety information… -
Page 12
DANGER Hardware Maintenance Manual… -
Page 13
PERIGO PERIGO PERIGO Chapter 1 Safety information… -
Page 14
PERIGO PERIGO PERIGO PERIGO PERIGO DANGER Hardware Maintenance Manual… -
Page 15
DANGER DANGER DANGER DANGER DANGER Chapter 1 Safety information… -
Page 16
DANGER DANGER VORSICHT VORSICHT VORSICHT Hardware Maintenance Manual… -
Page 17
VORSICHT VORSICHT VORSICHT VORSICHT VORSICHT Chapter 1 Safety information… -
Page 18
Hardware Maintenance Manual… -
Page 19
Chapter 1 Safety information… -
Page 20
Hardware Maintenance Manual… -
Page 21
Chapter 1 Safety information… -
Page 22
Hardware Maintenance Manual… -
Page 23: Laser Compliance Statement (Multilingual Translations)
Laser compliance statement (multilingual translations) The laser compliance statements in this section are provided in the following languages: • English • Arabic • Brazilian Portuguese • French • German • Hebrew • Japanese • Korean • Spanish • Traditional Chinese Chapter 1 Safety information…
-
Page 24
Hardware Maintenance Manual… -
Page 25
Chapter 1 Safety information… -
Page 26
Hardware Maintenance Manual… -
Page 27
Chapter 1 Safety information… -
Page 28
Hardware Maintenance Manual… -
Page 29: Chapter 2. Important Service Information
– “FRU identification for CTO, CMV, and GAV products” on page 25 Important: • Advise customers to contact the Lenovo Customer Support Center if they need any assistance in obtaining or installing any software fixes, drivers, and UEFI BIOS downloads. Telephone numbers for Lenovo Support are available at: http://www.lenovo.com/support/phone…
-
Page 30: Strategy For Replacing A Hard Disk Drive
Dynamic Configure To Order (CTO) This provides the ability for a customer to configure a Lenovo solution from an eSite, and have this configuration sent to fulfillment, where it is built and shipped directly to the customer. The machine label, Product Entitlement Warehouse (PEW), eSupport, and the HMM will load these products as the 4-digit MT and 3-digit model, where model = “CTO”…
-
Page 31: Fru Identification For Cto, Cmv, And Gav Products
= a “fixed part number”, not “CTO” (Example: 1829-F1U). • PEW can be accessed at the following Web site: http://www.lenovo.com/support/site.wss/document.do?lndocid=LOOK-WARNTY Select Warranty lookup. Input the MT and the Serial number and the list of key commodities will be returned in the PEW record under COMPONENT INFORMATION.
-
Page 32
Using the HMM For Key Commodities (Examples — hard disk drive, system board, microprocessor, LCD, and memory) Use the HMM as a back-up to PEW and eSupport to view the complete list of FRUs at the MT Model level. Hardware Maintenance Manual… -
Page 33: Chapter 3. General Checkout
“What to do first” on page 27 • “Checkout guide” on page 28 – “Diagnostics using PC-Doctor for DOS” on page 28 – “Lenovo ThinkVantage Toolbox” on page 31 – “FRU tests” on page 31 • “Power system checkout” on page 33 ®…
-
Page 34: Checkout Guide
PC-Doctor. Note: PC-Doctor for DOS is available at the following Web site: http://support.lenovo.com To create the PC-Doctor diagnostic CD, follow the instructions on the Web site. For some possible configurations of the computer, PC-Doctor might not run correctly. To avoid this problem, you need to initialize the computer setup by use of the ThinkPad Setup program before you run PC-Doctor.
-
Page 35: Testing The Computer
Configuration utility for DOS. The utility is available on the following Web site: http://support.lenovo.com PC-Doctor cannot be used to test a device that is in the docking station, even if the computer supports the docking station.
-
Page 36
The options on the test menu are as follows: Diagnostics Interactive Tests • Run Normal Test • Keyboard • Run Quick Test • Video • CPU/Coprocessor • Internal Speaker • Systemboard • Mouse • Video Adapter • Diskette • Fixed Disks •… -
Page 37: Lenovo Thinkvantage Toolbox
While the Windows operating system is running, press the ThinkVantage button. To start this program, do the following: • Click Start ➙ Control Panel ➙ System and Security ➙ Lenovo – System Health and Diagnostics. Windows Vista and Windows XP: Click Start ➙…
-
Page 38
Table 1. FRU tests Applicable test System board 1. Diagnostics ➙ CPU/Coprocessor 2. Diagnostics ➙ Systemboard 3. If the docking station or the port replicator is attached to the ThinkPad Notebook, detach it. 4. Place the computer on a horizontal surface, and run Diagnostics ➙ ThinkPad Devices ➙… -
Page 39: Power System Checkout
Power system checkout To verify a symptom, do the following: 1. Turn off the computer. 2. Remove the battery pack. 3. Connect the ac power adapter. 4. Check that power is supplied when you turn on the computer. 5. Turn off the computer. 6.
-
Page 40: Checking The Battery Pack
Perform operational charging. If the battery status indicator or icon does not turn on, remove the battery pack and let it return to room temperature. Reinstall the battery pack. If the charge indicator or icon still does not turn on, replace the battery pack. If the charge indicator still does not turn on, replace the system board.
-
Page 41
Wire Voltage (V dc) +2.5 to +3.2 Black Ground • If the voltage is correct, replace the system board. • If the voltage is not correct, replace the backup battery. • If the backup battery discharges quickly after replacement, replace the system board. Chapter 3 General checkout… -
Page 42
Hardware Maintenance Manual… -
Page 43: Chapter 4. Related Service Information
Service Web site: When the latest maintenance diskette and the system program service diskette become available, they will be posted on http://support.lenovo.com. Restoring the factory contents by using Product Recovery discs When the hard disk drive (HDD) or solid state drive (SSD) is replaced because of a failure, no Product Recovery program is on the new drive.
-
Page 44
The recovery disc set consists of the user instructions and the following set of DVDs to restore the computer to the original factory configuration. ® Operating System Recovery Disc (one disc) This disc restores the Microsoft Windows operating system. Use this disc to start the recovery process. Applications and Drivers Recovery Disc (one or This disc restores the preinstalled applications and more discs) -
Page 45: Passwords
Attention: If the user HDP has been forgotten, check whether a master HDP has been set. If it has, it can be used for access to the hard disk drive. If no master HDP is available, neither Lenovo nor Lenovo authorized service technicians provide any services to reset either the user or the master HDP, or to recover data from the hard disk drive.
-
Page 46: How To Remove The Hard-Disk Password
Attention: If User only mode is selected and the user HDP has been forgotten and cannot be made available to the service technician, neither Lenovo nor Lenovo authorized service technicians provide any services to reset the user HDPs or to recover data from the hard disk drive. The hard disk drive can be replaced for a scheduled fee.
-
Page 47: Sleep (Standby) Mode
You can also put the computer into screen blank mode, press ThinkVantage button and use the ThinkVantage Productivity Center. Note: If the computer is a Windows 7 model, it does not support ThinkVantage Productivity Center. To end screen blank mode and resume normal operation, press any key. Sleep (Standby) mode When the computer enters sleep (standby) mode, the following events occur in addition to what occurs in screen blank mode:…
-
Page 48: Symptom-To-Fru Index
• If you have defined one of the following actions as the event that causes the system to go into hibernation mode, perform that action. – Closing the lid. – Pressing the power button. – Pressing Fn+F4 keys. Also, the computer goes into hibernation mode automatically in either of the following conditions: •…
-
Page 49: Numeric Error Codes
Numeric error codes Table 2. Numeric error codes Symptom or error FRU or action, in sequence 0175 System board. Bad CRC1, stop POST task—The EEPROM checksum is not correct. 0176 1. Run the ThinkPad Setup program, and save the System Security—The system has been tampered with. current setting by pressing F10.
-
Page 50
Table 2. Numeric error codes (continued) FRU or action, in sequence Symptom or error 0197 The remote configuration for the security chip has Invalid remote change requested. failed. Confirm the operation and try again. 0199 1. Run the ThinkPad Setup program, and then save System Security—… -
Page 51
Table 2. Numeric error codes (continued) FRU or action, in sequence Symptom or error 0270 1. Charge the backup battery for more than 8 hours Real-time clock error. by connecting the ac power adapter. 2. Replace the backup battery and run the ThinkPad Setup program to reset the time and date. -
Page 52
Table 2. Numeric error codes (continued) FRU or action, in sequence Symptom or error 1810 1. If the Access Predesktop Area has been previously Hard disk partition layout error. disabled, then go to the ThinkPad Setup program by pressing F1 to open the ThinkPad Setup program. -
Page 53: Error Messages
Error messages Table 3. Error messages Symptom or error FRU or action, in sequence Device address conflict. 1. Load “Setup Defaults” in the ThinkPad Setup program. 2. Backup battery. 3. System board. Allocation error for device. 1. Load “Setup Defaults” in the ThinkPad Setup program.
-
Page 54: Beep Symptoms
If the LCD you are servicing has two or less visible defective pixels, it should not be considered faulty. However, if the LCD has three or more visible defective pixels, it will be deemed as defective by Lenovo and it should be replaced.
-
Page 55: Intermittent Problems
• This policy applies to all ThinkPad Notebooks purchased on 1 January, 2008 or later. • Lenovo will not provide replacement if the LCD is within specification as we cannot guarantee that any replacement LCD will have zero pixel defects.
-
Page 56
i. PC Cards 4. Turn on the computer. 5. Determine whether the problem has been solved. 6. If the problem does not recur, reconnect the removed devices one at a time until you find the failing FRU. 7. If the problem remains, replace the following FRUs one at a time (do not replace a nondefective FRU): a. -
Page 57: Copyright Lenovo
Chapter 5. Status indicators This chapter presents the system status indicators that show the status of the computer. © Copyright Lenovo 2011…
-
Page 58
Table 7. Status indicators Indicator Meaning Wireless LAN status The wireless LAN feature is on, and the radio link is ready for Green: use, or the data is being transmitted. Blinking green: Data is being transmitted (for some models). Bluetooth status Green: The Bluetooth feature is on, and the radio link is ready for use, or the data is being transmitted. -
Page 59: Chapter 6. Fn Key Combinations
Fn+F7 combination is available for switching a display output location. For Windows 7: Switch a display output location • Computer display only (LCD) • Computer display and external monitor (same image) • Computer display and external monitor (extended desktop) • External monitor only © Copyright Lenovo 2011…
-
Page 60
Open the ThinkPad EasyEject Utility screen. Buttons for the following choices are displayed: • Eject ThinkPad PC from UltraBase: This button is displayed only if the ThinkPad computer has been attached to a ThinkPad X220 UltraBase. The computer can be detached from the ThinkPad X220 UltraBase. -
Page 61: Chapter 7. Fru Replacement Notices
CRU; and (2) you may be charged for the replacement CRU if Lenovo does not receive the defective part within thirty (30) days of your receipt of the replacement CRU. See your Lenovo Limited Warranty documentation for full details.
-
Page 62: Retaining Serial Numbers
If you replace the system board, you must restore the serial number of the system unit to its original value. Before replacing the system board, save the original serial number by doing the following: 1. Install the LENOVO ThinkPad Hardware Maintenance Diskette Version 1.76 or later, and restart the computer.
-
Page 63: Retaining The Uuid
When you replace the system board, you must set the UUID on the new system board as follows: 1. Install the LENOVO ThinkPad Hardware Maintenance Diskette Version 1.76 or later, and restart the computer. 2. From the main menu, select 4. Assign UUID. A new UUID is created and written. If a valid UUID already exists, it is not overwritten.
-
Page 64
Hardware Maintenance Manual… -
Page 65: Chapter 8. Removing And Replacing A Fru
CRU; and (2) you may be charged for the replacement CRU if Lenovo does not receive the defective part within thirty (30) days of your receipt of the replacement CRU. See your Lenovo Limited Warranty documentation for full details.
-
Page 66: 1010 Battery Pack
Some models of the ThinkPad X220 and X220i you are servicing might have the SIM card that the customer has been installed. If the computer you are servicing has the SIM card, remove it before you start the servicing. To remove the SIM card, you need to remove the battery pack first. (See “1010 Battery pack” on page 60.) After you finish the servicing, make sure that you insert the card back into the slot firmly.
-
Page 67: 1020 Hard Disk Drive (Hdd) And Solid State Drive (Ssd)
The only exception to this is if the battery pack is physically damaged or a customer is reporting a possible safety issue. If Lenovo ThinkVantage Toolbox is not installed in the computer, the customer should download this program before a non-physically damaged battery pack is replaced. Note that the replacement of a physically damaged battery pack is not covered by the warranty.
-
Page 68
• Never remove the drive while the system is operating or is in suspend mode. Removal steps of hard disk drive and solid state drive Note: Loosen the screw Step Screw (quantity) Color Torque Black 0.392 Nm M3 × 3 mm, wafer-head, nylon-coated (1) (4 kgfcm) Hardware Maintenance Manual… -
Page 69: 1030 Dimm
HDD and HDD rubber rails: SSD and SSD spacers: When installing: Rubber rails on the hard disk drive or spacers on the solid state drive must be attached to the replacement drive. Otherwise the drive cannot be installed properly. 1030 DIMM For access, remove this FRU: •…
-
Page 70
Removal steps of DIMM Remove the DIMM slot cover as shown in the following figure. Loosen the screws If only one DIMM is used on the computer you are servicing, the card must be installed in SLOT-0 , but not in SLOT-1 When installing: Hardware Maintenance Manual… -
Page 71: 1040 Keyboard
Insert the notched end of the DIMM into the socket. Press the DIMM firmly, and pivot it until it snaps into place. Make sure that it is firmly installed in the slot and does not move easily. 1040 Keyboard For access, remove this FRU: •…
-
Page 72
Lift the keyboard a little in the direction shown by arrow , and then detach the connector When installing: 1. Attach the keyboard connector firmly. 2. Make sure that the keyboard edge is under the frame as shown in the following figure. Then press the keys to latch the keyboard firmly in place. -
Page 73: 1050 Palm Rest Or Palm Rest With A Fingerprint Reader
3. Gently press the keys with your palms and slightly slide the keyboard toward you until it snaps into position. 4. Secure the keyboard by tightening the screws from the bottom side of the computer. 1050 Palm rest or palm rest with a fingerprint reader For access, remove these FRUs in order: •…
-
Page 74
Removal steps of palm rest Step Icon Screw (quantity) Color Torque Black 0.181 Nm M2 × 5 mm, wafer-head, nylon-coated (5) (1.85 kgfcm) Step is only for models with a fingerprint reader. For models without a fingerprint reader, skip step Hardware Maintenance Manual… -
Page 75: 1060 Pci Express Mini Card For Wireless Lan/Wimax
When installing: 1. In models with a fingerprint reader, attach the fingerprint reader connector firmly to the system board. 2. Press the left and right top edges of the palm rest to fit it into place 3. Push the front side of the palm rest until it clicks into place 4.
-
Page 76
Removal steps of PCI Express Mini Card for wireless LAN/WiMAX In step , unplug the jacks by using the removal tool antenna RF connector (P/N: 08K7159) or pick the connectors with your fingers and gently unplug them in the direction of the arrow. Note: Some models might have three antenna cables. -
Page 77: 1070 Backup Battery
• In models with a wireless LAN card that has two antenna connectors, plug the gray cable into the jack labeled MAIN or M on the card, and the black cable into the jack labeled AUX or A. If the computer you are servicing has three cables, put the white cable in the cable protection tube.
-
Page 78: 1080 Pci Express Mini Card For Wireless Wan
When installing: Make sure that the battery connector is attached firmly. 1080 PCI Express Mini Card for wireless WAN For access, remove these FRUs in order: • “1010 Battery pack” on page 60 • “1040 Keyboard” on page 65 • “1050 Palm rest or palm rest with a fingerprint reader”…
-
Page 79: 1090 Keyboard Bezel
Step Screw (quantity) Color Torque Black 0.181 Nm M2 × 3 mm, wafer-head, nylon-coated (1) (1.85 kgfcm) When installing: Plug the red cable into the jack labeled MAIN on the card, and the blue cable into the jack labeled AUX. 1090 Keyboard bezel For access, remove these FRUs in order: •…
-
Page 80
• “1040 Keyboard” on page 65 • “1050 Palm rest or palm rest with a fingerprint reader” on page 67 Removal steps of keyboard bezel Step Screw (quantity) Color Torque M2 × 5 mm, wafer-head, nylon-coated (1) Black 0.181 Nm (1.85 kgfcm) When installing: Make sure that you attach the connector firmly. -
Page 81: 1100 Lcd Assembly
In step , detach the claws. Then remove the keyboard bezel in the direction shown by arrow Attention: When you service the keyboard bezel, avoid any kind of rough handling. When installing: Make sure that all the claws are attached firmly. 1100 LCD assembly For access, remove these FRUs in order: •…
-
Page 82
Removal steps of LCD assembly Step Screw (quantity) Color Torque M2 × 5 mm, wafer-head, nylon-coated (2) Black 0.181 Nm (1.85 kgfcm) Torque Step Screw (quantity) Color M2 × 5 mm, wafer-head, nylon-coated (2) Black 0.181 Nm (1.85 kgfcm) Before step , strip off the tapes securing the antenna cables, and release the cables from the cable guides of the frame. -
Page 83
When installing: • Make sure that you attach the connectors firmly. • Make sure that you route the cables correctly and you tape up the cables in the proper positions as shown in the following figure. • When you route the cables, make sure that they are not subjected to any tension. Tension could cause the cables to be damaged by the cable guides, or a wire to be broken. -
Page 84: 1110 Base Cover Assembly And Speaker Assembly
1110 Base cover assembly and speaker assembly For access, remove these FRUs in order: • “1010 Battery pack” on page 60 • “1020 Hard disk drive (HDD) and solid state drive (SSD)” on page 61 • “1030 DIMM” on page 63 •…
-
Page 85
Step Screw (quantity) Color Torque M2 × 3mm, wafer-head, nylon-coated (1) Black 0.181 Nm (1.85 kgfcm) When installing: Route the speaker cables along the cable guides as shown in the following figure. Chapter 8 Removing and replacing a FRU… -
Page 86
Removal steps of base cover assembly Step Screw (quantity) Color Torque M2 × 3 mm, wafer-head, nylon-coated (5) Black 0.181 Nm (1.85 kgfcm) HEX nut washer&nylok #4R (2) Silver 0.392 Nm (4 kgfcm) Hardware Maintenance Manual… -
Page 87
When installing: Make sure that the wireless switch is adjusted as shown by callout Applying labels to the base cover: The new base cover FRU is shipped with a kit containing labels of several kinds. Note: If the Windows Certificate of Authentication label (COA) is attached to a part that is replaced, return the old part with the label attached to the customer, or provide a letter to the customer stating what the label was originally on the system and what the label part number, serial number, and product key were. -
Page 88: 1120 Systemboard, Dc-In Connector, Fan, And Expresscard Slot Assembly
1120 Systemboard, DC-in connector, fan, and ExpressCard slot assembly • To identify the system board originally installed in your computer, go to PEW at the following web site: http://www.lenovo.com/support/site.wss/document.do?lndocid=LOOK-WARNTY Select Warranty Lookup. Input the machine type and the serial number. Use the system board listed on PEW.
-
Page 89
Attention: Do not apply physical shock to the computer while the test is running. For access, remove these FRUs in order: • “1010 Battery pack” on page 60 • “1020 Hard disk drive (HDD) and solid state drive (SSD)” on page 61 •… -
Page 90
Torque Step Screw (quantity) Color M2 × 3.5 mm, flat-head, nylon-coated (2) Silver 0.181 Nm (1.85 kgfcm) Turn the system board over, and then remove the ExpressCard slot assembly from the system board. Turn the system board over, and then disconnect the DC-in connector and the fan connector from the system board. -
Page 91
Torque Step Screw (quantity) Color M2 × 3.5 mm, wafer-head, nylon-coated (1) Silver 0.181 Nm (1.85 kgfcm) When installing: • Make sure that the DC-in connector and the fan connector are attached to the system board firmly. • Before you attach the fan assembly to the computer, apply thermal grease, at an amount of 0.2 grams, on the part marked as in the following figure. -
Page 92: 1130 Msata Solid State Drive
cause a thermal problem due to imperfect contact with a component. You need to peel the thin film off from the rubber 1130 mSATA solid state drive For access, remove these FRUs in order: • “1010 Battery pack” on page 60 •…
-
Page 93: 2010 Lcd Front Bezel
Removal steps of mSATA solid state drive Step Screw (quantity) Color Torque Black 0.181 Nm M2 × 3 mm, flat-head, nylon-coated (1) (1.85 kgfcm) 2010 LCD front bezel For access, remove this FRU: • “1010 Battery pack” on page 60 Chapter 8 Removing and replacing a FRU…
-
Page 94: 2020 Led Board
Removal steps of LCD front bezel Step Screw Screw (quantity) Color Torque M2.5 × 4 mm, wafer-head, nylon-coated (2) Black 0.392 Nm (4 kgfcm) In step , detach the claws. Then remove the LCD front bezel. When installing: Make sure that all the claws are attached firmly. 2020 LED board For access, remove these FRUs in order: •…
-
Page 95
Removal steps of LED board Torque Step Screw (quantity) Color M2 × 3.5 mm, wafer-head, nylon-coated (1) Silver 0.181 Nm (1.85 kgfcm) When installing: Make sure that connector is attached firmly. Cabling: When replacing the inverter card or the LED board, route the connector cable as in the following figure. -
Page 96: 2030 Bluetooth Daughter Card (Bdc-2.1)
2030 Bluetooth daughter card (BDC-2.1) For access, remove these FRUs in order: • “1010 Battery pack” on page 60 • “2010 LCD front bezel” on page 87 Hardware Maintenance Manual…
-
Page 97: 2040 Integrated Camera
Removal steps of Bluetooth daughter card Step Screw (quantity) Color Torque M2 × 3 mm, wafer-head, nylon-coated (1) Silver 0.181 Nm (1.85 kgfcm) When installing: Make sure that the connector is attached firmly. 2040 Integrated camera For access, remove these FRUs in order: •…
-
Page 98: 2050 Lcd Panel And Lcd Cable
Removal steps of Integrated camera When installing: Make sure that the connector is attached firmly. 2050 LCD panel and LCD cable For access, remove these FRUs in order: • “1010 Battery pack” on page 60 • “1040 Keyboard” on page 65 •…
-
Page 99
Removal steps of LCD panel, LCD brackets, and LCD cable Step Screw (quantity) Color Torque 0.181 Nm M2 × 3.5 mm, wafer-head, nylon-coated (4) Silver (1.85 kgfcm) In step , release the antenna cables from the cable guides, and then remove the LCD panel. When installing: When attaching the LCD panel to the cover, gently press the left and right edges covered with metal. -
Page 100: 2060 Hinges
When installing: Make sure that the LCD cable connector is attached firmly. 2060 Hinges For access, remove these FRUs in order: • “1010 Battery pack” on page 60 • “1040 Keyboard” on page 65 • “1050 Palm rest or palm rest with a fingerprint reader” on page 67 •…
-
Page 101: 2070 Lcd Rear Cover And Wireless Antenna Cables
2070 LCD rear cover and wireless antenna cables For access, remove these FRUs in order: • “1010 Battery pack” on page 60 • “1040 Keyboard” on page 65 • “1050 Palm rest or palm rest with a fingerprint reader” on page 67 •…
-
Page 102
In step , release the antenna cables from the cable guides of the rear cover. Note: Wireless antennas are secured with double-faced adhesive tapes. When installing: When you attach the antenna cables, place the antenna assembly as shown in the above figure. Wireless WAN antenna, AUX (blue) Wireless LAN antenna, AUX (black) Wireless LAN antenna, 3rd (white) -
Page 103: Chapter 9. Locations
Chapter 9. Locations This chapter presents the location of ThinkPad X220 and X220i features and hardware components. © Copyright Lenovo 2011…
-
Page 104: Front View
Front view ThinkLight light Status indicators Note: For the description of each indicator, see Chapter 5 “Status indicators” on page 51. Security keyhole Hard disk drive (HDD) or solid state drive (SSD) Combo audio jack Ethernet connector Always On USB connector Media card reader slot TrackPoint pointing stick TrackPoint buttons…
-
Page 105: Rear View
Rear view Status indicators Note: For the description of each indicator, see Chapter 5 “Status indicators” on page 51. ExpressCard slot Wireless radio switch USB connector DisplayPort connector External monitor connector USB connector ac power connector Chapter 9 Locations…
-
Page 106: Bottom View
Bottom view Battery pack latch Battery pack Docking connector DIMM slot cover Built-in speakers Hardware Maintenance Manual…
-
Page 107: Top View (Thinkpad X220 Ultrabase)
Top view (ThinkPad X220 UltraBase) Docking connector ac power connector Ethernet connector DisplayPort connector External monitor connector Headphone jack Microphone jack USB connectors Security keyhole Security lock key Serial Ultrabay Slim device Bottom view (ThinkPad X220 UltraBase) UltraBase eject request button…
-
Page 108: Front View (Thinkpad Port Replicator Series 3)
Front View (ThinkPad Port Replicator Series 3) Power switch Eject button Sliding adjuster Docking connector Rear View (ThinkPad Port Replicator Series 3) Power jack Ethernet connector USB connectors External monitor connector Security keyhole Hardware Maintenance Manual…
-
Page 109: Front View (Thinkpad Mini Dock Series 3)
Front View (ThinkPad Mini Dock Series 3) Power switch Key lock indicator Docking indicator Eject button Sliding adjuster Docking connector System lock key Chapter 9 Locations…
-
Page 110: Rear View (Thinkpad Mini Dock Series 3)
Rear View (ThinkPad Mini Dock Series 3) Power jack DisplayPort connector Digital visual interface connector Headphone jack Microphone jack Ethernet connector USB connectors External monitor connector Security keyhole Hardware Maintenance Manual…
-
Page 111: Front View (Thinkpad Mini Dock Plus Series 3)
Front View (ThinkPad Mini Dock Plus Series 3) Key lock indicator Power switch Docking indicator Eject button Sliding adjuster Microphone jack Headphone jack Docking connector System lock key Chapter 9 Locations…
-
Page 112: Rear View (Thinkpad Mini Dock Plus Series 3)
Rear View (ThinkPad Mini Dock Plus Series 3) DisplayPort connector Digital visual interface connector DisplayPort connector Digital visual interface connector Ethernet connector USB connectors Power jack Security keyhole External monitor connector eSATA Hardware Maintenance Manual…
-
Page 113: Chapter 10. Parts List
(1) return instructions, a prepaid shipping label, and a container will be included with the replacement CRU; and (2) you may be charged for the replacement CRU if Lenovo does not receive the defective part within thirty (30) days of your receipt of the replacement CRU. See your Lenovo Limited Warranty documentation for full details.
-
Page 114: Overall
Overall Table 9. Parts list—Overall No. FRU FRU no. LCD unit (see “LCD FRUs” on page 122.) Keyboard bezel assembly 04W1405 N Hardware Maintenance Manual…
-
Page 115
Table 9. Parts list—Overall (continued) No. FRU FRU no. Backup battery 04W3253 02K7078 ® System board with Intel Core™ i5-2520M processor, NV, AMT, TPM, AES 04W3286 N • 4286-CTO, 23x, 27x, 2Qx, 37x • 4287-CTO, 22x, 2Ex, 2Fx, 2Hx, 2Jx, 2Sx, 34x, 38x, 3Cx, 3Kx, 3Lx •… -
Page 116
Table 9. Parts list—Overall (continued) No. FRU FRU no. 04W3292 N System board with Intel Core i5-2540M processor, NV, AMT, non-TPM, non-AES • 4286-CTO • 4287-CTO • 4289-CTO • 4290-CTO • 4291-CTO 04W3293 N System board with Intel Core i5-2540M processor, NV, non-AMT, non-TPM, non-AES •… -
Page 117
Table 9. Parts list—Overall (continued) No. FRU FRU no. 04W3298 N System board with Intel Core i5-2537M processor, ULV, AMT, TPM, AES • 4286-CTO • 4287-CTO • 4289-CTO • 4290-CTO • 4291-CTO 04W3299 N System board with Intel Core i5-2537M processor, ULV, non-AMT, TPM, AES •… -
Page 118
Table 9. Parts list—Overall (continued) No. FRU FRU no. 04W3304 N System board with Intel Core i5-2410M processor, NV, TPM, non-AES • 4286-CTO, 26x, 2Bx, 2Lx, 2Sx, 35x, 38x • 4287-CTO, 26x, 2Gx, 2Kx, 2Nx, 2Px, 2Rx, 2Vx, 35x, 3Jx •… -
Page 119
Table 9. Parts list—Overall (continued) No. FRU FRU no. 04W3386 N System board with Intel Core i7-2640M processor, NV, AMT, TPM • 4286-CTO, 3Nx • 4287-CTO, 3Xx, 47x • 4289-CTO • 4290-CTO, 4Qx, 4Rx • 4291-CTO, 4Ax, 4Bx, 4Cx 04W3387 N System board with Intel Core i7-2640M processor, NV, non-AMT, TPM •… -
Page 120
Table 9. Parts list—Overall (continued) No. FRU FRU no. 04W3392 N System board with Intel Core i5-2430M processor, NV, TPM • 4286-CTO, 3Cx, 3Dx, 3Lx, 3Px • 4287-CTO, 3Vx, 43x, 45x, 46x, 4Bx • 4289-CTO • 4290-CTO • 4291-CTO 04W3393 N System board with Intel Core i5-2430M processor, NV, non-TPM •… -
Page 121
Table 9. Parts list—Overall (continued) No. FRU FRU no. ® 04W3308 N System board with Intel Pentium Dual Core 957 processor, ULV, TPM, non-AES • 4286-CTO, 2Mx, 2Nx • 4287-CTO • 4289-CTO • 4290-CTO • 4291-CTO 04W3309 N System board with Intel Pentium Dual Core 957 processor, ULV, non-TPM, non-AES •… -
Page 122
Table 9. Parts list—Overall (continued) No. FRU FRU no. 60Y3257 Integrated Mobile Broadband (Gobi 3000 3G with GPS) • 4286-CTO • 4287-CTO, 3Kx • 4289-CTO • 4290-CTO, 4Fx • 4291-CTO 60Y3283 Integrated Mobile Broadband (Gobi 3000 3G with GPS, Malaysia) •… -
Page 123
Table 9. Parts list—Overall (continued) No. FRU FRU no. 60Y3247 ThinkPad b/g/n Wireless (1×1 BGN) 60Y3249 • 4286-CTO, 2Cx, 2Dx, 2Ex, 2Fx, 2Gx, 2Hx, 2Jx, 2Kx, 2Mx, 2Nx, 2Zx, 32x, 3Ex, 3Fx, 3Gx, 3Hx, 3Jx, 3Kx, 3Lx • 4287-CTO, 27x, 28x, 2Bx, 2Cx, 2Dx, 2Xx, 2Yx, 2Zx, 32x, 33x, 36x, 3Fx, 3Jx, 3Vx, 44x, 45x, 46x •… -
Page 124
Table 9. Parts list—Overall (continued) No. FRU FRU no. 60Y3209 Intel Centrino Advanced-N + WiMAX 6250, Russian SKU • 4286-CTO • 4287-CTO • 4289-CTO • 4290-CTO • 4291-CTO 04W1680 N DC-in cable assembly Battery pack, 4 cell, 2.0Ah 42T4899 42T4901 •… -
Page 125
Table 9. Parts list—Overall (continued) No. FRU FRU no. Battery pack, 9 cell, 2.8Ah, 47++ 42T4940 42T4941 • 4286-CTO, 25x, 36x 42T4942 • 4287-CTO, 3Kx, 3Rx • 4289-CTO • 4290-CTO, 27x, 2Bx, 2Rx, 2Ux, 2Vx, 2Wx, 2Yx, 32x, 35x, 36x, 39x, 45x, 48x, 49x, 4Ax, 4Bx, 4Fx •… -
Page 126
Table 9. Parts list—Overall (continued) No. FRU FRU no. 42T1159 SATA hard disk drive, 320 GB, 7,200 rpm 42T1171 • 4286-CTO, 23x, 26x, 27x, 28x, 29x, 2Ax, 2Jx, 2Kx, 2Lx, 2Px, 2Qx, 2Rx, 2Sx, 2Tx, 2Ux, 33x, 36x, 37x, 38x, 39x, 3Ax, 3Bx, 3Cx, 3Dx, 3Kx, 3Lx, 3Mx, 3Rx •… -
Page 127
• 4290-CTO, 2Bx, 2Wx, 2Yx, 38x, 39x, 3Ax, 3Bx, 4Ax, 4Bx • 4291-CTO, 2Bx, 2Mx, 2Rx, 2Wx, 36x, 4Cx ThinkPad X220 UltraBase 04W1420 * 04W1890 * ThinkPad X220 UltraBase (TW) DIMM door kit 04W1416 ** Base cover assembly 04W2184 N… -
Page 128: Lcd Frus
91P9642 — AC adapter (see “AC adapters” on page 127.) LCD FRUs In ThinkPad X220 and X220i, there are following types of LCDs. • “12.5-in. HD LED backlight LCD” on page 123 • “12.5-in. HD LED backlight premium LCD” on page 124…
-
Page 129: 12.5-In. Hd Led Backlight Lcd
12.5-in. HD LED backlight LCD Table 10. Parts list—12.5-in. HD LED backlight LCD No. FRU FRU no. LCD bezel assembly 04W2186 N Wireless LAN/WAN antenna kit 04W1409 N Hinge L/R 04W1407 N 04W2185 N LCD rear cover assembly LED-backlight LCD cable assembly 04W1408 N Chapter 10 Parts list…
-
Page 130: 12.5-In. Hd Led Backlight Premium Lcd
Table 10. Parts list—12.5-in. HD LED backlight LCD (continued) No. FRU FRU no. 04W1679 N LCD cable assembly Integrated camera 04W1364 N • 4286-CTO, 23x, 26x, 27x, 28x, 29x, 2Ax, 2Bx, 2Fx, 2Hx, 2Jx, 2Kx, 2Lx, 2Mx, 2Nx, 2Qx, 2Sx, 2Tx, 2Ux, 2Zx, 32x, 34x, 35x, 36x, 39x, 3Ax, 3Bx, 3Cx, 3Dx, 3Ex, 3Fx, 3Gx, 3Jx, 3Kx, 3Lx, 3Nx, 3Px, 3Qx, 3Rx •…
-
Page 131: Keyboard
Table 11. Parts list—12.5-in. HD LED backlight premium LCD (continued) No. FRU FRU no. 04W1679 N LCD cable assembly Integrated camera 04W1364 N • 4286-CTO, 23x, 26x, 27x, 28x, 29x, 2Ax, 2Bx, 2Fx, 2Hx, 2Jx, 2Kx, 2Lx, 2Mx, 2Nx, 2Qx, 2Sx, 2Tx, 2Ux, 2Zx, 32x, 34x, 35x, 36x, 39x, 3Ax, 3Bx, 3Cx, 3Dx, 3Ex, 3Fx, 3Gx, 3Jx, 3Kx, 3Lx, 3Nx, 3Px, 3Qx, 3Rx •…
-
Page 132: Miscellaneous Parts
Table 12. Parts list—Keyboard (continued) Language CRU ID Hungarian 45N2226 45N2086 45N2156 Icelandic 45N2227 45N2087 45N2157 India 63Y0223 63Y0219 63Y0221 45N2225 45N2085 45N2155 Israel (Hebrew) Italian 45N2228 45N2088 45N2158 Japanese 45N2242 45N2102 45N2172 Kazakhstan 45N2229 45N2089 45N2159 Korean 45N2243 45N2103 45N2173 45N2214 45N2074…
-
Page 133: Ac Adapters
Table 13. Parts list—Miscellaneous parts (continued) • Screw cap circle, (2) Base cover miscellaneous parts kit 04W1417 • Battery Latch left • Battery Latch right • Battery Latch spring • Battery knob, (2) • Front rubber foot, (2) • Rear rubber foot, (2) •…
-
Page 134: Recovery Discs
Table 16. Parts list—3-pin power cords FRU no. Country or region Australia, New Zealand 42T5050 42T5135 • models -CTO, xxM 42T5056 42T5141 Bangladesh, Sri Lanka, South Africa • models -CTO, xxG 42T5004 42T5089 Canada, U.S. • models -CTO, xxG, xxT 42T5065 42T5150 China (P.R.C.) (other than Hong Kong S.A.R.)
-
Page 135: Windows Xp Professional Generic Dvds
Windows XP Professional Generic DVDs Windows XP Professional Generic is preinstalled as the operating system in the following models: • 4286-CTO • 4287-CTO • 4289-CTO • 4290-CTO • 4291-CTO Table 18. Parts list—Windows XP Professional Generic recovery DVDs Language Brazilian Portuguese 03W7476 Czech 03W7479…
-
Page 136: Windows Vista Business (32 Bit) Dvds
Table 19. Parts list—Windows XP Tablet recovery DVDs Language English 04T1051 Japanese 04T1050 Windows Vista Business (32 bit) DVDs Windows Vista Business (32 bit) is preinstalled as the operating system in the following models: • 4286-CTO • 4287-CTO • 4289-CTO •…
-
Page 137: Windows 7 Ultimate (32 Bit) Dvds
Table 22. Parts list—Windows 7 Professional (32 bit) recovery DVDs Language English 04T2218 Japanese 04T2216 Simplified Chinese 04T2213 French 04T2214 04T2215 German Spanish 04T2217 04T2219 English, Danish, Finnish, Swedish, and Norwegian English, Dutch, French, German, and Italian 04T2220 Windows 7 Ultimate (32 bit) DVDs Windows 7 Ultimate (32 bit) is preinstalled as the operating system in the following models: •…
-
Page 138: Windows 7 Ultimate (64 Bit) Dvds
Table 24. Parts list—Windows 7 Professional (64 bit) recovery DVDs Language Arabic 04T2222 Brazilian Portuguese 04T2223 Czech 04T2226 04T2246 English, Danish, Finnish, Swedish, and Norwegian English, Dutch, French, German, and Italian 04T2247 04T2248 English, Slovenian, and Croatian French 04T2228 German 04T2230 04T2229 Greek…
-
Page 139: Windows 7 Home Basic (32 Bit) Dvds
Table 25. Parts list—Windows 7 Ultimate (64 bit) recovery DVDs Language English 04T2249 Windows 7 Home Basic (32 bit) DVDs Windows 7 Home Basic (32 bit) is preinstalled as the operating system in the following models: • 4286-CTO, 2Cx, 2Dx, 2Ex, 2Fx, 2Gx, 2Hx, 2Jx, 2Kx, 2Lx, 2Mx, 2Nx, 2Zx, 32x, 3Ex, 3Fx, 3Gx, 3Hx, 3Jx, 3Kx, 3Lx •…
-
Page 140: Windows 7 Home Premium (64 Bit) Dvds
Table 27. Parts list—Windows Home Premium (32 bit) recovery DVDs Language English 04T2263 English (for India) 04T2262 Simplified Chinese 04T2261 Windows 7 Home Premium (64 bit) DVDs Windows 7 Home Premium (64 bit) is preinstalled as the operating system in the following models: •…
-
Page 141: Common Service Tools
USB floppy diskette drive for maintenance diskette 05K9283 27L3452 USB floppy diskette drive tool kit Test card for integrated Smart Card 42W7820 — Lenovo ThinkPad Hardware Maintenance Diskette Version 1.76 or later Note: Download the file from the following Web site: http://support.lenovo.com Chapter 10 Parts list…
-
Page 142
Hardware Maintenance Manual… -
Page 143: Appendix A. Notices
Lenovo representative for information on the products and services currently available in your area. Any reference to a Lenovo product, program, or service is not intended to state or imply that only that Lenovo product, program, or service may be used. Any functionally equivalent product, program, or service that does not infringe any Lenovo intellectual property right may be used instead.
-
Page 144: Electronic Emission Notices
Electronic emission notices For electronic emission information on Class B digital devices, refer to the corresponding information in the User Guide. Trademarks The following terms are trademarks of Lenovo in the United States, other countries or both: Active Protection System Lenovo ThinkLight…
-
Page 146
Part Number: 0A60739_02 (1P) P/N: 0A60739_02 *0A60739_02*…
![]()
Руководство пользователя
ThinkPad X220, X220i, X220 Tablet и X220i Tablet
Примечания: Перед тем, как воспользоваться этой информацией и самим продуктом, обязательно прочтите следующее:
•Руководство по технике безопасности и гарантии
•Regulatory Notice
•“Важная информация по технике безопасности” на странице vi
•Приложение C “Замечания” на странице 271
На веб-сайт загружена новейшая версия Руководства по технике безопасности и гарантии и
Regulatory Notice. Чтобы просмотреть их, перейдите на страницу http://www.lenovo.com/support и щелкните User Guides & Manuals (Руководства пользователя).
Первое издание (Апрель 2011)
© Copyright Lenovo 2011.
Изделия, данные, компьютерное программное обеспечение и услуги LENOVO были созданы исключительно за частный счет и предлагаются государственным организациям на коммерческой основе согласно положению 48 Свода федеральных нормативных актов США 2.101 с ограничением прав использования, копирования и разглашения.
ОГОВОРКА ОБ ОГРАНИЧЕНИИ ПРАВ. В случае если изделия, данные, компьютерное программное обеспечение или услуги предоставляются в соответствии с контрактом Управления служб общего назначения США (GSA), на их использование, копирование и разглашение распространяются ограничения, установленные контрактом № GS-35F-05925.

Содержание
|
Прочтите вначале . . . . . . . . . . |
. |
v |
|
Важная информация по технике безопасности . |
. |
vi |
|
Состояния, требующие немедленных |
||
|
действий . . . . . . . . . . . . . . . |
vii |
|
|
Техника безопасности . . . . . . . . . |
viii |
|
Глава 1. Обзор продукта . . . . . . |
. |
1 |
|
Расположение элементов управления, |
||
|
разъемов и индикаторов компьютера. . . . . |
. |
1 |
|
Вид сверху . . . . . . . . . . . . . . |
. |
1 |
|
Вид справа . . . . . . . . . . . . . . |
. |
9 |
|
Вид слева . . . . . . . . . . . . . . |
13 |
|
|
Вид снизу . . . . . . . . . . . . . . |
16 |
|
|
Вид снизу . . . . . . . . . . . . . . |
19 |
|
|
Индикаторы состояния . . . . . . . . . |
20 |
|
|
Расположение наклеек с важной информацией |
||
|
о продукте . . . . . . . . . . . . . . . . |
25 |
|
|
Наклейки с информацией о типе и модели |
||
|
компьютера. . . . . . . . . . . . . . |
25 |
|
|
Наклейка с идентификатором FCC ID и |
||
|
номером IC Certification . . . . . . . . . |
26 |
|
|
Наклейка сертификата подлинности . . . |
28 |
|
|
Компоненты . . . . . . . . . . . . . . . |
29 |
|
|
Компоненты ThinkPad X220 and X220i . . . |
29 |
|
|
Компоненты ThinkPad X220 Tablet и X220i |
||
|
Tablet . . . . . . . . . . . . . . . . |
31 |
|
|
Спецификации . . . . . . . . . . . . . . |
32 |
|
|
Спецификации ThinkPad X220 and X220i . . |
32 |
|
|
Спецификации ThinkPad X220 Tablet и X220i |
||
|
Tablet . . . . . . . . . . . . . . . . |
33 |
|
|
Условия эксплуатации . . . . . . . . . . . |
34 |
|
|
Технологии и программное обеспечение |
||
|
ThinkVantage . . . . . . . . . . . . . . . |
34 |
|
|
Доступ к приложениям в Windows 7 . . . |
35 |
|
|
Access Connections . . . . . . . . . . |
37 |
|
|
Active Protection System. . . . . . . . . |
37 |
|
|
Client Security Solution . . . . . . . . . |
37 |
|
|
Fingerprint Software. . . . . . . . . . . |
38 |
|
|
Lenovo ThinkVantage Tools . . . . . . . . |
38 |
|
|
Lenovo ThinkVantage Toolbox . . . . . . . |
38 |
|
|
Message Center Plus . . . . . . . . . . |
39 |
|
|
Password Manager . . . . . . . . . . . |
39 |
|
|
Power Manager . . . . . . . . . . . . |
39 |
|
|
Product Recovery . . . . . . . . . . . |
39 |
|
|
Presentation Director . . . . . . . . . . |
39 |
|
|
Rescue and Recovery . . . . . . . . . . |
40 |
|
|
System Update . . . . . . . . . . . . |
40 |
|
|
ThinkVantage GPS . . . . . . . . . . . |
40 |
Lenovo SimpleTap . . . . . . . . . . . 41 Lenovo ThinkVantage Tablet Shortcut Menu . 41
|
Глава 2. Работа на компьютере . . |
43 |
|
Регистрация компьютера . . . . . . . . . . |
43 |
|
Часто задаваемые вопросы . . . . . . . . . |
43 |
|
Режим планшета . . . . . . . . . . . . . |
45 |
|
Как использовать режим планшета . . . . |
45 |
|
Использование цифрового пера . . . . . |
48 |
|
Использование сенсорной панели . . . . |
49 |
|
Как использовать кнопки планшета. . . . |
50 |
|
Как использовать меню ярлыков |
|
|
планшета . . . . . . . . . . . . . . . |
51 |
|
Специальные клавиши и кнопки . . . . . . . |
51 |
|
Кнопка ThinkVantage . . . . . . . . . . |
51 |
|
Числовая клавиатура . . . . . . . . . . |
52 |
|
Комбинации функциональных клавиш. . . |
53 |
|
Кнопки регулирования громкости и |
|
|
отключения звука . . . . . . . . . . . |
57 |
|
Клавиша Windows и клавиша приложения . |
59 |
|
Использование манипулятора UltraNav . . . . |
59 |
|
Использование манипулятора TrackPoint. . |
60 |
|
Использование сенсорной панели . . . . |
62 |
|
Работа устройства UltraNav и внешней |
|
|
мыши . . . . . . . . . . . . . . . . |
63 |
|
Добавление значка UltraNav на панель |
|
|
задач . . . . . . . . . . . . . . . . |
63 |
|
Управление питанием . . . . . . . . . . . |
64 |
|
Проверка состояния аккумулятора . . . . |
64 |
|
Использование адаптера питания . . . . |
64 |
|
Зарядка аккумулятора . . . . . . . . . |
65 |
|
Обеспечение максимальной |
|
|
продолжительности срока службы |
|
|
аккумулятора . . . . . . . . . . . . . |
65 |
|
Управление зарядом аккумулятора . . . |
66 |
|
Режимы энергосбережения . . . . . . . |
66 |
|
Эксплуатация аккумулятора . . . . . . . |
68 |
|
Подключение к сети . . . . . . . . . . . . |
69 |
|
Соединения Ethernet . . . . . . . . . . |
69 |
|
Беспроводные соединения . . . . . . . |
69 |
|
Использование проектора или внешнего |
|
|
дисплея . . . . . . . . . . . . . . . . . |
78 |
|
Изменение настроек дисплея . . . . . . |
78 |
|
Подключение проектора или внешнего |
|
|
дисплея . . . . . . . . . . . . . . . |
79 |
|
Настройка презентации. . . . . . . . . |
83 |
|
Использование двойных дисплеев . . . . |
84 |
|
Использование звуковых функций . . . . . . |
86 |
|
© Copyright Lenovo 2011 |
i |
|
Использование встроенной камеры . . . . . |
87 |
|
Использование функции ThinkLight . . . . . . |
88 |
|
Использование устройства считывания |
|
|
мультимедийных карт . . . . . . . . . . . |
88 |
|
Установка карты ExpressCard, flash media |
|
|
card или смарт-карты. . . . . . . . . . |
89 |
|
Извлечение карты ExpressCard, flash media |
|
|
card или смарт-карты. . . . . . . . . . |
90 |
|
Глава 3. Вы и ваш компьютер . . . |
91 |
|
Специальные возможности и удобство |
|
|
работы . . . . . . . . . . . . . . . . . |
91 |
|
Эргономичность работы . . . . . . . . |
91 |
|
Настройка компьютера для своих |
|
|
потребностей . . . . . . . . . . . . . |
92 |
|
Информация о специальных |
|
|
возможностях. . . . . . . . . . . . . |
93 |
|
Функция полноэкранного увеличителя . . |
94 |
|
Использование компьютера в поездке . . . . |
94 |
|
Советы в поездку . . . . . . . . . . . |
94 |
|
Дорожные аксессуары . . . . . . . . . |
95 |
|
Глава 4. Безопасность . . . . . . . |
97 |
|
Установка механического замка . . . . . . . |
97 |
|
Использование паролей . . . . . . . . . . |
97 |
|
Пароли и режим сна (ожидания) . . . . . |
98 |
|
Ввод паролей . . . . . . . . . . . . . |
98 |
|
Пароль при включении . . . . . . . . . |
98 |
|
Пароли на доступ к жесткому диску . . . |
99 |
|
Пароль администратора . . . . . . . . |
101 |
|
Защита жесткого диска . . . . . . . . . . |
103 |
|
Установка микросхемы защиты . . . . . . . |
105 |
|
Использование устройства распознавания |
|
|
отпечатков пальцев . . . . . . . . . . . . |
106 |
|
Использование устройства распознавания |
|
|
отпечатков пальцев в ThinkPad X220 и |
|
|
X220i . . . . . . . . . . . . . . . . |
106 |
|
Использование устройства распознавания |
|
|
отпечатков пальцев в ThinkPad X220 Tablet |
|
|
и X220i Tablet . . . . . . . . . . . . . |
110 |
|
Замечания относительно удаления данных с |
|
|
жесткого или твердотельного диска . . . . . |
115 |
|
Принципы работы и использование |
|
|
брандмауэров . . . . . . . . . . . . . . |
116 |
|
Защита данных от вирусов . . . . . . . . . |
116 |
Глава 5. Восстановление:
обзор . . . . . . . . . . . . . . . . 117
Создание и использование носителей восстановления . . . . . . . . . . . . . . 117
Создание носителей восстановления . . . 118
Использование носителей восстановления . . . . . . . . . . . . 118
Резервное копирование и восстановление . . 119
Резервное копирование . . . . . . . . 119
Восстановление . . . . . . . . . . . . 120
Рабочее пространство Rescue and Recovery . . 120
Создание и использование резервных носителей . . . . . . . . . . . . . . . . 122
Создание резервных носителей . . . . . 122
Использование резервных носителей . . . 122
Повторная установка предустановленных приложений драйверов устройств . . . . . . 123
Решение проблем, связанных с восстановлением . . . . . . . . . . . . . 124
Глава 6. Замена устройств . . . . 125
|
Защита от статического электричества . . . . |
125 |
|
Замена аккумулятора . . . . . . . . . . . |
126 |
|
Замена клавиатуры . . . . . . . . . . . . |
128 |
|
Замена подставки для рук . . . . . . . . . |
132 |
|
Замена жесткого диска . . . . . . . . . . |
135 |
|
Замена твердотельного диска . . . . . . . . |
138 |
|
Установка и замена карты PCI Express Mini Card |
|
|
для подключения к беспроводной локальной |
|
|
сети LAN/WiMAX . . . . . . . . . . . . . |
141 |
|
Установка и замена карты PCI Express Mini Card |
|
|
для подключения к беспроводной глобальной |
|
|
сети WAN . . . . . . . . . . . . . . . . |
149 |
|
Установка и замена твердотельного диска |
|
|
mSATA. . . . . . . . . . . . . . . . . . |
152 |
|
Замена памяти . . . . . . . . . . . . . . |
155 |
|
Замена SIM-карты . . . . . . . . . . . . . |
159 |
Глава 7. Расширение возможностей компьютера . . . . 161
Подбор дополнительных аксессуаров
ThinkPad . . . . . . . . . . . . . . . . . 161
ThinkPad Ultrabase Series 3 . . . . . . . . . 161
Док-станция ThinkPad Ultrabase Series 3
(вид сверху). . . . . . . . . . . . . . 162
Док-станция ThinkPad Ultrabase Series 3
(вид снизу) . . . . . . . . . . . . . . 163
Присоединение док-станции ThinkPad
Ultrabase Series 3 . . . . . . . . . . . 163
Отсоединение док-станции ThinkPad
Ultrabase Series 3 . . . . . . . . . . . 165
Средства защиты . . . . . . . . . . . 167
ThinkPad Battery 19+ . . . . . . . . . . . . 167
Вид сверху . . . . . . . . . . . . . . 168
Вид снизу . . . . . . . . . . . . . . 168
Подключение аккумулятора ThinkPad
Battery 19+ . . . . . . . . . . . . . . 168
Отсоединение аккумулятора ThinkPad
Battery 19+ . . . . . . . . . . . . . . 169
Зарядка аккумулятора ThinkPad Battery
19+ . . . . . . . . . . . . . . . . . 170
ii Руководство пользователя

ThinkPad Port Replicator Series 3, ThinkPad Mini Dock Series 3 и ThinkPad Mini Dock Plus Series
3 . . . . . . . . . . . . . . . . . . . . 171
Вид сверху . . . . . . . . . . . . . . 172
Вид снизу . . . . . . . . . . . . . . 175
Присоединение ThinkPad Port Replicator Series 3, ThinkPad Mini Dock Series 3 и
ThinkPad Mini Dock Plus Series 3 . . . . . 178
Отсоединение ThinkPad Port Replicator Series 3, ThinkPad Mini Dock Series 3 и
ThinkPad Mini Dock Plus Series 3 . . . . . 180
Средства защиты . . . . . . . . . . . 182
Использование ключа блокировки системы . . . . . . . . . . . . . . . 184
Глава 8. Расширенные настройки. . . . . . . . . . . . . . 185
|
Установка новой операционной системы . . . |
185 |
|
Перед началом работы . . . . . . . . . |
185 |
|
Установка Windows 7. . . . . . . . . . |
186 |
|
Установка Windows Vista . . . . . . . . |
187 |
|
Установка Windows XP . . . . . . . . . |
189 |
|
Установка драйверов устройств . . . . . . . |
191 |
|
Установка драйвера для считывателя карт |
|
|
4-в-1. . . . . . . . . . . . . . . . . |
191 |
|
Установка драйвера USB 3.0 . . . . . . |
191 |
|
Установка файла настроек монитора |
|
|
ThinkPad для Windows 2000/XP/Vista/7 . . |
192 |
|
Установка программы Intel Chipset Support |
|
|
для Windows 2000/XP/Vista/7 . . . . . . |
194 |
|
Установка драйверов и программного |
|
|
обеспечения . . . . . . . . . . . . . |
194 |
|
ThinkPad Setup . . . . . . . . . . . . . . |
194 |
|
Меню Config . . . . . . . . . . . . . |
195 |
|
Меню Date/Time . . . . . . . . . . . . |
196 |
|
Меню Security . . . . . . . . . . . . . |
196 |
|
Меню Startup . . . . . . . . . . . . . |
197 |
|
Меню Restart . . . . . . . . . . . . . |
199 |
|
Элементы ThinkPad Setup . . . . . . . . |
199 |
|
Обновление UEFI BIOS . . . . . . . . . |
215 |
|
Использование средств управления |
|
|
системой . . . . . . . . . . . . . . . . |
215 |
|
Средства системного управления . . . . |
215 |
|
Настройка средств управления |
|
|
компьютером . . . . . . . . . . . . . |
217 |
Глава 9. Предотвращение неполадок . . . . . . . . . . . . . 219
Общие советы по предотвращению проблем . . 219
Поддержание драйверов устройств в актуальном состоянии . . . . . . . . . . . 220
Загрузка последних версий драйверов с веб-сайта . . . . . . . . . . . . . . 220
|
Обновление драйверов с использованием |
|
|
программы System Update . . . . . . . |
220 |
|
Уход за компьютером . . . . . . . . . . . |
221 |
|
Чистка крышки компьютера . . . . . . . |
224 |
|
Глава 10. Устранение неполадок |
|
|
компьютера . . . . . . . . . . . . |
225 |
|
Диагностика неполадок . . . . . . . . . . |
225 |
|
Использование Lenovo ThinkVantage |
|
|
Toolbox. . . . . . . . . . . . . . . . |
225 |
|
Устранение неполадок . . . . . . . . . . . |
225 |
|
Компьютер перестал отвечать на |
|
|
команды . . . . . . . . . . . . . . . |
226 |
|
Попадание жидкости на клавиатуру . . . |
226 |
|
Сообщения об ошибках. . . . . . . . . |
227 |
|
Ошибки, при которых сообщения не |
|
|
выводятся . . . . . . . . . . . . . . |
230 |
|
Звуковые сигналы, сообщающие об |
|
|
ошибках . . . . . . . . . . . . . . . |
231 |
|
Неполадки памяти . . . . . . . . . . . |
231 |
|
Модем и сеть . . . . . . . . . . . . . |
231 |
|
Клавиатура и прочие указывающие |
|
|
устройства . . . . . . . . . . . . . . |
237 |
|
Устройства отображения и |
|
|
мультимедиа . . . . . . . . . . . . . |
238 |
|
Неполадки устройства распознавания |
|
|
отпечатков пальцев . . . . . . . . . . |
248 |
|
Аккумулятор и сеть питания . . . . . . . |
249 |
|
Накопители и прочие устройства хранения |
|
|
данных. . . . . . . . . . . . . . . . |
253 |
|
Неполадки программ . . . . . . . . . . |
253 |
|
Порты и соединители. . . . . . . . . . |
254 |
|
Неполадки USB . . . . . . . . . . . . |
254 |
|
Проблема с док-станцией или |
|
|
репликатором портов . . . . . . . . . |
254 |
|
Глава 11. Оказание технической |
|
|
поддержки . . . . . . . . . . . . . |
255 |
|
Перед тем как связаться с Lenovo . . . . . . |
255 |
|
Регистрация компьютера . . . . . . . . |
255 |
|
Загрузка системных обновлений . . . . . |
255 |
|
Информация, необходимая для получения |
|
|
технической поддержки . . . . . . . . |
255 |
|
Получение консультаций и услуг . . . . . . . |
256 |
|
Использование программ диагностики . . |
256 |
|
Сайт технической поддержки Lenovo . . . |
256 |
|
Как обратиться в центр поддержки |
|
|
клиентов Lenovo . . . . . . . . . . . . |
257 |
|
Как приобрести дополнительные услуги . . . |
261 |
|
Приложение A. Нормативные |
|
|
сведения . . . . . . . . . . . . . . |
263 |
|
Информация о беспроводной связи . . . . . |
263 |
|
© Copyright Lenovo 2011 |
iii |
|
Расположение антенн беспроводной связи |
|
|
UltraConnect™ . . . . . . . . . . . . |
264 |
|
Поиск нормативных уведомлений для |
|
|
устройств беспроводной связи . . . . . |
266 |
|
Замечания по классификации для экспорта . . |
266 |
|
Замечания по электромагнитному |
|
|
излучению . . . . . . . . . . . . . . . . |
266 |
|
Информация о соответствии стандартам |
|
|
Федеральной комиссии связи США. . . . |
266 |
|
Заявление о соответствии промышленным |
|
|
стандартам Канады по электромагнитному |
|
|
излучению для оборудования класса B . . |
267 |
|
Заявление о соответствии требованиям |
|
|
Директивы по электромагнитной |
|
|
совместимости (Electromagnetic |
|
|
Compatibility Directive) Европейского |
|
|
Союза . . . . . . . . . . . . . . . . |
267 |
|
Заявление о соответствии |
|
|
энергопотребления классу B для |
|
|
Германии. . . . . . . . . . . . . . . |
267 |
|
Заявление о соответствии классу B для |
|
|
Кореи . . . . . . . . . . . . . . . . |
268 |
Заявление о соответствии классу B
по стандарту VCCI (Добровольного контрольного совета по помехам) для Японии. . . . . . . . . . . . . . . . 268
Заявление о соответствии для продуктов, подключаемых к линиям электропередач с номинальным током не более 20 А на одну фазу для Японии . . . . . . . . . . . 268
Информация об обслуживании продуктов
Lenovo для Тайваня . . . . . . . . . . 268
Сведения о печатных источниках дополнительной нормативной информации . . 268
Приложение B. WEEE и заявление
об утилизации . . . . . . . . . . . 269
Заявления WEEE ЕС . . . . . . . . . . . . 269
Заявление об утилизации для Японии. . . . . 269
Приложение C. Замечания . . . . 271
Товарные знаки . . . . . . . . . . . . . . 272
iv Руководство пользователя

Прочтите вначале
Следуя приведенным ниже важным советам, вы получите максимум пользы и удовольствия от работы на компьютере. Несоблюдение этих рекомендаций может стать причиной дискомфорта, травмы или привести к отказу компьютера.
Когда компьютер включен или заряжается аккумулятор, основание компьютера, подставка для рук и некоторые другие части компьютера могут нагреваться. Температура этих частей зависит от интенсивности работы компьютера и уровня зарядки аккумулятора.
Длительный контакт компьютера с телом, даже через одежду, может вызвать неприятные ощущения или даже ожоги.
•Не допускайте, чтобы части компьютера, которые нагреваются во время работы, длительное время контактировали с руками, коленями или другой частью тела.
•Время от времени делайте перерывы в работе на клавиатуре (убирайте руки с подставки для рук).
Будьте осторожны: в процессе работы адаптер питания нагревается.
Если адаптер питания подключен к розетке и к компьютеру, он нагревается.
Длительный контакт адаптера с телом, даже через одежду, может привести к ожогам.
•Держите жидкости подальше от компьютера, чтобы не пролить их на компьютер и избежать удара электрическим током.
•Никогда не используйте адаптер для согревания тела.
Берегите компьютер от влаги.
•Держите жидкости подальше от компьютера, чтобы не пролить их на компьютер и избежать удара электрическим током.
Старайтесь не повредить кабели.
Не применяйте силу при работе с кабелями — их можно повредить или порвать.
•Прокладывайте кабели адаптера питания, мыши, клавиатуры, принтера и других электронных устройств, а также коммуникационные кабели так, чтобы не было возможности о них споткнуться, зацепить или повредить их каким-либо другим способом: это может нарушить работу компьютера.
|
© Copyright Lenovo 2011 |
v |

При переноске компьютера защищайте компьютер и данные.
Прежде чем переносить компьютер, оснащенный жестким диском, выполните одно из следующих действий и убедитесь, что индикатор питания погас или мигает:
•Выключите компьютер.
•Нажмите клавиши Fn+F4, чтобы перевести компьютер в режим сна (ожидания).
•Нажмите Fn+F12, чтобы перевести компьютер в спящий режим.
Это позволит не допустить повреждения компьютера и возможной потери данных.
Обращайтесь с компьютером бережно.
•Не роняйте, не ударяйте, не царапайте, не перегибайте и не трясите компьютер, не ставьте на него, а также на дисплей и внешние устройства тяжёлые предметы.
Носите компьютер осторожно.
•Переносите компьютер в качественной сумке, обеспечивающей должную амортизацию и защиту.
•Не кладите компьютер в плотно набитый чемодан или сумку.
•Прежде чем поместить компьютер в сумку для переноски, убедитесь, что он находится в режиме ожидания (Fn+F4), в спящем режиме (Fn+F12) или выключен. Не помещайте в сумку включенный компьютер.
Важная информация по технике безопасности
Примечание: Перед началом работы ознакомьтесь с важной информацией по технике безопасности.
Эта информация поможет вам безопасно пользоваться вашим ноутбуком. Сохраните всю документацию, поставляемую с вашим компьютером. Информация, содержащаяся в данной публикации, не меняет условий вашего договора о приобретении компьютера или ограниченной гарантии Lenovo®. Дополнительную информацию см. в разделе “Информация о гарантии” документа
Руководство по технике безопасности и гарантии, прилагаемого к вашему компьютеру.
Безопасности клиентов придается большое значение. Мы разрабатываем нашу продукцию с прицелом на безопасность и эффективность. Однако персональные компьютеры являются электронными устройствами. Электрические шнуры, адаптеры питания и другие детали несут потенциальную угрозу безопасности и могут стать причиной телесного повреждения или материального ущерба, особенно в случае неправильного обращения. Чтобы свести эту угрозу к минимуму, строго следуйте инструкциям, сопровождающим устройство, обращайте внимание на предупреждения, написанные на табличках и содержащиеся в рабочих инструкциях, и внимательно ознакомьтесь с содержанием данного документа. Тщательное соблюдение предписаний и рекомендаций, содержащихся в данном и других документах, поставляемых вместе с компьютером, поможет вам защитить себя от возможных рисков и создать безопасную рабочую среду.
vi Руководство пользователя
Примечание: В данной публикации содержатся ссылки на адаптеры и источники питания. Помимо ноутбуков внешние адаптеры питания используется и в других устройствах (например, в колонках и мониторах). Если у вас имеется такое устройство, данная информация относится и к нему.
Кроме того, в компьютерах есть встроенная батарейка размером с небольшую монету, которая предназначена для поддержания питания системных часов в выключенном компьютере, так что информация по технике безопасности работы с батарейками относится ко всем компьютерам.
Состояния, требующие немедленных действий
Продукт может получить повреждение в результате неправильного обращения или халатности. При этом повреждение может оказаться таким серьезным, что продуктом нельзя будет пользоваться, пока его не осмотрит (а при необходимости и не отремонтирует) уполномоченный представитель по обслуживанию.
Как и в случае любого электронного прибора, внимательно следите за продуктом в момент включения. Очень редко, но бывает, что при включении в сеть из прибора вырывается клуб дыма, сыплются искры или исходит запах. Или раздаётся щелчок, потрескивание или шипение. Эти признаки означают, что какой-то электронный компонент вышел из строя —
перегорел, что само по себе для пользователя не представляет никакой опасности. Однако они могут означать и потенциально опасное состояние устройства. Не рискуйте и не пытайтесь самостоятельно определить причину этих явлений. Обратитесь в Центр поддержки заказчиков за дополнительными указаниями. Список телефонов отделов обслуживания и поддержки смотрите на веб-сайте
http://www.lenovo.com/support/phone
Регулярно осматривайте свой компьютер и все его компоненты с целью выявления повреждений, износа или признаков потенциальной опасности. В случае сомнений по поводу состояния какого-либо из компонентов прекратите пользоваться продуктом. Обратитесь в Центр поддержки заказчиков или к изготовителю продукта и узнайте, как проверить продукт и где при необходимости можно его отремонтировать.
Если вы обнаружите один из описанных ниже признаков неисправностей (это маловероятно), или если вам кажется, что работать с устройством небезопасно, то выключите устройство и отсоедините источники питания и коммуникационные линии; не пользуйтесь устройством, пока вы не обратитесь в Центр поддержки заказчиков для получения дальнейших указаний.
•Шнуры питания, электрические вилки, адаптеры питания, удлинители, разрядники и источники питания с трещинами, вмятинами, выбоинами и другими следами повреждения или разрушения.
•Признаки перегрева, дым, искры или пламя.
•Повреждения аккумулятора (трещины, выбоины, вмятины), протечка или отложение посторонних веществ на его поверхности.
•Щелчки, потрескивание или шипение, раздающиеся из продукта, или исходящий из него запах.
•Признаки того, что внутрь компьютера попала жидкость, или на него, на электрический шнур или на адаптер питания упал тяжёлый предмет.
•На компьютер, электрический шнур или адаптер питания попала вода.
•Продукт уронили или повредили каким-то другим образом.
•Продукт не работает надлежащим образом, хотя вы точно следуете инструкциям по эксплуатации.
Примечание: Заметив признаки неполадки у продукта, изготовленного не Lenovo или не для Lenovo (например, у удлинителя), не пользуйтесь им до тех пор, пока не свяжетесь с производителем и не получите соответствующие рекомендации или не найдете подходящую замену.
|
© Copyright Lenovo 2011 |
vii |

Техника безопасности
Во избежание телесного повреждения или материального ущерба всегда соблюдайте следующие меры предосторожности.
Дополнительную информацию см. в разделе “Важная информация о технике безопасности” документа Руководство по технике безопасности и гарантии, прилагаемого к вашему компьютеру.
Обслуживание и модернизация
Не пытайтесь самостоятельно выполнять обслуживание продукта кроме случаев, когда это рекомендовано Центром поддержки заказчиков или документацией к продукту. Обращайтесь только в сервис-центры, которые уполномочены выполнять ремонт именно таких изделий, к которым относится принадлежащий вам продукт.
Примечание: Некоторые детали компьютера подлежат замене силами пользователя. Обновленные компоненты обычно называются дополнительными аппаратными средствами. На английском запасные части, устанавливаемые пользователем, называются Customer Replaceable Units, или CRU. Если пользователи могут сами установить дополнительные аппаратные средства или заменить CRU, Lenovo предоставляет соответствующие инструкции по замене этих компонентов. При установке или замене компонентов нужно строго следовать этим инструкциям. Если индикатор питания находится в состоянии “Выключено”, это еще не означает, что внутри устройства нет напряжения. Прежде чем снимать крышки с устройства, оснащенного шнуром питания, убедитесь в том, что устройство выключено, а шнур питания выдернут из розетки. Дополнительную информацию о CRU см. в разделе Глава 6 “Замена устройств” на странице 125 инструкции к этому продукту. Если у вас возникли затруднения или есть вопросы, обращайтесь в Центр поддержки клиентов.
Хотя после отсоединения шнура питания в компьютере нет движущихся частей, приведенные ниже предупреждения необходимы для обеспечения вашей безопасности.
 ОПАСНО
Опасные движущиеся части. Не касайтесь их пальцами или другими частями тела.
ОСТОРОЖНО:
Перед заменой CRU выключите компьютер и дайте ему остыть (3—5 минут), прежде чем открывать корпус.
viii Руководство пользователя
![]()
Шнуры и адаптеры питания
 ОПАСНО
Пользуйтесь только теми шнурами и адаптерами питания, которые поставляются изготовителем продукта.
Шнуры питания должны быть одобрены для использования. В Германии следует использовать шнуры H05VV-F, 3G, 0,75 мм2 или более высокого качества. В других странах нужно использовать аналогичные типы шнуров.
Не оборачивайте шнур вокруг адаптера питания или какого-либо другого предмета. Возникающие при этом напряжения могут привести к тому, что изоляция потрескается, расслоится или лопнет. А это представляет угрозу безопасности.
Укладывайте шнуры питания так, чтобы о них нельзя было споткнуться и чтобы они не оказались защемлёнными какими-либо предметами.
Не допускайте попадания жидкостей на шнуры и адаптеры питания. В частности, не оставляйте их возле раковин, ванн, унитазов или на полу, который убирают с использованием жидких моющих средств. Попадание жидкости может вызвать короткое замыкание, особенно если шнур или адаптер питания изношен или поврежден в результате неаккуратного обращения. Жидкости также могут вызывать коррозию контактов шнура и (или) адаптера питания, что в свою очередь будет приводить к их перегреву.
Подключайте шнуры питания и сигнальные кабели в правильной последовательности. Следите за тем, чтобы соединительные колодки шнуров питания надёжно и плотно входили в предназначенные для них гнёзда.
Не пользуйтесь адаптерами питания со следами коррозии на штырьках вилки или признаками перегрева (например, деформированная пластмасса) на вилке или на пластмассовом корпусе.
Не пользуйтесь шнурами питания со следами коррозии или перегрева на входных или выходных контактах или с признаками повреждения.
Удлинители и родственные устройства
Проследите за тем, чтобы удлинители, разрядники, источники бесперебойного питания и другие электрические приборы, которыми вы собираетесь пользоваться, по своим характеристикам соответствовали электрическим требованиям продукта. Не допускайте перегрузки этих устройств. В случае использования сетевого фильтра подключённая к нему суммарная нагрузка не должна превышать его номинальной мощности. Если у вас возникнут вопросы относительно нагрузок, потребления электроэнергии и других электрических параметров, проконсультируйтесь с электриком.
|
© Copyright Lenovo 2011 |
ix |

Электрические вилки и розетки
 ОПАСНО
Если розетка, которой вы собираетесь воспользоваться для подключения своего компьютера и периферийных устройств, повреждена или носит следы коррозии, не пользуйтесь ею. Пригласите электрика, чтобы он заменил неисправную розетку.
Не гните и не переделывайте вилку. Если вилка повреждена, свяжитесь с производителем и потребуйте заменить её.
Не подключайте к розеткам, к которым подключен компьютер, мощные бытовые или промышленные приборы: скачки напряжения могут повредить компьютер, данные в компьютере или устройства, подключенные к компьютеру.
Некоторые устройства снабжены трёхштырьковой вилкой. Такая вилка втыкается только в розетку с контактом заземления. Это элемент безопасности. Не отказывайтесь от этого элемента безопасности, втыкая вилку с заземлением в розетку без заземления. Если вы не можете воткнуть вилку в розетку, подберите подходящий переходник или попросите электрика заменить розетку на другую с контактом заземления. Не подключайте к розетке
большую нагрузку, чем та, на которую розетка рассчитана. Суммарная нагрузка системы не должна превышать 80% номинальной мощности электрической цепи. Проконсультируйтесь с электриком относительно допустимой нагрузки для вашей электрической цепи.
Убедитесь, что подводка к вашей розетке выполнена правильно, розетка находится не далеко от места установки компьютера и легко доступна. Во избежание повреждения шнур во включённом состоянии не должен быть натянут.
Убедитесь, что к розетке подведено правильное напряжение и что она может обеспечить ток, потребляемый устанавливаемым устройством.
Вставляйте вилку в розетку и вытаскивайте вилку из розетки с осторожностью.
Инструкция по работе с блоками питания
 ОПАСНО
Ни при каких обстоятельствах не снимайте крышку с блока питания или любого другого узла, который снабжен следующей этикеткой:
Внутри данного устройства присутствует опасное напряжение, течет сильный ток и выделяется значительная энергия. Внутри этих узлов нет деталей, подлежащих
обслуживанию. Если вы полагаете, что с какой-то из этих деталей возникла проблема, обратитесь к специалисту.
x Руководство пользователя

Внешние устройства
ОСТОРОЖНО:
Не подсоединяйте и не отсоединяйте кабели внешних устройств (за исключением кабелей USB и 1394), если компьютер включен: вы можете повредить компьютер. Если вы отсоединяете внешнее устройство, то выключите компьютер и подождите по крайней мере пять секунд; в ином случае вы можете повредить внешнее устройство.
Аккумуляторы
 ОПАСНО
Персональные компьютеры Lenovo оснащены батарейкой размером с монету, которая обеспечивает бесперебойное питание системных часов. Кроме того, многие переносные устройства (например, ноутбуки), оснащены аккумулятором, который поддерживает работоспособность компьютера, когда он выключен из электрической сети. Аккумуляторы, поставляемые Lenovo для использования в компьютере, проверены на совместимость, и заменять их следует только на такие же или другие источники питания, одобренные Lenovo.
Ни в коем случае не пытайтесь вскрывать аккумулятор или обслуживать его. Не разбивайте и не протыкайте корпус аккумулятора, не бросайте его в огонь, не замыкайте накоротко его контакты. Не допускайте контакта аккумулятора с водой и другими жидкостями. Зарядку аккумулятора следует производить строго в соответствии с прилагаемой к нему инструкцией.
В результате неправильного использования аккумулятор может перегреться, и из него или из батарейки могут “вырваться” газы или пламя. Если ваш аккумулятор поврежден, или вы заметили выброс из него каких-то веществ или отложения посторонних материалов на контактах, то немедленно прекратите пользоваться им и потребуйте у производителя заменить этот аккумулятор.
Аккумулятор, долгое время остающийся без использования, может утратить свои свойства. У некоторых аккумуляторов (особенно литий-ионных) долгое бездействие в разряженном состоянии увеличивает риск короткого замыкания, сокращает срок службы и делает их потенциально опасными. Не давайте литий-ионным аккумуляторам разряжаться полностью и не храните их в разряженном состоянии.
|
© Copyright Lenovo 2011 |
xi |

Замечания для аккумулятора
 ОПАСНО
Не пытайтесь разобрать или модернизировать аккумулятор. Это может привести к взрыву или к утечке жидкости из аккумулятора. Действие гарантии не распространяется на аккумуляторы, не входящие в список, составленный Lenovo, а также на разобранные или модифицированные аккумуляторы.
При неправильной замене аккумулятора существует опасность взрыва. Аккумулятор содержит небольшие количества опасных веществ. Чтобы избежать травмы, соблюдайте следующие правила техники безопасности:
•Заменяйте аккумулятор только на аккумуляторы, рекомендованные Lenovo.
•Храните аккумулятор вдали от огня.
•Не допускайте, чтобы аккумулятор попал в воду или под дождь.
•Не пытайтесь разбирать его.
•Не замыкайте его контакты.
•Держите аккумулятор в недоступном для детей месте.
•Не выбрасывайте аккумулятор.
Не выбрасывайте аккумулятор в мусорный ящик, предназначенный для отправки на свалку. При утилизации аккумулятора соблюдайте местные законы и постановления.
Аккумулятор нужно хранить при комнатной температуре заряженным на 30 — 50%. Для предотвращения критической разрядки аккумулятора мы рекомендуем заряжать его не реже одного раза в год.
xii Руководство пользователя

Замечание о литиевой батарейке
 ОПАСНО
При неправильной замене батарейки существует опасность взрыва.
При замене литиевой батарейки используйте только батарейку того же типа, который рекомендован изготовителем (или эквивалентный). Внутри батарейки содержится литий, поэтому при неправильном использовании, обращении или утилизации батарейка может взорваться.
Запрещается:
•Бросать или погружать батарейку в воду
•Нагревать батарейку выше 100°C.
•Ремонтировать или разбирать батарейку
При утилизации батареек соблюдайте правила, установленные в вашей стране.
Нижеследующее заявление относится к пользователям в штате Калифорния (США).
Информация по перхлоратам для Калифорнии:
Продукты, укомплектованные литиевыми батарейками CR (двуокись марганца), могут содержать перхлораты.
Содержит перхлораты — возможно, требуется особое обращение. См. http://www.dtsc.ca.gov/hazardouswaste/perchlorate
|
© Copyright Lenovo 2011 |
xiii |

Эмиссия тепла и вентиляция
 ОПАСНО
При работе компьютера, адаптеров питания и многих других устройств выделяется тепло; тепло выделяется и при зарядке аккумулятора. Ноутбуки могут выделять значительное количество тепла в силу своего небольшого размера. Во избежание перегрева соблюдайте следующие меры предосторожности:
•Когда компьютер включен или заряжается аккумулятор, основание компьютера, подставка для рук и некоторые другие части компьютера могут нагреваться. Не допускайте, чтобы части компьютера, которые нагреваются во время работы, длительное время соприкасались с руками, коленями или другими частями тела. Если вы работаете с клавиатурой, не держите долго руки на подставке для рук. При нормальной работе компьютера выделяется тепло. Количество тепла зависит от интенсивности работы компьютера и уровня зарядки аккумулятора. Длительный контакт компьютера с телом, даже через одежду, может вызвать неприятные ощущения или даже ожоги. Время от
времени делайте паузу при работе на клавиатуре (убирайте руки с подставки для рук) и не используйте клавиатуру в течение длительного времени.
•Не пользуйтесь компьютером и заряжайте аккумулятор возле горючих материалов и во взрывоопасных условиях.
•Для предотвращения перегрева, повышения безопасности, надёжности и комфорта при эксплуатации компьютера последний снабжается вентиляционными отверстиями и оснащается вентиляторами и/или теплоотводами. Положив ноутбук на кровать, диван, ковёр и т.п., вы можете нечаянно перекрыть какой-то из каналов отвода тепла. Следите за тем, чтобы вентиляция компьютера всегда функционировала исправно.
•Если адаптер питания подключен к розетке и к компьютеру, он нагревается. Не допускайте, чтобы во время работы адаптер касался вашего тела. Никогда не используйте адаптер для того, чтобы согреться. Длительный контакт адаптера с телом, даже через одежду, может привести к ожогам.
Для вашей безопасности всегда соблюдайте основные правила техники безопасности:
•Корпус включенного компьютера всегда должен быть закрыт.
•Периодически проверяйте, не скопилась ли пыль на наружных частях компьютера.
•Удаляйте пыль из вентиляционных отверстий и прорезей в лицевой панели. Если компьютер работает в запыленном помещении или в местах с интенсивным движениям, то чистить его нужно чаще.
•Не перекрывайте и не блокируйте вентиляционные отверстия.
•Не работайте на компьютере, размещенном в нише, и не храните его там: это повышает вероятность перегрева.
•Температура воздуха внутри компьютера не должна превышать 35°C.
xiv Руководство пользователя

Информация о технике безопасности при работе с электроприборами
 ОПАСНО
Существует опасность поражения электрическим током от силовых кабелей, телефонных и других линий связи.
Во избежание поражения током:
•Не работайте на компьютере во время грозы.
•Не присоединяйте и не отсоединяйте провода и кабели, а также не производите установку, обслуживание или переконфигурирование данного продукта во время грозы.
•Включайте шнуры питания в розетки с правильной подводкой и заземлением.
•Оборудование, подсоединяемое к данному продукту, включайте в розетки с правильной подводкой.
•По мере возможности, при отсоединении или присоединении сигнальных кабелей старайтесь действовать одной рукой.
•Не включайте оборудование, если оно имеет повреждения, следы возгорания или следы попавшей внутрь воды.
•Перед тем как открывать крышки устройства, отсоединяйте шнуры питания, аккумуляторы и все кабели (если только в инструкциях по установке и конфигурированию не указано иное).
•Запрещается использовать компьютер, не установив и не закрепив крышки всех внутренних компонентов. Запрещается использовать компьютер с незащищенными внутренними компонентами и цепями.
 ОПАСНО
Устанавливая или перемещая продукт либо подсоединенные к нему устройства, а также открывая их крышки, отсоединяйте и присоединяйте кабели так, как описано ниже.
|
При подсоединении: |
При отсоединении: |
||
|
1. |
ВЫКЛЮЧИТЕ все. |
1. |
ВЫКЛЮЧИТЕ все. |
|
2. |
Присоедините все кабели к устройствам. |
2. |
Отсоедините шнуры питания от розеток. |
|
3. |
Присоедините сигнальные кабели к разъемам. |
3. |
Отсоедините сигнальные кабели от разъемов. |
|
4. |
Включите шнуры питания в розетки. |
4. |
Отсоедините все кабели от устройств. |
|
5. |
Включите устройства. |
Вначале отсоедините от розетки шнур питания и только после этого подсоединяйте к компьютеру все остальные кабели.
Подсоединять к розетке шнур питания можно только после того, как все остальные кабели подсоединены к компьютеру.
Замечание о жидкокристаллическом дисплее (ЖКД)
ОСТОРОЖНО:
ЖК-дисплей сделан из стекла; при неосторожном обращении с ним или падении компьютера он может разбиться. Если он разбился и содержащаяся в нем жидкость попала вам в глаза или на руки, немедленно промойте пораженные органы и участки кожи водой (промывать в течение не менее 15 минут); если беспокоящие симптомы сохранятся и после промывания, обратитесь к врачу.
|
© Copyright Lenovo 2011 |
xv |

Головные телефоны и наушники
Если компьютер оснащен и разъемом для наушников, и разъемом линейного аудиовыхода, то всегда подключайте гарнитуру или наушники к разъему для наушников.
ОСТОРОЖНО:
Избыточное звуковое давление от гарнитуры или наушников может привести к потере слуха. Если эквалайзер настроен на максимальную громкость, то на наушники подается повышенное напряжение, поэтому уровень звукового давления также повышается.
Долговременное использование головных телефонов или наушников с высоким уровнем громкости может быть опасно, если выходные параметры телефонов или наушников не соответствуют спецификациям EN 50332-2. Выходной разъем наушников в вашем компьютере соответствует спецификации EN 50332-2, подпункт 7. В соответствии с этой спецификацией максимальное истинное среднеквадратичное значение напряжения широкополосного выхода компьютера равно 150 мВ. Во избежание ухудшения слуха убедитесь, что головные телефоны или наушники также соответствуют спецификации EN 50332-2 (ограничения подпункта 7), согласно которой широкополосное характеристическое напряжение составляет 75 мВ. Использование головных
телефонов, не соответствующих EN 50332-2, может быть опасным из-за слишком высокого уровня звукового давления.
Если в комплект поставки компьютера Lenovo включены головные телефоны или наушники, то комбинация телефоны (наушники) — компьютер соответствует спецификациям EN 50332-1. Если вы используете другие головные телефоны или наушники, то убедитесь, что они соответствуют спецификации EN 50332-1 (Clause 6.5 Limitation Values — пункт 6.5, посвященный значениям ограничений). Использование головных телефонов, не соответствующих EN 50332-1, может быть опасным из-за слишком высокого уровня звукового давления.
Дополнительная информация по технике безопасности
 ОПАСНО
Пластиковые пакеты могут быть опасными. Держите их подальше от детей, чтобы избежать возможности удушения.
Замечания для пользователей планшетных компьютеров
Замечание по безопасности для пользователей в Австралии:
 ОПАСНО
Не подключайте телефонную линию при работе в режиме планшета.
Замечание для пользователей в США
Персональные компьютеры и связанные с ними устройства оснащаются шнурами и кабелями, такими как шнуры питания и соединительные кабели. Если данный продукт оснащен таким шнуром или кабелем, обратите внимание на следующее предупреждение:
ОСТОРОЖНО!
Прикасаясь к шнуру питания данного устройства или к шнурам связанного с ним вспомогательного оборудования, вы можете подвергнуться воздействию свинца, который в штате Калифорния признан канцерогенным веществом, способным вызывать врожденные пороки развития или другие нарушения детородной функции. Мойте руки после прикосновения к шнурам и кабелям.
Сохраните эти инструкции.
xvi Руководство пользователя

Глава 1. Обзор продукта
В этой главе описаны: расположение разъемов и наклеек с важной информацией о продукте, компоненты компьютера, спецификации, рабочие условия и предварительно установленные программы.
Глава состоит из перечисленных ниже разделов.
•“Расположение элементов управления, разъемов, устройств и индикаторов компьютера” на странице 1
•“Расположение наклеек с важной информацией о продукте” на странице 25
•“Спецификации” на странице 32
•“Условия эксплуатации” на странице 34
•“Технологии и программное обеспечение ThinkVantage” на странице 34
Расположение элементов управления, разъемов и индикаторов компьютера
В данном разделе представлен обзор аппаратных средств компьютера, а также базовые сведения, необходимые для начала использования его функций.
•Передняя сторона
•Правая сторона
•Левая сторона
•Задняя панель
•Нижняя сторона
•Индикаторы состояния
Вид сверху
В этом разделе описывается вид компьютера спереди.
|
© Copyright Lenovo 2011 |
1 |

ThinkPad X220 и X220i (вид спереди)
Рис. 1. ThinkPad X220 и X220i (вид спереди)
|
1 Антенна беспроводной глобальной сети WAN |
|
(вспомогательная) и антенна для беспроводной |
|
локальной сети LAN/WiMAX (вспомогательная) |
|
3 |
ThinkLight |
|
5 |
Дисплей компьютера |
|
7 |
Кнопка питания |
|
9 Разъем для карты PCI Express Mini Card для |
|
беспроводной глобальной сети WAN или для |
|
твердотельного жесткого диска mSATA (SSD) |
|
11 |
Кнопки TrackPoint |
|
13 |
Манипулятор TrackPoint |
|
15 |
Индикатор CapsLock |
|
17 |
Кнопки регулирования громкости |
|
4 Антенна для беспроводной локальной сети LAN |
|
(третья), беспроводной локальной сети LAN/WiMAX |
|
(основная) и беспроводной глобальной сети WAN |
|
(основная) |
|
6 |
Индикаторы системы и состояния питания |
|
8 Разъем для карты PCI Express Mini Card для |
|
беспроводной сети LAN/WiMAX |
|
10 |
Устройство распознавания отпечатков пальцев |
|
12 |
Touch pad (сенсорная панель) |
|
14 |
Клавиша Fn |
|
16 |
Кнопка ThinkVantage |
|
18 |
Встроенные микрофоны |
2 Руководство пользователя
![]()
|
1 Антенна беспроводной глобальной сети WAN (вспомогательная) и антенна для беспроводной |
|
локальной сети LAN/WiMAX (вспомогательная) |
|
4 Антенна для беспроводной локальной сети LAN (третья), беспроводной локальной сети |
|
LAN/WiMAX (основная) и беспроводной глобальной сети WAN (основная) |
Встроенные антенны для беспроводной связи расположены в верхней левой и верхней правой частях дисплея компьютера.
Подробную информацию о расположении каждой антенны см. раздел “Расположение беспроводных антенн UltraConnect” на странице 264.
Некоторые модели оснащены встроенной камерой. При помощи этой камеры можно делать фотографии и вести видеоконференции.
Дополнительную информацию об использовании камеры см. в разделе “Использование встроенной камеры” на странице 87.
Вы можете использовать свой компьютер в условиях недостаточного освещения.
Чтобы подсветить клавиатуру, включите функцию ThinkLight®, нажав клавиши Fn+PgUp. Для выключения повторно нажмите Fn+PgUp.
Дисплей высокого разрешения на тонкопленочных транзисторах (TFT) обеспечивает четкость и яркость текста и графических изображений.
Дополнительную информацию см. в разделе “Изменение настроек дисплея” на странице 78.
|
6 |
Индикаторы системы и состояния питания |
Ваш компьютер оснащен индикаторами состояния системы и питания. Дополнительные сведения о расположении и назначении каждого индикатора см. в разделе “Индикаторы состояния ThinkPad X220 и X220i” на странице 20.
Кнопка питания используется для включения компьютера. Для выключения компьютера выполняйте процедуру завершения работы в меню Пуск.
Если вам не удается выключить компьютер таким образом, держите кнопку включения питания нажатой в течение 2 секунд.
Если компьютер не реагирует на ваши действия и вы не можете выключить его, нажмите кнопку включения питания и удерживайте ее в течение 4 секунд или больше. Если компьютер не перезагружается, отключите адаптер электропитания и извлеките аккумулятор.
Кроме того, с помощью программы Power Manager кнопку питания можно запрограммировать на выключение компьютера или на вход в спящий режим или режим гибернации.
|
8 |
Разъем для карты PCI Express Mini Card для беспроводной сети LAN/WiMAX |
В вашем компьютере может быть карта PCI Express Mini Card, установленная в разъеме для карты PCI Express Mini Card, которая обеспечивает соединение с беспроводной локальной сетью LAN/WiMAX.
Глава 1. Обзор продукта 3

|
9 Разъем для карты PCI Express Mini Card для беспроводной глобальной сети WAN или для |
|
твердотельного жесткого диска mSATA (SSD) |
В вашем компьютере может быть карта PCI Express Mini Card, установленная в разъеме для карты PCI Express Mini Card, которая обеспечивает соединение с беспроводной глобальной сетью WAN.
Lenovo использует свои новейшие технологии, предлагая оптимальные конструкции компьютеров, и оснащает некоторые модели твердотельным диском mSATA, на котором хранятся данные. Ноутбуки, в которых использована эта современная технология, легче обычных, меньше по размеру и работают быстрее.
|
10 |
Устройство распознавания отпечатков пальцев |
Некоторые модели оснащены устройством распознавания отпечатков пальцев. Технология распознавания отпечатков пальцев позволяет вам с помощью отпечатков пальцев запускать компьютер и входить в систему ThinkPad Setup.
Подробную информацию см. в разделе “Использование устройства распознавания отпечатков пальцев” на странице 106.
|
11 |
Кнопки TrackPoint |
|
12 |
Touch pad (сенсорная панель) |
|
13 |
Манипулятор TrackPoint |
На клавиатуре установлено уникальное манипуляторное устройство TrackPoint®. Не снимая рук с клавиатуры, вы можете одним движением наводить указатель, выделять и перетаскивать элементы.
Для перемещения указателя по экрану проведите кончиком пальца по сенсорной панели UltraNav®.
Манипулятор TrackPoint и его кнопки выполняют функции, аналогичные функциям мыши и кнопкам на ней.
Клавиша Fn позволяет воспользоваться такими функциями ThinkPad®, как, например, включение подсветки ThinkLight. Чтобы воспользоваться функциями ThinkPad, нажмите клавишу Fn и соответствующую функциональную клавишу (функция выделена синим цветом).
Индикатор CapsLock расположен на клавише CapsLock.
Дополнительную информацию об индикаторе CapsLock см. “Индикаторы состояния ThinkPad X220 и X220i” на странице 20.
16Кнопка ThinkVantage
Спомощью кнопки ThinkVantage® можно прервать последовательность загрузки компьютера и запустить рабочее пространство Rescue and Recovery®, которое работает независимо от операционной системы Windows® и скрыто от нее.
Примечание: В моделях компьютера с операционной системой Windows 7 Lenovo ThinkVantage Toolbox не отображается.
4 Руководство пользователя

|
17 |
Кнопки регулирования громкости |
Встроенные кнопки регулирования громкости позволяют быстро отрегулировать громкость или отключить звук на компьютере.
Дополнительную информацию см. в разделе “Кнопки регулирования громкости и отключения звука” на странице 57.
Встроенные микрофоны улавливают звук и голос, если они используются с прикладной программой для обработки звукового потока.
ThinkPad X220 Tablet и X220i Tablet (вид спереди)
Рис. 2. Вид сверху
|
1 Антенна беспроводной глобальной сети WAN |
|
(вспомогательная) и антенна для беспроводной |
|
локальной сети LAN/WiMAX (вспомогательная) |
|
3 |
Встроенные микрофоны |
|
5 |
Дисплей компьютера |
|
7 |
Кнопка питания |
|
9 Разъем для карты PCI Express Mini Card для |
|
беспроводной сети LAN/WiMAX |
|
4 Антенна для беспроводной локальной сети LAN (третья), |
|
LAN/WiMAX (основная) и глобальной сети (основная) |
|
6 |
Устройство распознавания отпечатков пальцев |
|
8 |
Кнопка ThinkVantage |
|
10 Разъем для карты PCI Express Mini Card для |
|
беспроводной глобальной сети WAN или для |
|
твердотельного жесткого диска mSATA (SSD) |
Глава 1. Обзор продукта 5

|
11 |
Манипулятор TrackPoint |
|
13 |
Touch pad (Сенсорная панель) |
|
15 |
Клавиша Fn |
|
17 |
Индикаторы системы и состояния питания |
|
14 |
Индикатор CapsLock |
|
16 |
Кнопки регулирования громкости |
|
18 |
Кнопки планшета |
19Встроенные стереоколонки
1Антенна беспроводной глобальной сети WAN (вспомогательная) и антенна для беспроводной локальной сети LAN/WiMAX (вспомогательная)
|
4 Антенна для беспроводной локальной сети LAN (третья), LAN/WiMAX (основная) и глобальной |
|
сети (основная) |
Встроенные антенны для беспроводной связи расположены в верхней левой и верхней правой частях дисплея компьютера.
Подробную информацию о расположении каждой антенны см. раздел “Расположение беспроводных антенн UltraConnect” на странице 264.
Некоторые модели оснащены встроенной камерой. При помощи этой камеры можно делать фотографии и вести видеоконференции.
Дополнительную информацию об использовании камеры см. в разделе “Использование встроенной камеры” на странице 87.
Встроенные микрофоны улавливают звук и голос, если они используются с прикладной программой для обработки звукового потока.
Дисплей высокого разрешения на тонкопленочных транзисторах (TFT) обеспечивает четкость и яркость текста и графических изображений.
Дополнительную информацию см. в разделе “Изменение настроек дисплея” на странице 78.
|
6 |
Устройство распознавания отпечатков пальцев |
Некоторые модели оснащены устройством распознавания отпечатков пальцев. Технология распознавания отпечатков пальцев позволяет вам с помощью отпечатков пальцев запускать компьютер и входить в систему ThinkPad Setup.
Подробную информацию см. в разделе “Использование устройства распознавания отпечатков пальцев” на странице 110.
Кнопка питания используется для включения компьютера. Для выключения компьютера выполняйте процедуру завершения работы в меню Пуск.
6 Руководство пользователя

Если вам не удается выключить компьютер таким образом, держите кнопку включения питания нажатой в течение 2 секунд.
Если компьютер не реагирует на ваши действия и вы не можете выключить его, нажмите кнопку включения питания и удерживайте ее в течение 4 секунд или больше. Если компьютер не перезагружается, отключите адаптер электропитания и извлеките аккумулятор.
Кроме того, с помощью программы Power Manager кнопку питания можно запрограммировать на выключение компьютера или на вход в спящий режим или режим гибернации.
С помощью кнопки ThinkVantage можно прервать последовательность загрузки компьютера и запустить рабочее пространство Rescue and Recovery, которое работает независимо от операционной системы Windows и скрыто, когда операционная система загружена.
Примечание: В моделях компьютера с операционной системой Windows 7 с помощью кнопки
ThinkVantage можно запустить программу Lenovo ThinkVantage Toolbox.
|
9 |
Разъем для карты PCI Express Mini Card для беспроводной сети LAN/WiMAX |
|
В вашем компьютере может быть карта PCI Express Mini Card, установленная в разъеме для карты PCI |
|
Express Mini Card, которая обеспечивает соединение с беспроводной локальной сетью LAN/WiMAX. |
|
10 Разъем для карты PCI Express Mini Card для беспроводной глобальной сети WAN или для |
|
твердотельного жесткого диска mSATA (SSD) |
|
В вашем компьютере может быть карта PCI Express Mini Card, установленная в разъеме для карты |
|
PCI Express Mini Card, которая обеспечивает соединение с беспроводной глобальной сетью WAN. |
Lenovo использует свои новейшие технологии, предлагая оптимальные конструкции компьютеров, и оснащает некоторые модели твердотельным диском mSATA, на котором хранятся данные. Ноутбуки, в которых использована эта современная технология, легче обычных, меньше по размеру и работают быстрее.
|
11 |
Манипулятор TrackPoint |
|
12 |
Кнопки TrackPoint |
|
13 |
Touch pad (Сенсорная панель) |
На клавиатуре установлено уникальное устройство манипуляции TrackPoint. Не снимая рук с клавиатуры, вы можете одним движением наводить указатель, выделять и перетаскивать элементы.
Чтобы передвинуть указатель, подвигайте кончиком пальца по сенсорной панели UltraNav.
Манипулятор TrackPoint и его кнопки выполняют функции, аналогичные функциям мыши и кнопкам на ней.
Индикатор CapsLock расположен на клавише CapsLock.
Дополнительную информацию об индикаторе CapsLock см. “Индикаторы состояния ThinkPad X220 Tablet и X220i” на странице 23.
Глава 1. Обзор продукта 7

Клавиша Fn позволяет воспользоваться такими функциями ThinkPad, как, например, включение подсветки ThinkLight. Чтобы воспользоваться функциями ThinkPad, нажмите клавишу Fn и соответствующую функциональную клавишу (функция выделена синим цветом).
|
16 |
Кнопки регулирования громкости |
Встроенные кнопки регулирования громкости позволяют быстро отрегулировать громкость или отключить звук на компьютере.
Дополнительную информацию см. в разделе “Кнопки регулирования громкости и отключения звука” на странице 57.
|
17 |
Индикаторы системы и состояния питания |
Ваш компьютер оснащен индикаторами состояния системы и питания. Дополнительные сведения о расположении и назначении каждого индикатора см. в разделе “Индикаторы состояния ThinkPad X220 Tablet и X220i” на странице 23.
Кнопки планшета позволяют управлять компьютером в режиме планшета даже без использования клавиатуры и UltraNav.
|
19 |
Встроенные стереоколонки |
Стереоколонки встроены в компьютер.
Дополнительную информацию см. в разделе “Кнопки регулирования громкости и отключения звука” на странице 57.
8 Руководство пользователя

Вид справа
В этом разделе описывается вид компьютера справа.
ThinkPad X220 и X220i (вид справа)
Рис. 3. Вид справа
1 Отверстие для ключа защиты
3 Гнездо звукового входа-выхода
5 Разъем Always On USB
1 Отверстие для ключа защиты
|
2 |
Жесткий или твердотельный диск |
|
4 |
Разъем Ethernet |
|
6 Разъем для устройства считывания |
|
мультимедийных карт |
В вашем компьютере имеется отверстие для ключа защиты. Вы можете приобрести защитный трос и замок для этого отверстия.
|
2 |
Жесткий или твердотельный диск |
Компьютер может поставляться с жестким диском большой емкости и возможностью модернизации пользователем; данный диск соответствует различным требованиям к запоминающим устройствам. Для защиты диска на компьютере установлена система Active Protection System™. Дополнительную информацию см. в разделе “Access Connections” на странице 37.
При желании можно приобрести другой жесткий диск и установить его в отсек Serial Ultrabay™ Slim док-станции ThinkPad Ultrabase™ Series 3.
Lenovo использует свои новейшие технологии, предлагая оптимальные конструкции компьютеров, и оснащает некоторые модели твердотельным диском (Solid State Drive — SSD), на котором хранятся данные. Ноутбуки, в которых использована эта современная технология, легче обычных, меньше по размеру и работают быстрее.
Примечание: На жестком или твердотельном диске имеется скрытый служебный раздел, поэтому свободного места там может оказаться меньше, чем ожидалось. Это заметнее на твердотельном диске, поскольку он имеет меньшую емкость.
Глава 1. Обзор продукта 9

|
3 |
Гнездо звукового входа-выхода |
Чтобы услышать звук, подсоедините через гнездо комбинированного аудиоразъема наушники или мини-гарнитуру с 3,5-миллиметровым четырехконтактным разъемом.
Примечания:
•Если вы используете гарнитуру с переключателем, например гарнитуру для мобильного цифрового устройства iPhone®, не нажимайте этот переключатель при использовании гарнитуры. Если вы нажмете его, то микрофон в гарнитуре будет отключен, а вместо него включится внутренний микрофон.
•Гнездо звукового входа-выхода нельзя использовать для подключения обычных микрофонов. Дополнительную информацию о звуковых устройствах, которые можно подключать к комбинированному аудиоразъему компьютера, см. в разделе “Использование звуковых функций” на странице 86.
Подключите компьютер к локальной сети LAN с помощью разъема Ethernet.
 ОПАСНО
Во избежание риска поражения электрическим током не подключайте телефонный кабель в разъем Ethernet. К этому разъему вы можете подключать только кабель Ethernet.
Два индикатора, расположенные на правой и левой сторонах разъема, отображают состояние сетевого соединения. Когда ваш компьютер подключится к локальной сети LAN и начнется сеанс, загорится верхний правый индикатор. При передаче данных верхний левый индикатор мигает желтым светом.
Дополнительную информацию смотрите в разделе “Access Connections” на странице 37.
Примечание: Если компьютер подключен к док-станции ThinkPad Port Replicator Series 3, ThinkPad Mini Dock Series 3 или ThinkPad Mini Dock Plus Series 3, используйте разъем Ethernet док-станции, а
не компьютера.
Разъемы Universal Serial Bus используются для подключения устройств, поддерживающих интерфейс USB, например принтера или цифровой камеры.
Даже если компьютер находится в режиме сна, функция Always On USB по умолчанию позволяет заряжать такие устройства, как iPod®, iPhone и BlackBerry®, подключая их к этому разъему.
Однако если есть необходимость зарядить эти устройства в то время, когда компьютер выключен или находится в режиме гибернации и при этом подсоединен к электросети, следует открыть программу Power Manager и выполнить настройки, необходимые для активации функции разъема Always On USB. Дополнительную информацию об активации функции разъема Always On USB можно найти в интерактивной справочной системе программы Power Manager.
Примечание: Ваш компьютер поддерживает USB 1.1 и 2.0.
|
6 |
Разъем для устройства считывания мультимедийных карт |
Некоторые модели компьютеров оснащены разъемом для устройства считывания мультимедийных карт. Устройство считывания мультимедийных карт поддерживает следующие типы карт:
• Карта SD
10 Руководство пользователя

•Плата SDHC
•Плата SDXC
•Карта MultiMediaCard
Примечание: Ваш компьютер не поддерживает функцию CPRM для карт SD.
Дополнительную информацию смотрите в разделе “Использование карт ExpressCard, Flash Media Card и смарт-карт” на странице 88.
ThinkPad X220 Tablet и X220i Tablet (вид справа)
|
Рис. 4. Вид справа |
|||
|
1 |
Отверстие для ключа защиты |
2 |
Цифровое перо |
|
3 |
Жесткий или твердотельный диск |
4 |
Гнездо звукового входа-выхода |
|
5 |
Разъем Ethernet |
6 |
Разъем Always On USB |
|
7 |
Разъем для устройства считывания мультимедийных |
||
|
карт |
|||
|
1 |
Отверстие для ключа защиты |
В вашем компьютере имеется отверстие для ключа защиты. Вы можете приобрести защитный трос и замок для этого отверстия.
С помощью цифрового пера можно управлять компьютером в режиме “Режим планшета” на странице 45 так же, как и с помощью мыши или клавиатуры.
|
3 |
Жесткий или твердотельный диск |
Компьютер может поставляться с жестким диском большой емкости и возможностью модернизации пользователем; данный диск соответствует различным требованиям к запоминающим устройствам. Для обеспечения безопасности диска на компьютере установлена система Active Protection System.
Дополнительную информацию см. в разделе “Access Connections” на странице 37.
Глава 1. Обзор продукта 11

При желании можно приобрести другой жесткий диск и установить его в отсек Serial Ultrabay Slim
док-станции ThinkPad Ultrabase Series 3.
Lenovo использует свои новейшие технологии, предлагая оптимальные конструкции компьютеров, и оснащает некоторые модели твердотельным диском (Solid State Drive — SSD), на котором хранятся данные. Ноутбуки, в которых использована эта современная технология, легче обычных, меньше по размеру и работают быстрее.
Примечание: На жестком или твердотельном диске имеется скрытый служебный раздел, поэтому свободного места там может оказаться меньше, чем ожидалось. Это заметнее на твердотельном диске, поскольку он имеет меньшую емкость.
|
4 |
Гнездо звукового входа-выхода |
Чтобы услышать звук, подсоедините через гнездо комбинированного аудиоразъема наушники или мини-гарнитуру с 3,5-миллиметровым четырехконтактным разъемом.
Примечания:
•Если вы используете гарнитуру с переключателем, например гарнитуру для мобильного цифрового устройства iPhone, не нажимайте этот переключатель при использовании гарнитуры. Если вы нажмете его, то микрофон в гарнитуре будет отключен, а вместо него включится внутренний микрофон.
•Гнездо звукового входа-выхода нельзя использовать для подключения обычных микрофонов. Дополнительную информацию о звуковых устройствах, которые можно подключать к комбинированному аудиоразъему компьютера, см. в разделе “Использование звуковых функций” на странице 86.
Подключите компьютер к локальной сети LAN с помощью разъема Ethernet.
 ОПАСНО
Во избежание риска поражения электрическим током не подключайте телефонный кабель в разъем Ethernet. К этому разъему вы можете подключать только кабель Ethernet.
Два индикатора, расположенные на правой и левой сторонах разъема, отображают состояние сетевого соединения. Когда ваш компьютер подключится к локальной сети LAN и начнется сеанс, загорится верхний правый индикатор. При передаче данных верхний левый индикатор мигает желтым светом.
Дополнительную информацию смотрите в разделе “Access Connections” на странице 37.
Примечание: Если компьютер подключен к док-станции ThinkPad Port Replicator Series 3, ThinkPad Mini Dock Series 3 или ThinkPad Mini Dock Plus Series 3, используйте разъем Ethernet док-станции, а
не компьютера.
Разъемы Universal Serial Bus используются для подключения устройств, поддерживающих интерфейс USB, например принтера или цифровой камеры.
Даже если компьютер находится в режиме сна, функция Always On USB по умолчанию позволяет заряжать такие устройства, как iPod, iPhone и BlackBerry, подключая их к этому разъему.
12 Руководство пользователя
![]()
Однако если есть необходимость зарядить эти устройства в то время, когда компьютер выключен или находится в режиме гибернации и при этом подсоединен к электросети, следует открыть программу Power Manager и выполнить настройки, необходимые для активации функции разъема Always On USB. Дополнительную информацию об активации функции разъема Always On USB можно найти в интерактивной справочной системе программы Power Manager.
Примечание: Ваш компьютер поддерживает USB 1.1 и 2.0.
|
7 |
Разъем для устройства считывания мультимедийных карт |
Некоторые модели компьютеров оснащены разъемом для устройства считывания мультимедийных карт. Устройство считывания мультимедийных карт поддерживает следующие типы карт:
•Карта SD
•Плата SDHC
•Плата SDXC
•Карта MultiMediaCard
Примечание: Ваш компьютер не поддерживает функцию CPRM для карт SD.
Дополнительную информацию смотрите в разделе “Использование карт ExpressCard, Flash Media Card и смарт-карт” на странице 88.
Вид слева
В этом разделе описывается вид компьютера слева.
ThinkPad X220 и X220i (вид слева)
|
Рис. 5. Вид слева |
|
|
1 |
Гнездо ExpressCard |
|
3 |
Разъем USB (на левой стороне) |
|
2 |
Переключатель средства беспроводной радиосвязи |
Глава 1. Обзор продукта 13

|
5 |
Разъем монитора |
|
7 |
Решетка вентилятора (левая) |
Ваш компьютер оснащен гнездом для карт ExpressCard, рассчитанным на карты шириной 54 мм.
Дополнительную информацию смотрите в разделе “Использование карт ExpressCard, Flash Media Card и смарт-карт” на странице 88.
|
2 |
Переключатель средства беспроводной радиосвязи |
С помощью этого переключателя можно быстро включать и отключать беспроводные средства.
|
3 |
Разъем USB (на левой стороне) |
Разъем Universal Serial Bus (USB) используется для подключения устройств, поддерживающих интерфейс USB, например принтера или цифровой камеры.
Примечание: Ваш компьютер поддерживает USB 1.1 и 2.0.
Подключайте USB-кабель к разъему отметкой вверх. В противном случае вы можете повредить разъем.
Компьютер поддерживает DisplayPort — интерфейс цифрового дисплея следующего поколения, позволяющий подключать к компьютеру совместимые проектор, внешний монитор или ТВВЧ.
Вы можете подключить к компьютеру внешний монитор или проектор для отображения данных.
Примечание: Если компьютер подключен к док-станции ThinkPad Port Replicator Series 3, ThinkPad Mini Dock Series 3, ThinkPad Mini Dock Plus Series 3 или ThinkPad Ultrabase Series 3, используйте разъем монитора док-станции ThinkPad Port Replicator Series 3, ThinkPad Mini Dock Series 3, ThinkPad Mini Dock Plus Series 3 или ThinkPad Ultrabase Series 3, а не компьютера.
Дополнительную информацию см. в разделе “Подсоединение внешнего монитора” на странице 79.
Разъемы Universal Serial Bus используются для подключения устройств, поддерживающих интерфейс USB, например принтера или цифровой камеры.
Примечания:
•Ваш компьютер может выглядеть несколько иначе, чем на рисунках.
•Ваш компьютер поддерживает USB 1.1 и 2.0. Некоторые модели поддерживают USB 3.0.
•Если компьютер поддерживает USB 3.0, функции, связанные с USB 3.0, доступны только после запуска операционной системы Windows. Тогда как устройства USB 2.0 и 1.0 могут работать и без запуска ОС.
|
7 |
Решетка вентилятора (левая) |
Внутренний вентилятор и решетка обеспечивают циркуляцию воздуха в компьютере и охлаждение центрального процессора.
14 Руководство пользователя

Примечание: Чтобы не мешать циркуляции воздуха, не помещайте никаких предметов напротив вентилятора.
ThinkPad X220 Tablet и X220i Tablet (вид слева)
Рис. 6. Вид слева
|
1 |
Гнездо ExpressCard |
|
3 |
Разъемы USB (на левой стороне) |
|
5 |
Разъем монитора |
|
7 |
Решетка вентилятора (левая) |
|
2 |
Переключатель средства беспроводной радиосвязи |
|
4 |
Разъем DisplayPort |
|
6 |
Разъем USB |
Ваш компьютер оснащен гнездом для карт ExpressCard, рассчитанным на карты шириной 54 мм.
Дополнительную информацию смотрите в разделе “Использование карт ExpressCard, Flash Media Card и смарт-карт” на странице 88.
|
2 |
Переключатель средства беспроводной радиосвязи |
С помощью этого переключателя можно быстро включать и отключать беспроводные средства.
|
3 |
Разъемы USB (на левой стороне) |
Разъемы Universal Serial Bus используются для подключения устройств, поддерживающих интерфейс USB, например принтера или цифровой камеры.
Примечание: Ваш компьютер поддерживает USB 1.1 и 2.0.
Подключайте USB-кабель к разъему отметкой вверх. В противном случае вы можете повредить разъем.
Глава 1. Обзор продукта 15

Компьютер поддерживает DisplayPort — интерфейс цифрового дисплея следующего поколения, позволяющий подключать к компьютеру совместимые проектор, внешний монитор или ТВВЧ.
Вы можете подключить к компьютеру внешний монитор или проектор для отображения данных.
Примечание: Если после подсоединения компьютера к док-станции ThinkPad Ultrabase Series 3 потребуется воспользоваться портом для подключения внешнего монитора, используйте порт на док-станции ThinkPad Ultrabase Series 3, а не на компьютере.
Дополнительную информацию см. в разделе “Подсоединение внешнего монитора” на странице 79.
Разъемы Universal Serial Bus используются для подключения устройств, поддерживающих интерфейс USB, например принтера или цифровой камеры.
Примечания:
•Ваш компьютер может выглядеть несколько иначе, чем на рисунках.
•Ваш компьютер поддерживает USB 1.1 и 2.0. Некоторые модели поддерживают USB 3.0.
•Если компьютер поддерживает USB 3.0, функции, связанные с USB 3.0, доступны только после запуска операционной системы Windows. Тогда как устройства USB 2.0 и 1.0 могут работать и без запуска ОС.
|
7 |
Решетка вентилятора (левая) |
Внутренний вентилятор и решетка обеспечивают циркуляцию воздуха в компьютере и охлаждение центрального процессора.
Примечание: Чтобы не мешать циркуляции воздуха, не помещайте никаких предметов напротив вентилятора.
Вид снизу
В этом разделе описывается вид компьютера снизу.
16 Руководство пользователя

ThinkPad X220 и X220i (вид снизу)
Рис. 7. Вид снизу
1 Батарейка
3 Разъем дока
5 Встроенные стереоколонки
1 Батарейка
|
2 |
Гнездо платы SIM |
|
4 |
Гнездо для дополнительной платы памяти |
В случае если нет возможности подключить компьютер к источнику питания, он может работать от аккумулятора.
Время работы компьютера можно продлить, установив в последовательный отсек Serial Ultrabay Slim второй аккумулятор, который заказывается дополнительно. Кроме того, можно отрегулировать режим питания с помощью программы Power Manager.
Дополнительную информацию см. в разделе “Power Manager” на странице 39.
Если компьютер оснащен устройством беспроводной глобальной сети WAN, для установки беспроводных соединений WAN может понадобиться установка SIM-карты (карты модуля идентификации абонента). В зависимости от страны, куда выполняется доставка, SIM-карта может быть предварительно установлена в слот для SIM-карты.
С помощью док-станций ThinkPad Port Replicator Series 3, ThinkPad Mini Dock Series 3, ThinkPad Mini Dock Plus Series 3 или ThinkPad Ultrabase Series 3 вы можете увеличить возможности компьютера, когда находитесь в офисе или дома.
|
4 |
Гнездо для дополнительной платы памяти |
Объем памяти компьютера можно увеличить, установив модуль памяти в специальное гнездо. Модули памяти можно приобретать дополнительно.
Глава 1. Обзор продукта 17

|
5 |
Встроенные стереоколонки |
Стереоколонки встроены в компьютер.
Дополнительную информацию см. в разделе “Кнопки регулирования громкости и отключения звука” на странице 57.
ThinkPad X220 Tablet и X220i Tablet (вид снизу)
Рис. 8. Вид снизу
|
1 |
Батарейка |
|
3 |
Разъем дока |
|
1 |
Батарейка |
|
2 |
Гнездо платы SIM |
|
4 |
Гнездо для дополнительной платы памяти |
В случае если нет возможности подключить компьютер к источнику питания, он может работать от аккумулятора.
Дополнительную информацию см. в разделе “Power Manager” на странице 39.
Если компьютер оснащен устройством беспроводной глобальной сети WAN, для установки беспроводных соединений WAN может понадобиться установка SIM-карты (карты модуля идентификации абонента). В зависимости от страны, куда выполняется доставка, SIM-карта может быть предварительно установлена в слот для SIM-карты.
С помощью док-станции ThinkPad Ultrabase Series 3 можно расширить возможности компьютера, когда вы находитесь в офисе или дома.
|
4 |
Гнездо для дополнительной платы памяти |
Объем памяти компьютера можно увеличить, установив модуль памяти в специальное гнездо. Модули памяти можно приобретать дополнительно.
18 Руководство пользователя

Вид снизу
В этом разделе описывается вид компьютера сзади.
ThinkPad X220 и X220i (вид сзади)
Рис. 9. ThinkPad X220 и X220i (вид сзади)
1 Разъем электропитания
1 Разъем электропитания
|
2 |
Решетка вентилятора (задняя) |
Кабель адаптера питания подсоединяется к разъему электропитания компьютера и обеспечивает работу компьютера от электросети и зарядку аккумулятора.
|
2 |
Решетка вентилятора (задняя) |
Внутренний вентилятор и решетка обеспечивают циркуляцию воздуха в компьютере и охлаждение центрального процессора.
Примечание: Чтобы не мешать циркуляции воздуха, не помещайте никаких предметов напротив вентилятора.
Глава 1. Обзор продукта 19

ThinkPad X220 Tablet и X220i Tablet (вид сзади)
Рис. 10. ThinkPad X220 Tablet и X220i Tablet (вид сзади)
1 Разъем электропитания
1 Разъем электропитания
|
2 |
Решетка вентилятора (задняя) |
Кабель адаптера питания подсоединяется к разъему электропитания компьютера и обеспечивает работу компьютера от электросети и зарядку аккумулятора.
|
2 |
Решетка вентилятора (задняя) |
Внутренний вентилятор и решетка обеспечивают циркуляцию воздуха в компьютере и охлаждение центрального процессора.
Примечание: Чтобы не мешать циркуляции воздуха, не помещайте никаких предметов напротив вентилятора.
Индикаторы состояния
Этот компьютер оснащен индикаторами состояния системы и питания. Индикаторы состояния отображают текущее состояние вашего компьютера.
Индикаторы состояния ThinkPad X220 и X220i
Этот компьютер оснащен индикаторами состояния системы и питания. Индикаторы состояния отображают текущее состояние вашего компьютера.
20 Руководство пользователя

Индикаторы состояния
Жесткий диск или дополнительный диск, например диск в Ultrabay, применяются для считывания и записи данных. Если данный индикатор мигает, не переводите компьютер в режим ожидания.
Выньте устройство из отсека или выключите компьютер.
2Состояние Bluetooth
•Зеленый: устройство включено, радиоканал готов к использованию, или происходит передача данных.
•Не горит: устройство Bluetooth отключено.
3Состояние беспроводной локальной сети LAN/беспроводной глобальной сети WAN/WiMAX
•Зеленый: подключена функция беспроводной локальной сети LAN (802.11b/g стандарт, 802.11a/b/g или 802.11n проект 2.0), функция беспроводной глобальной сети WAN или WiMAX, радиоканал готов к использованию или происходит передача данных.
•Не горит: устройства беспроводной связи или радиоканал отключены.
4Caps Lock
Включен режим Caps Lock. В этом режиме можно вводить все буквенные символы (А—Я) в верхнем регистре без нажатия кнопки Shift.
|
6 |
Кнопка отключения звука и 5 кнопка отключения микрофона |
Если вы отключите звук, а потом выключите компьютер, то после включения компьютера звук останется отключенным. Чтобы включить звук, нажмите кнопку “Плюс” (+) или “Минус” (—).
Глава 1. Обзор продукта 21

Кнопка питания светится, если компьютер включен; мигает, если компьютер находится в режиме ожидания; не светится, если компьютер отключен.
По умолчанию в случае, если режим numeric lock активен, индикатор этого режима отображается на экране. Инструкции по изменению настроек индикатора режима NumLock см. в разделе “Изменение настроек дисплея” на странице 78.
Примечание: Ваш компьютер поддерживает еще один режим — Scroll Lock, хотя для него индикатор не предусмотрен. Когда этот режим активен, клавиши со стрелками можно использовать не для перемещения курсора, а для прокрутки экрана. Чтобы включить или отключить этот режим, нажмите клавишу ScrLk. Не все прикладные программы поддерживают эту функцию.
Индикаторы питания
Индикаторы состояния на компьютере указывают текущий режим работы (режим сна/ожидания, гибернации или обычный режим), состояние источника питания и аккумулятора, а также состояние цветового датчика (в некоторых моделях). На приведенном ниже рисунке показано расположение индикаторов и описано их значение.
1Спящий режим (режим ожидания в Windows XP)
•Зеленый: компьютер находится в спящем режиме (режиме ожидания).
•Мигающий зеленый: компьютер входит в спящий режим (режим ожидания) или в режим гибернации, либо возобновляет работу.
2Состояние аккумулятора
•Зеленый: осталось более 20% заряда аккумулятора
•Оранжевый: осталось 5—20% заряда аккумулятора.
•Быстро мигающий оранжевый: осталось менее 5% заряда аккумулятора.
•Медленно мигающий оранжевый: аккумулятор заряжается. Когда уровень заряда достигнет 20%, мигающий индикатор станет зеленым.
•Медленно мигающий зеленый: уровень заряда аккумулятора составляет от 20 до 80% и подзарядка продолжается. Когда уровень заряда аккумулятора достигнет 80%, мигание индикатора прекратится, а подзарядка может продолжаться до тех пор, пока аккумулятор не зарядится на 100%.
22 Руководство пользователя
![]()
Примечание: При работе от аккумулятора индикатор состояния аккумулятора не работает, пока компьютер выключен или находится в режиме сна или гибернации.
•Быстро мигающий оранжевый: в работе аккумулятора произошел сбой.
•Индикатор состояния аккумулятора мигает три раза: компьютер подключен к адаптеру питания.
•Индикатор состояния аккумулятора отключен: аккумулятор полностью заряжен или извлечен из компьютера.
Индикаторы состояния ThinkPad X220 Tablet и X220i
Этот компьютер оснащен индикаторами состояния системы и питания. Индикаторы состояния отображают текущее состояние вашего компьютера.
Индикаторы состояния
Кнопка питания светится, если компьютер включен; мигает, если компьютер находится в режиме ожидания; не светится, если компьютер отключен.
|
2 |
Кнопка отключения звука и 4 |
кнопка отключения микрофона |
Если вы отключите звук, а потом выключите компьютер, то после включения компьютера звук останется отключенным. Чтобы включить звук, нажмите кнопку “Плюс” (+) или “Минус” (—).
Включен режим Caps Lock. В этом режиме можно вводить все буквенные символы (А—Я) в верхнем регистре без нажатия кнопки Shift.
|
5 |
Состояние беспроводной локальной сети LAN/беспроводной глобальной сети WAN/WiMAX |
Глава 1. Обзор продукта 23

•Зеленый: подключена функция беспроводной локальной сети LAN (802.11b/g стандарт, 802.11a/b/g или 802.11n проект 2.0), функция беспроводной глобальной сети WAN или WiMAX, радиоканал готов к использованию или происходит передача данных.
•Не горит: устройства беспроводной связи или радиоканал отключены.
6Состояние Bluetooth
•Зеленый: устройство включено, радиоканал готов к использованию, или происходит передача данных.
•Не горит: устройство Bluetooth отключено.
7Доступ к устройству
Жесткий диск или дополнительный диск, например диск в Ultrabay, применяются для считывания и записи данных. Если данный индикатор мигает, не переводите компьютер в режим ожидания.
Выньте устройство из отсека или выключите компьютер.
По умолчанию в случае, если режим numeric lock активен, индикатор этого режима отображается на экране. Инструкции по изменению настроек индикатора режима NumLock см. в разделе “Изменение настроек дисплея” на странице 78.
Примечание: Ваш компьютер поддерживает еще один режим — Scroll Lock, хотя для него индикатор не предусмотрен. Когда этот режим активен, клавиши со стрелками можно использовать не для перемещения курсора, а для прокрутки экрана. Чтобы включить или отключить этот режим, нажмите клавишу ScrLk. Не все прикладные программы поддерживают эту функцию.
Индикаторы питания
Индикаторы состояния на компьютере указывают текущий режим работы (режим сна/ожидания, гибернации или обычный режим), состояние источника питания и аккумулятора, а также состояние цветового датчика (в некоторых моделях). На приведенном ниже рисунке показано расположение индикаторов и описано их значение.
|
1 |
Спящий режим (режим ожидания в Windows XP) |
• Зеленый: компьютер находится в спящем режиме (режиме ожидания).
24 Руководство пользователя

•Мигающий зеленый: компьютер входит в спящий режим (режим ожидания) или в режим гибернации, либо возобновляет работу.
2Состояние аккумулятора
•Зеленый: осталось более 20% заряда аккумулятора
•Оранжевый: осталось 5—20% заряда аккумулятора.
•Быстро мигающий оранжевый: осталось менее 5% заряда аккумулятора.
•Медленно мигающий оранжевый: аккумулятор заряжается. Когда уровень заряда достигнет 20%, мигающий индикатор станет зеленым.
•Медленно мигающий зеленый: уровень заряда аккумулятора составляет от 20 до 80% и подзарядка продолжается. Когда уровень заряда аккумулятора достигнет 80%, мигание индикатора прекратится, а подзарядка может продолжаться до тех пор, пока аккумулятор не зарядится на 100%.
Примечание: При работе от аккумулятора индикатор состояния аккумулятора не работает, пока компьютер выключен или находится в режиме сна или гибернации.
•Быстро мигающий оранжевый: в работе аккумулятора произошел сбой.
•Индикатор состояния аккумулятора мигает три раза: компьютер подключен к адаптеру питания.
•Индикатор состояния аккумулятора отключен: аккумулятор полностью заряжен или извлечен из компьютера.
Расположение наклеек с важной информацией о продукте
В данном разделе приведена информация о расположении наклеек с типом и моделью компьютера, идентификатором FCC ID и номером IC Certification, а также наклейка сертификата подлинности
Windows.
Наклейки с информацией о типе и модели компьютера
Наклейка с информацией о типе и модели компьютера служит для идентификации компьютера. Если вы обратитесь в компанию Lenovo за помощью, тип компьютера и номер модели помогут техническим специалистам установить модель компьютера, после чего они смогут оказать вам помощь на самом высоком уровне.
Данные о типе и модели компьютера вы найдете на соответствующей наклейке (см. рисунок ниже).
Глава 1. Обзор продукта 25

ThinkPad X220 и X220i
Компоненты ThinkPad X220 Tablet и X220i Tablet
Наклейка с идентификатором FCC ID и номером IC Certification
В этом разделе рассказано, как найти на компьютере наклейку с идентификатором FCC ID и номером
IC Certification.
26 Руководство пользователя

Наклейка с идентификатором FCC ID и номером IC Certification моделей
ThinkPad X220 и X220i
На корпусе компьютера не указан идентификатор FCC ID или номер IC Certification для мини-карты PCI Express. Наклейка с идентификатором FCC ID и номером IC Certification прикреплена на карте, которая вставлена в слот для мини-карт PCI Express компьютера.
Если в компьютере изначально отсутствует предустановленная встроенная беспроводная мини-карта PCI Express, ее можно установить. Для этого воспользуйтесь процедурой, описанной в разделе “Установка и замена мини-карты PCI Express для беспроводного подключения к локальной сети и сети WiMAX” на странице 141 или “Установка и замена мини-карты PCI Express для беспроводного подключения к Интернету” на странице 149.
Глава 1. Обзор продукта 27

Наклейка с идентификатором FCC ID и номером IC Certification моделей
ThinkPad X220 Tablet и X220i Tablet
На корпусе компьютера не указан идентификатор FCC ID или номер IC Certification для мини-карты PCI Express. Наклейка с идентификатором FCC ID и номером IC Certification прикреплена на карте, которая вставлена в слот для мини-карт PCI Express компьютера.
Если в компьютере изначально отсутствует предустановленная встроенная беспроводная мини-карта PCI Express, ее можно установить. Для этого воспользуйтесь процедурой, описанной в разделе “Установка и замена мини-карты PCI Express для беспроводного подключения к локальной сети и сети WiMAX” на странице 141 или “Установка и замена мини-карты PCI Express для беспроводного подключения к Интернету” на странице 149.
Наклейка сертификата подлинности
Прилагается наклейка сертификата подлинности Microsoft® для предустановленной операционной системы. На этой наклейке указаны код и ключ продукта для данного компьютера. Запишите эти сведения и храните их в надежном месте. Они могут понадобиться при запуске компьютера или повторной установке операционной системы.
Пример сертификата подлинности Windows для данного компьютера показан ниже.
28 Руководство пользователя

ThinkPad X220 и X220i
Компоненты ThinkPad X220 Tablet и X220i Tablet
Компоненты
В этом разделе представлен обзор компонентов ноутбука.
Компоненты ThinkPad X220 and X220i
Процессор
•Просмотрите системные свойства своего компьютера. Сделать это можно следующим образом: щелкните Пуск, щелкните правой кнопкой мыши Компьютер (в Windows XP, Мой компьютер)
и выберите в выпадающем меню Свойства.
Memory
• Синхронная динамическая оперативная память с удвоенной скоростью обмена (DDR3)
Устройство хранения данных
• Твердотельный диск 2,5 дюйма (76 мм) или жесткий диск 2,5 дюйма (64 мм)
Глава 1. Обзор продукта 29
• Твердотельный диск mSATA (в некоторых моделях)
Display
Цветной дисплей использует технологию TFT:
•Размер: 12,5 дюйма (317.5 мм)
•Разрешение:
–Жидкокристаллический дисплей: 1366х768
–Внешний монитор: до 2560х1600
•Задняя подсветка на светодиодах
•Регулятор яркости
•ThinkLight
Клавиатура
•89-, 90или 94-клавишная
•UltraNav (TrackPoint и мультисенсорная панель)
•Функциональная клавиша Fn
•Кнопка ThinkVantage
•Кнопки регулирования громкости
•Кнопка отключения звука
•Кнопка отключения микрофона
Интерфейс
•Разъемы внешнего монитора
•Гнездо звукового входа-выхода (стереонаушники или мини-гарнитура)
•3 разъема Universal Serial Bus (USB)
•Разъем Ethernet RJ45
•Гнездо для карт ExpressCard
•Считыватель мультимедийных карт 4-в-1
•Разъем дока
•разъем DisplayPort
Дисковод оптических дисков в ThinkPad Ultrabase Series 3
•Дисковод DVD-дисков
•Дисковод DVD Multi-Burner
Компоненты для беспроводной связи
•Встроенная функция беспроводной глобальной сети LAN (в некоторых моделях)
•Встроенная функция Bluetooth (в некоторых моделях)
•Встроенная функция беспроводной глобальной сети WAN (в некоторых моделях)
•Встроенная функция WiMax (в некоторых моделях)
Средства защиты
• Устройство распознавания отпечатков пальцев (у некоторых моделей)
30 Руководство пользователя
Компоненты ThinkPad X220 Tablet и X220i Tablet
Процессор
•Просмотрите системные свойства своего компьютера. Сделать это можно следующим образом: щелкните Пуск, щелкните правой кнопкой мыши Компьютер (в Windows XP, Мой компьютер)
и выберите в выпадающем меню Свойства.
Memory
• Синхронная динамическая оперативная память с удвоенной скоростью обмена 3(DDR3)
Устройство хранения данных
•Твердотельный диск 2,5 дюйма (76 мм) или жесткий диск 2,5 дюйма (64 мм)
•Твердотельный диск mSATA (в некоторых моделях)
Display
Цветной дисплей использует технологию TFT:
•Размер: 12,5 дюйма (317.5 мм)
•Разрешение:
–Жидкокристаллический дисплей: 1366х768
–Внешний монитор: до 2560х1600
•Задняя подсветка на светодиодах
•Регулятор яркости
Клавиатура
•89-, 90или 94-клавишная
•UltraNav (TrackPoint и мультисенсорная панель)
•Функциональная клавиша Fn
•Кнопка ThinkVantage
•Кнопки регулирования громкости
•Кнопка отключения звука
•Кнопка отключения микрофона
Интерфейс
•Разъемы внешнего монитора
•Гнездо звукового входа-выхода (стереонаушники или мини-гарнитура)
•3 разъема Universal Serial Bus (USB)
•Разъем Ethernet RJ45
•Гнездо для карт ExpressCard
•Считыватель мультимедийных карт 4-в-1
•Разъем дока
•разъем DisplayPort
Дисковод оптических дисков в ThinkPad Ultrabase Series 3
•Дисковод DVD-дисков
•Дисковод DVD Multi-Burner
Глава 1. Обзор продукта 31

Компоненты для беспроводной связи
•Встроенная функция беспроводной глобальной сети LAN (в некоторых моделях)
•Встроенная функция Bluetooth (в некоторых моделях)
•Встроенная функция беспроводной глобальной сети WAN (в некоторых моделях)
•Встроенная функция WiMax (в некоторых моделях)
Средства защиты
• Устройство распознавания отпечатков пальцев (у некоторых моделей)
Компоненты планшета
•Цифровое перо
•Сенсорная панель (в некоторых моделях)
Спецификации
В этом разделе представлен обзор спецификаций компьютера.
Спецификации ThinkPad X220 and X220i
Размеры
•Ширина: 305,0 мм
•Длина: 206,5 мм
•Высота: от 19 мм до 26,6 мм
Параметры окружающей среды
•Максимально допустимая высота над уровнем моря без герметизации: 3048 м
•Температура
–До высоты над уровнем моря 2438 м
–Рабочая: от 5,0°C до 35,0°C (от 41°F до 95°F)
–Выключенный компьютер: от 5,0°C до 43,0°C (от 41°F до 109°F)
–На высоте над уровнем моря выше 2438 м
–Максимальная температура при работе в условиях пониженного давления: 31,3°C (88°F)
Примечание: При зарядке аккумулятора его температура должна составлять не ниже 10 °C (50 °F).
•Относительная влажность:
–Для включенного компьютера: от 8% до 80%
–Для выключенного компьютера: от 5% до 95%
Тепловая эмиссия
• 65 Вт (222 Бте/ч) макс., или 90 Вт (307 Бте/ч) макс. (в зависимости от модели)
Источник питания (адаптер питания)
•Переменный ток (50-60 Гц)
•Входное напряжение адаптера электропитания: 100-240 В переменного тока, 50-60 Гц
32 Руководство пользователя
 Loading…
42904FUПоказать ещё
, 429033U, 42902WU, 42912VU, 42912UU, 42912YU, 42902ZU, 429148U, 429133U, 4290RA7, 429046U, 429047U, 429045U, 429044U, 429043U, 429042U, 429132U, 429036U, 429142U, 429035U, 429048U, 429143U, 429032U, 429037U, 429147U, 429145U, 429144U, 428623U, 42912ZU, 42912TU, 429146U, 42873KU, NYG44MH, NYG2WML, NYG2WMZ, NYG43ML, NYG43MH, NYG2WMB, NYG49AT, NYG49MS, NYG49MD, NYG49UK, 42872WS, 42902YS, NYN26GE, NYN26UK, NYN26MB, NYN26MD, NYN26MS, NYN26AT, NYG36IT, NYG2WCX, NYF2BZA, NYF2BFR, NYD3HPB, NYD3HHV, 4293W16, 4293W15, NYF2BGE, 4293W14, 4293W18, 4293W17, NYF28GE, NYG2BGE, NYF2XGE, NYG29MD, NYG29GE, NYG37MH, NYF27GE, NYG37UK, NYF2WGE, NYG2WGE, NYG28GE, NYF4XMD, NYG4XMD, NYF4XMS, NYG4XMS, NYG4XGE, NYF4XAT, NYF4XGE, NYG4XUK, NYF4XUK, NYG4XAT, NYF27MD, NYF26MD, NYF27MS, NYF26MS, NYF27AT, NYF27UK, NYF26UK, NYF26AT, NYF2AMS, NYF2AAT, NYF2AMD, NYF2AUK, NYF45MD, NYF42MD, NYF48MD, NYF3SMD, NYF29MD, NYF2XMD, NYF3WMD, NYF2WMD, NYF2BMD, NYF48MS, NYF2WMS, NYF45MS, NYF2BMS, NYF28MS, NYF29MS, NYF2XMS, NYF42MS, NYF3SMS, NYF28MD, NYF48AT, NYF3SGE, NYF3SUK, NYF3SAT, NYF42UK, NYF45AT, NYF48GE, NYF45UK, NYF48UK, NYF42AT, NYF45GE, NYF3WAT, NYF3WUK, NYF3WGE, NYF28UK, NYF2XUK, NYF28AT, NYF29AT, NYF2WAT, NYF2XAT, NYF2BAT, NYF2BUK, NYF2WUK, NYF29UK, NYF2AGE, NYF29GE, NYG27GE, NYG26MD, NYG26MS, NYG26AT, NYG26UK, NYG26GE, NYG2AUK, NYG2AGE, NYG2XGE, NYF26GE, NYG36FR, NYN2PMH, NYG37MD, NYG37FR, NYG36MD+45N6679, NYD2SMC, NYD37MS, NYG35MD, NYG35MH, 4290W1C, 4290W1B, 42905HU, 42905FU, 42905EU, 42915EU, 429026U, 4291WBF, 4291QP7, NYG5DGE, 4290LF1, NYD37GE, NYG53GE, 4290LA9, NYG5CGE, 42872W5, 4291WSL, NYG4BGE, NYG49GE, NYG44GE, NYF42GE, NYG46GE, NYG2WUK, NYG36GE, NYG35GE, NYD37MD, NYD2QMC, NYG36UK, NYG36MD+45N6678, NYG36MD, NYN2QFR, NYG37SP, NYD2QHV, NYD37UK, NYD37FR, NYD2SHV, NYG37MB, NYG36SP, NYD37SP, NYD37MD+45N6679, NYD37IX, NYG35MB, NYG37MD+45N6678, NYK26MC, NYG42MD, NYG42MS, NYG42AT, NYG42UK, NYG42GE, NYF46GE, NYG37GE, NYD37MD+45N6678, NYG37MD+45N6679, NYG35ML, NYG36MB, NYG37ML, NYG36FR + 433610W, NYG36IX, NYG45MD, NYG45MS, NYG45GE, NYG45AT, NYG45UK, NYG36MS, NYG2BMN, NYG2BMH, NYG37IX, NYF47UK, NYF46UK, NYF47AT, NYG37GB, NY62WML, NYG28MD, NYG28MS, NYG28UK, NYG28AT, NYF46AT, NYF47GE, NYG2WFR, NYG2WMN, NYG2WMH, NYG44MD, NYG44MS, NYG44AT, NYG44UK, NYF3WMN, NYF3WUS, NYF3WMS, NYG37MZ, NYG43MD, NYG43MS, NYG43GE, NYG43AT, NYG43UK, NYG36MZ, NYK27MC, NYK27PB, NYG29MH, NYG29MB, NYG29FR, NYG42FR, NYF43MB, NYF43MH, NYF43FR, NYF43MD, NYF43MS, NYF43AT, NYF43GE, NYF43UK, NYG48MD, NYG48MS, NYG48GE, NYG48UK, NYG48AT, NYG47MD, NYG47MS, NYG47UK, NYG47GE, NYG47AT, NYF44GE, NYF44SP, NYF44MD, NYF44MS, NYF44AT, NYF44UK, NYG46MD, NYG46MS, NYG46AT, NYG46UK, 42902XU, NYF46MD, 42912XU, NYF47MS, 42872WU, NYF46MS, 42872VU, NYG4CIX, NYG4BIX, NYG4BMB, NYG4CMZ, NYG4BMZ, NYG4BMH, NYG4CFR, 429034U, 42912WU, NYG44MB, 42983US, NYG27MD, NYG27MS, NYG27UK, NYG27AT, 428742U, NYD2TPB, NYD2RZA, NYD2RPB, NYK26PB, NYK26ZA, NYG43SP, NYG2XMN, NYG2XMH, NYG35IX, 42902WG, NYD3YFR, NYG4CMS, 428743U, NYG4CMD, NYG4CUK, NYN2PSP, NYD3YHV, 42903WG, NYG4CGE, NYG4CAT, NYD3YMC, NYD3YMN, NYD3YIX, NYG37PG, NYG37MN, NYG4CUK+45N6681, NYG36MN, NYD37MN, NYD5AHV, 42914AA, NYD5AGE, NYD5AMC, NYD5APB, NYG5CUK, NYD3YPB, NYG5CMS, NYG5CAT, NYG5CMD, NYD66MN, NYD66MS, NYD66IX, NYD66FR, NYD66UK, NYG53AT, 42875TU, 428767U, NYD59MC, NYG5DIX, NYG53MS, 42875UU, NYG53MD, NYG53UK, NYF4XFR, 678D907, NYG2WSP, 4291B24, NYD5DHV, 4286CTO, NYG4CMD+55Y3711, NYG4BFR, NYG4CMN, NYG4BMN, NYG4BSP, NYD6GHV, 42904XU, 429027U, NYG43MZ, NYG2XMZ, 42914XU, 4290H84, 4290G51, 4290G53, 4290JN6, NYD5DMC, 4290W47, 4290LE9, NYF2WML, 4291WF5, NYG53MB, NYG4BML, NYF2XFR, NYF2WMB, 429144Y, 42905BQ, 4290KG4, 42876EA, NYD6FPB, 4291W63, 4290HT9, 42901Q1, 4290HT6, 42901P8, 42915AQ, 42915Y6, 4287A91, 4287-68A, 42992US, 42873UQ, 42992RS, 4291ID9, 4291T1G, 669D875, 4291UL8, 4291DV0, 343823S, 4291SWW, NYF2WIX, 42912WS, 4291C94, 4290-A11, 4291-AP8, 4291-ULU, 4290-BB8, 42919K6, 4291WWU, 42904E9, 4291T84, 4291VVD, 4291V6L, 4290W1A, 4291WX2, 4291W9P, 4291V61, 4291CT0, 4291VMH, 4291WXC, 4291VMB, 42911E0, 4291WLN, 4291V68, 4291WF9, 4291ZFA, 4291TGK, 4291W7X, 4291ZN7, 4291VJV, 4291WCU, 4291ZQK, 42873VM, 4290MB2, 42912Z1, 4287A75, 42904B3, 4291V65, 4291WAF, 4291WWQ, 4290W2V, 4291VKG, 4291WQD, 4291ID7, 4291VMA, 4291WQX, 4291TBU, 4291VVA, 4291Z5B, 4290CF1, 4291V6H, 4291W7Q, 4291Z6P, 4291RS3, 4291Z67, 4291VV3, 4290NJ2, 4291WKF, 4291ZP2, 4291V67, 4291WLM, 4291IB2, 4291VMC, 4291VMG, 4291SZM, 4291WXH, 4291-6Z9DEMO, 4290-4E2, 4290-L99, 4291V7X, 42872MA, NYG37MS, NYF47MD, NYG4BMS, NYG4BUK, NYG4BAT, NYG4BMD, NYG44MZ, 4290JP3, 4291VQK, 4291Z6H, 4291ZQJ, 4291VMF, 4291ZDU, 4291Z6V, 4291SGH, 429136G, 4291-AQ, NW4MBSP, NYF2WFR, NYF2WMH, NYF2XMH, NYG53MD?LIAB, NYG53MH, NYG53ML, NYG53MN, NYG5CFR, NYG5CIX, NYG5CMB, NYG5CMH, NYG5CML, NYG5CMN, NYG5CMZ, NYG5CPG, NYG5CSP, NYK2BHV, NYM4TGE
Скрыть
Для ознакомления с инструкцией необходимо нажать на ссылку «ЗАГРУЗИТЬ», чтобы скачать pdf файл. Если есть кнопка «ПРОСМОТР», то можно просто посмотреть документ онлайн.
Для удобства, Вы можете сохранить данную страницу с файлом руководства по эксплуатации в свой список «избранное» прямо на сайте (доступно для зарегистрированных пользователей).
Смотрите инструкцию для похожих моделей:

Вы можете задать вопрос посетителям сайта по модели LENOVO ThinkPad X220(i) (Tablet). Если Вы являетесь её пользователем, то пожалуйста оставьте, по возможности развёрнутый отзыв: