По языку
По категории продукции
Введите название модели или ключевые слова
YAMAHA
РУКОВОДСТВО
по использованию инструмента
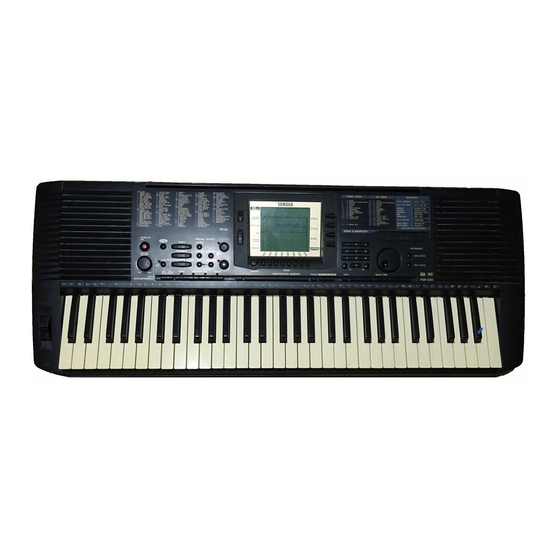
YAMAHA PSR-530
1997г.
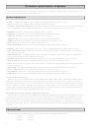
Предостережения !
Проявляйте заботу о Вашем инструменте ! Обращайтесь с ними заботливо и со здравым смыслом, и он
доставит Вам много лет удовольствия.
Выбор места установки
Не подвергайте инструмент различным нежелательным воздействиям, таким как: прямые солнечные лучи,
высокая температура, высокая влажность, сильная запыленность, сильная вибрация.
Питание
• После окончания игры всегда выключайте питание.
• Отключайте внешний адаптер от инструмента, если инструмент не используется длительный период вре—
мени.
• Отключайте внешний адаптер от инструмента при грозе.
Выключение внешних MIDI-устройств при соединениях
• Для предотвращения повреждения инструмента и других устройств, которые к нему подключены, вы—
ключайте питание на всех внешних устройствах перед присоединением и разъединением MIDI-кабелей.
Обращение и транспортировка
• Никогда не применяйте больших усилий для управления, при внешних подключениях и т.д.
• Отключайте все кабели перед перемещением инструмента. При отсоединении внешних кабелей держи—
тесь за джеки ровно, никогда не тяните за кабель.
• Оберегайте Ваш инструмент от сильных ударов. Опускайте его осторожно и не ставьте на него тяжелых
предметов. Не прикладывайте сильных усилий при нажатии клавиш.
Чистка
• Очищайте поверхность мягкой, слегка влажной тканью. Для удаления сильных пятен используйте слегка
смоченную ткань.
• Никогда не используйте для чистки спирт, и другие химические жидкости, так как они могут привести к
нежелательному результату.
• Используйте ткань из натуральных материалов, так как винилхлоридные материалы могут прилипать к
поверхности.
Помехи от электромагнитных полей
• Этот инструмент содержит цифровые микросхемы и может вызывать помехи, если расположить его ря—
дом с телевизором, радио и другими похожими приборами. Если это произойдет, переместите инстру—
мент подальше от вышеназванных приборов.
Сохранение данных
• Внутренние данные (регистрационная память, пользовательские песни, пользовательские стили, пользо—
вательские пэды) будут сохраняться в памяти даже при выключении кнопки питания, если останется
подключенным адаптер (к инструменту и к сети) или будут вставлены батарейки.
2
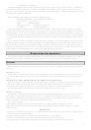
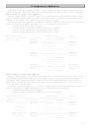
Поздравляем Вас с приобретением инструмента YAMAHA PSR-530 !
Вы теперь имеете собственные «портативные клавиши«, которые имеют развитые функции, прекрасный
звук и небольшой размер.
Новый большой графический дисплей и простой для пользователя интерфейс сильно повышают опера—
тивность в управлении этим инструментом.
Главные характеристики
• 61—клавишная динамическая клавиатура с большим диапазоном музыкальной выразительности.
• панельных голосов + 12 наборов ударных + 480 XG-голосов.
• Функция «Voice Set» автоматически выбирает наилучшую комбинацию параметров обработки для вы—
бранного тембра.
• Расширенная технология автоаккомпанемента дает вам 100 полностью оркестрованных аккомпанемент—
ных стиля, каждый из которых включает интродукцию, вариацию А, вариацию В, 4 вставки и коду.
• Виртуальный аранжировщик позволяет присоединять аккорды к любому стилю для большей музыкаль—
ности и изысканности аккомпанемента.
• Функция «OTS» позволяет вам вызывать для каждого стиля 4 наиболее соответствующих этому стилю
регистрационных тембра.
• Большой подсвеченный жидкокристаллический дисплей делает простым выбор и редактирование любых
параметров.
• Регистрационная память включает 32 банка по 4 тембра, в которые вы можете записать любые панельные
установки и затем быстро их вызывать.
• Цифровые эффекты «ревер«, «хорус» и «DSP», которые можно комбинировать вместе, позволяют создать
замечательную звуковую окраску.
• Функции «минус один» и «повтор» идеальны для разучивания новых песен и повышения техники игры на
клавиатуре.
• Для записи 4 собственных песен предназначен 5-трековый секвенсер. Он имеет 1 аккомпанементный
трек + 4 мелодических.
• Функция «User Style» позволяет вам создать 3 собственных автоаккомпанементных 8-трековых стиля.
• С помощью «мульти—пэдов» вы можете воспроизводить и записывать короткие ритмические и мелодиче—
ские секвенции, использовать их в игре.
• Музыкальный картридж позволяет вам дополнительно использовать внешние стили и песни.
• Полная GM- и XG-совместимость и большой диапазон MIDI-функций позволяют использовать PSR-530 в
составе больших MIDI-систем.
• Встроенный усилитель и внутренние динамики дают высококачественный звук даже без дополнительно—
го усиления.
Комплект поставки:
• PSR-530
• подставка для нот
• музыкальный картридж
• руководство пользователя
3
(скачивание инструкции бесплатно)
Формат файла: PDF
Доступность: Бесплатно как и все руководства на сайте. Без регистрации и SMS.
Дополнительно: Чтение инструкции онлайн

YAMAHA
РУКОВОДСТВО
по использованию инструмента
YAMAHA PSR-530
1997г.
Страница:
(1 из 52)
навигация
1

2
3
4
5
6
7
8
9
10
11
12

13
14
15
16

17

18

19

20
21
22
23

24
25
26
27
28

29
30
31
32

33
34
35
36
37

38
39

40

41

42
43
44
45
46
47
48
49
50
51
52
Оглавление инструкции
- Страница 1 из 53
YAMAHA РУКОВОДСТВО по использованию инструмента YAMAHA PSR-530 1997г. - Страница 2 из 53
Предостережения ! Проявляйте заботу о Вашем инструменте ! Обращайтесь с ними заботливо и со здравым смыслом, и он доставит Вам много лет удовольствия. Выбор места установки Не подвергайте инструмент различным нежелательным воздействиям, таким как: прямые солнечные лучи, высокая температура, высокая - Страница 3 из 53
Поздравляем Вас с приобретением инструмента YAMAHA PSR-530 ! Вы теперь имеете собственные «портативные клавиши», которые имеют развитые функции, прекрасный звук и небольшой размер. Новый большой графический дисплей и простой для пользователя интерфейс сильно повышают оперативность в управлении этим - Страница 4 из 53
Содержание Стр. Панель управления ………………………………………………………………………………… 7 Основные дисплейные операции ……………………………………………………………. 8 Включение инструмента - Страница 5 из 53
Колесо «PITCH BEND» ………………………………………………………………………….. 22 Транспонирование ……………………………………………………………………………….. 22 • Установка диапазона «PITCH - Страница 6 из 53
Изменение параметров треков пользовательских песен …………………………………………… 38 Общие функции …………………………………………………………………………………….. • • • • • • • • • • Динамическая чувствительность - Страница 7 из 53
Панель управления Передняя панель 1. Кнопка STAND BY/ON (Выключатель питания)………………………………………………………………….. 2. Ручка MASTER VOLUME (Общая громкость)……………………………………………………………………… 3. Кнопка DEMO - Страница 8 из 53
Основные дисплейные операции Назначение основных кнопок для управления дисплеем — [MENU] и [SUB MENU], а также значков, которые возникают на дисплее, рассмотрено ниже. Значки параметров • CART (Cartridge) Возникает, когда выбрана картриджная песня или стиль (стр.35). • XG Возникает, когда выбран - Страница 9 из 53
CARTRIDGE (Картридж) Текущий выбранный пункт меню отображается с помощью черного треугольника слева от названия. В дополнение к важным функциям, которые активируются с помощью кнопок прямого доступа справа от дисплея, система «меню» содержит кнопки слева [MENU] и [SUB MENU], которые контролируют - Страница 10 из 53
Внешние соединения Джек для наушников При использовании дома для тихой игры подключите стереонаушники в гнездо на передней панели HEADPHONES. Внутренние динамики будут автоматически отключены, когда вы вставите джек в гнездо. Педаль «Сустейн» Для имитации фортепьянной педали к PSR-530 может - Страница 11 из 53
Игра на PSR-530 Голоса PSR-530 PSR-530 имеет 2 голосовых набора: «панельные» голоса и XG-голоса. Панельные голоса включают 200 тембровых голосов (номера 1..200) и 12 наборов ударных инструментов (номера 201..212). XG-голоса включают 480 голосов (номера 213..692). Список всех голосов приведен на - Страница 12 из 53
• Функция «TRANSPOSE» (транспонирование) не действует, если установлены ударные голоса. • На стр.112 оригинального руководства приведен полный перечень ударных инструментов, входящих в каждый набор. Режим DUAL VOICE (добавочный голос) Режим DUAL VOICE позволяет вам к основному голосу R1 добавить - Страница 13 из 53
Автоаккомпанемент PSR-530 имеет 100 различных аккомпанементных стилей, которые могут использоваться для полной оркестровки аккомпанемента или только для ритмического сопровождения. Мощная система автоаккомпанемента автоматически присоединяет бас и аккорды, которые наилучшим образом соответствуют - Страница 14 из 53
После того, как вы возьмете в секции автоаккомпанемента в левой руке аккорды, которые инструмент сможет «распознать», PSR-530 начнет автоматически проигрывать басовую партию и аккорды, соответствующие выбранному стилю. Аккомпанемент будет продолжать играть, и если вы уже не будете удерживать - Страница 15 из 53
Используя кнопки [SUB MENU] выберите функцию «VirtArng». Текущее ее состояние (вкл/выкл) будет показано в верхней строке дисплея. Используя кнопки [-/NO] и [+/YES] или колесо данных выберите «on» или «off». • Одновременное нажатие кнопок [SYNC STOP] и [SYNC START] вызывает переключение виртуального - Страница 16 из 53
для установки точки разделения. Самая нижняя клавиша на клавиатуре (C1) имеет номер «36», средняя (C3) — «60», самая верхняя (C6) — «96». Точка разделения может быть установлена на любую клавишу с номером от 000 до 127, т.е. допускается устанавливать точку разделения вне диапазона клавиатуры - Страница 17 из 53
Пример для аккордов, построенных от ноты «До»: До 1 1 1 1 1 1 1 1 1 1 1 1 1 1 1 1 1 1 1 1 1 1 1 1 1 1 1 1 1 (1) 1 (1) 1 1 Ре 2 2 2 (2) Ми 3 3 (3) 3 3 3 3 3 3- Фа 4+ 4 2 2 (2) 2 22 2 2+ 3 (3) 333333333333 3 3 3 3 3 3 3 3 4 4+ 4 2 Соль 5 5 5 (5) (5) (5) (5) 555 5+ 5+ 5 5 5 5 (5) 5 (5) (5) 555(5) (5) - Страница 18 из 53
Режим MUL — MULTI-FINGER (аккордами + одним пальцем) Это режим по умолчанию. При этом возможна игра как аккордами, так и одним пальцем. Установка одним нажатием Функция «OTS» (установка одним нажатием) позволяет сразу выбрать подходящие панельные установки для текущего стиля. Каждый стиль содержит - Страница 19 из 53
Выбор типа «ревер»-эффектов 1. Выбор функции «Reverb» («ревер») Используя кнопки [MENU] слева от дисплея, выберите пункт «DIGITAL EFFECT». Используя кнопки [SUB MENU], выберите подпункт «Reverb». Через несколько секунд название текущего типа «ревера» возникнет в верхней строке дисплея. • При - Страница 20 из 53
Установка выходного уровня «хоруса» 1. Выбор функции «ChoRtnLv» (выходной уровень хоруса) Используя кнопки [MENU] слева от дисплея, выберите пункт «DIGITAL EFFECT». Используя кнопки [SUB MENU], выберите подпункт «ChoRtnLv». 2. Установка величины выходного уровня. Используя кнопки [-/NO] и [+/YES], - Страница 21 из 53
Автогармония Гармонические эффекты автоматически добавляют подходящие гармонические ноты к мелодической линии, которую вы играете на клавиатуре в правой руке. Эффект создается на базе аккордов которые вы играете в секции автоаккомпанемента левой рукой. Автоаккомпанемент должен быть включен. Нажмите - Страница 22 из 53
Колесо «PITCH BEND» Колесо «PITCH BEND», расположенное слева от клавиатуры, позволяет исполнителю в процессе игры после нажатия клавиш оперативно изменять высоту нот в заданных пределах вверх или вниз (важно для таких инструментов как саксофон, гитара). Установка диапазона «PITCH BEND» Диапазон - Страница 23 из 53
• динамика клавиатуры • «ревер» ВКЛ./ВЫКЛ. • «хорус» ВКЛ./ВЫКЛ. • «DSP» тип, «DSP» ВКЛ./ВЫКЛ., «DSP»-вариации ВКЛ./ВЫКЛ. • автогармония ВКЛ./ВЫКЛ., тип, громкость • диапазон колеса «PITCH BEND» • тонкая подстройка нот Параметры аккомпанемента: • автоаккомпанемент ВКЛ./ВЫКЛ. • номер стиля • режим - Страница 24 из 53
Мульти-пэды Мульти-пэды PSR-530 могут быть использованы для проигрывания 144 коротких предварительно записанных ритмических и музыкальных последовательностей, которые можно оперативно добавлять к игре на клавиатуре. Мульти-пэды PSR-530 могут быть использованы также для записи 16 собственных - Страница 25 из 53
Выбор набора мульти-пэдов PSR-530 имеет 36 наборов мульти-пэдов, каждый из которых состоит из 4 мульти-пэдовых фраз. Перед использованием мульти-пэдов выберите набор, содержащий фразы, которые вы хотите использовать. 1. Выбор меню MULTI PAD (мульти-пэды) Используя кнопки [MENU] слева от дисплея, - Страница 26 из 53
Воспроизведение песен Используйте описанные ниже процедуры для воспроизведения внутренних демонстрационных песен, а также собственных записанных песен. Процедура воспроизведения песни 1. Выбор меню SONG (песня) Нажмите кнопку [SONG] справа от дисплея. Номер и название текущей песни появится в - Страница 27 из 53
3. Старт воспроизведения Воспроизведение начнется как только вы нажмете кнопку [START/STOP]. Режим «минус один» Режим «минус один» позволяет вам отключать определенную партию в песнях, при этом вы можете самостоятельно исполнять ее на клавиатуре. Может быть включен или выключен любой из 4 - Страница 28 из 53
Запись песен Песенные треки инструмента позволяют записывать и воспроизводить законченные песни, включая создание последовательностей аккордов с использованием автоаккомпанемента и мелодических партий, которые вы проигрываете на клавиатуре. Песенные треки включают 1 аккомпанементный трек и 4 - Страница 29 из 53
Вокруг песенных треков появятся мигающие рамки, показывая тем самым, что вы можете выбрать любой трек для записи. • Если перед началом записи выбрана песня 1-12 или картриджная песня, то при включении готовности к записи автоматически будет выбрана песня с наименьшим номером (из ряда 13..16), не - Страница 30 из 53
9. Выход из режима записи Когда вы полностью записали песню, нажмите кнопку [RECORD]. Индикатор рядом с ней при этом погаснет, что означает выход из режима записи. Записанная песня после этого может воспроизводиться обычным путем, как описано в предыдущих главах. • Некоторые типы трековых данных - Страница 31 из 53
Запись стилей PSR-530 позволяет вам записать 3 собственных пользовательских стиля во внутреннюю память, которые потом вы можете использовать также как и пресетовые стили. Пользовательские стили записываются под номерами 101, 102, 103, и каждый стиль может иметь 8 треков RHYTHM1, RHYTHM2, BASS, - Страница 32 из 53
Используя кнопки [-/NO] и [+/YES], цифровые кнопки или колесо данных, вы можете выбрать необходимый номер стиля. 5. Выбор секции для записи Нажмите кнопку той автоаккомпанементной секции, которую вы решили записывать (т.е. INTRO, MAIN A, MAIN B, ENDING). После этого индикаторы других секций - Страница 33 из 53
11. Выход из режима записи Когда вы полностью записали стиль, нажмите кнопку [RECORD]. Индикатор рядом с ней при этом погаснет, что означает выход из режима записи. Записанный стиль после этого может использоваться обычным путем, как описано в предыдущих главах. • Некоторые типы трековых данных - Страница 34 из 53
Запись мульти-пэдов В дополнении к пресетовым наборам мульти-пэдов (номера 01..36) PSR-530 позволяет записать 4 собственных пользовательских набора под номерами 37..40. • Данные мульти-пэдов могут сохраняться в памяти до тех пор, пока вставлены батарейки (даже при выключении инструмента кнопкой - Страница 35 из 53
6. Запись Запись начнется сразу после того, как вы нажмете первую ноту на клавиатуре или нажмете кнопку [START/STOP]. Точки индикатора битов начнут отображать текущий бит. Если вы хотите записать фразы «аккордового» типа, то записывайте все фразы в тональности CM7 в соответствии с правилами записи - Страница 36 из 53
Данные картриджа не могут быть правильно считаны, если электрические контакты картриджа загрязнены. Если это случилось, вставьте и вытащите картридж несколько раз подряд. Это может решить проблему. Если это не помогает, то нужно вытереть и почистить контакты сухой мягкой тканью. Удостоверьтесь, что - Страница 37 из 53
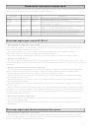
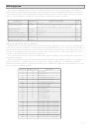
Изменение звуковых параметров Функция «REVOICE» позволяет вам изменять параметры голосов R1, R2, L, автоаккомпанементных треков и треков пользовательских песен, перечисленные в таблице. Параметр Voice Volume Octave Дисплей GrandPno Volume Octave Диапазон 000..692 000..127 -2..2 Pan Pan -7..7 Reverb - Страница 38 из 53
Функция «REVOICE» для стилей также может быть включена, если вы нажмете кнопку [REVOICE] во время проигрывания стиля. Функция «REVOICE» не может быть выбрана, если вы находитесь в режиме готовности к записи. Функция «FREEZE» будет автоматически включена при выборе функции «REVOICE» для стилей. 2. - Страница 39 из 53
Например, при записи трека MELODY1 вы несколько раз меняли номер голоса на протяжении песни. Если потом к такому треку применить функцию «REVOICE», то новый номер голоса будет записан только один раз в начале трека, т.е. весь трек теперь будет звучать одним новым тембром. Надпись «—» в верхней - Страница 40 из 53
Смещение нот (SC.Note, SC.Tune) Эта функция позволяет сместить любую индивидуальную ноту октавы в диапазоне -64…+63 цента (1 цент = 1/100 полутона), что позволяет получить ноты, характерные, например, для «арабского» строя. Смещение действует на одноименные ноты всех октав. Сначала используйте - Страница 41 из 53
MIDI-функции На задней панели инструмента расположены разъемы MIDI IN, MIDI OUT, разъем TO HOST (для подключения к COM-порту компьютера), а также переключатель HOST SELECT (выбор типа подключения к компьютеру). С их помощью при использовании MIDI-функций вы можете существенно расширить ваши - Страница 42 из 53
После редактирования данных при включении внешнего секвенсера или компьютера на воспроизведение, PSR-530 будет автоматически проигрывать записанную информацию во всех деталях. PSR-530 MIDI OUT MIDI IN MIDI IN Секвенсер или MIDI OUT компьютер Режим сохранения или загрузки памяти Вы можете сохранять - Страница 43 из 53
MIDI-функции Для доступа к MIDI-функциям, используя кнопки [MENU] слева от дисплея, выберите пункт «MIDI». Используя кнопки [SUB MENU], выберите требуемую функцию из списка MIDI-функций. Ее текущее значение появится слева от имени выбранной функции в верхней строке дисплея. Затем с помощью кнопок - Страница 44 из 53
Установки функций «Tr.Ch» и «Tr.Trk» могут сохраняться в памяти до тех пор, пока вставлены батарейки (даже при выключении инструмента кнопкой STAND BY/ON) или пока подключен адаптер (т.е. адаптер должен быть подключен и к инструменту и к сети 220 вольт). Каналы для приема и режимы приема PSR-530 - Страница 45 из 53
«BkSnd:Sg» (песенные данные), «BkSnd:Pd» (данные мульти-пэдов), «BkSnd:Cs» (данные пользовательских стилей). Когда все данные будут переданы, на дисплее появится «End». • Передача блоков данных может быть прервана в любое время нажатием на кнопку [-/NO]. • Во время передачи данных инструмент не - Страница 46 из 53
Структура меню и подменю Дисплей VOICE GrandPno STYLE 8BtPop1 x VirtArng * Quantiz? * AllClr? * TrkClr? * Cancel SONG PeterGun Measure x MinusCh x Repeat * SongClr? * SongTrk? CARTRIDGE 530XG REGIST MEMORY Bank1 MULTI PAD Fanfare1 Pad1Chd Pad2Chd Pad3Chd Pad4Chd * BankClr? * PadClr? MIDI Tr.Ch - Страница 47 из 53
О цифровых эффектах PSR-530 имеет три группы эффектов: «ревер», «хорус» и «DSP». Все типы «ревера» и «хоруса» являются только «системными» эффектами. «DSP»-эффекты включают как «системные», так и «вставные» эффекты. Использование системных «DSP»-эффектов Входные уровни «ревера», «хоруса» и «DSP» - Страница 48 из 53
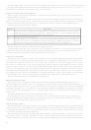
Список цифровых эффектов Номер Тип Характеристика 01-04 05-08 09,10 11,12 13 «РЕВЕР» Hall1-4 Room1-4 Stage1,2 Plate1,2 OFF Реверберация в концертном зале Реверберация в маленькой комнате Реверберация для соло-инструментов Эмуляция реверберации в стальной пластине Нет эффекта 01-05 06-09 10 «ХОРУС» - Страница 49 из 53
Неисправности и их устранение 1. В динамиках слышен щелчок при включении и выключении питания. • Это нормально и нет причин для беспокойства. 2. Громкость уменьшена или звук искажается. Неправильно работает регистрационная память. Записанные песенные данные правильно не воспроизводятся. - Страница 50 из 53
Сохранение данных и инициализация Сохранение данных Кроме данных, перечисленных ниже, все панельные установки PSR-530 при выключении и повторном включении питания будут «сброшены» и приведены к своим значениям по умолчанию. • данные регистрационной памяти • данные пользовательских песен • данные - Страница 51 из 53
Спецификация Клавиатура: • динамическая, 61 клавиша стандартного размера Дисплей: • большой многофункциональный ЖК-дисплей с подсветкой Управляющие и цифровые кнопки: • кнопки [MENU], [SUB MENU], [VIOCE], [STYLE], [SONG], [CARTRIDGE], • кнопки [0]..[9], кнопки [+/YES], [-/NO], колесо данных Слот - Страница 52 из 53
Регистрационная память: • 32 банка, 4 кнопки памяти, кнопка [FREEZE] для аккомпанемента Мульти-пэды: • 36 пресетовых банка, 4 пэда, кнопка [STOP], • «аккордовые» типы фраз, Вкл./Выкл • 4 пользовательских банка • редактирование: очистка банка, очистка пэда Песни: • • • • • • • 12 демо-песен - Страница 53 из 53
Как использовать наш сайт инструкций OnlineManuals.ru
Наша цель состоит в том, чтобы предоставить вам быстрый доступ к содержанию инструкции для синтезатора, цифрового пианино Yamaha PSR-530.
С помощью онлайн просмотра, Вы можете быстро просмотреть содержимое инструкции и найти решение проблемы с синтезатора, цифрового пианино Yamaha PSR-530.
Для Вашего удобства
Если листать руководство пользователя синтезатора, цифрового пианино Yamaha PSR-530 прямо на сайте, не очень удобно для Вас, есть два возможных решения:
• Просмотр в полноэкранном режиме — легко просмотреть руководство пользователя (без загрузки его на свой компьютер), Вы можете использовать режим полноэкранного просмотра.
Для просмотра инструкции пользователя синтезатора, цифрового пианино Yamaha PSR-530 на полном экране, используйте кнопку «Открыть в Pdf-viewer».
• Загрузка на компьютер — Вы можете также скачать Инструкция синтезатора, цифрового пианино Yamaha PSR-530 на свой компьютер и сохранить его в файлах.
Многие люди предпочитают читать документы не на экране, а в печатной версии.
Возможность печати руководства пользователя также была предусмотрена на нашем сайте,
и вы можете использовать ее, нажав на иконку «печать» в Pdf-viewer.
Нет необходимости печатать все руководство синтезатора, цифрового пианино Yamaha PSR-530, можно выбрать только нужные страницы инструкции.
-
Contents
-
Table of Contents
-
Troubleshooting
-
Bookmarks
Quick Links
Related Manuals for Yamaha Portatone PSR-530
Summary of Contents for Yamaha Portatone PSR-530
-
Page 2: Special Message Section
Yamaha. This product should be used only with the components supplied or; a cart, rack, or stand that is recommended by Yamaha. If a cart, etc., is used, please observe all safety markings and instructions that accom- pany the accessory product.
-
Page 3
SAVING USER DATA • Save all data to an external device such as the Yamaha MIDI Data Filer MDF2, in order to help prevent the loss of important data due to a malfunc- tion or user operating error. -
Page 4: Important Features
You are the proud owner of a fine electronic keyboard. The Yamaha PSR-530 PortaTone combines the most advanced tone generation technology with state-of-the-art digital electronics and features to give you stunning sound quality with maximum musical enjoyment. A large graphic display and easy-to-use interface also greatly enhance the operability of this advanced instrument.
-
Page 5: Packing List
A range of MIDI functions for expanded musical enjoyment (General MIDI System Level 1 and Yamaha XG compatible). XG is a new MIDI format created by Yamaha which significantly improves and expands upon the “GM Sys- tem Level 1” standard by providing a greater variety of high-quality voices plus considerably enhanced effect operation while being fully compatible with GM.
-
Page 6: Table Of Contents
The AUX OUT R and L/L+R Jacks … 13 MIDI IN/OUT and TO HOST Connectors … 13 The Demonstration Playing the PSR-530 The PSR-530 Voices … 16 A Word About the “R1”, “R2”, and “L” Voices … 16 Selecting & Playing Voices … 17 Keyboard Percussion … 19 The Dual Voice Mode …
-
Page 7
What You Can Do with MIDI … 88 Connecting to a Personal Computer (TO HOST Terminal/HOST SELECT Switch) … 90 Connect using the PSR-530 MIDI terminals … 90 Connect using the TO HOST terminal … 91 The PSR-530 MIDI Functions … 92 Transmit Channel &… -
Page 8: Panel Controls
Panel Controls Top Panel Controls STAND BY/ON Switch … page 14 MASTER VOLUME Control … page 14 DEMO Button … page 14 TEMPO Buttons … page 23 TRANSPOSE Buttons … page 46 ACCOMPANIMENT/SONG VOLUME Buttons … pages 28, 53 AUTO ACCOMPANIMENT SECTION •…
-
Page 9: The Music Stand
PRESS AND HOLD FOR A WHILE. KEYBOARD DUAL VOICE SPLIT VOICE PSR-530 The Music Stand The PSR-530 is supplied with a music stand that can be attached to the instrument by insert- ing it into the slot at the rear of the control panel.
-
Page 10: Basic Display Operation
Basic Display Operation The PSR-530 LCD panel is a large multi-function type that simultaneously displays and provides access to a number of important parameters. Basic operation of the display as well as the MENU and SUB MENU buttons, and the meaning of the icons which appear in the display, are summarized briefly below.
-
Page 11
REPEAT Indicates the “A” and “B” repeat points when programming a repeat section, and whether REPEAT PLAY is on or off (page 57). ONE TOUCH SETTING ONE TOUCH Appears when the ONE TOUCH SET- SETTING TING feature is engaged (page 34). REGISTRATION 1 …… -
Page 12: The Menus
Basic Display Operation The Menus The buttons to the right of the display directly select one of the PSR-530’s four main function menus: VOICE, STYLE, SONG, and CARTRIDGE. The currently selected menu is indicated by a triangular indicator in the display next to the menu list printed immediately to the right of the display panel.
-
Page 13: Shortcuts
REVERB type selection function. The shortcut buttons and the functions they access are listed on the PSR-530 panel, near the upper left corner of the display. The shorcuts will also be described where appropriate throughout this manual.
-
Page 14: Setting Up
Setting Up This section contains information about setting up your PSR-530 and preparing to play. Be sure to go through this section carefully before using your PSR-530. Power Supply Although the PSR-530 will run either from an optional AC adaptor or batteries, Yamaha recommends use of the more environmentally safe AC adaptor.
-
Page 15: Connections
If you will be connecting the PSR-530 to a monaural sound system, use only the L/L+R jack. When a plug is inserted into the L/L+R jack only, the left- and right- channel signals are combined and delivered via the L/L+R jack so you don’t lose any…
-
Page 16: The Demonstration
The Demonstration Once you’ve set up your PSR-530, try listening to the pre-programmed demonstration songs. A total of 12 demo songs are provided. Switch ON Turn the power ON by pressing the [STAND BY/ON] switch. Set an Initial Volume Level Turn the [MASTER VOLUME] control up (clockwise) about a quarter-turn from its minimum position.
-
Page 17
Skip to the Beginning Of a Different Demo Song While the demonstration is playing you can select any of the demo songs by using the [–] and [+] buttons. Playback will skip to the beginning of the selected song. R&B Stop When Done Press the [DEMO] button or the [START/STOP] button to stop demo playback. -
Page 18: Playing The Psr-530
A Word About the “R1”, “R2”, and “L” Voices The PSR-530 allows up to three voices to be selected at the same time: “R1” (Right- hand 1), “R2”, (Right-hand 2) and “L” (Left-hand). Only the “R1” voice is used when you’re playing a single voice over the entire range of the keyboard.
-
Page 19: Selecting & Playing Voices
GrandPno Select a Panel Voice The PSR-530 voices can be selected by using the [–] and [+] buttons, the number buttons, the data dial, or the [VOICE] button. The [–] and [+] Buttons When the VOICE menu is selected these buttons step up or down through the PSR- 530’s voices.
-
Page 20: Data Dial
Play & Adjust Volume You can now play the selected voice on the PSR-530 keyboard. Use the [MASTER VOLUME] control to adjust the overall volume level. If the Voice Set function (page 85) is turned “on”, whenever a panel voice is selected appropriate “R2”…
-
Page 21: Keyboard Percussion
ACCOM- VOICE VOICE VOICE PANIMENT DUAL TRACK Playing the PSR-530 • The HARMONY effect (page 42) cannot be turned on while a drum kit is selected for the “R1” voice, and will automatically be turned off if a drum kit is selected while HARMONY is on.
-
Page 22: The Split Voice Mode
Playing the PSR-530 The Split Voice Mode The SPLIT VOICE mode lets you play different voices with the left and right hands. You could, for example, play bass with the left hand (the L voice) while playing piano with the right (the R1 or R1 and R2 voices). The “split point” is initially set at B2 (note number 59), but it can be set at any key on the keyboard.
-
Page 23: Changing The Split Voice Split Point
“60”, and the highest key (C5) is 96. The split point can be set at any key number from 0 through 127, allowing the split point to be set outside the range of the PSR-530 keyboard for MIDI applications.
-
Page 24: Auto Accompaniment
Auto Accompaniment The PSR-530 has 100 different accompaniment “styles” that can be used to provide fully- orchestrated or rhythm-only accompaniment. The PSR-530’s sophisticated AUTO ACCOM- PANIMENT system can provide automated bass and chord backing that is perfectly matched to the selected accompaniment style.
-
Page 25: Select A Style
Select a Style The PSR-530 has 100 styles that can be selected by using the [–] and [+] buttons, the number buttons, the data dial, or the [STYLE] button (these controls function in the same way as for voice selection — see page 17). The styles are listed in the STYLE list printed at the top of the instrument’s control panel.
-
Page 26: Sync Start Button
Auto Accompaniment Start the Accompaniment There are several ways to start the accompaniment: Straight start Press the [START/STOP] button. The rhythm will begin playing immediately without bass and chord accompaniment. The currently selected MAIN [A] or [B] section will play. START/STOP Start with an introduction followed by the MAIN A section Press the [INTRO] button so that its indicator lights, press the MAIN/AUTO…
-
Page 27
START Play On the Auto-accompaniment Section Of the Keyboard As soon as you play any chord that the PSR-530 can “recognize” on the left- hand section of the keyboard, the PSR-530 will automatically begin to play the chord along with the selected rhythm and an appropriate bass line. The name of the current chord will appear on the display. -
Page 28: The Synchro Stop Function
Auto Accompaniment the last half beat of the measure, in which case the fill-in will begin from the first beat of the next measure. SYNC STOP Stop the Accompaniment The accompaniment can be stopped at any time by pressing the [START/ STOP] button.
-
Page 29: Using Virtual Arranger
Then use the [–] and [+] buttons or the Dial to select “on” or “off.” Accompaniment Track Muting The PSR-530 has eight accompaniment tracks — RHYTHM 1, RHYTHM 2, BASS, CHORD 1, CHORD 2, PAD, PHRASE 1, and PHRASE 2 — that you can control to modify the “orchestration”…
-
Page 30: Muting Individual Tracks
Auto Accompaniment Muting Individual Tracks Individual accompaniment tracks can be turned OFF (muted) or ON by using the TRACK buttons corresponding to the target tracks. The track icon will disappear when a track is muted. RHYTHM MELODY Accompaniment Volume Control When the STYLE menu is selected (i.e.
-
Page 31: Changing The Accompaniment Split Point
“60”, and the highest key (C5) is 96. The split point can be set at any key number from 0 through 127, allowing the split point to be set outside the range of the PSR-530 keyboard for MIDI applications.
-
Page 32: Interaction Between The Auto Accompaniment And Split Voice Split Points
Accompaniment/ L Voice The Auto Accompaniment Fingering Modes The PSR-530 AUTO ACCOMPANIMENT feature has five different fingering modes which can be selected as follows. Select the Fingering Mode Function Use the MENU [ ] and [ ] buttons to the left of the display to move the triangular indicator next to “OVERALL”…
-
Page 33
Then use the SUB MENU [ ] and [ ] buttons to select the “FngrngMd” function from within the OVERALL menu. The abbreviated name of the current fingering mode will appear to the left of “FngrngMd” on the top line of the display. Select the Required Fingering Mode Use the [–] and [+] buttons or data dial to select the desired fingering mode: Single Finger… -
Page 34
The Fingered 1 mode lets you finger your own chords on the AUTO ACCOMPA- NIMENT section of the keyboard (i.e. all keys to the left of and including the split- point key — normally 54) while the PSR-530 supplies appropriately orchestrated rhythm, bass, and chord accompaniment in the selected style. -
Page 35
FuL: The FULL KEYBOARD Mode FngrngMd When the FULL KEYBOARD mode is selected, the PSR-530 will automatically create appropriate accompaniment while you play just about anything using both hands, anywhere on the keyboard. You do not have to worry about specifying the accompaniment chords. -
Page 36: The Stop Accompaniment Function
While the SINGLE FINGER, FINGERED 1, FINGERED 2, or MULTI-FIN- GER mode is selected chords played in the AUTO ACCOMPNIMENT section of the keyboard are also detected and played by the PSR-530 Auto Accompaniment system when the accompaniment is stopped (except when the FULL KEYBOARD mode is engaged).
-
Page 37: One Touch Setting Button
Select a Style Select the STYLE menu and select an accompaniment style as described on page Press the [ONE TOUCH SETTING] Button Press the [ONE TOUCH SETTING] button. The ONE TOUCH SETTING and REGIST [1] icons will appear in the display, and the ONE TOUCH SETTING type 1 panel settings will be recalled.
-
Page 38: Digital Effects
Digital Effects With the digital effects built into the PSR-530 you can add ambiance and depth to your music in a variety of ways—such as adding reverb that makes you sound like you are playing in a concert hall or adding harmony notes for a full, rich sound.
-
Page 39: Selecting A Reverb Type
Some of the Styles contain Reverb types which cannot be selected on the PSR-530. In this case “ – :XG Rev.” will be displayed when you select the SUB MENU Reverb of the DIGI- TAL EFFECT.
-
Page 40: Reverb Return Level
The range is from “0” to “127”. The higher the value the greater the return level. Chorus The PSR-530’s 9 chorus effects can be used to give your sound extra life and animation. See “The Digital Effect List” on page 108. Turning the Chorus Effect On or Off Press the [CHORUS] button so that the CHORUS icon appears in the display to turn the selected chorus effect on.
-
Page 41: Selecting A Chorus Effect
Some of the Styles contain Chorus types which cannot be selected on the PSR-530. In this case “ – :XG Cho.” will be displayed when you select the SUB MENU Chorus of the DIGI- TAL EFFECT.
-
Page 42: Dsp
The range is from “0” to “127”. The higher the value the greater the return level. The PSR-530 features an extensive range of 45 DSP (Digital Signal Processor) effects. There are two types of digital effects, system effects and insertion effects. The illustration below will give you an idea of how DSP effects work, centering on the mixer.
-
Page 43: Turning The Dsp Effect On Or Off
(the name of the selected DSP effect will appear on the top line of the display). Select “Off” if you want no DSP effect on any part of the PSR-530 sound. Each DSP effect has its own variation. Turn the [DSP VARIATION] button ON to activate each variation.
-
Page 44: Dsp Return Level
(AUTO ACCOMPANIMENT must be on). Harmony is applied to the R1 voice. When chords are played the harmony is based on the last note played (i.e. last-note priority). The PSR-530 has 16 different harmony types, as listed below. Type Duet…
-
Page 45: Turning The Harmony Effect On Or Off
Type Tremolo Octave Combination of Tremolo and Octave; produces a duophonic melody with two voices played alternately (the second voice is an octave below the melody). Strumming This type adds arpeggiated pattern to the melody. Trio Delay Two notes slightly below the melody are added to create three parts. Additional notes are delayed slightly.
-
Page 46: Adjusting The Harmony Volume
Digital Effects Then use the SUB MENU [ ] and [ ] buttons to select “Harmony”. After a few seconds the name of the currently selected HARMONY type will appear on top line of the display. Select a Harmony Type Use the [–] and [+] buttons, number buttons, or data dial to select the desired HARMONY type (the name of the selected HARMONY type will appear on the top line of the display).
-
Page 47: The Pitch Bend Wheel
The Pitch Bend Wheel Use the PSR-530 pitch bend wheel to bend notes up (roll the wheel away from you) or down (roll the wheel toward you) while playing the keyboard. The pitch bend wheel is self-centering and will automatically return to nornal pitch when released.
-
Page 48: Transpose
Transpose This functions allow the overall pitch of the PSR-530 to be transposed up or down by a maximum of one octave in semitone increments. Setting Transposition Use the TRANSPOSE [ ] and [ ] buttons to set the desired degree of transposi- tion.
-
Page 49: Registration Memory
Registration Memory The PSR-530 Registration Memory feature can be used to memorize 128 complete control- panel setups (32 banks, 4 setups each) that you can recall whenever needed. Registering the Panel Settings Set Up the Controls as Required Make the desired control settings. The following settings are memorized by the…
-
Page 50: Recall The Registered Panel Settings
ONE TOUCH SETTING feature is • No REGISTRATION MEMORY indicator will be showing when REPEAT MEASURE the PSR-530 is ini- REGISTRATION MULTI PAD tially turned on or when a bank is se- lected prior to actually selecting a REGIS- TRATION MEMORY number.
-
Page 51: The Multi Pads
The Multi Pads The PSR-530 MULTI PADS can be used to play a number of short pre-recorded rhythmic and melodic sequences that can be used to add impact and variety to your keyboard perfor- mances. You can also record your own MULTI PAD phrases as described in “MULTI PAD Recording”…
-
Page 52: Playing The Multi Pads
When the CHORD MATCH function (see page 51) for a pad is turned on, the corresponding phrase will be automatically transposed to match chords played using the PSR-530 Auto-accompaniment feature. MULTI PAD playback can be terminated by pressing the MULTI PAD [STOP] button.
-
Page 53: Turning The Chord Match Function On/Off
Turning the CHORD MATCH Function On/Off The CHORD MATCH function can be individually turned on or off for each of the MULTI PADs, as described below. Select the MULTI PAD Function Use the MENU [ ] and [ ] buttons to select the MULTI PAD function so that the triangular indicator in the display appears next to “MULTI PAD”…
-
Page 54: Song Playback
Song Playback Use the following procedure to play back the PSR-530’s internal demonstration songs as well as songs you record yourself (see “Song Recording”, page 58). Song Playback Procedure Select the Song Menu Press the [SONG] button to select the SONG menu (the triangular indicator will appear next to “SONG”…
-
Page 55: Song Volume Control
Start Playback Playback will begin as soon as the [START/STOP] button is pressed. You can turn the MELODY and ACCOMPANIMENT tracks on and off during playback as required by using the TRACK buttons. Play Along If You Like Play along on the keyboard if you like. You can also change the tempo during playback.
-
Page 56: Play From A Specified Measure
Song Playback Play from a Specified Measure You can start SONG playback from any specified measure, as long as the specified measure is within the range of measures that has already been recorded: Select the Measure Parameter While the SONG menu is selected, but no playback or recording is in progress, use the SUB MENU [ ] and [ ] buttons to select the “Measure”…
-
Page 57: Minus-One Practice
(see “Using Music Cartridges”, page 75) have more than 4 channels — as many as 16, in fact. This function lets you assign any of the song’s channels to the PSR-530’s MELODY tracks so they can be turned on or off for minus-one practice.
-
Page 58
Song Playback Select a MELODY Track Use the TRACK buttons to select the song MELODY track (1…4) to which a minus-one channel is to be assigned. A frame will appear around the selected track icon. MELODY Assign a Channel to the Selected Track Use the [–] and [+] buttons, number buttoms, or data dial to assign the desired minus-one channel (1…16) to the selected MELODY track. -
Page 59: Repeat Play
Repeat Play This function allows you to specify any section of a song — internal or cartridge — for continuous repeat playback. Select the A-b Repeat Parameter While the SONG menu is selected, but no recording is in progress, use the SUB MENU [ ] and [ ] buttons to select the “A-b Repeat”…
-
Page 60: Song Recording
The SONG tracks include one ACCOMPANIMENT track and four MELODY tracks. The PSR-530 can retain up to 4 complete songs in internal memory, and these can be selected and played back as described in the preceding section.
-
Page 61: Song Recording Procedure
Song Recording Procedure Set Up to Record Before recording set up the PSR-530 as required: e.g. select the required voice(s), effects, accompaniment style, accompaniment fingering mode, etc. Engage the Record Ready Mode Press the [RECORD] button to engage the record-ready mode. The [RECORD] button indicator will light, and the SONG, STYLE, and MULTI PAD [1] ……
-
Page 62
Song Recording If Necessary, Select a User Song Number If the desired user song is not already selected, use the [–] and [+] buttons, number buttons, or data dial to select as required. Select the Track(s) to be Recorded Use the TRACK buttons to select a SONG MELODY track to record (only one MELODY track can be recorded at a time). -
Page 63: Stop Recording
• Before actually starting to record you can try playing the PSR-530 the way it is set up by using the “Rehearsal Mode”: press the [SYNC START] button to temporarily disengage the record ready mode, rehearse as necessary, then press the [SYNC START] button again to return to the record ready mode.
-
Page 64: About The Recording With The Digital Effects Applied
Song Recording About the Recording with the Digital Effects Applied You can use three Digital Effects, Reverb, Chorus and DSP, at one time. However, two or more types from the same group cannot be selected at the same time. Be aware the following facts especially when recording a song with the different effects applied to the different tracks.
-
Page 65: Clearing Song Data
Clearing Song Data This function makes it possible to clear unneeded data from the PSR-530 SONG memory. Clearing an Entire Song While the SONG record-ready or rehearsal mode is engaged use the SUB MENU [ ] and [ ] buttons to select the “SongClr?” function, then press the [+] (YES) button: “Sure?”…
-
Page 66: Style Recording
Style Recording The PSR-530 lets you record up to three original “user styles” which can be used for auto- accompaniment in the same way as the preset styles. The user styles are recorded as style numbers 101, 102, and 103, and each style can be recorded with the full complement of 8 tracks (RHYTHM 1, RHYTHM 2, BASS, CHORD 1, CHORD 2, PAD, PHRASE 1, PHRASE 2) and 5 sections (INTRO, MAIN A, MAIN B, ENDING, FILL).
-
Page 67: Multi Pad
Engage the Record Ready Mode Press the [RECORD] button to engage the record-ready mode. The [RECORD] button indicator will light, and the SONG, STYLE, and MULTI PAD [1] … [4] icons will flash, indicating that you must select one of the corresponding record modes.
-
Page 68
Style Recording If Necessary, Select a User Style Number If the desired user style is not already selected, use the [–] and [+] buttons, number buttons, or data dial to select as required. Select a Section to Record Press the auto-accompaniment section button corresponding to the section you want to record. -
Page 69
• Before actually starting to record you can try playing the PSR-530 the way it is set up by using the “Re- hearsal Mode”: press the [SYNC START] button to temporarily disengage the… -
Page 70: Drum Cancel
Style Recording Record Additional Sections & Tracks as Required By repeating steps through and tracks as required. Exit From the Record Mode When you’re finished recording a style, press the [RECORD] button so that its indicator goes out to exit from the record mode. The recorded user style can now be used in the same way as the preset styles (page 22).
-
Page 71: Quantize
Quantization can be used to align notes to the nearest specified beat to tighten up loose timing. With the style record ready mode (or rehearsal mode) engaged and the tartget style and its section selected, use the SUB MENU [ ] and [ ] buttons to select the “YES:Quantiz?”.
-
Page 72: Clearing User Style Data
Style Recording Clearing User Style Data This function makes it possible to clear unneeded data from the PSR-530 User Style tracks. Clearing an Entire Style While the STYLE record-ready or rehearsal mode is engaged use the SUB MENU [ ] and [ ] buttons to select the “All Clr?” function, then press the [+] (YES) button: “Sure?”…
-
Page 73: Multi Pad Recording
Multi Pad Recording In addition to the preset MULTI PAD sets, the PSR-530 has 4 user-recordable sets that you can use to store your own creations. • Material recorded in the MULTI PADs will be retained even after turning the power off.
-
Page 74: Button
Multi Pad Recording Select the MULTI PAD Record Mode Press any MULTI PAD button ([1] … [4]) to select the MULTI PAD record mode (the MULTI PAD button you press will be selected for recording). The MULTI PAD menu will automatically be selected and a user pad set number will appear on the top line of the display.
-
Page 75
MENU “MULTI PAD” even af- ter exiting the recording mode. • Before actually starting to record you can try playing the PSR-530 the way it is set up by using the “Rehearsal Mode”: press the [SYNC START] button to temporarily… -
Page 76: Clearing Multi Pad Data
Multi Pad Recording Clearing MULTI PAD Data This function makes it possible to clear unneeded data from the PSR-530 MULTI PADs. Clearing an Entire Pad Set While the MULTI PAD record-ready or rehearsal mode is engaged use the SUB MENU [ ] and [ ] buttons to select the “BankClr” function, then press the [+] (YES) button: “Sure?”…
-
Page 77: Using Music Cartridges
The PSR-530 features a cartridge slot which accepts pre-programmed Yamaha Music Cartridges containing style and/or song data. One sample Music Cartridge containing song data is supplied with the PSR-530. Others are available from your Yamaha dealer. Inserting a Music Cartridge…
-
Page 78: Cartridge Songs
Cartridge Songs Using Yamaha Music Cartridges (the one supplied with the PSR-530 includes 7 songs, others are available from your Yamaha dealer), the PSR-530 will let you enjoy listening to automated performances, or function as your “private music tutor,” allowing you to practice various parts of a piece while the others are played automatically.
-
Page 79: Cartridge Accompaniment Styles
PSR-530 to read the cartridge data. • Some cartridge styles, for example, have A and B intro and end-…
-
Page 80: Revoicing
Revoicing The PSR-530 REVOICE function lets you change the following parameters for the R1, R2 and L voices, the AUTO ACCOMPANIMENT tracks, and the user SONG tracks. Revoice Parameters Parameter Display Voice Voice Name Volume Volume Octave Octave Reverb Send Level…
-
Page 81
[CAR- TRIDGE] button is pressed. • Save any revoice settings you want to keep to the PSR-530 REGISTRATION MEMORY (page 47). The revoice setting are tempo- rary and will be lost if the power is turned off, a differ-… -
Page 82: Revoicing A Style
Revoicing Revoicing a Style Select the STYLE REVOICE Mode While the STYLE menu and the style you want to revoice are selected, press the [REVOICE] button (actually, the order here is not important: you can also press the [STYLE] button after pressing the [REVOICE] button). The [REVOICE] button indicator will light and a frame will appear around the RHYTHM 1 track icon in the display (i.e.
-
Page 83: Revoicing A User Song
[CAR- TRIDGE] button is pressed. • Save any revoice settings you want to keep to the PSR-530 REGISTRATION MEMORY (page 47). The revoice setting are tempo- rary and will be lost if the power is turned off, a differ-…
-
Page 84
[CARTRIDGE] button is pressed. • Since revoicing a user song ac- tually rewrites the song data, the revoiced song will remain in memory as long as a working set of batteries is installed in the PSR-530, or the AC adapter is connected. -
Page 85: Overall Functions
Overall Functions Some of the functions in the OVERALL function group have already been described in appropriate sections of this manual. Others will be introduced for the first time in this section. Refer to the chart below for the page numbers on which each function is described. The chart also lists the full name of each function, the abbreviated name which appears on the display, and the available settings or range of settings.
-
Page 86: Touch Sensitivity
See page 45. Master Tuning The Tuning function sets the overall pitch of the PSR-530 over a 100 cent range (from –100 to +100) in 1-cent increments. Since 1 cent is 1/100th of a semitone, the total tuning range is from a semitone below normal pitch to a semitone above normal pitch.
-
Page 87: Song Transpose
(Minus-one function) in the desired key without affecting your performance. SongTrns Metronome When turned “on” the PSR-530 metronome will sound during AUTO ACCOMPA- NIMENT playback as well as SONG playback and recording. Metronom Split Voice Split Point See page 21.
-
Page 88: Midi Functions
MIDI Functions In the rear panel of your PSR-530, there are MIDI terminals (MIDI IN, MIDI OUT), a TO HOST terminal, and a HOST SELECT switch. By using the MIDI functions you can expand your musical possibilities. This section explains what MIDI is, and what it can do, as well as how you can use MIDI on your PSR-530.
-
Page 89
MIDI data, or messages. The PSR-530 can control a MIDI device by transmitting note related data and various types of controller data. The PSR-530 can be controlled by the incoming MIDI messages which automatically determine tone generator mode, select MIDI channels, voices and effects, change parameter values and of course play the voices specified for the various parts. -
Page 90: Midi Terminal/To Host Terminal
MIDI terminals of an external device using a MIDI cable, or from the TO HOST port of the PSR-530 to the serial port of a personal computer using a special cable. If you connect from the PSR-530 TO HOST terminal to a personal computer, the PSR-530 will be used as a MIDI interface device, meaning that a specialized MIDI interface device is not necessary.
-
Page 91
Use the PSR-530 as a multi tone generator (playing 16 channels at one time). Receive mode for all channels set to “normal.” PSR-530 MIDI IN MIDI receive settings (page 93). Play music from another keyboard (no tone generator) using the PSR-530 XG tone generator. -
Page 92: Connecting To A Personal Computer (To Host Terminal/Host Select Switch)
For the connection cable, use a special MIDI cable. When the computer has a MIDI interface installed, connect the MIDI OUT terminal of the personal computer to the MIDI IN terminal of the PSR-530. Set the HOST SELECT switch to “MIDI.”…
-
Page 93: Connect Using The To Host Terminal
IBM-PC/AT Series Connect the RS-232C terminal on the computer to the TO HOST terminal on the PSR-530 using a serial cable (D-SUB 9P —> MINI DIN 8P cross cable). Set the PSR-530 HOST SELECT switch in the “PC-2” position. mini DIN 8-pin •…
-
Page 94: The Psr-530 Midi Functions
MIDI channels. Transmit Channel The “Tr.Ch” function selects a MIDI channel to which a PSR-530 track can be assigned via the Transmit Track function, below. First select a transmit channel, then the transmit track for that channel. Different tracks can be assigned to each of the 16 MIDI channels.
-
Page 95: Receive Channel & Receive Mode
No data transmitted. Receive Channel & Receive Mode The PSR-530 can simultaneously receive data on all 16 MIDI channels, allowing it to function as a 16-channel multi-timbral tone generator. The Receive Channel and Receive Mode functions determine how each channel will respond to received MIDI data.
-
Page 96: Local Control
When MIDI clock reception is enabled (“on”), however, all timing is controlled by an external MIDI clock signal received via the MIDI IN terminal (in this case the PSR-530 TEMPO setting has no effect). The default setting is “off”.
-
Page 97: Bulk Data Send
BkRcv Initial Data Send Transmits all current panel settings to a second PSR-530 or a MIDI data storage device. To send the initial data, select the “InitSnd?” function. Press the [+] (YES) to begin transmission of the initial data.
-
Page 98: Appendix
Appendix PSR-530 Display MENU/SUB MENU Structure MENU GrandPno VOICE 8BtPop1 STYLE VirtArng Quantiz? AllClr? TrkClr? Cancel SONG PeterGun Measure MinusCh A-b : Repeat SongClr? TrkClr? 530XG CARTRIDGE REGISTRATION MEMORY Bank 1 MULTI PAD Fanfare1 Pad1Chd Pad2Chd Pad3Chd Pad4Chd BankClr? PadClr? MIDI Tr.Ch…
-
Page 99
R2 voice revoice function, and the [SPLIT VOICE] button can be held to jump to the L voice revoice function. PSR-530 Display MENU/SUB MENU Structure SUB MENU [Reverb] (Reverb type name) … Reverb type selection..37 REVERB Button … -
Page 100: Data Backup & Initialization
Data Backup & Initialization Data Backup Except for the data listed below, all PSR-530 panel settings are reset to their initial settings whenever the power is turned on. • Registration Memory • User Song Data • User Style Data • User Pad Data •…
-
Page 101: Voice List
Voice List Maximum Polyphony The PSR-530 has 32-note maximum polyphony. This means that it play a maximum of up to 32 notes at once, regardless of what functions are used. Auto Accompaniment uses a number of the available notes, so when Auto Accompaniment is used the total number of notes that can be played on the keyboard is correspondingly reduced.
-
Page 102
Voice List MIDI Bank Select Voice Program Change Number Number Ensemble Solo Brass Brass Ensemble Reed Voice Voice Name Number Cello Contrabass Harp Hackbrett Shamisen Koto Sitar Banjo Strings OrchStrings Symphon. Str SlowStrings Str.Quartet ConcertoStr MarcatoStrs ChamberStrs TremoloStrs PizzStrings Syn Strings Analog Strs Choir Air Choir… -
Page 103
[XG Voice List] MIDI Bank Select Voice Program Voice Name Change Number Number Piano GrandPno GrndPnoK MelloGrP PianoStr Dream BritePno BritPnoK E.Grand ElGrPnoK Det.CP80 ElGrPno1 ElGrPno2 HnkyTonk HnkyTnkK E.Piano1 El.Pno1K MelloEP1 Chor.EP1 HardEl.P VX El.P1 60sEl.P E.Piano2 El.Pno2K Chor.EP2 DX Hard DXLegend DX Phase DX+Analg… -
Page 104
Voice List MIDI Bank Select Voice Program Voice Name Change Number MSB Number 60sStrng Orchestr Orchstr2 TremOrch VeloStr Strings2 S.SlwStr LegatoSt Warm Str Kingdom 70s Str Str Ens3 Syn.Str1 ResoStr Syn Str4 SS Str Syn.Str2 ChoirAah S.Choir Ch.Aahs2 MelChoir ChoirStr VoiceOoh SynVoice SynVox2… -
Page 105
MIDI Bank Select Voice Program Voice Name Change Number Number Smokey Goblins GobSyn 50sSciFi Ring Pad Ritual ToHeaven Night Glisten BelChoir Echoes EchoPad2 Echo Pan EchoBell Big Pan SynPiano Creation Stardust Reso Pan Sci-Fi Starz Ethnic Sitar DetSitar Sitar 2 Tambra Tamboura Banjo… -
Page 106: Drum Kit List
Drum Kit List • “<——” indicates that the drum kit is the same as “Standard Kit1”. • Each percussion voice uses one note. • The note numbers and note names printed on the keyboard are one octave higher than the MIDI note numbers and note names shown in the list. For example, the note number and note name, #36 and C1, on the keyboard correspond to the MIDI note number and note name, #24 and C0, shown in the list.
-
Page 107
Voice # Bank MSB# Bank LSB# Program Change# MIDI Dance Kit Note# Note C#-1 <—— <—— <—— <—— D#-1 <—— <—— <—— <—— <—— <—— F#-1 <—— <—— <—— <—— G#-1 <—— <—— <—— <—— A#-1 <—— <—— <—— <—— <——… -
Page 108: About Digital Effects (Reverb/Chorus/Dsp)
MIDI, the panning position for the effect can be set (page 115). • If a “Send Chorus to Reverb” (page 115) signal is transmitted to the PSR-530 from an external MIDI device, a signal can be sent from the chorus to the reverb (connected in series). Also, if a “Send Variation (DSP) to Reverb”…
-
Page 109: When Dsp Type Is Selected As A Insertion Effect
(page 115). • If a “Send Chorus to Reverb” (page 115) signal is transmitted to the PSR-530 from an external MIDI device, a signal can be sent from the chorus to the reverb (connected in series).
-
Page 110
About Digital Effects (Reverb/Chorus/DSP) The Digital Effect List Effect Type REVERB 01~04 Hall1~4 05~08 Room1~4 09, 10 Stage1, 2 11, 12 Plate1, 2 CHORUS 01~05 Chorus1~5 06~09 Flanger1~4 01~04 Hall1~4 05~08 Room1~4 09, 10 Stage1, 2 11, 12 Plate1, 2 13, 14 Early Reflection1, 2 Gate Reverb… -
Page 111: Troubleshooting
Control is turned on (page 94). You are probably exceeding the maximum polyphony of the PSR-530. The PSR-530 can play up to 32 notes at the same time — including split, dual, auto-accompaniment, song, and multi pad notes. Notes exceeding this limit will not sound.
-
Page 112: Midi Data Format
RPN LSB BnH, 64H RPN MSB BnH, 65H PITCH BEND SENS BnH, 65H, 00H, 64H, 00H, 06H, mmH <YAMAHA MIDI FORMAT> <UNIVERSAL> F0H 7FH…F7H F0H 7EH…F7H <XG STANDARD> F0H 43H 1nH 4CH aaH aaH aaH ddH F0H 43H 0nH 4CH bbH bbH aaH aaH aaH ddH…ddH ccH F7H…
-
Page 113: Midi Data Format
MONO BnH,7EH POLY BnH,7FH PROGRAM CHANGE CHANNEL AFTER TOUCH PITCH BEND CHANGE SYSTEM EXCLUSIVE MESSAGE <YAMAHA MIDI FORMAT> <UNIVERSAL> UNIVERSAL REALTIME F0H 7FH…F7H UNIVERSAL NON-REALTIME F0H 4EH…F7H <XG STANDARD> XG PARAMETER CHANGE F0H 43H 1nH 4CH aaH aaH aaH ddH…
-
Page 114
(3-5-1) MIDI CLOCK STATUS (3-5-2) START STATUS (3-5-3) STOP STATUS (3-5-4) ACTIVE SENSING STATUS (3-6) SYSTEM EXCLUSIVE MESSAGE (3-6-1) YAMAHA MIDI FORMAT (3-6-1-1) SECTION CONTROL binary 11110000 01000011 DATA RANGE 01111110 00000000 {mmH,llH} = {00H,00H} — {40H,00H} — {7FH,7FH} 0sssssss… -
Page 115
(3-6-1-2) TEMPO CONTROL binary hexadecimal 11110000 Exclusive status 01000011 YAMAHA ID 01111110 Style 00000000 0ttttttt Tempo4 0ttttttt Tempo3 0ttttttt Tempo2 0ttttttt Tempo1 11110111 End of Exclusive The internal clock will be set to the received Tempo value. Tempo Meta Event is a large data block (24-bit), it is divided into 4 groups with 7-bits going into each of the Tempos 1-4 (4 receives the remaining 3 bits). -
Page 116
3n 0C 00 note number 14 3n 5B 00 note number 91 hexadecimal Exclusive status YAMAHA ID Clavinova ID Model ID (PSR-530) Bulk ID Bulk No. (0AH;User Song, 07H;User Style) Data Length Data Length Data Length Data Length Data Length… -
Page 117
< Table 1-2 > MIDI Parameter Change table (SYSTEM) Address Size Data Parameter Name 0000 Master Tune ..07FF 00..7F Master Volume Not Used 28..58 Transpose Drum Setup Reset XG System On All Parameter Reset TOTAL SIZE 6 < Table 1-3 > MIDI Parameter table (System information) Address Size Data… -
Page 118
MIDI Data Format Address Size Data Parameter Name 00..7F Chorus Parameter 11 00..7F Chorus Parameter 12 00..7F Chorus Parameter 13 00..7F Chorus Parameter 14 00..7F Chorus Parameter 15 00..7F Chorus Parameter 16 TOTAL SIZE 6 00..7F Variation Type MSB 00..7F Variation Type LSB 00..7F Vari. -
Page 119
Address Size Data Parameter Name 00..7F Note Limit Low 00..7F Note Limit High 00..7F Dry Level 00..7F Chorus Send 00..7F Reverb Send 00..7F Variation Send 00..7F Vibrato Rate 00..7F Vibrato Depth 00..7F Vibrato Delay 00..7F Filter Cutoff Freq. 00..7F Filter Resonance 00..7F EG Attack Time 00..7F… -
Page 120
* Using an external sequencer, capable of editing and transmitting the system exclusive messages and parameter changes, allows you to select the reverb, chorus and DSP effect types which are not accessible from the PSR-530 panel operation. When one of the effects is selected by the external sequencer, “XG Rev.,” “XG Cho.” or “XG Eff.” will be shown on the display. -
Page 121
DSP TYPE (0 — 63) TYPE TYPE LSB NO EFFECT [1]HALL1 HALL2 ROOM1 ROOM2 ROOM3 STAGE1 STAGE2 PLATE “DELAY L,C,R” “[39]DELAY L,R” [40]ECHO [41]CROSS DELAY [13]ER1 [14]ER2 [15]GATE REVERB [16]REVERS GATE 012…019 NO EFFECT or THRU KARAOKE 1 KARAOKE 2 KARAOKE 3 021…063 NO EFFECT or… -
Page 122
MIDI Data Format DELAY L,C,R (variation block) Parameter Lch Delay 0.1 — 715.0ms Rch Delay 0.1 — 715.0ms Cch Delay 0.1 — 715.0ms Feedback Delay 0.1 — 715.0ms Feedback Level -63 — +63 Cch Level 0 — 127 High Damp 0.1 —… -
Page 123
ROTARY SPEAKER (variation block) Parameter LFO Frequency 0.00Hz — 39.7Hz LFO Depth 0 — 127 EQ Low Frequency 50Hz — 2.0kHz EQ Low Gain –12 — +12dB EQ High Frequency 500Hz — 16.0kHz EQ High Gain –12 — +12dB Dry/Wet D63 >… -
Page 124: Midi Implementation Chart
MIDI Implementation Chart [Portable Keyboard] Model: PSR-530 Function Basic Default 1~16 CH (*1) Channel Changed 1~16 CH (*1) Default Mode 3 Mode Messages Altered ***** Note 0~127 Number : True voice ***** Velocity Note on O 9nH, v=1~127 Note off…
-
Page 125
* 1 The tracks for each channel can be selected on the panel. See page 92 for more information. * 2 Incoming MIDI messages control the PSR-530 as 16 chan- nel multi timbral tone generator when initially shipped (factory set). The MIDI messages don’t affect the panel controls including the Panel Voice selection since they are directly sent to the tone generator of the PSR-530. -
Page 126: Specifications
Specifications Keyboards • 61 standard-size keys (C1 — C6) with touch response. Display • Large multi-function LCD display Setup • Stand by/ON • Master Volume : MIN — MAX Control & Number Buttons • MENU , VOICE, STYLE, SONG, CARTRIDGE, SUB MENU , [1] —…
-
Page 127: Index
Index AC power adaptor … 12 Accompaniment styles, cartridge … 77 Accompaniment tracks, song … 58 Auto accompaniment … 22 Auto accompaniment on/off … 23 Auto Fill … 25 Bank, registration … 47 Batteries … 12 Beat indicator … 25 Bulk data receive …
-
Page 128: Limited Warranty
PSR SERIES OF PORTATONE ELECTRONIC KEYBOARDS If during the first 90 days that immediately follows the purchase date, your new Yamaha product covered by this warranty is found to have a defect in material and/or workmanship, Yamaha and/or its authorized representative will repair such defect without charge for parts or labor.
-
Page 129
For details of products, please contact your nearest Yamaha or the authorized distributor listed below. Pour plus de détails sur les produits, veuillez-vous adresser à Yamaha ou au distributeur le plus proche de vous figurant dans la liste suivante. NORTH AMERICA CANADA Yamaha Canada Music Ltd. -
Page 130
M.D.G., EMI Division © 1997 Yamaha Corporation VV67140 808POCP5.3-06F0 Printed in Japan…