-
Contents
-
Table of Contents
-
Troubleshooting
-
Bookmarks
Quick Links
User’s Guide
WAP3205 v3
Wireless N300 Access Point
Default Login Details
LAN IP Address
User Name
Password
Copyright © 2016 Zyxel Communications Corporation
http://192.168.1.2
admin
1234
Version 1.00 Edition 1, 08/2016
Related Manuals for ZyXEL Communications wap3205 V3
Summary of Contents for ZyXEL Communications wap3205 V3
-
Page 1
User’s Guide WAP3205 v3 Wireless N300 Access Point Default Login Details Version 1.00 Edition 1, 08/2016 LAN IP Address http://192.168.1.2 User Name admin Password 1234 Copyright © 2016 Zyxel Communications Corporation… -
Page 2: Related Documentation
The Quick Start Guide shows how to connect the NAP and access the Web Configurator. • Web Configurator Online Help Click the help icon in any screen for help in configuring that screen and supplementary information. • More Information Go to support.zyxel.com to find other information on the WAP3205 v3 WAP3205 v3 User’s Guide…
-
Page 3: Table Of Contents
Connection Wizard ……………………..21 Modes …………………………32 Tutorials …………………………44 Technical Reference ……………………52 Wireless LAN ……………………….53 LAN …………………………… 67 System …………………………70 Logs ………………………….. 73 Tools ………………………….. 75 Language ………………………… 80 Operation Mode ……………………..81 Troubleshooting ………………………. 83 WAP3205 v3 User’s Guide…
-
Page 4: Table Of Contents
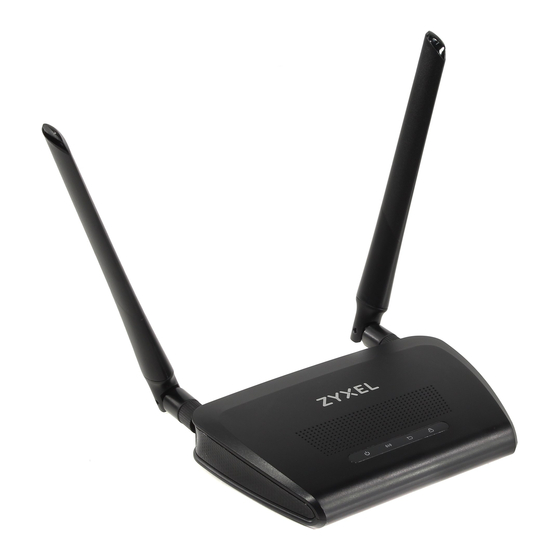
Part I: User’s Guide……………….. 8 Chapter 1 Introduction ……………………….9 1.1 Overview ……………………….9 1.2 Securing the WAP3205 v3 ………………….10 1.3 LEDs …………………………11 1.4 The WPS/RESET Button ……………………11 1.4.1 Using the WPS/RESET Button ………………..12 1.5 Wall Mounting ……………………..12 Chapter 2 The Web Configurator……………………14…
-
Page 5
5.1 Overview ……………………….44 5.2 How to Connect to the Internet from an AP …………….44 5.3 Configure Wireless Security Using WPS on both your WAP3205 v3 and Wireless Client ..44 5.3.1 Push Button Configuration (PBC) ………………45 5.3.2 PIN Configuration ……………………46 5.4 Enable and Configure Wireless Security without WPS on your WAP3205 v3 …… -
Page 6
10.3 Firmware Upload Screen ………………….75 10.4 Configuration Screen ……………………77 10.4.1 Backup Configuration ………………….77 10.4.2 Restore Configuration ………………….78 10.4.3 Back to Factory Defaults ………………..79 10.5 Restart Screen ……………………..79 Chapter 11 Language ……………………….80 WAP3205 v3 User’s Guide… -
Page 7
13.1 Power, Hardware Connections, and LEDs …………….. 83 13.2 WAP3205 v3 Access and Login ………………..84 13.3 Internet Access ……………………..85 13.4 Resetting the WAP3205 v3 to Its Factory Defaults …………..86 13.5 Wireless Problems …………………….. 86 Appendix A IP Addresses and Subnetting………………88 Appendix B Pop-up Windows, JavaScripts and Java Permissions ………. -
Page 8: User’s Guide
User’s Guide…
-
Page 9: Introduction
Your can create the following connections using the WAP3205 v3: • LAN. You can connect network devices via the Ethernet ports of the WAP3205 v3 so that they can communicate with each other and access the Internet.
-
Page 10: Securing The Wap3205 V3
If you forget your password, you will have to reset the WAP3205 v3 to its factory default settings. If you backed up an earlier configuration file, you would not have to totally re-configure the WAP3205 v3. You could simply restore your last configuration.
-
Page 11: Leds
The WPS status is not configured or disabled. 1.4 The WPS/RESET Button Your WAP3205 v3 supports WiFi Protected Setup (WPS), which is an easy way to set up a secure wireless network. WPS is an industry standard specification, defined by the Wi-Fi Alliance.
-
Page 12: Using The Wps/Reset Button
Make sure the screws are fastened well enough to hold the weight of the WAP3205 v3 with the connection cables. Align the holes on the back of the WAP3205 v3 with the screws on the wall. Hang the WAP3205 v3 on the screws.
-
Page 13
Chapter 1 Introduction Figure 3 Wall Mounting Example WAP3205 v3 User’s Guide… -
Page 14: The Web Configurator
H A P T E R The Web Configurator 2.1 Overview This chapter describes how to access the WAP3205 v3 Web Configurator and provides an overview of its screens. The Web Configurator is an HTML-based management interface that allows easy setup and management of the WAP3205 v3 via Internet browser.
-
Page 15
Start Menu and clicking on Network and Sharing Center. Once you have accessed the Network and Sharing Center, click on Local Area Connection to access the adapter’s settings. After accesing the connection’s general settings, click on the Properties button. WAP3205 v3 User’s Guide… -
Page 16
Internet Protocol Version 4 (TCP/IPv4) Properties window. Then click OK to close the Local Area Connection Note: After you have configured your WAP3205 v3, you must remember to change your static IP back to automatic to be able to access the Internet. If you want to change the IP address to automatic (default) then repeat steps 1 to 4, for step 5 select the Obtain an IP address automatically radio button, and click OK. -
Page 17: Static Ip Configuration In Mac Os X
Once the Network screen is open, it is recommended you click on Location > Edit Locations to create a new profile. Use the + button to add a new profile, in this case it is called Static IP. This will easily help you change from static IP address to automatic. WAP3205 v3 User’s Guide…
-
Page 18: Accessing The Web Configurator
192.168.1.254. Then type 255.255.255.0 as your subnet mask, and click Apply to save your changes. Note: After you have configured your WAP3205 v3, you must remember to change your static IP back to obtaining it automatically to be able to access the Internet. If you want to change the IP address to automatic (default) repeat step 1, then on Location select Automatic or a different profile you have configured.
-
Page 19
• Click Go to Wizard Setup to use the Configuration Wizard for basic Internet and Wireless setup. • Click Go to Advanced Setup to view and configure all the WAP3205 v3’s settings. • Select a language to go to the basic Web Configurator in that language. To change to the… -
Page 20: Resetting The Wap3205 V3
If you forget your password or IP address, or you cannot access the Web Configurator, you will need to use the WPS/RESET button at the back of the WAP3205 v3 to reload the factory-default configuration file. This means that you will lose all configurations that you had previously saved, the username will be reset to admin and password will be reset to 1234.
-
Page 21: Connection Wizard
Figure 7 Select Go to Wizard setup 3.3 Choosing a System Operation Mode The WAP3205 v3 offers three different system operation modes: Access Point mode, Universal Repeater mode and Client Bridge mode. To learn more about each mode refer to Chapter 4 on page 32.
-
Page 22: Connection Wizard — Access Point Mode
3.4 Connection Wizard — Access Point Mode The WAP3205 v3’s system operation mode is set to access point mode by default. In this mode your WAP3205 v3 bridges a wired network (LAN) and wireless LAN (WLAN) in the same subnet.
-
Page 23: Device Information
802.11 Mode Select the wireless standard the WAP3205 v3 uses. Name (SSID) Type the descriptive name used to identify the WAP3205 v3 in the wireless LAN. Security Security Mode Select the data encryption method the WAP3205 v3 uses for wireless connection.
-
Page 24: Connection Wizard — Universal Repeater Mode
Click here to go to your WAP3205 v3’s advanced settings. 3.5 Connection Wizard — Universal Repeater Mode In Universal Repeater mode, your WAP3205 v3 can act as an access point and wireless client at the same time. 3.5.1 AP Select The following screen will open.
-
Page 25: Wireless Setup
Click Last to go to the last page of the AP select table. Select Click to choose the wireless device your WAP3205 v3 will connect to. SSID This displays Service Set IDentity of the wireless device. The SSID is a unique name that identifies a wireless network.
-
Page 26: Wlan Information
Click Apply to associate with the selected wireless device. 3.5.3 WLAN Information After your WAP3205 v3 has connected to a wireless device, use the following screen to configure the wireless settings between the WAP3205 v3 and its wireless clients. Figure 13 Connection Wizard — Universal Repeater> WLAN Information…
-
Page 27: Device Information
Click Reset to reload the previous configuration of this screen. 3.5.4 Device Information After connecting to an AP and configuring the WAP3205 v3’s wireless LAN, the following screen will open, providing detailed information about your device. WAP3205 v3 User’s Guide…
-
Page 28
— Status This shows the current status of the Wireless LAN — Enabled or Disabled. — Name (SSID) This shows a descriptive name used to identify the WAP3205 v3 in the wireless LAN. — Channel This shows the channel number which you select manually or Auto when the WAP3205 v3 automatically scans and selects the Wireless Lan’s… -
Page 29: Connection Wizard — Client Bridge Mode
3.6.1 AP Select The AP Select screen will open. Use this screen to connect your WAP3205 v3 to an access point in the area. Figure 15 Connection Wizard — Client Bridge> AP Select…
-
Page 30: Device Information
Click Last to go to the last page of the AP select table. Select Click to choose the wireless device your WAP3205 v3 will connect to. SSID This displays Service Set IDentity of the wireless device. The SSID is a unique name that identifies a wireless network.
-
Page 31
This shows a descriptive name used to identify the WAP3205 v3 in the wireless LAN. — Security Mode This shows the wireless security the WAP3205 v3 is using to connect to the wireless device. — Connection Status This shows whether the WAP3205 v3 is currently associated with the selected AP. -
Page 32: Modes
WLAN • Client Bridge: Use this mode to have the WAP3205 v3 work only as a wireless client if there is an existing wireless router or access point in the network to which you want to connect your local network wirelessly.
-
Page 33: Setting Your Wap3205 V3 To Ap Mode
Connect your computer to the LAN port of the WAP3205 v3. The default LAN IP address of the WAP3205 v3 is 192.168.1.2. The WAP3205 v3 cannot assign your computer an IP address, so you must give it a fixed IP address in the range between 192.168.1.3 and 192.168.1.254…
-
Page 34: Status Screen (Ap Mode)
This shows the current status of the Wireless LAN — Enabled or Disabled. — Name (SSID) This shows a descriptive name used to identify the WAP3205 v3 in the wireless LAN. — Channel This shows the channel number which you select manually or Auto when the WAP3205 v3 automatically scans and selects the Wireless Lan’s channel.
-
Page 35: Ap Navigation Panel
Use this screen to view the status of the WAP3205 v3. 4.2.2 AP Navigation Panel Use the menu in the navigation panel to configure WAP3205 v3 features in AP Mode. The following screen and table show the features you can configure in AP Mode.
-
Page 36: Setting Your Wap3205 V3 To Universal Repeater Mode
4.3 Setting your WAP3205 v3 to Universal Repeater Mode Connect your computer to the LAN port of the WAP3205 v3. The default LAN IP address of the WAP3205 v3 is 192.168.1.2. You must give your computer a fixed IP address in the range between 192.168.1.3 and 192.168.1.254 (Section 2.2 on page…
-
Page 37: Status Screen (Universal Repeater Mode)
A pop-up window appears providing information on this mode. Click OK in the pop-up message window. Click Apply. Your WAP3205 v3 is now in Universal Repeater mode. Note: Wait while the WAP3205 v3 restarts, then log in to the Web Configurator again. 4.3.1 Status Screen (Universal Repeater Mode) Click on Status.
-
Page 38
— Status This shows the current status of the Wireless LAN — Enabled or Disabled. — Name (SSID) This shows a descriptive SSID name used to identify the WAP3205 v3 in the wireless LAN. — Channel This shows the channel number which you select manually or Auto when the WAP3205 v3 automatically scans and selects the Wireless LAN’s channel. -
Page 39: Universal Repeater Navigation Panel
Use this screen to view the status of the WAP3205 v3. 4.3.2 Universal Repeater Navigation Panel Use the menu in the navigation panel to configure WAP3205 v3 features in Universal Repeater Mode. The following screen and table show the features you can configure in Universal Repeater Mode.
-
Page 40: Setting Your Wap3205 V3 To Client Bridge Mode
4.4 Setting your WAP3205 v3 to Client Bridge Mode Connect your computer to the LAN port of the WAP3205 v3. The default LAN IP address of the WAP3205 v3 is 192.168.1.2. You give your computer a fixed IP address in the range between 192.168.1.3 and 192.168.1.254 (Section 2.2 on page…
-
Page 41: Status Screen (Client Bridge Mode)
A pop-up window appears providing information on this mode. Click OK in the pop-up message window. Click Apply. Your WAP3205 v3 is now in Client Bridge mode. Note: Wait while the WAP3205 v3 restarts, then log in to the Web Configurator again. 4.4.1 Status Screen (Client Bridge Mode) Click on Status.
-
Page 42: Universal Repeater Navigation Panel
Use this screen to view port status and packet specific statistics. 4.4.2 Universal Repeater Navigation Panel Use the menu in the navigation panel to configure WAP3205 v3 features in Client Bridge Mode. The following screen and table show the features you can configure in Client Bridge Mode.
-
Page 43
Network AP Select AP Select Use this screen to choose an access point that you want the WAP3205 v3 to connect to. You should know the security settings of the target AP. WLAN Use this screen to view the SSID and security mode of the AP to which the Information WAP3205 v3 is connecting. -
Page 44: Tutorials
This section gives you an example of how to set up wireless network using WPS. This example uses the WAP3205 v3 as the AP and NWD210N as the wireless client which connects to a notebook. Note: The wireless client must be a WPS-aware device (for example, a WPS USB adapter or PCI card).
-
Page 45: Push Button Configuration (Pbc)
5.3.1 Push Button Configuration (PBC) Make sure that your WAP3205 v3 is turned on and that it is within range of your computer. Make sure that you have installed the wireless client (this example uses the NWD210N) driver and utility in your notebook.
-
Page 46: Pin Configuration
This may take up to two minutes. Then the wireless client is able to communicate with the WAP3205 v3 securely. The following figure shows you the example to set up wireless network and security on WAP3205 v3 and wireless client (ex. NWD210N in this example) by using PIN method.
-
Page 47
Chapter 5 Tutorials Figure 28 Example WPS Process: PIN Method Wireless Client WAP3205 v3 WITHIN 2 MINUTES Authentication by PIN SECURITY INFO COMMUNICATION WAP3205 v3 User’s Guide… -
Page 48: Enable And Configure Wireless Security Without Wps On Your Wap3205 V3
WPA-PSK (Pre-Shared Key: ThisismyWPA-PSKpre-sharedkey) Follow the steps below to configure the wireless settings on your WAP3205 v3. The instructions require that your hardware is connected (see the Quick Start Guide) and you are logged into the Web Configurator through your LAN connection (see Section 2.3 on page…
-
Page 49: Configure Your Wireless Client
Note: We use the Zyxel M-302 wireless adapter utility screens as an example for the wireless client. The screens may vary for different models. The WAP3205 v3 supports IEEE 802.11b, IEEE 802.11g and IEEE 802.11n wireless clients. Make sure that your notebook or computer’s wireless adapter supports one of these standards.
-
Page 50
The Confirm Save window appears. Check your settings and click Save to continue. Figure 33 Confirm Save Check the status of your wireless connection in the screen below. If your wireless connection is weak or you have no connection, see the Troubleshooting section of this User’s Guide. WAP3205 v3 User’s Guide… -
Page 51
If your connection is successful, open your Internet browser and enter http://www.zyxel.com or the URL of any other web site in the address bar. If you are able to access the web site, your wireless connection is successfully configured. WAP3205 v3 User’s Guide… -
Page 52: Technical Reference
Technical Reference…
-
Page 53: Wireless Lan
H A P T E R Wireless LAN 6.1 Overview This chapter discusses how to configure the wireless network settings in your WAP3205 v3. See the appendices for more detailed information about wireless networks. The following figure provides an example of a wireless network.
-
Page 54: What You Can Do
(Section 6.9 on page 64). • Use the AP Select screen to choose an access point that you want the WAP3205 v3 (in universal repeater mode) to connect to. You should know the security settings of the target AP (Section 6.10 on page 65).
-
Page 55: Wireless Security Overview
Some wireless devices, such as scanners, can detect wireless networks but cannot use wireless networks. These kinds of wireless devices might not have MAC addresses. Hexadecimal characters are 0, 1, 2, 3, 4, 5, 6, 7, 8, 9, A, B, C, D, E, and F. WAP3205 v3 User’s Guide…
-
Page 56: Wps
Use this screen to enable the Wireless LAN, enter the SSID and select the wireless security mode. Note: If you are configuring the WAP3205 v3 from a computer connected to the wireless LAN and you change the WAP3205 v3’s SSID, channel or security settings, you will lose your wireless connection when you press Apply to confirm.
-
Page 57
Table 19 Network > Wireless LAN > General LABEL DESCRIPTION WLAN STA This section is available only when the WAP3205 v3 is in universal repeater mode. This shows the Information wireless and security settings of the selected AP wireless network. SSID This displays the Service Set IDentity of the wireless device to which you are connecting. -
Page 58: No Security
DESCRIPTION Channel Width Select whether the WAP3205 v3 uses a wireless channel width of 20MHz, 40MHz or Auto 20/ 40MHz. A standard 20MHz channel offers transfer speeds of up to 150Mbps whereas a 40MHz channel uses two standard channels and offers speeds of up to 300 Mbps. Because not all devices support 40MHz channels, select Auto 20/40MHz to allow the WAP3205 v3 to adjust the channel bandwidth automatically.
-
Page 59
Chapter 6 Wireless LAN Your WAP3205 v3 allows you to configure up to four 64-bit or 128-bit WEP keys but only one key can be enabled at any one time. In order to configure and enable WEP encryption; click Network > Wireless LAN to display the General screen. -
Page 60: Wpa Psk/Wpa2-Psk
Click Reset to reload the previous configuration for this screen. 6.5 MAC Filter The MAC filter screen allows you to configure the WAP3205 v3 to give exclusive access to up to 16 devices (Allow) or exclude up to 16 devices from accessing the WAP3205 v3 (Deny). Every Ethernet device has a unique MAC (Media Access Control) address.
-
Page 61: Wireless Lan Advanced Screen
This field shows the MAC addresses of the wireless station that are allowed or denied access to (White List) the WAP3205 v3 in these address fields. Enter the MAC addresses in a valid MAC address format, that is, six hexadecimal character pairs, for example, 12:34:56:78:9a:bc.
-
Page 62: Wps Screen
Wireless Advanced Setup Tx Power This field controls the transmission power of the WAP3205 v3. If there is a high density of APs in an area, decrease the output power of the WAP3205 v3 to reduce interference with other APs.
-
Page 63: Wps Station Screen
DESCRIPTION Status This displays Configured when the WAP3205 v3 has connected to a wireless network using WPS or when Enable WPS is selected and wireless or wireless security settings have been changed. The current wireless and wireless security settings also appear in the screen.
-
Page 64: Scheduling Screen
Select Everyday or the specific days to turn the Wireless LAN on or off. If you select Everyday you can not select any specific days. This field works in conjunction with the Except for the following times field. WAP3205 v3 User’s Guide…
-
Page 65: Ap Select Screen
Click Reset to reload the previous configuration for this screen. 6.10 AP Select Screen Use this screen to choose an access point that you want the WAP3205 v3 (in universal repeater mode) to connect to. You should know the security settings of the target AP.
-
Page 66: Wlan Information Screen
6.11 WLAN Information Screen Use this screen to view the SSID and security of the selected AP wireless network when the WAP3205 v3 is in client bridge mode. To open this screen, click Network > AP Select > WLAN Info tab.
-
Page 67: Lan
7.2 What You Need To Know The actual physical connection determines whether the WAP3205 v3 ports are LAN or WAN ports. There are two separate IP networks, one inside the LAN network and the other outside the WAN network as shown next.
-
Page 68: Ip Address And Subnet Mask
Once you have decided on the network number, pick an IP address that is easy to remember, for instance, 192.168.1.1, for your WAP3205 v3, but make sure that no other device on your network is using that IP address.
-
Page 69: Ip Pool Setup
(192.168.1.2 to 192.168.1.32) for other server computers, for instance, servers for mail, FTP, TFTP, web, etc., that you may have. 7.2.4 LAN TCP/IP The WAP3205 v3 has built-in DHCP server capability that assigns IP addresses and DNS servers to systems that support DHCP client capability. 7.3 LAN IP Screen Use this screen to change your basic LAN settings.
-
Page 70: System
See the chapter about wizard setup for more information on the next few screens. 8.2 What You Can Do • Use the General screen to enter a name to identify the WAP3205 v3 in the network and set the password (Section 8.3 on page…
-
Page 71: Time Setting Screen
To change your WAP3205 v3’s time and date, click Maintenance > System > Time Setting. The screen appears as shown. Use this screen to configure the WAP3205 v3’s time based on your local time zone. Figure 52 Maintenance > System > Time Setting…
-
Page 72
Current Time and Date Current Time This field displays the time of your WAP3205 v3. Each time you reload this page, the WAP3205 v3 synchronizes the time with the time server. Current Date This field displays the date of your WAP3205 v3. -
Page 73: Logs
9.3 View Log Screen Use the View Log screen to see the logged messages for the WAP3205 v3. Options include logs about system maintenance, system errors, access control, allowed or blocked web sites, blocked web features (such as ActiveX controls, Java and cookies), attacks (such as DoS) and IPSec.
-
Page 74
This field displays the time the log was recorded. Index This is the index number of the log. Type This field displays the type of the log. Log information This field states the reason for the log. WAP3205 v3 User’s Guide… -
Page 75: Tools
“WAP3205 v3.bin”. The upload process uses HTTP (Hypertext Transfer Protocol) and may take up to two minutes. After a successful upload, the system will reboot. Click Maintenance > Tools. Follow the instructions in this screen to upload firmware to your WAP3205 v3. Figure 54 Maintenance > Tools > Firmware…
-
Page 76
Click Upload to begin the upload process. This process may take up to two minutes. Check for Click Check for Latest Firmware Now button to have the WAP3205 v3 search for the latest Latest Firmware firmware available online at Zyxel’s website. -
Page 77: Configuration Screen
Figure 58 Maintenance > Tools > Configuration 10.4.1 Backup Configuration Backup configuration allows you to back up (save) the WAP3205 v3’s current configuration to a file on your computer. Once your WAP3205 v3 is configured and functioning properly, it is highly recommended that you back up your configuration file before making configuration changes.
-
Page 78: Restore Configuration
Figure 60 Temporarily Disconnected If you uploaded the default configuration file you may need to change the IP address of your computer to be in the same subnet as that of the default WAP3205 v3 IP address (192.168.1.2). See Section 2.2 on page 14 for details on how to set up your computer’s IP address.
-
Page 79: Back To Factory Defaults
10.5 Restart Screen System restart allows you to reboot the WAP3205 v3 without turning the power off. Click Maintenance > Tools > Restart. Click Restart to have the WAP3205 v3 reboot. This does not affect the WAP3205 v3’s configuration. Figure 62 Maintenance > Tools > Restart…
-
Page 80: Language
Use this screen to change the language for the Web Configurator display. Click the language you prefer. The Web Configurator language changes after a while without restarting the WAP3205 v3. Figure 63 Language Figure 64 Language Change Example WAP3205 v3 User’s Guide…
-
Page 81: Operation Mode
Universal Repeater Use Universal Repeater mode if there is an existing wireless router or access point in your network and you want the WAP3205 v3 to wirelessly relay communications from its wireless clients to it. Client Bridge Use Client Bridge mode if your device needs a wireless client to connect to an existing access point.
-
Page 82
IP addresses or else you need to manually assign IP addresses to devices on your network. • The LAN IP address of the WAP3205 v3 is set to 192.168.1.2. WAP3205 v3 User’s Guide… -
Page 83: Troubleshooting
Make sure you are using the power adaptor or cord included with the WAP3205 v3. Make sure the power adaptor or cord is connected to the WAP3205 v3 and plugged in to an appropriate power source. Make sure the power source is turned on.
-
Page 84: Wap3205 V3 Access And Login
See Appendix B on page Make sure your computer is in the same subnet as the WAP3205 v3. (If you know that there are routers between your computer and the WAP3205 v3, skip this step.) • If there is a DHCP server on your network, make sure your computer is using a dynamic IP address.
-
Page 85: Internet Access
Section 2.2 on page If the problem continues, contact your ISP. I cannot access the Internet anymore. I had access to the Internet (with the WAP3205 v3), but my Internet connection is not available anymore. Check the hardware connections, and make sure the LEDs are behaving as expected. See the Quick Start Guide and Section 1.3 on page…
-
Page 86: Resetting The Wap3205 V3 To Its Factory Defaults
Check the signal strength. If the signal strength is low, try moving the WAP3205 v3 closer to the AP if possible, and look around to see if there are any devices that might be interfering with the wireless network (for example, microwaves, other wireless networks, and so on).
-
Page 87
Check that both the WAP3205 v3 and your wireless station are using the same wireless and wireless security settings. Make sure traffic between the WLAN and the LAN is not blocked by the firewall on the WAP3205 v3. Make sure you allow the WAP3205 v3 to be remotely accessed through the WLAN interface. Check your remote management settings. -
Page 88: Appendix A Ip Addresses And Subnetting
Therefore, each octet has a possible range of 00000000 to 11111111 in binary, or 0 to 255 in decimal. The following figure shows an example IP address in which the first three octets (192.168.1) are the network number, and the fourth octet (16) is the host ID. Figure 67 Network Number and Host ID WAP3205 v3 User’s Guide…
-
Page 89: Subnet Masks
An IP address with host IDs of all zeros is the IP address of the network (192.168.1.0 with a 24-bit subnet mask, for example). An IP address with host IDs of all ones is the broadcast address for that network (192.168.1.255 with a 24-bit subnet mask, for example). WAP3205 v3 User’s Guide…
-
Page 90
In this example, the company network address is 192.168.1.0. The first three octets of the address (192.168.1) are the network number, and the remaining octet is the host ID, allowing a maximum of 2 – 2 or 254 possible hosts. The following figure shows the company network before subnetting. WAP3205 v3 User’s Guide… -
Page 91
In a 25-bit subnet the host ID has 7 bits, so each sub-network has a maximum of 2 – 2 or 126 possible hosts (a host ID of all zeroes is the subnet’s address itself, all ones is the subnet’s broadcast address). WAP3205 v3 User’s Guide… -
Page 92
11111111.11111111.11111111. 11000000 Subnet Address: Lowest Host ID: 192.168.1.129 192.168.1.128 Broadcast Address: Highest Host ID: 192.168.1.190 192.168.1.191 Table 44 Subnet 4 IP/SUBNET MASK NETWORK NUMBER LAST OCTET BIT VALUE IP Address 192.168.1. IP Address (Binary) 11000000.10101000.00000001. 11000000 WAP3205 v3 User’s Guide… -
Page 93
The following table is a summary for subnet planning on a network with a 16-bit network number. Table 47 16-bit Network Number Subnet Planning NO. “BORROWED” NO. HOSTS PER SUBNET MASK NO. SUBNETS HOST BITS SUBNET 255.255.128.0 (/17) 32766 255.255.192.0 (/18) 16382 WAP3205 v3 User’s Guide… -
Page 94: Private Ip Addresses
Address Translation (NAT) on the WAP3205 v3. Once you have decided on the network number, pick an IP address for your WAP3205 v3 that is easy to remember (for instance, 192.168.1.1) but make sure that no other device on your network is using that IP address.
-
Page 95
LAN and the Internet (WAN), the router’s LAN and WAN addresses must be on different subnets. In the following example, the LAN and WAN are on the same subnet. The LAN computers cannot access the Internet because the router cannot route between networks. WAP3205 v3 User’s Guide… -
Page 96
LAN port both use 192.168.1.1 as the IP address. The computer cannot access the Internet. This problem can be solved by assigning a different IP address to the computer or the router’s LAN port. Figure 72 Conflicting Computer and Router IP Addresses Example WAP3205 v3 User’s Guide… -
Page 97: Appendix B Pop-Up Windows, Javascripts And Java Permissions
You can also check if pop-up blocking is disabled in the Pop-up Blocker section in the Privacy tab. In Internet Explorer, select Tools, Internet Options, Privacy. Clear the Block pop-ups check box in the Pop-up Blocker section of the screen. This disables any web pop-up blockers you may have enabled. WAP3205 v3 User’s Guide…
-
Page 98
Alternatively, if you only want to allow pop-up windows from your device, see the following steps. In Internet Explorer, select Tools, Internet Options and then the Privacy tab. Select Settings…to open the Pop-up Blocker Settings screen. WAP3205 v3 User’s Guide… -
Page 99
Type the IP address of your device (the web page that you do not want to have blocked) with the prefix “http://”. For example, http://192.168.167.1. Click Add to move the IP address to the list of Allowed sites. Figure 76 Pop-up Blocker Settings WAP3205 v3 User’s Guide… -
Page 100
Click the Custom Level… button. Scroll down to Scripting. Under Active scripting make sure that Enable is selected (the default). Under Scripting of Java applets make sure that Enable is selected (the default). Click OK to close the window. WAP3205 v3 User’s Guide… -
Page 101
From Internet Explorer, click Tools, Internet Options and then the Security tab. Click the Custom Level… button. Scroll down to Microsoft VM. Under Java permissions make sure that a safety level is selected. Click OK to close the window. WAP3205 v3 User’s Guide… -
Page 102
JAVA (Sun) From Internet Explorer, click Tools, Internet Options and then the Advanced tab. Make sure that Use Java 2 for <applet> under Java (Sun) is selected. Click OK to close the window. Figure 80 Java (Sun) WAP3205 v3 User’s Guide… -
Page 103
You can enable Java, Javascripts and pop-ups in one screen. Click Tools, then click Options in the screen that appears. Figure 81 Mozilla Firefox: TOOLS > Options Click Content to show the screen below. Select the check boxes as shown in the following screen. Figure 82 Mozilla Firefox Content Security WAP3205 v3 User’s Guide… -
Page 104
Open all pop-ups. Figure 83 Opera: Allowing Pop-Ups Enabling Java From Opera, click Tools, then Preferences. In the Advanced tab, select Content from the left-side menu. Select the check boxes as shown in the following screen. WAP3205 v3 User’s Guide… -
Page 105
Appendix B Pop-up Windows, JavaScripts and Java Permissions Figure 84 Opera: Enabling Java To customize JavaScript behavior in the Opera browser, click JavaScript Options. Figure 85 Opera: JavaScript Options Select the items you want Opera’s JavaScript to apply. WAP3205 v3 User’s Guide… -
Page 106: Appendix C Setting Up Your Computer’s Ip Address
P P E N D I X Setting Up Your Computer’s IP Address Note: Your specific WAP3205 v3 may not support all of the operating systems described in this appendix. See the product specifications for more information about which operating systems are supported.
-
Page 107
Appendix C Setting Up Your Computer’s IP Address In the Control Panel, click the Network Connections icon. Right-click Local Area Connection and then select Properties. On the General tab, select Internet Protocol (TCP/IP) and then click Properties. WAP3205 v3 User’s Guide… -
Page 108
Appendix C Setting Up Your Computer’s IP Address The Internet Protocol TCP/IP Properties window opens. WAP3205 v3 User’s Guide… -
Page 109: Windows Vista
You can also go to Start > Control Panel > Network Connections, right-click a network connection, click Status and then click the Support tab to view your IP address and connection information. Windows Vista This section shows screens from Windows Vista Professional. WAP3205 v3 User’s Guide…
-
Page 110
Appendix C Setting Up Your Computer’s IP Address Click Start > Control Panel. In the Control Panel, click the Network and Internet icon. Click the Network and Sharing Center icon. Click Manage network connections. Right-click Local Area Connection and then select Properties. WAP3205 v3 User’s Guide… -
Page 111
Note: During this procedure, click Continue whenever Windows displays a screen saying that it needs your permission to continue. Select Internet Protocol Version 4 (TCP/IPv4) and then select Properties. The Internet Protocol Version 4 (TCP/IPv4) Properties window opens. WAP3205 v3 User’s Guide… -
Page 112
You can also go to Start > Control Panel > Network Connections, right-click a network connection, click Status and then click the Support tab to view your IP address and connection information. Windows 7 This section shows screens from Windows 7 Enterprise. WAP3205 v3 User’s Guide… -
Page 113
Appendix C Setting Up Your Computer’s IP Address Click Start > Control Panel. In the Control Panel, click View network status and tasks under the Network and Internet category. Click Change adapter settings. Double click Local Area Connection and then select Properties. WAP3205 v3 User’s Guide… -
Page 114
Appendix C Setting Up Your Computer’s IP Address Note: During this procedure, click Continue whenever Windows displays a screen saying that it needs your permission to continue. Select Internet Protocol Version 4 (TCP/IPv4) and then select Properties. WAP3205 v3 User’s Guide… -
Page 115
Appendix C Setting Up Your Computer’s IP Address The Internet Protocol Version 4 (TCP/IPv4) Properties window opens. WAP3205 v3 User’s Guide… -
Page 116
Click OK to close the Local Area Connection Properties window. Verifying Settings Click Start > All Programs > Accessories > Command Prompt. In the Command Prompt window, type «ipconfig» and then press [ENTER]. The IP settings are displayed as follows. WAP3205 v3 User’s Guide… -
Page 117
Mac OS X: 10.3 and 10.4 The screens in this section are from Mac OS X 10.4 but can also apply to 10.3. Click Apple > System Preferences. In the System Preferences window, click the Network icon. WAP3205 v3 User’s Guide… -
Page 118
Appendix C Setting Up Your Computer’s IP Address When the Network preferences pane opens, select Built-in Ethernet from the network connection type list, and then click Configure. For dynamically assigned settings, select Using DHCP from the Configure IPv4 list in the TCP/IP tab. WAP3205 v3 User’s Guide… -
Page 119
• In the Router field, type the IP address of your device. Click Apply Now and close the window. Verifying Settings Check your TCP/IP properties by clicking Applications > Utilities > Network Utilities, and then selecting the appropriate Network Interface from the Info tab. WAP3205 v3 User’s Guide… -
Page 120
Figure 86 Mac OS X 10.4: Network Utility Mac OS X: 10.5 and 10.6 The screens in this section are from Mac OS X 10.5 but can also apply to 10.6. Click Apple > System Preferences. In System Preferences, click the Network icon. WAP3205 v3 User’s Guide… -
Page 121
When the Network preferences pane opens, select Ethernet from the list of available connection types. From the Configure list, select Using DHCP for dynamically assigned settings. For statically assigned settings, do the following: • From the Configure list, select Manually. • In the IP Address field, enter your IP address. WAP3205 v3 User’s Guide… -
Page 122
Appendix C Setting Up Your Computer’s IP Address • In the Subnet Mask field, enter your subnet mask. • In the Router field, enter the IP address of your WAP3205 v3. Click Apply and close the window. Verifying Settings Check your TCP/IP properties by clicking Applications > Utilities > Network Utilities, and then selecting the appropriate Network interface from the Info tab. -
Page 123
When the Network Settings window opens, click Unlock to open the Authenticate window. (By default, the Unlock button is greyed out until clicked.) You cannot make changes to your configuration unless you first enter your admin password. WAP3205 v3 User’s Guide… -
Page 124
Appendix C Setting Up Your Computer’s IP Address In the Authenticate window, enter your admin account name and password then click the Authenticate button. In the Network Settings window, select the connection that you want to configure, then click Properties. WAP3205 v3 User’s Guide… -
Page 125
Click OK to save the changes and close the Properties dialog box and return to the Network Settings screen. If you know your DNS server IP address(es), click the DNS tab in the Network Settings window and then enter the DNS server information in the fields provided. WAP3205 v3 User’s Guide… -
Page 126
Verifying Settings Check your TCP/IP properties by clicking System > Administration > Network Tools, and then selecting the appropriate Network device from the Devices tab. The Interface Statistics column shows data if your connection is working properly. WAP3205 v3 User’s Guide… -
Page 127
10.3 installation. Note: Make sure you are logged in as the root administrator. Follow the steps below to configure your computer IP address in the KDE: Click K Menu > Computer > Administrator Settings (YaST). WAP3205 v3 User’s Guide… -
Page 128
Appendix C Setting Up Your Computer’s IP Address When the Run as Root — KDE su dialog opens, enter the admin password and click OK. When the YaST Control Center window opens, select Network Devices and then click the Network Card icon. WAP3205 v3 User’s Guide… -
Page 129
Appendix C Setting Up Your Computer’s IP Address When the Network Settings window opens, click the Overview tab, select the appropriate connection Name from the list, and then click the Configure button. When the Network Card Setup window opens, click the Address tab WAP3205 v3 User’s Guide… -
Page 130
Click Next to save the changes and close the Network Card Setup window. If you know your DNS server IP address(es), click the Hostname/DNS tab in Network Settings and then enter the DNS server information in the fields provided. WAP3205 v3 User’s Guide… -
Page 131
Click the KNetwork Manager icon on the Task bar to check your TCP/IP properties. From the Options sub- menu, select Show Connection Information. Figure 90 openSUSE 10.3: KNetwork Manager When the Connection Status — KNetwork Manager window opens, click the Statistics tab to see if your connection is working properly. WAP3205 v3 User’s Guide… -
Page 132
Appendix C Setting Up Your Computer’s IP Address Figure 91 openSUSE: Connection Status — KNetwork Manager WAP3205 v3 User’s Guide… -
Page 133: Appendix D Wireless Lans
Intra-BSS traffic is traffic between wireless clients in the BSS. When Intra-BSS is enabled, wireless client A and B can access the wired network and communicate with each other. When Intra-BSS is disabled, wireless client A and B can still access the wired network but cannot communicate with each other. WAP3205 v3 User’s Guide…
-
Page 134
An ESSID (ESS IDentification) uniquely identifies each ESS. All access points and their associated wireless clients within the same ESS must have the same ESSID in order to communicate. WAP3205 v3 User’s Guide… -
Page 135
(AP) or wireless gateway, but out-of-range of each other, so they cannot «hear» each other, that is they do not know if the channel is currently being used. Therefore, they are considered hidden from each other. WAP3205 v3 User’s Guide… -
Page 136: Fragmentation Threshold
If the Fragmentation Threshold value is smaller than the RTS/CTS value (see previously) you set then the RTS (Request To Send)/CTS (Clear to Send) handshake will never occur as data frames will be fragmented before they reach RTS/CTS size. WAP3205 v3 User’s Guide…
-
Page 137: Preamble Type
Wireless security is vital to your network to protect wireless communication between wireless clients, access points and the wired network. Wireless security methods available on the WAP3205 v3 are data encryption, wireless client authentication, restricting access by device MAC address and hiding the WAP3205 v3 identity.
-
Page 138
Wi-Fi Protected Access (WPA) WPA2 Most Secure Note: You must enable the same wireless security settings on the WAP3205 v3 and on all wireless clients that you want to associate with it. IEEE 802.1x In June 2001, the IEEE 802.1x standard was designed to extend the features of IEEE 802.11 to support extended authentication as well as providing additional accounting and control features. -
Page 139
MD5 authentication is the simplest one-way authentication method. The authentication server sends a challenge to the wireless client. The wireless client ‘proves’ that it knows the password by encrypting the password with the challenge and sends back the information. Password is not sent in plain text. WAP3205 v3 User’s Guide… -
Page 140: Dynamic Wep Key Exchange
Note: EAP-MD5 cannot be used with Dynamic WEP Key Exchange For added security, certificate-based authentications (EAP-TLS, EAP-TTLS and PEAP) use dynamic keys for data encryption. They are often deployed in corporate environments, but for public deployment, a WAP3205 v3 User’s Guide…
-
Page 141
The RADIUS server distributes a Pairwise Master Key (PMK) key to the AP that then sets up a key hierarchy and management system, using the PMK to dynamically generate unique data encryption keys to WAP3205 v3 User’s Guide… -
Page 142: User Authentication
RADIUS server. «DS» is the distribution system. The AP passes the wireless client’s authentication request to the RADIUS server. The RADIUS server then checks the user’s identification against its database and grants or denies network access accordingly. WAP3205 v3 User’s Guide…
-
Page 143
PSK and the SSID. The AP and wireless clients use the TKIP or AES encryption process, the PMK and information exchanged in a handshake to create temporal encryption keys. They use these keys to encrypt data exchanged between them. WAP3205 v3 User’s Guide… -
Page 144: Security Parameters Summary
An antenna couples RF signals onto air. A transmitter within a wireless device sends an RF signal to the antenna, which propagates the signal through the air. The antenna also operates in reverse by capturing RF signals from the air. Positioning the antennas properly increases the range and coverage area of a wireless LAN. WAP3205 v3 User’s Guide…
-
Page 145: Antenna Characteristics
For a single AP application, place omni-directional antennas as close to the center of the coverage area as possible. For directional antennas, point the antenna in the direction of the desired coverage area. WAP3205 v3 User’s Guide…
-
Page 146: Appendix E Common Services
H.323 1720 NetMeeting uses this protocol. HTTP Hyper Text Transfer Protocol — a client/server protocol for the world wide web. HTTPS HTTPS is a secured http session often used in e- commerce. WAP3205 v3 User’s Guide…
-
Page 147
Traps for use with the SNMP (RFC:1215). SQL-NET 1521 Structured Query Language is an interface to access data on many different types of database systems, including mainframes, midrange systems, UNIX systems and network servers. TCP/UDP Secure Shell Remote Login Program. WAP3205 v3 User’s Guide… -
Page 148
TFTP Trivial File Transfer Protocol is an Internet file transfer protocol similar to FTP, but uses the UDP (User Datagram Protocol) rather than TCP (Transmission Control Protocol). VDOLIVE 7000 Another video conferencing solution. WAP3205 v3 User’s Guide… -
Page 149: Appendix F Customer Support
• Brief description of the problem and the steps you took to solve it. Corporate Headquarters (Worldwide) Taiwan • Zyxel Communications Corporation • http://www.zyxel.com Asia China • Zyxel Communications (Shanghai) Corp. Zyxel Communications (Beijing) Corp. Zyxel Communications (Tianjin) Corp. • http://www.zyxel.cn India • Zyxel Technology India Pvt Ltd • http://www.zyxel.in Kazakhstan •…
-
Page 150
• Zyxel Singapore Pte Ltd. • http://www.zyxel.com.sg Taiwan • Zyxel Communications Corporation • http://www.zyxel.com/tw/zh/ Thailand • Zyxel Thailand Co., Ltd • http://www.zyxel.co.th Vietnam • Zyxel Communications Corporation-Vietnam Office • http://www.zyxel.com/vn/vi Europe Austria • Zyxel Deutschland GmbH • http://www.zyxel.de Belarus • Zyxel BY • http://www.zyxel.by… -
Page 151
Appendix F Customer Support Belgium • Zyxel Communications B.V. • http://www.zyxel.com/be/nl/ • http://www.zyxel.com/be/fr/ Bulgaria • Zyxel България • http://www.zyxel.com/bg/bg/ Czech Republic • Zyxel Communications Czech s.r.o • http://www.zyxel.cz Denmark • Zyxel Communications A/S • http://www.zyxel.dk Estonia • Zyxel Estonia • http://www.zyxel.com/ee/et/ Finland •… -
Page 152
• Zyxel Communications Poland • http://www.zyxel.pl Romania • Zyxel Romania • http://www.zyxel.com/ro/ro Russia • Zyxel Russia • http://www.zyxel.ru Slovakia • Zyxel Communications Czech s.r.o. organizacna zlozka • http://www.zyxel.sk Spain • Zyxel Communications ES Ltd • http://www.zyxel.es Sweden • Zyxel Communications • http://www.zyxel.se Switzerland •… -
Page 153
Appendix F Customer Support • http://www.zyxel.ch/ Turkey • Zyxel Turkey A.S. • http://www.zyxel.com.tr • Zyxel Communications UK Ltd. • http://www.zyxel.co.uk Ukraine • Zyxel Ukraine • http://www.ua.zyxel.com Latin America Argentina • Zyxel Communication Corporation • http://www.zyxel.com/ec/es/ Brazil • Zyxel Communications Brasil Ltda. -
Page 154
Appendix F Customer Support North America • Zyxel Communications, Inc. — North America Headquarters • http://www.zyxel.com/us/en/ Oceania Australia • Zyxel Communications Corporation • http://www.zyxel.com/au/en/ Africa South Africa • Nology (Pty) Ltd. • http://www.zyxel.co.za WAP3205 v3 User’s Guide… -
Page 155: Appendix G Legal Information
The contents of this publication may not be reproduced in any part or as a whole, transcribed, stored in a retrieval system, translated into any language, or transmitted in any form or by any means, electronic, mechanical, magnetic, optical, chemical, photocopying, manual, or otherwise, without the prior written permission of ZyXEL Communications Corporation. Published by ZyXEL Communications Corporation. All rights reserved.
-
Page 156
Appendix G Legal Information The following information applies if you use the product within the European Union. Declaration of Conformity with Regard to EU Directive 1999/5/EC (R&TTE Directive) • Compliance information for 2.4GHz and/or 5GHz wireless products relevant to the EU and other Countries following the EU Directive 1999/5/ EC (R&TTE). -
Page 157: Safety Warnings
Appendix G Legal Information • Questo prodotto è utilizzabile in tutte i paesi EU (ed in tutti gli altri paesi che seguono le direttiva 1999/5/EC) senza nessuna limitazione, eccetto per i paesii menzionati di seguito: • Das Produkt kann in allen EU Staaten ohne Einschränkungen eingesetzt werden (sowie in anderen Staaten die der Richtlinie 1999/5/CE folgen) mit Außnahme der folgenden aufgeführten Staaten: In the majority of the EU and other European countries, the 2.4GHz and 5GHz bands have been made available for the use of wireless local area networks (LANs).
-
Page 158
Appendix G Legal Information • Connect ONLY suitable accessories to the device. • Do not open the device or unit. Opening or removing covers can expose you to dangerous high voltage points or other risks. ONLY qualified service personnel should service or disassemble this device. Please contact your vendor for further information. •… -
Page 159
Appendix G Legal Information Environmental Product Declaration VMG3925-B10A User’s Guide… -
Page 160
Appendix G Legal Information About the Symbols Various symbols are used in this product to ensure correct usage, to prevent danger to the user and others, and to prevent property damage. The meaning of these symbols are described below. It is important that you read these descriptions thoroughly and fully understand the contents. -
Page 161: Index
See CA. Firmware upload certifications file extension viewing using HTTP Channel 34, 38 firmware version 34, 38, 42 channel 55, 135 fragmentation threshold interference Configuration backup reset the factory defaults restore contact information General wireless LAN screen WAP3205 v3 User’s Guide…
-
Page 162
MAC filter shared secret key MAC OS X Reset button 20, 79 managing the device Reset the device good habits Restore configuration Media access control Roaming Message Integrity Check (MIC) RTS (Request To Send) Microsoft Windows WAP3205 v3 User’s Guide… -
Page 163
WPA2-PSK wireless client supplicant with RADIUS application example WPA2-Pre-Shared Key WPA2-PSK 141, 142 wall mounting application example warranty WPA-PSK 141, 142 note application example Web Configurator how to access WPS button Overview WEP Encryption WEP encryption WAP3205 v3 User’s Guide… -
Page 164
Index WAP3205 v3 User’s Guide… -
Page 165
Index WAP3205 v3 User’s Guide…
Информация о товаре носит справочный характер и не является публичной офертой. Характеристики, комплект поставки и внешний вид товара могут отличаться от указанных или быть изменены производителем без предварительного уведомления. Перед покупкой проверяйте информацию на официальном сайте производителя.
Если вы заметили ошибку или неточность в описании товара, пожалуйста, выделите часть текста с ошибкой и нажмите кнопку «Сообщить об ошибке».
Посмотреть инструкция для ZyXEL WAP3205 v3 бесплатно. Руководство относится к категории точки доступа, 2 человек(а) дали ему среднюю оценку 5.6. Руководство доступно на следующих языках: английский. У вас есть вопрос о ZyXEL WAP3205 v3 или вам нужна помощь? Задайте свой вопрос здесь
Не можете найти ответ на свой вопрос в руководстве? Вы можете найти ответ на свой вопрос ниже, в разделе часто задаваемых вопросов о ZyXEL WAP3205 v3.
Какой вес ZyXEL WAP3205 v3?
Какие сертификаты ZyXEL WAP3205 v3 имеет?
Какая высота ZyXEL WAP3205 v3?
Какая ширина ZyXEL WAP3205 v3?
Какая толщина ZyXEL WAP3205 v3?
Инструкция ZyXEL WAP3205 v3 доступно в русский?
Не нашли свой вопрос? Задайте свой вопрос здесь
Search by model number
Not sure how to find model number? Click here
| Model | Material | Version | OS | Language | Release Date | Download | Checksum |
|---|---|---|---|---|---|---|---|
| WAP3205 v3 | Firmware | V2.00(ABDM.5)C0 | English | March 10, 2022 | Download File
|
||
| WAP3205 v3 | Certification WAP3205 v3, Regulation Certificates for RF, CE Certificate/ Regulation Report |
002.351-03-00292 | English | October 12, 2021 | Download File
|
||
| WAP3205 v3 | Certification WAP3205 v3, Regulation Certificates for Safety, CE-LVD Certificate/ Regulation Report |
002.351-02-00390 | English | January 27, 2021 | Download File | ||
| WAP3205 v3 | Declaration WAP3205 v3, DoC, CE |
006.214-01-00644 | English | December 22, 2020 | Download File | ||
| WAP3205 v3 | Datasheet | 3 | English | May 27, 2020 | Download File | ||
| WAP3205 v3 | User’s Guide | _v1_ed4 | English | January 30, 2019 | Download File | ||
| WAP3205 v3 | Firmware | V2.00(ABDM.4)C0 | English | May 15, 2018 | Download File
|
||
| WAP3205 v3 | Firmware | V2.00(ABDM.3)C0 | English | December 27, 2017 | Download File
|
||
| WAP3205 v3 | Product Icon | 1 | English | October 03, 2017 | Download File | ||
| WAP3205 v3 | Certification WAP3205 v3, Regulation Certificates for RF, FCC ID Certificate/ Regulation Report |
001.351-03-00269 | English | January 25, 2017 | Download File | ||
| WAP3205 v3 | Quick Start Guide | 001 | Multiple languages | May 17, 2016 | Download File | ||
| WAP3205 v3 | Certification WAP3205 v3, Regulation Certificates for EMC, CE Certificate/ Regulation Report |
001.351-01-00627 | English | May 05, 2016 | Download File |